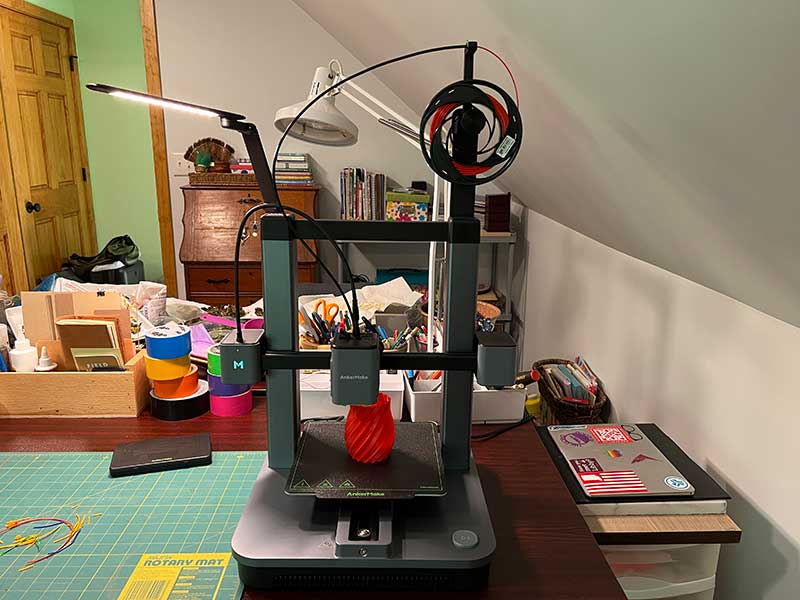
REVIEW – We have reviewed dozens of 3D printers here on The Gadgeteer, but so far, I’ve personally only reviewed 3 and the first 2 didn’t even count because they were more like toys than real 3D printers. But today, I want to show you my current favorite and best one that I’ve reviewed so far. It’s the AnkerMake MC5 3D printer and it might be sparking a new hobby for me! Let’s take a closer look.
What is it?
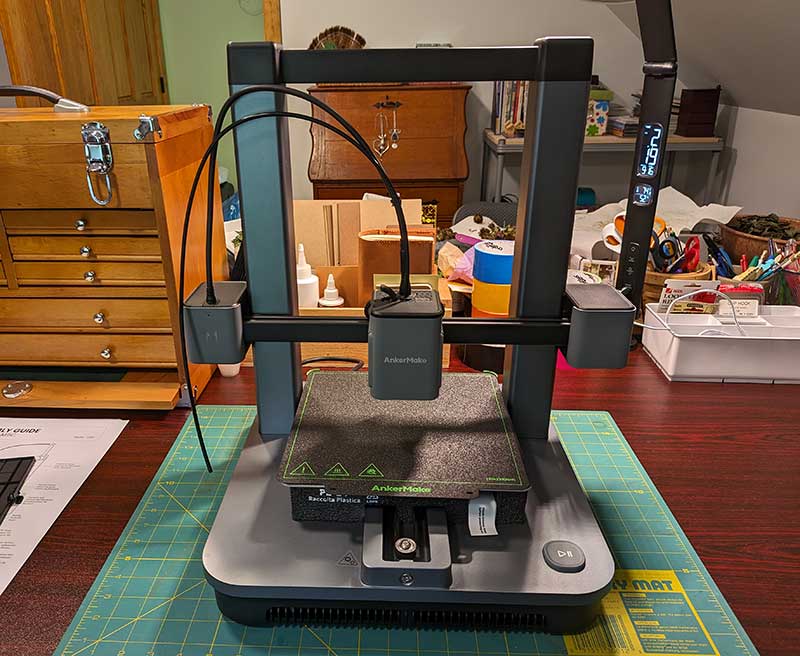
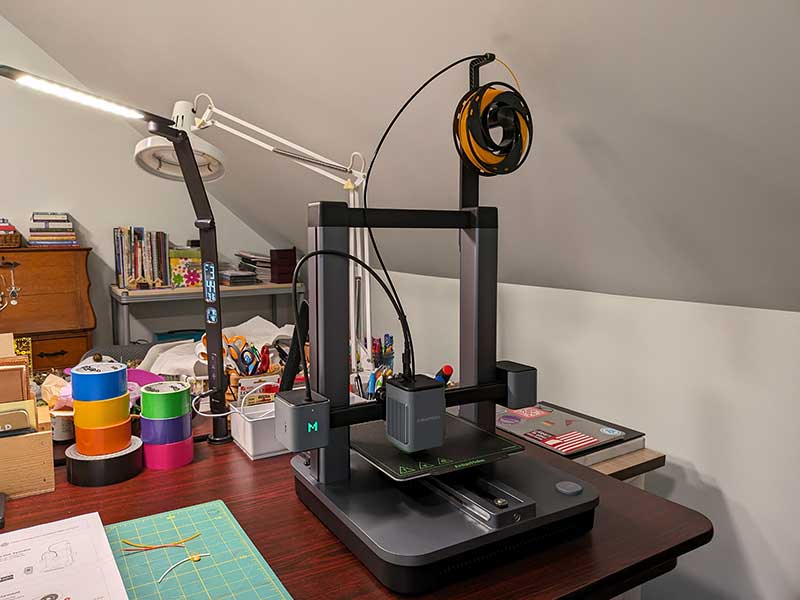
The AnkerMake MC5 is an FDM 3D printer that has been designed to be easy to use even for beginners like me!
Price: $399.00 | Where to buy: AnkerMake and Amazon
Specifications
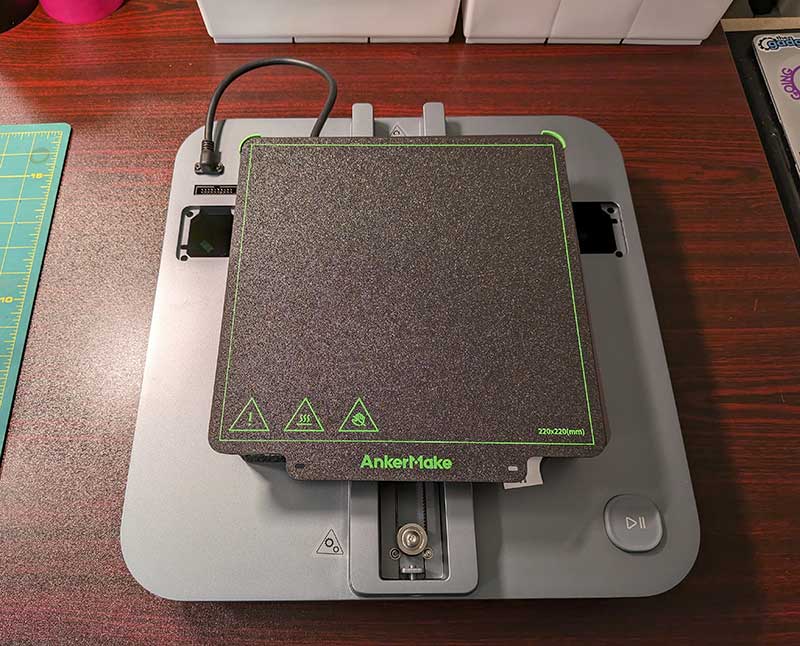
Print Size: 220×220×250 mm³
Default Speed Max: 250mm/s
Default Acceleration Max: 2500mm/s^2
Fast Mode Speed Max: 500mm/s
Fast Mode Acceleration Max: 5000mm/s^2
Filament: 1.75 mm
Plate Temperature (Max): 100ºC
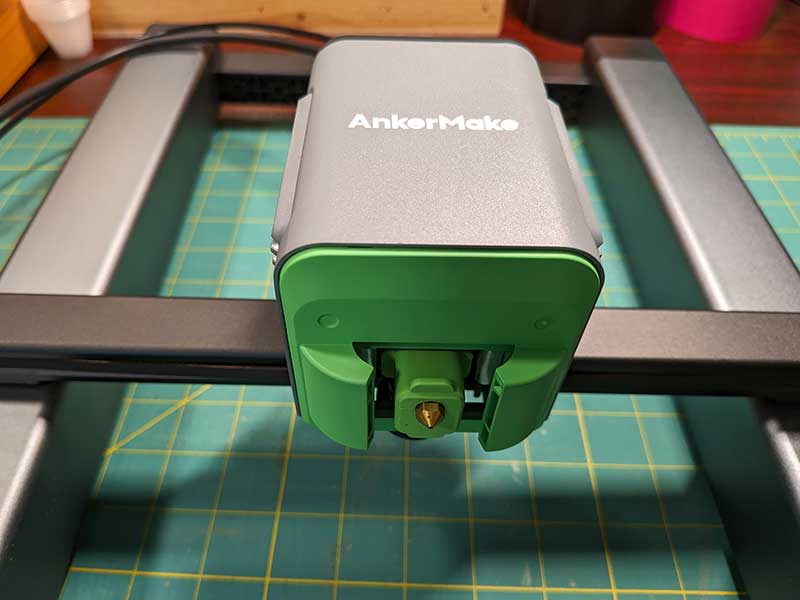
Hotend: All metal
Nozzle: Brass, 0.4mm
Extrusion Distance: Direct Extrusion
Extrusion Flow: 35 mm³/s
Hotend Tempreture (Max): 300ºC
Auto-leveling: 7×7 point
Multi-material support: PLA, PETG / PET, ABS, TPU, PA, PLA-CF, PETG-CF, PA-CF
What’s in the box?
- AnkerMake MC5 3D printer base
- Extruder assembly
- Power adapter
- Tool box
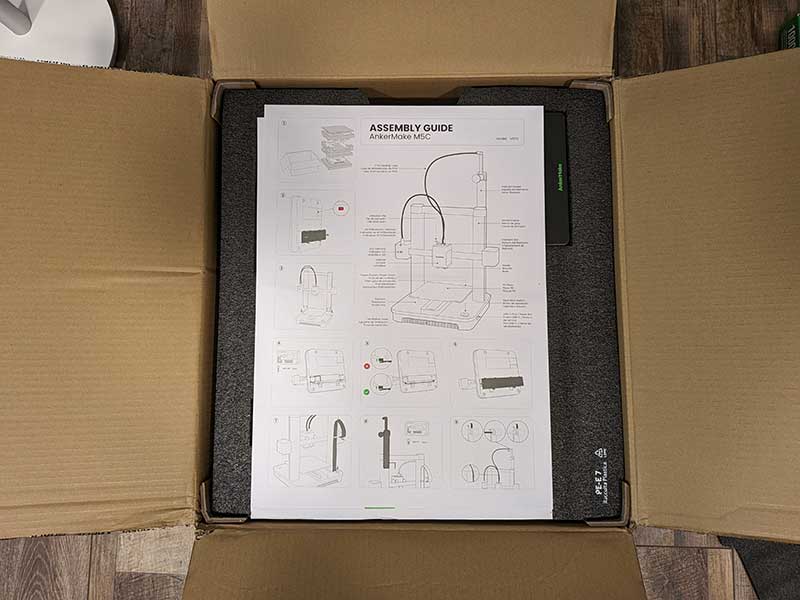
Everything comes well packaged with a large assembly guide right on top.
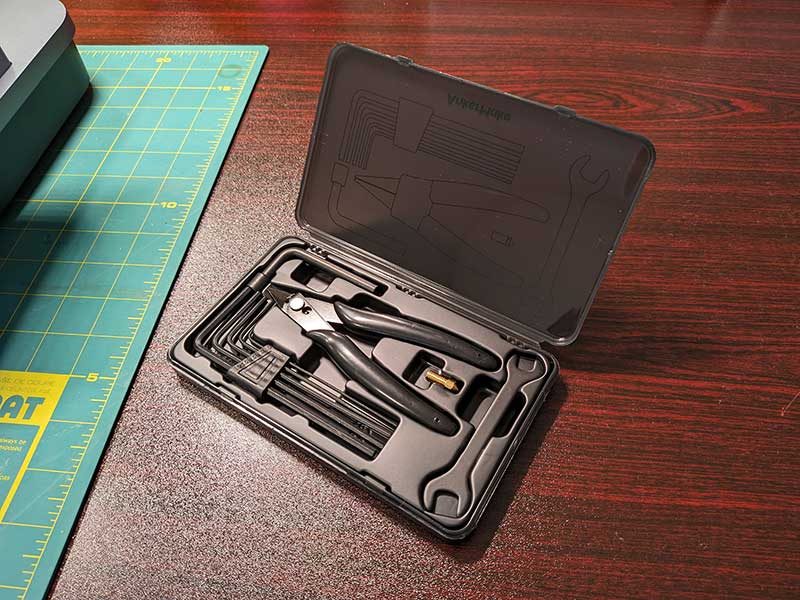
Including a small toolkit is a nice touch!
Some assembly required
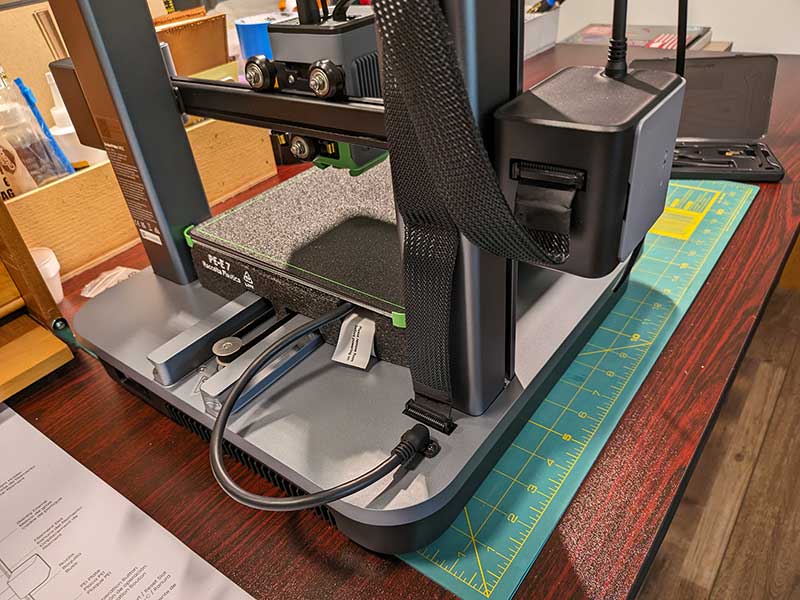
Although you have to build/assemble the AnkerMake MC5 3D printer, there’s nothing to worry about here. First of all, it’s easy and secondly, AnkerMake gives you all the tools that you need to perform the job. Basically, all you have to do is attach the extruder assembly to the base.
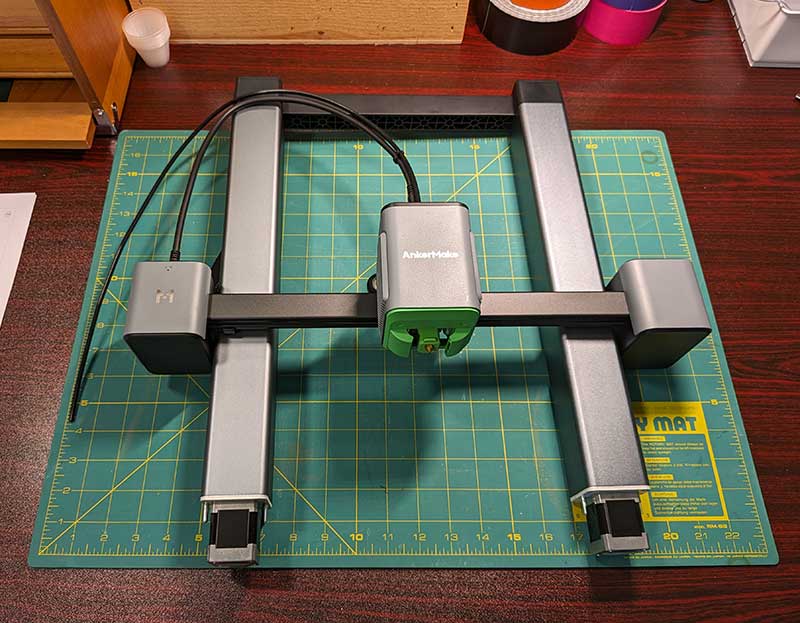
This is accomplished by turning the base over…
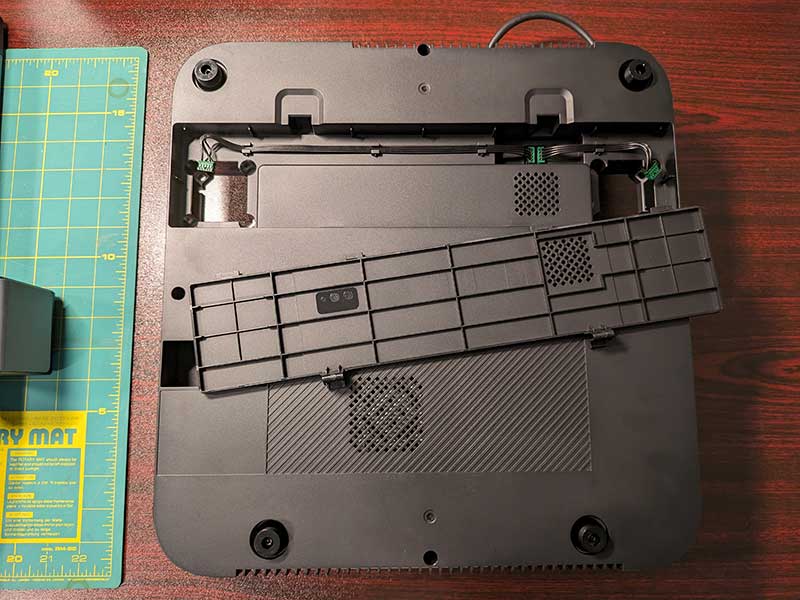
… and removing the protective cover over the connection points for the frame of the extruder assembly.
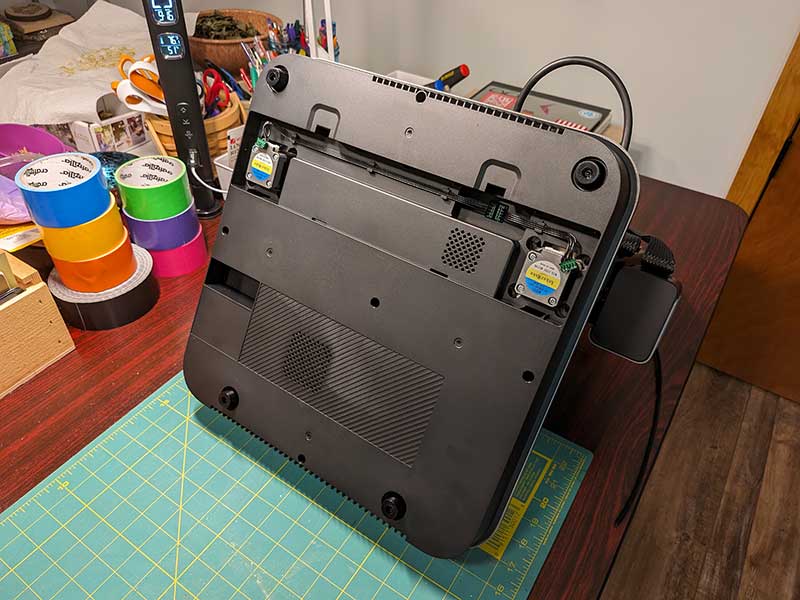
Each leg of the frame has 4 screws to attach it to the base. It’s an easy one person job to lock everything in place.
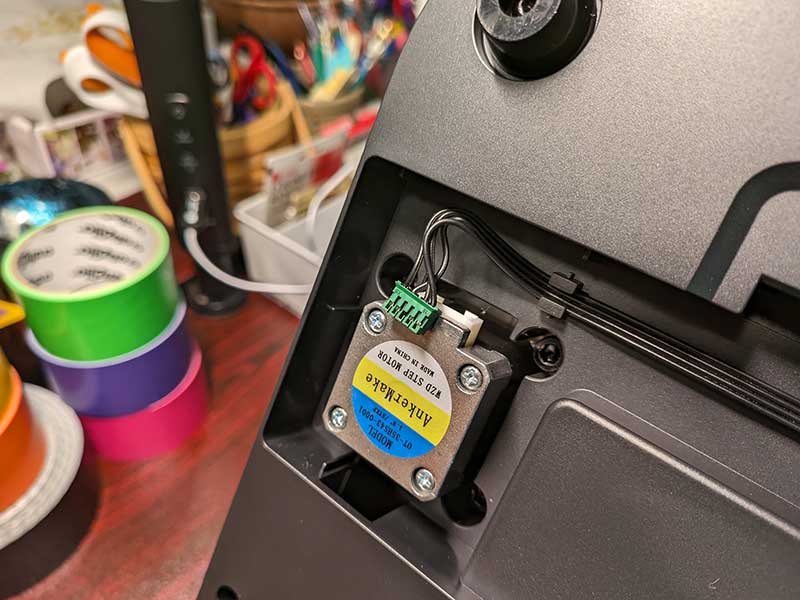
There is also a stepper motor on the bottom of each leg that has a cable that you have to plug in. Again, this is easy to do.
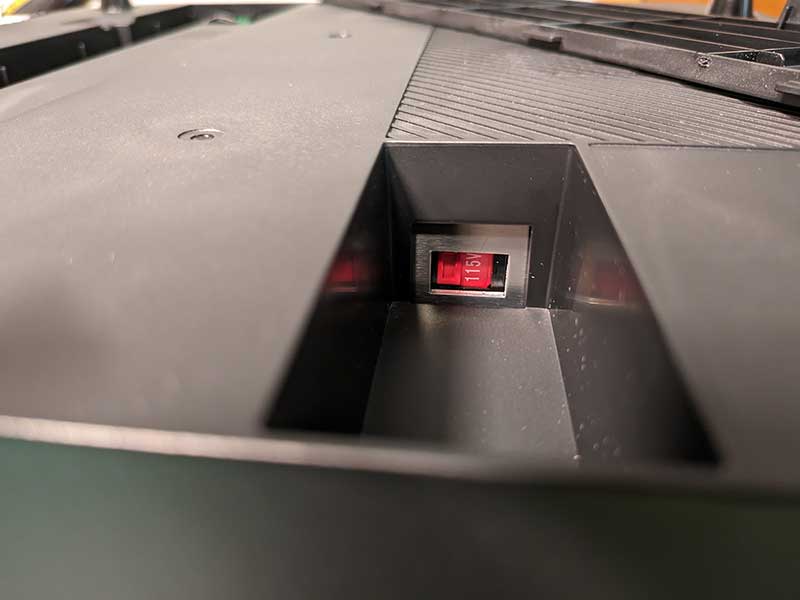
The bottom of the base also has a voltage switch that needs to be set to 115V if you’re in the US like I am.
Once the frame is attached to the base, you can plug the ribbon cable from the extruder to the base.
At this point, you’re almost done. You have to attach the feeder tube from the extruder to the filament holder.
The filament holder has an L bracket at the top.
The filament feeder tube secures into the L bracket.
Let’s print some stuff!
With everything assembled, you have to load some filament (not included). The AnkerMake MC5 3D printer can work with a variety of 1.75mm filament materials (see specs above). I already had some PLA filament left over from my last 3D printer review that I did over a year ago, so I used that.
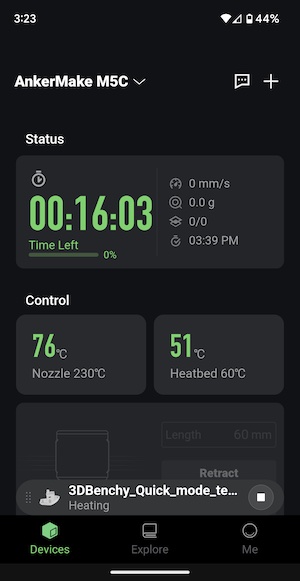
Loading the filament is easy. You just feed it into the feeder tube at the top then you turn on the printer, and then using the AnkerMake app, you select the extrude option. But before you can do that, you have to set up the printer using the app. The MC5 doesn’t have a built-in user interface to control it other than pausing and resuming a print job using the large PLAY/PAUSE button on the base, so you have to use the AnkerMake app to set things up.
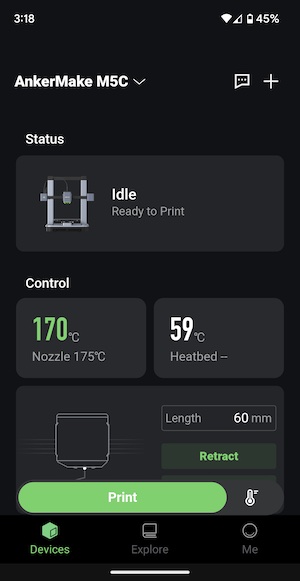
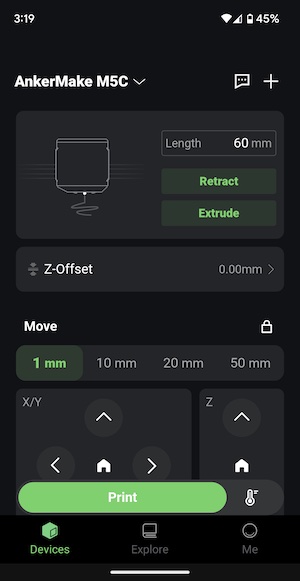
The app shows the status of the printer and it is used to start and stop jobs as well as to perform tasks like inserting and removing filament and doing the auto-leveling operation.
So, back to loading the filament. To do this, you need to tap the Extrude button in the app.
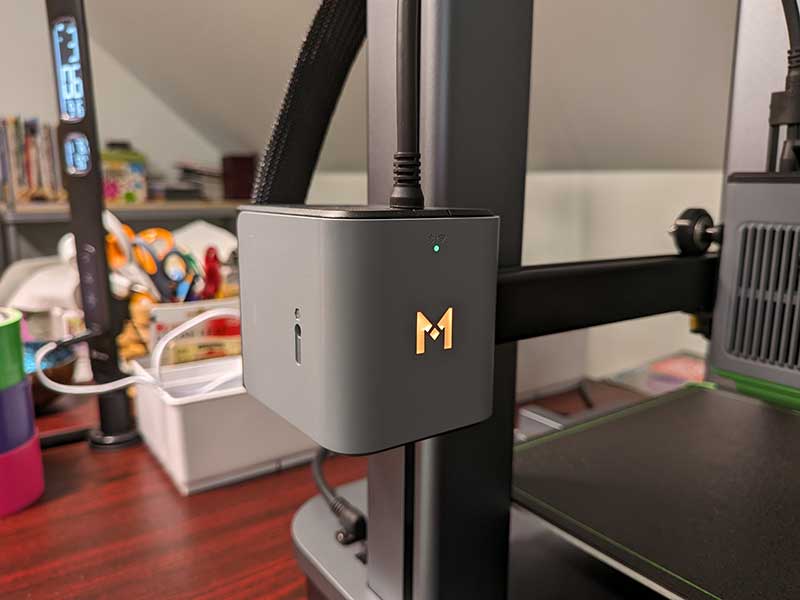
The extruder will heat up which takes a couple of minutes. When it reaches the right temp, it will beep and the AnkerMake status LED will change from glowing yellow/amber, to…
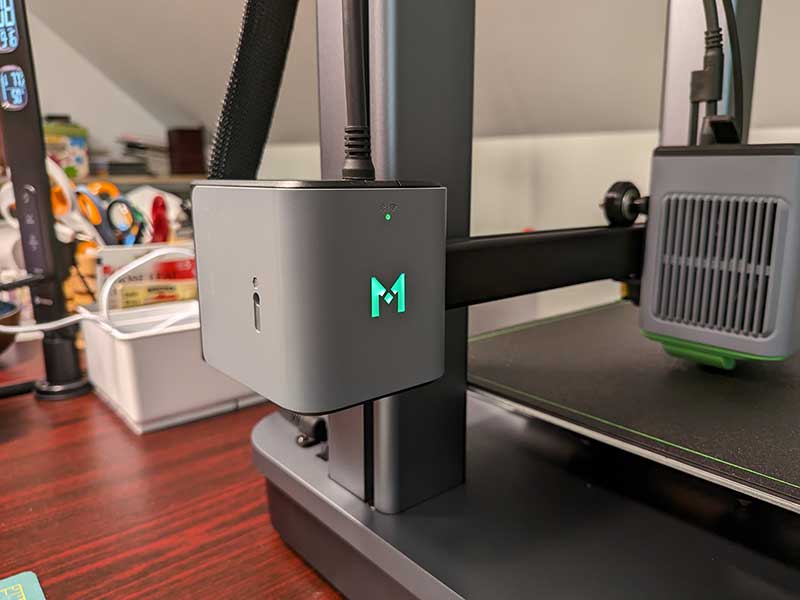
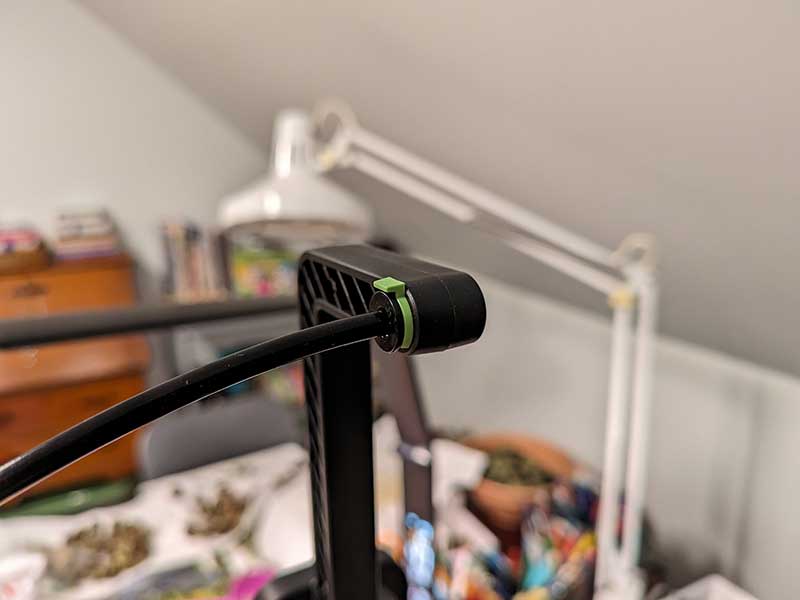
… glowing green. Once it’s green, you can then press the clip on the top of the extruder and start feeding the filament into the tube from the top of the filament holder. When the melted filament starts to come out of the extruder nozzle, you’re ready to print.
How do you send a 3D model to the printer? You have 3 options to choose from; the AnkerMake app, a USB flash drive, or your computer running the AnkerMake Slicer application.

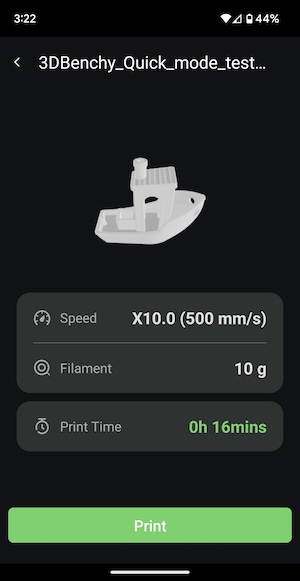
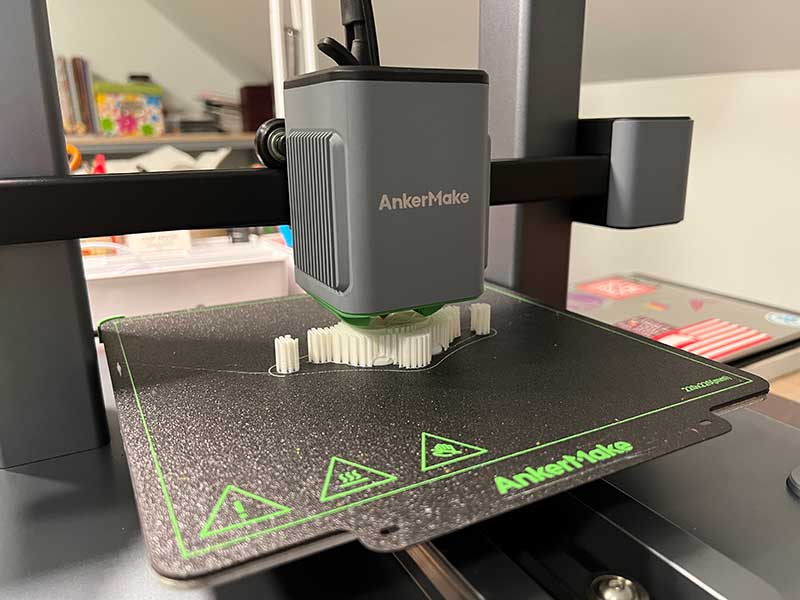
I started with the AnkerMake app on my phone and picked from one of the ready-to-go models… Good old benchy! Benchy for 3D printer enthusiasts is like a Hello World program for programmers. It’s always the first thing you print when you get a new printer because it’s a kind of benchmark to let you see if there are any issues you need to resolve before you go on to more ambitious prints.

And boy is the AnkerMake MC5 3D printer fast! It printed Benchy in 16 minutes!
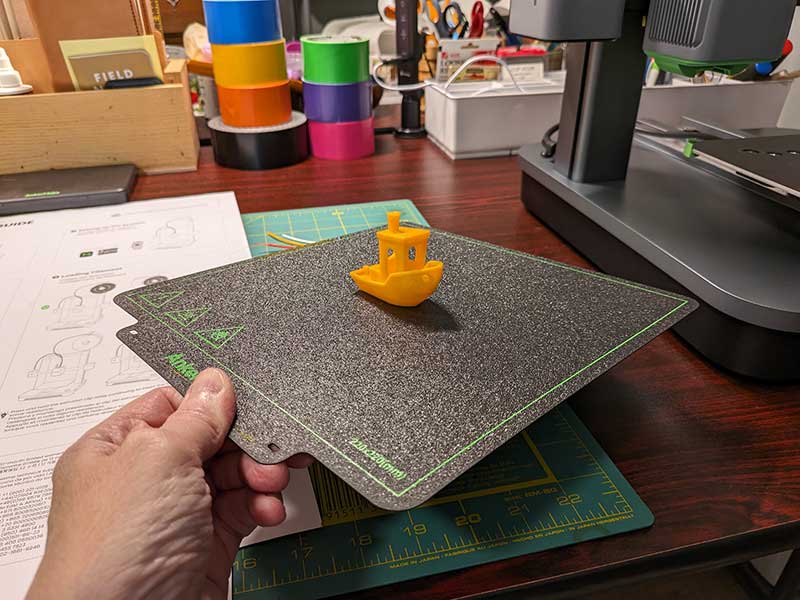
When the print was finished, it was easy to remove the magnetic plate and flex it to remove the print.
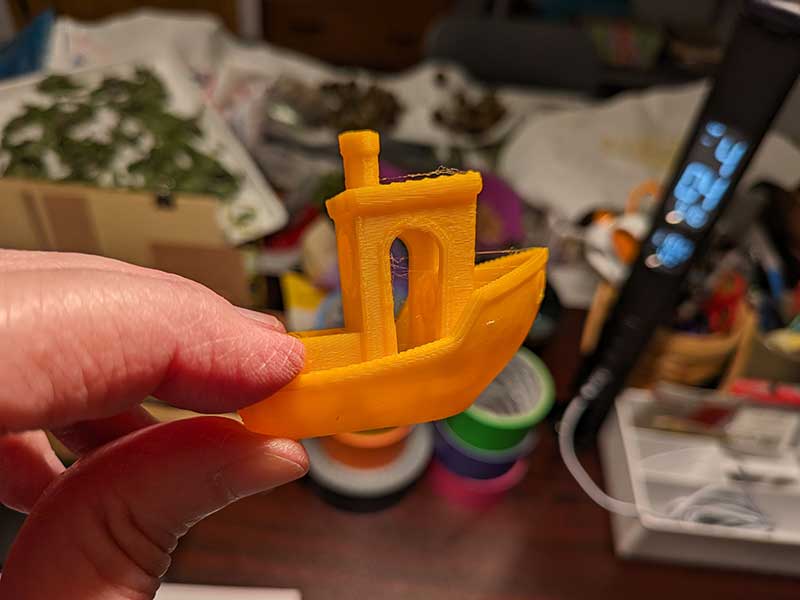
I was really impressed by the first print’s quality as it had very minimal stringing.

With that first print done, it was time to move to something a little larger! But then…
Houston, we have a problem…
First, I decided to change out the filament to a different color and when I went to insert the new (still older filament from last year) into the feeder tube, it wouldn’t insert more than 3-4 inches. Something was stuck in there (obviously it was filament) and I was confused as to why it happened and what to do about it. So, I visited the AnkerMake discord channel.
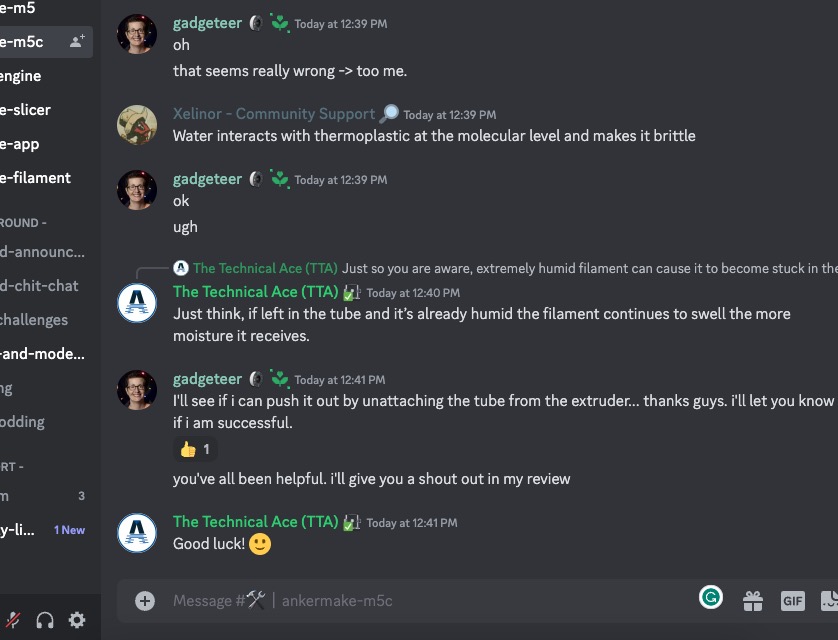
And after talking to the very knowledgeable and friendly (to newbies like me) group of volunteer helpers, I learned that my filament was too “wet”. I didn’t want to believe them at first because if anything, I thought my filament was too brittle because I had noticed that it would break easily. I mentioned this and they told me that that was exactly what filament does when it has absorbed too much moisture… it becomes brittle. They advised me to buy a filament drier which I did and then I went on my merry way (after asking more newbie questions here and there) to print more prints.
My next print test was also from the built-in models in the AnkerMake app, but it was a bigger model of a vase.
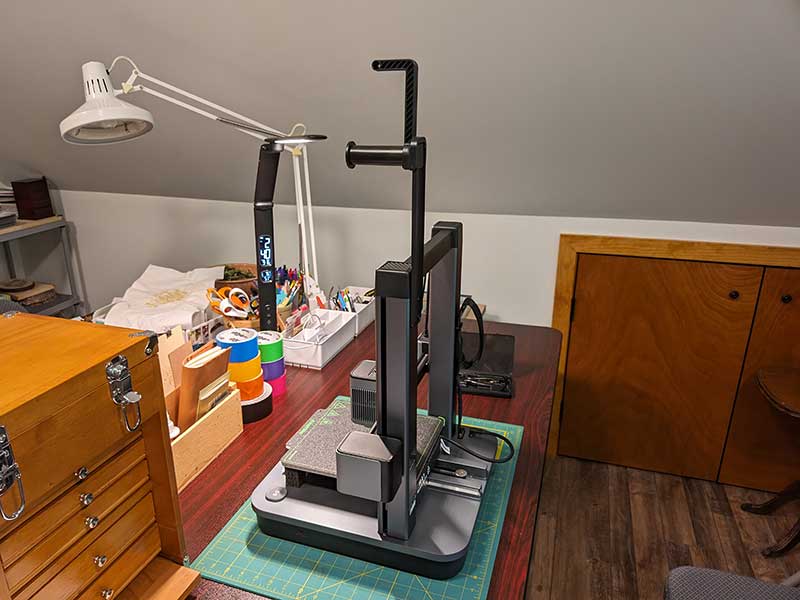
It’s really easy to be hypnotized by a 3D printer while it’s printing layer upon layer…
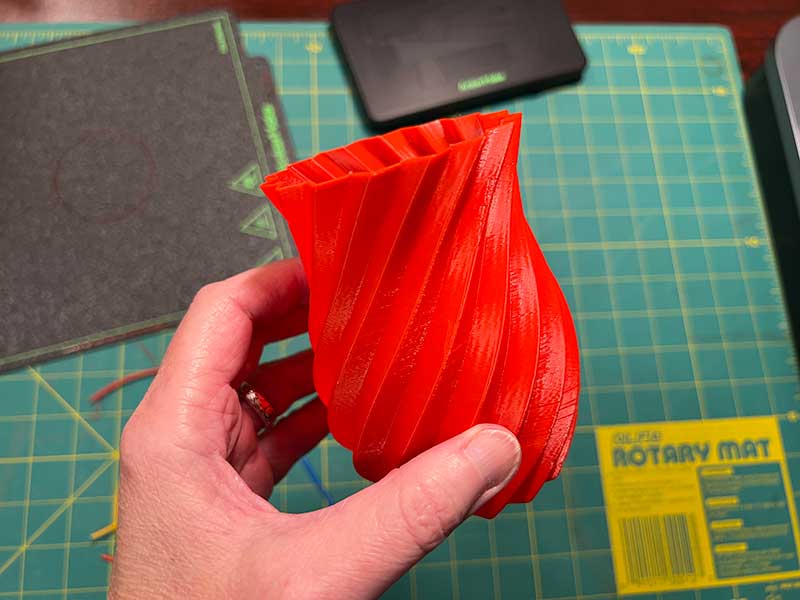
Another successful print! Now it was time for something a bit more ambitious…
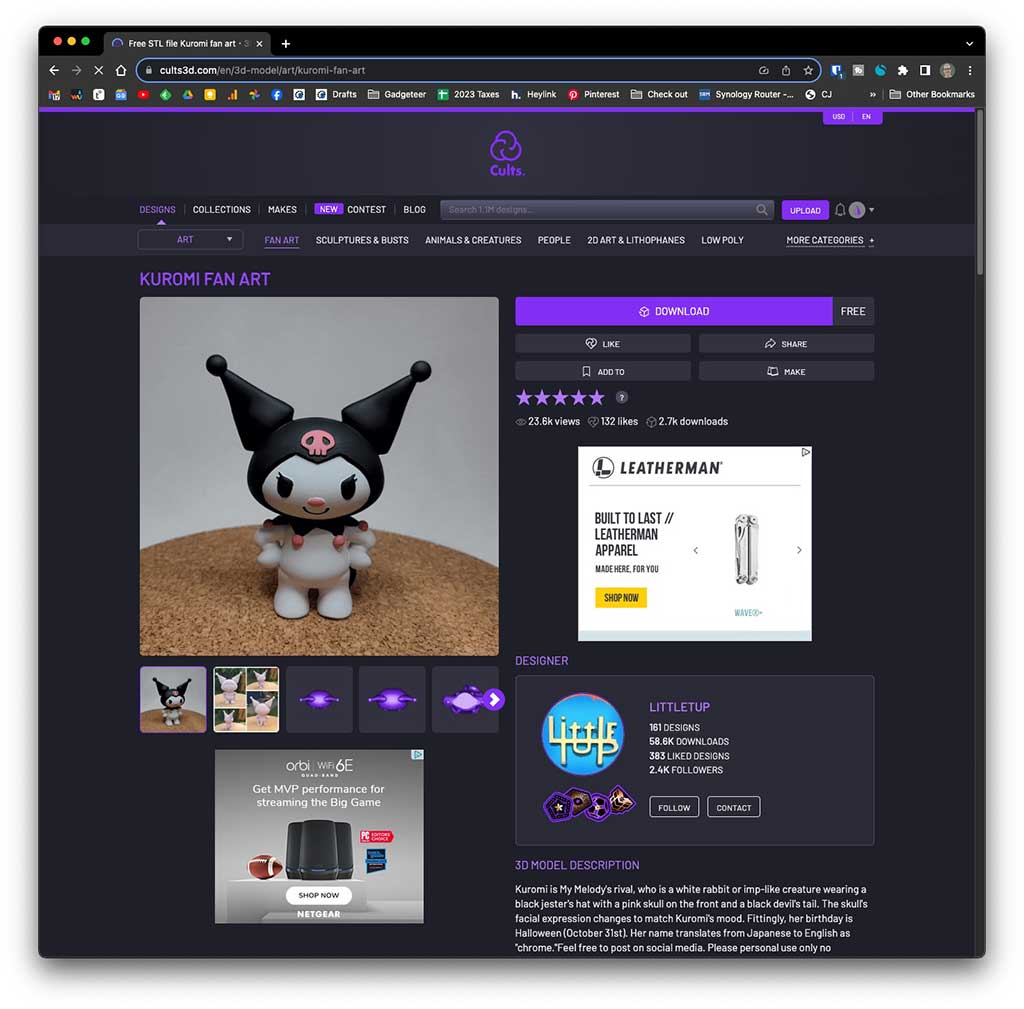
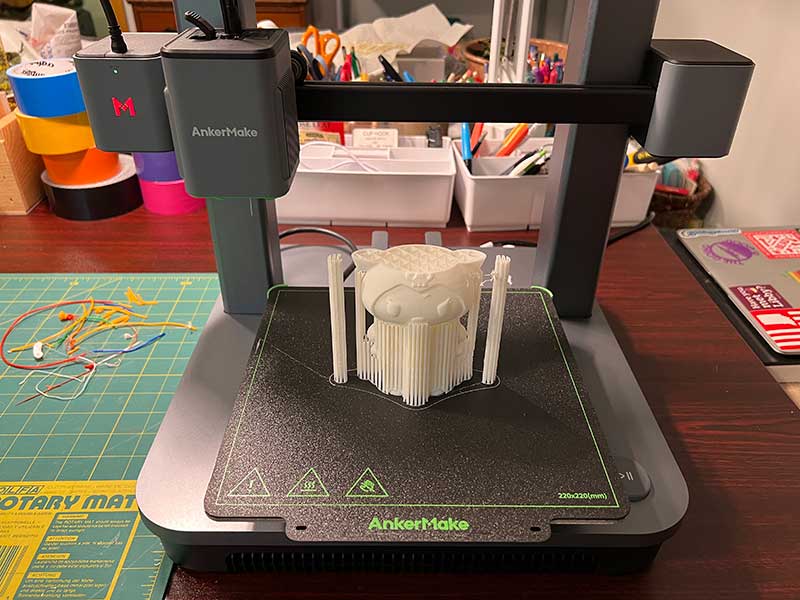
I visited the cults3D.com site and downloaded a free model of a Kuromi character. My niece loves this character, so I thought it would be fun to print it and paint it for her as a Christmas gift.
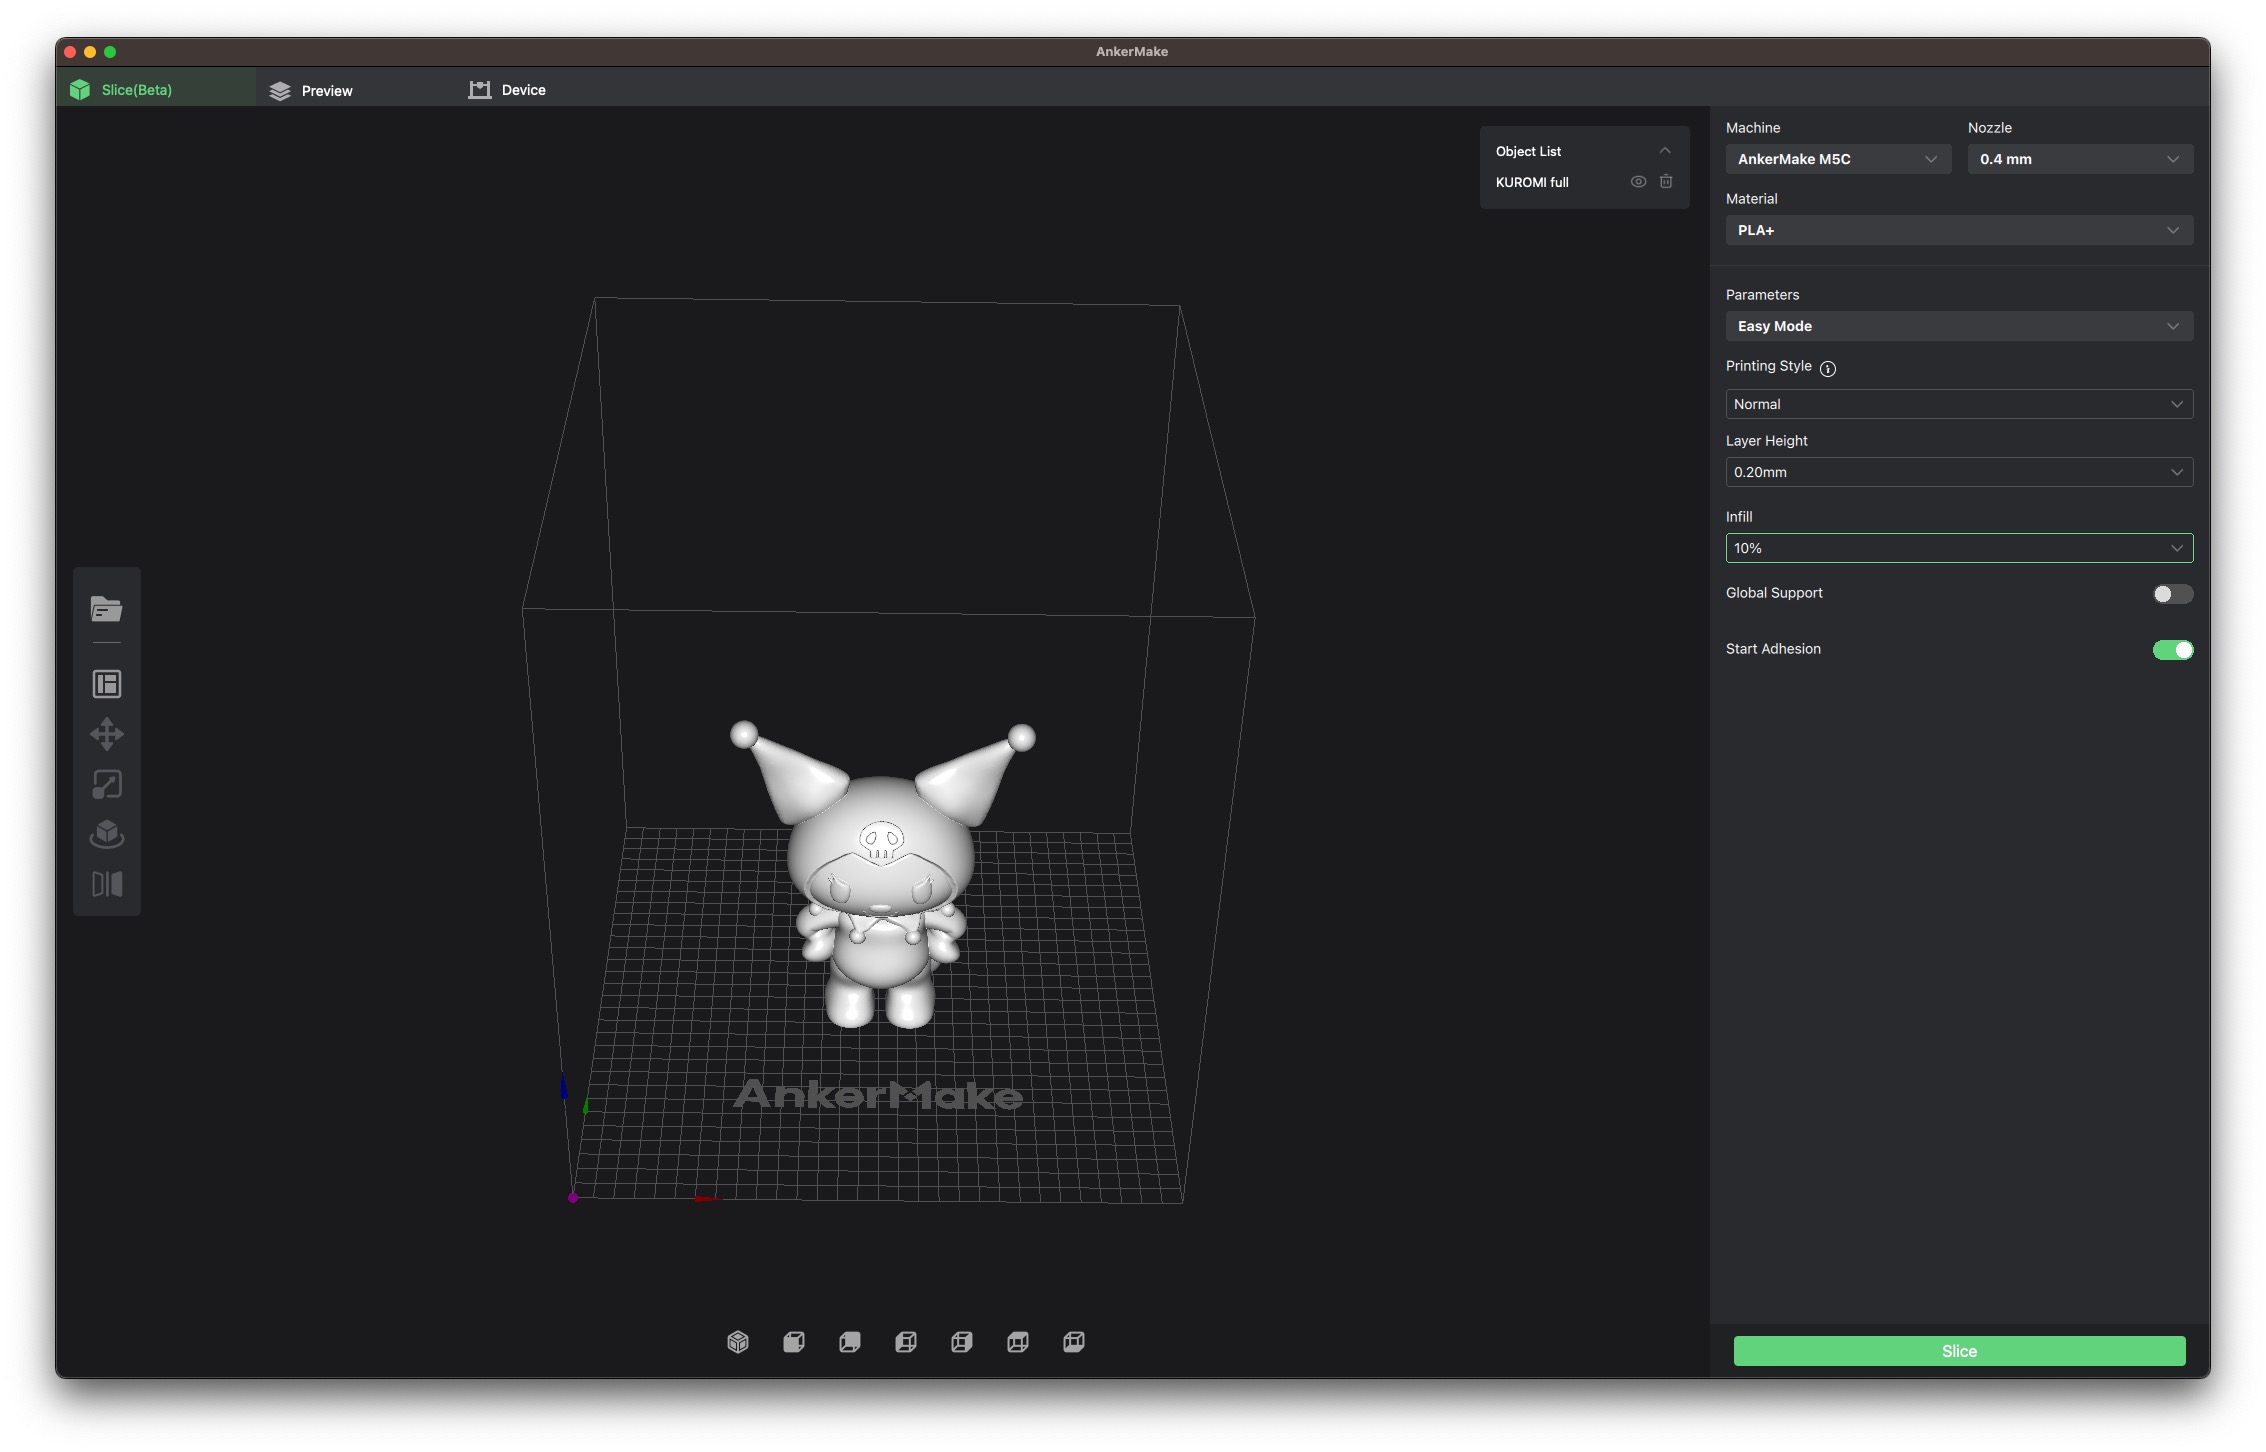
In order to prepare this 3D model for printing, I used the AnkerMake slicer application. With this application, you can resize the model which I did and you can turn on supports which were needed for this model due to the points on the hat and other parts that could droop while printing without supports.
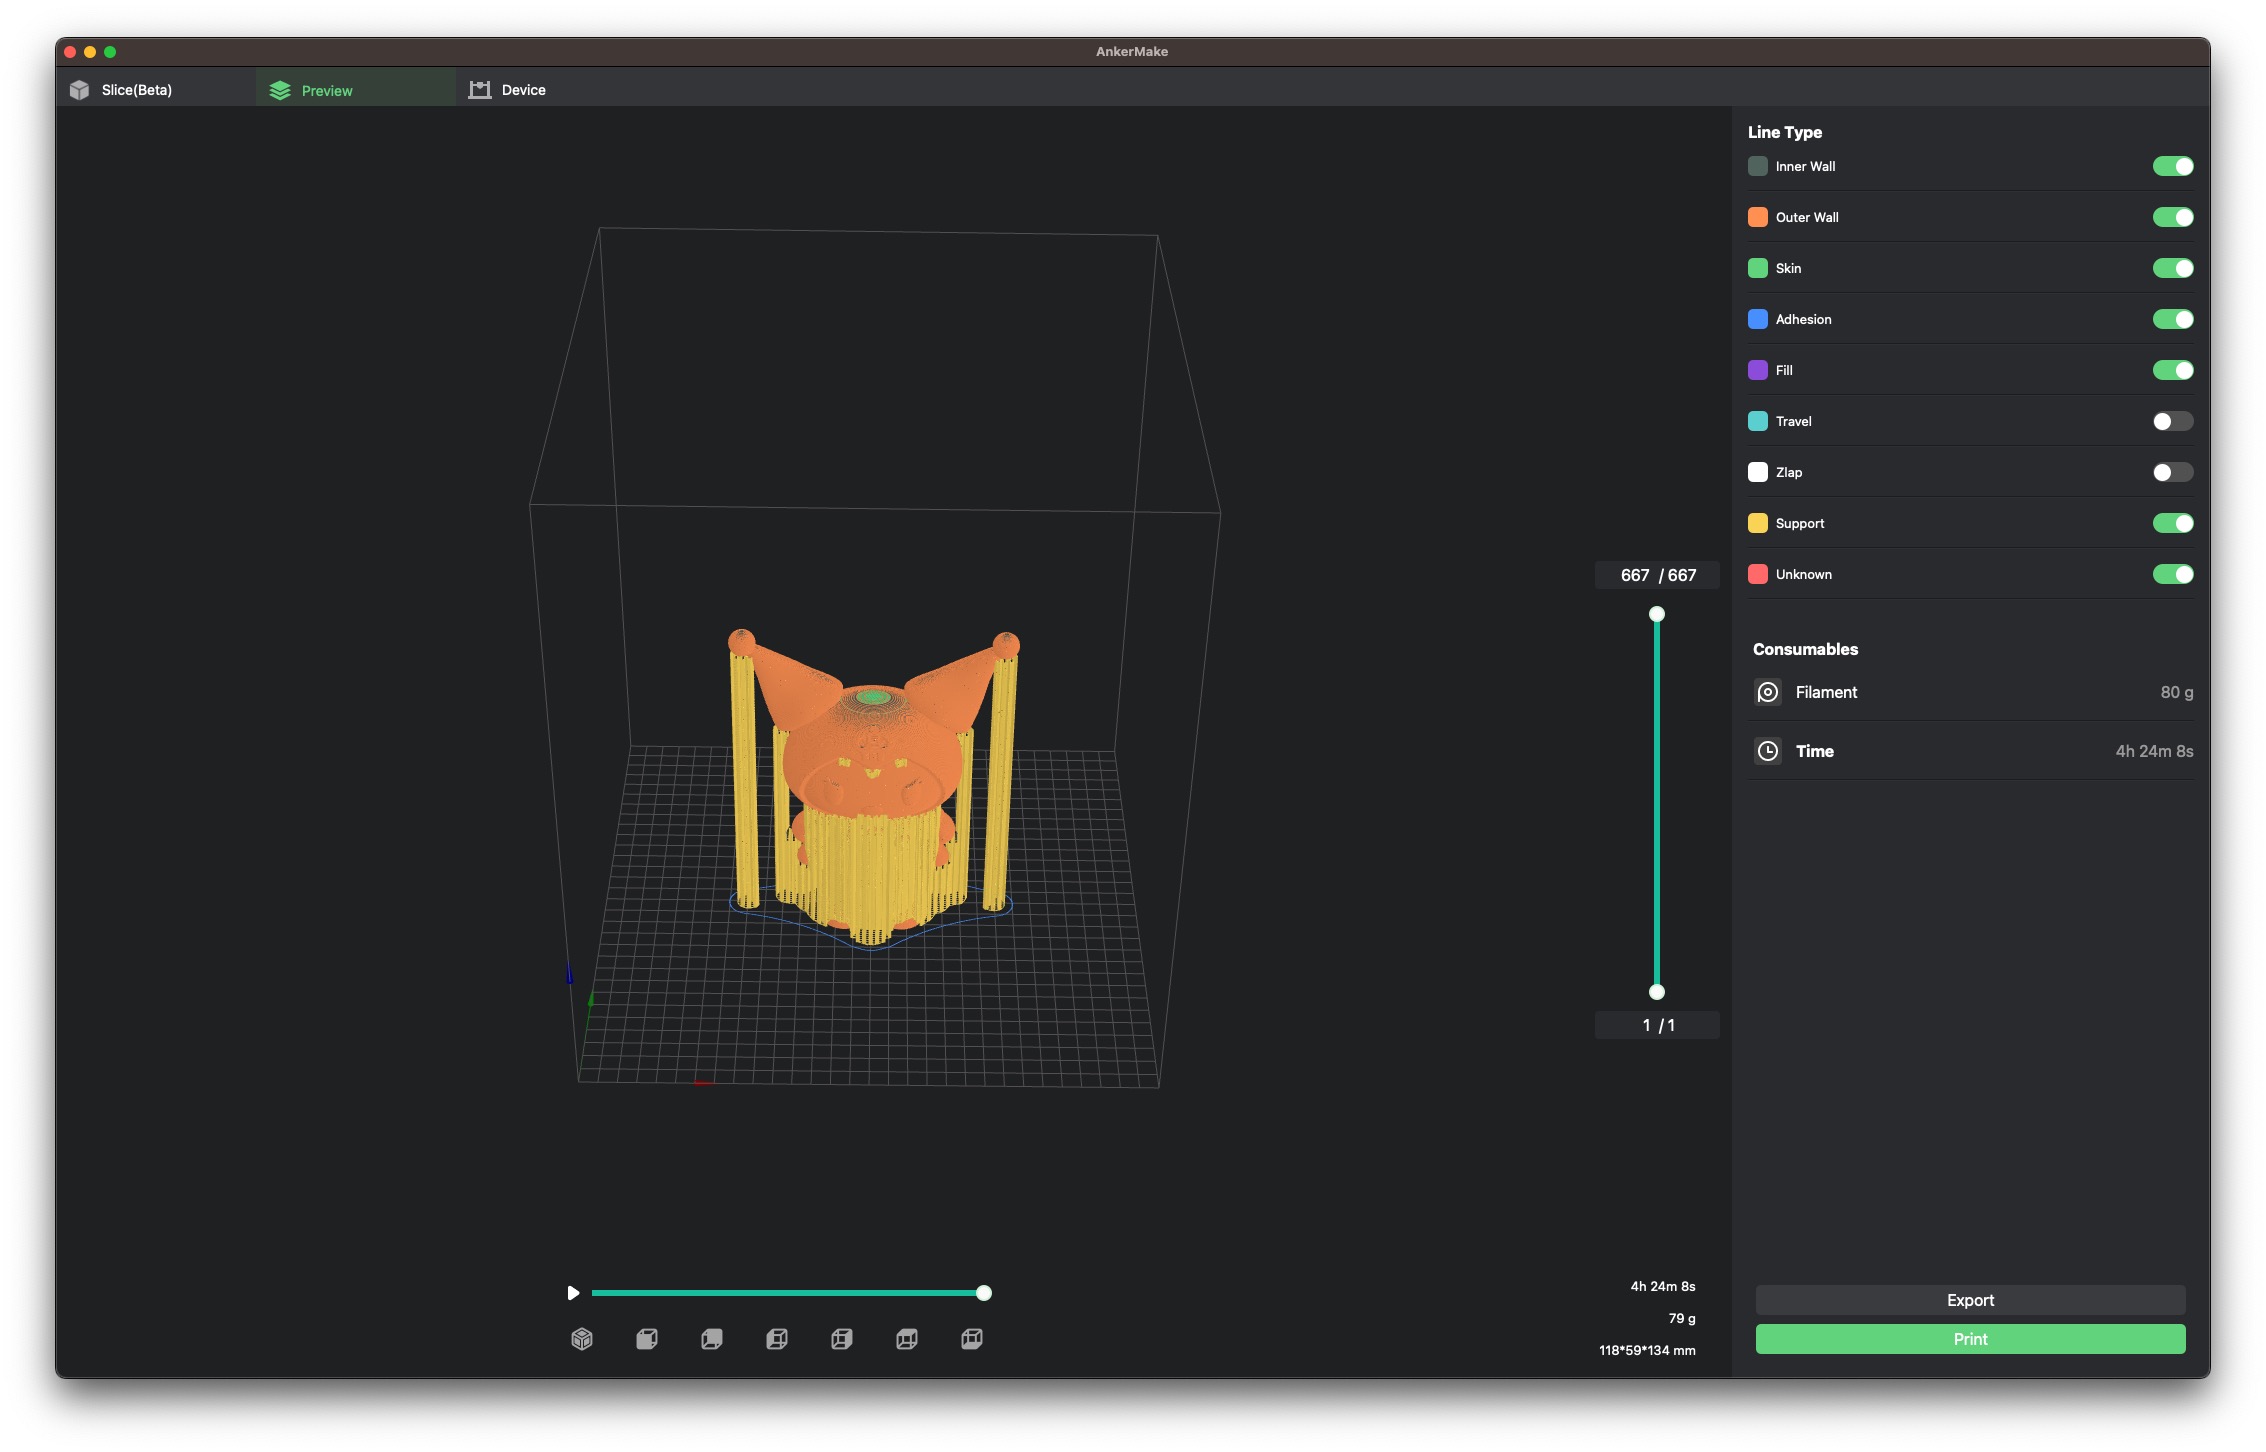
With the supports option turned on, the app shows what the printed model will look like. You can then slice it and from the app, you can send it to the AnkerMake MC5 3D printer wirelessly.
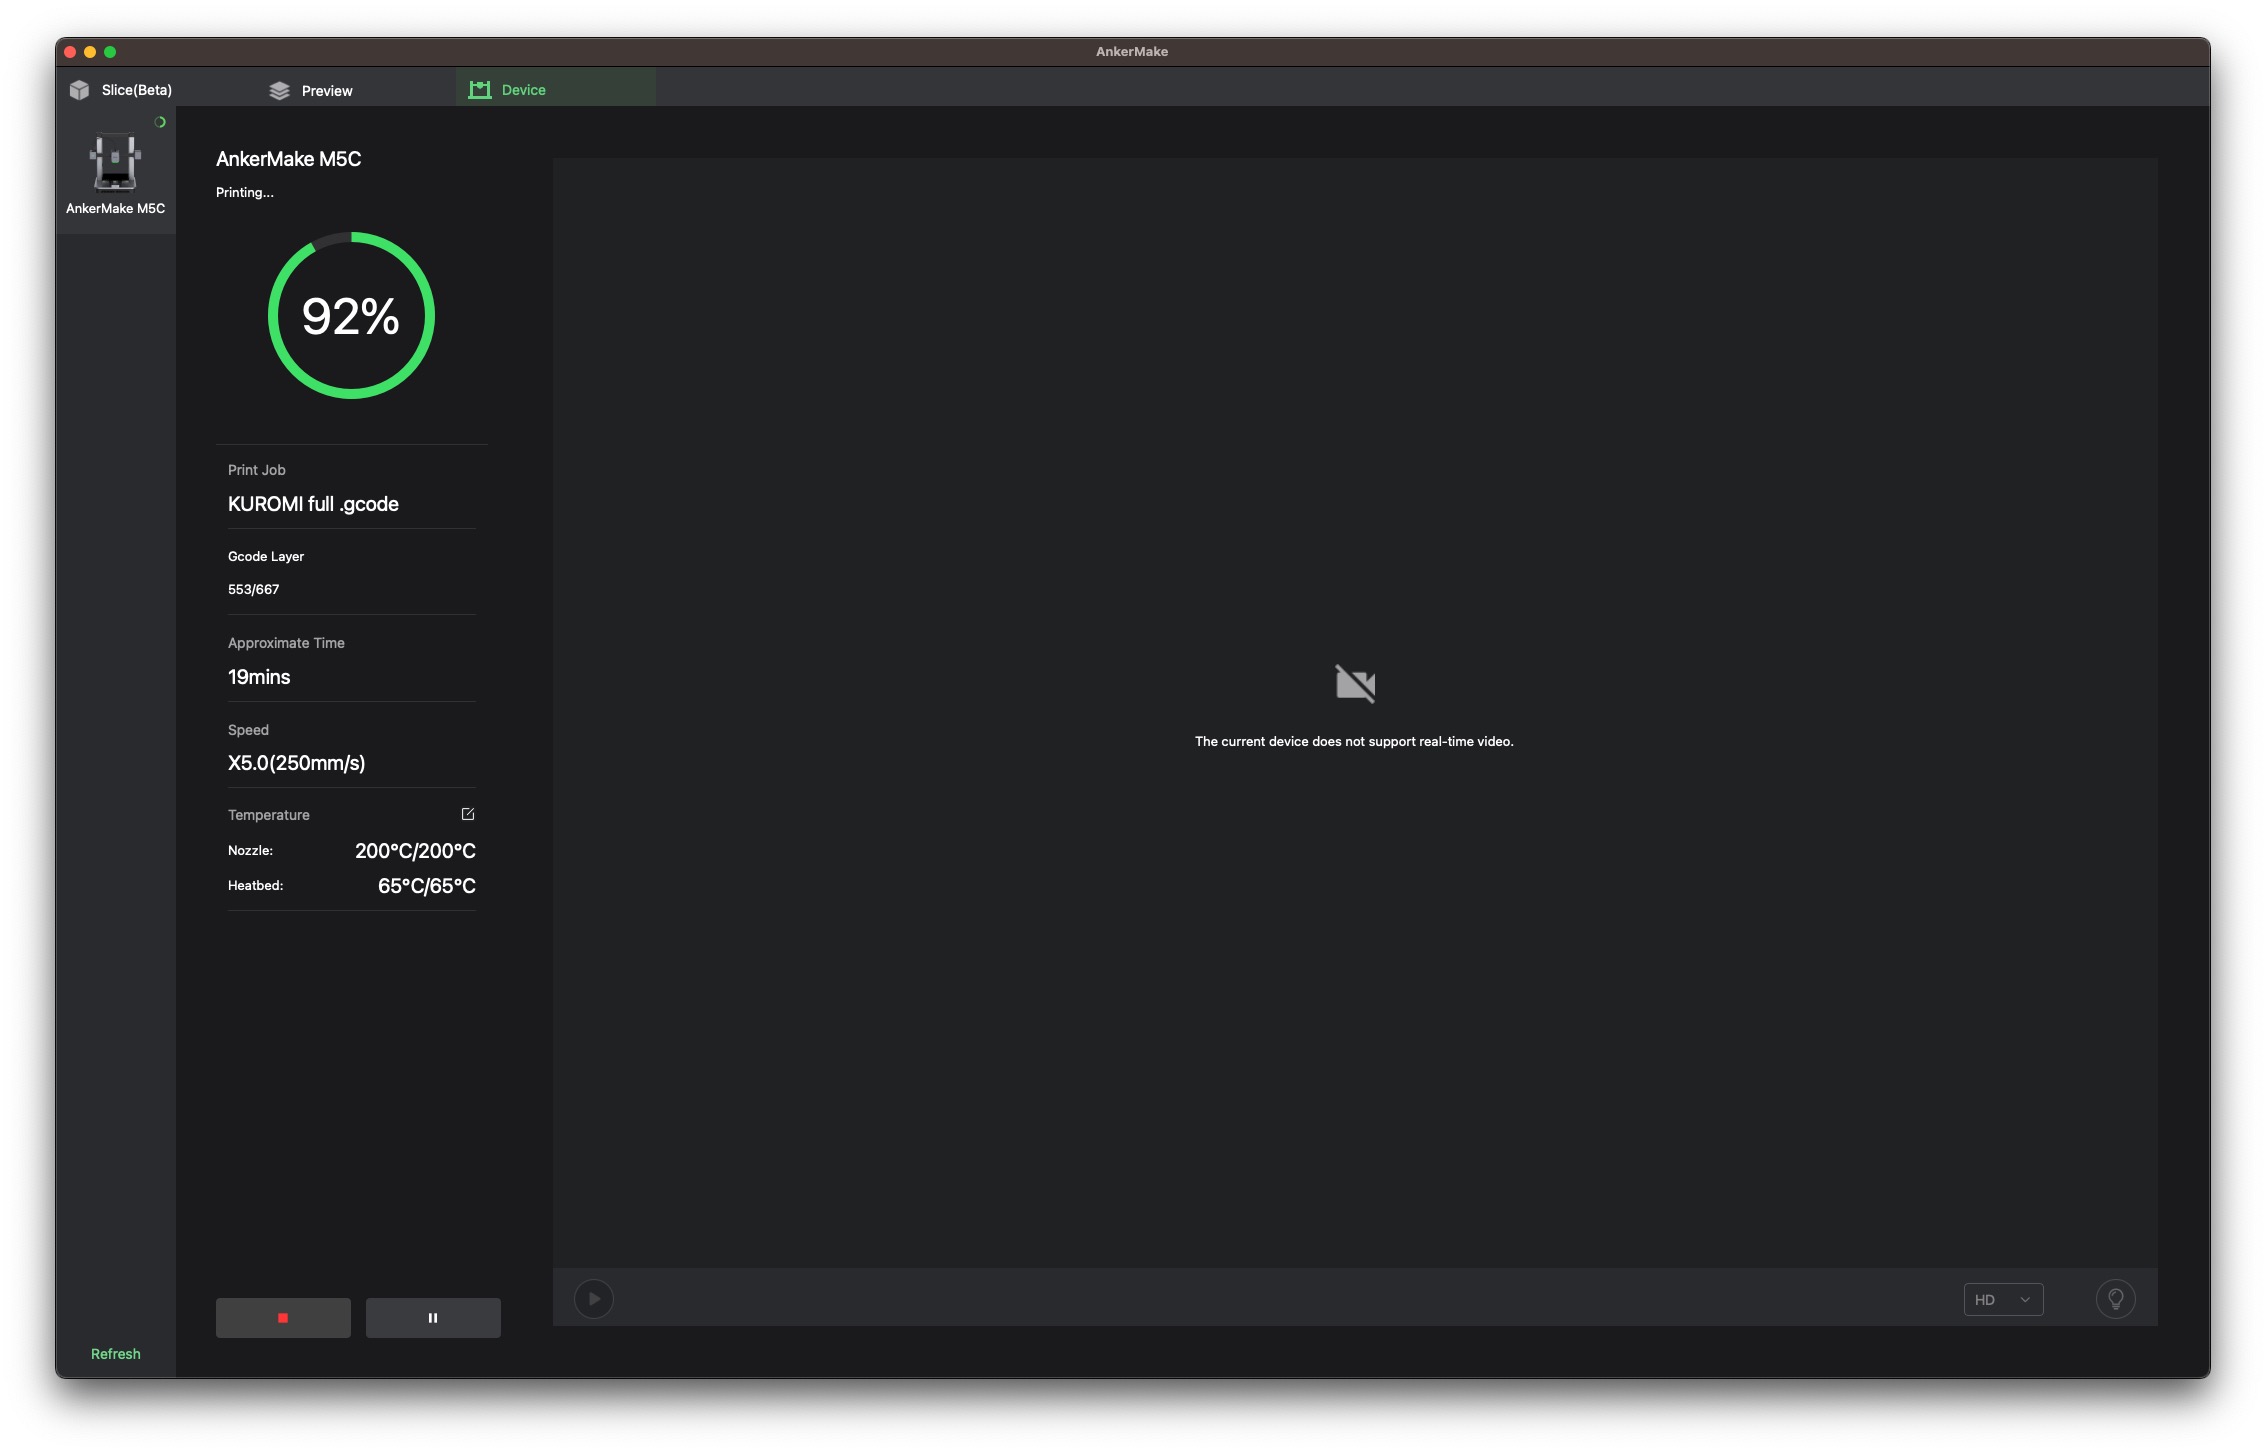
The desktop app will show the progress of the print, but since this printer does not have a built-in camera (darn it), it won’t show you a live view while it’s printing.
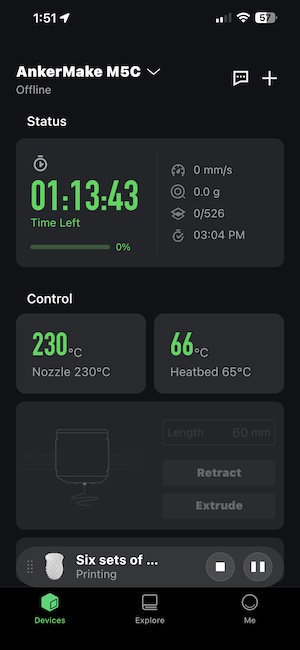
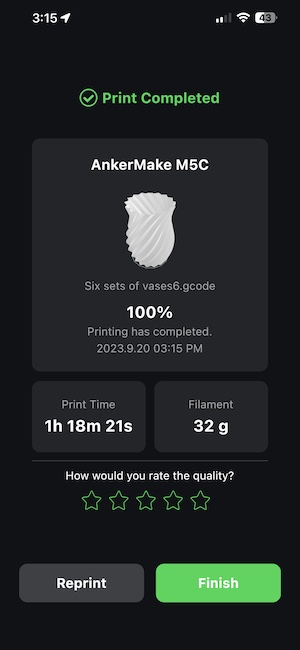
Not being very experienced with 3D printing, I didn’t realize that the amount of filament on the spool was too little for the print, so at about 90% done, my phone alerted me to a problem.

Oh no! I sprinted up the basement stairs and then. up the loft stairs to find that I had run out of filament.
I thought I had wasted 3 hours of work and a bunch of filament for nothing but it turns out that I was able to load new filament and take right back off from where it left off!
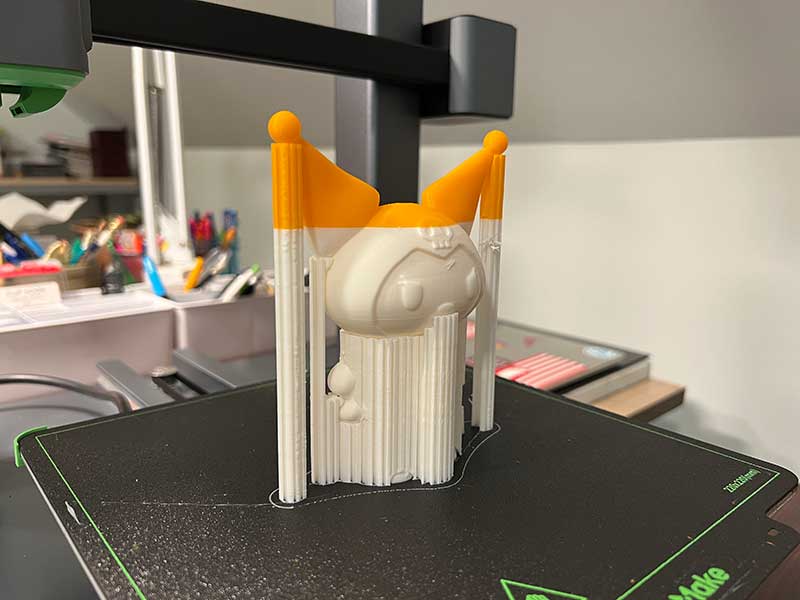
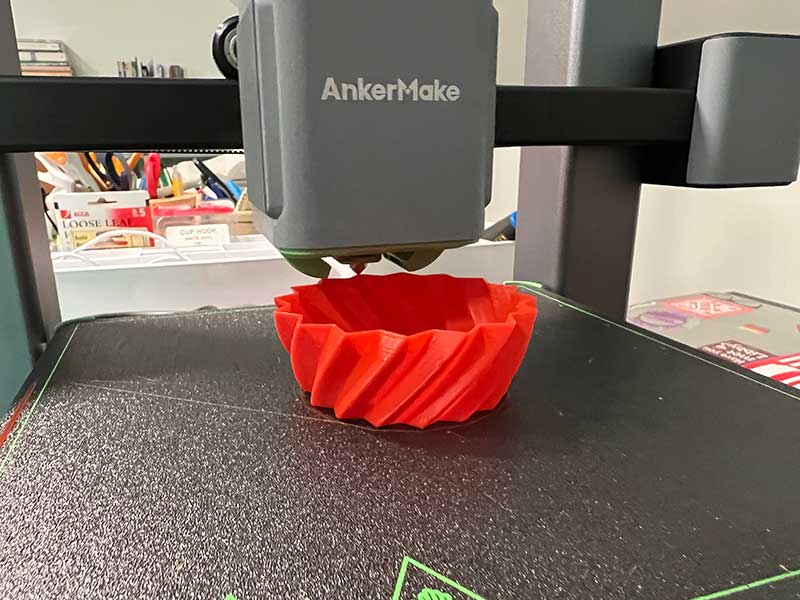
Yes, it looks wonky, but I’m going to paint it anyway…
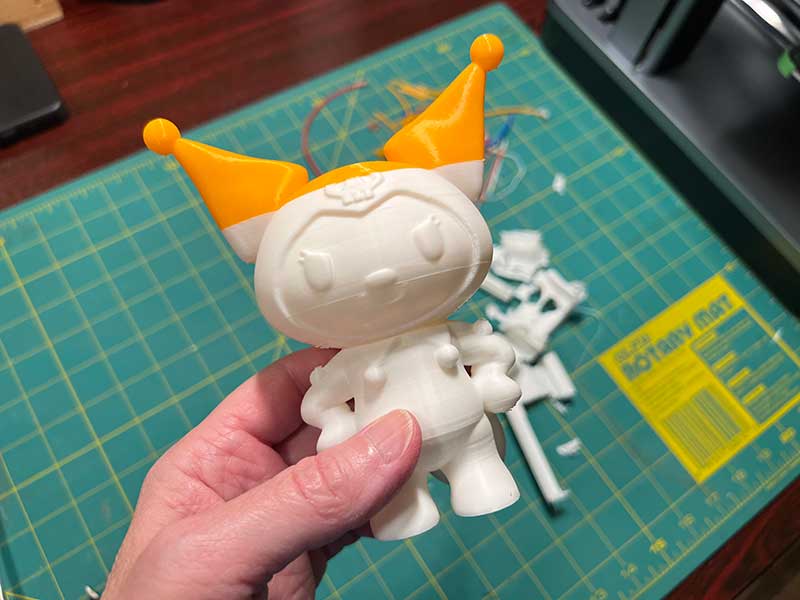
Other than the 2 colors, I think the print turned out great! I’ll have to update the review with a picture of it painted once I get time to do it.
What I like
- Well made printer
- Easy to use
- Fast!
What I’d change
- Ability to add a camera
- Ability to add a control panel
Final thoughts
Reviewing the AnkerMake MC5 3D printer has been a lot of fun and I’ve learned a few things along with way. The printer was very easy to build and has also been easy to use. I think it’s a great printer for a newbie like me and now I am trying to think of other things to print besides toys. I will update this review to share any cool models I come across and I look forward to checking out other AnkerMake products in the future!
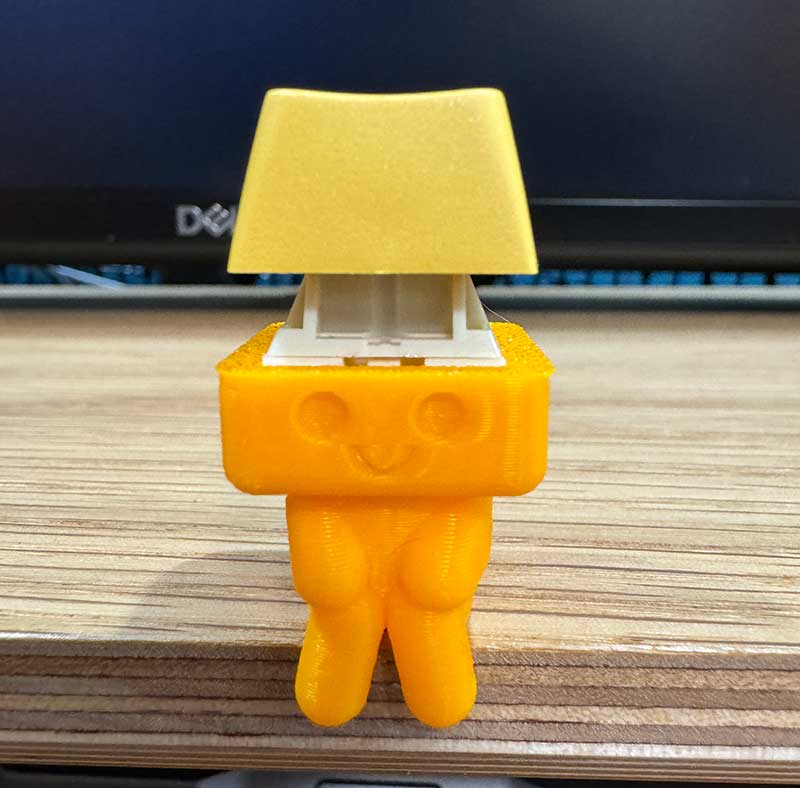
Update 11/27/23
I’m still enjoying using this 3D printer. I even printed some stocking stuffers with it! I love how fast this printer can print! If you want to print the Key Crappie model below, you can find the model here.
Price: $399.00
Where to buy: AnkerMake and Amazon
Source: The sample for this review was provided by AnkerMake.
![[MINI SIZE. ULTRA PORTABLE CHARGER]: Roughly the size of an AirPods Pro case, this smallest power bank packs 10,000mAh of long lasting power into a tiny, nano footprint. Easily slide this ultra slim, credit card size charger into your skinny jeans, a...](https://m.media-amazon.com/images/I/41rATpm6dyL._SL160_.jpg)
Now retrieving an image set.
INIU Portable Charger, Ultra Mini 10000mAh 45W Fast Charging with Detachable Cable, Flight-Safe Travel USB C Power Bank External Phone Battery Pack for Xiaomi iPhone 17 16 Samsung S26 Google iPad etc
(as of July 13, 2026 18:57 GMT -05:00 - More infoProduct prices and availability are accurate as of the date/time indicated and are subject to change. Any price and availability information displayed on [relevant Amazon Site(s), as applicable] at the time of purchase will apply to the purchase of this product.)
Now retrieving an image set.