REVIEW – The last 4 years have been pretty epic as far as personal electric vehicles go. The sheer quantity of electric bikes and scooters available is staggering which can make it tricky to find that one model that will be the perfect fit for you. Smaller moped-style bikes have become increasingly popular due to their ease of use and the one-size-fits-most design. Engwe has a brand new one called the M20 and I was able to get an early look.
What is it?
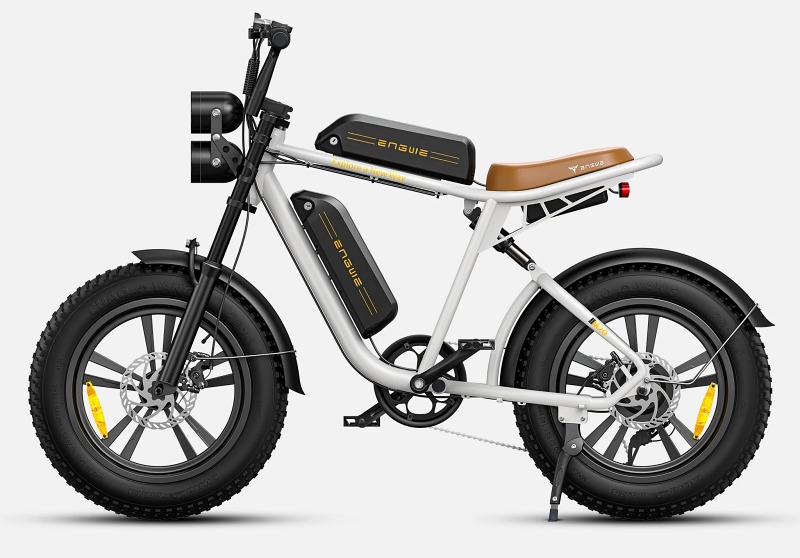
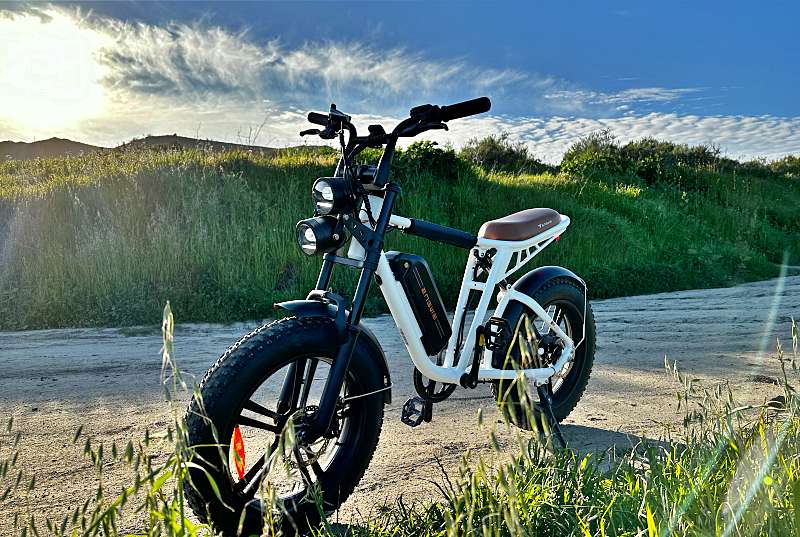
The Engwe M20 eBike is a moto-inspired, Class 3 ebike eBike with pedal assist, throttle, 4″ fat tires, dual-suspension, and can be equipped with either 1 or 2 batteries depending on your range needs.
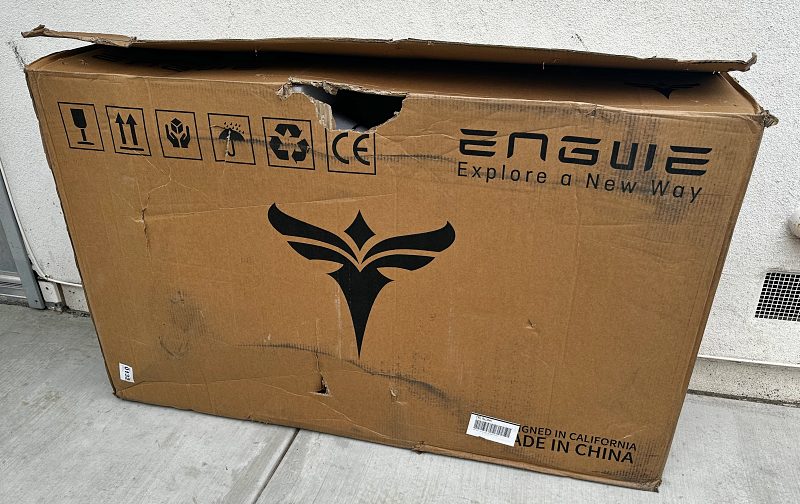
What’s in the massive box?
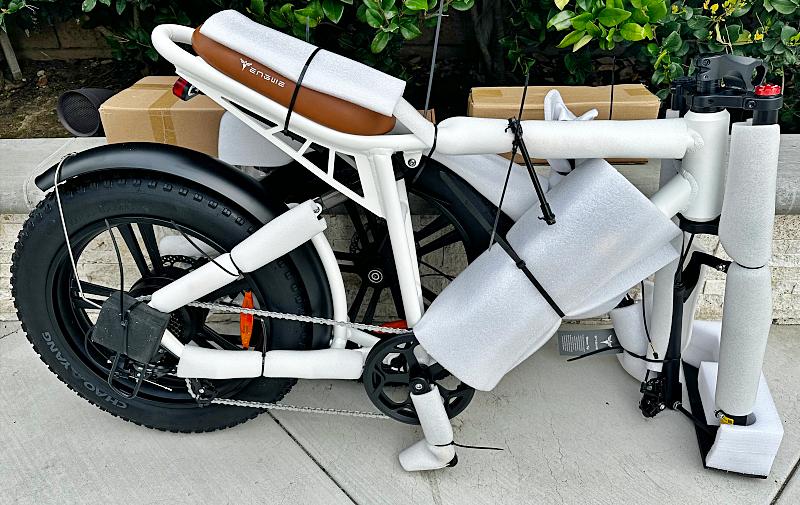
- Engwe M20 eBike w/ 1 battery (partially assembled)
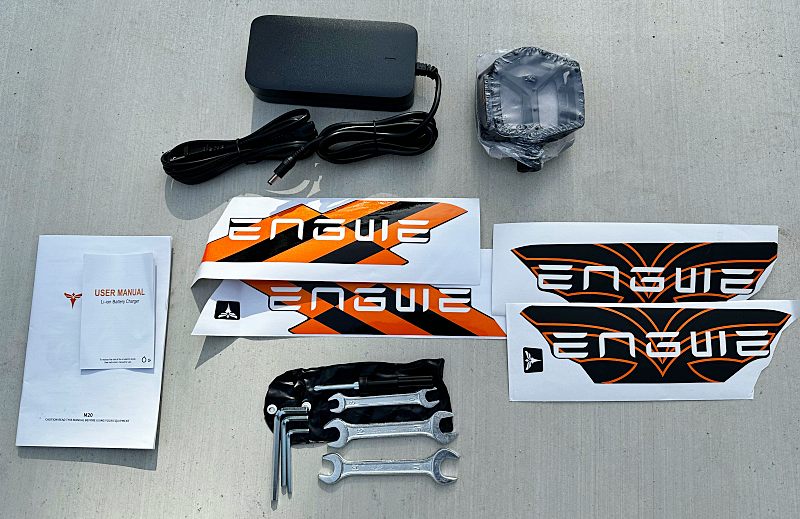
- Battery charger, pedals, tools, extra battery decals and user/assembly manuals
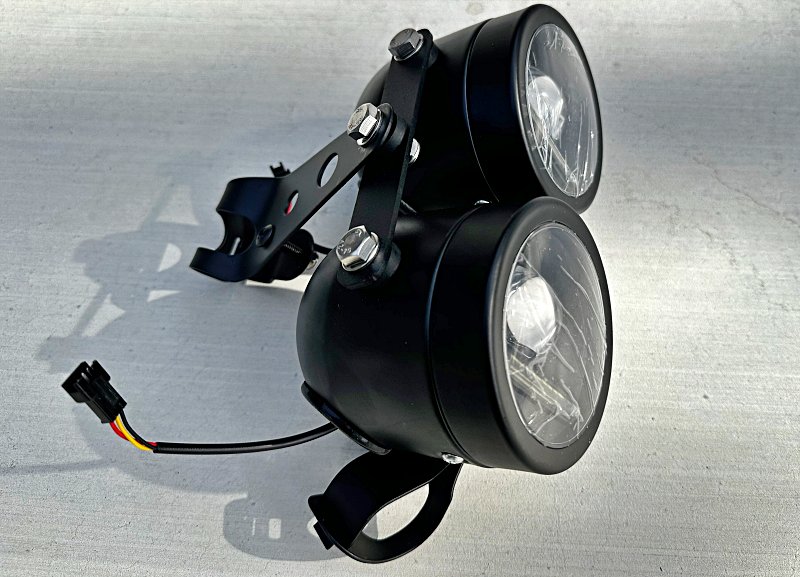
- Dual headlights
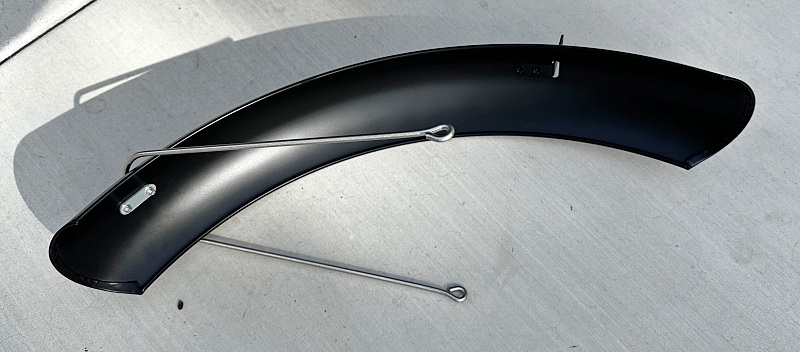
- Front fender
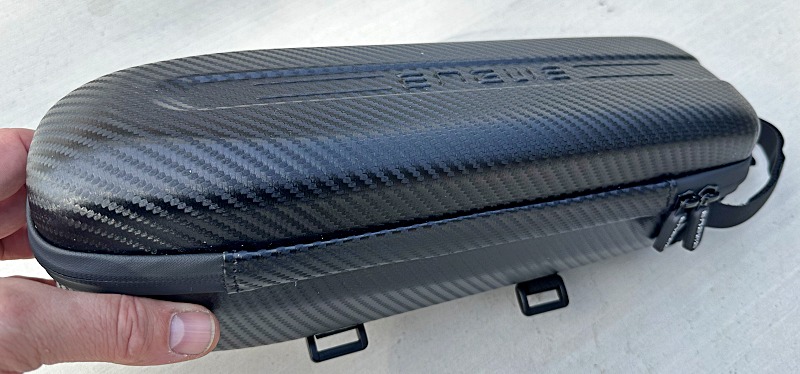
- Frame bag
Hardware specs
Motor: 48v 750W (1000W peak) hub motor
Battery: 48v 13Ah Lithium battery (1 or 2 can be mounted)
Charge Time: ~ 5 hours per battery
Frame: 6061 Aluminum
Suspension: Front and rear suspension
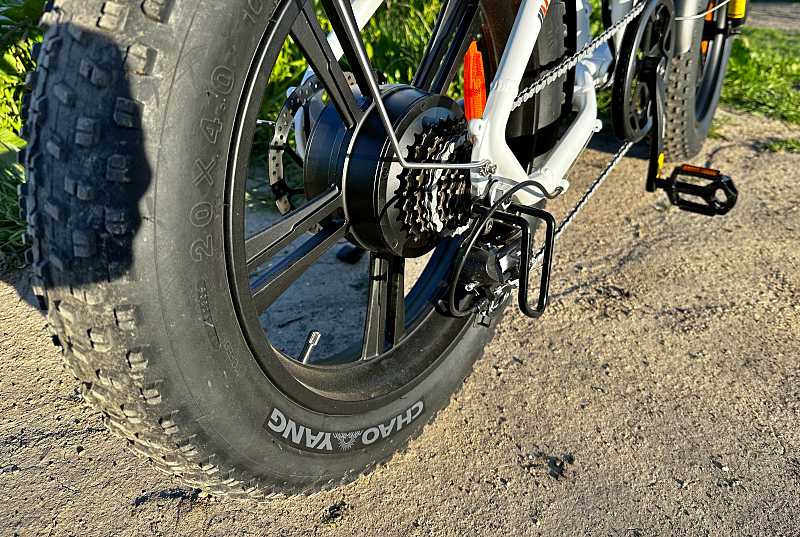
Tires: 20 x 4.0 All-terrain Fat Tires
Lights: Dual headlights and rear brake/running light
Display: Color LCD Display/Controller
Gears: 7-speed Shimano system
Braking: 160mm front & rear mechanical disc brakes w/ motor cut-off sensors
Throttle: Full width twist throttle
Torque: 55 N.m
Max Incline: 10°
Speed: 28MPH (45 KPH) max speed (Actual speed varies w/ rider weight and terrain)
Mileage: Up to 45 miles (pedal-assist only in mode 1) | Up to 30 miles (throttle only in mode 1)
Weight: ~68 lbs without battery | ~77 lbs with 1 battery | ~86 lbs with 2 batteries
Limits: Max load ~265 lbs | Rider height 5′ – 6′ (Engwe states up to 6’8″)
Design and features
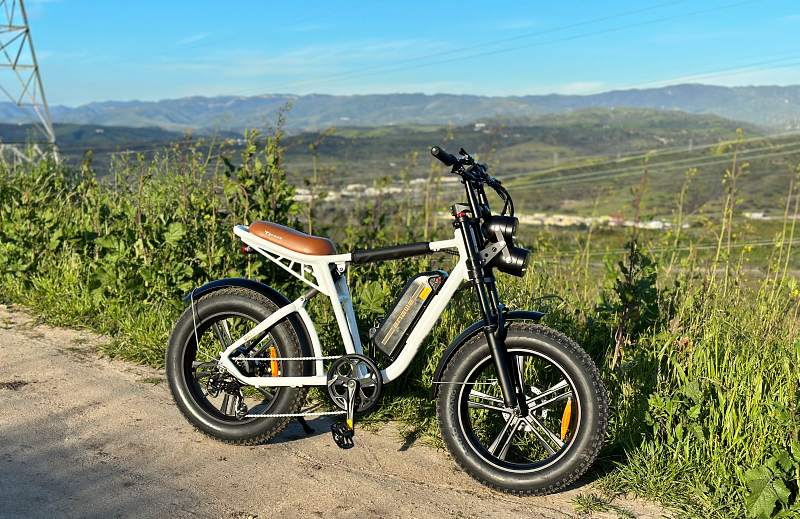
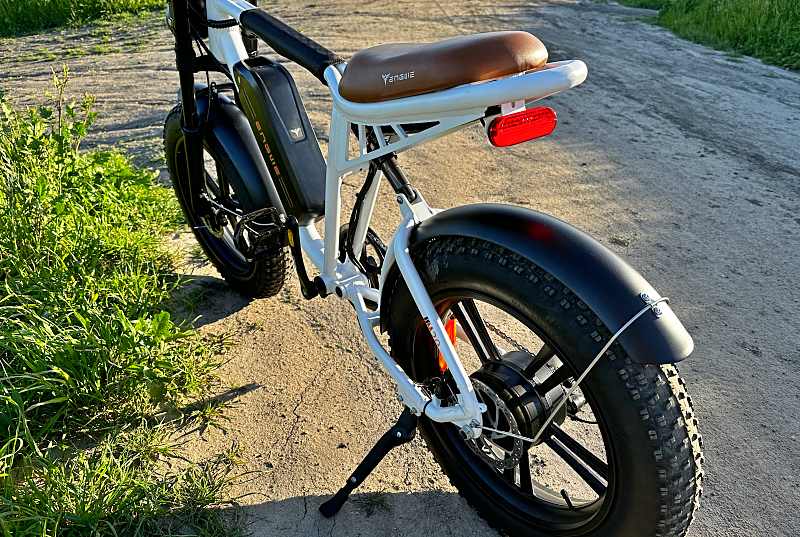
The Engwe M20 eBike has a great look to it that just asks to be ridden.
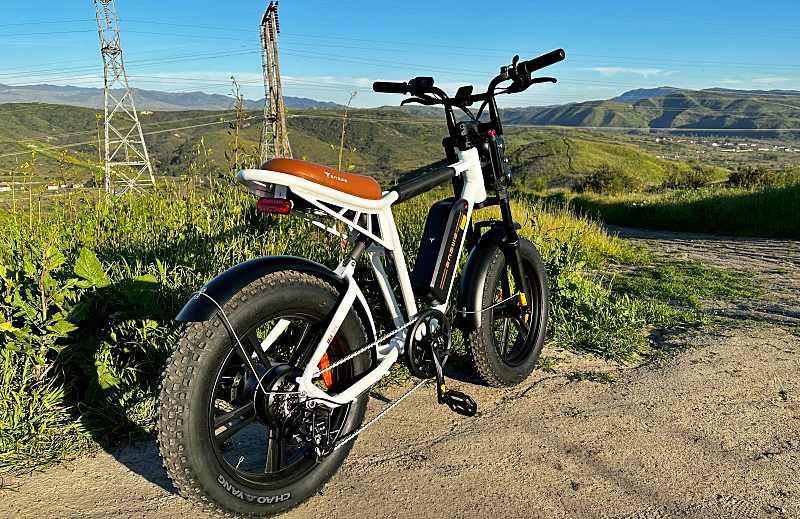
It’s available in 3 different colors; White, Green or Black.
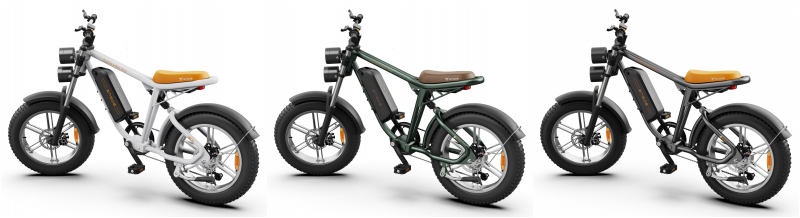
And additionally, can be ordered with two batteries if you want to double your range.
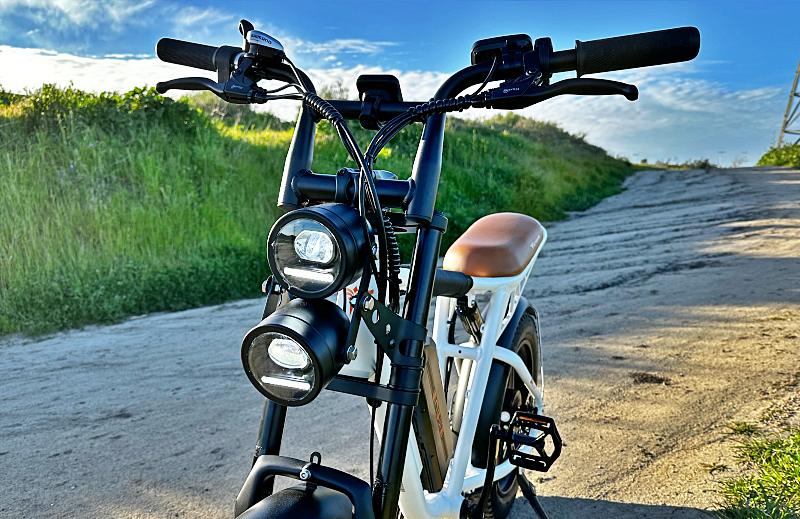
Up front, there are dual headlights that can be aimed individually. They have low running lights and a control switch by the left hand to toggle on the high beam.
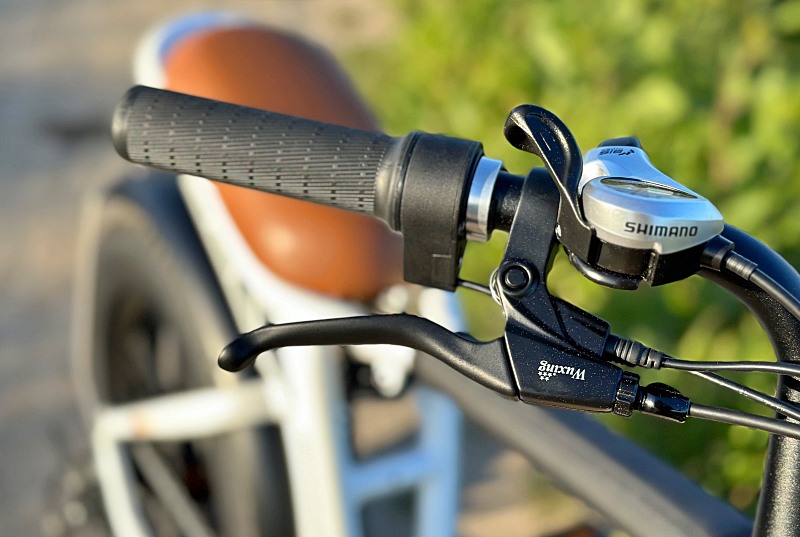
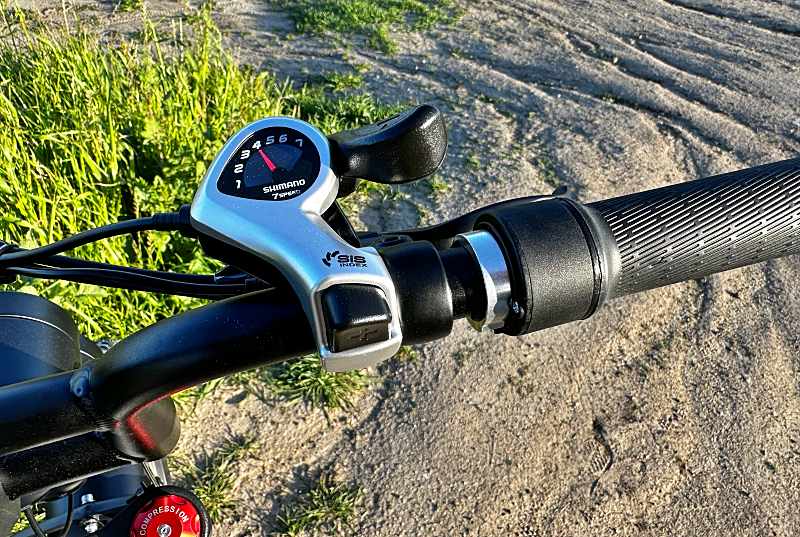
On the right hand are the full-size throttle, 7-speed shifter, and your rear brake which has a sensor that cuts power to the motor when used, even if the throttle is still open.
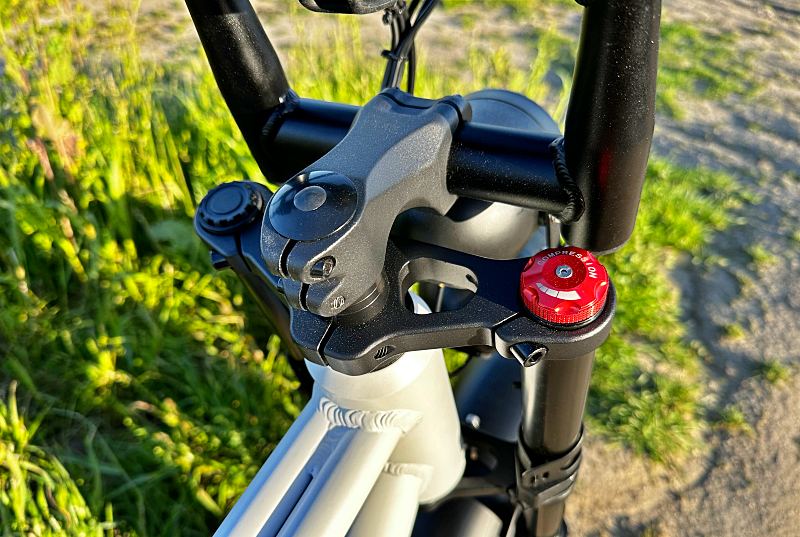
The Engwe M20 eBike’s front wheel is mounted to a triple clamp suspension fork, providing a smooth ride and also preventing the steering from turning too far where the headlights might hit the frame.
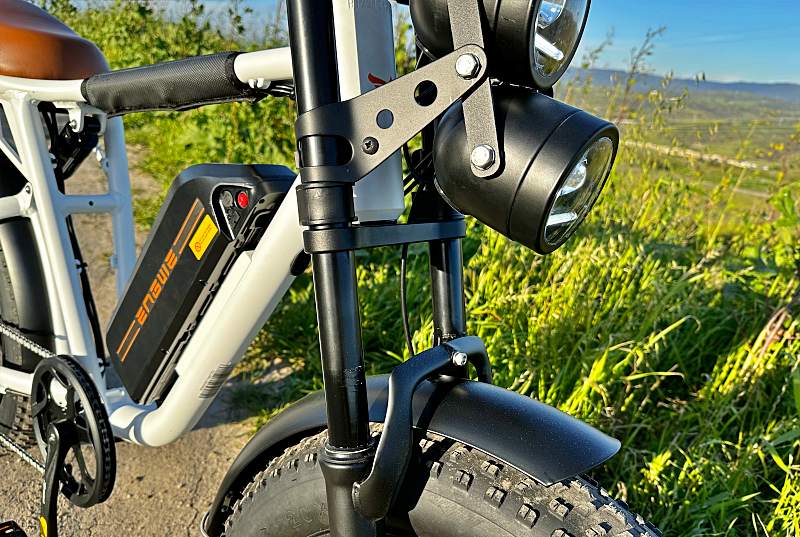
At the top of the triple clamp fork, you have a red compression adjustment knob to tune the fork’s feel.
Here’s the whole cockpit. The small square in the center of the bar is my addition. That’s a Peak Design handlebar mount for their Mobile phone cases. Great, secure mount for your phone if you need GPS to get where you’re going.
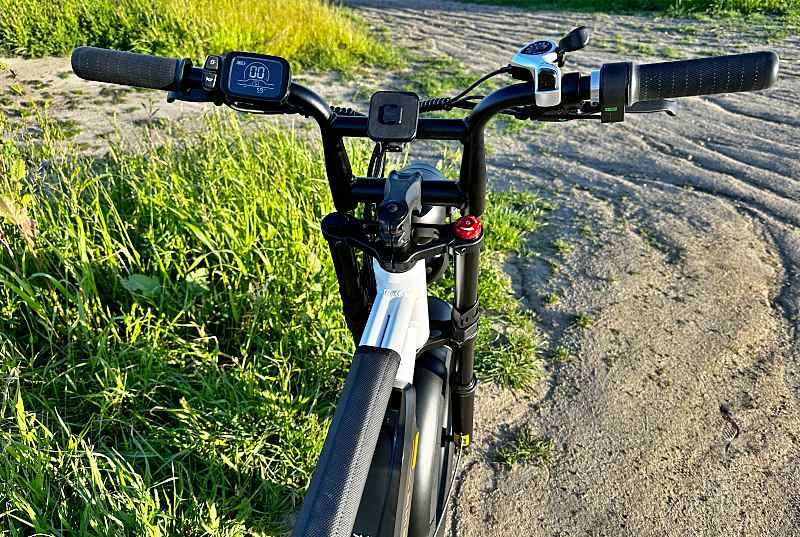
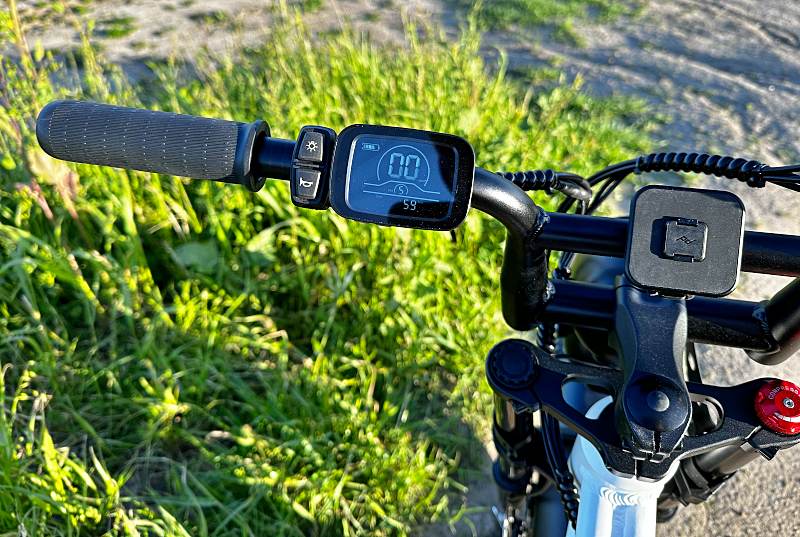
The lights and horn are handled by 2-button remote mounted just to the right of the grip. As for the eBike settings, they’re all handled by the display which has three buttons. The power button is just above the battery icon on the top edge of the display. Just under the display on the left side are + and – buttons. Pressing those increase or decrease the assist level from 0-5 (0 being no assist and 5 being max assist). Additionally, if you press and hold the – button the bike will slowly roll itself forward to help carry its own weight as you walk up hills. Just keep it pressed as long as you need the assist.
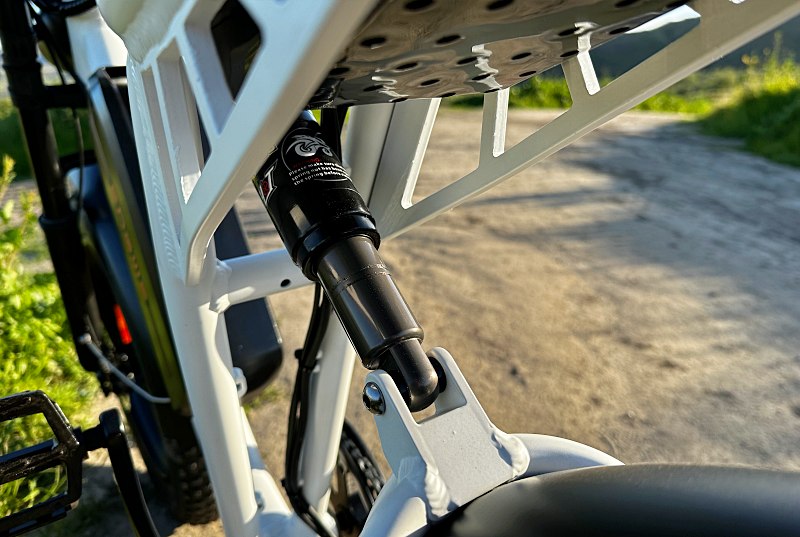
At the rear, you’ll find a very visible tail light that illuminates any time the bike is on and pulses brightly when the brakes are engaged. You can also see the rear swingarm in this shot heading up to the shock mounted under the seat.
Here’s that up close. The black perforated box under the seat hides the motor controller along with the horn’s speaker.
The Engwe M20 eBike’s rear derailleur comes with one of those protective cages around it. I’d recommend leaving it in place just due to the increased weight of this bike. A tip over to the right side could damage the derailleur pretty good. The mag-style wheels look good and are plenty strong.
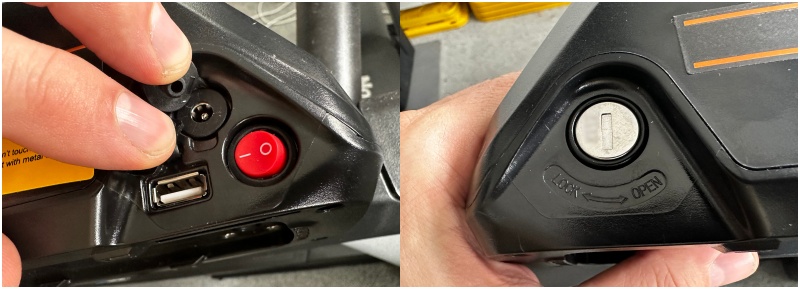
As for the battery, it installs by sliding onto a modular rail and then locks in place with a key on the left side.
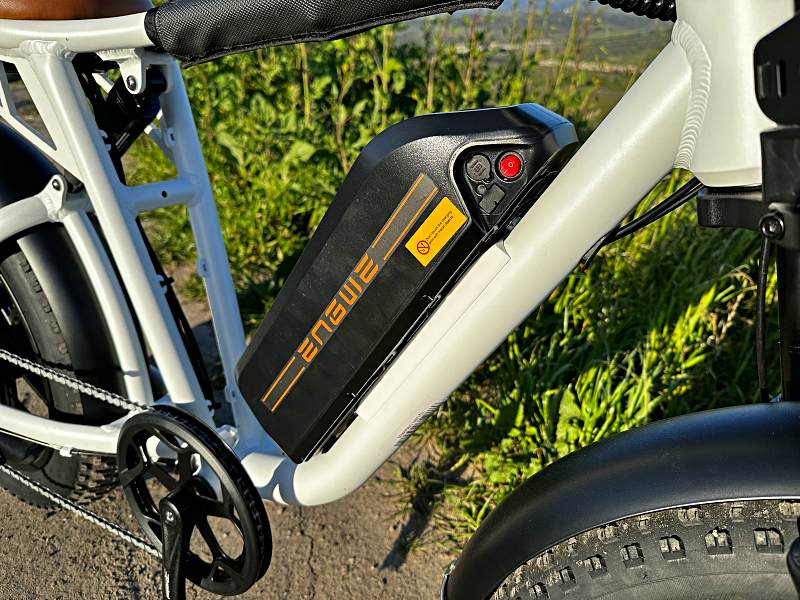
On the right side is a power switch along with the input barrel jack for charging the battery, and an output USB which you can use to charge up your phone or other USB-powered device. Both of those ports have rubber port covers to help keep moisture out.
Setting up the Engwe M20 eBike
Assembling a bike isn’t all that hard. Just take your time, follow the instructions, and hit up the manufacturer’s website (and maybe Google) if something doesn’t make sense. As was evidenced by the beat up shipping box up above, and this repeated photo here, transit can take its toll, so there’s a lot of protective packaging and cable ties that need to be removed.
The M20 assembly was pretty standard including…
- Installing the handlebars into the stem and tightening the 4 bolts
- Installing the front fender
- Adjusting position of the brake levers and shifter for hand size and reach
- Adjusting the display for visibility and the light/horn remote for reach
- Installing the front headlights and electrical connection (a little fussy, but easy enough)
- Inflating tires to proper levels
- Checking brakes and adjusting shifting
- Plugging in the battery to get an initial full charge
Steps of note:
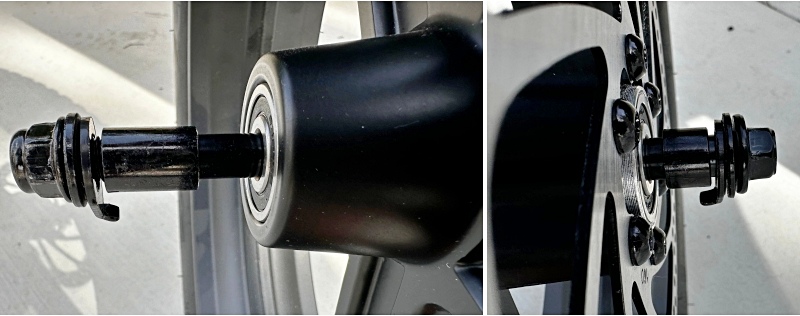
Installing the front wheel was interesting just because of how wide the fork is for the fat tires it’s running. As a result, the front axle had some spacers that need to be installed correctly. In the below photo, you can see the long spacer goes on the non-brake side in order to properly center the wheel and have the disc brake rotor properly align with the caliper. Photo is taken facing the front of the bike. The small bent tabs fit into retention holes as you’re installing the wheel.
Checking the tire pressure was a slight surprise. The rear tire needed about 20 psi to get up to spec, but the front was over-inflated by about 15 psi which was a little alarming.
The last item was switching the display from Metric to Imperial. To enter the settings mode, hold down both the + and – buttons then press and hold the power button as well until the display enters a mode where you see P1. Use the +/- buttons to navigate to P4 and press the power button to adjustment mode. Again use the +/- keys to adjust. 00 is Metric, 01 is Imperial. Press the power button again to back out, or press and hold the power button to save all setting adjustments and power off the display.
Another setting you may want to enable is P7 which lets you set a power-on password that has to be entered for the bike to work. Super useful if you want to prevent someone from taking your bike for a spin. The two included keys are just for locking the battery to the bike, not preventing the use or physical locks that prevent moving the bike.
Performance
The M20 is straight-up, super fun to ride. Select the assist level from 1-5 after powering up and off you go. The low seat makes it easy to put your feet flat on the ground. The handlebar angle can be adjusted to help with reach and a comfortable riding position. The big 4″ tires have plenty of traction and together with the dual suspension, smooth out any rough roads nicely. The pedal assist has a momentary pause before engaging and a slight punch when it engages after which it feels nice and smooth. Similarly, you can just twist, sit back and smile as you cruise along.
The seat height and fore/aft position are fixed which is part of why the bike looks so cool. I’d confidently say that if you’re between 5 and 6 feet tall, this will fit you pretty well. Over 6 feet, pedaling can be awkward as your knees rise above your seated position. I definitely fall into that category, but that’s where the throttle comes into play.
The suspension is going to work better for you if you weigh a little more. I’m around 215 lbs and could feel it working, but wouldn’t call it plush. There doesn’t appear to be all that much adjustment outside the one dial on the fork. There’s also no damping on the return so if your wheels leave the ground, you’ll hear and feel the suspension shoot back out full force. Lowering the pressure in the tires will absorb the smaller stuff and help the suspension focus on the larger bumps.
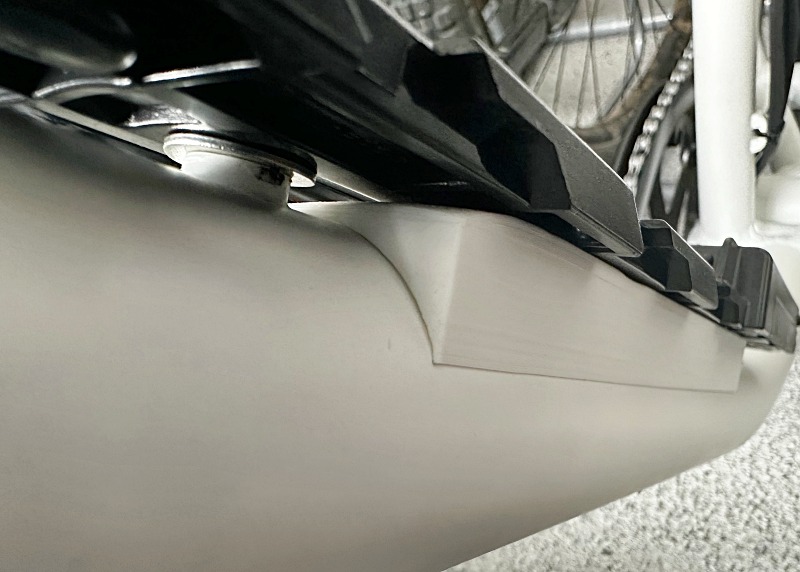
I did have an issue with how the battery was secured. It’s mounted on the bike prior to shipping and there may be a customs ruling or other regulation type reason for that but regardless, as I was setting up the bike, I noticed that the battery was leaning to the right side. It was also wobbly when moving the bike. After using the key to remove the battery and look at the mount I found the problem.
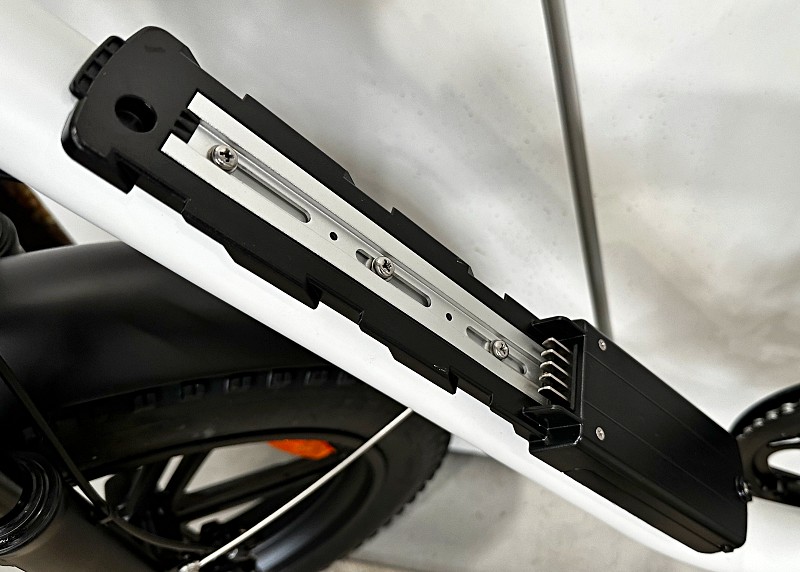
It is held onto the bike’s down-tube with 3 bolts. This is a relatively normal installation other than the choice to use Phillips head screws. However, these were a little loose, and tightening them up didn’t really solve the issue, so I removed them to take off the mount and get a closer look.
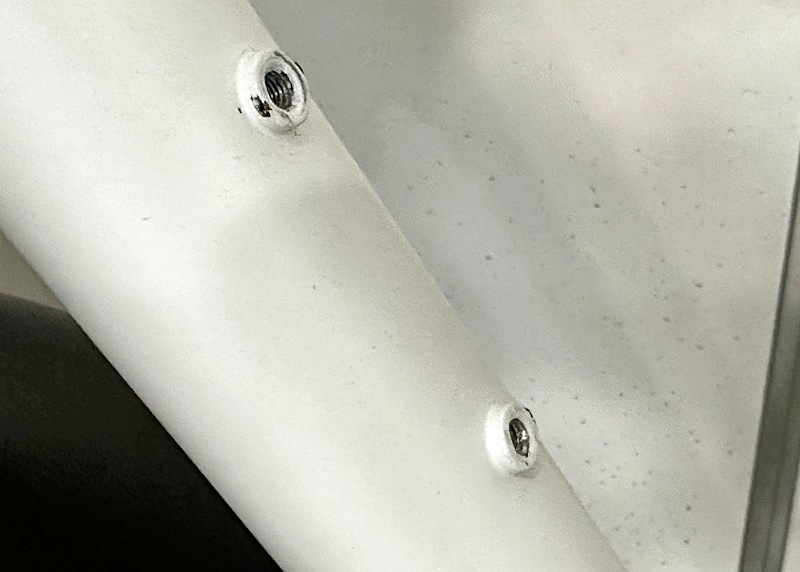
Here you can see that each of the 3 screw bosses are proud by about 2mm. Again, relatively normal for mounting a water bottle cage, but not for balancing an eBike battery that weighs 9 lbs. Even if these were flush, you’d be balancing a flat-bottomed battery mount on a round tube. To solve the problem, I knocked out a quick design file and sent it to the 3D printer. Voila! A platform that matched the tube diameter and sat flush with the top of the screw bosses (in a matching white even). I was limited on the print bed size, so the front boss is still working that original way whereas the lower two are handling the support. I’ll end up printing a pair to support the full length, but this absolutely created a rock solid foundation.
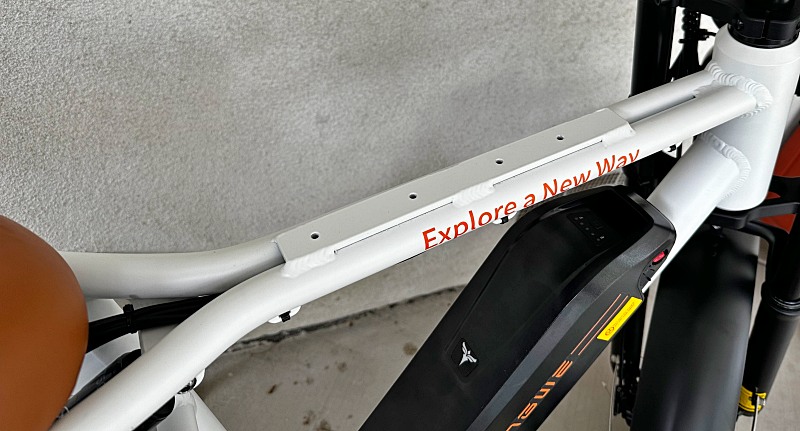
What’s interesting is that they got this scenario right for the optional 2nd battery location. Here you can see that the top tube has a nice flat spot for securing the battery mount. I supposedly have a 2nd battery on the way so I’ll update this post with images of that mount and battery installed when it arrives.
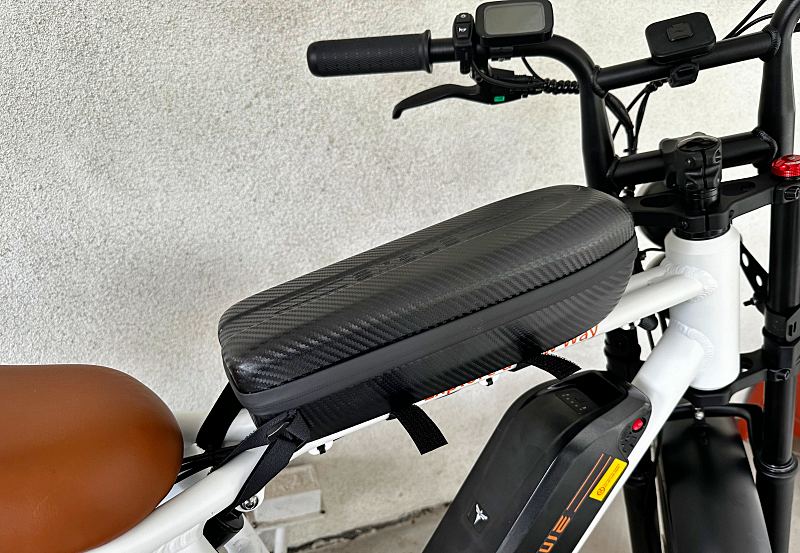
I found this to look a little unfinished without a battery so I installed the storage case they sent along. It’s the perfect size for lunch runs down the hill to Jersey Mike’s. It fits a little awkwardly though so ultimately I ended up finding an old Timbuk2 shoulder strap pad that fit well after removing the padding. You can see that in the lead photo and some others as I promptly forgot that it wasn’t a stock item.
Another issue I ran into was the throttle. Both it and the matching grip on the left side felt good in the hand, but I noticed that when I twisted the throttle, it did not spring back to the neutral position. That could create a very dangerous situation.
After removing the throttle and looking closely, I found that there is no inner sleeve isolating the throttle from the handlebar surface. Basically, if the silver clamping collar is tightened and not perfectly square to the handlebar, the throttle is able to drag and bind internally. It could also occur if installed too far onto the bar where the inside end of the throttle/grip is contacting the end of the bar. The solution was sliding the throttle on until it stopped and then backing up about 1mm before clamping nice and square. It’s worked properly since then. Just always test before riding by twisting and making sure it snaps back.
I also noticed while riding the Engwe M20 eBike that the throttle has a delay in engaging the motor. Diving further into this off the bike, the throttle drives the motor almost immediately so what I noticed was the effect that my weight has on the torque and getting the bike moving. One of the biggest power draws is getting the bike moving from zero. If you pedal to start (or at least pedal and twist the throttle) you’ll get moving quicker.
Hill climbing is the other place that comes into play. The bike has to work a lot harder the more weight it has to move. I definitely need to pedal up hills in addition to the throttle or the speed will keep declining. Overall that’s not a big deal as the bike’s assist is definitely noticeable.
If you’ve got big hills or testing the weight limits of the Engwe M20 eBike, I’d highly recommend picking up the 2nd battery as well as I’m definitely getting less than the specified range. Keep in mind Engwe has listed those using assist level 1. We all know that’s an unlikely scenario when you have 4 more settings to choose from. I’ll know a bit more when I can play around with 2 installed, but doubling the range almost has no downsides other than adding some weight. The top tube position also gives it a bit of a moto gas tank feel which further adds to the look they’re going for.
I’d also recommend upgrading the brakes if you’ve got big hills. These mechanicals aren’t bad, but the rotor size is small and extended hills are going to have you squeezing pretty hard.
Speaking of weight, that round tube behind the seat is an awesome grab handle for moving the bike around or lifting it up onto a bike rack. If you do throw it on a rack, take a second to remove the batteries as most eBike racks aren’t rated above 65 lbs per bike tray and regular racks can be far below that.
What I like
- Very cool looking bike
- Stable and fun to ride
- Optional 2nd battery for increased range
What I’d change
- The battery mount needs a flat section, not a round tube to mount to
- Better throttle and preferably a half-twist to avoid accidental throttle use
- Quieter motor with more torque for hills/heavier riders
- Top tube wrap/pad for single battery version to hide battery mount holes
Final thoughts
Overall, the Engwe M20 eBike is really fun and a great way to get around. The assist levels are great and with the included throttle you can just keep rolling. I can see this being really popular with teens getting to and from school as it would hit the sweet spot of range and rider weight. Nice work Engwe. Looking forward to more bikes like this.
Pricing: $1299 – M20 (13Ah – 1 battery) | $1599 – M20 (26Ah – 2 batteries)
Where to buy: Engwe and Amazon
Source: The sample of this product was provided by Engwe.

Google Review Tap Cards (3-Pack) by TapFive - Tap for Instant Reviews - All Phones Compatible - Reusable Smart Tap NFC & QR - Boost Business Reviews - Powered by TapFive (3 Card Pack)
(as of July 4, 2026 00:32 GMT -05:00 - More infoProduct prices and availability are accurate as of the date/time indicated and are subject to change. Any price and availability information displayed on [relevant Amazon Site(s), as applicable] at the time of purchase will apply to the purchase of this product.)
Gadgeteer Comment Policy - Please read before commenting
That was the BEST review I have ever read on any E-Bike, so informative and thorough, it’s a pity I reside in Australia, and almost certain they wouldn’t export to Australia (very common here) we are very limited to many ebike options here unfortunately. but thanks for that review.
The review was very useful, but I am concerned about the lack of seat hight adjustment ( it looks quite low) and there doesn’t seem to be any luggage options.
Spend an additional $1k and get an Ariel Rider X-Class 52V — 1,000W motor, 20Ah 52V battery. Faster, longer range, better suspension, better build quality.
I second the comment that this was a great review! Maybe missed it but where is the company based and are these bike available in the EU or only in the U.S.? Thanks!
I just got one in green with dual batteries, the box says designed in San Diego built in China. If bought from the Engwe website and shipped within the continental united states there is no tax or shipping fees. Also, they have a 150 dollar off coupon so it’s 1499 total for dual battery model. I like it a lot, just be prepared, tubes and tires are pricey
Can you please share the 3D file for the battery mount?
Hello,
Maybe u can share the 3d Print Modell
hi, great review – could you please share the 3d print file? Cheers 🙂