REVIEW – Have you every wondered how much energy is used around your home? Your monthly bill gives you the overall picture, but if you’re looking for more detailed info you need a different solution. Emporia Energy specializes in products that make usage more transparent like smart plugs, which can give you info on a specific appliance or device plugged into an AC outlet. Their Smart Home Energy Monitor however is as accurate as the zones defined within your electrical panel and that’s what we’re going to take a look at today.
What is it?
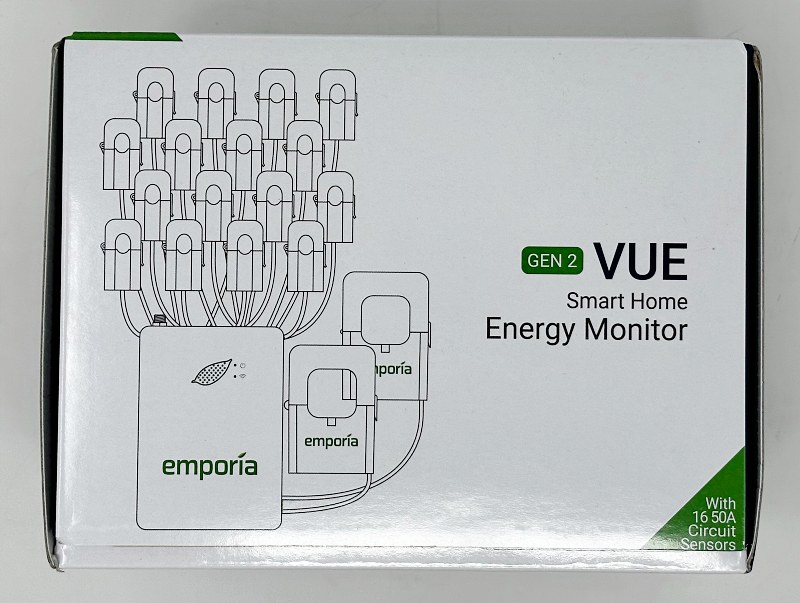
The Vue Home Energy Monitor is a component based system that measures energy use from individual breakers inside your electrical panel allowing you to see energy real-time energy usage. Armed with that information, smarter energy decisions are yours to make.
What’s in the box?
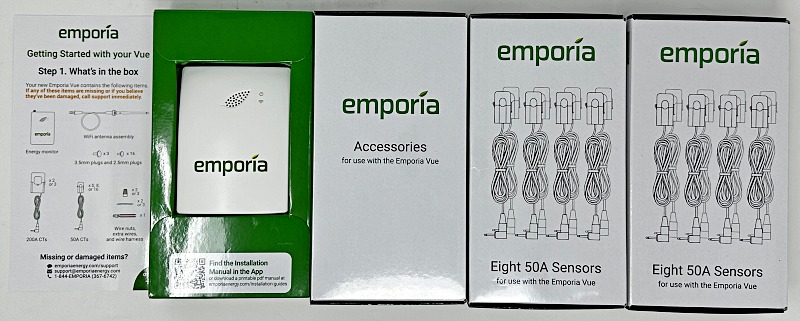
- Gen 2 Vue Energy Monitor
- Two 200A current sensors for service mains
- Sixteen 50A current sensors for individual circuits
- Wire harness
- Extra wire & wire nuts
- Wifi antenna & cable
Hardware specs
-
Supported Systems: 1) single-phase up to 240VAC line-neutral; 2) single, split-phase 120/240VAC; and 3) three-phase up to 415Y/240VAC (no Delta)
-
WiFi: 2.4 GHz 802.11b/g/n
-
Input Power Rating: 100-240VAC 50-60Hz
-
Power Consumption: < 3W
-
Certification: Energy monitor: EMCTV2 ( E506714) as per UL/IEC/EN 62368-1 | FCC ID 2AS6P-EMPCTV2
-
Dimensions: 4.1″ x 3.1″ x 1.1″ (105mm x 80mm x 30mm)
-
Operating Conditions: -40 to +122° F (-40 to +50° C) | 0 to 80% RH
-
200A sensor ports: 3 @ 3.5mm two-pole audio connector
-
50A sensor ports: 16 @ 2.5mm two-pole audio connector
-
WiFi antenna port: 1 @ RP-SMA coaxial connector
-
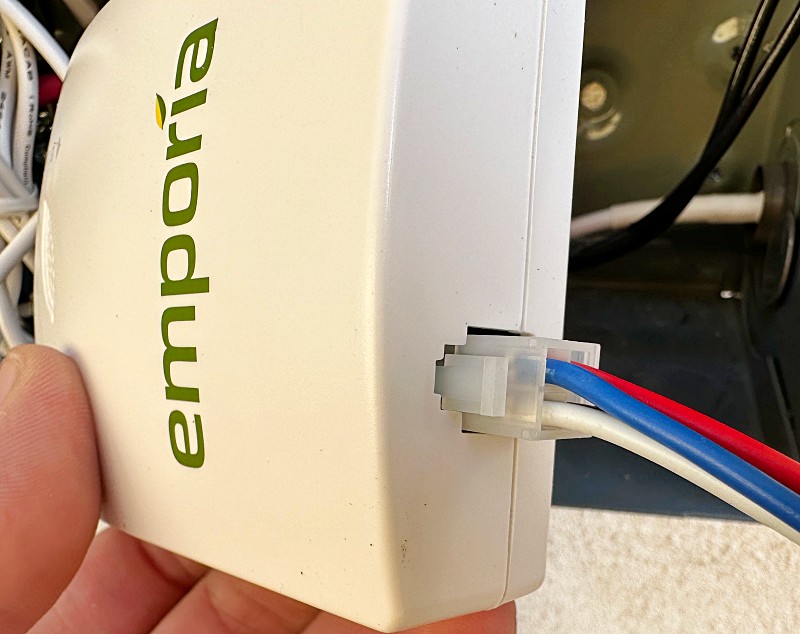
Wire harness (power) port: 1 @ 4-pin Molex connector
Design and features
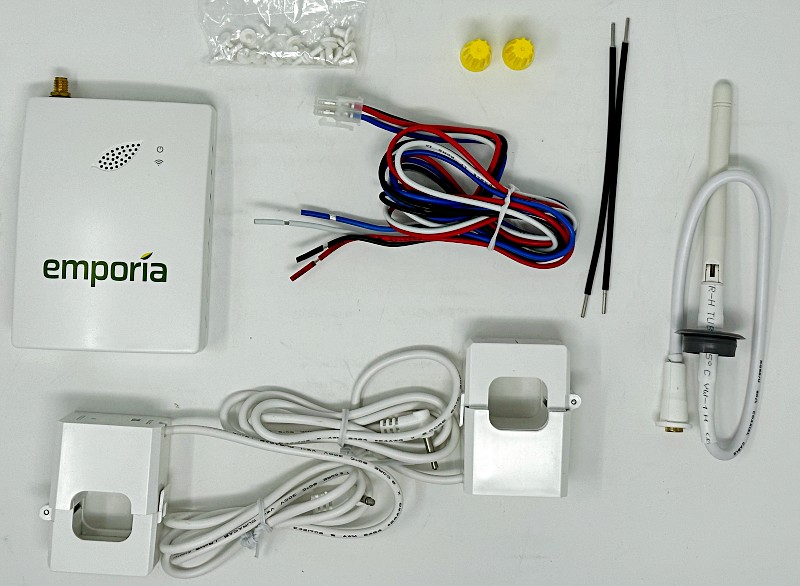
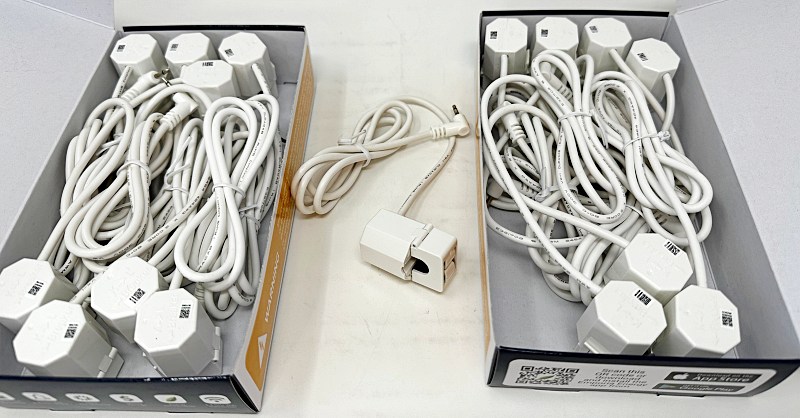
A perfect case of functionality taking the lead while keeping all components very user friendly and small enough for the task at hand. This unboxing image showcases it best.
Above is the monitor and the two main sensors that clip around the power leads into your electrical panel. All of it is built to disappear inside your panel providing insight without anything unsightly.
Setup
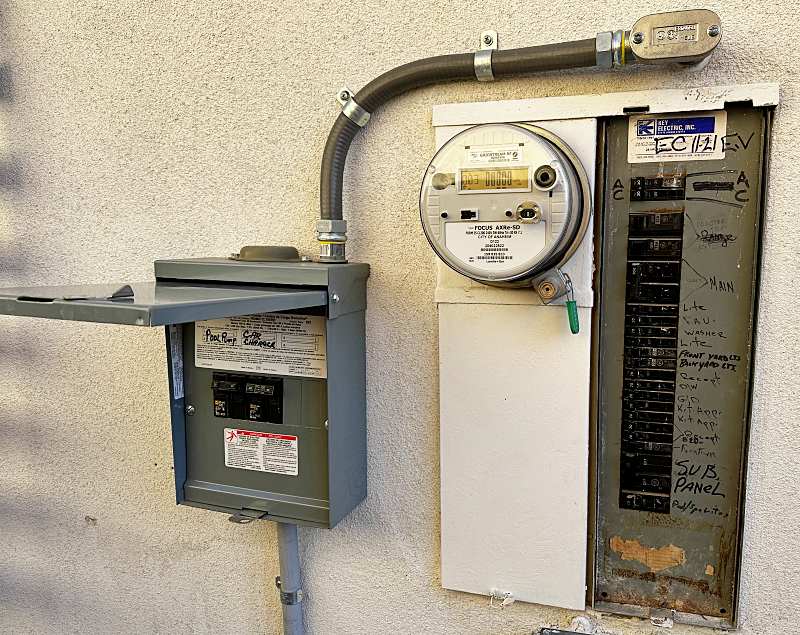
Correct installation is the key to the Vue Energy Monitor working properly. It’s not a terribly complicated installation, but depending on your particular electrical panel a licensed electrician is definitely recommended. My electrical panel actually showcases both good and bad scenarios, so let’s take a look. Here is my main electrical panel and recently installed sub-panel that houses circuits for our EV Charger and pool pump. Before removing the cover panels, turn off the main breaker which may or may not be in your panel or elsewhere in your house.
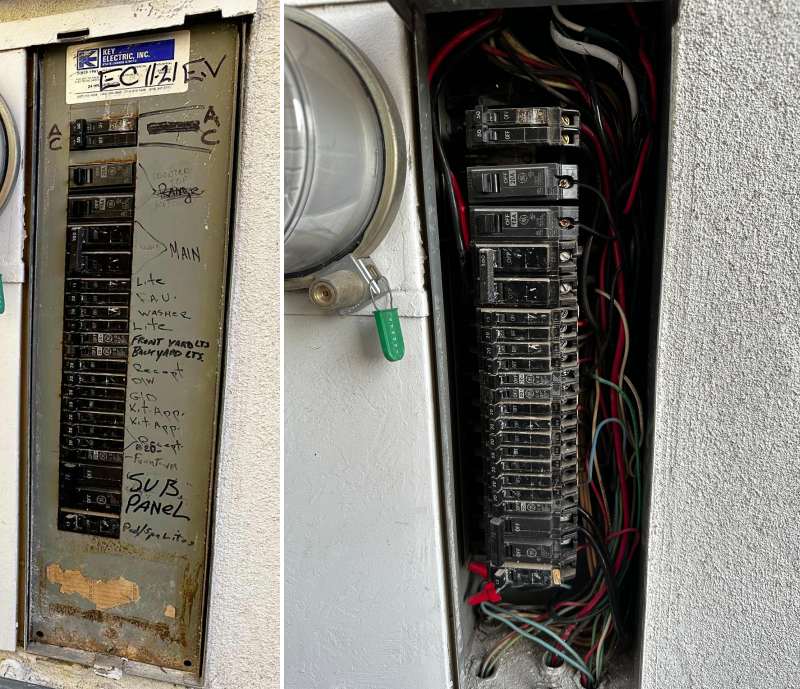
A look inside the main panel shows that there is not enough room to house the main hardware or the sensors on the individual breakers. Even if there was, it’s important to know that while you can turn off individual breakers, the main power leads into the panel are live, so a licensed contractor would be the right approach here.
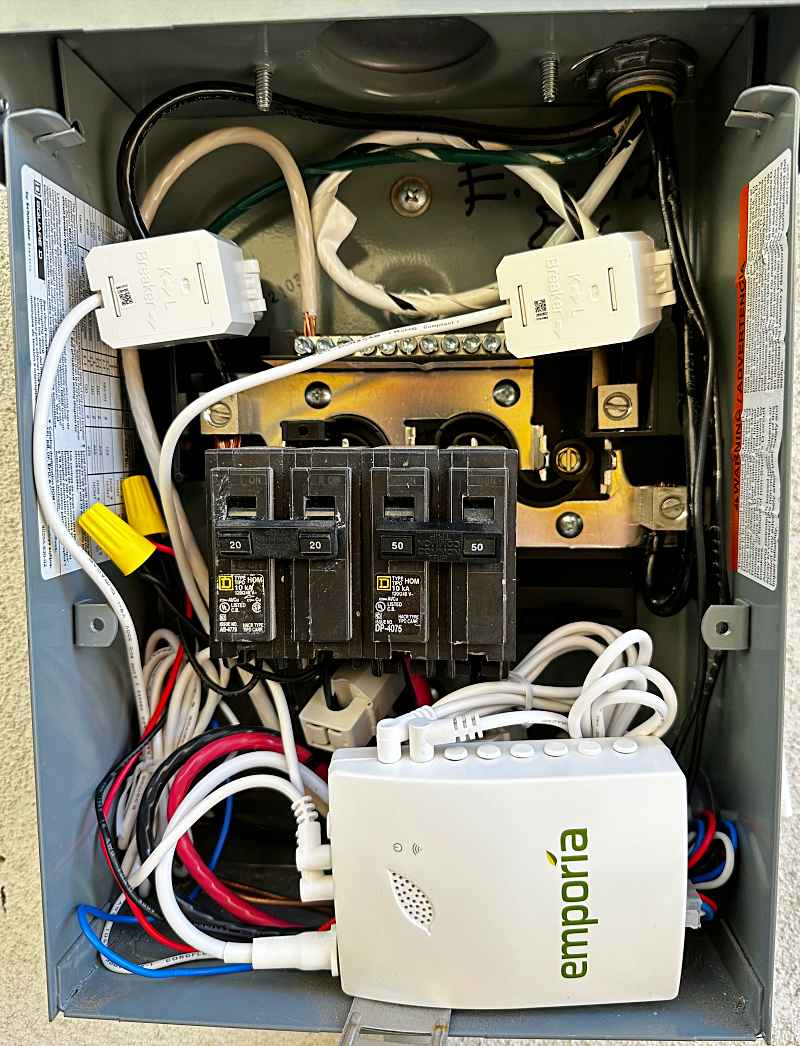
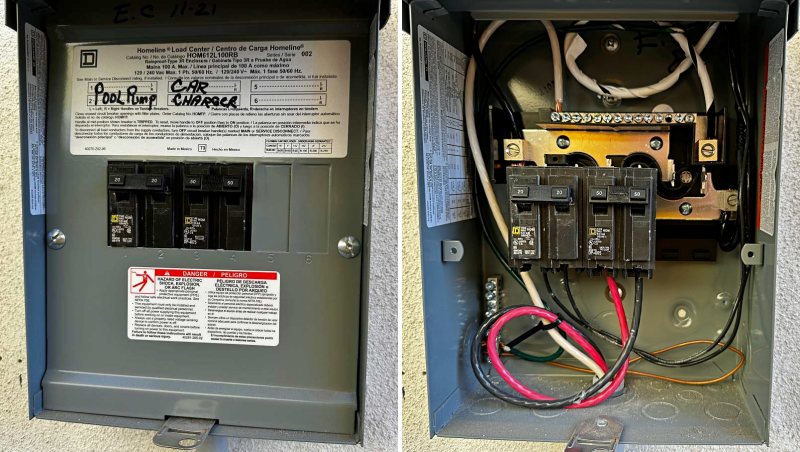
The sub-panel by comparison is new and downright roomy. So, until I am able to get a contractor out to update the main panel to a new box with some more room, my installation will be limited to this smaller panel.
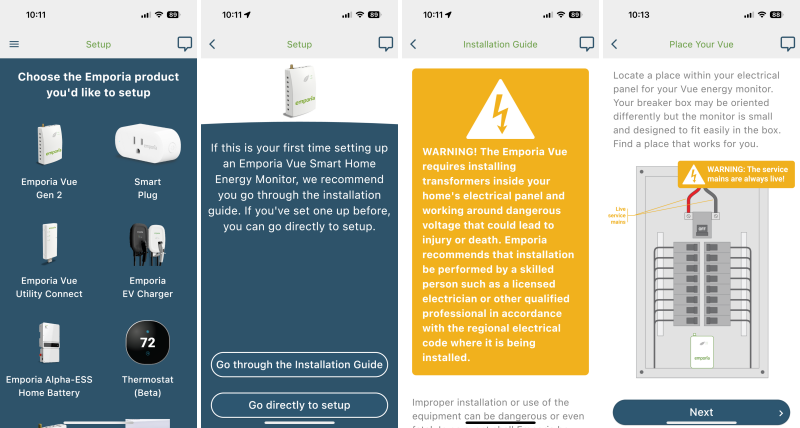
Step one is to download the app, set up an account, and select the Vue Energy Monitor to your profile. It will then give you the option to go through the installation guide before setup. I would highly recommend going through this even if you have a contractor install as it helps you understand how an electrical panel works and clearly lays out the dangers involved and the necessary safety precautions.
You need to knock out one of the conduit punch-outs in order to install the external WiFi antenna. It’s on a decent length cord so there’s some flexibility in placement.
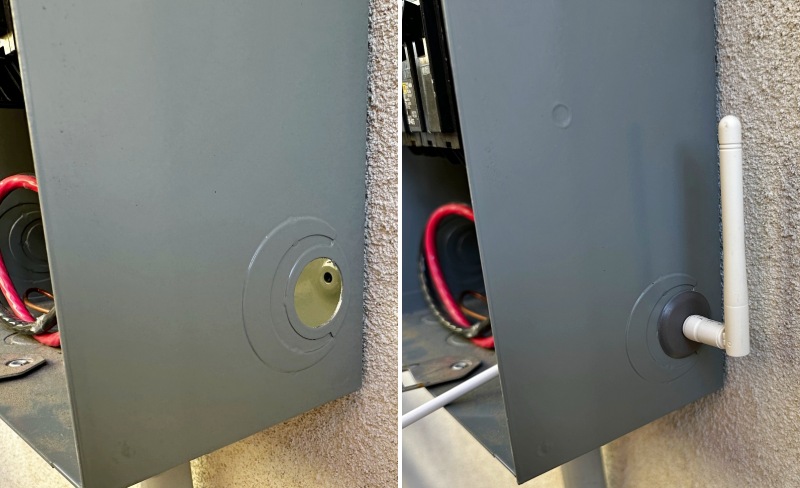
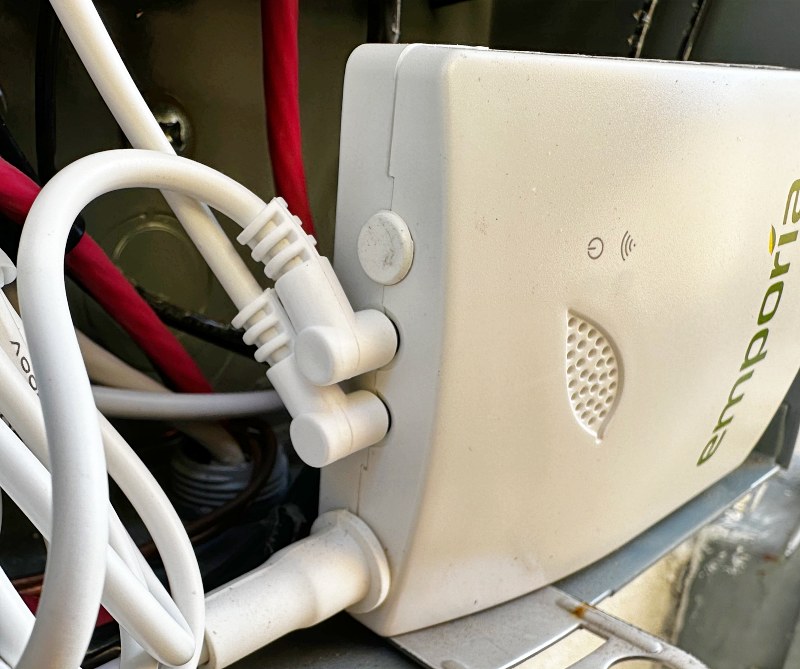
Connect the antenna cord’s coaxial connector to the top of the Energy Monitor and slide the rubber cover into place, before positioning the monitor into an available space in your panel.
Depending on your panel you may have 1, 2 or 3 main service leads. Select the appropriate number in the app and follow the instructions as to where to attach them. They look like this and have a specific orientation to follow the direction of current flow. They’re installed by unlocking the clasp and clipping around the service leads.
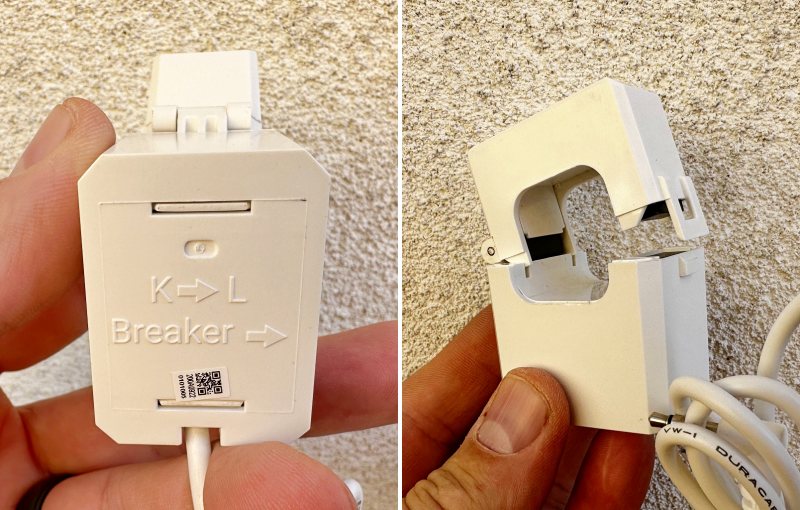
Once connected the 3.5mm plugs on the end of the sensors are plugged into the A,B,C ports on the top of the monitor. In my install, I had two leads and used the included plug to cover the C port.
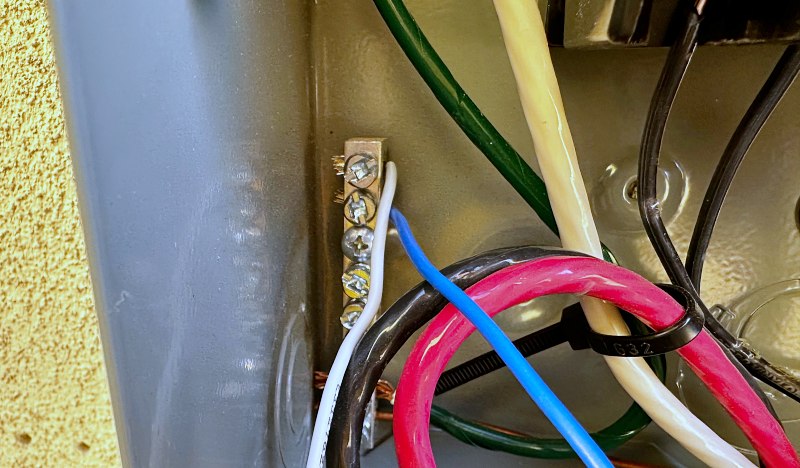
This next step varies depending on if you have an empty circuit or not. It’s quite common for US installations to have all circuits full. The wiring harness is attached to two leads from adjacent breakers and two grounding posts. This is then connected to the bottom of the monitor.
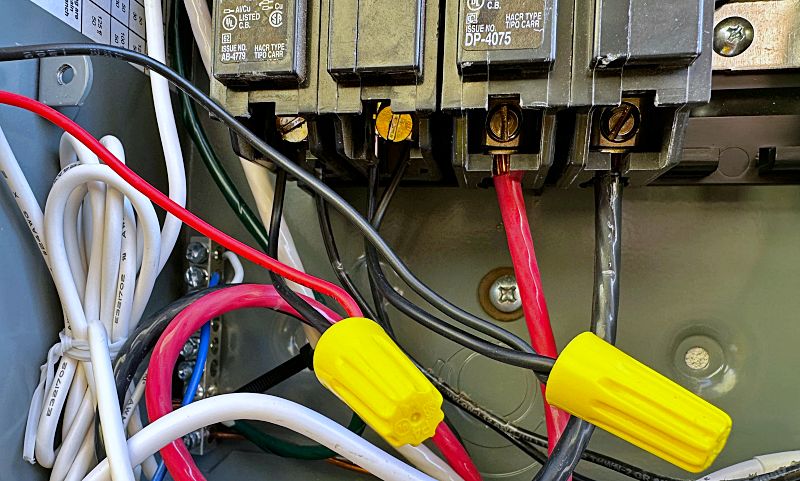
The last step of the physical install is to connect sensors to the individual breakers you want to monitor. These clip around the black lead of each breaker and then plug the 2.5mm plugs into one of the many ports along the two sides of the monitor.
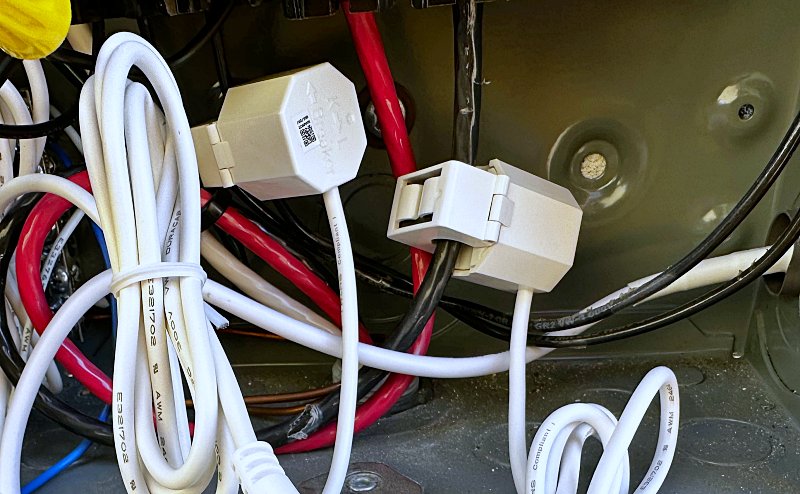
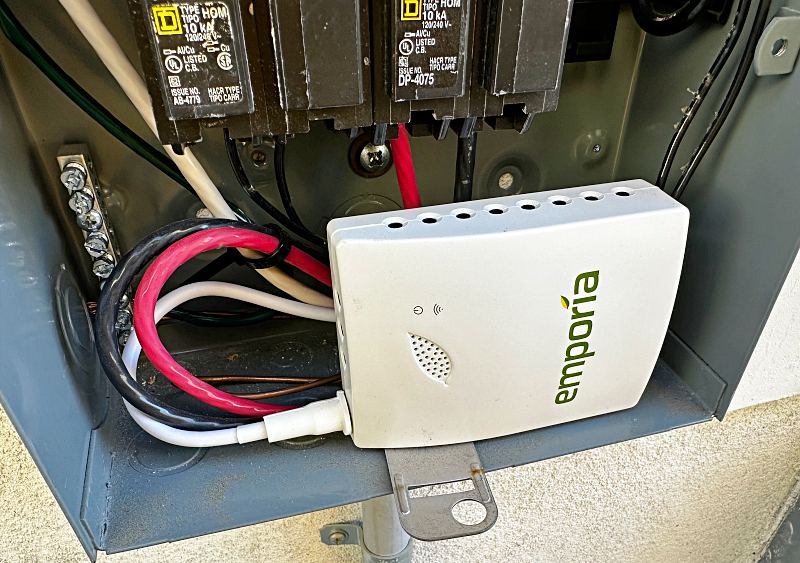
Any unused ports should have one of the smaller plugs installed to close them up. As you connect each in the app, you’ll be able to note what that breaker is for monitoring usage in the app. The final install in my case looked like this.
Make sure all the cables are tucked back and close up the panel before turning your breaker back on. You’ll be able to hear the monitor power on and then you can proceed with setting up the monitor via the app and connecting it to your WiFi. Everything else from here out is through the app.
Performance
After installing and setting up the monitor I began using the app to gain insights into my energy usage. I’m obviously just scratching the surface since I’m only able to monitor my EV charger and pool pump that are on the circuits in the sub-panel where I installed the kit.
This is the first home that I’ve owned with a pool and while I had heard some estimates, I did not have any concrete data until now on how much it cost to have the pump running on a daily schedule. Similarly, the actual costs of charging the EV at home were unclear. So here’s what the Emporia Energy App was able to show me.
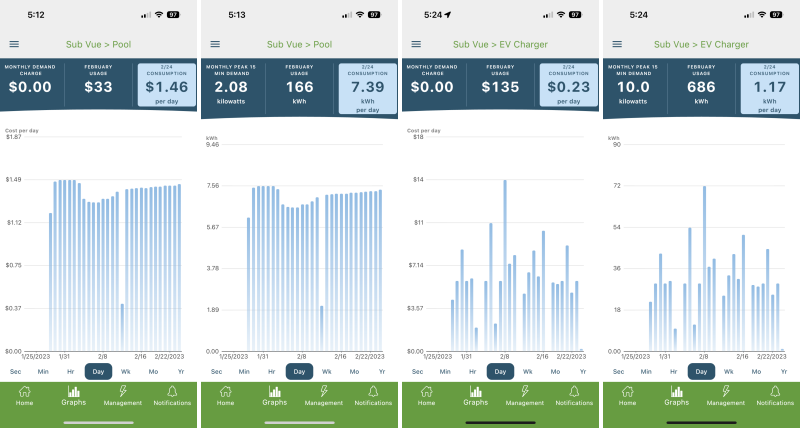
The first two above are the pool, first in dollars and then in kWh, followed by the same breakout for the EV charger. These charts are adjustable from seconds to years and by metrics, like Amps, Gal of Gas, Car Miles, Carbon, Trees or the Dollars and watt hours shown above. Note that the scale on the left side is quite different between the pool and the EV charts.
The pool averages around $1.50 a day to run the pump (from 10am to 4pm). The light blue consumption box shows $1.46 for today’s date of 2/24 and a cumulative total for February of $33 for 166kWh used.
The EV shows a February total of $135 so far and consumption for 2/24 of $0.23 because it finished charging before midnight and was barely drawing anything today until unplugged. You can see in the graph that our EV charging use averages a little under $7 a day, and that’s for 2 EVs.
The above is calculated as a result of manually entering my electricity rate in the app. After digging a bit more into my bill I have a tiered rate where the first 270 kWh are discounted. Switching from a manually entered rate to one for my utility via a lookup in the app provided by NREL and OpenEL resulted in a bit lower cost basis, although I couldn’t find rates that exactly matched my plan.
Regardless, this is a level of energy and cost understanding that I previously did not have. I look forward to being able to set up additional sensors when I can get around to having the main panel updated to have enough room and finally troubleshooting the scenario of my microwave and toaster oven not being able to be used simultaneously.
What I like
- Kind of a fun install if you’re comfortable and competent with electrical wiring. (Licensed electrician recommended)
- 16 breakers can be monitored with this kit
- Lots of data to sift through in the app
- Good visibility into power consumption
- Relatively low cost for info that could save you lots long term
What I’d change
- Only as narrow as the breaker zones already established in your panel, or your willingness to tinker with turning individual things on and off within a zone
Final thoughts
The Vue Home Energy Monitor is a powerful gadget that can absolutely provide insights into the energy usage around your entire home. If you’re not opposed to some trial and error power toggling of devices within a zone, you should be able to spot excess draw from devices in standby saving you money if they don’t need to be on.
Price: $164.99
Where to buy: Emporia Energy and Amazon
Source: The sample of this product was provided by Emporia Energy.

GMKtec G3 Pro Mini PC, Intel Core i3-10110U (Beats 4300U/N150) 16GB DDR4 (Dual Channel) 512GB PCIe M.2 SSD, Desktop Computer 4K Dual HDMI/USB3.2/WiFi 6/BT5.2/2.5GbE for Office, Business
(as of June 16, 2026 02:31 GMT -05:00 - More infoProduct prices and availability are accurate as of the date/time indicated and are subject to change. Any price and availability information displayed on [relevant Amazon Site(s), as applicable] at the time of purchase will apply to the purchase of this product.)
Gadgeteer Comment Policy - Please read before commenting
I use a similar system from Sense (https://sense.com/). The big difference is that the Sense system does not use individual circuit sensors, it relies on forensic information from the electrical footprint of each device. This makes it a simpler install, plus it can differentiate between multiple devices on the same circuit and automatically label them. I’ve had it about three years and it has worked flawless the entire time. A better idea in my opinion.
In France it is the meter “LINKY” of ENEDIS which makes it possible to see in detail the consumption of each apparatus. If one is with the supplier of electricity “EDF” it is very well detailed, not needing to make dangerous assemblies in the electric boards.
I’ve had the Vue II for a little over 2 years now, and really like it, but I’m a data person by nature lol
I use all 16 sensors, and yes it’s not distinguish devices on the same circuit, you learn individual behaviors, especially cycling appliances like chest freezers and refrigerators and sump pumps. It has paid for itself already… I have set notifications that detect if the HVAC runs too long (i.e. a door or window is left open) , and it let me know my furnace had a flame sensor issue. I even have a refrigerator notification in case that door is left open!
If you want more detail on a specific circuit, you can add emporia smart plugs and nest then within the appropriate circuit within the app. This also allows you to turn then on and off remotely. I installed two emporia vues and 8 smart plugs last summer and am debating about a couple more in additional subpanels. Great insight.