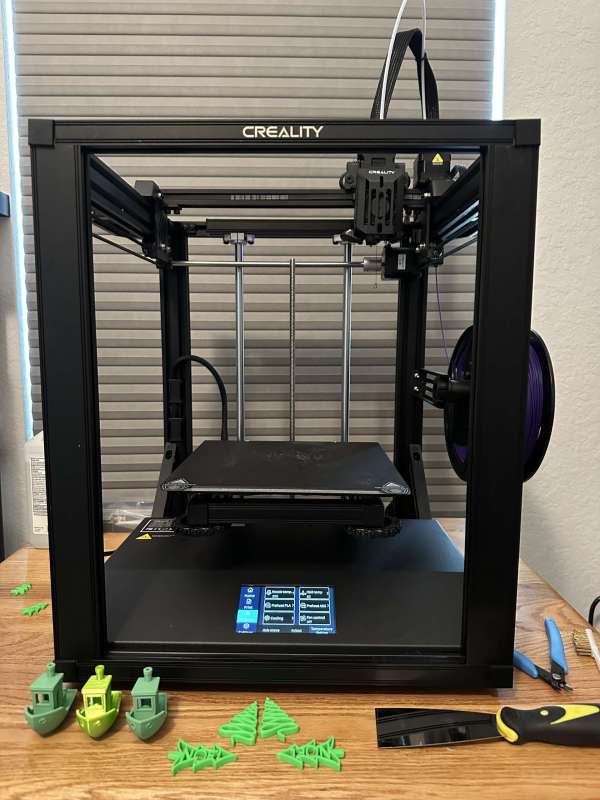
REVIEW – I have now owned four different 3D printers. My first was a Creality Ender 3 V2, a Christmas gift from my Mom. I then reviewed the Elegoo Neptune 3, which added a self-leveling bed and a magnetic plate to easily remove prints. The next printer that I reviewed was a Mingda Magician Max. It was a large format printer that allowed me to print objects as big as 320 x 320 x 400. This past month I received a Creality Ender 5 S1 printer to review. This printer has a slightly larger printing area than the Ender 3 V2, a removable magnetic sticky printing sheet, a self-leveling bed, and is a cube frame-based printer. Let’s see if this printer becomes my new favorite. If you read the title, you know it does!
What is it?
The Creality Ender 5 S1 is a 3D FDM printer with a cube frame for added stability. Instead of the print head moving up and down the z-axis, the print bed moved up and down the z-axis. It has a print head that allows it to heat filament up to 300 degrees Celsius, and the cube frame will let it print at some pretty fast speeds, up to 250 mm a second.
What’s in the box?
The Creality Ender 5 S1 3D printer came well packed in foam packing that was not styrofoam. I love that manufacturers do this because it is much cleaner and reusable than styrofoam. I have several pictures to show how well it was packed and to show you what was in the box.
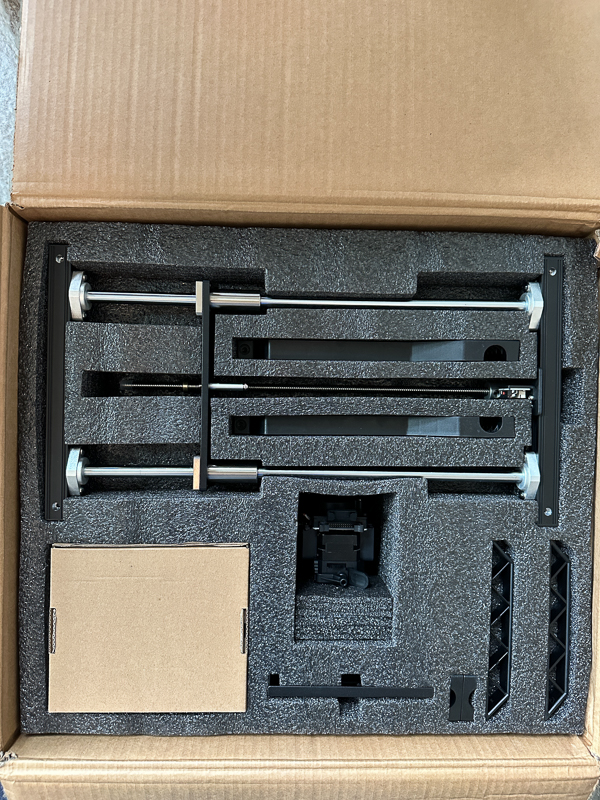
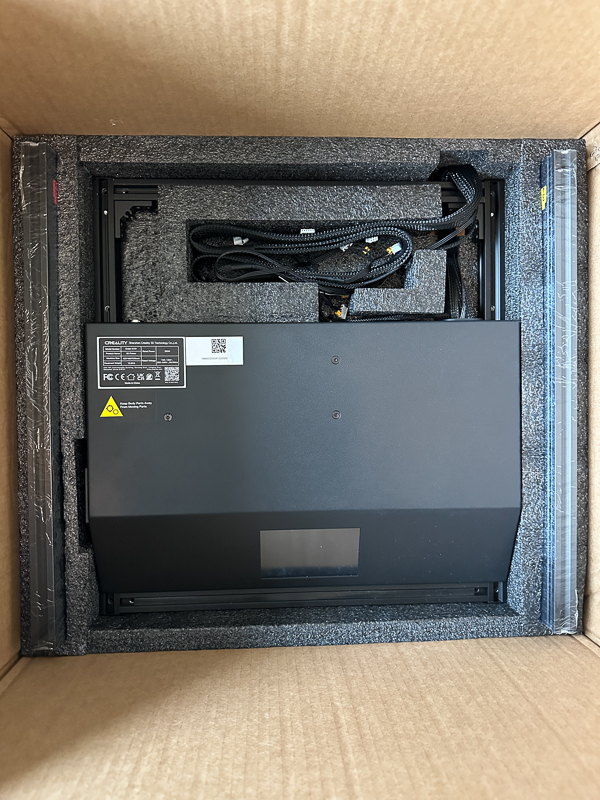
There were three levels of packing with the base being at the very bottom.
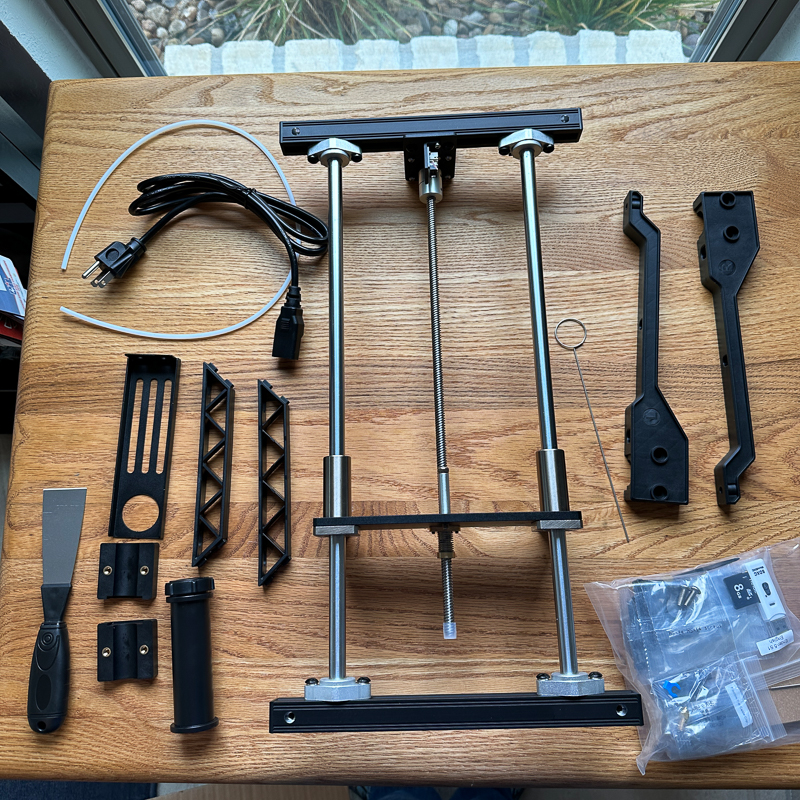
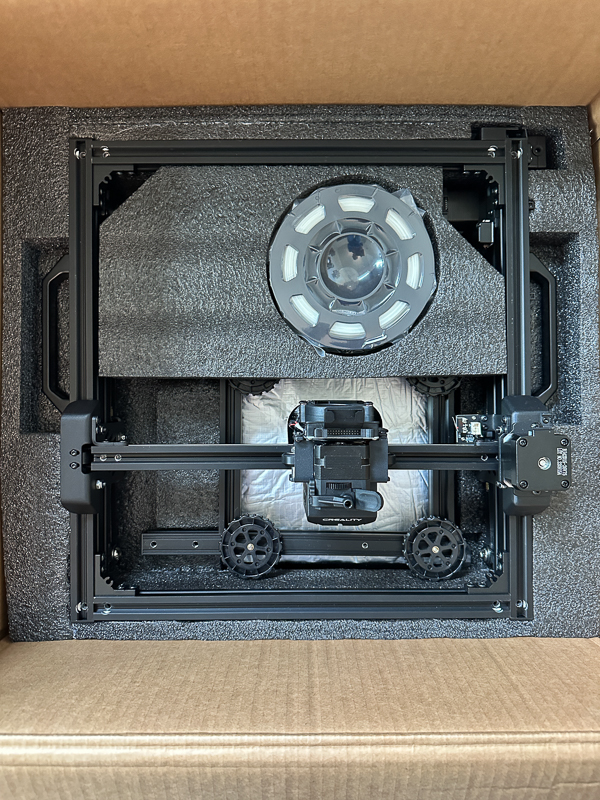
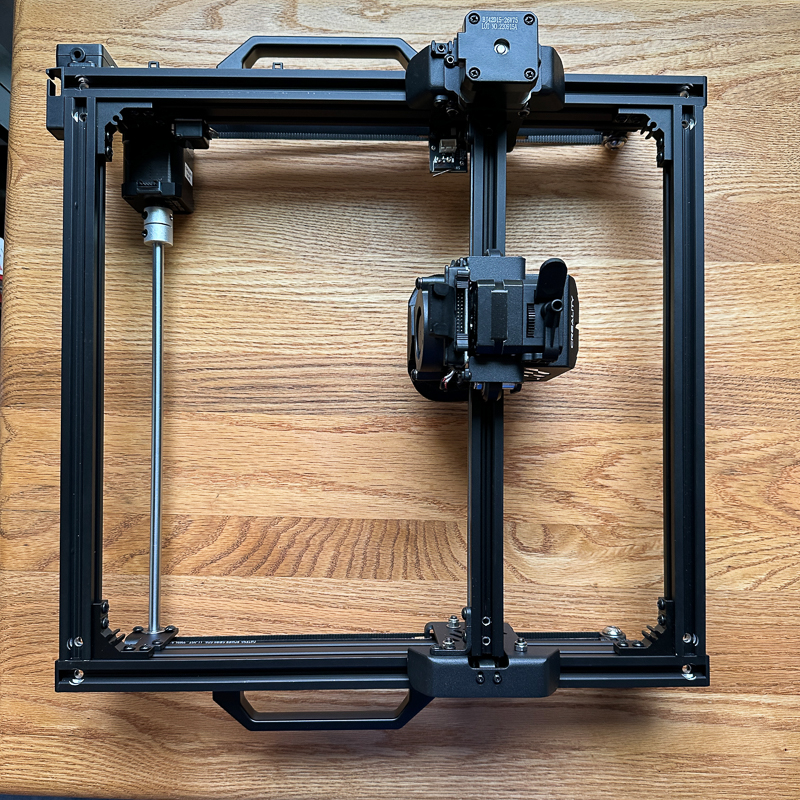
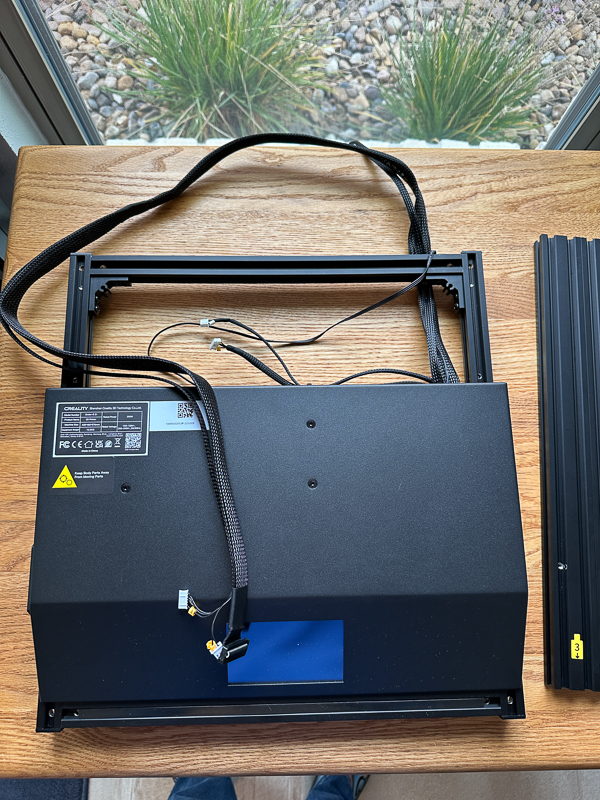
This is the support that goes on the very top of the printer. It includes the print head that will move along the X and Y axis.
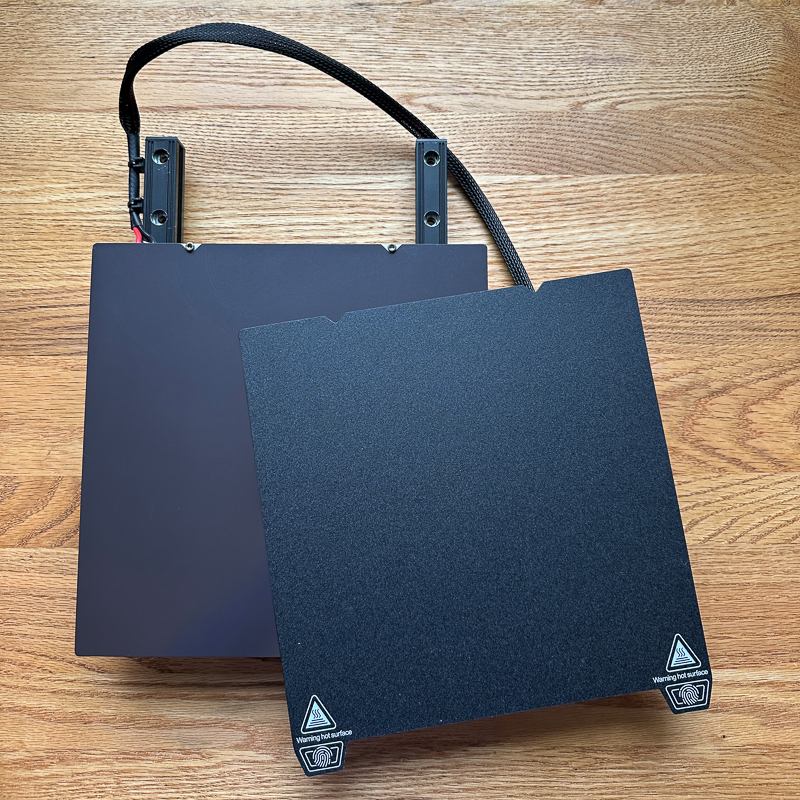
This picture shows the print bed and the removable magnetic plate on top.
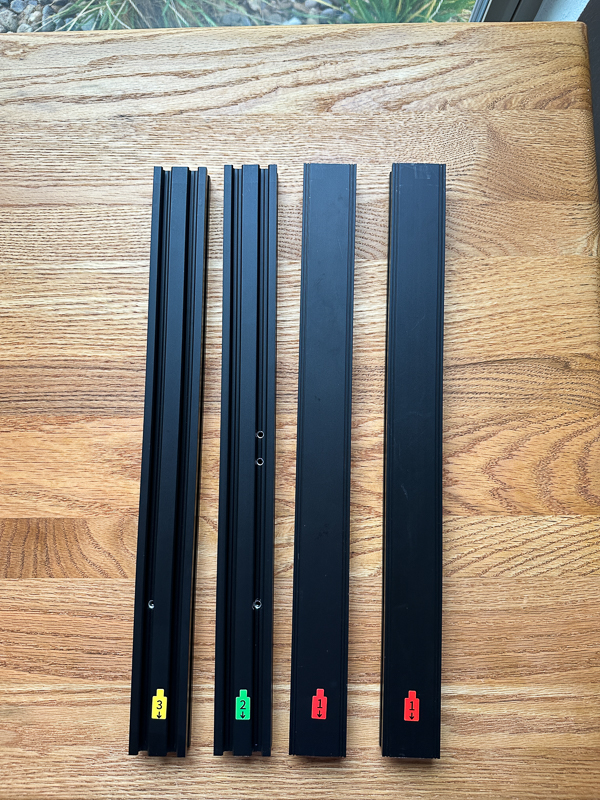
I thought the numbers on the supports were a nice touch. It would be easy to put the wrong support on a given corner.
Hardware specs
- Molding Technology: FDM
- Build Volume: 220*220*280mm
-
Net Weight: 12.1kg
-
Gross Weight: 14.7kg
-
Extruder Type: “Sprite” dual-gear direct drive extruder
-
Extruder Material: All metal
-
Leveling Mode: CR Touch Auto-leveling
-
Mainboard: 32-bit silent mainboard
-
Display Screen: 4.3 inch color touch screen
-
Printing Speed: ≤250mm/s
-
Typical Printing Speed: ≤120mm/s
-
Acceleration: 2000mm/s²
-
Nozzle Type: Brass nozzle x1
-
Nozzle Diameter: Standard 0.4mm
-
Printing Accuracy: ±0.1mm
-
Layer Height: 0.05-0.35mm
-
Filament Diameter: 1.75mm
-
Nozzle Temperature: ≤300°C
-
Heatbed Temperature: ≤110°C
-
Build Surface: PC spring steel sheet
-
Power Loss Recovery: Yes
-
Filament Runout Sensor: Yes
-
Rated Voltage: 100-120V~, 200-240V~, 50/60Hz
-
Rated Power: 350W
-
File Transfer: SD card, USB Type-C cable
-
File Formats: STL, OBJ, AMF
-
Supported Filaments: PLA, PETG, ABS, TPU, PC, ASA, HIPS
-
Slicing Software: Creality Slicer, Creality Print, Cura, Repetier-Host, Simplify3D
-
UI Languages: English, Spanish, German, French, Russian, Portuguese, Italian, Turkish, Chinese
Design and features
The Creality Ender 5 S1 3D printer has a lot of really nice features. As I mentioned, it comes with the CR-Touch auto bed leveling feature. You still have to go through the manual process of bed leveling with a piece of paper, but then the CR-Touch will take care of any minor adjustments you may need. I found that even after manual leveling, then using the CR-Touch, I still had to adjust the Z-axis up a bit through the menu system on the printer.
The hot end on this printer is all metal, an upgrade from the previous version. It will let you print up to 300 degrees Celsius using filaments like carbon fiber. The other nice feature of this printer is its support on all four corners. This makes the printer very stable and will let it print up to 250mm/s on some prints. It comes with the Creality version of Ultimaker Cura for a slicer. It has the template for the Ender 5 S1, and the default printing speed is 120mm/s. This is pretty fast, and it made me notice right away that I will have to eventually upgrade my printing table because it is not stable enough to handle the super quick back-and-forth jerky motions of the printer on small prints.
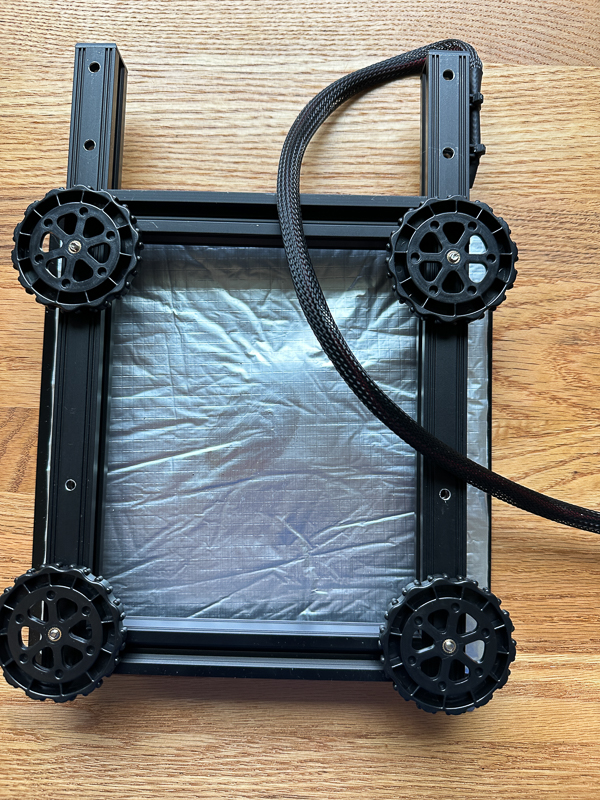
This printer’s print bed heated up faster than the Mingda and the Elegoo. Flipping the print bed over, you can see the insulation, which is most likely letting it heat up so fast. This picture also shows the four manual leveling knobs on the bottom of the bed.
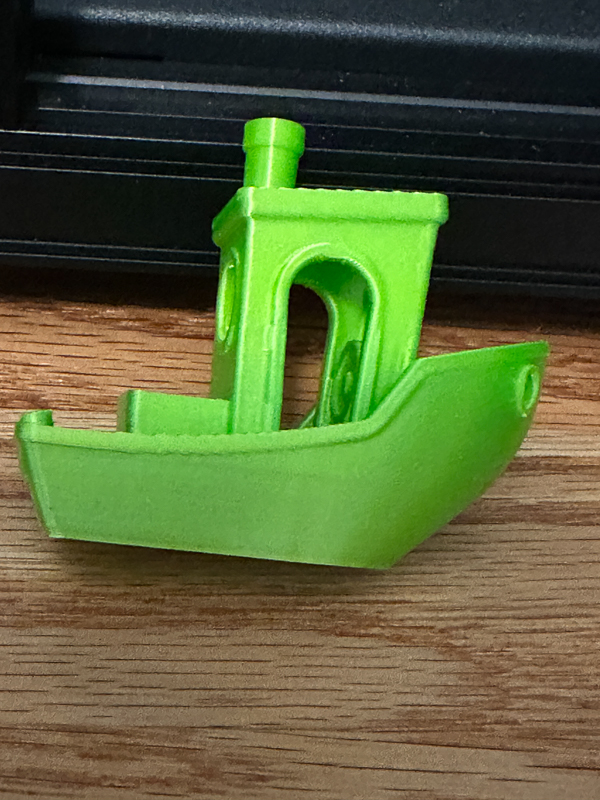
The first thing I printed was the Benchy boat that came as a STL model on the SD card. It printed fast in about 35 minutes.
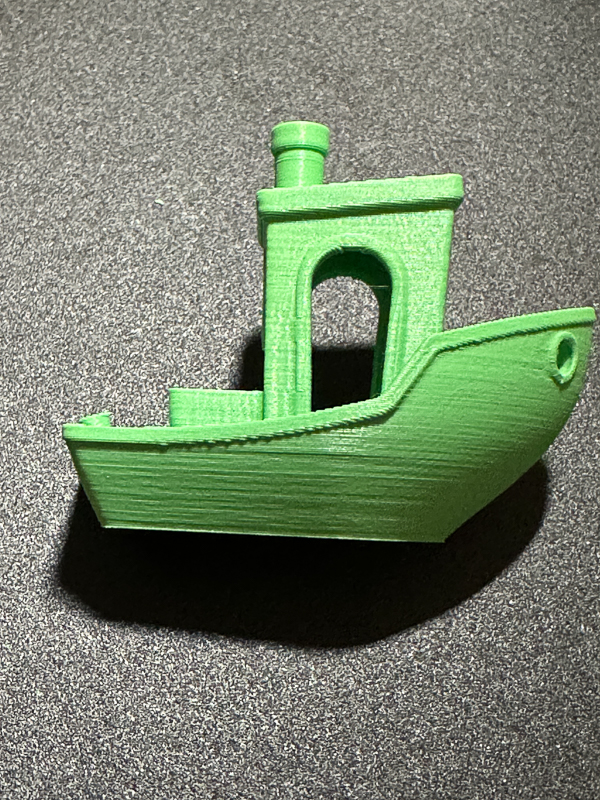
You can see a bit of stringing and some rough edges. I believe it is more due to the table the printer was on shaking that caused these issues. I was very happy to have this result after following the steps for manual bed leveling and then using the CR touch. Adhesion to the print bed was great, and I could pop the print off by peeling up the magnetic plate and bending the plate.
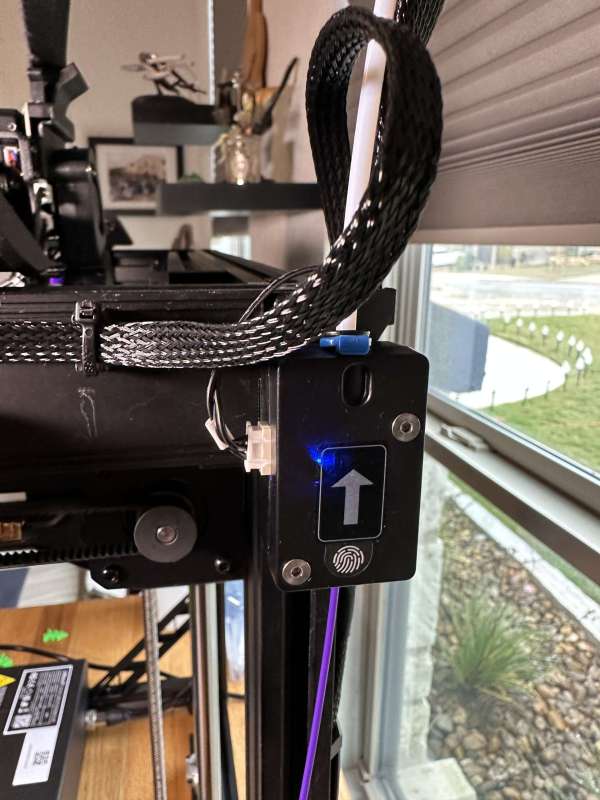
The printer comes with a nice filament detector. The moment you feed filament through the detector, the light comes on. I did not get a chance to test it out, but the light on the detector gave me a warm fuzzy.
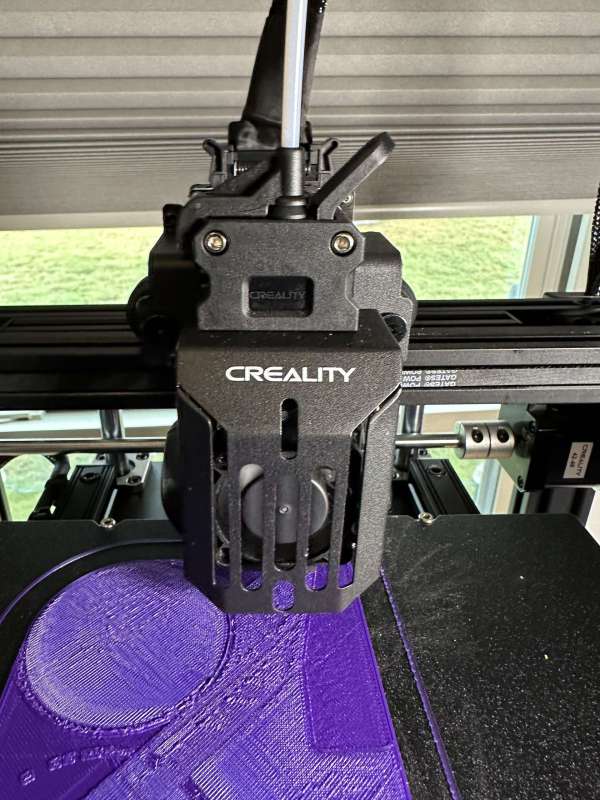
This next picture is a shot of the print head. It is very large. It is a larger print head than any other printer I have owned. It is Creality’s new Sprite extruder. It was very easy to load and unload filament. The menu has default temp setting buttons for PLA. I pressed that to get the hot end up to temperature. I then loaded the filament into the detector, up through the conduit to the print head. I pressed down on the lever to release the gears and continued to feed the filament until I saw some coming out of the print head.
There are some serious cooling fans on the Creality Ender 5 S1 3D printer. I did find it slightly louder than any other printer I have owned. It soon became background noise, and I could work without issues. The printer is in my home office. People cannot hear it when I am in a meeting, but I would not want it printing in a bedroom overnight.
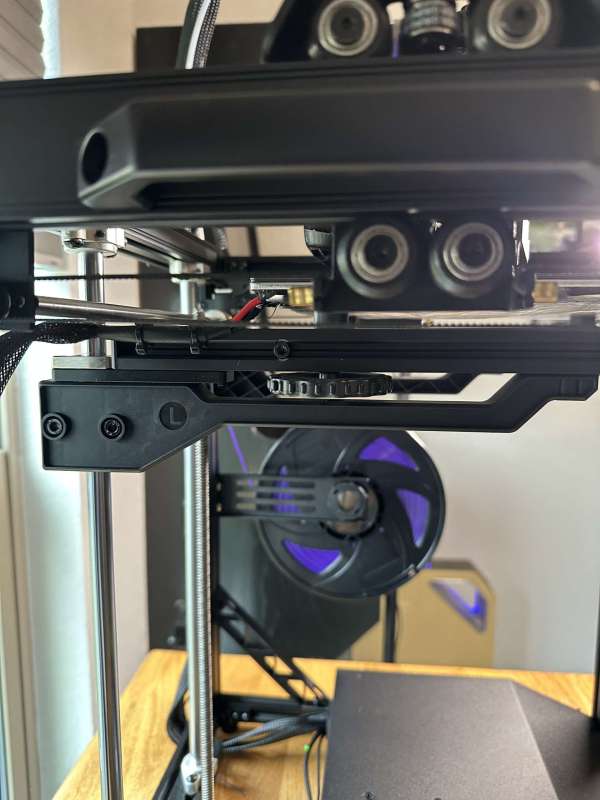
This next picture shows the supports under the print bed. Since the bed is being raised up and down along the z-axis, it must be prevented from sagging. I read in other reviews of the older printer version that it was an issue. Some reviewers complained that the supports are plastic and not metal, but they seem sturdy and do their job well.
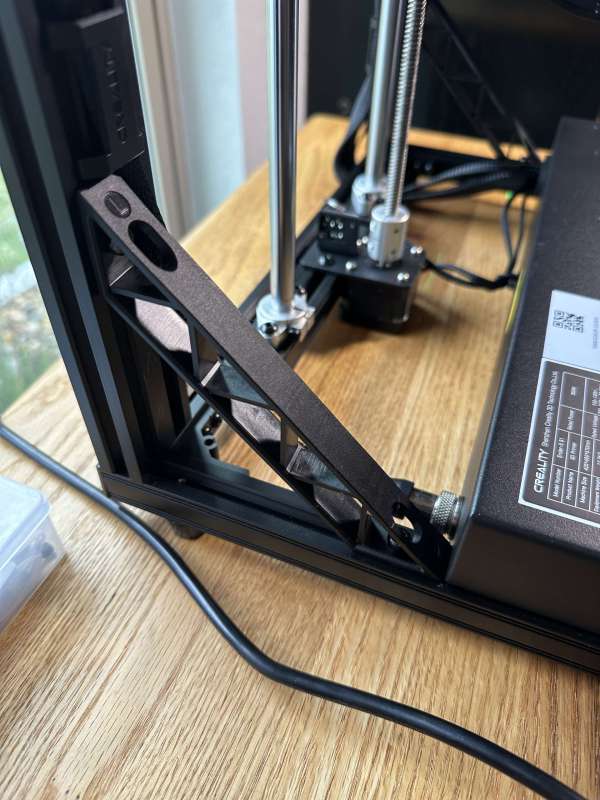
The printer also has additional plastic supports along the back corners of the printer.
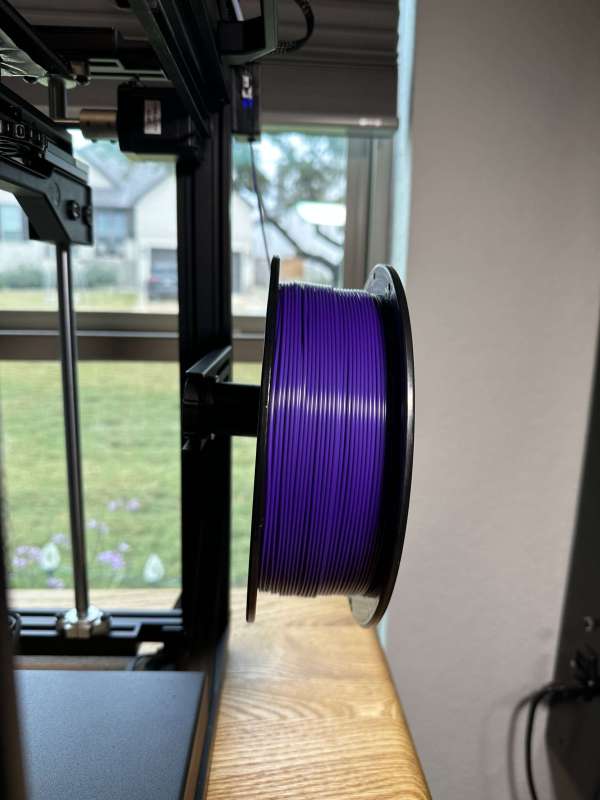
My only real complaint about the Creality Ender 5 S1 3D printer is the spool holder for the filament. The arm from the back right corner bar is metal. However, the spool holder itself is plastic. When I put a full KG spool of filament on the older, it wants to sag a bit to the right, and the filament falls to the end of the spool. It holds the filament fine, but my OCD kicks in when I see that slight sag.
Setup
I took many pictures during the printer’s setup, but in reality, nothing can compare to the unboxing and setup video created by Creality. I followed this video to a tee and set up the printer with no issues. No, I did not wear white gloves during the assembly of my printer! I admit that this printer took a bit longer to set up than any printer I have. It was not complicated, but I took my time and made sure I was following the steps exactly.
I had to use the foam packing pieces just like they did in the video to build out the z-axis part of the printer. I was really happy with the cable routing clips and zip ties they provided. It kept the build clean and neat. Everything went together exactly as it should.
At the end of the video, they go through the bed leveling process. I was surprised by the final bed leveling steps. The printer comes with the CR-Touch auto-leveling system built by Creality. I thought this would work like other printers I have had that auto-leveled, but you will notice in the video and pictures that this printer does come with knobs below the print bed for manual leveling.
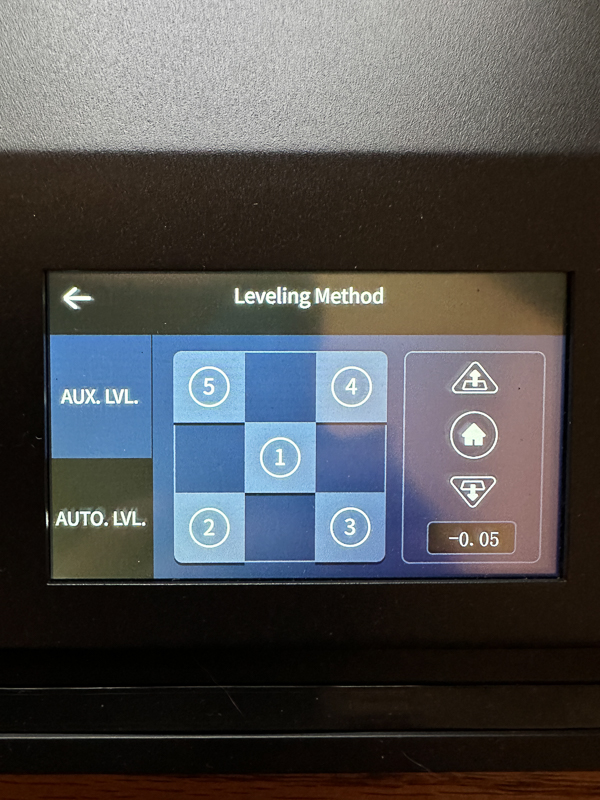
In the picture below, you can see the menu for Aux. Leveling. This menu is used in the first step of the leveling process. Pressing the one will raise the print bed to the printer and place the nozzle in the center of the print bed. At that point, you use the up and down arrows on the right-hand side to get the perfect gap for a piece of paper to have slight resistance from the print head when placed on the print bed. You then press the buttons for each of the four corners, using the paper again, but this time using the knobs below the print bed to adjust the nozzle to the paper. At this point, I returned to the number one setting and ensured the paper still had good clearance. If I had to adjust again, I went back to all four corners and manually adjusted those. Once the manual adjustment was good on all five points, I ran the auto-level sequence.
Here is the unboxing and setup of the Ender 5 S1.
Performance
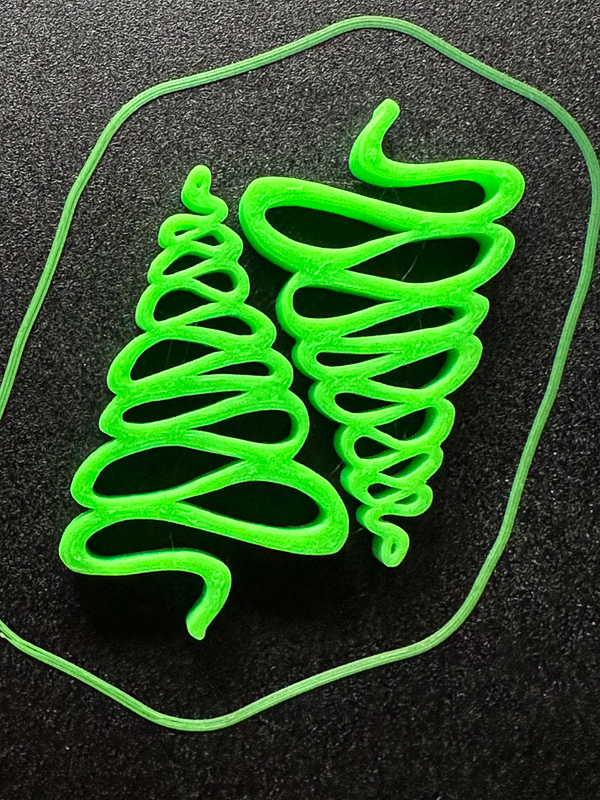
I have been really happy with the performance of the Creality Ender 5 S1 3D printer. You saw a picture of the first print of the Benchy above. The next thing I tried to print was some Christmas earrings I found. I had some nice bright green filament that I felt would work perfectly. There was some slight stringing on the first pair, and even more on the second pair. The second pair was a perfect example of something tiny with lots of detail and back-and-forth motion by the printer. They were easily cleaned up and made great gifts for friends.

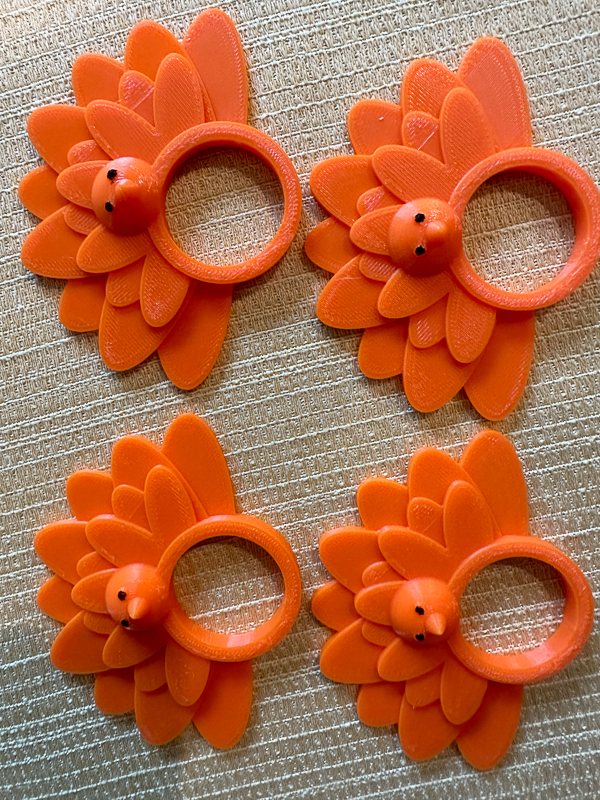
Next, I decided to print some turkey napkin holders for Thanksgiving. I thought these came out great. I used a permanent marker to bring out the eyes of the turkey.
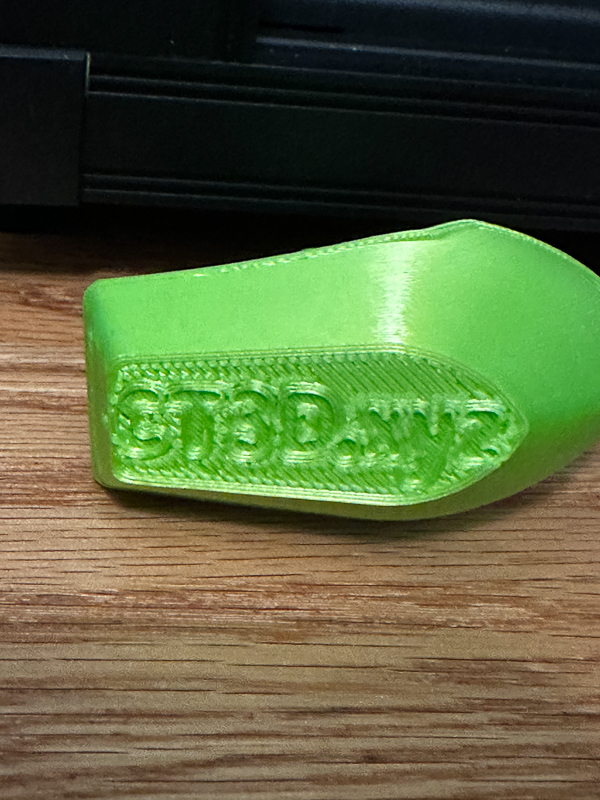
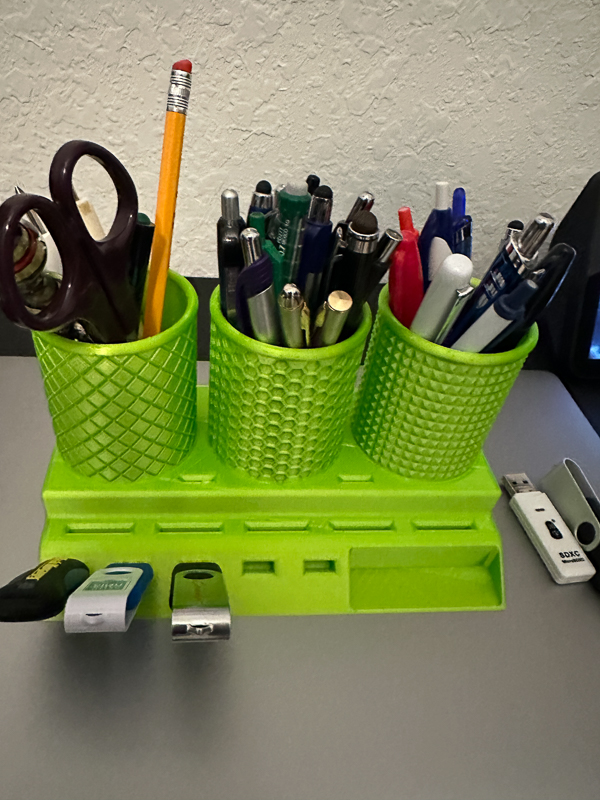
I next printed a couple of pen and pencil holders I found. My first print used a standard blue PLA filament, and the holder came out great. I gave that one to my husband, who took it to work before I could take a picture! I then decided to use a pretty ‘silk’ type PLA in green to print it again for myself. Green is my favorite color, and this filament is really shiny. As soon as the printer started to make the base, I had the bottom left corner of the print start to peel up from the print bed. I stopped the print immediately. I tried hairspray to get it to stick, and that did not work. I found this particular print bed to be very sticky, to begin with. That made me realize that maybe I needed to relevel the bed again. I did that and printed another Benchy, this time with the silk PLA. I found that I had to adjust the z axis up a bit more towards the print head and the left front corner was not as high as it should have been.
The next time I tried to print the pencil holder, it worked. Here is the final product. I think it came out nice.
What I like
- CR-Touch self-leveling system included
- New Sprite print head
- Direct Extrusion
- Filament detector
- Four-corner stable support for fast printing
- Good cable management
- Video provided for building
What I’d change
- Make the spool holder all metal
Final thoughts
I really like the Creality Ender 5 S1 3D printer. Creality always does a great job of making a good 3D FDM printer. I think that most of the issues I had with stringing and a few rough areas in my prints had to do with table stability, and I plan on building a new printer table soon. I love that Creality provides its version of Ultimaker Cura with the profile for the printer readily available.
I am looking forward to seeing when they will offer the enclosure option for the printer so that other temperature-sensitive filaments can be printed easier.
Price: $579
Where to buy: Creality
Source: The sample of this product was provided by Creality.

Zip Ties Assorted Sizes(4”+6”+8”+12”), 400 Pack, Black Cable Ties, UV Resistant Wire Ties by ANOSON
(as of May 10, 2026 03:01 GMT -05:00 - More infoProduct prices and availability are accurate as of the date/time indicated and are subject to change. Any price and availability information displayed on [relevant Amazon Site(s), as applicable] at the time of purchase will apply to the purchase of this product.)
Gadgeteer Comment Policy - Please read before commenting
Save 200$ and get a Sovol5.