REVIEW – I received my first 3D printer this past Christmas as a gift from my Mom. I asked for and received a Creality Ender 3 V2. It had quite an extensive build process and I struggled a bit to get a good quality first build. It did not have any kind of auto bed leveling system, and I was having issues with bed adhesion that I finally ended up solving by putting hairspray on the bed before each build. When the Elegoo Neptune 3 3D printer came up for review I saw that it had a lot of the features I had wished my Creality had. I was lucky enough to get the chance to review it. Keep reading to see how it worked out for me.
What is it?
The Elegoo Neptune 3 is a 3D FDM printer. It has a 16-point RSG self-leveling bed, a touch screen, and several other features that make it a stand out 3D printer at a pretty darn good price.
What’s in the box?
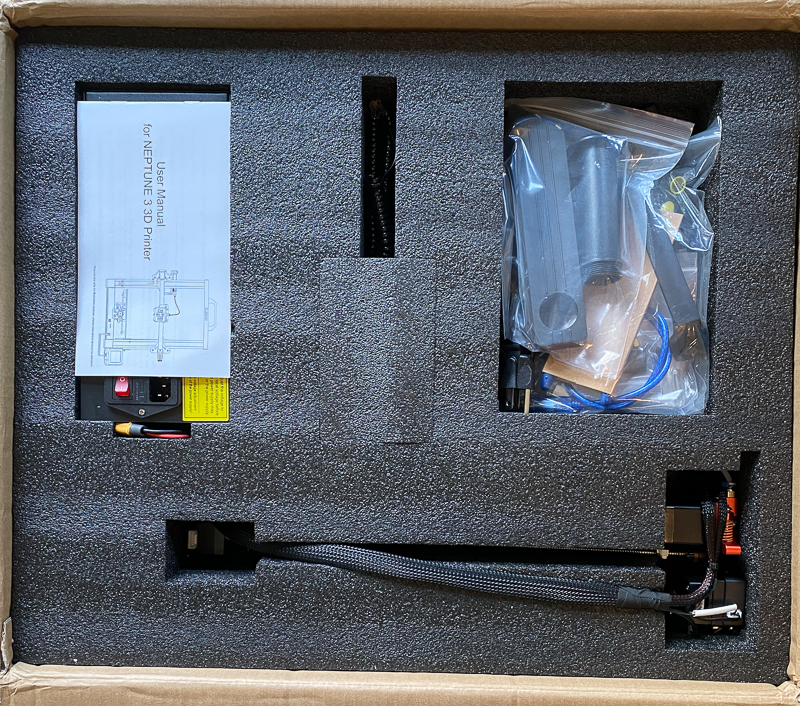
The Elegoo Neptune 3 3D printer came well packed just like my Creality printer. In the picture below you can see the first level of stuff well protected by a nice layer of flexible foam packaging. The was another layer of foam that sat on top of it. Everything came with no damage to any parts.
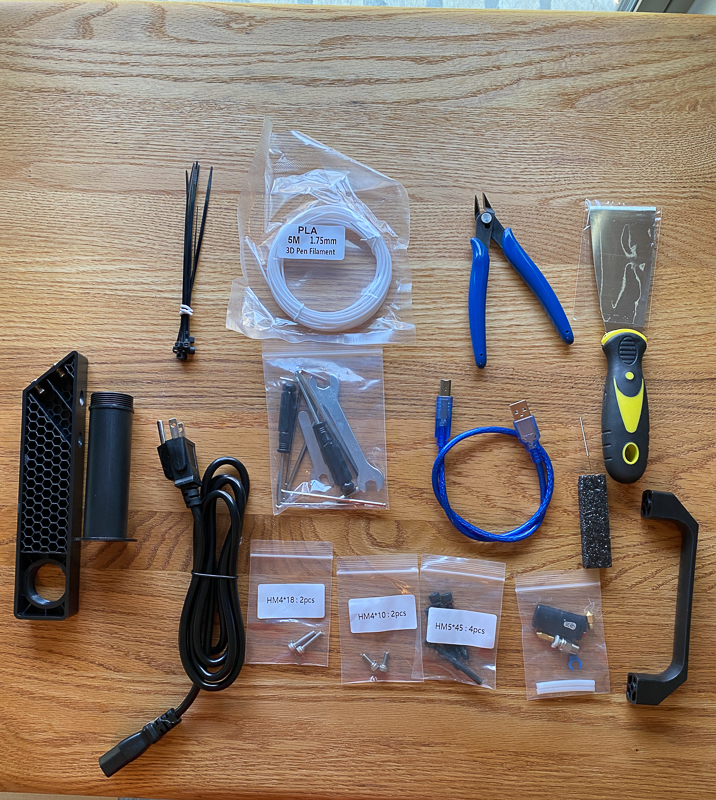
This first screen shot shows you the small parts that came with the printer.
- zip ties for organizing cables
- sample PLA filiment
- small wire cutters – used to cut PLA for loading into the printer and cleaning of prints
- scraping tool – used to remove the prints from the base plate (not needed at all so far!)
- mounting bracket and PLA spool holder
- power cord
- several screws for assembly
- assembly tools
- cable to connect to PC directly via USB port
- nozzle head cleaner
- handle
- extra print head
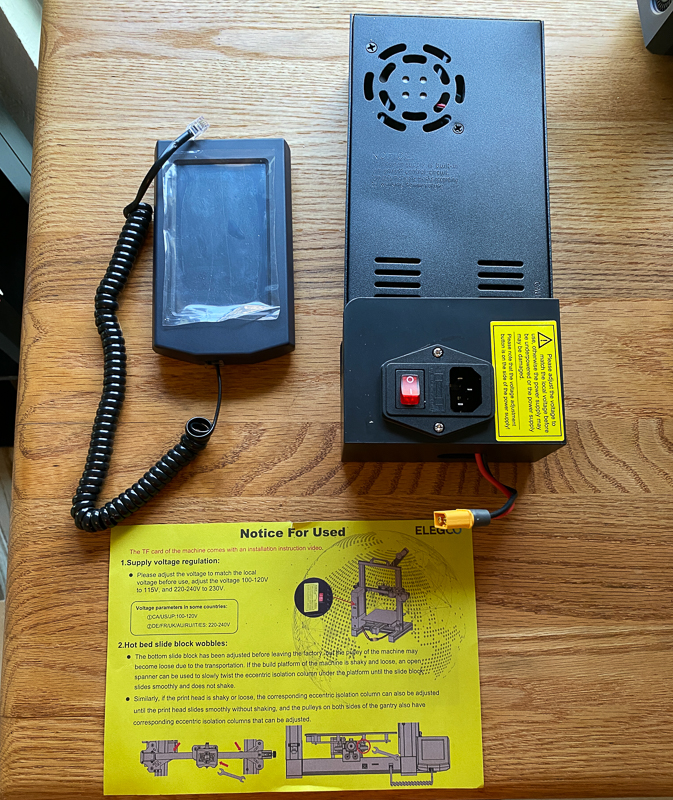
The power supply and touch display are pictured below.
Finally, you can see the main frame and base of the unit which was packed below the small stuff in its own set of separate foam compartments.
Hardware specs
- Build volume: 220 x 220 x 280 mm
- Automatic bed leveling – 16 points
- Dual gear full metal Bowden extruder
- Max. printing temperature: 260 °C
- Max. heat bed temperature: 100 °C
- Flexible PEI spring steel print surface
- Belt tensioner on X and Y axis
- Resume print function in case of filament breakage & power failure
- 4.3″ touch screen
- SD card connector, USB connector
- Menu navigation in 8 languages: German, English, French, Italian, Spanish, Russian, Japanese, Chinese
- Device size: 442 x 452 x 530 mm
- Weight: 8.1kg
Design and features
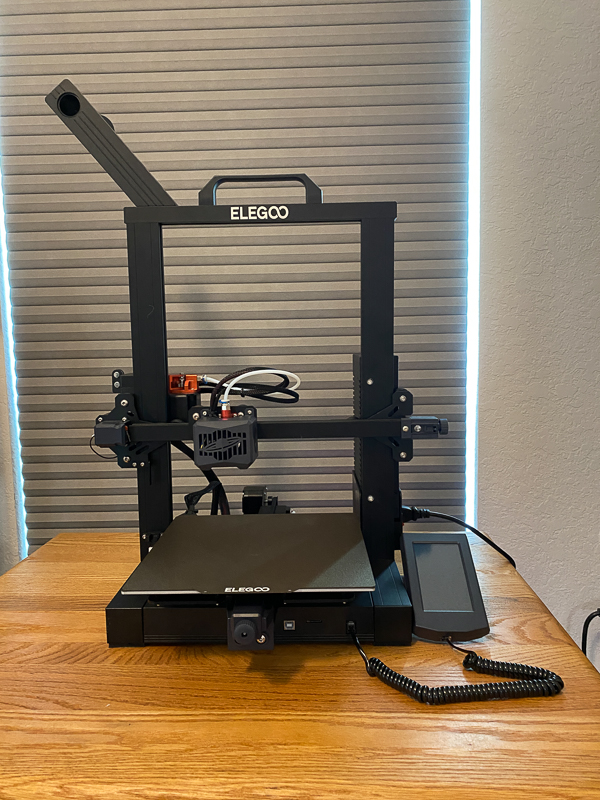
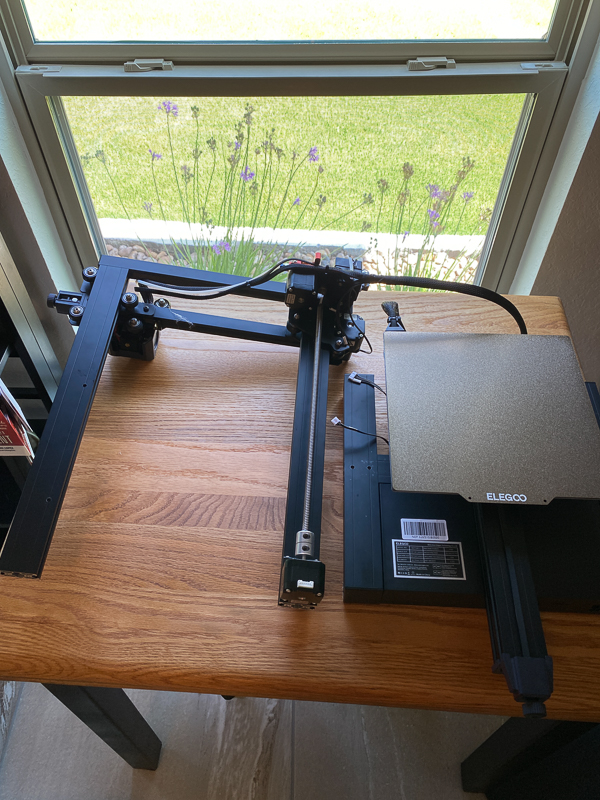
The Elegoo Neptune 3 3D printer comes with a lot of really nice extras for a really good price. Some quick things to point out in the picture below are:
- It has a handle at the top of the printer. It is a simple thing but makes it so much easier to pick the printer up and move it around.
- Notice there are no knobs underneath the print bed. It has a 16-point auto-leveling system. More on that in the setup process.
- It has a 4.3-inch removable touch screen. The cord attaching the screen to the printer is a nice quality cord.
- It has knobs to adjust the belt tension on the X and Y axis.
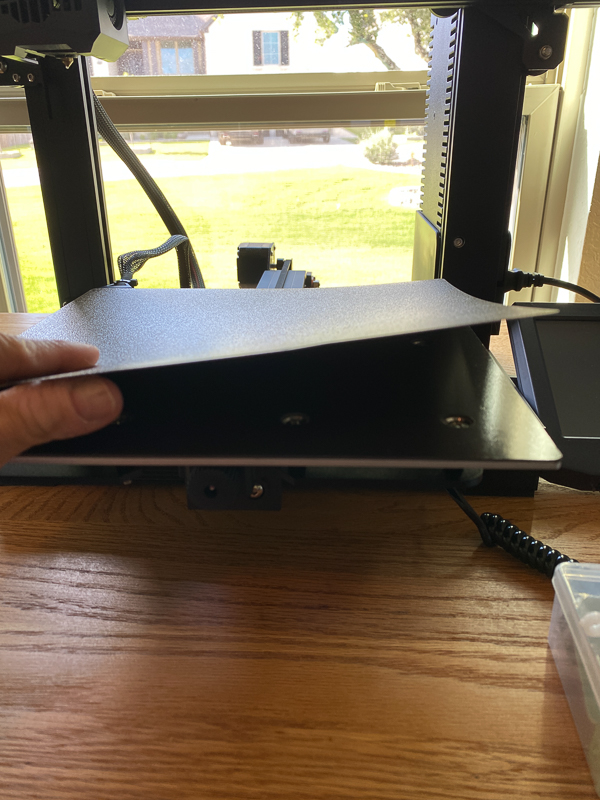
Another cool feature of the Elegoo Neptune 3 3D printer is the flexible PEI steel print bed. I have had zero problems with adhesion on this print bed. It may be a feature of the auto-leveling system, but it really makes me happy. The ability to bend the print bed allows you to remove prints easier without having to scrap the print off the bed. It attaches to the base via a magnet. So I no longer have to mess with metal clamps as I did on my Creality.
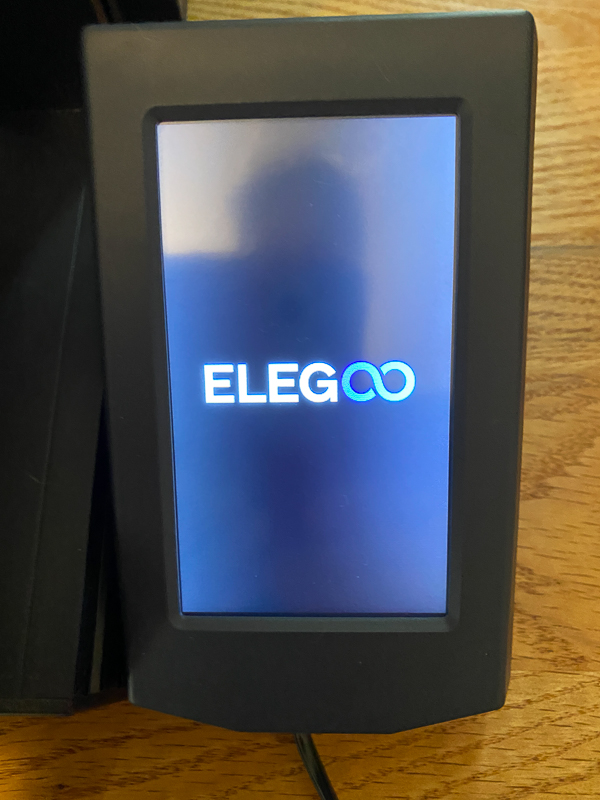
The display is a 4.3-inch touch screen. My Creality had a knob and was not touch-capable. I did not think a touch screen would make that much of a difference, but I have to admit it is so much easier to operate than with a knob. The picture below shows the initial bootup logo on the screen.
Below is a screenshot of the home page. You have options to print, prepare (screenshot below this one), and settings (where you can set the language, default temperature of bed and nozzle, set default PLA and ABS temperatures). In there, you can also turn off the filament detector. This is a really nice feature as it will detect if you have run out of filament and pause your print. The last option is to level the print bed, but I will get more into that in the setup part of this review. 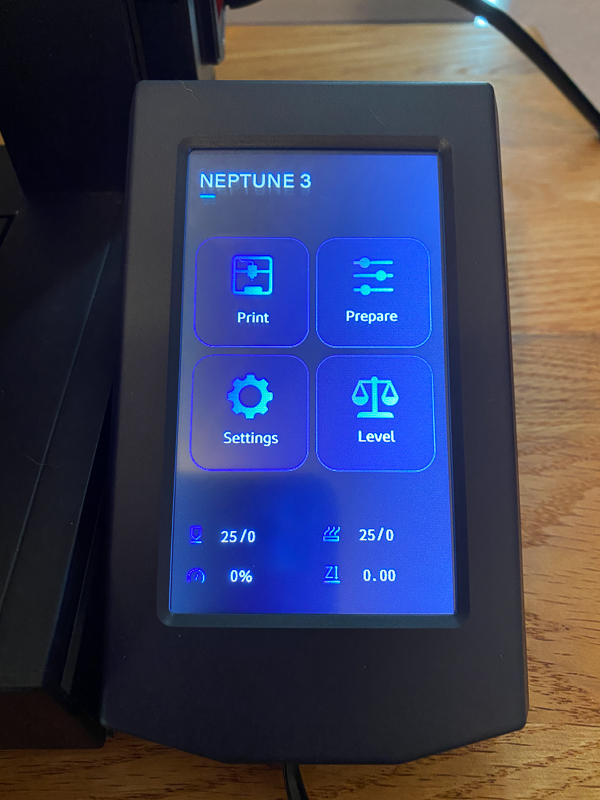
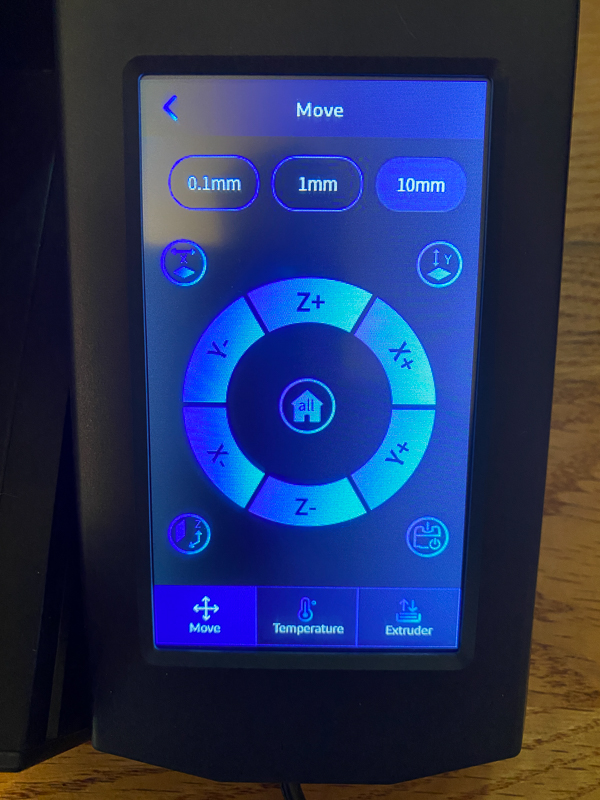
Pressing the prepare icon takes you to this Move screen. If I wanted to manually move the Elegoo Neptune 3 3D printer’s print bed or head on my Creality, I had to unlock the motors and manually move them. The Neptune provides you with a screen where you can move the bed and head where you want it to go. The extruder button on the bottom right lets you load and unload your filament by auto-feeding it for you. You have to get the filament to the gear box, but from that point forward, you control the loading through the screen.
Setup
The Elegoo Neptune 3 3D printer was so much easier to set up versus my Creality printer. To be honest, I have noticed on several other 3D printer reviews that most of them come 90% set up like the Neptune. On my Creality printer, I had to manually build the entire support system rail by rail, thread belts, and mount the motor and extruders. With the Neptune 3, all of that was complete. I simply installed four screws to mount the tower to the base, two screws to mount the power supply to the base, and four screws to mount the spool holder and handle. I then had to plug in a few cables, and the printer was built.
The part I was super excited about was the auto bed leveling system. With my Creality, I had to take a piece of paper and manually move the print head to the four corners of the bed and the middle of the bed, making sure I was feeling enough tension on the paper. My inability to do this properly is what caused several print failures on that printer. The Neptune has this super cool bed leveling system that slowly brings the print head down on 16 points of the print bed and records the exact depth of each location. The video below shows the leveling in process.
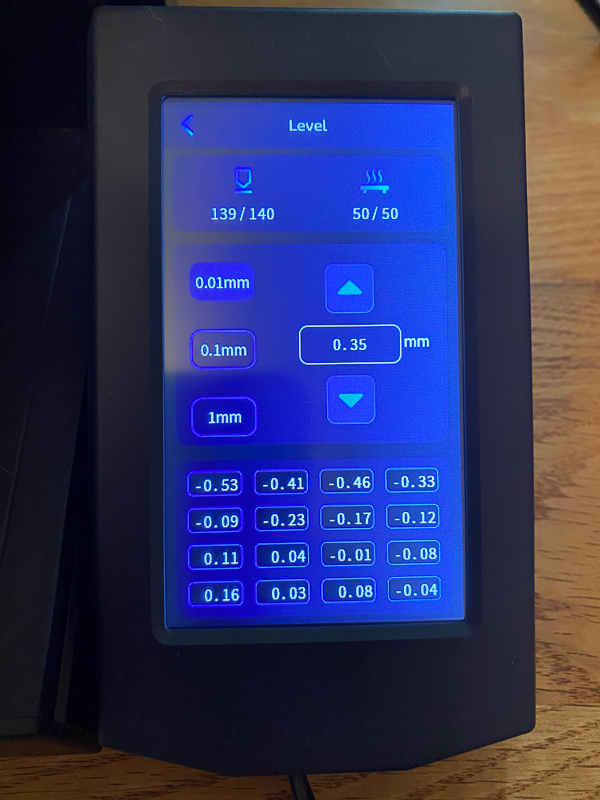
The leveling function is an option you select through the touch screen. When it is complete, you can see the display below that shows you the readings for all 16 points. It is pretty amazing how much of a difference there can be between the points. The last part of leveling does involve paper again. That is what the middle section of the display is for. The print head ends up in the middle of the bed, and you put a piece of paper between it and the print bed. You pull the paper across the print head, trying to get a touch of friction. You don’t want it tearing the paper or no friction at all. You use the up and down arrows to move the print head until you feel that friction.
That was it for leveling. No real guessing or messing with dials under the print bed in four corners. I leveled one time, and I have made about 4 prints over a month and never had a failure with adhesion.
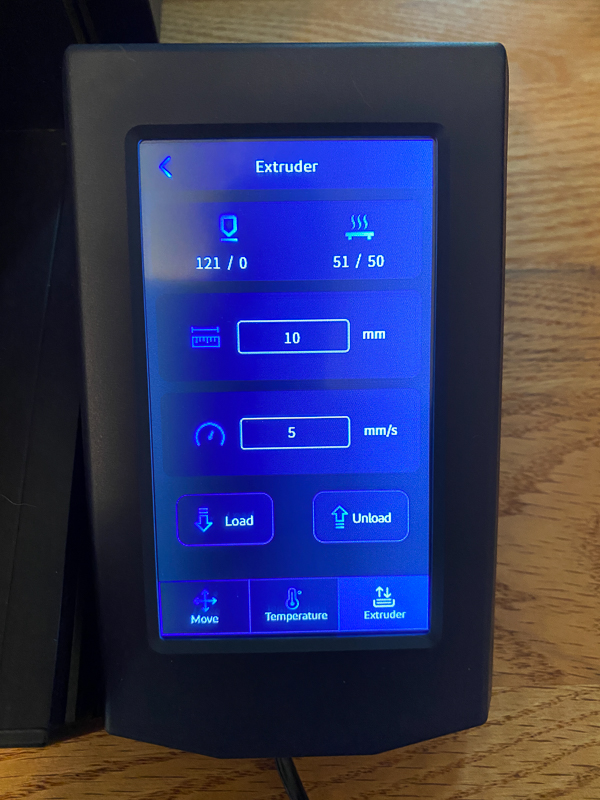
Another really nice feature of the Elegoo Neptune 3 3D printer that I want to mention was the loading of the PLA filament. On my Creality printer, I had a knob that I had to manually turn to load the PLA from the spool, through the extruder down to the print head. With the Neptune, there are load and unload buttons where pressing the button automatically pulled the PLA through the extruder to the print head. You could adjust how much filament was loaded and how fast it loads by changing the settings on the screen below.
Performance
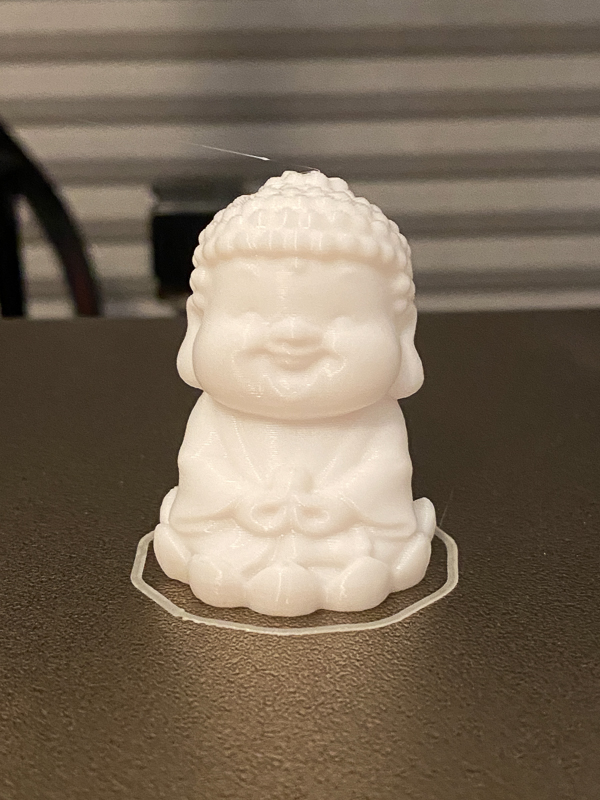
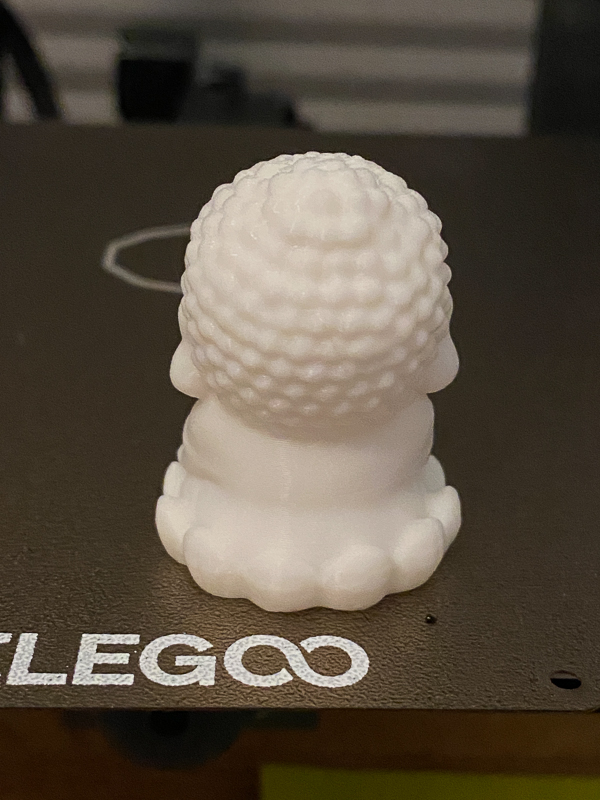
I picked a small Buddha figurine as my first print. I am happy to say it was printed with no issues. The picture below shows the print right after it finished. You can see a bit of stringing coming off the top of the head of the print. Otherwise, I think the print came out very clean. This was printed using the small bit of filament provided with the printer.
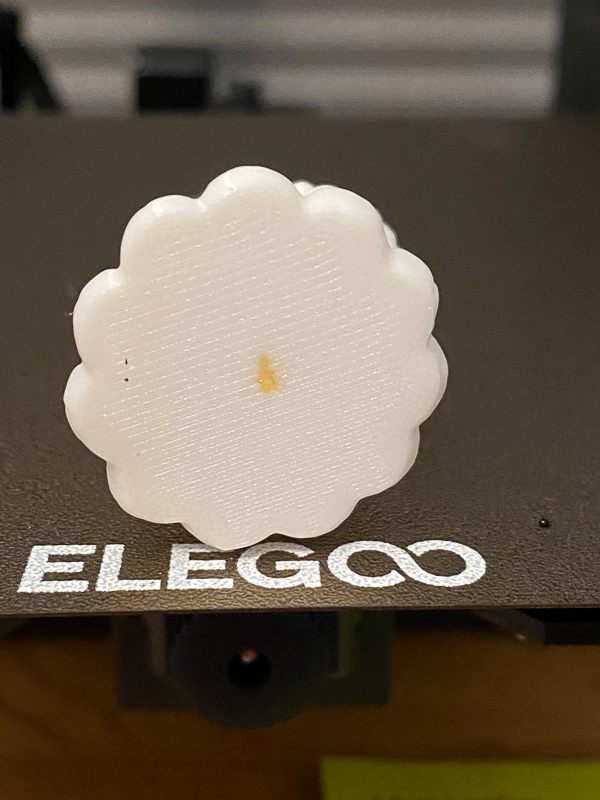
He came off the print bed very easily. Below is a picture of the back of the print. Once again it is very clean.
The only real issue I have with the print has to do with how the Elegoo Neptune 3 3D printer works. When you say start printing, the first thing it does is move the print head to the middle of the bed and drop it down to the bed as if it were leveling again. That leaves a small dot of PLA on the bed. That small yellow dot on the bottom of the print is that dot left by the printer. I have learned now that every time I do a print, I let the printer do its center drop thing. I then immediately scrap it off as the head moves to the left of the print bed to print its initial priming line. That way I don’t have any extra filament sitting in an area I know it will print.
Next, I tried to print a self-watering planter. This involves printing two different pieces. The first item I tried to print was the interior cup where the plant will sit. Part way through the print, I got an out-of-filament error. Checking the printer I could see that I was not out of filament. It turned out that the print head was clogged. Unfortunately for me, I spent time trying to restart it thinking it would work again, and realized it was not out of filament. I know next time that I get that error to check for a clog if I still see that I have filament. However, since I tried to make it print with no filament, the printer lost its place in the print, and the print was ruined. See the picture below of the failed print.
I cleared the nozzle and cleaned off the print bed. I restarted the print and I was able to print both the inside plant cup in black along with the outside cup that holds the water in white. You can see on the black print there was a tiny bit of stringing going on. That was easily cleaned up.
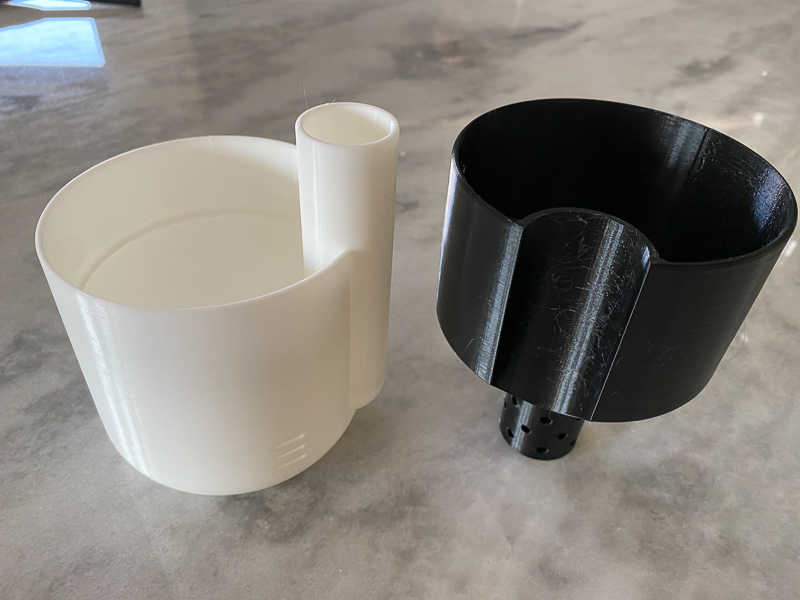
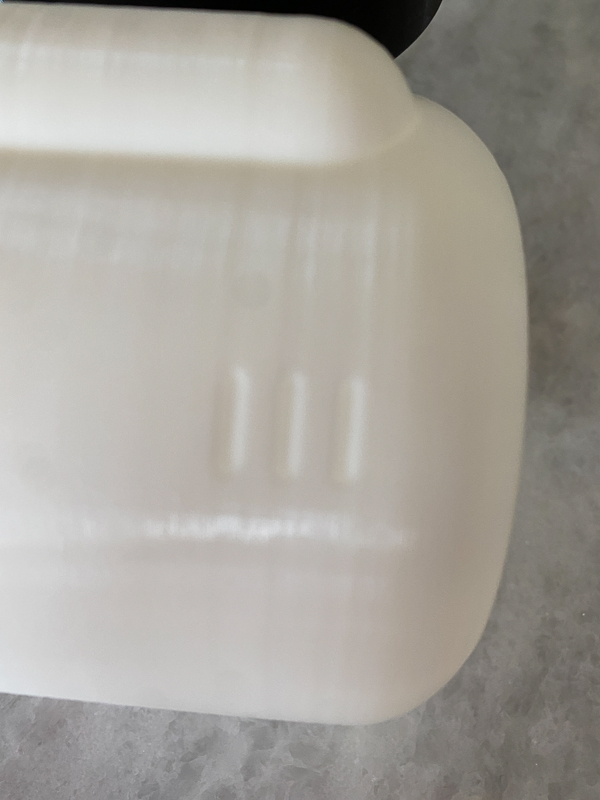
I did a close-up shot of the outside cup to show the detail where hopefully I will be able to see how much water is in the cup.
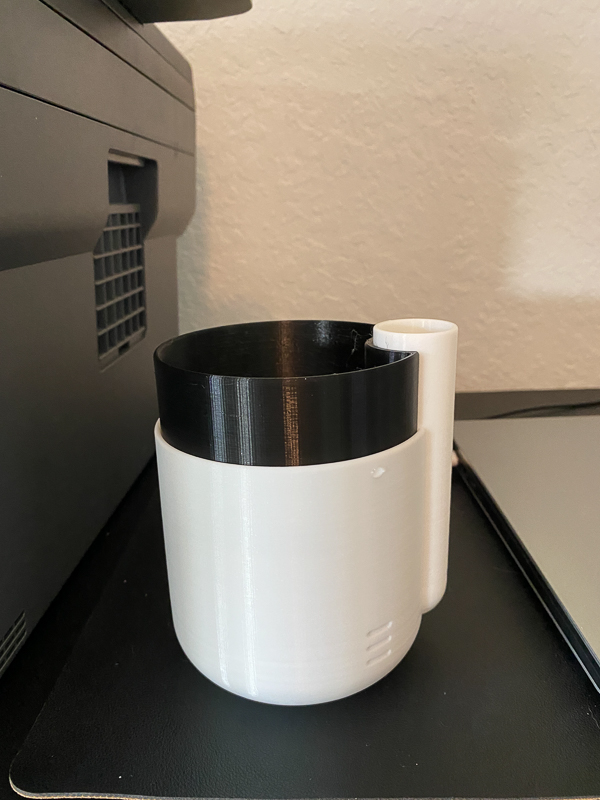
Here is the planter assembled. The black cup fit inside perfectly. To water my plant, all I have to do now is pour water into that white spout on the right. I did a test and the white cup held water with no leaking at all.
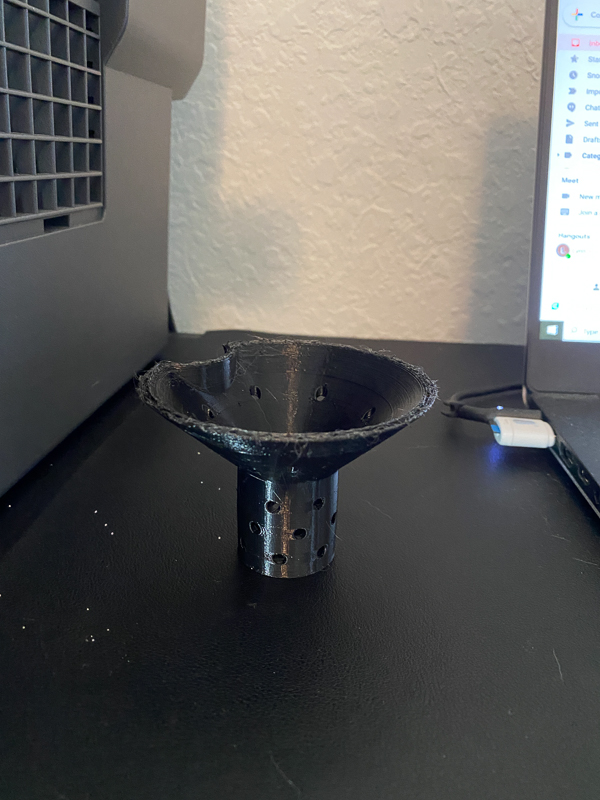
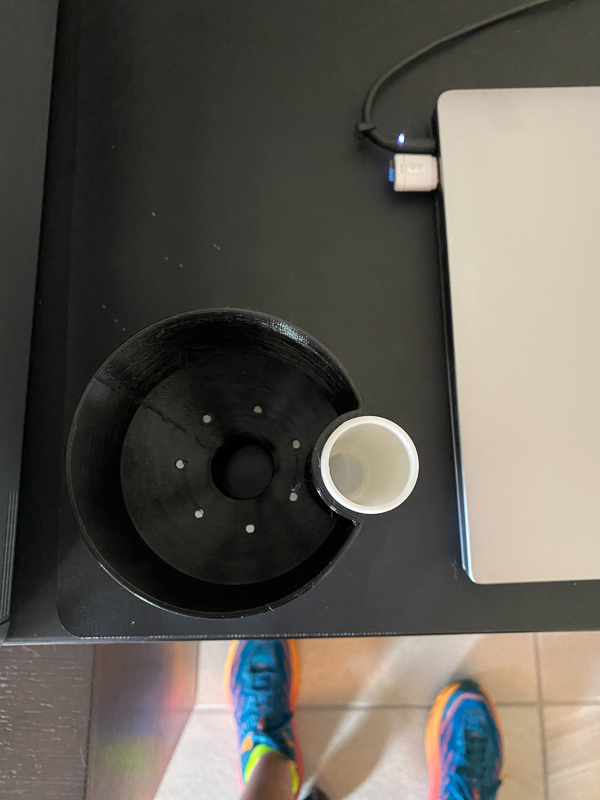
Here is an inside shot of the black cup so you can see some of the holes where water can come through.
What I like
- Easy to put together. I was ready to go in less than 15 minutes.
- It has a handle to easily carry it.
- Touch screen
- Self-leveling bed.
- The filament sensor will stop print before the nozzle runs out of filament
What needs to be improved
- It would be nice if the printer had Bluetooth or Wifi so I did not have to use a cable or SD card.
- The printer needs to know the difference between out of filament and a nozzle clog.
Final thoughts
I really love the Elegoo Neptune 3 3D printer. It was a breeze to set up, and the bed leveling makes getting a good print pretty darn easy. The price is also a great deal. If you are looking for your first 3D printer or maybe another to add to your stable, I highly recommend the Elegoo Neptune 3 3D printer.
Price: $209.99
Where to buy: Elegoo and you can find many of their printers on Amazon
Source: The sample of this product was provided by Elegoo.

Gerber Gear Suspension 12-in-1 EDC Multi-Plier Multitool with Pocket Knife, Needle Nose Pliers, Wire Cutters and More, Gifts for Men, Camping and Survival, Grey
(as of July 30, 2026 09:33 GMT -05:00 - More infoProduct prices and availability are accurate as of the date/time indicated and are subject to change. Any price and availability information displayed on [relevant Amazon Site(s), as applicable] at the time of purchase will apply to the purchase of this product.)
Gadgeteer Comment Policy - Please read before commenting
I followed all the assembly and leveling instructions to the letter. Watched the video above and verified I has it right. Problem is, the mesh leveling is NOT working. I generated a 160mmx160mm open rectangular outline pattern that is 10mm wide and 0,20mm high so I could print only one layer when I used the Elegoo Cura 4.8 clone software set to a 0.20 layer height.
Right off, I heard a nozzle to bed scraping noise when it printed the purge strip. then the rectangle shows that the nozzle is too close to the bed at the forward left corner and sort of OK at the back right corner. There is nozzle dragging noise during the print on the left side front to back and left to right at the front of the bed.
I have a photo the results if there is a way to post it.
I have rechecked the roller tightness for both sides of the z-axis. I have verified tightness of the Y and X rollers as well. The nozzle carriage has no wobble either side to side or top to bottom. All frame assembly screws are tight (I rechecked them all.
Its as if the leveling MESH is not saved or possibly used. I tried adding an M420 S1 to force it to used the Mesh but no Joy.
The mesh values show as:
1.16 0.36 -0.44 -1.24
1.21 0.52 -0.37 -1.22
1.45 0.45 -0.35 -1.34
1.33 0.46 -0.40 -1.29
I have re-leveled this machine a few times now and turned it off and on to see if it fixes itself.
HELP!!!
Hi Scott, I recommend you contact Elagoo support. These machines can be very finicky. I am currently reviewing a supersized 3D printer from another manufacturer, and I am running into issues with the filament not extracting. I have contacted the manufacturer and received a reply within 24 hours. Remember these folks are in China, so I usually saw a reply the next morning.
Hello Scott,
What was the solution from Elegoo?? Because i have the same problem 🙁
YouTube!!!
Baby steps, also called e-steps, in your adjustments menu. If you are scraping the nozzle, raise it by 0.1 mm and save that adjustment. You ‘generated’ a square to print?
How?
Their Cura is not a clone, but a visually reskinned version of Cura. You can adjust layer height. Again, YOUTUBE!!!!!
There is practically nothing you could need to know about getting any 3D printer up and running and tuned well that is not there, no matter the brand and model.
This article is, at least in part, FALSE.
The Ender 3 V2 did NOT require the person to build anything but the superstructure. The base came 100% built. Not one person on the planet received one that the base had to be assembled.
This is the best video that goes above and beyond in its assembly and pre-assembled:
https://youtu.be/LV1Nnohwqik
So, threading belts, plural?
Nope.
Next, she extols the wonders of the auto bed leveling feature and tells the commenter to contact elegoo support.
Sounds like she really does not have real experience with either of the mentioned printers.
Hey Art, I never said I had to build the base of the Creality. My exact words were, ‘On my Creality printer, I had to manually build the entire support system rail by rail, thread belts, and mount the motor and extruders. With the Neptune 3, all of that was complete. Many more steps were involved in building the Ender 3 V2 compared to the Elegoo. I received the Ender for Christmas last year. Maybe they are now shipping with a more complete build in place.