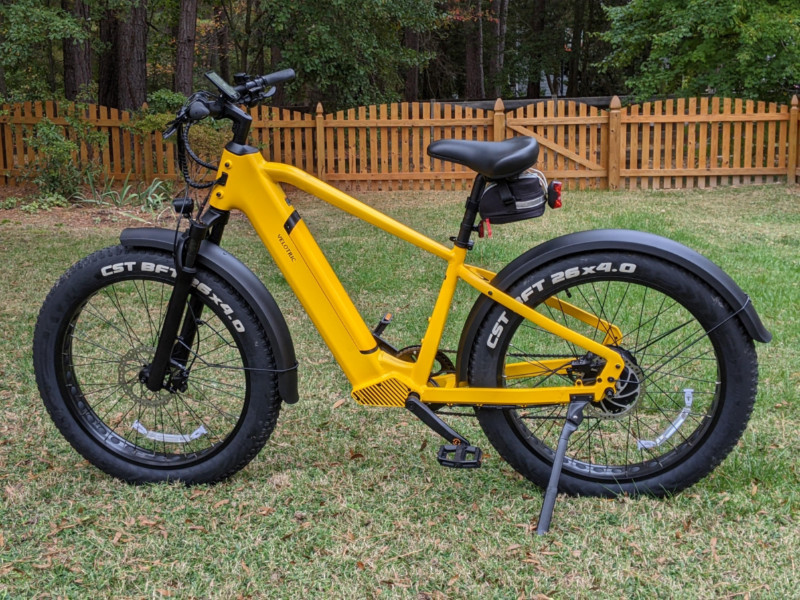
REVIEW – The Velotric Nomad 1 e-bike is a new model from Velotric Bikes. Its fat tires are matched by a well-built, substantial frame. Plain road bikers with their synthetic bike shorts and featherweight bikes they can lift with two fingers may scoff as I pass, as I sit comfortably upright, not sweating, not pedaling but using the throttle… and I might be having more fun. I’m just joking. I’ve got a lot of road biker good friends. But somewhere in this Nomad 1’s 48-volt battery there is a large supply of fun that flows into the rider with each use. I’ll discuss my assembly goofs and Velotric’s, the top speed, whether e-bikes count for exercise, and recommend a few exceptions to the installation directions. Ladies and gentlemen, start your e-bikes!
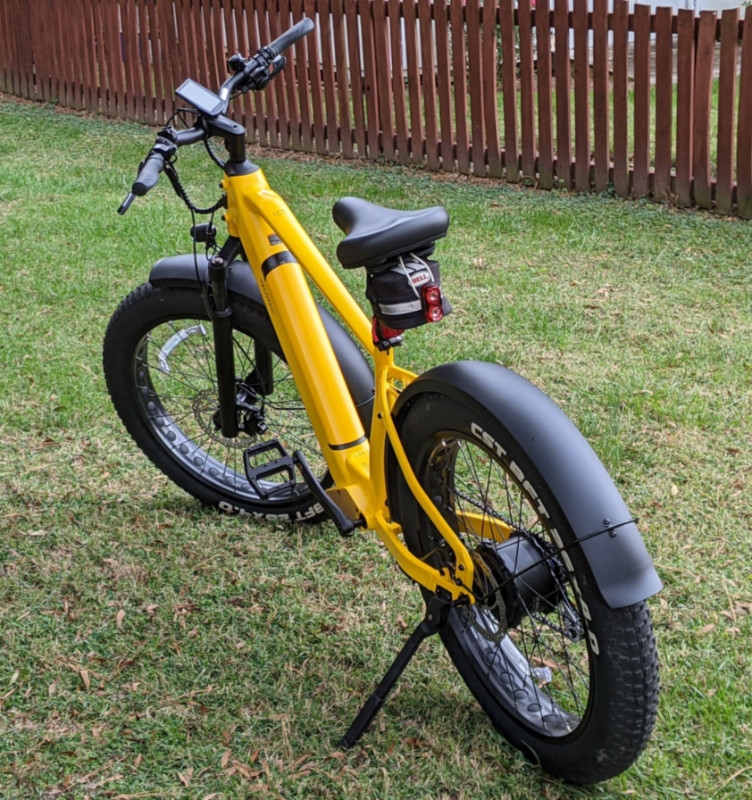
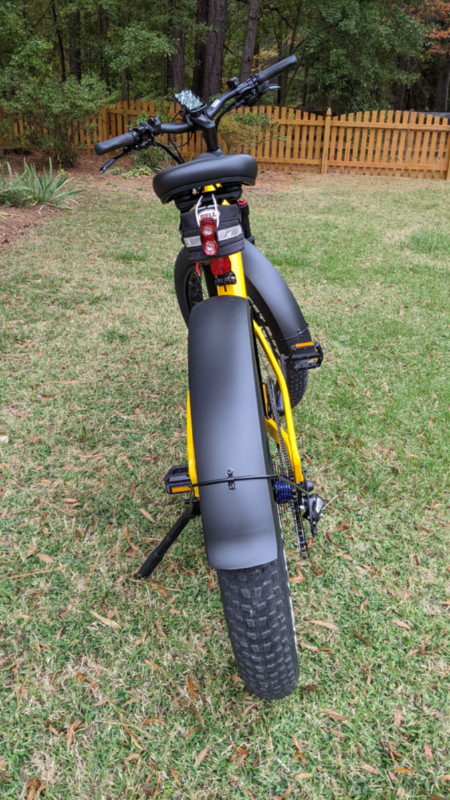
The seat bag and tail light were supplied by me.
What is it?
The Velotric Nomad 1 e-bike is a fat tire, electric bike with 5 levels of pedal assist, a throttle, 8 gears, and hydraulic disc brakes. Velotric is led by the Lime scooter company co-founder Adam Zhang, who oversaw Lime’s hardware team from 2017-2020. Zhang’s team designed and manufactured three generations of e-scooters and two generations of e-bikes.
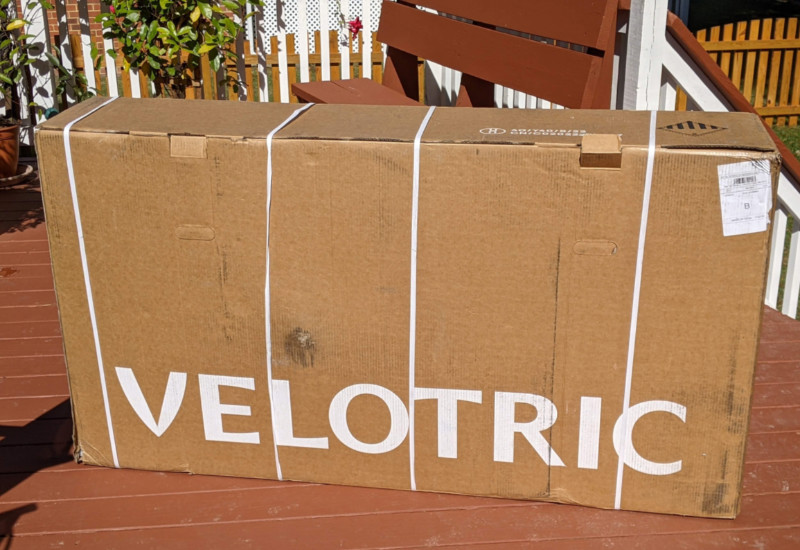
What’s in the box?
-
- Velotric Nomad 1 electric bike
- Rechargeable battery
- Charger with cords
- Front light
- Rear light
- ’Ding ding’ bell
- Quick Start Guide (QS Guide from here on)
- Full user manual
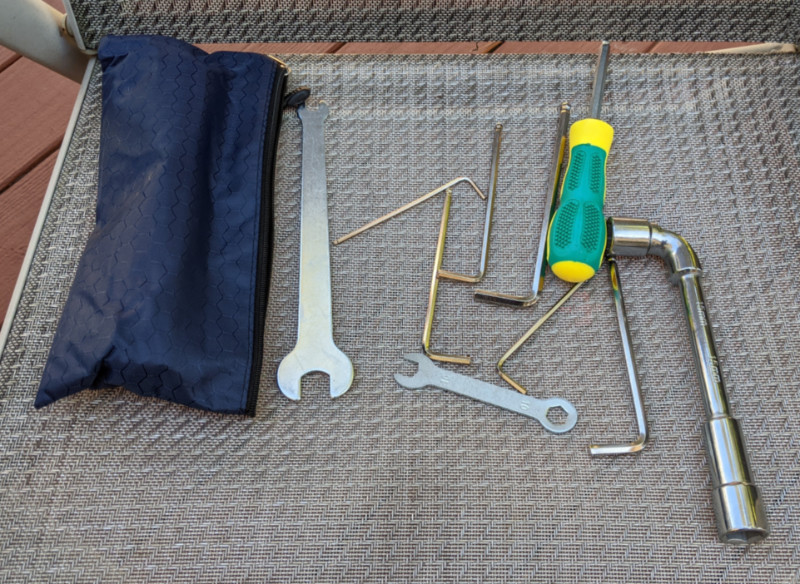
- Tool kit
Specs
- Motor: 48V, 750W (peak 1200W), max torque 75Nm
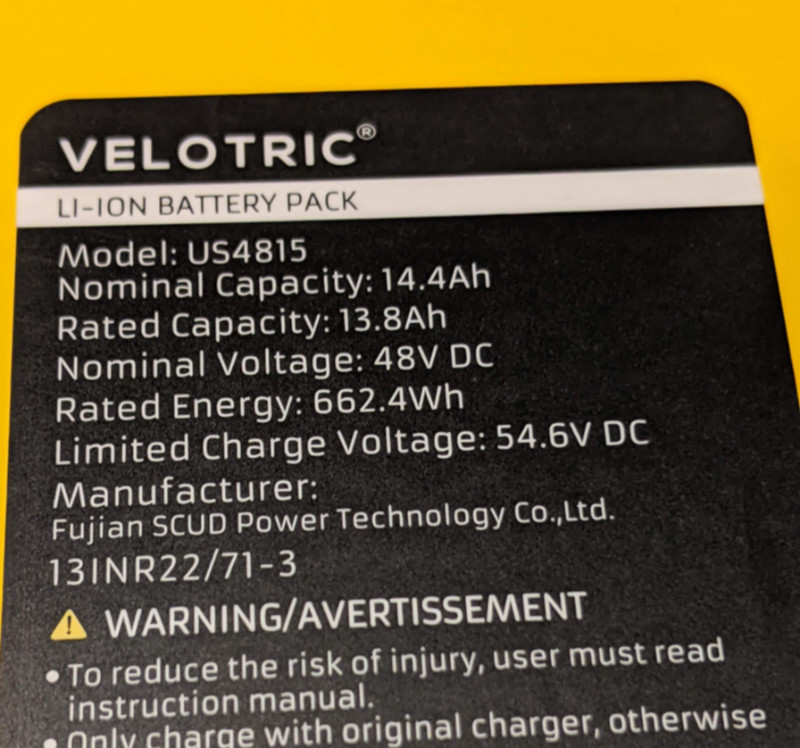
- Battery: 48V, 14.4Ah, 692 Wh, Lithium ion rechargeable, UL 2271 certified
- Battery cells: 21700 pack made by LG/Samsung
- Frame: Aluminum alloy, fully integrated & lockable down tube battery, internal cable routing, front and rear fenders, quick release seatpost clamp
- Fork: Hydraulic suspension with 80mm travel, with Lock-out
- Range: 55 mile range claim per fully charged battery
- Pedal assist: 5 levels
- Throttle: Variable speed. For pedal-free riding
- Weight: Step-thru: 33KG (72.75lbs)
- Weight: High step: 32.5KG (71.65lbs)
- Wheels: 26″. Aluminum alloy. 4” fat tires. Puncture resistant liner.
- Gear set: Shimano 8 speed RD-M310
- Shift lever: Shimano SL-M315, 8-Speed, thumb shifter
- Crank set: Aluminum alloy, 170mm
- Chain: KMC Z8
- Hydraulic disc brakes
- Rotors: 180 mm front and rear
- USB port: 5V, 500mAh output for charging devices
- Seat: Padded, 220mm wide, adjustable
- Seat post: Aluminum alloy, 350mm x 30.4mm, quick release clamp
- Complete tool kit
- 1 year warranty, free shipping to continental U.S. states, 14 day free trial period
- Return policy: “If you find that your new Velotric bike isn’t right for you, you can return it (in new, unridden condition) within 15 days for a full refund.”

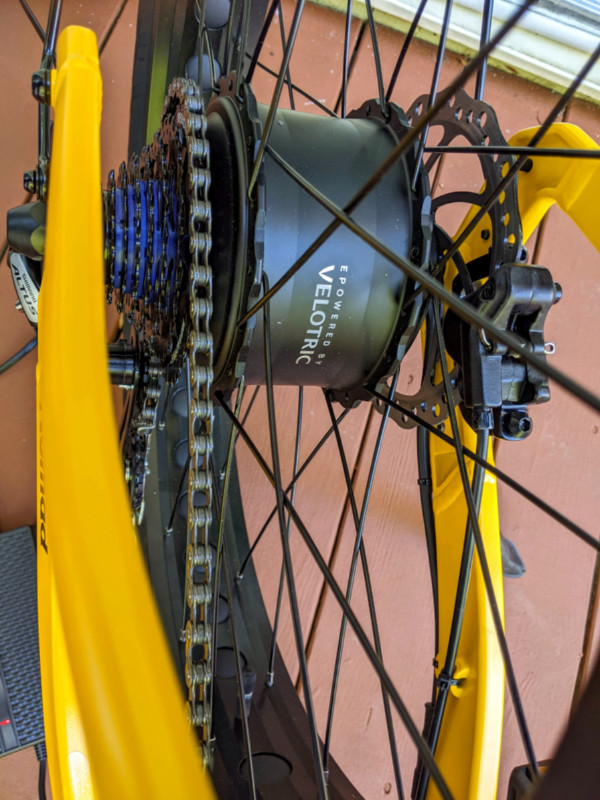
The rear brake assembly.
Design and features
The Velotric Nomad 1 e-bike is available in 2 frame configurations, ‘Step Thru’ and ‘High Step’. The old-school names for these frames would have been ‘womens’ and ‘mens’. But guys are seen on step-through e-bikes, and some e-bike makers only offer the Step Thru style. The Step Thru may be better for those 5’9” and shorter, or with 30” pants inseams or less, so the rider can step forward off the saddle and comfortably (painlessly) straddle the bike standing on the ground during stops.
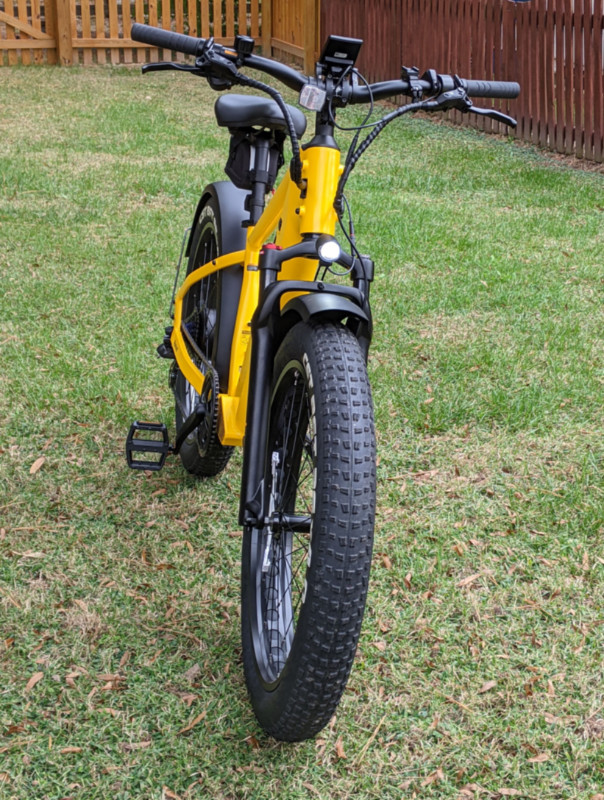
Interestingly, the four color choices for the Velotric Step Through bikes are pastel, and the colors for the High Step aren’t, with the exception that both configurations offer ‘Mango’. I have a reputation to uphold so I requested the High Step, and ‘Mango’, which seems a great safety color. I like all the High Step colors but might have been snickered at if I were riding on the Step Though in ‘Cyan’ or ‘Spring’. I’m 5’10” and thankfully can just safely straddle the top bar at its lowest point. I probably should have gotten the Step Thru. Be bold, short guys, get a Mango Step Thru.
Setup
I think Velotric has some helpful resources in the works based on links not working yet in the Support section of their website. Those appear to be forthcoming videos and online manuals which I think are great ideas that I could have really used before and when assembling the bike.
The main Owner’s Manual is loaded with warnings and non-specific information. The lawyers definitely got their hands on this booklet. Bike buyers need a manual that shows information about the Nomad 1 and how to adjust each system on it.
Unless you are an experienced bike assembler, I recommend taking your time going one step at a time through the included Quick Start guide (QS Guide), page by page, to build the bike. It wasn’t hard and I’ve assembled other bikes, but I’ve never assembled an e-bike nor a Velotric. Take your time and it’ll be right. And avoid the mistakes I confess herein.
If you need to talk to Velotric Support, use Email: [email protected] or call: +1 888-559-3099. The phone number on the QS Guide is no longer in use. Support hours are, Monday~Friday 10AM~5PM PST.
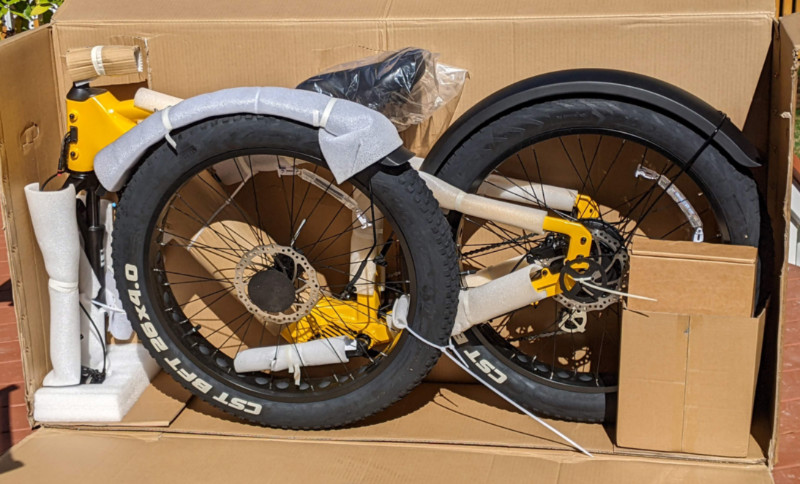
I was surprised by the light weight of the front wheel. With its width and fat tire I figured it’d be a chore to lift. No problem there.
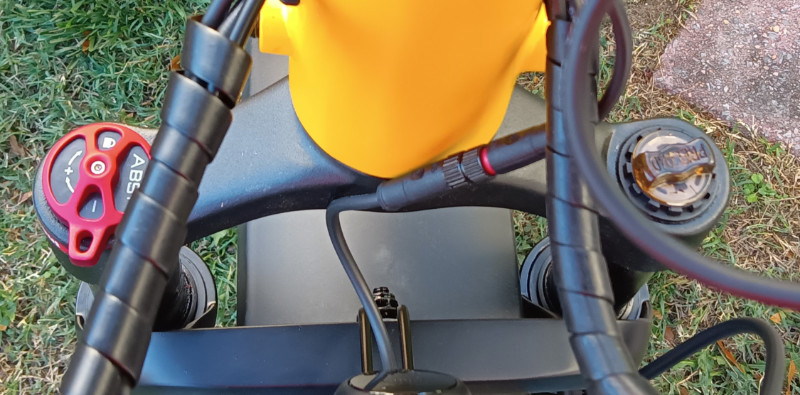
These are the fork suspension adjustment knobs viewed from facing the bike.
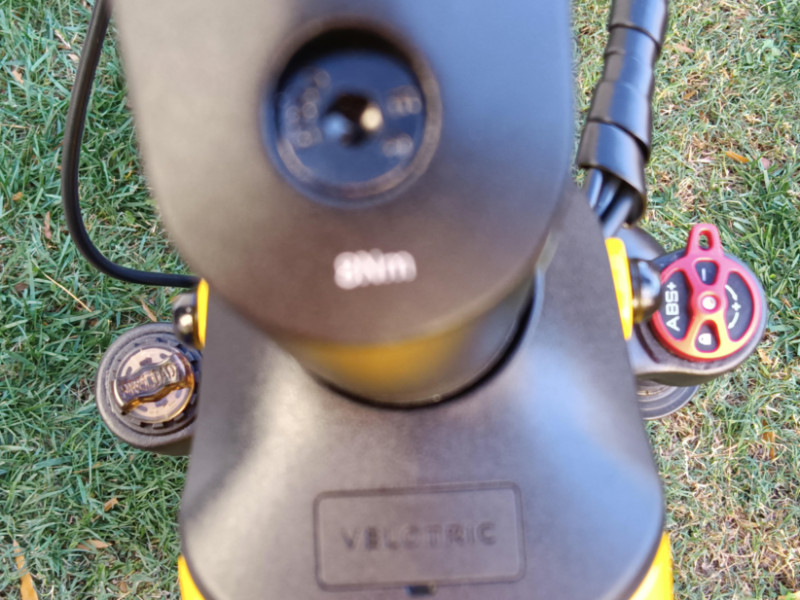
Fork knobs viewed from sitting on the bike. And a blurred view of the USB output port.
If you wish to alter the suspension on the front fork, there are no directions provided. The right fork (viewed from sitting on the bike) has a red control that is either locked or unlocked. With a locked fork it has no spring to the suspension. The left fork dial can be rotated counterclockwise for more bounce per ounce (some call it ‘plushness’ or ‘springiness’ of the suspension). For a firmer ride the left fork dial should be rotated clockwise.
Firm rides (clockwise) are said to be better for paved surface riding. A softer suspension setting (counterclockwise) should give a better ride on paths, trails, fields, etc.

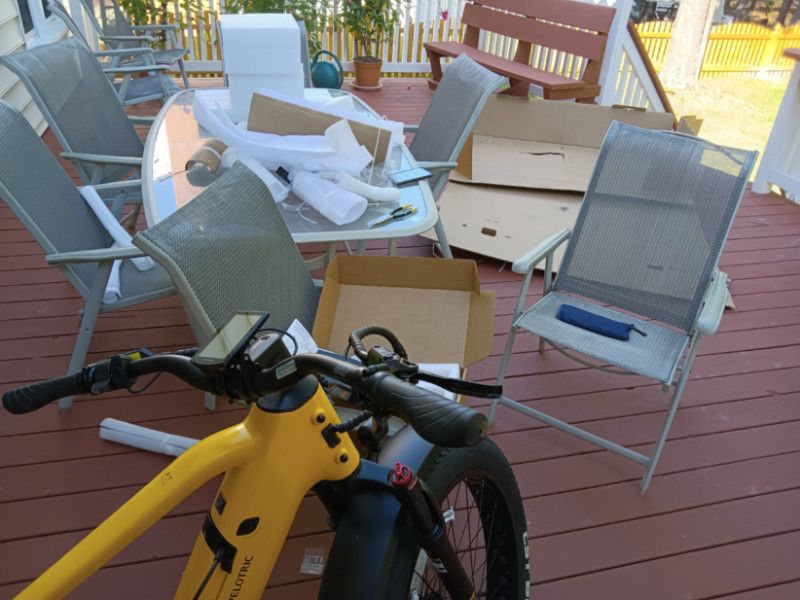
Save the packing material, just in case.
A few assembly exceptions I’d note.
-
- I recommend charging the battery separated from the bike as a first step. Let it charge while you’re building the bike. Velotric Support says the battery can take 6 hours to charge fully at its first charge. My battery took 3 hours to fully charge but for 2 hours of that time I was building the bike.
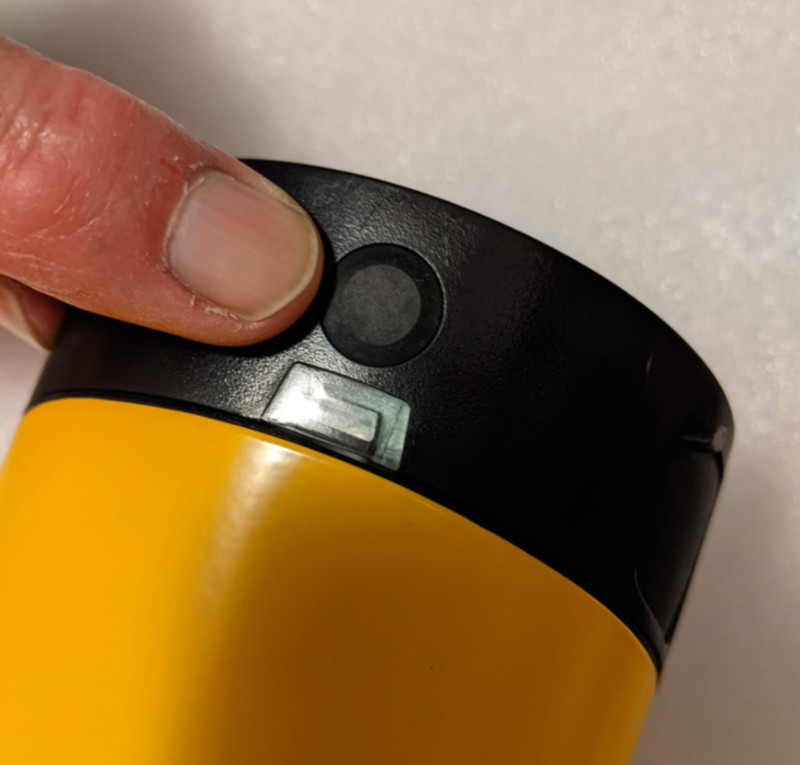
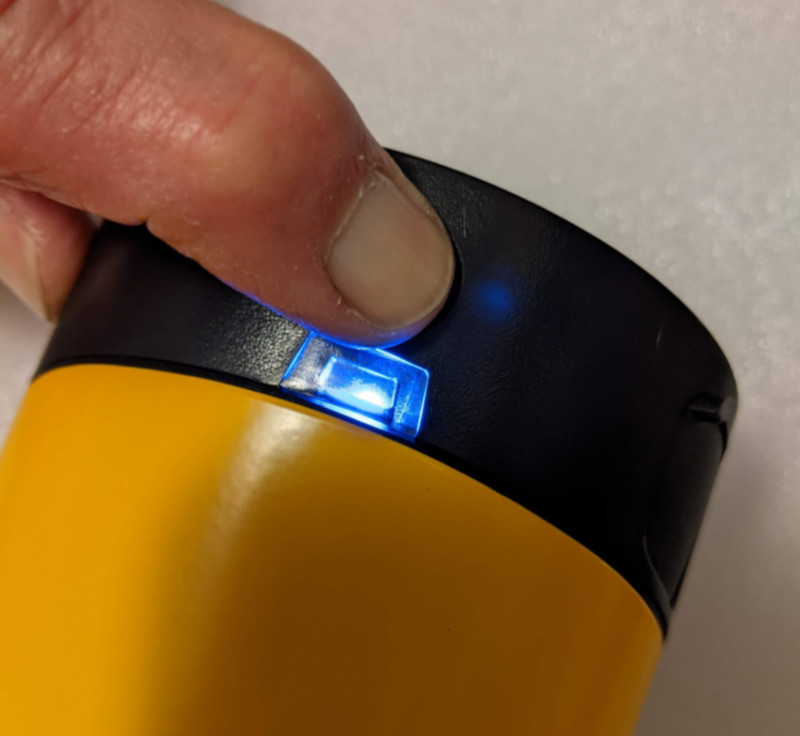
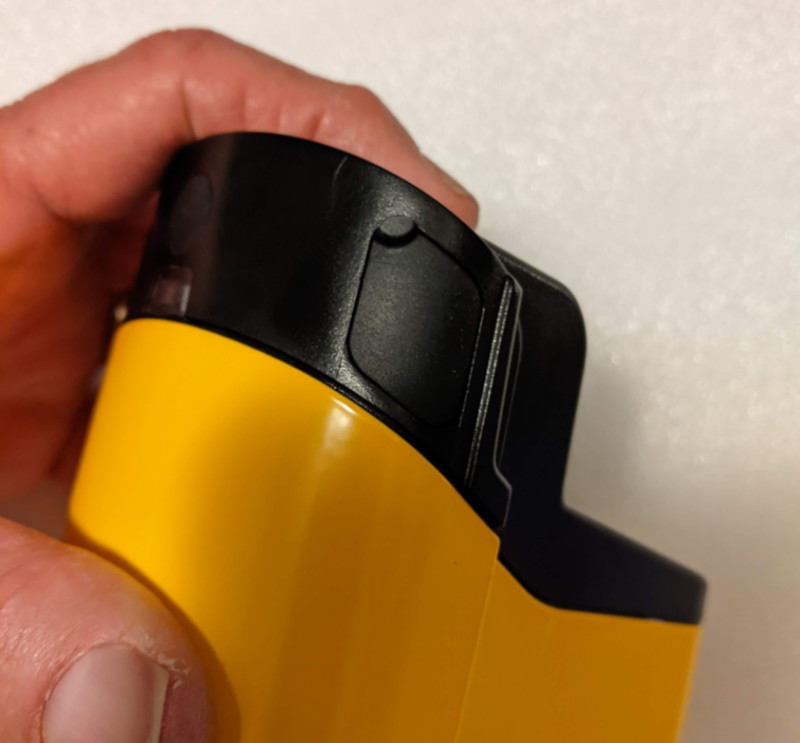
- The QS Guide doesn’t mention it but there’s a rubber covered button in the center top of the battery. When the battery is not charging, that button can be pressed to show a colored LED (in a window under the button) indicating a range of remaining power in the battery. Those colors and ranges are in the QS Guide. Red, Green and Blue. Blue means fully charged but the battery isn’t really fully charged to 100% until the red light on the charging brick turns from red to green.
- Install the kickstand first (more below). If you’re working alone it’ll hold up the bike while you work. The kickstand isn’t even mentioned in the instructions so as I went page by page through the QS Guide, I struggled to get the front wheel on with nothing but me holding up the swaying bike. The brilliant thought came to me – – Find out where the kickstand is in the directions. It isn’t mentioned. The kickstand fits a space on the left side of the frame at the rear wheel. It’s a space into which only the kickstand can fit, and has two allen screws in the frame that match the kickstand screw holes perfectly. There is no way the kickstand can accidentally get mounted anywhere except its proper location. It sure held the bike up better for the remainder of the install. Put the kickstand on first, I’d say.
- I don’t think it’s important to align the front brakes immediately after installing the front wheel, as the directions specify. I adjusted the brakes as my last step before riding.
- The directions for brake alignment in the QS Guide are confused. The text got into the manual before being edited so it’s unclear. I can understand needing to use up a bunch of mis-printed QS Guides with an ‘oops’ or two in them but this is a critical safety adjustment, right? This calls for a special sheet on brake alignment that could be added to the directions.
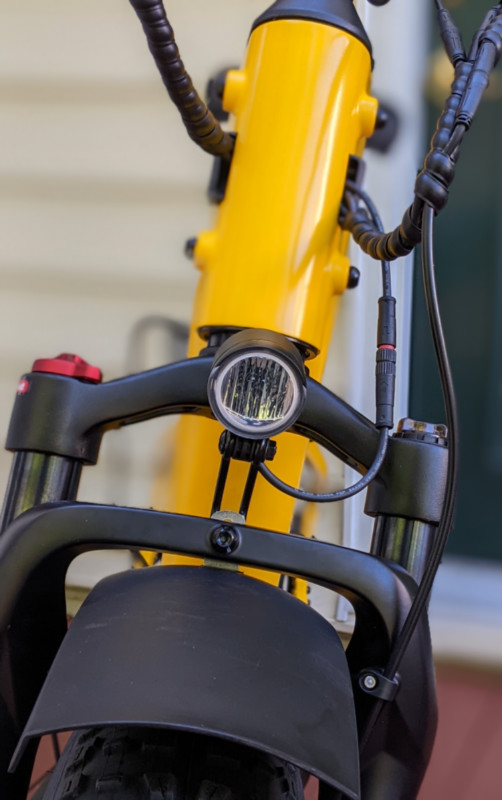
- The front fender should be mounted very loosely because once the handlebars are mounted the directions call for mounting of the front light. The light is held by the same screw and nut that holds the fender. If the nut is loose it’ll be easier to get it off for light mounting, then tighten it completely to hold the fender and light securely.
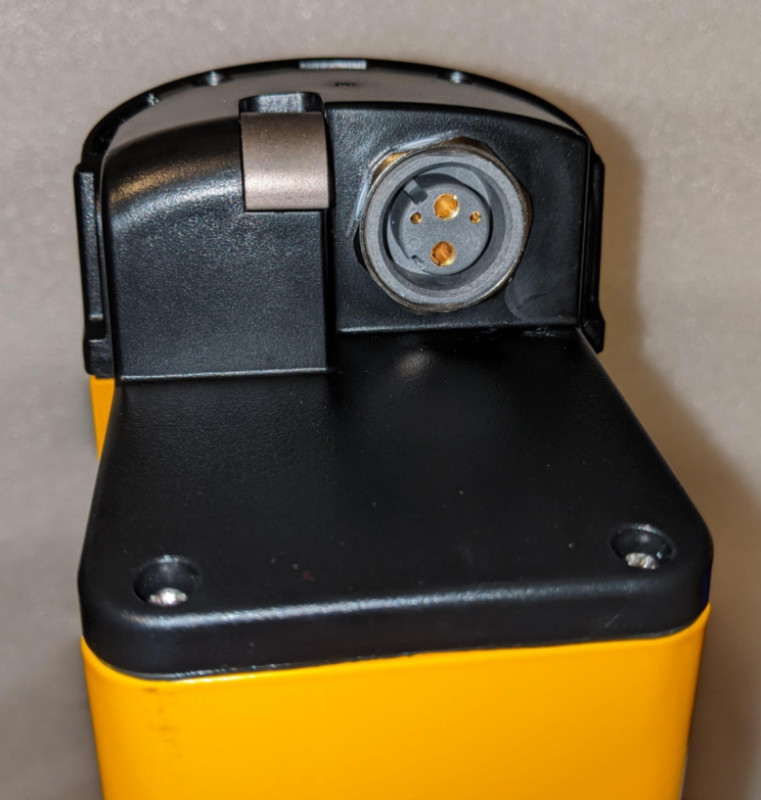
Here’s the business end of the battery. This connector at the top of the battery connects as you tilt it forward into place, when the battery is placed into the frame bottom first. It takes a firm press to lock the battery securely into place. The battery key is needed to remove it.
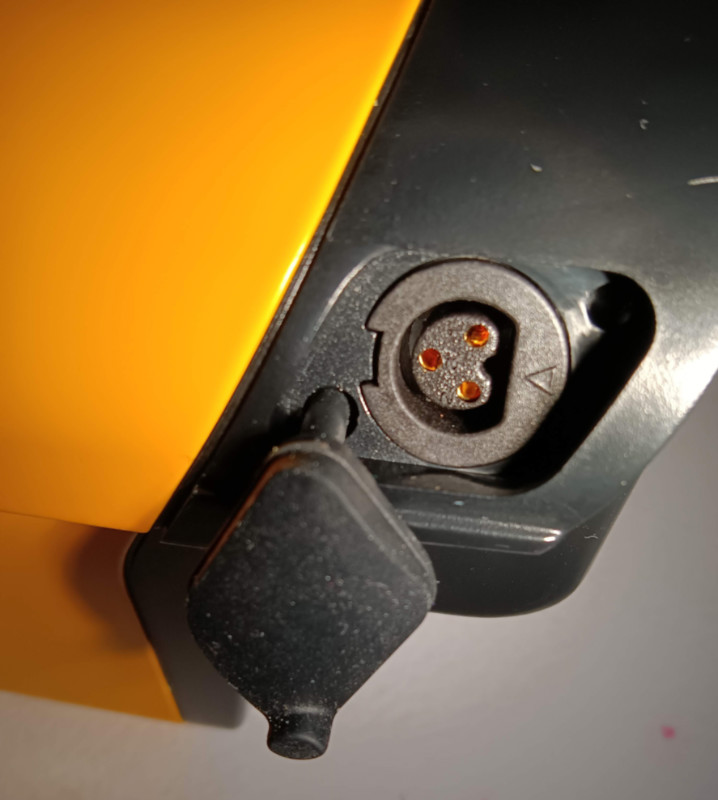
The battery charging port. Charging is fine with the battery on or off the bike.
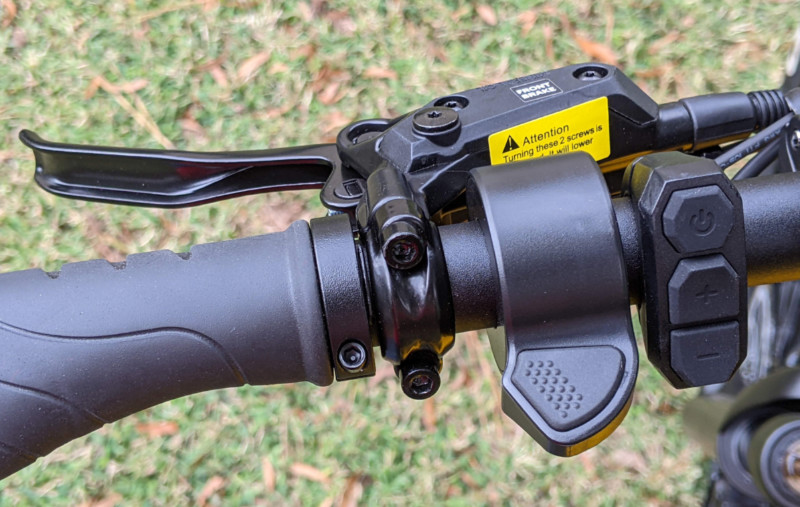
These are the left side controls from left to right; Brake lever, throttle and the bike power switch at the top, and pedal assist level +/- switches.
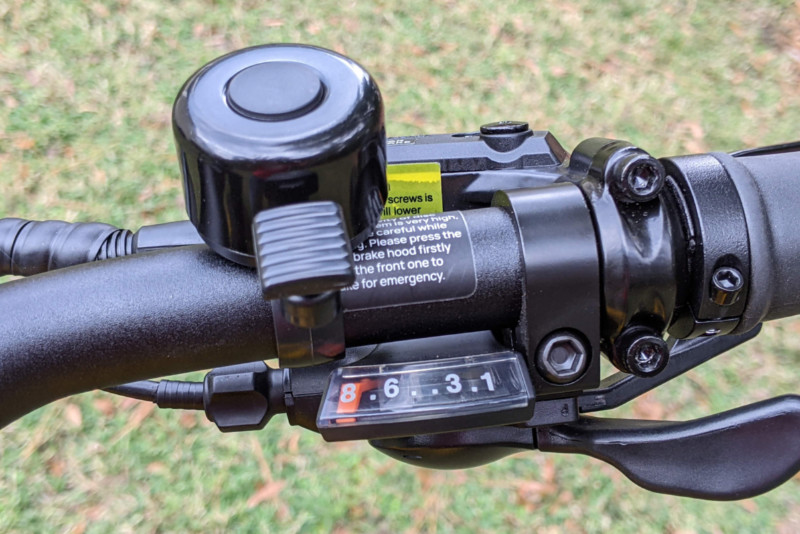
The right side controls are seen here. The thumb lever at the bottom right changes gears up/higher. An index finger trigger behind the hand grip lowers gears. The ‘ding-ding’ bell is super helpful and a nice courtesy to use when passing pedestrians or slower bikers.
Performance
To everyone’s first question, ‘how fast does the Nomad 1 go?’ I regularly achieved a bit over 20 mph using the throttle alone (no pedaling). 20 mph is the stated top speed capability. 21 mph on long, level, straight roadways happened from time to time. The Nomad 1 doesn’t get from zero to 20 in breakneck speed, but it doesn’t take long. 20.6 mph was my more common top throttle speed. I did reach 22 mph with the Nomad on a 25 degree downhill and occasional level roads. But 17-20 mph feels just great for me for neighborhood rides with leaves on the roads and light traffic passing through.
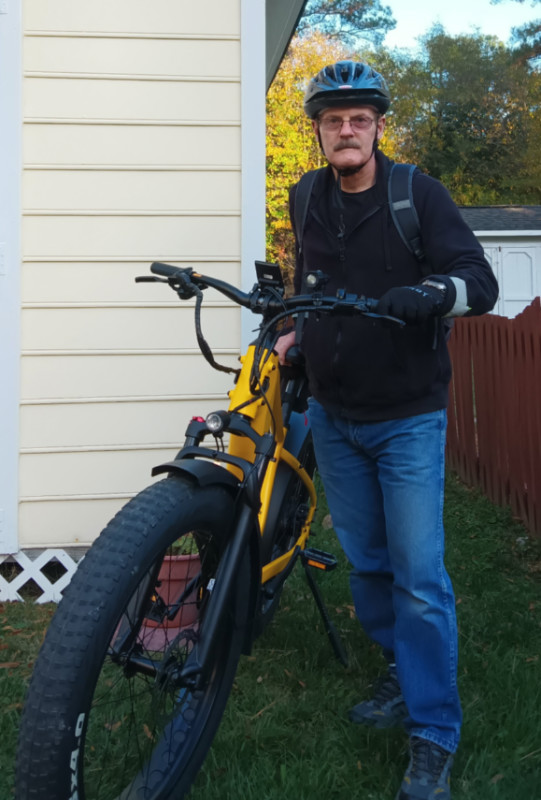
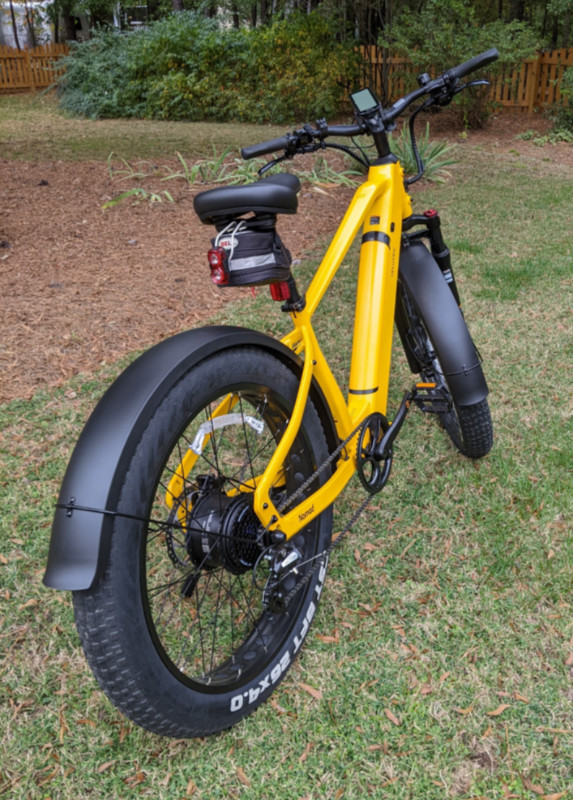
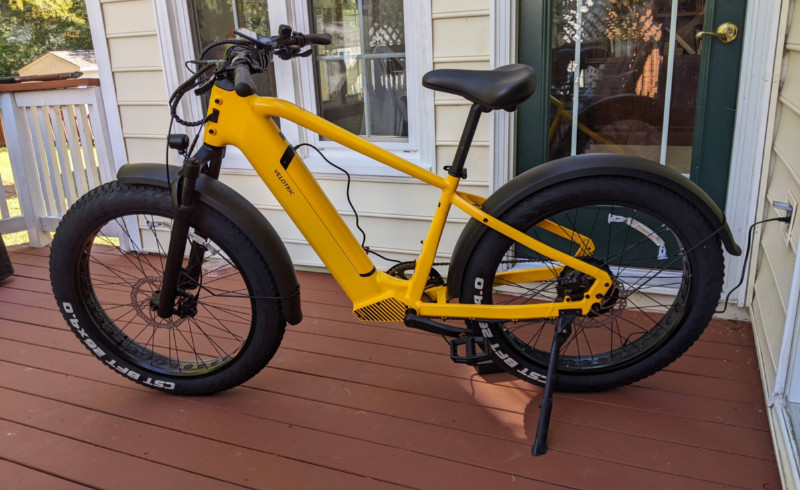
A serious man taking his aluminum alloy horse out of the stable.
I often ride through a gated neighborhood with radar speed signs that show the driver’s speed. They pick up bikes too. The signs show I am at 17 or 18 mph when the bike display shows 20 mph. I want to think the bike is right, but who knows?
At about the 30 mile point, on some rides using throttle alone I could only achieve 18.2-18.6 mph on level roads and a bit over 19 mph pedaling very hard downhill. I reported the issue to Support and they (sigh) wanted the bike back to pin down the problem. They sent another Nomad 1. It took me 2 hours to dissemble the first bike, protect its parts like Velotric does when they ship them, and get the bike back into the shipping box. I’d rather not have to do that again.
So, I have now assembled two Nomad 1 bikes, disassembled one and repacked it into the shipping box bike # 2 came in. I think with this resume I could build bikes for Christmas sales at Big Blue or Big Red!
Assembly of bike #1 took me 2 hours, but I was intentionally trying to be slow and careful. I didn’t want to make assumptions so I went page by page through the QS Guide. Bike #2 got built faster. From opening the box top to fanny on seat, that one took 90 minutes.
There are plastic covers on the front wheel bolts. One was smooth and cone-shaped. I thought it might have been the design of the bolt, but it is a safety cover and should be pulled off so the bolt can be tool-tightened.

This is the front brake caliper and the rotor between the brake pads.

Getting the front wheel on while working solo with no bike service rack took me more time than it should with both bikes. When I assembled my wife’s bike recently the front wheel was on and tightened in 30 seconds. But those weren’t disc brakes and her bike weighs 28 pounds.
With the Nomad 1, the rotor has to fit between the brake pads while aligning the left and right axle bolts into the front fork. I didn’t want to damage anything so I wanted to be gentle getting the rotor into the brake caliper, between the brake pads. There is a red plastic safety spacer between the brake pads. That is pretty obvious and should be removed before mounting the front wheel.
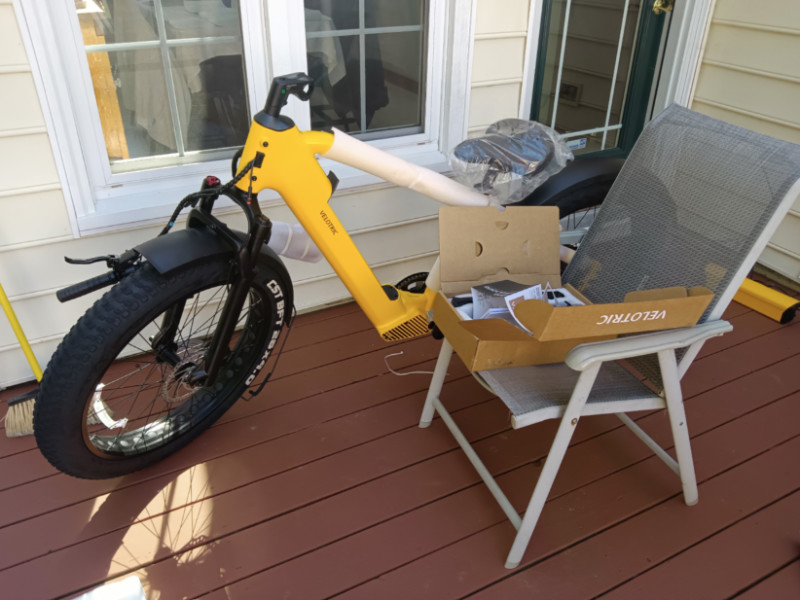
I missed a point in the directions and I wish it were clearer. On bike #1 I installed the handlebars in the stem mount backwards. Embarrassing, but it looked cool. I only rode 12 miles that way. The directions say, “Straighten up the stem 90 degree.” There it was, I guess. Not quite the way I’d put it, but there it is. My goof.
The stem is shipped 90 degrees ‘backwards’. My bike shop says that’s a common way bikes are shipped. I missed it. No, the handlebars weren’t backwards, the stem was.
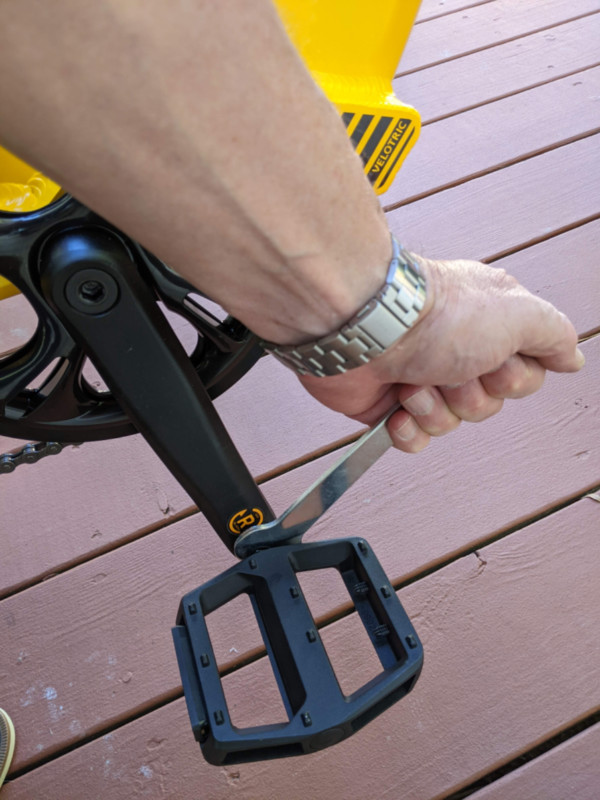
Pedal tip – As on most bikes, the right pedal bolt screws into the crank arm clockwise. The left pedal screws in counterclockwise. That breaks the ‘righty-tighty, leftie loosie’ rule for bolt and screw attachment in most parts of the universe, but it’s normal for bike pedal attachment.
Step Through or High Step bike style? I requested the High Step to review because the color choices were different than the Step Though choices. My 30 inch inseam is just barely safe if I step forward off the saddle, straddling the frame with my feet on the ground. I like the extra frame stability of the High Step given the upper bar being welded in. But I’ve seen close-ups of the welds of the Step Through bike and it too is engineered to be solid, safe and reliable.
On my first ride with bike #1 I could immediately tell the front wheel was not ‘trued’ from the factory. Either that, or it got out of true during shipping, which seems unlikely. As I looked down at the front tire spinning, it wavered. I don’t trust myself with spoke adjustment. I’ve tried it and it didn’t go great. The wheel isn’t way out of true but it should be right, from the factory.
The brakes on bike #1 were very noisy too. There was loud moaning noise coming from the front and rear rotors whether walking the bike, riding or braking. I could have fooled around with brake adjustments more, but decided to let a pro get my bike safe and ready. This too should have been made right from the factory.
Based on the shop cost I really should learn to adjust my own spokes and brakes, but thanks to Conte’s Bikes in Richmond, Virginia, they turned me around in a day. The tech who worked on my bike said he had a challenge on the rear brakes and had to add some washers and spacers to stop the rotor noise.
Be sure to take your first ride on an e-bike with pedal assist off or at level 1. Get a feel for the bike’s weight and handling before using pedal assist. Then use level 1 and get used to it. Go straight. Corner. Feel the pedal assist come on and be ready for more powerful pushes from the motor at higher assist levels. Move on up the pedal assist levels to see how they make the bike and your body react when they kick in.
The Nomad allows about a half pedal crank before pedal assist kicks in. I like that time to adjust and be ready for the motor’s push so the bike doesn’t feel like it’s getting away from me.
I wondered where the reputed 20 mph was when I was cruising on throttle alone at pedal assist level 3, then it occurred to me, maybe 17 mph was what the bike was supposed to do at that pedal assist level, even using just the throttle. That was it. When I changed to pedal assist level 5, then used throttle alone, 20 mph came pretty soon.
I had to be mindful of pedal assist level 4 or 5 when cornering. I’d coast into a turn and start pedaling early in the turn and pedal assist would kick in before I had completed the arc. There is a sudden push you have to be ready for. Pedaling in a turn with pedal assist 4 or 5 on, on a sandy, wet, or gravel road, or if traction slips, could make for a wipeout.
I had a big mental grin the first time I was doing 20 mph in pedal assist level 5 on a slight uphill road section. At that assist level I don’t count the ride as serious exercise but as serious fun. With pedal assist set at level 1 to 3, most pedaling does increase the ol’ heart rate, just not as much as with a person-powered bike. Good old person-powered bikes excel as an exercise form.
Now, if you put your Velotric Nomad 1 at pedal assist 0 and just pedal it around, you’ll be pushing its 70 pounds yourself and will develop the leg muscles to prove it. I plan to ride this Nomad 1 far and fun, and not be in a heap of sweaty-ness when I arrive. I’ll pedal some and use a lot of throttle and pedal assist.
Going from a near stop, to pedaling again in pedal assist 5 almost made me laugh. The speed of the bike was not attributable to my pedaling, it was the e-bike motor doing its thing. It felt like a scene from a comedy as I pedaled a little but the bike sped up a lot.
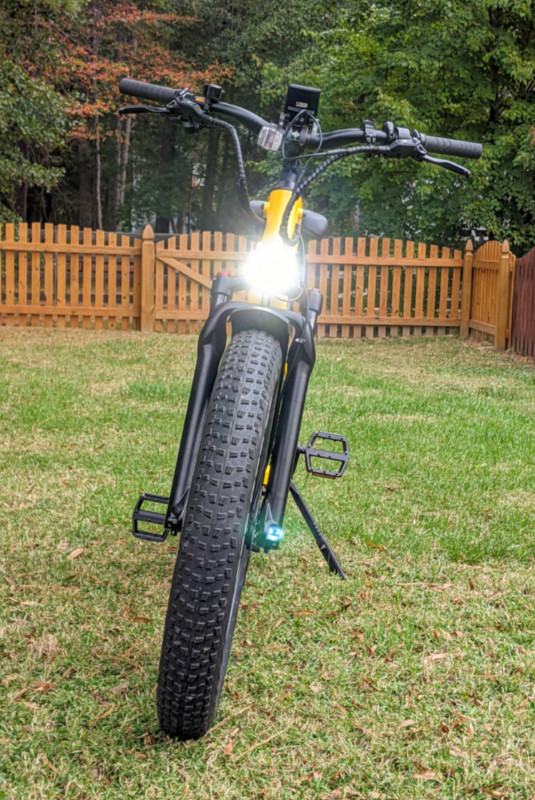
The front light is a very nice, bright LED light. In daylight, the Velotric Nomad 1 is very visible to traffic or people in front of the bike. At night it casts a wide and relatively long diffused beam, meaning there is no tight focus of light. Since it’s a wide beam, more of the roadway is visible. The light can seem like a small high-beam to oncoming traffic. I aimed mine down a bit after my first night ride.
The supplied tail light is visible at night but only has a small, single, LED emitter, does not flash, and is powered by two button cell batteries. The batteries are marked as 3 volts but they checked at 1.8 volts. I set this light aside.
I recommend getting a brand name, ‘daylight bright’, flashing tail light as your first accessory. I also like to use my flashing headlight I mounted to the handlebars to conserve the bike battery and its flash is unmissable.
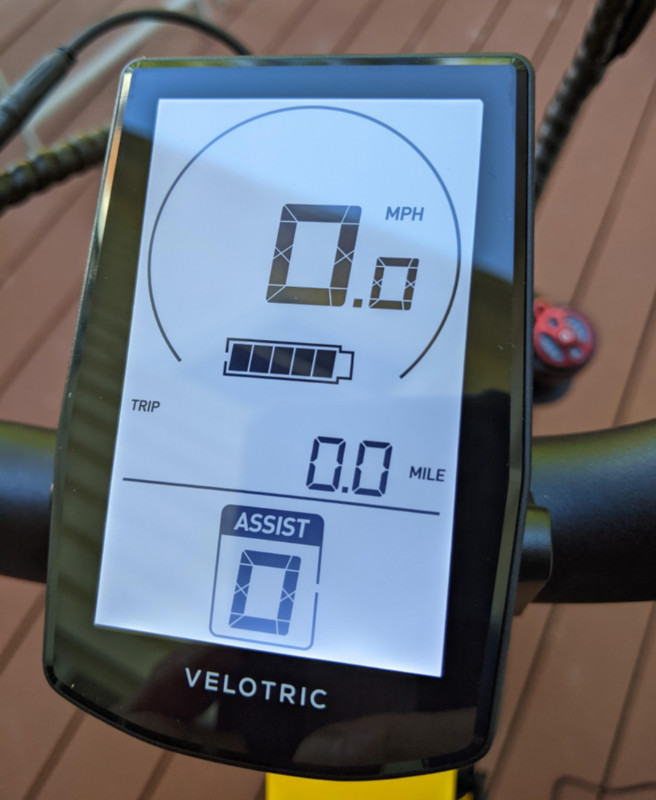
While the LCD display dims with the built-in headlight on, it is too bright even with the headlight off. There are brightness settings for the display but I have it dimmed as far as possible and still find it too bright at night. I may try a piece of red cellophane over the display for night rides or a piece of t-shirt cloth I can flip up to read the display.
My car bike rack turns out to be inappropriate for carrying an e-bike. It’s made to carry two bikes and is rated for 70 pounds total. The Velotric Nomad 1 with the battery removed is under that limit. But according to my bike shop, the weight distribution of an e-bike the size of the Nomad 1 needs a dedicated e-bike car rack. Mine is really made for a traditional mountain or road bike or two.
E-bike mileage claims need footnotes explaining the conditions under which they are achieved. Everyone’s mileage experience will vary based on body weight, terrain, stopping and starting vs. steady runs, etc. There are a lot of variables at play with an e-bike’s range.
I wanted to see how many miles the Velotric Nomad 1 e-bike would deliver on a full charge using throttle alone, before the battery got to one bar capacity. I don’t like to completely deplete lithium ion batteries.
I achieved 25.7 miles from a full battery down to 1 bar on the power readout of the bike’s display, using mostly the throttle. I pedaled probably less than ½ mile during this test. I weigh 170 pounds. I never used the headlight during this test. This mileage was accumulated over several rides in a variety of temperatures as we’ve transitioned from summer into cold fall weather during this review. I brought the battery indoors on cold nights.
Using pedal assist most of the time would extend the mileage delivered by the battery, and bring it closer to the 50 mile range claim.
Be safe out there everyone. On a full sunlight, clear weather ride one morning, as I returned into my own neighborhood, a driver to my right who was looking directly at me, came out from a stop sign to make a left turn right in front of me when I just entered into a left turn. I had signaled my turn with my arm for 10 seconds, from the right of way / no stop lane. She missed me by about 2 feet. Again, I had the right of way, I properly signaled, I started my turn, and she came out from a stop sign to turn right in front of me.
The Velotric Nomad 1 has great brakes. I pulled them hard, skidded a few inches and I just missed hitting the side of her car as it passed in front of me. I shouted a child-safe, non-profane ‘COME ON!!!’ directly at the driver’s window. (I pleasantly surprised myself.)
I have a referee whistle on an 8” lanyard hanging from my helmet strap. I guess I should have blown it to really get her attention but I don’t whistle at every intersection. I didn’t think it’d be necessary with her looking at me, my left arm signal lasting so long, and with no other vehicles anywhere. I’m over it, but we can never relax while mixing with any vehicles, anywhere.
If I may over state: Expect car drivers to not see you, and not care about your presence on the road.
My suggestions for safety equipment once you have a helmet on:
- Hunter orange or safety yellow vest or top
- Wide, reflective wrist bands for night time turn signaling (I made mine from an abandoned road-worker vest)
- Loud noise-maker
- Daylight bright, flashing headlight and tail light.
- Gauze pads, bandaids and roller-gauze wrap in your seat bag.
A consideration when buying any bike online is ‘what if I have to return it’? The Nomad 1 comes with a one year warranty but if it needs work, I assume it would have to go back to Velotric. One of the larger FedEx offices in my area said they would not accept an e-bike for shipment with the battery in the box. Well, they sent it to me that way from Velotric. Your experience may vary but I’m still waiting to hear Velotric’s decision on how to get two bikes back from me. (One was sent to me in error.)
Velotric decided they wanted my first Nomad 1 back to figure out why it would only do 18 mph. It took me two hours and a good deal of exercise to disassemble the bike and package it into its original box, padded, protected, supported, very nearly as Velotric sends them out, working alone.
Pro packaging tip I hope you don’t need: I stood the box up and rolled the bike into the box. I had the handlebars detached and hanging to the right, with the front fork upright, ‘wheelie’ style, rolling slowly on the rear wheel. Then I lowered the bike box to the ground and continued packing through the open box top. It sounds easy but it took several tries, and it worked.
What I like
-
-
- Excellent build quality of all components (except the tail light).
- The Nomad 1 rides comfortably.
- The Nomad 1 has plenty of power for me. 20 mph maximum is just great.
- The Nomad 1 makes people grin when they see it.
- Timely responsiveness from Velotric email and phone support.
-
What I’d change
-
-
- Brake alignment directions in the QS Guide should be corrected and improved.
- The main Owner’s Manual gives no detail about brake alignment, and the QS Guide is too brief on the topic.
- Wheels should be ‘trued’ from the factory. (The second bike’s were perfect.)
- There should be no loud brake and rotor noise on a new e-bike. (Bike 2 was perfect.)
- Provide information about fork suspension adjusting in the manual or QS Guide.
- The Owner’s Manual should be re-made with useful information for the Nomad 1.
- Quality control may need to review their final inspection procedures.
-
Final thoughts
The Velotric Nomad 1 is a very well-built e-bike. And it is head-turning good looking. The components are of very good quality, and the ride is comfortable. The Nomad 1 bike should provide riders with years of grin-making, super fun rides at a price far less than some pay for quality as good as the Velotric Nomad 1 electric bike. Also check out our Velotric Discovery 1 e-bike review.
Price: $1399
Where to buy: Velotric Nomad 1
Source: The sample of this product was provided by Velotric.

Gerber Gear Suspension 12-in-1 EDC Multi-Plier Multitool with Pocket Knife, Needle Nose Pliers, Wire Cutters and More, Gifts for Men, Camping and Survival, Grey
(as of June 19, 2026 18:47 GMT -05:00 - More infoProduct prices and availability are accurate as of the date/time indicated and are subject to change. Any price and availability information displayed on [relevant Amazon Site(s), as applicable] at the time of purchase will apply to the purchase of this product.)
Gadgeteer Comment Policy - Please read before commenting
Thanks Lex! Appreciate the info.
Great “ride up” ;). I’m toying with the idea of an e-bike, and this helped
Velotric namod 1
So amarelos
Excellent thorough review; i am debating moving off buying the Aventon Aventure for the Nomad; just seems like a much better deal. But what happened to the $1399 price?
Thanks