REVIEW – 3D printers are a regular review item here at The Gadgeteer, and I’ve been waiting in the wings to tackle a printer which matches my experience level as a beginner. In addition to documenting my experience with the Monoprice Joule 3D Printer DIY Assembly Kit, I’ll also be sharing some of the resources I found useful in learning more about 3D printing. Let’s find out if I can translate those into some successful prints!
What is it?
The Monoprice Joule DIY Assembly Kit is a build-it-yourself 3D printer as the name implies. This printer is marketed and geared towards beginners, as the assembly process allows you to gain some familiarity with the components and how they work with each other. I work in tech and often find supporting something I made or implemented is far easier than trying to troubleshoot someone else’s work, so I appreciate the approach here. Not to worry – you won’t be soldering circuit boards or anything that involved, but there is more work here in assembly than what I’ve seen from other printers.
What’s in the box?
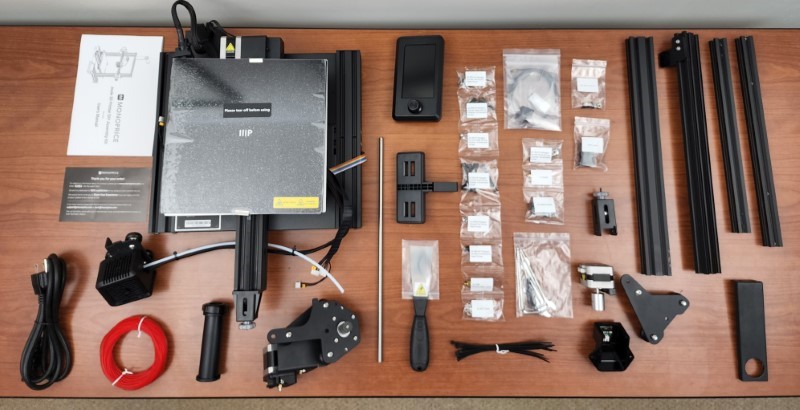
- Everything you need to assemble the Monoprice Joule 3D printer, and start printing!
- SD card with USB-A adapter, includes test prints and software.
- Assembly and usage instructions.
Hardware specs
| Print Technology | Fused Filament Fabrication (FFF) |
| Print Area | 220 x 220 x 250 mm |
| Number of Nozzles | 1 |
| Filament Diameter | 1.75mm |
| Nozzle Diameter | 0.4mm |
| Layer Thickness | 0.1 ~ 0.4 mm |
| XY Axis Precision | ±0.2mm |
| Maximum Print Speed | ≤ 180mm/sec |
| Normal Print Speed | 30 ~ 60 mm/sec |
| Nozzle Temperature | ≤ 250°C |
| Build Plate Temperature | ≤ 100°C |
| File Format | STL, OBJ, AMF |
| Print Modes | microSD™ card, online |
| Input Power | 115 VAC, 60Hz or 230 VAC, 50Hz |
| Maximum Power Consumption | 350 watts |
| OSD Menu Languages | English, Chinese |
| Compatible Operating Systems | Windows® 7/10, macOS® |
| Compatible Slicing Software | Cura, Simplify 3D |
Design and features
- Large 220 x 220 x 250 mm build area
- Easy assembly using the detailed assembly guide
- Color 4.3″ LCD display
- Fast heating in 5 minutes or less
- Auto‑resume feature continues printing after power loss
- Heated carbon‑silicon glass print bed
- All‑metal frame reduces vibrations
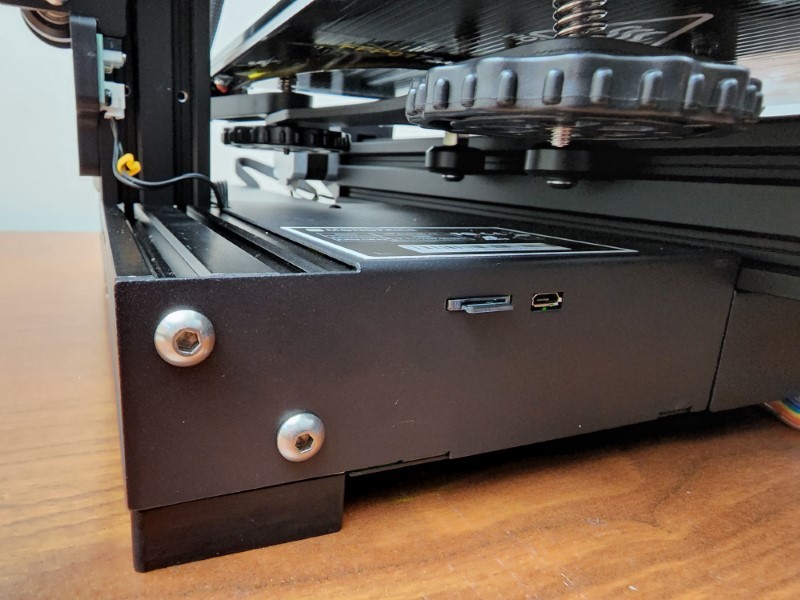
- MicroSD™ card slot and USB connection options
Getting started
Monoprice has done a great job of lowering the barriers of entry to 3D printing, both in terms of printer pricing and by making some great educational resources available.
Common Terminology in 3D Printing
Types of 3D Printer Filaments (this is in no way exhaustive of everything, but covers what the Joule can do)
How to Level a Print Bed
Not from Monoprice, but a great reference to the types of 3D printers is available from ProtoLabs.com.
If you noticed that the FFM printer type is not listed on the ProtoLabs blog, but sounds a lot like the FDM printing technology… there is a reason for that. There is a storied history between the terms, which is detailed by William Stone at 3Dprintingspot.com. This article also covers some of the common FFM/FDM printer types you may see, and different extruder technologies.
Lastly, I found this video particularly helpful from YouTube channel stem.t4l with getting started on the FlashPrint software included with the Monoprice Joule.
If you’re new to 3D printing, don’t be discouraged if a lot of the content in these articles or videos seems daunting. Like most things, context is important to understanding. Once I dove in and started printing on the Monoprice Joule, I found things began to make a lot more sense.
Assembly and performance
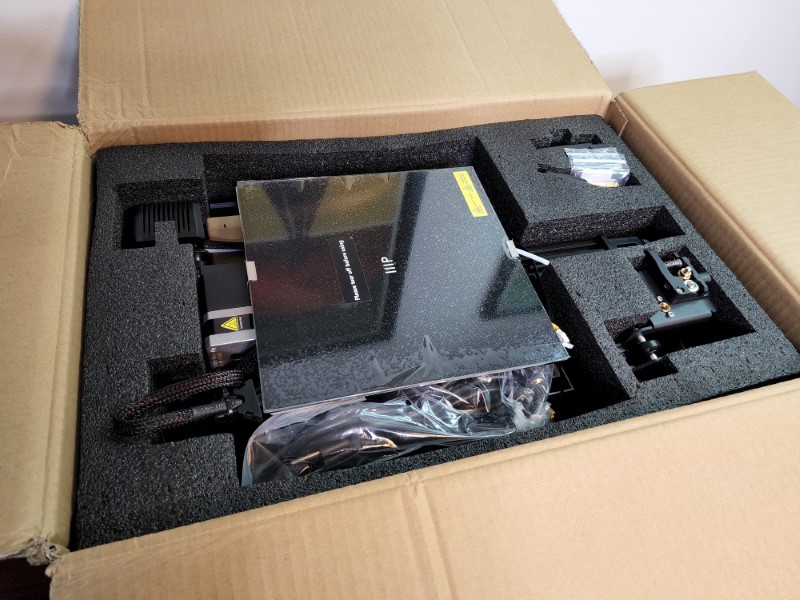
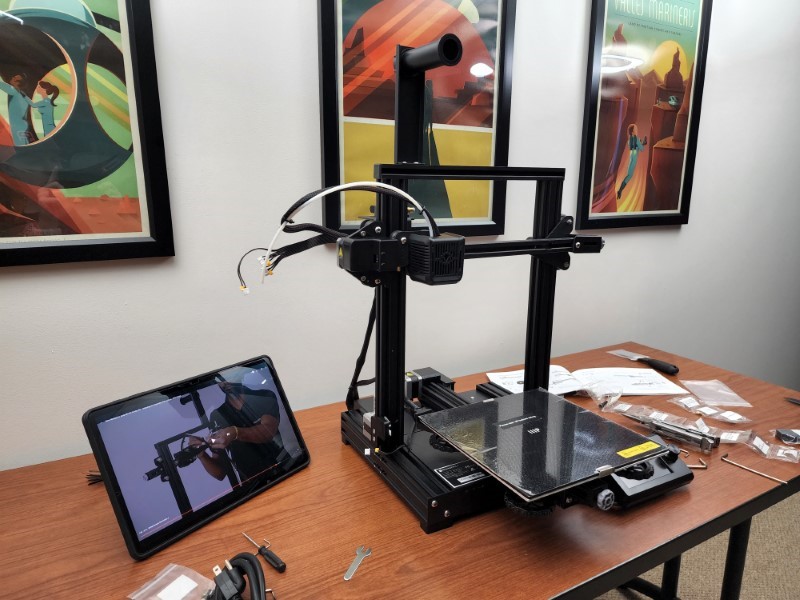
The Monoprice Joule DIY Assembly Kit arrived well packaged, and with all of the tools necessary to get straight to building. Included in the box is a set of paper instructions, which I set aside in favor of the official Monoprice YouTube assembly video.
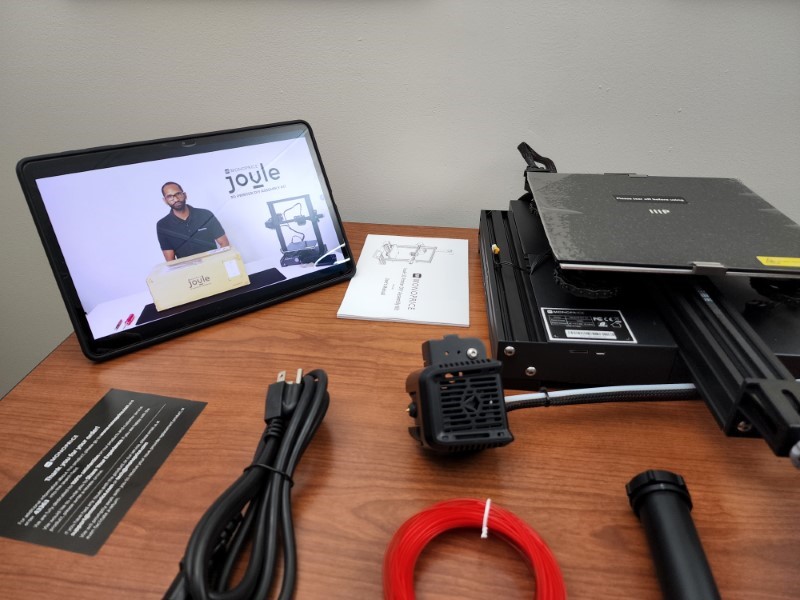
Assembly took about an hour and half, and in retrospect, it would have probably been faster if I watched the video in its entirety before digging in. I did need to reference the paper instructions a few times as the angle of the video wasn’t always optimal to understand how some of the parts came together.
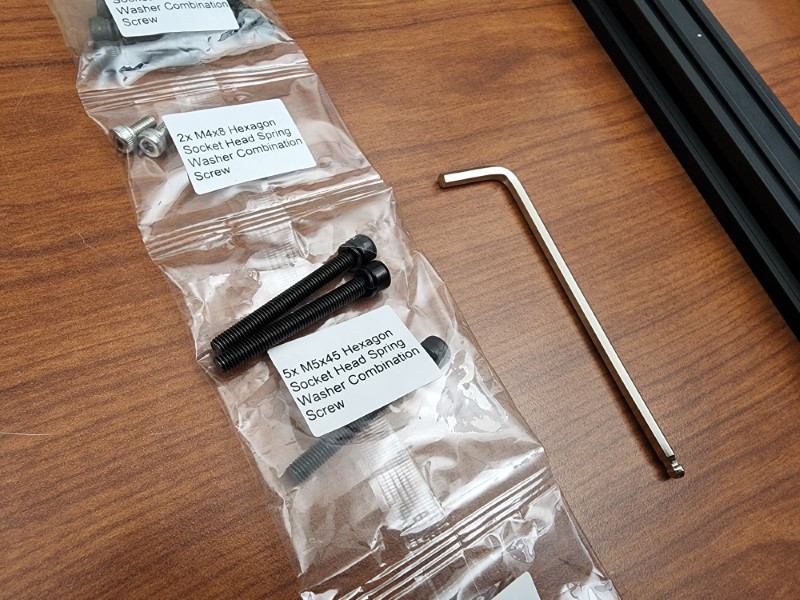
Having the screws clearly labeled and in their own respective packaging was very helpful. I was surprised at the quality of the tools provided, and didn’t find a reason to use any of my own tools for the build process (except for that one time I dropped a screw and needed my pliers to fish it out from a channel in the frame rails).
Overall, I’d say the assembly was about what I expected – not overly difficult, but some patience is required. I value good cable management, and I feel like there’s an opportunity to clean up the various wires and tubes on the Monoprice Joule, but I’ll need more time with it to figure out the best way to achieve that without inhibiting performance. I was also a bit surprised that the ribbon cable to the control panel is as exposed as it is. Not likely an issue as this isn’t moving around much, but notable.
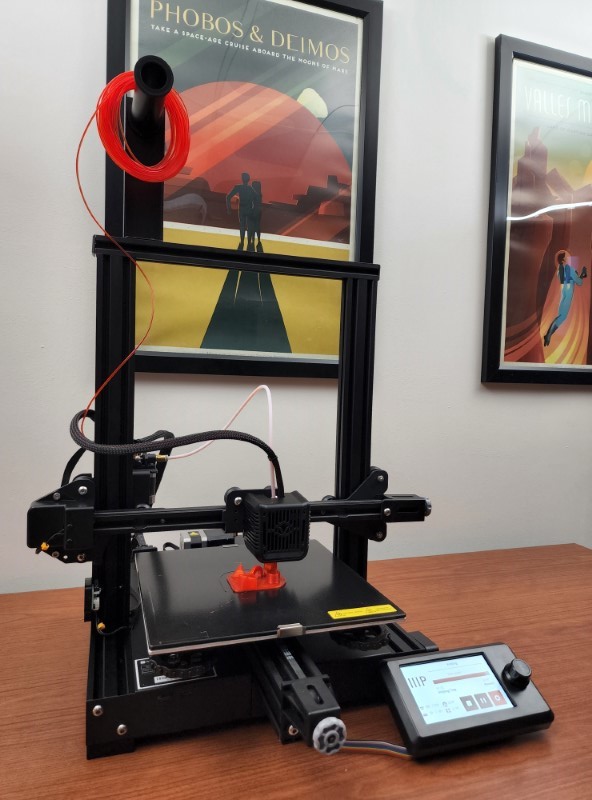
Now that the Monoprice Joule 3D printer is assembled, let’s print!
Wait – not yet. The Monoprice Joule 3D printer does not come with an auto-leveling bed, so we need to do this manually. While the assembly video and instructions touch on this, I found the bed leveling guide linked above did a better job of explaining the process. I made the mistake of rushing the leveling process the first time around and my first test print didn’t go well.
The large leveling adjustment wheels found in each corner of the print bed made leveling adjustments by hand easy, without the need for any tools. With the bed properly leveled, I dialed up one of the test prints from the included SD card and set the printer to work.
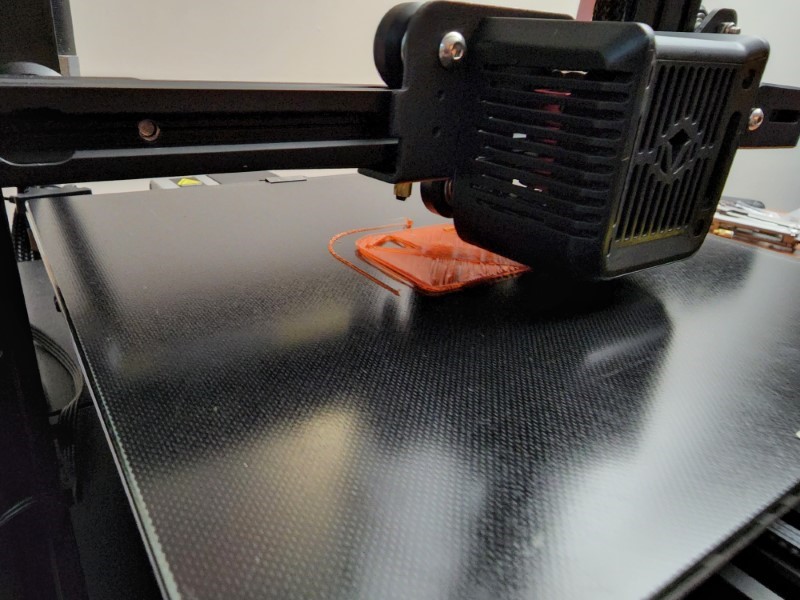
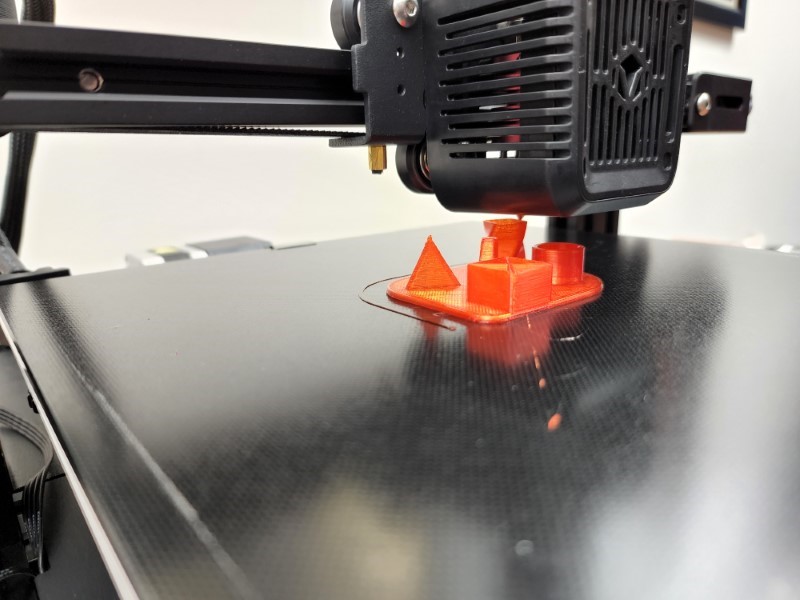

Powering the printer on, the fan for the extruder immediately turns on regardless of if there is a print in progress or not. I found the sound to be noticeable but not over the top. The actual noise during printing is less than I expected, and largely was just the sounds of the print bed moving. A common theme I’m finding in 3D printing is patience. After gawking at the extruder and print bed dance for ten minutes or so, I realized this was going to take a while – and the control panel confirmed I had over an hour to go. I had already installed the software on my PC before kicking off the test print, so I headed over there to queue up the 3DBenchy print.

The software included on the SD card is FlashPrint 4.6.4 which appears to be specific to select Monoprice printers. If I download the latest vanilla FlashPoint 5.3.4 (as of this writing) – there is no option to select the Monoprice Joule as an option in the software setup. Further, I was unable to readily locate this version of FlashPrint on the Monoprice website. For these reasons I’d suggest immediately making a backup copy of the software installer, to avoid any headaches should you need it later and not have access to the SD card.
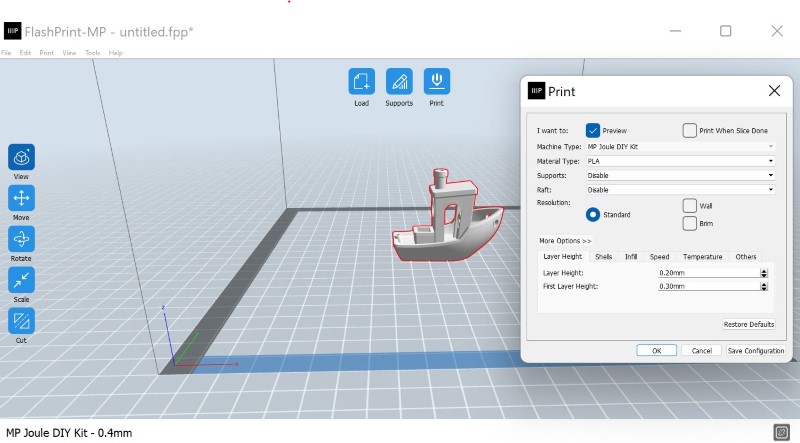
I did find the software interface easy to figure out, and there’s a lot here to learn with regard to print setup and settings. With the STL file uploaded and configured with some of the basic settings such as material and supports, I was able to generate the necessary .gcode file for my next print and drop it onto the root of the SD card. I’m already wishing this printer had a wireless capability, as that would make life a lot simpler for setting up prints.
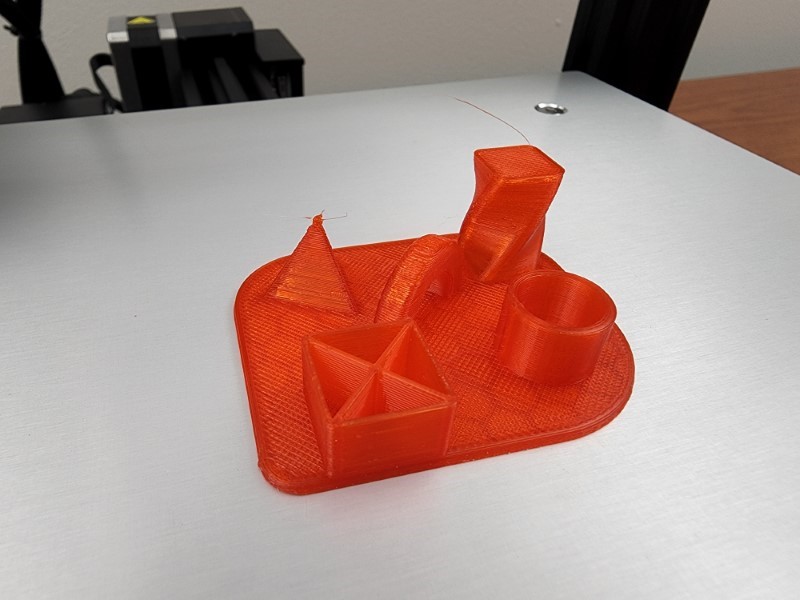
With my first test print completed, I was impressed with the results. Slight cleanup is needed at the tip of the triangle in one of the corners of the tower, but overall it came out great. I suspect I could improve on this by making adjustments to the layer width.
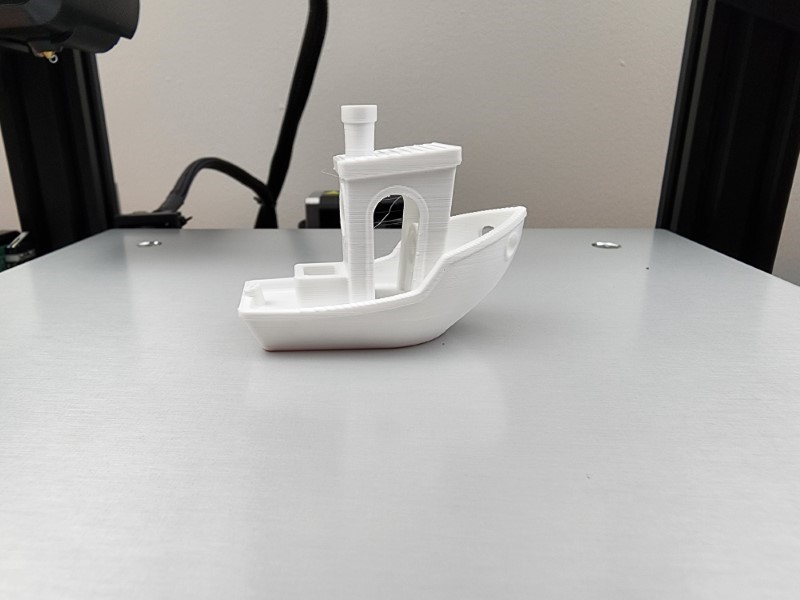
Finally, the 3DBenchy result. There is some extrusion webbing left between the archways, but by and large, I am again impressed with the outcome. I can see some opportunities to even further dial things in and improve on (what is already good, to my eye) print quality, considering that these prints have been performed with minimal configuration.
What I like
- Hands on assembly approach helps with understanding how the printer works.
- Low barrier of entry with price point.
- Relative ease to get a successful print.
What I’d change
- Assembly video could be better improved with different camera angles at certain points.
- Wireless printing capability.
- Auto leveling feature. While leveling isn’t necessarily difficult, it’s one less thing to worry about.
Final thoughts
The Monoprice Joule 3D print has been a lot of fun to assemble, work, and learn with. The additional assembly steps are worth the effort to work through, as it allows you to gain familiarity with how the extruder X-axis moving assembly functions. I am most looking forward to experimenting with different filament types and seeing how different print settings affect print quality. I would encourage anyone on the fence about getting into 3D printing to consider it as a solid entry point.
Price: $199.99
Where to buy: Monoprice
Source: The product sample was provided by Monoprice for review.

HATCHBOX 1.75mm Black PLA 3D Printer Filament, 1 KG Spool, Dimensional Accuracy +/- 0.03 mm, 3D Printing Filament
(as of July 9, 2026 18:55 GMT -05:00 - More infoProduct prices and availability are accurate as of the date/time indicated and are subject to change. Any price and availability information displayed on [relevant Amazon Site(s), as applicable] at the time of purchase will apply to the purchase of this product.)
Gadgeteer Comment Policy - Please read before commenting
This is a general question and not specific to this printer but I look at the stuff that people are printing w 3d printers and I wonder “why”? The printers may be technical wonders but what does anyone do w the little things that they appear to be printing. Is a 3d printer actually useful or are they just fun toys.
Hi Donald! That’s a really good question. At the hobbyist level, I’d say they’re both. For the sake of a review we don’t have a lot of time to print and assemble something elaborate, which may explain why you generally see smaller items in review posts. The 3D Benchy (tugboat) is a standard stress test, so there are lots of those to go around 🙂
I am really impressed with the group e-NABLE (https://enablingthefuture.org/). This is a community which helps connect volunteers with 3D printers to those who could benefit from a 3D printed prosthetic.
The list of projects I’m going to try to tackle with the printer are: custom pegboard tool holders for a few items in my workshop, cable management for my desk, and some figures for a DnD campaign. Also, my bike uses a proprietary seat post and I’d like to work up a custom adapter for my rear light as well. Lastly, I also have a few collectables that I’d like to display that I’ll need to come up with a custom design for.
Of course they are fun and lots of toys and other “useless” stuff is printed. But the are useful tools indeed, from the list of useful things I printed over the last year: cases for custom electronic components, replacement feet for ladders and various furniture, replacements for various shackles / fixtures, tool holders for the workshop, tripod clamp adapters for phones and tablets, etc., etc., etc.
YMMV but I’m a fan.
Is this 3D Printer MADE IN USA, CHINA or elsewhere… I stay away from Made in China.. stuff.