REVIEW – Replicators are no longer just something that you see in sci-fi movies anymore. With a 3D printer, you can imagine something, model it, and print it. If you’ve wanted to jump into 3D printing but haven’t made the leap because you feared it would be too hard to figure out, I have a 3D printer to show you today that might change your mind. It’s the Creality Sermoon V1 Pro 3D printer, and it’s easy, compact, and quiet. Let’s take a closer look.
What is it?
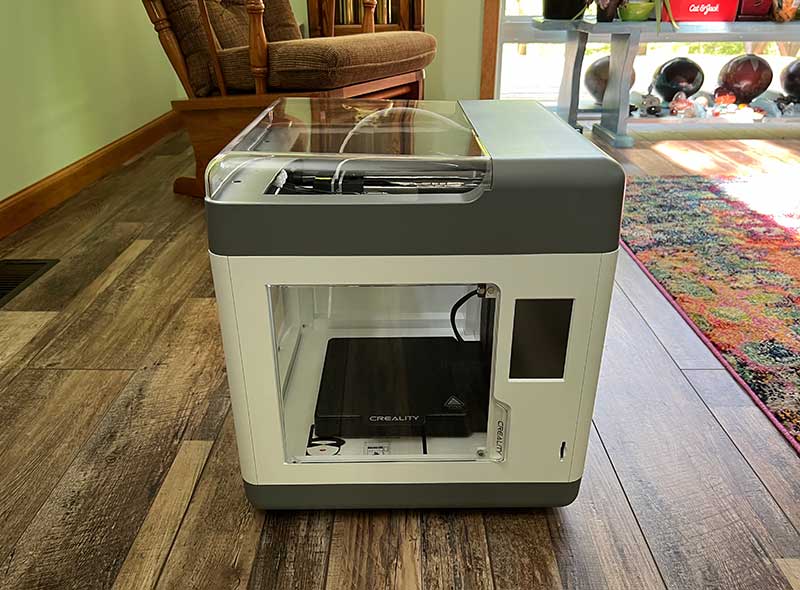
The Creality Sermoon V1 Pro is an enclosed 3D printer that’s great for both beginners and intermediate makers.
What’s in the box?
The Creality Sermoon V1 Pro 3D printer comes well package and fully assembled which is awesome!
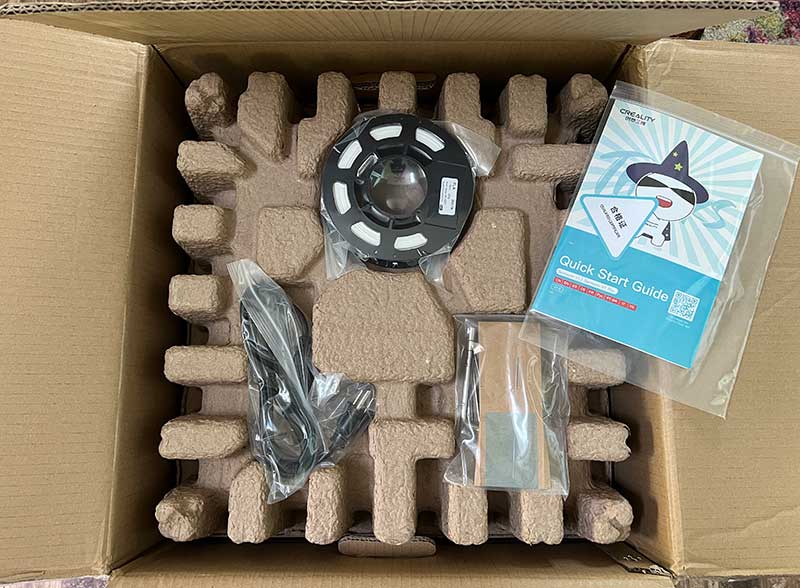
- Creality Sermoon V1 Pro 3D printer
- Clippers, screwdriver, nozzle cleaning tool, Allen wrenches
- Replacement nozzle
- Full roll of white filament
- Power cable
- Quick start guide
Hardware specs
- 175 x 175 x 165mm bed size
- Magnetic bed
- Sprite Direct Drive Extruder
- 4 mm print nozzle
- PLA, ABS, PETG filament
- Filament run out sensor
- Power recovery
- Built-in remote camera
Design and features
There are two versions of the Creality Sermoon 3D printer. There’s the V1 and the V1 Pro. I was sent the V1 Pro. The differences are that the V1 does not have a built-in remote viewing camera or the auto stop door sensor like the Pro version.
As you can see, the printer is a fully enclosed unit which is great because the fumes from the melting filament are contained inside the printer and not in your room. This design also helps keep noise from printing lower than a traditional open style 3D printer.
The front of the Creality Sermoon 3D printer has a magnetic latching door, an SD card slot, and a touch screen display that you use to control the printer.
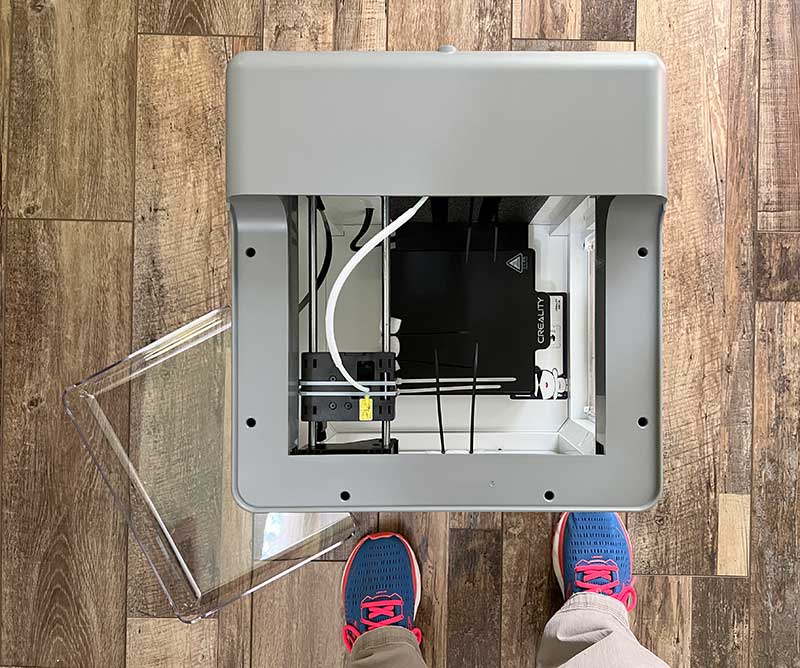
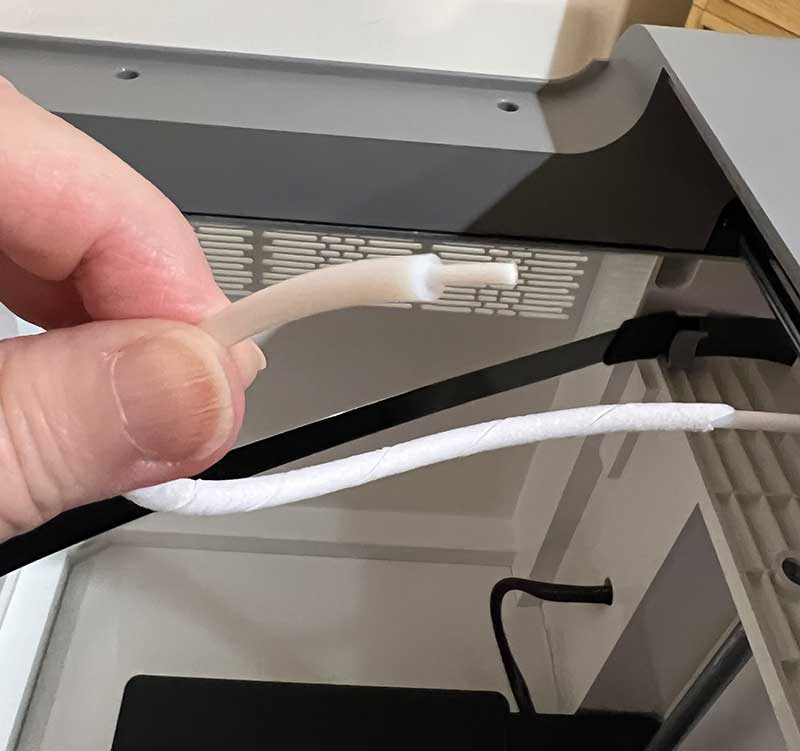
On the top of the printer is a removable clear lid that allows you access to the filament tube.
The only “assembly” that you have to do before using the printer for the first time is to remove several wire ties and the block of foam that you can see on the right side in the image above. Creality even includes a pair of snips that you can use to cut the ties. Just be careful that you don’t cut something important.
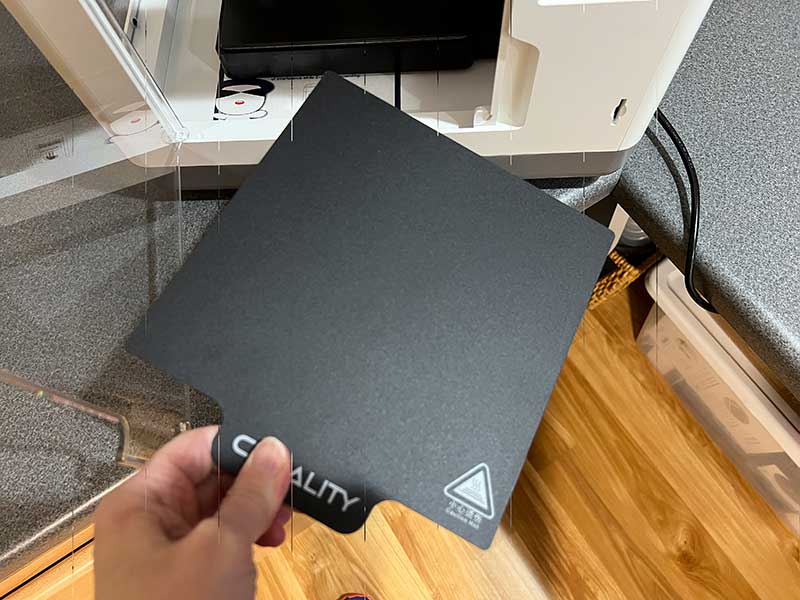
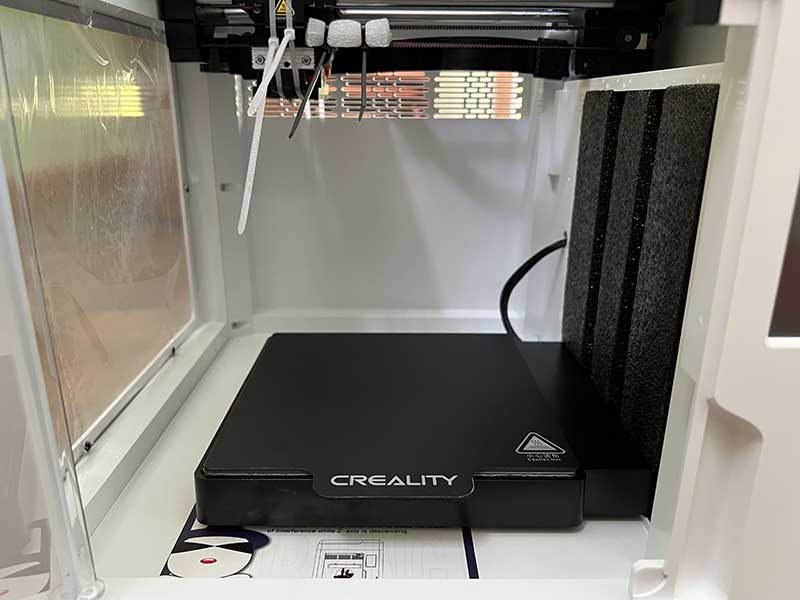
This printer has a magnetic bed that pulls out so that you can flex it to remove your finished print. Just remember not to touch the bed itself because your fingers can transfer dirt and oils to it, which will cause the filament not to stick to the bed.
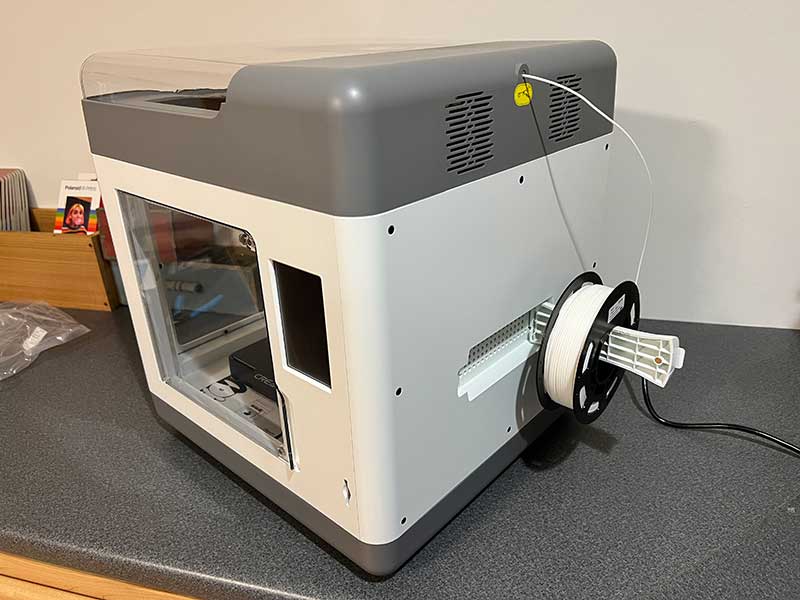
The right side of the unit has the feed tube for the filament and below that is a fold-out filament spool holder.
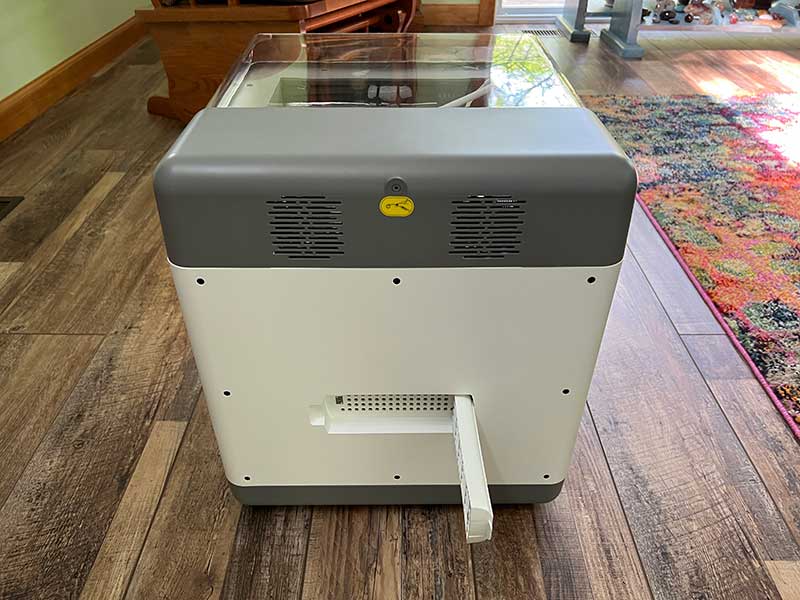
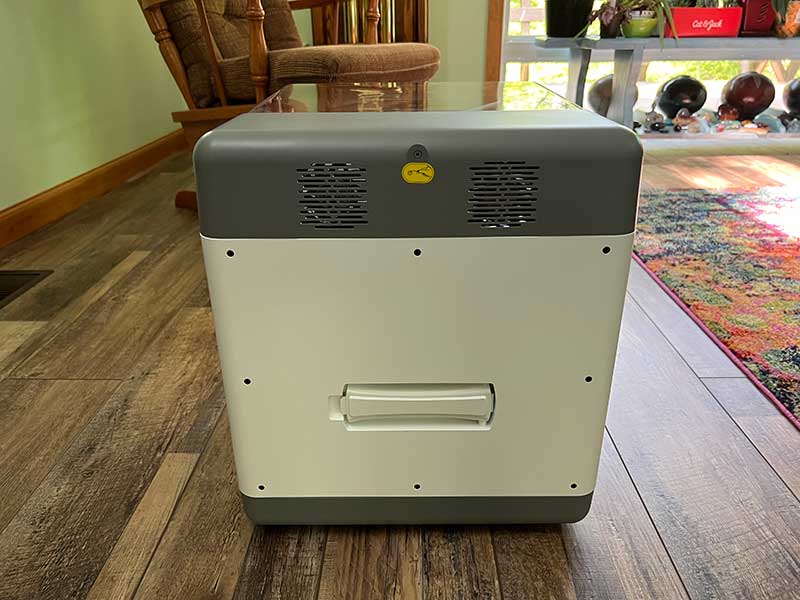
Behind the fold-out arm is the reset switch.
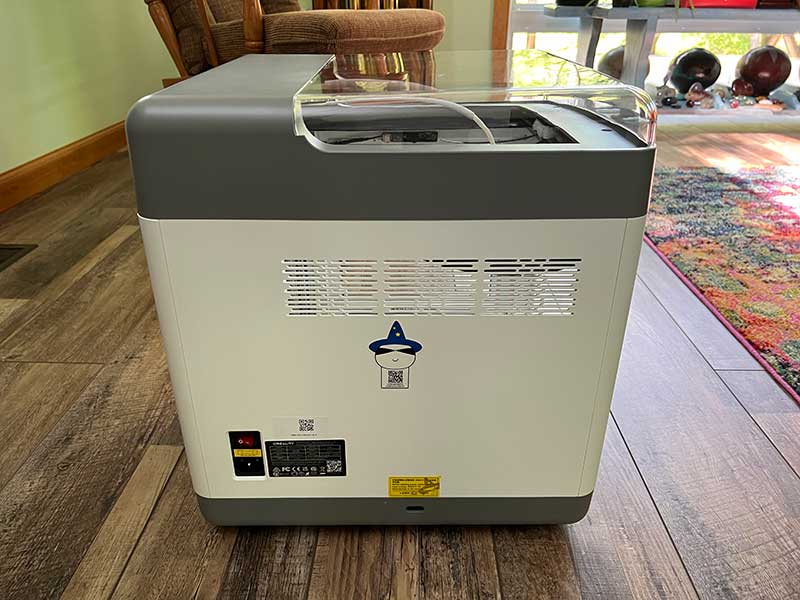
The back side of the Creality Sermoon 3D printer has a power switch, power cord connector, and a voltage selector switch.

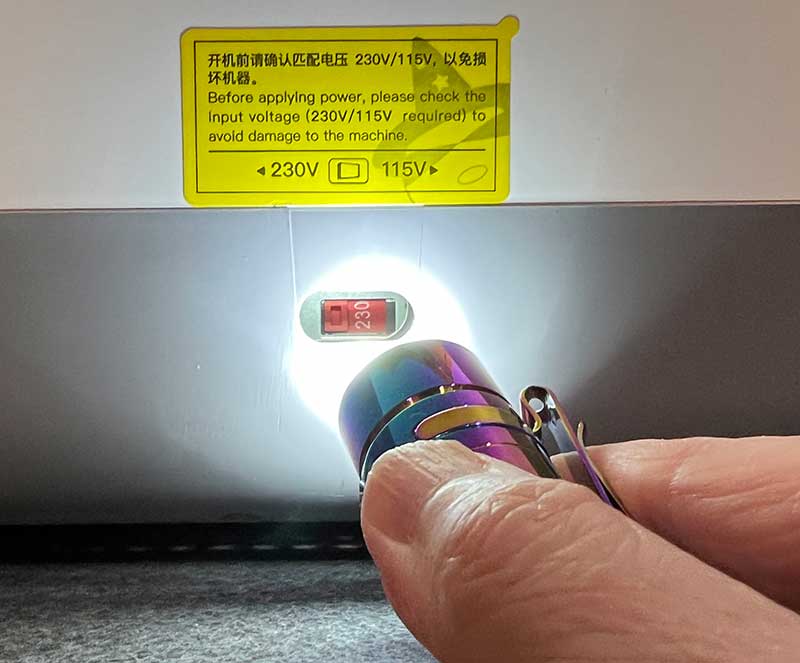
If you buy this printer and you live in the US, it’s important that you switch the voltage switch to 115V because by default, it’s set to 230V.
Let’s print with the Creality Sermoon V1 Pro 3D printer
As already mentioned, the Creality Sermoon 3D printer comes fully assembled so you can be ready to print within just a couple of minutes after removing it from the box. All you need to do is snip the cable ties inside the printer, put the included spool of filament on the holder, and feed the end of the filament into the tube on the side of the printer.
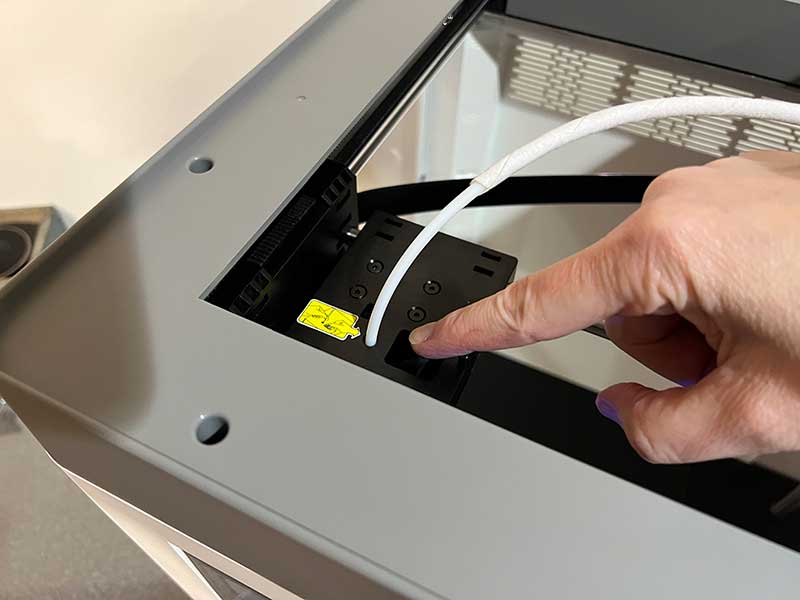
The filament will feed through the sleeve inside the printer and then you hold down spring loaded button on top of the printing head and feed the filament in place.
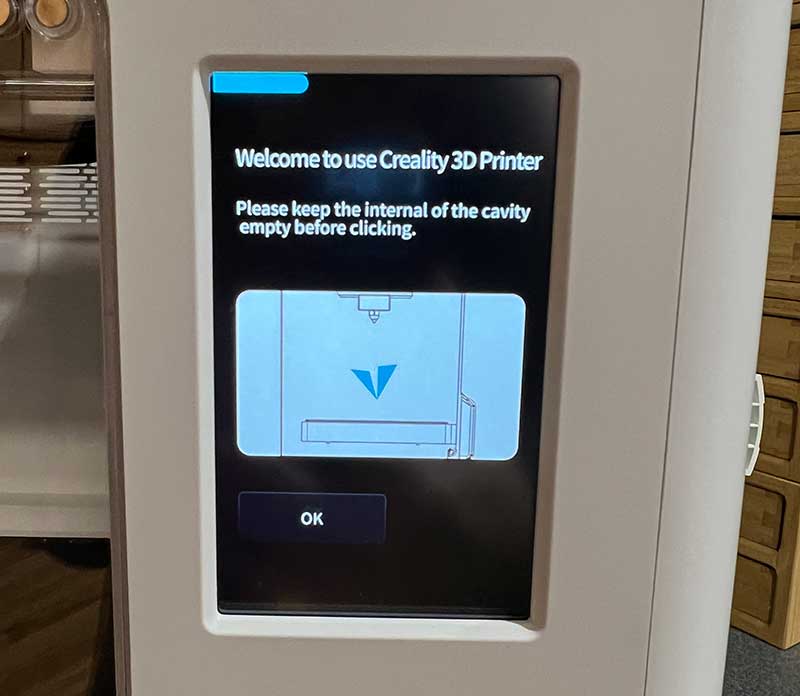
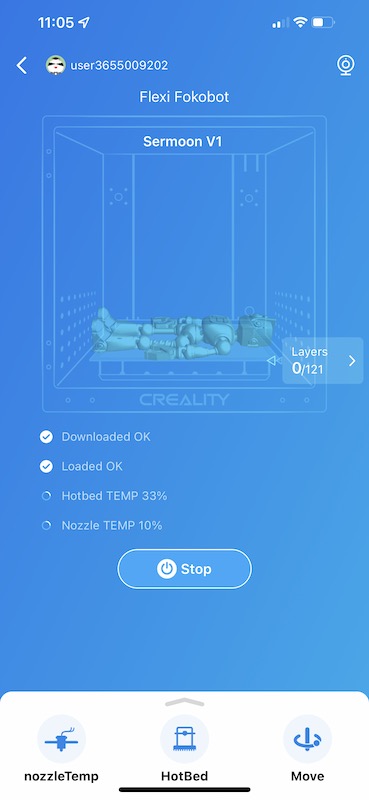
Then, you plugin the printer, flip the power button to ON (after you’ve double-checked your correct voltage selection), and follow the prompts on the touch screen that is on the front of the printer.
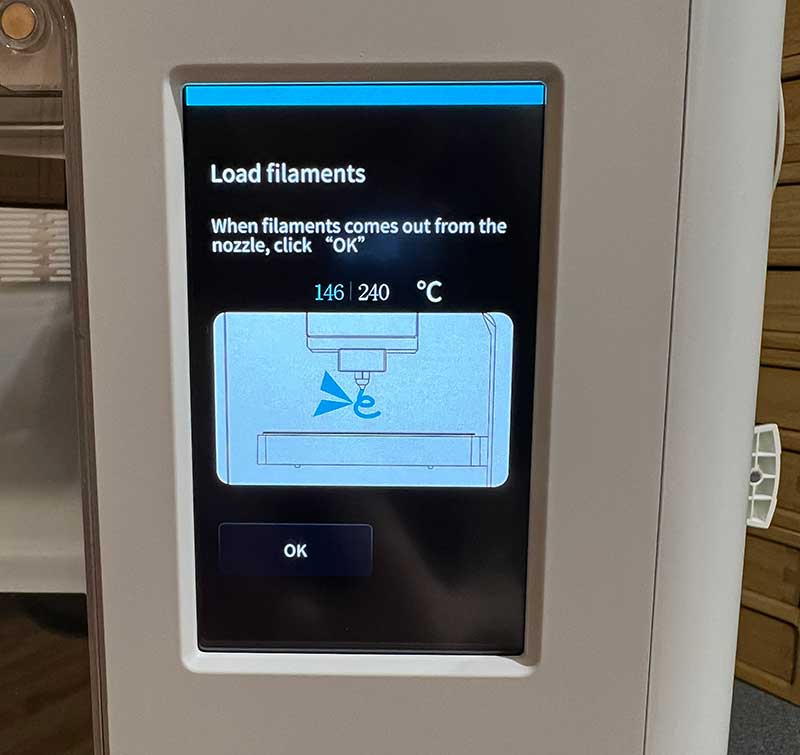
You will be instructed to load the filament and it will then heat the nozzle so that the filament will flow out.
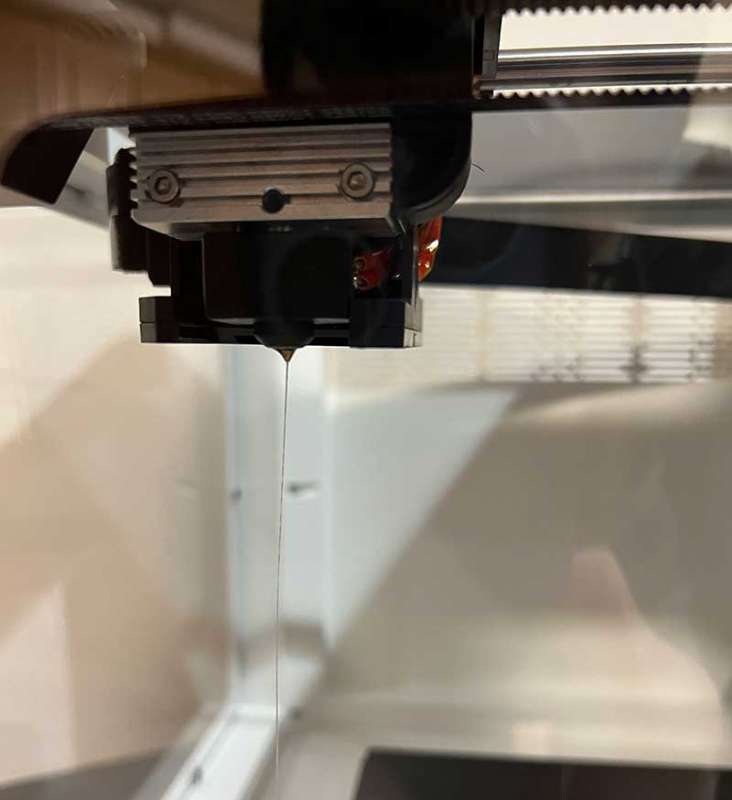
Success! We’re all set and ready to print!
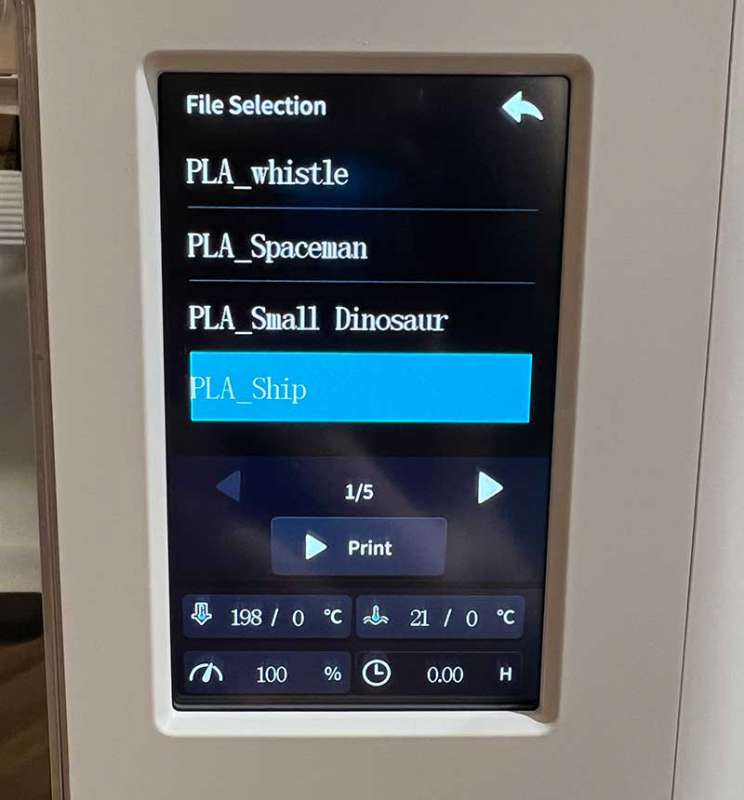
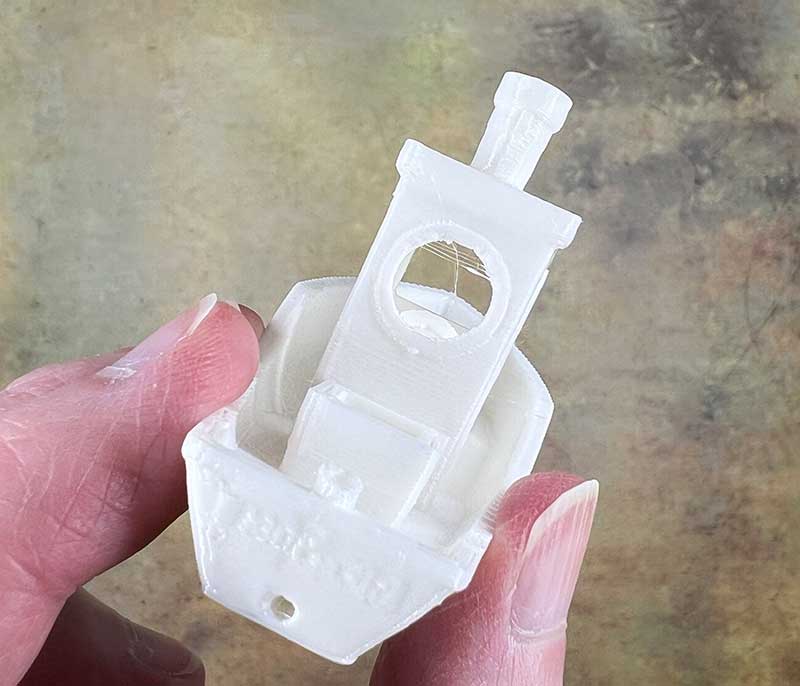
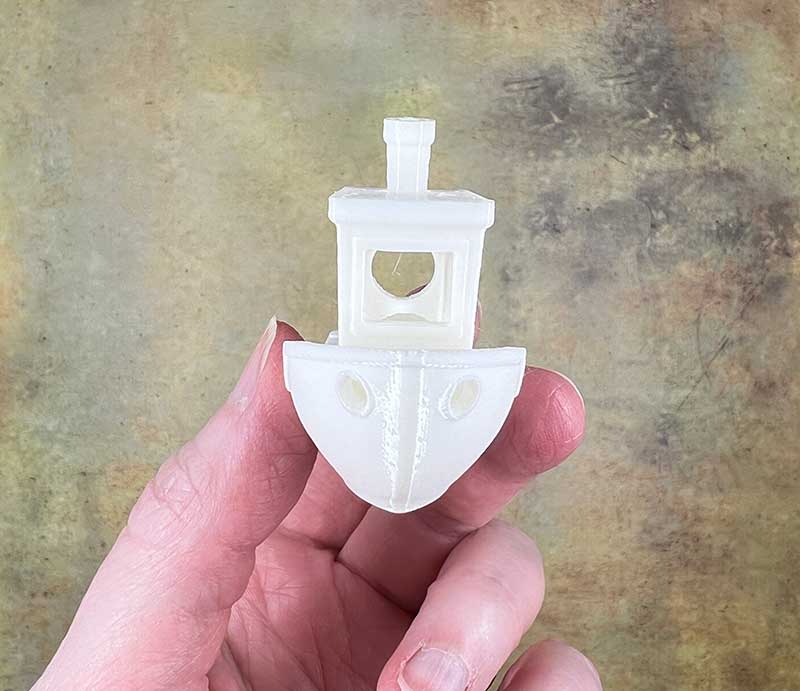
Included with the Creality Sermoon V1 Pro 3D printer is an SD card that contains the manual, instructional videos, information on filaments, slicing software, and a few ready-to-print models. For my first print, I chose the PLA_Ship model aka Benchy. This boat shaped model is the 3D printer’s equivalent of creating a “hello world” program for programmers.
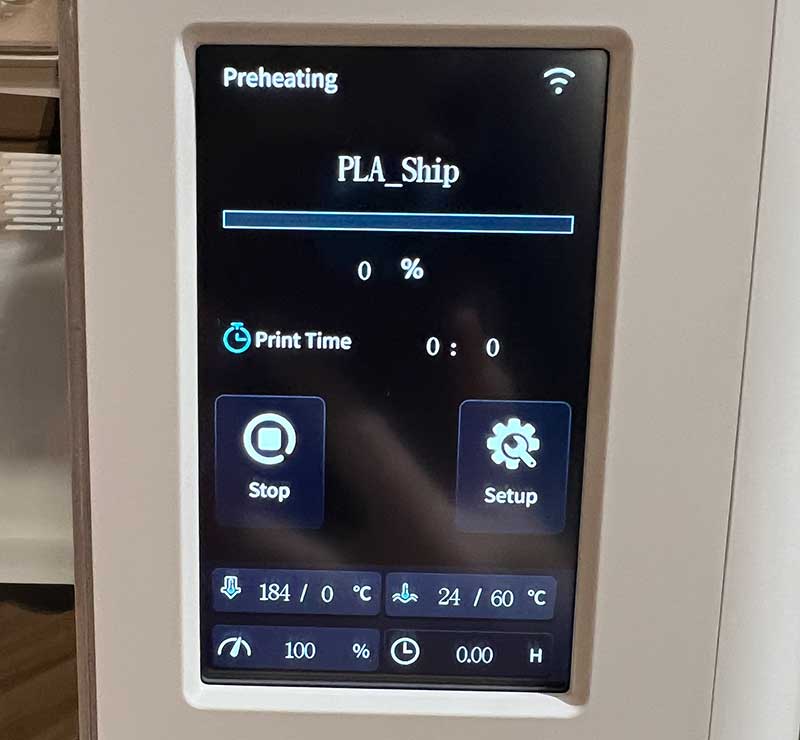
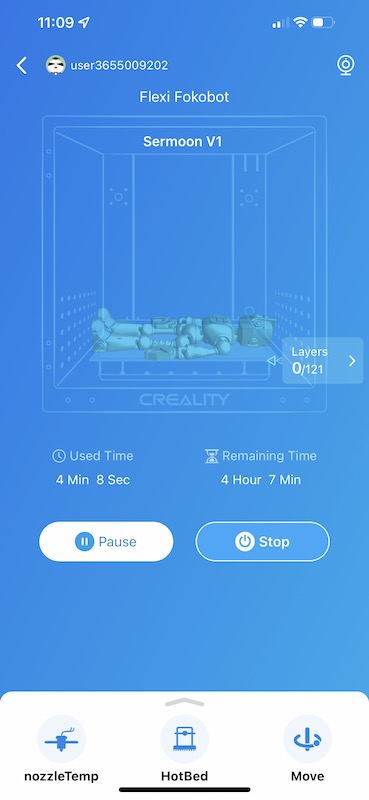
The touch screen provides a visual indicator of the bed and nozzle temperatures and a progress bar of the current print.
How loud is the Creality Sermoon V1 Pro 3D printer?
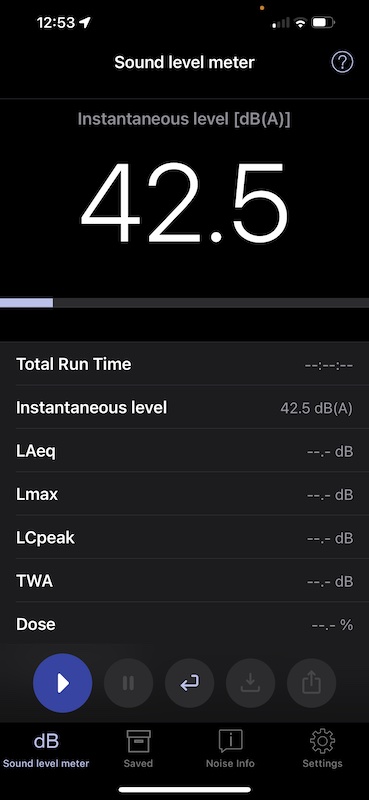

Using a sound level meter app on my iPhone 13 Pro Max, I recorded the sound with the printer running but not printing (on the left) and again while the printer was printing (right). The Creality Sermoon V1 Pro 3D printer has a built-in fan that runs continuously while the printer is powered on.
In my opinion, the printer isn’t loud at all. Yes, I can hear it and I know it’s running, but it’s not super annoying or distracting.
Creality Sermoon V1 Pro 3D printer print results
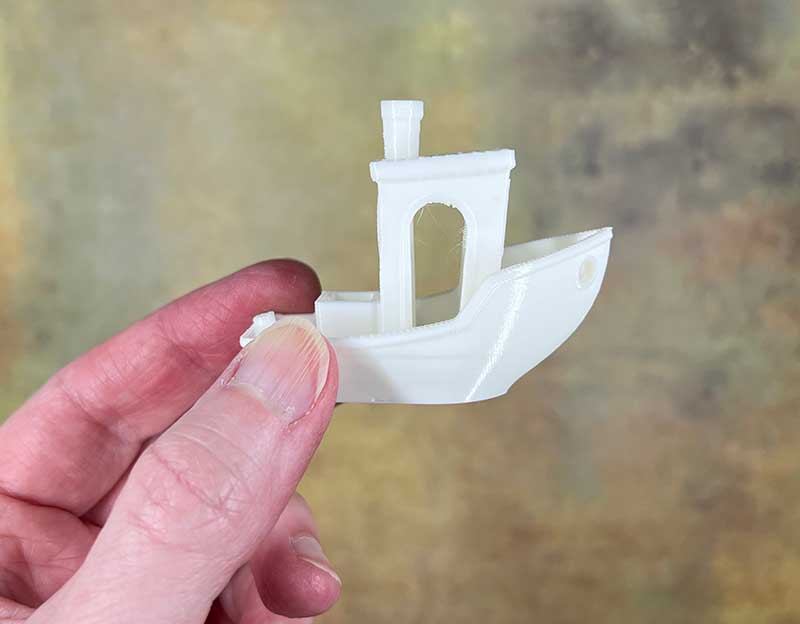
My first print was the ship model included on the SD card that ships with the printer. As you can see, the printer did a really nice job printing this 3D model. The images you see are of the model straight after the print completed. I didn’t need to remove any supports or clean it up. You can see a teeny tiny bit of stringing in the doorway of the ship’s wheelhouse, but it’s very minimal.
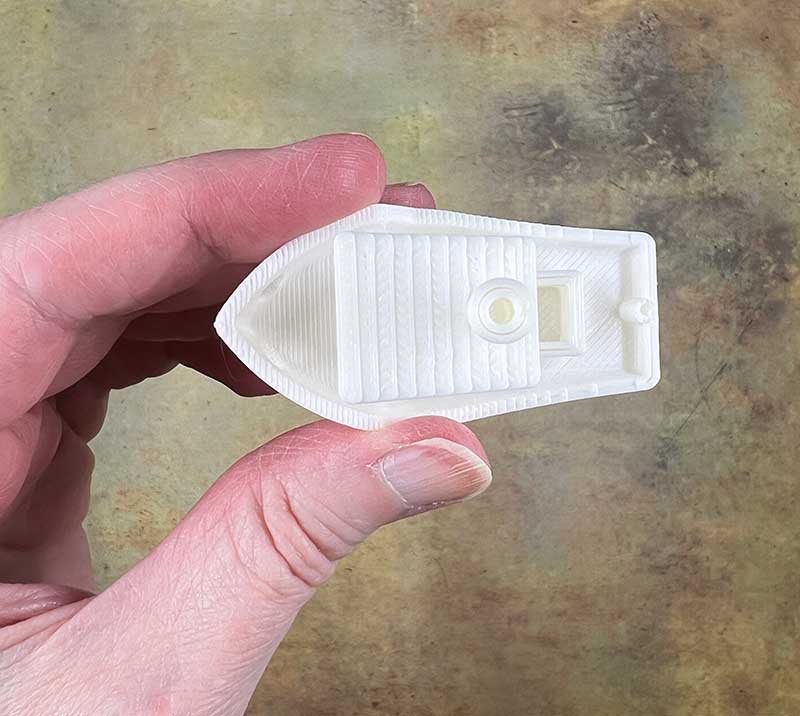
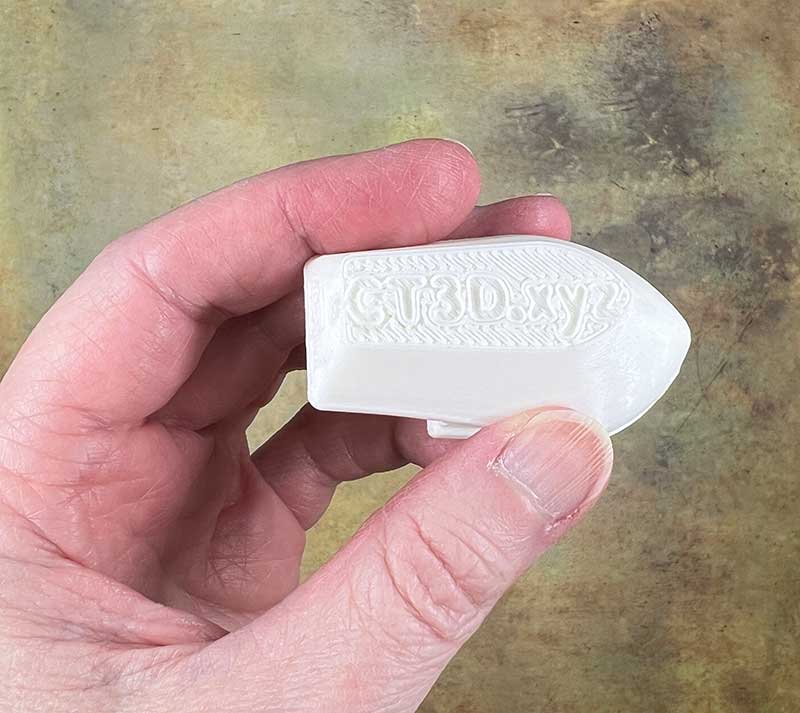
Here are some more images from different angles. You can click the smaller thumbnails to see larger versions of the images.
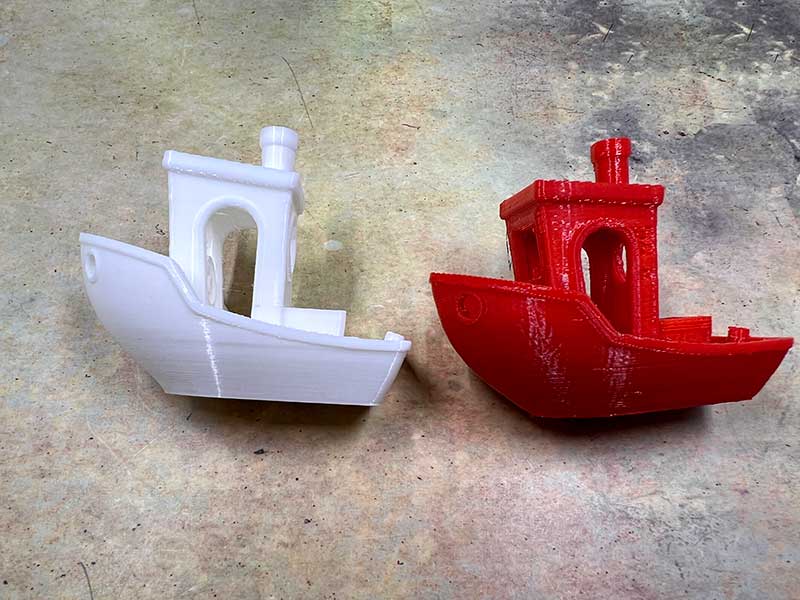
The image above is a comparison of the Benchy that I printed on the “toy” Easythreed K7 mini 3D printer that I reviewed. The Creality print is on the left and the Easythreed print is on the right. The Creality print is considerably smoother.
For my next print test, I wanted an action figure so used Creality’s cloud app (more about that in a minute) and found a model that was sent to the printer from the app.
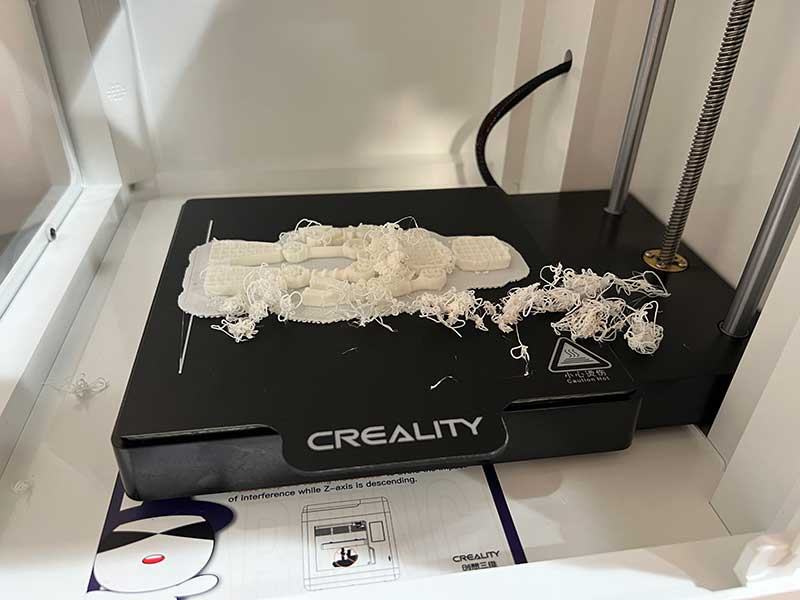
Ummmm, I don’t think that’s supposed to happen… This is what I saw when I walked into my office a couple of hours after I started the print.

And here is the result. Not really what I had in mind. I tried this model twice with slightly different settings and had the same results so I am pretty sure the model is the problem and definitely not the printer.
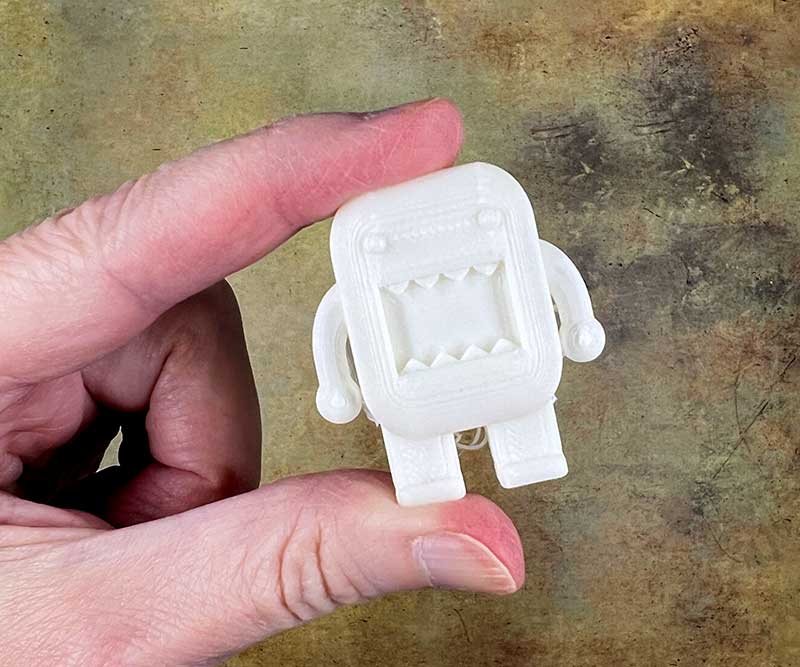
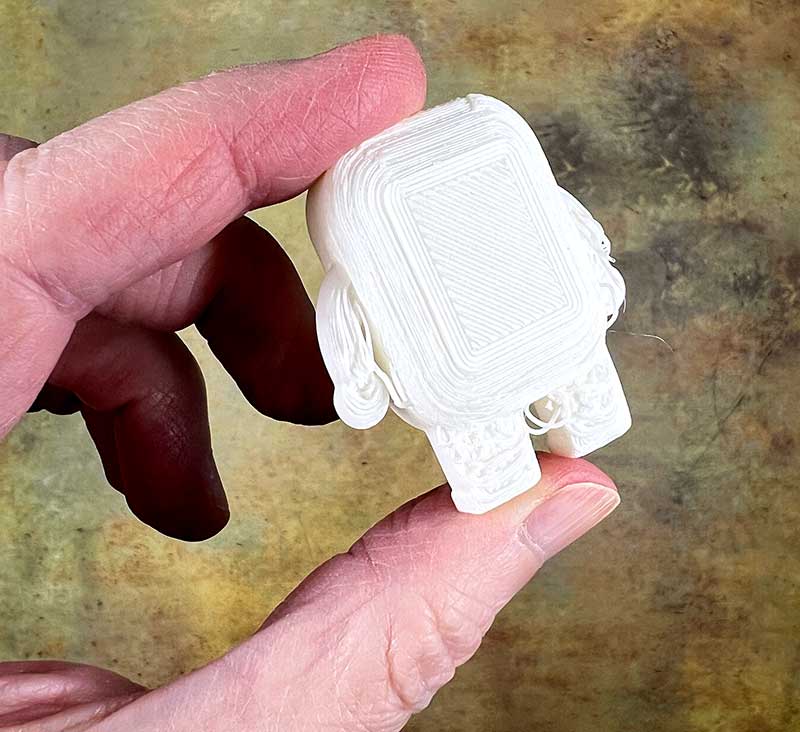
Next up, Domo-kun! I found this model on Thingiverse. Note that you’ll need to slice any STL models that you download to turn them into GCODE that the printer will understand. That’s where the slicing software that is included on the SD card comes in. There is a version for Windows computers and macOS computers.
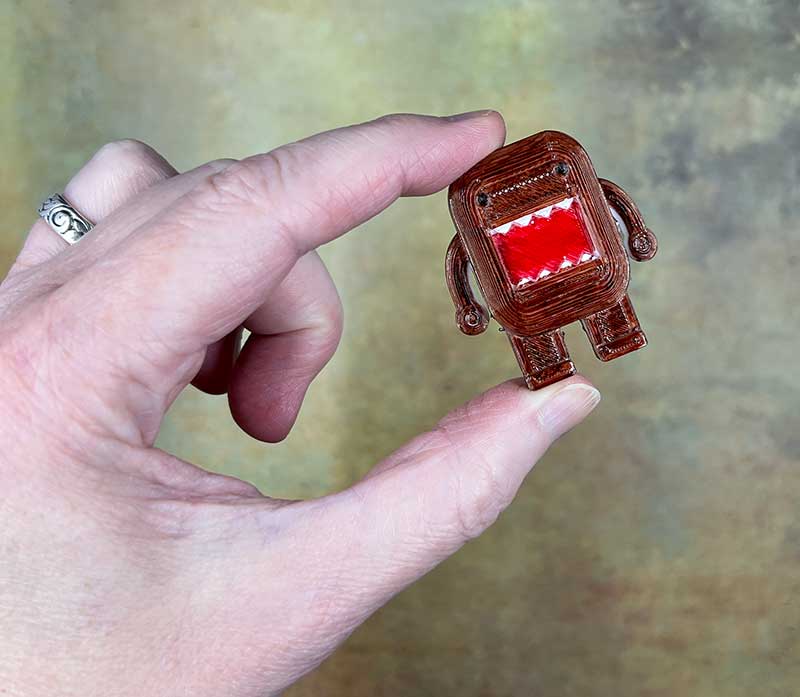
The Domo-kun model had a bit of stringing on the back, that I removed with a Xacto knife. Then I used some Sharpie markers to “paint” him.
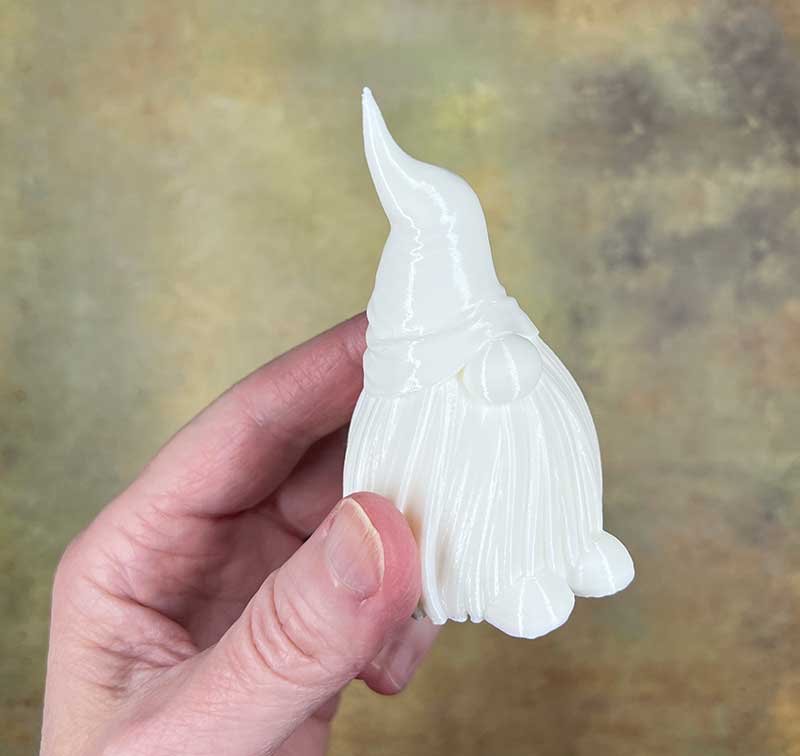
I also printed this gnome for my niece. I think it turned out great!
Creality Cloud app
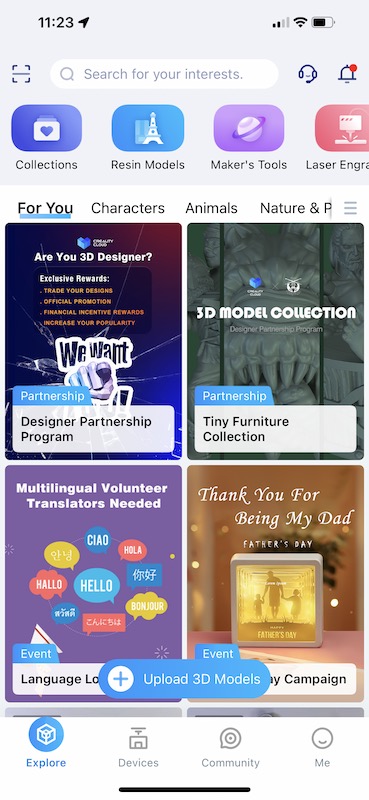
The Creality Cloud app allows you to find models and send them directly to the Creality Sermoon V1 Pro 3D printer. The app has some weird childish features like giving you credits and coins, and letting you earn levels like a game.
You really don’t even need to use the app at all because you can copy the GCODE files to an SD card, insert the card into the printer, and use the touchscreen to select the model to print. But you will need to use the Creality Cloud app in order to take advantage of the remote viewing option.
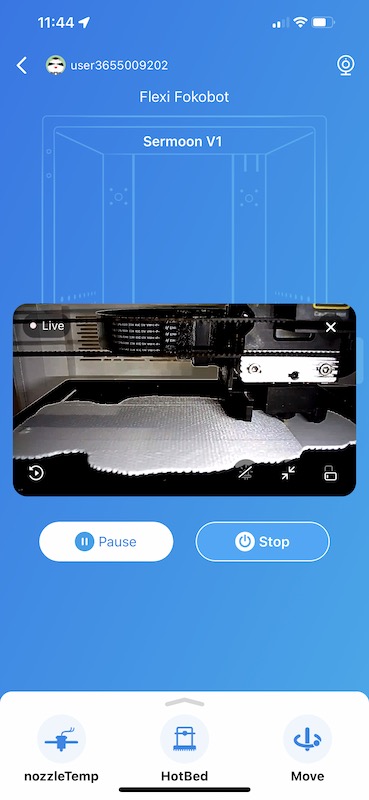
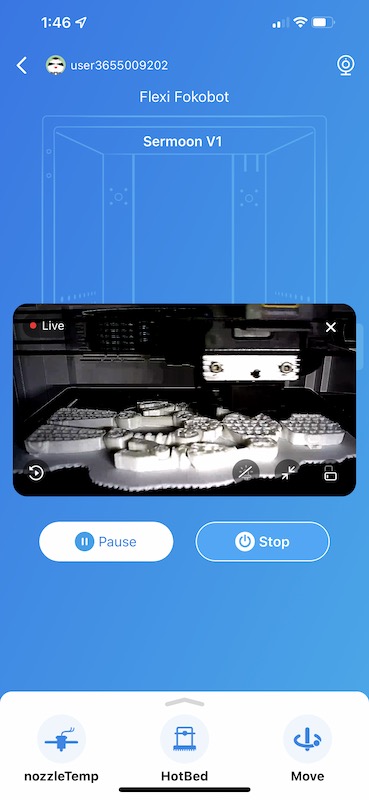
The built-in camera inside the Creality Sermoon V1 Pro 3D printer enables you to have a live view of what’s happening with the printer from anywhere in the world. That’s a really cool feature. You can also use the app to pause or even stop the print if you see that something is going wrong.
See it in action
What I like
- Comes fully assembled
- Simple to use
- Quiet
- Built-in remote camera
- Front and top windows for easy viewing
- Touch screen
What I’d change
- Needs auto bed-leveling
- Small print bed
Final thoughts
The Creality Sermoon V1 Pro 3D printer is my first real 3D printer and as a beginner, I found it extremely easy to set up and use. So far I’ve only been printing other people’s models, but I have an idea for my first original design, so I will definitely follow up with a review update in the future. If you’ve been wanting to try your hand at printing 3D models, I think the Creality Sermoon V1 Pro 3D printer is a really good printer to consider. It’s small, ready to go, and easy to use.
Price: $539.00
Where to buy: Creality and Amazon has the non-Pro version
Source: The sample for this review was provided by Creality.

Gerber Gear Suspension 12-in-1 EDC Multi-Plier Multitool with Pocket Knife, Needle Nose Pliers, Wire Cutters and More, Gifts for Men, Camping and Survival, Grey
(as of June 13, 2026 18:40 GMT -05:00 - More infoProduct prices and availability are accurate as of the date/time indicated and are subject to change. Any price and availability information displayed on [relevant Amazon Site(s), as applicable] at the time of purchase will apply to the purchase of this product.)
Gadgeteer Comment Policy - Please read before commenting
After reading this and seeing the video, it’s the first time I’ve ever actually kind of wanted a 3D printer. Nothing to fuss with, it just works. I really can’t come up with a good use case for myself, so maybe in a few years when they become more popular and prices hopefully drop.
Chris, that’s the big thing about 3D printers. You really do need a reason to have one because printing a bunch of little figurines is only fun for a little while. 🙂
I agree with Julie – it’s fun, but without any real-world need, it can get old quickly. I’d recommend looking for a local maker space or library where they have them available for a small fee or free, rather than getting one for yourself, at least until you’ve printed a few things. The one I reviewed last month is “only” $300, and is very easy to use (and has an auto bed-leveling feature!), but you have to have space for it, and that’s no small thing.
I own this little printer along with 3 other printers including a bambu, a ender 3 s1 pro and a fully modified ender 3 v2 and i got to say, the sermoon v1 pro is a complete waste of money. The bed has no stability which hinders it’s printing speed incredibly. The lack of versatility in bed leveling makes it almost unusable because of first layer issues. It’s also not accurate enough to print small fidgets, and being for first timers and kids let me assure you. This is not a good printer to buy. It’s price tag needs to come down to around $150.
I’d like to compare it to buying a watch, with all the cool features, but it doesn’t actually tell the time.