REVIEW – Cameraready Lighting is a company whose name very clearly explains the products they make; lights that make things camera ready. Their Deluxe LiteBar Kit includes everything you’ll need to elevate your video conferencing game and can handle photo shoots as well. Does it meet the need? Read on.
What is it?
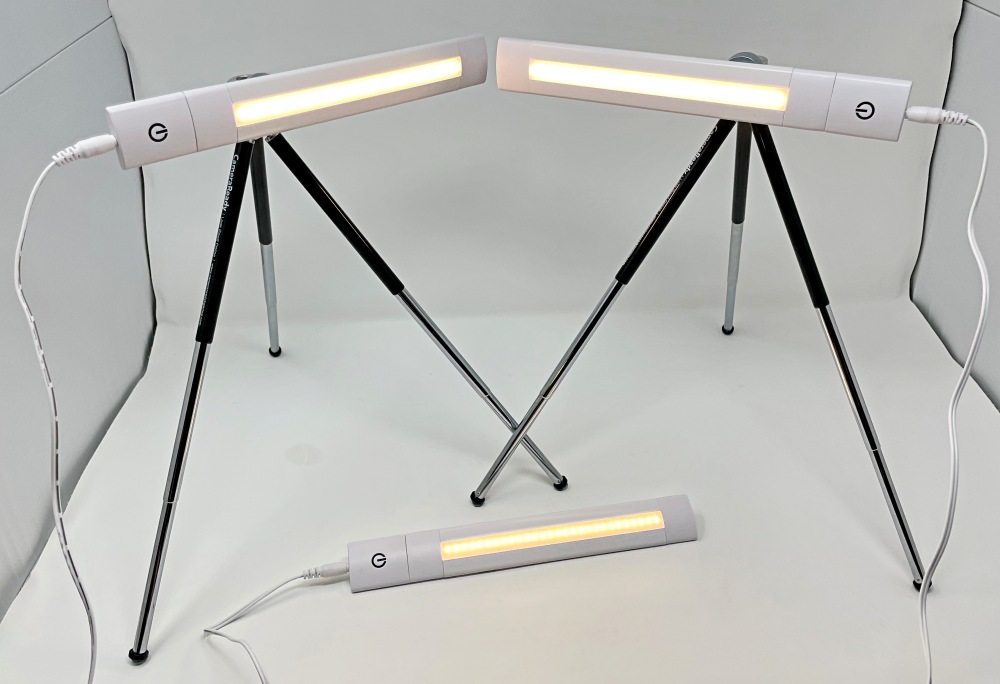
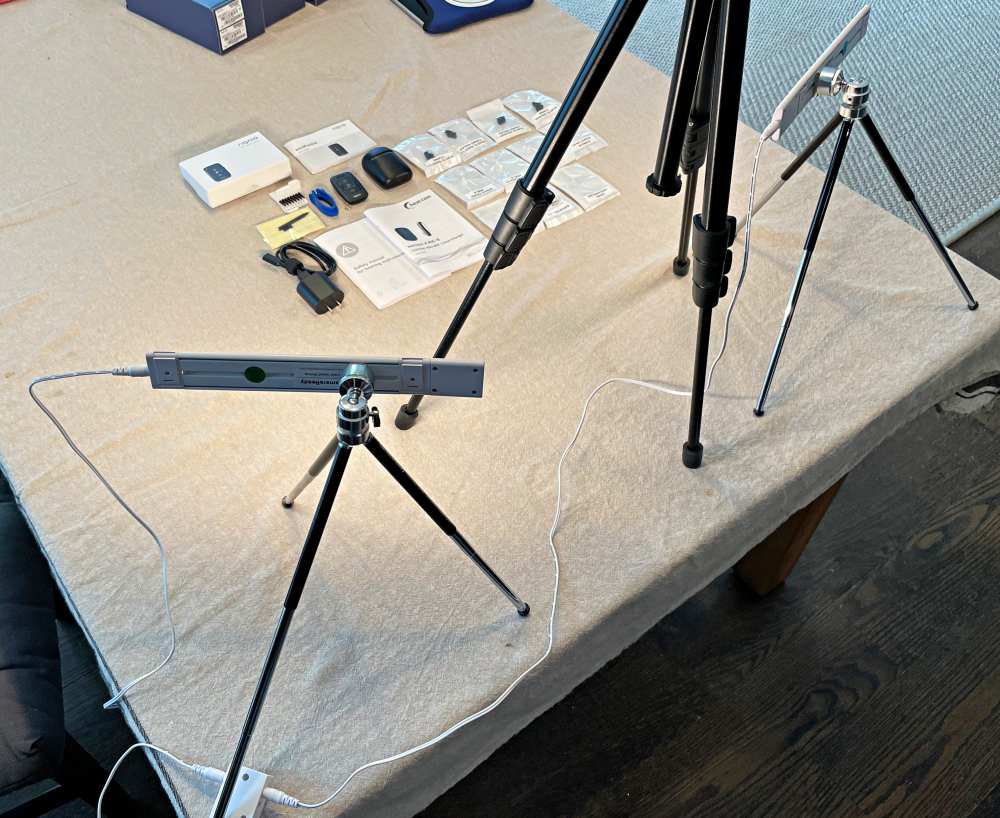
The Deluxe LiteBar Kit is a lighting solution for video conferencing and photography consisting of 3 LiteBars and 2 tripods along with a power supply and all the cables you need to have a professionally lit setup.
What’s in the box?
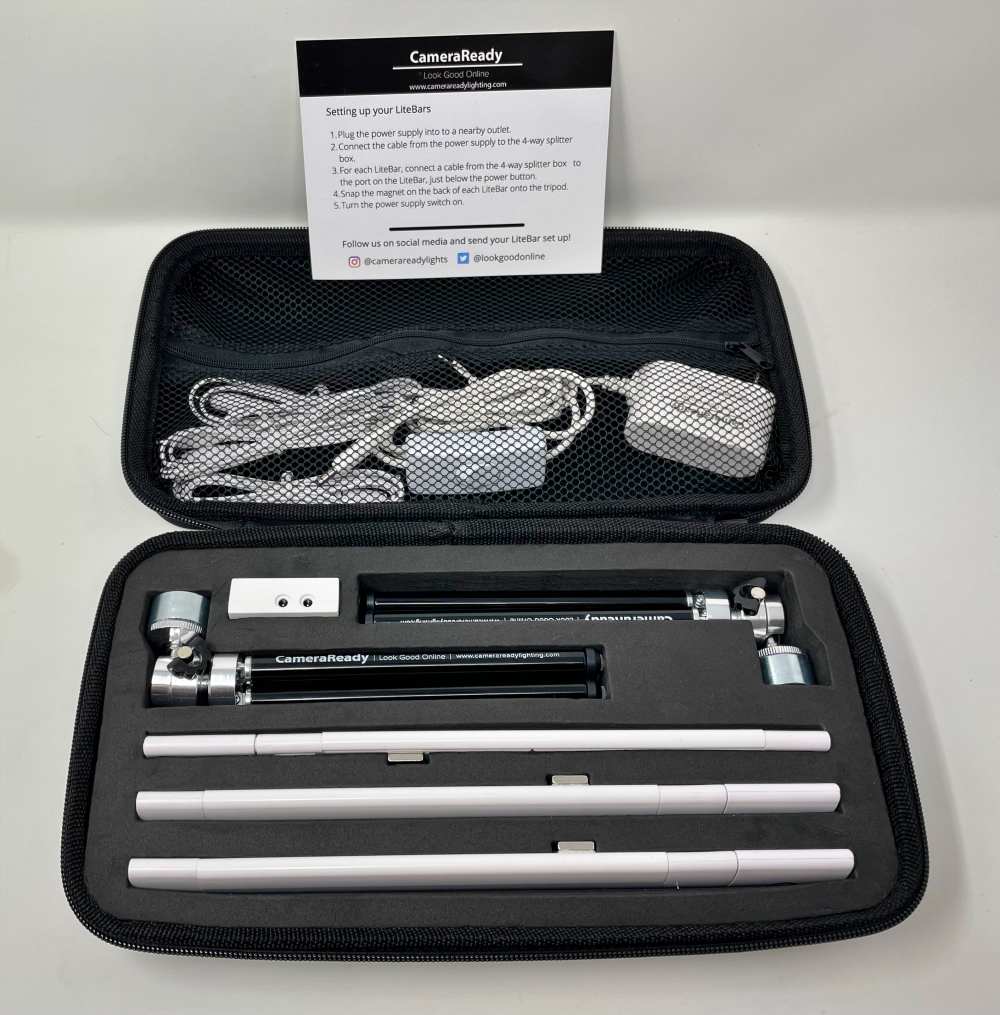
- (3) LiteBars (each with their own removable power switch/dimmer control)
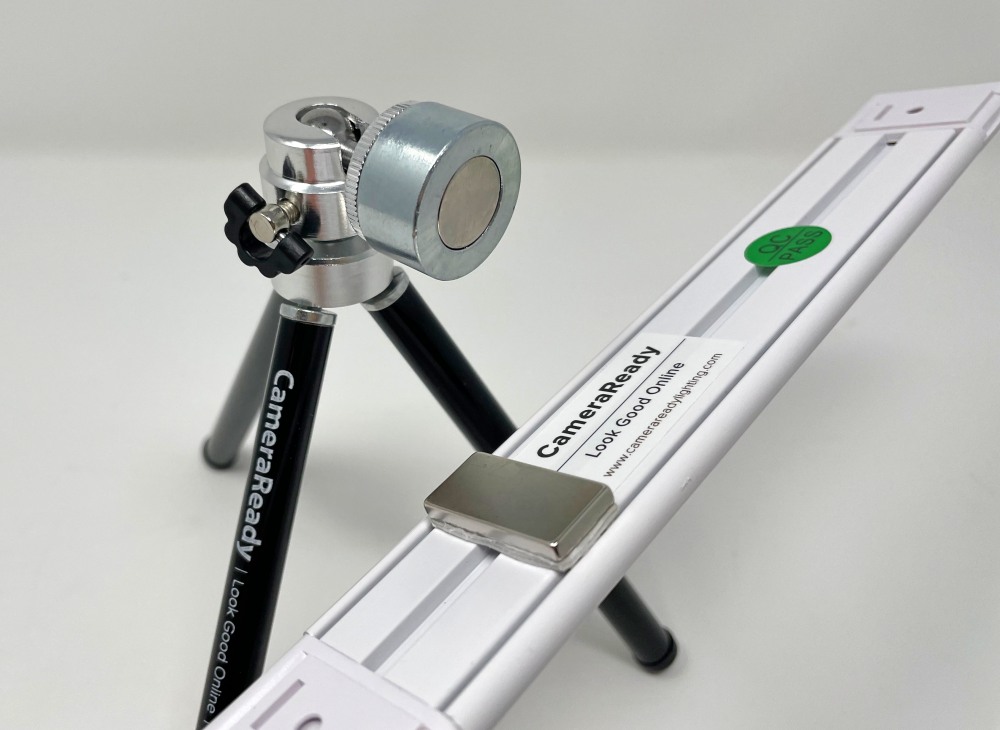
- (2) Mini tripods w/ magnetic mounts
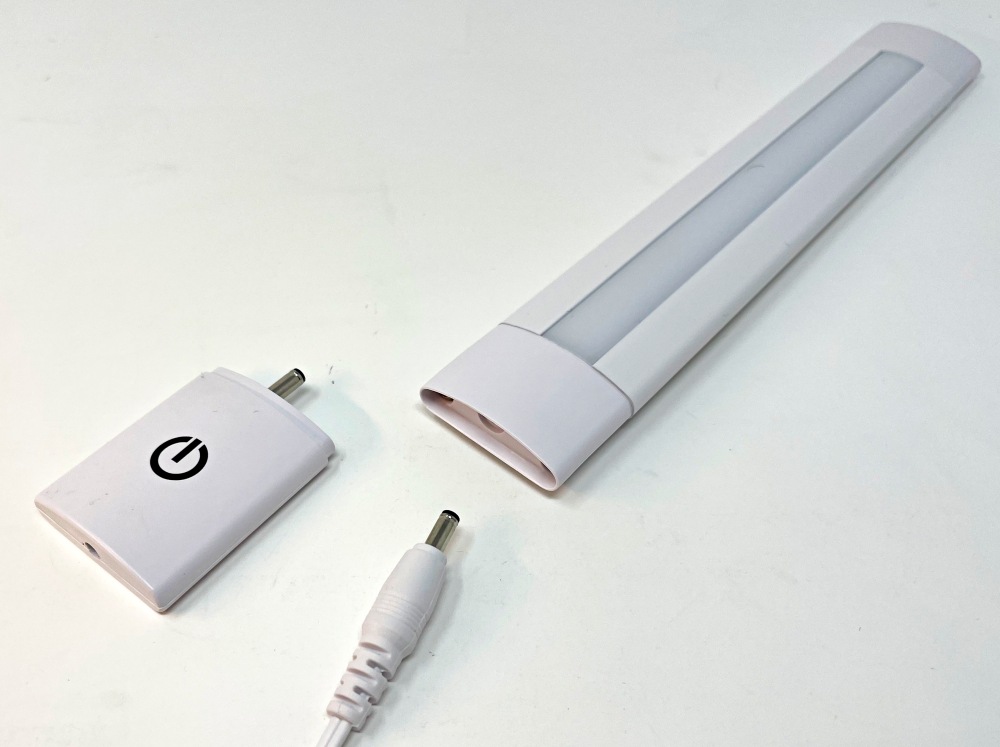
- (1) Power supply
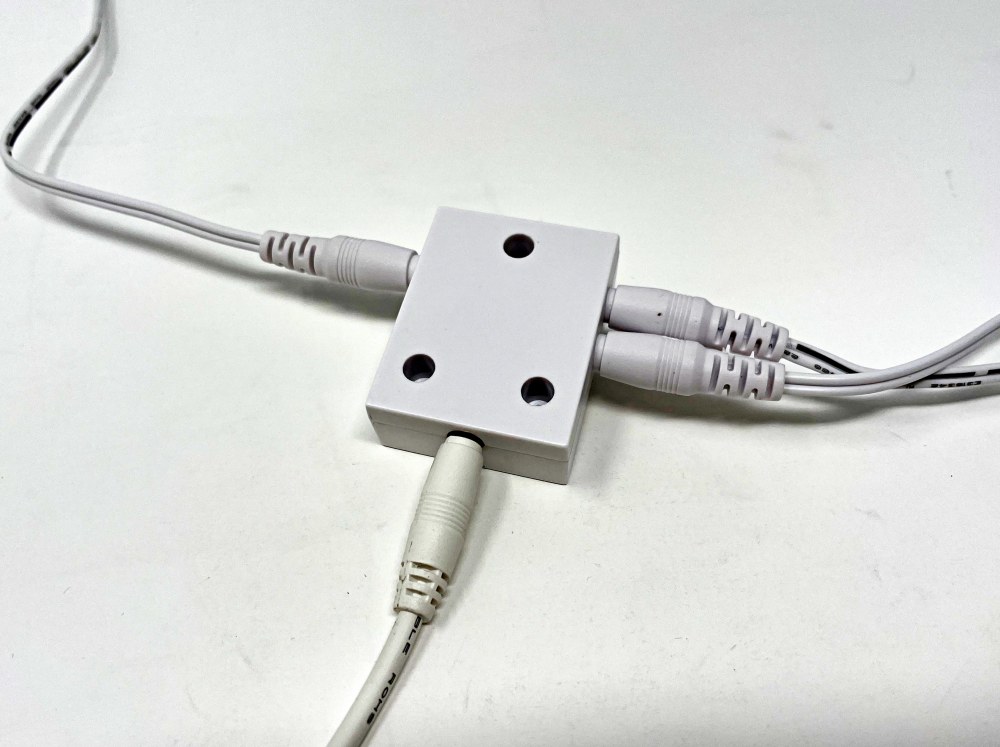
- (1) 4-way power splitter
- (3) Extension cables
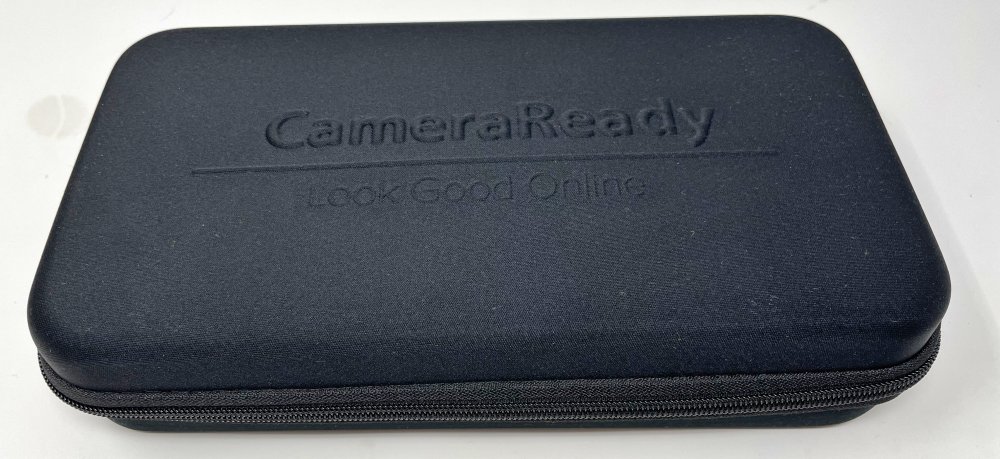
- (1) Storage case
Hardware specs
Lighting Type: High CRI LEDs (Color Rendering Index)
Lighting Color: 3000k (Warm white)
Power Supply: Wall adapter with physical switch – Input 100-240v~0.25A Max 50/60Hz | Output 24v 0.5A
Dimensions: LiteBars = 9.5 1.25 x .5″ (includes magnet thickness) | Tripod height range = 5-12″
Design and features
Each LiteBar is a clean white color with a curved front surface that houses an adjustable white LED.
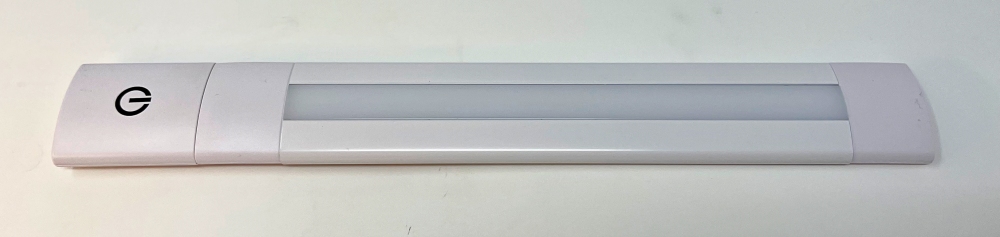
On the back are two “kickstands” that can be deployed to allow the LiteBar to rest at an angle casting light upward.
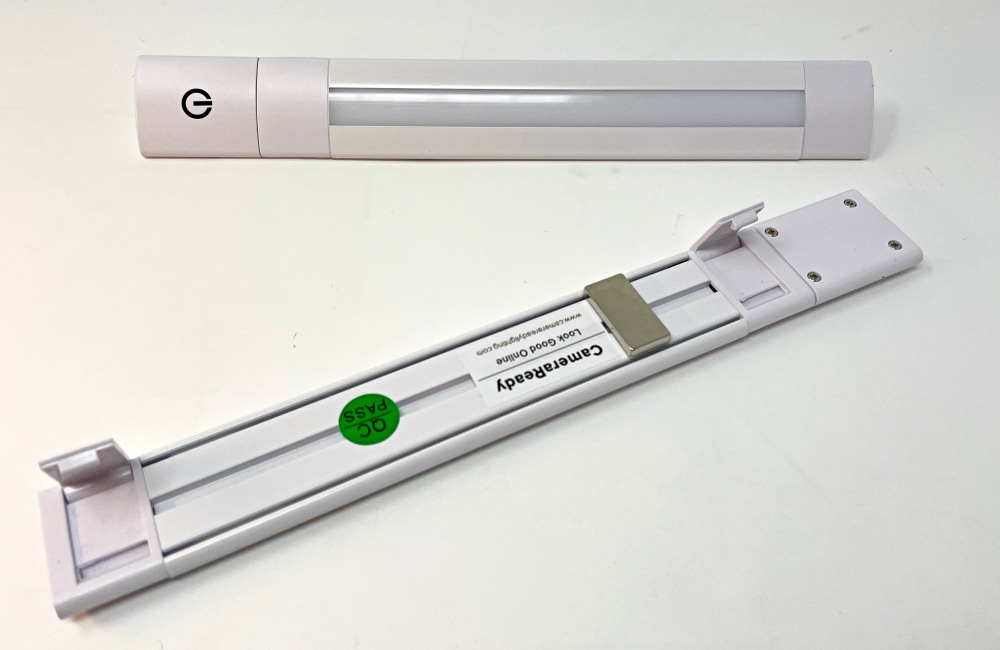
There is also a powerful magnet on the back for attaching to their magnetic tripod stands.
A controller is included for each LiteBar that enables on/off and brightness control.
A power adapter and 4-way splitter will power all three included in the kit (and I assume a 4th).
Setup
Setting up is straightforward and very easy. To set up a single LiteBar, follow these steps…
- Remove a LiteBar from the storage case and connect the wall adapter to the power switch end of the LiteBar.
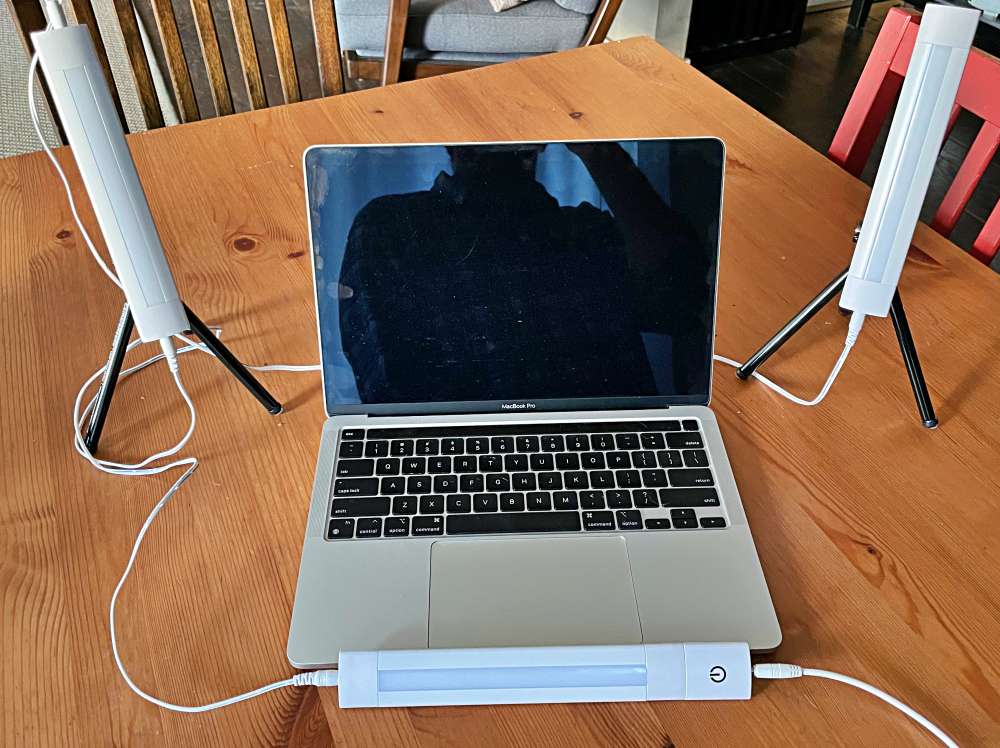
- Either use the built-in kickstand if you want to use the light at table level or set up one of the tripods and use the magnet attachment to position the LiteBar where you want it. For improved stability on tripods set the LiteBar vertically with the controller at the bottom.
- To turn on the light, touch the power logo on the LiteBar. (If the light does not come on, you may need to flip the physical switch on the power adapter’s cable.
- To increase brightness of the light, touch and hold the power logo until the brightness level is reached and let go. To decrease brightness, touch and hold again. To turn off, touch the logo.
Here’s a quick video showing that touch control in action…
To add a second or third LiteBar, they recommend that you use the 4-way splitter block on the end of the power adapter, and then one of the extension cables for each LiteBar you are using.
For video conferencing, they recommend that you set up two on either side and slightly behind your laptop, with the third in front of you on its kickstands.
For any other lighting purposes feel free to place these where needed to create the light effect you are looking for.
Performance
The storage case is the first thing you experience and it’s sturdy with a home for everything making it easy to put things away, as well as helping you realize you missed something as you put things away.
The built-in kickstands are easy to use once you’ve opened and closed them a couple of times. That first unfold is pretty stiff and takes slightly too much effort, but all good after that.
These LiteBars put out plenty of light for video conferencing purposes and you’ll find that you end up dialing them back a bit in most cases as they can definitely be too bright. The color is warm white (3000k value) which is a pretty solid universal choice. While it might be nice to have control over the color temperature, it’s not something you’re like to miss all that much.
The tripods are exceptionally easy to use as the legs just telescope with friction and the LiteBars magnet into place. The magnets are off-center on the LiteBars which seems weird at first, but when you factor in the controller module on each and the cable connecting to that end the balance starts to make more sense.

The power controller on each is easy to dismiss as only a touch on/off button as there’s no icon indicating that touching and holding changes brightness. Once you use it though it’s very intuitive and easy to do. One more reason to read manuals.
The biggest hurdle is cabling. The cable on the power adapter itself is just x” long. Not too bad, but just reaches a table. Adding the 4-splitter and then 3 extension cables quickly starts to feel like a mess of spaghetti and that main cord is heavy enough that it likes to drag things off the table. No matter what you do, those cables are going to be laying around and visible. If you like a clean workspace this will likely bother you.
I can definitely see where you might want individual control over the brightness of each light, but as I used them I found that I almost always adjusted all three of the LiteBars equally. This quickly became annoying as you have to control each one and try to get it close.
The controls come attached to the LiteBars and it’s not immediately obvious that you can remove them. Once discovered, however, I was able to use one controller and then daisy-chain the lights from one to the next without additional controllers. This allows a single on/off for all three, and synced brightness from the one controller. It certainly made them more versatile being able to deploy them as needed. Here’s that setup for video conferencing…
I used these for a few video conferences with good results. The hardest part was getting tripods balanced, and everything positioned where I didn’t bump something, but once set up it worked well. The one controller setup was the trick here to make adjustments quick and easy. If you wear glasses and have used a ring light, then you know that weird reflection issue that you have to deal with. Sorry to say but that is still an issue here and possibly much more distracting due to the size of the LiteBars’ rectangular cast. Here’s what it looks like at about 30% and then at full power.
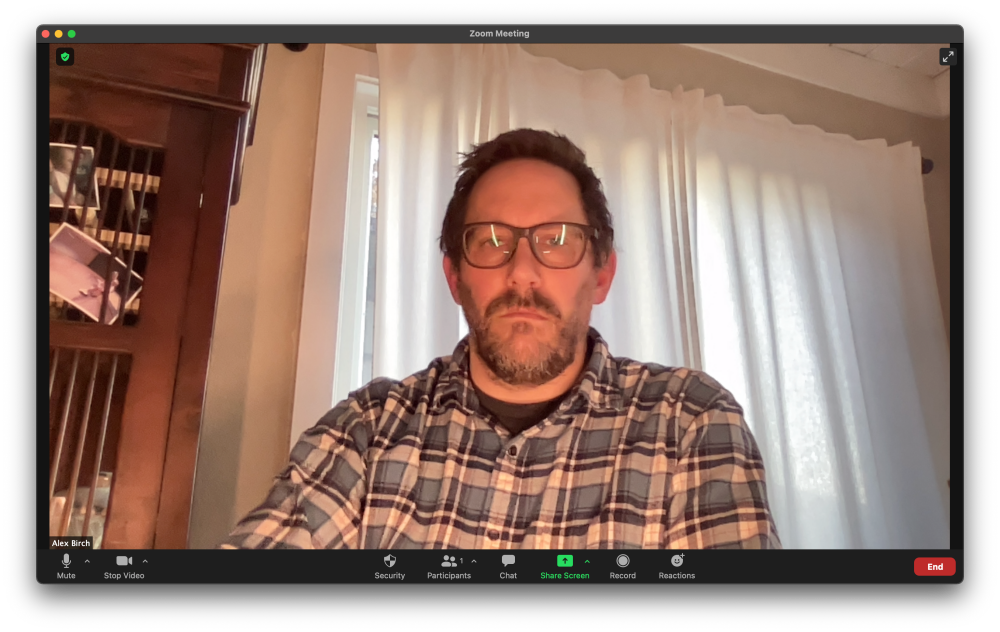
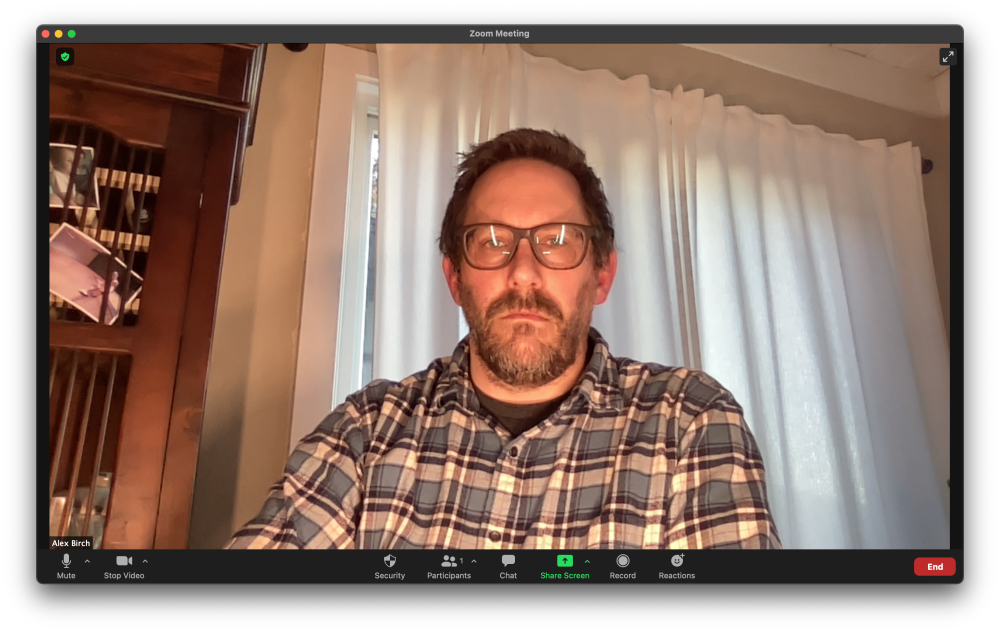
To be fair, this was around dusk so already pretty dark. If you’re in a whiter space or have additional light it looks a lot better, but you can see the additional illumination on my face and shirt as you get brighter.
The best way to avoid the glasses reflection is to position all the LiteBars as far as possible to the sides, or below the camera. This will at least minimize how distracting it can be to your chat partners, but it’s nearly impossible to make it go away unless you deploy a white screen and try to reflect the lights back at you.
Using them for product photography is a more realistic scenario for me where the brightness control really helped to illuminate shadows.
Here, unlike video conferencing, I needed to aim the lights down from the tripods. The ball-head only goes to 90º at most, so to tilt down, you have to start leaning the tripod forward which can only go so far before it tips over.
What I like
- Complete kit (and storage case!) that solves lighting for a lot of scenarios
- Separate power and brightness controllers that you can choose to use (or not use)
- Good neutral warm color that should work for most users
- Easy to use tripods
What I’d change
- Longer cables (both power adapter and extensions)
- Tripods should be able to tilt down further
- Lower cost
Final thoughts
Better lighting is one of the quickest ways to look better on camera. That goes as much for photography as it does for video conferencing. The Deluxe LiteBar Kit provides plenty of light and lots of options in how you can set it up. That versatility comes at the expense of it always feeling a little DIY with cabling everywhere, which might be a non-starter for a lot of users when it comes to video conferencing, especially for this price. That said, they perform as advertised and are easy to set up and control.
Price: $274.99 (as reviewed) | $199 – Double LiteBar Kit | $99 – Single LiteBar Kit
Where to buy: CameraReady Lighting
Source: The sample of this product was provided by CameraReady Lighting

KAMRUI Pinova P1 Mini PC Computer, AMD Ryzen 4300U (Beats i3-10110U/3500U), 16GB RAM 256GB SSD, Mini Desktop Computer Support Triple 4K, USB-C, WiFi, Bluetooth, Ethernet for Business, Education, Home
(as of May 3, 2026 03:16 GMT -05:00 - More infoProduct prices and availability are accurate as of the date/time indicated and are subject to change. Any price and availability information displayed on [relevant Amazon Site(s), as applicable] at the time of purchase will apply to the purchase of this product.)