REVIEW – Name two things plaguing all of the small electronics we have all grown to depend on. I’ll start. 1) They all need to be charged. 2) There are way too many cables strung all over the place. Wireless chargers have helped, but they still take up valuable desk/table/nightstand space and are somewhat unsightly. Some furniture pieces have sought to simplify this by integrating a wireless charger into their surface, only requiring a power source to wirelessly charge your compatible devices. But these are typically expensive and may or may not fit into your personal decorating scheme.
Wouldn’t it be great if someone could come up with a way to turn just about any flat surface into a Qi-enabled wireless charger? InvisQi claims to do that with their new invisible Qi-enabled charger.
What is it?
The InvisQi charger is an invisible Qi charger.
Well, technically, it isn’t invisible, but since it is designed to be mounted under a flat surface, you really won’t see the charger when it is in use. The beauty of InvisQi versus other Qi chargers is that your phone doesn’t have to sit on the charger. It only needs to sit above the charger, up to 1.18″ above the charger to be exact. Inbetween the charger and your phone can be just about anything – anything other than metal as that would block the charging signal. This lets you mount it under a tabletop, counter, or other flat surfaces, creating a charger-free charging location on the top of that surface. It uses 4 Qi coils and a proprietary magnetic amplification system to provide maximum distance and charging efficiency.
What’s in the box?
- InvisQi charger
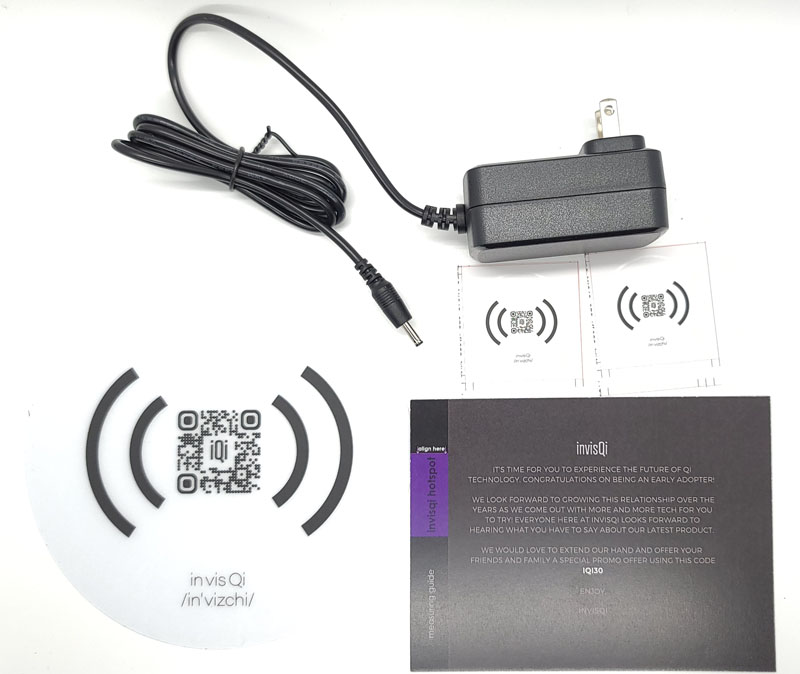
- Power supply with 6-foot cord
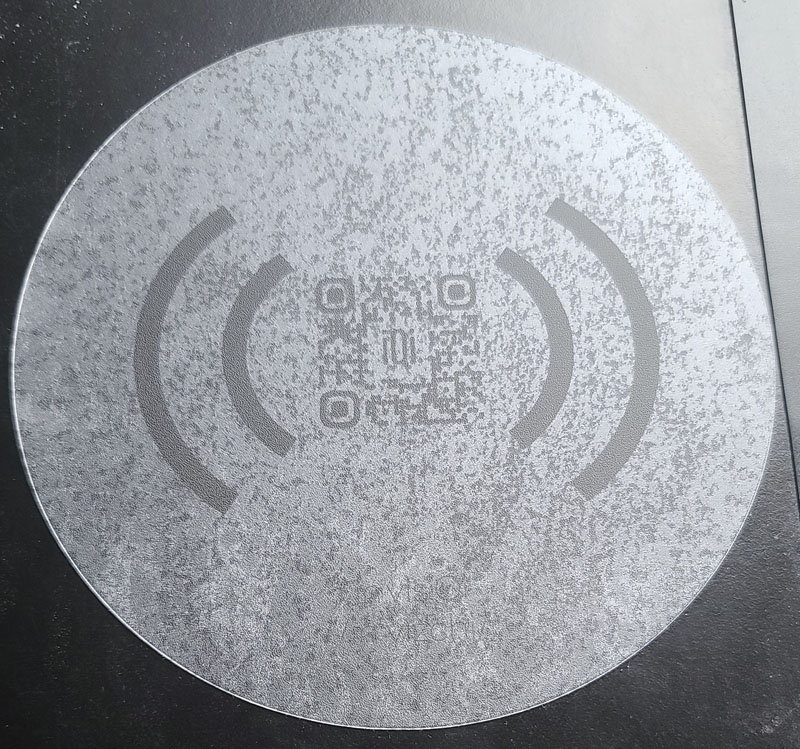
- Phone placement sticker (lower left)
- I also received a separate envelope containing:
- A welcome card – the card’s left edge is a “measuring guide” with an alignment guide – who knows for what as there is no explanation
- Two small stickers – again without explanation for their use, but they appear to just be smaller versions of the position sticker, in case you want something smaller to mark the spot
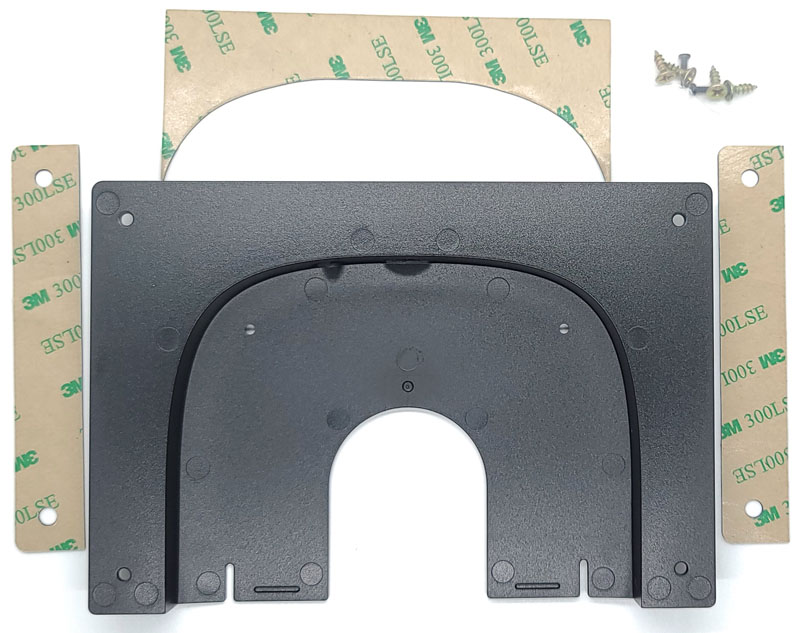
- Mounting hardware
- Bracket
- 3M adhesive strips, pre-cut (3)
- Bracket screws (4) and charger securing screws (2)
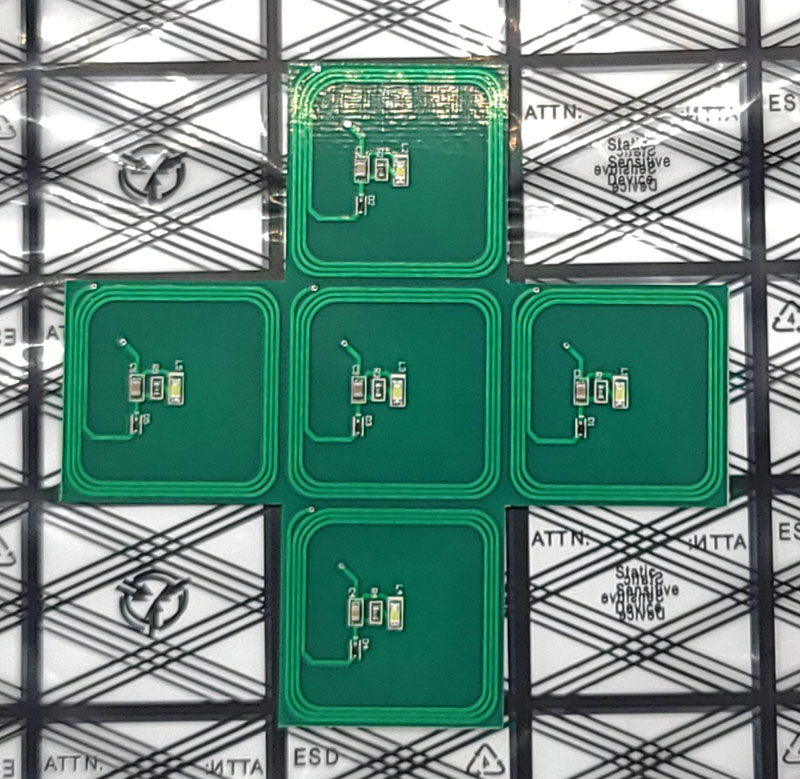
- This wireless sensor with no explanation of what the heck it is/does
- A user manual, and I’m being generous – more on that below
Hardware specs
- Dimensions: 12 x 12 x 1.5cm / 4.72″ x 4.72″ x 0.59″
- Weight: 175g / 6.2 oz
- Input: 12V 3A 36W DC adaptor included with 6′ cord
- Output: Apple 7.5W Fast Charge; Samsung 10W Fast Charge
- Wireless technologies:
- Intelligent Qi Communication™ (IQC)
- Apple & Samsung Fast Charge
- Qi Wireless Charging
- Physical separation from device to be charged: 18mm-30mm / 0.7″-1.18″
- Allowable pass-through materials: Wood, glass, plastic, marble, quartz, granite
- Non-allowed materials: Metal
- Safety certifications: UL, CE, FCC, KR, ROHS
Design and features
Before I get into the design, let me address that user manual that was included in the box. Here it is, all four pages of it:
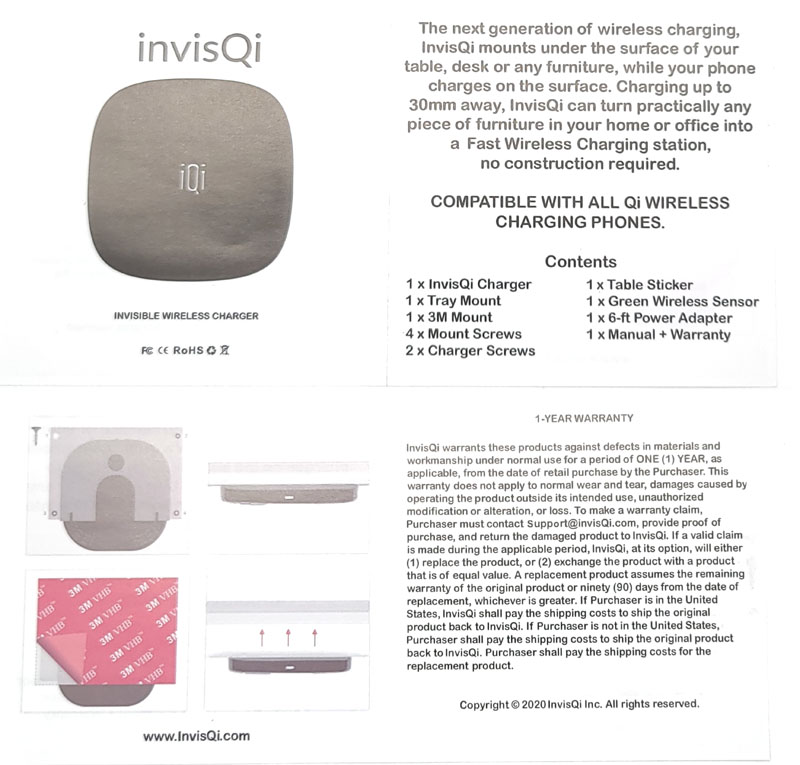
One page shows a photo of the charger. Another tells you what it is and what’s in the box. The third shows really vague images of how to install it. The last page talks about the warranty. There is absolutely no description of what the two different types of screws are for, why the 3M adhesive in the image is different from what is in the box, and no mention of the green thing other than the fact that it is included. Wow, just wow.
I went to the InvisQi website and found a chat button. It said they respond immediately but I was skeptical. I entered a question and waited…about 20 seconds. OK, that’s not “immediate”, but I’m obviously splitting hairs there. The tech, Dominic, was friendly and responded very quickly. He explained that the actual user manual, a PDF, arrives with the order email. Since I didn’t order this review sample, I never received that email with the PDF manual. OK, InvisQi, you get a pass on not providing actual documentation in the box. And, kudos for the highly responsive support chat.
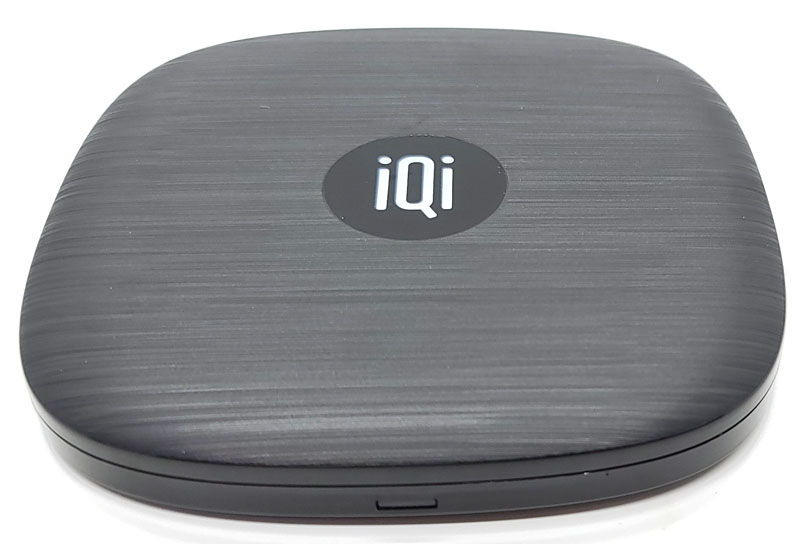
The charger itself is a rounded square of about 4-3/4″. The surface is a brushed, textured plastic. It is actually somewhat attractive. Too bad it will be hidden from view.
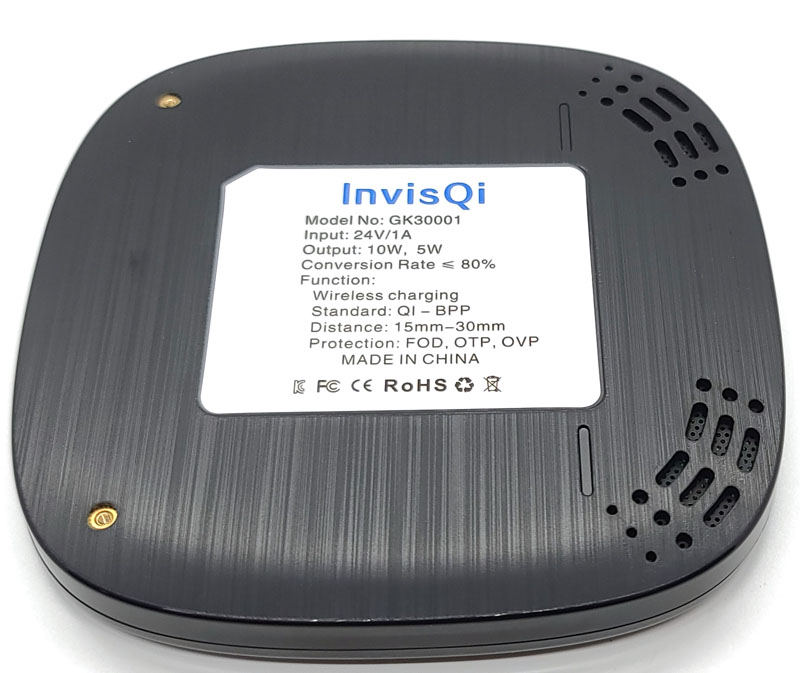
Underneath, we find the info tag. Interestingly, the information on the tag is completely different from the specs on the website. I really have no idea which is correct.
On the left side, there are two threaded brass inserts. These line up with holes in the bracket. You can insert the two securing screws so the charger is firmly secured in the bracket. On the right side are ventilation holes.
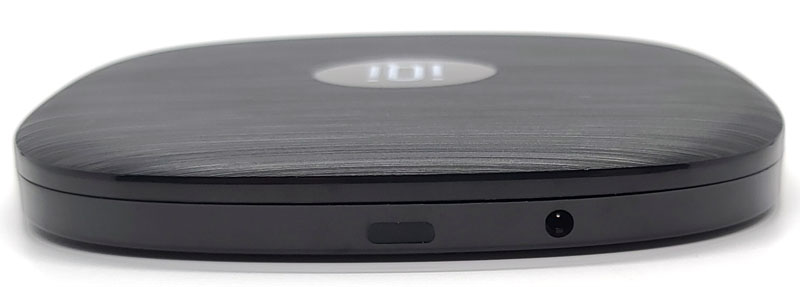
On the back of the charger, we see the power input port. In the center of both the front and back of the charger, we find a small, rectangular window. When charging, the one on the front lights with a dim white light that is completely unobtrusive in a dark bedroom.
Setup
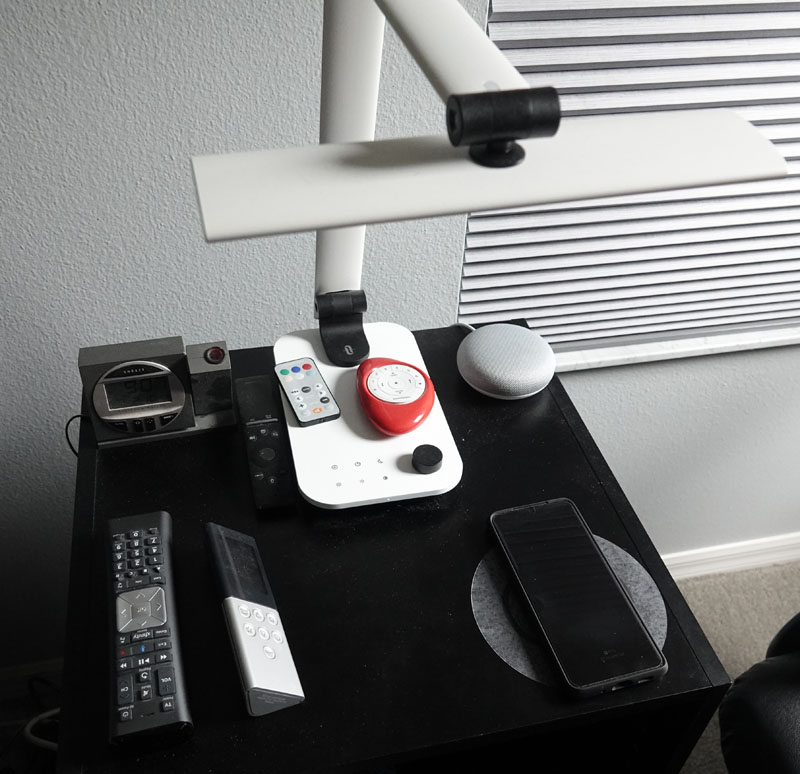
Before we get into the setup, let me publically apologize to my lovely wife for every single piece of dust that is visible in the following photos.
The setup is where the work comes in. InvisQi offers two choices for mounting – screws or 3M adhesive tape – both are included. You start by choosing the place you want to set your phone when you want to charge. In the installation instructions, they say to place the sticker and then align the bracket under it. To me, that seems a little backward as there may be obstacles under the shelf. I chose the approximate location for the bracket and held the charger in the bracket. Then, I used the wireless signal tool – that green thing I mentioned above. The PDF instructions explain that it is used to locate the charging signal. When it is in the right location where a charging signal exists, one or more of the surface-mounted LEDs will light up.
Once I identified the approximate location, I decided to mount the bracket using the 3M tape. I attached the tape to the bracket first.
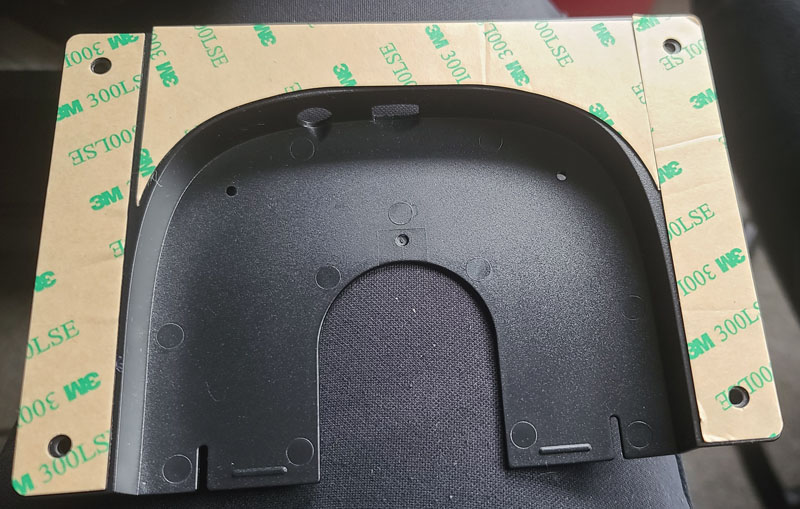
I have to rant a little about the 3M tape. The protective paper sticks so well, that fingernails, tweezers, and some inappropriate language were necessary to get that paper off the adhesive strips.
Once I finally got all the protective paper removed, I stuck the bracket in place and slid the charger into the pocket.

I opted to not use the two screws to attach the charger to the bracket as the fit was perfect and nothing should make it move. I should note that the board that it is mounted under is about 0.625″ thick – well within the range InvisQi should be able to handle.
I placed the sticker in place, again using the green wireless signal detector to ensure proper placement.
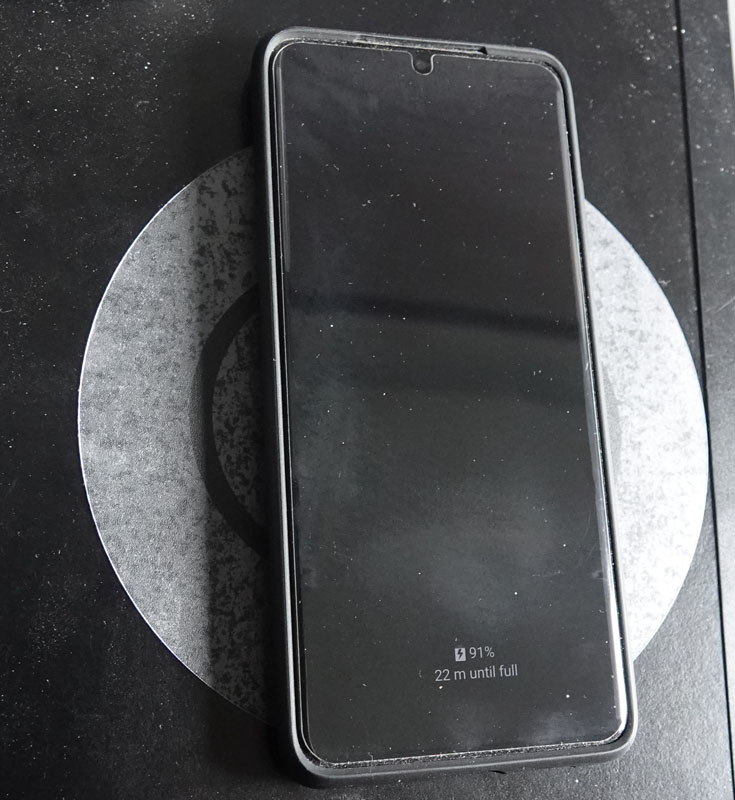
The last step was drilling a small hole in the back of the nightstand so I could pass the cord through from the wall charger. Here is the final look with my Samsung Galaxy S20 Ultra in place, charging.
Performance
Using InvisQi is simple – just place your device on the charging pad sticker and tada – your Qi-enabled device starts charging.
One thing to note is that charging speed certainly varies. When I tested initially by placing the phone directly on the charger, I got fast charging speeds. When charging through a particleboard shelf, I only get regular charging speed. That’s not a big deal or a deal-breaker, since I intend to charge overnight. But, if you’re considering this for a work surface as a charger, you won’t get fast charging.
I placed my phone on the pad when I went to bed. Because I tend to wake up in the middle of the night, I looked at the charger. It cycled on and off, ensuring that my phone didn’t overheat. When I got up in the morning, it was off, but my phone was at 100%, ready for the day. Nice. Or so I thought. The first couple of nights turned out great. Then, I woke up to find my phone only charged to 77%. I figured that since it was dark when I set it on the nightstand, perhaps I didn’t get my phone right on top of the charger. It went from 46% to 77% overnight, so it was still charging, just slowly, so an off-center placement might explain it. The next night, I was again down to about 45%. I carefully placed it on the pad at about 11 pm and it started charging, saying that in 2 hours and 26 minutes, it should be fully charged. At about 2:30 am, my bladder woke me up. I took a peek at what I expected would be a fully-charged phone. Nope. 77% and about 90 minutes remaining. I verified that the phone was perfectly centered on the charging sticker. Hmm… When I woke up around 7 am, I checked, and the phone was only charged to 90%. Both days, I plugged the phone into the RAVPower PD Pioneer power bank to top it off. The next night, with a remaining 36% charge, I put it on the pad at night and in the morning, I was at 100% power. The following night, with about 50% charge at night, I woke up at 6 am to a 70% charge. I put it back on the charger and checked again at 8 am and found it at 59%. Strange, indeed.
My razor also charges via Qi charging. I have a dedicated charger for it but decided to set it on my nightstand and see what happened.
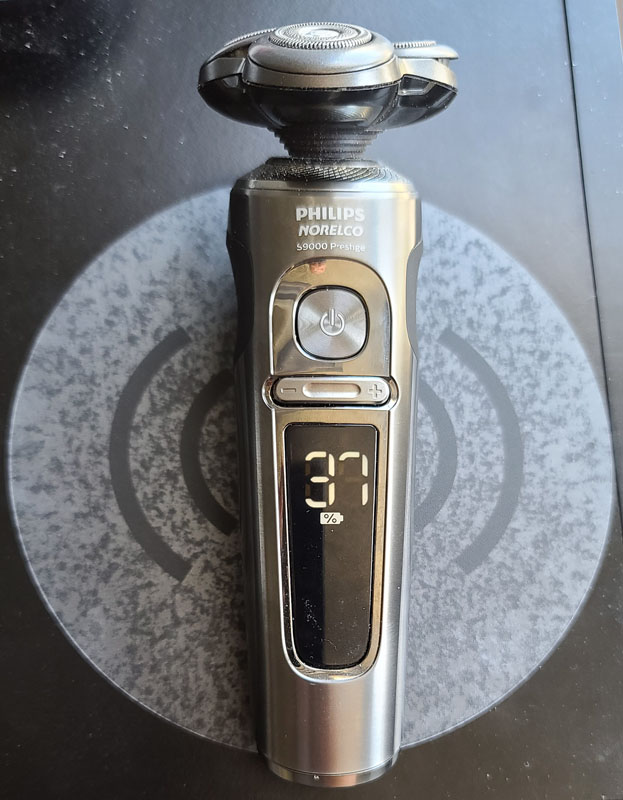
Sure enough, it started charging, just like when I set it in its dedicated charging pad or so I thought. I checked it later, and its charging speed was incredibly slow.
Before installing it under my nightstand’s top surface, I tried holding the charger under my 1.125″ quartz countertop and setting my phone on top, above the charger. My phone charged through the quartz. The same was true with my thinner glass-top dining room table. I added a book on top of my nightstand, taking the overall thickness above the charger to about 1.25″ My phone was still able to charge when I set it on the book. Other than metal surfaces or surfaces thicker than 30mm/1.18″, just about any horizontal surface in your home or office can become a wireless charging location. But, I will continue to experiment with charging, as the results seem pretty inconsistent.
What I like
- Turns just about any non-metal surface into a Qi wireless charger
- Doesn’t take space on the work surface
- Nice mounting options with tape or screws
What I’d change
- Inconsistent charging results
- Get some consistency between documentation sources
- Fast charging would be nice as it claims to be able to do it
Final thoughts
I really wanted to like the InvisQi. Lucky for me, I do, sort of. The installation process was pretty simple – it took me all of about 20 minutes and that included taking photos for this review. Now, I can just drop my phone on the nightstand when I go to bed and it will charge, although I’m still trying to figure out why it only partially charges at times. I had been charging it on a Samsung semi-upright wireless charger and always woke up to a 100% charge. It reduces some of the clutter on my already cluttered nightstand, and that’s a good thing. It would be great to get fast charging speeds, but for me, that isn’t that big a deal. But, if I continue to not get a full charge overnight, that might be an issue. It really seems to be hit or miss and that’s pretty frustrating.
Now, if I had only done a better job of dusting before taking the review photos…
Price: $119 – discounts available with code IQI30
Where to buy: InvisQi
Source: The sample of this product was provided by InvisQi.
![[MINI SIZE. ULTRA PORTABLE CHARGER]: Roughly the size of an AirPods Pro case, this smallest power bank packs 10,000mAh of long lasting power into a tiny, nano footprint. Easily slide this ultra slim, credit card size charger into your skinny jeans, a...](https://m.media-amazon.com/images/I/41rATpm6dyL._SL160_.jpg)
Now retrieving an image set.
INIU Portable Charger, Ultra Mini 10000mAh 45W Fast Charging with Detachable Cable, Flight-Safe Travel USB C Power Bank External Phone Battery Pack for Xiaomi iPhone 17 16 Samsung S26 Google iPad etc
(as of July 13, 2026 18:57 GMT -05:00 - More infoProduct prices and availability are accurate as of the date/time indicated and are subject to change. Any price and availability information displayed on [relevant Amazon Site(s), as applicable] at the time of purchase will apply to the purchase of this product.)
Now retrieving an image set.
Gadgeteer Comment Policy - Please read before commenting
Thanks for this detailed review and the solid 30% off code! I decided to buy one and hope I find a surface that gives more charging consistency.
Scam company, they used to advertise as ENERQi and took all the money on Kickstarter and Indiegogo without ever delivering.
Alex:
I can’t find any evidence that these two companies are related, other than they both are based in Illinois. If you have any facts that support this claim, please feel free to share.