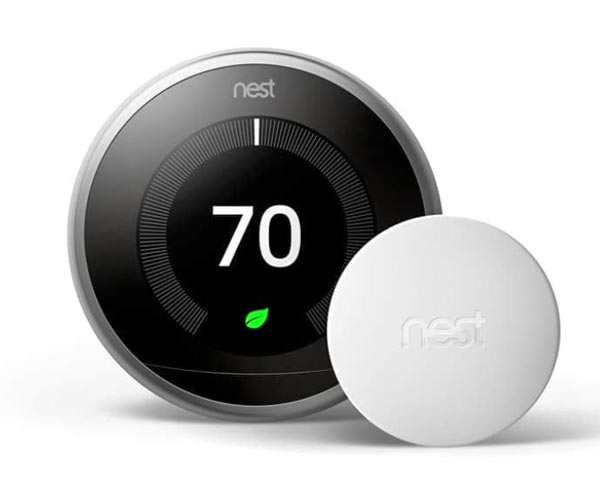
My condo is a rectangle, with the HVAC unit and thermostat at one end and the bedrooms at the opposite end of the condo on the long axis. The air flows out and has a straight path to the living and dining room areas, but it has a 90° turn to the hallway towards the bedrooms and another 90° turn back to the office. This means the living/dining areas are freezing in the summer / hot in the winter and the bedrooms and office are uncomfortably warm in summer /cold in winter. We replaced our ancient HVAC unit last summer, which did greatly improve the amount of air flowing to the bedrooms, but they are still too warm this summer. When the HVAC unit was replaced, we had a Nest Learning Thermostat installed. This made it easier to adjust the thermostat settings without having to get up in the middle of the night, but the Nest alone couldn’t make our bedrooms more comfortable. That’s why I was so interested to learn about Nest’s Temperature Sensor.

The Sensor works with the Nest thermostat to send information about the “local” temperature to the Nest. The Nest app can then prioritize that sensor temperature to control the behavior of the HVAC unit if desired. I purchased a Sensor from my local Lowes and installed it in the master bedroom. Adding the Sensor to the Nest system was easily accomplished by simply following the instructions included with the Sensor.
The Temperature Sensor is powered by a CR2 3V lithium battery (included); Nest says you’ll get up to two years from the battery. It connects to your Nest thermostat (either the 3rd-gen Learning or the Thermostat E model) via Bluetooth Low Energy and can be placed up to 50 feet away from the thermostat. This distance may vary depending on the construction of your home and sources of interference. My Sensor connected to my 3rd-gen Learning thermostat with no problems. I placed it on a wall close to the bed and out of the direct flow of air from the vent in the master bedroom.
You can see the Sensor in the above image. It’s a white plastic puck with a 1.9″ diameter and a 0.8″ thickness. It comes with a special hanging screw to allow you to take it down to change the battery when needed.
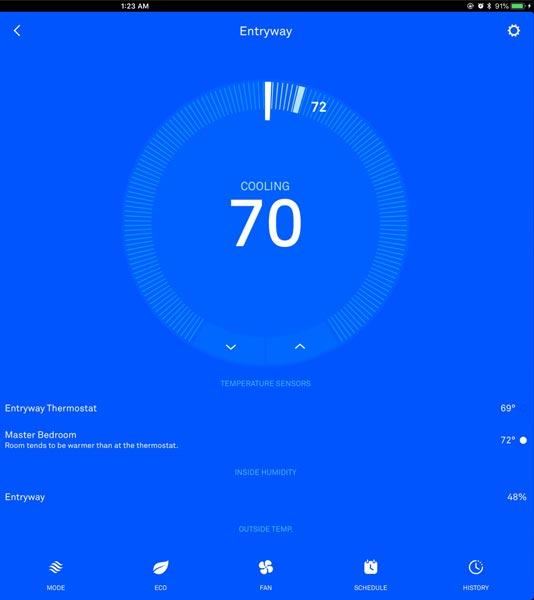
The Sensor shows up in the Nest app under the thermostat information. If you aren’t familiar with the app, the circle shows the set point (longer white marker) and the current temperature (shorter blue line with the current temp shown beside it). Under that, you’ll see the temperature measured by the thermostat and by the sensor. The white dot beside the master bedroom temperature shows that I have manually selected that sensor to be prioritized by the thermostat. You can see that the bedroom is still three degrees warmer than the dining room area with the thermostat.
However, I was able to increase my set point after I installed the Sensor. I used to have the set point at 67° to try to get the bedrooms cooled down a bit. The living and dining rooms would be uncomfortable to stay in without a blanket or sweater, and the bedrooms would still be uncomfortable for sleeping. The bedroom used to be about 76° at the coolest. Now that I have the Sensor controlling the HVAC unit, the bedroom is much more comfortable and the living and dining rooms are, too.
You can have 6 Nest Temperature Sensors supported per connected thermostat and up to 18 Nest Temperature Sensors supported per home. With multiple sensors in your house, you can use the Nest app to schedule which Sensor will be prioritized during various hours during the day. I don’t need a schedule, because I need the bedrooms always prioritized. Since adding the sensor, I haven’t had to use a fan to make the room more livable. This makes me very happy because I can’t stand the sound of the fan. Having a cool bedroom to sleep in was well worth the cost of the sensor for me.
The Nest Temperature Sensor is $39.00, or you can purchase a three-pack for $99.00 from Nest and other retailers like Target.

GMKtec G3 Pro Mini PC, Intel Core i3-10110U (Beats 4300U/N150) 16GB DDR4 (Dual Channel) 512GB PCIe M.2 SSD, Desktop Computer 4K Dual HDMI/USB3.2/WiFi 6/BT5.2/2.5GbE for Office, Business
(as of June 19, 2026 03:29 GMT -05:00 - More infoProduct prices and availability are accurate as of the date/time indicated and are subject to change. Any price and availability information displayed on [relevant Amazon Site(s), as applicable] at the time of purchase will apply to the purchase of this product.)
Gadgeteer Comment Policy - Please read before commenting
You should also ask your HVAC contractor to look at your supply ducting and see if there is an issue. Most home ducting systems are either efficiently designed or broken. When we moved into our current house, the bedrooms were iceboxes for the first winter. Our HVAC COntractor found that in the attic, the run to the bedrooms had been collapsed and broken so we were essentially heating the attic, not the rooms.
We asked our HVAC guy about the ducts, but there wasn’t anything he could do. (He does almost all the work in this building and has years of experience with its quirks.) We live in a 50+ year-old high rise. The ceilings (which cover the ducts) and most of the walls are cement. The HOA would require an architect to give approval to excavate the ductwork, assuming we could even afford that. Our guy suggested we get those plastic magnetic sheets to cover off part or all of a vent to control the amount of air coming out of it.
Our HVAC contractors were just incompetent – ducting to our bedroom has various turns and branches, so hardly any conditioned air (hot or cold) comes out. Genius!
We have a couple of 90-degree turns to go back to our bedrooms. Most of the air stays straight, so our living and dining rooms are frigid. I wish I could get a baffle in the duct to send half of that air down the hallway to the bedrooms. It seems to me that one baffle would make everything a little better.
Buy a ceiling fan
Overhead lights only in the dining room and kitchen, and the previously-mentioned cement ceiling means we can’t install any.
I am still a bit confused about how this works. I realize you have the sensor in your bedroom so it will read that the temp is higher in there than your main living room. So that would trigger the unit to kick on to try to cool the bedroom down. So that should make your main living room even colder. I don’t see how this sensor makes your living room not get colder when it tries to cool down the bedroom. I realize you get the benefit on not having to manually set your thermostat lower in the living room to force it down, but the end result is still the same is it not?
Yes, the living room gets colder and my bedroom gets more comfortable. And I could accomplish that by just setting my thermostat cooler. The benefit comes from the fact that I could set up schedules to automatically use the temperature in one room or another to determine which room is more comfortable during the day.
I could program it to use the temperature in the west-facing living room in the afternoon through early evening, then switch over to cooling down my bedroom in early evening. In the winter, I could make it warm up my daughter’s bedroom (with the sensor I just added in there) when it’s time for her to get home from classes.
I could do all of this manually, but automation is always easier. And gadgets are always more fun. ;o)
Thanks for the explanation. I agree, gadgets are always more fun!