Last year for vacation, my husband and I joined another couple for a trip to Santa Fe, New Mexico. The very first day we were there, we were walking around the main square as the ‘Golden Hour’ hit. For the photography nuts reading this, you will know the Golden Hour is the hour after sunrise and the hour before sunset where you can get some really optimal lighting. Just down the street was the Cathedral Basilica of St. Francis of Assisi. It was the perfect ‘Kodak’ moment! I ran like a fool down the street stopping traffic so I could stand in the middle of the street and get the shot. When we got home I had the image printed on metal and have it hanging proudly in our living room. Our friends who went on the trip with us have said that they really want a copy of the image for themselves. Lucky me, Julie posted up an offer to review the canvas prints from Canvas Press. I jumped at it and now I have the perfect gift for our friends who are getting married in September.
What is it?
Canvas Press is a web-based photo printing company. They have been in business since 2006. They offer canvas, metal and paper prints. They even offer murals using a set of stock photos. I was given the opportunity to try out a 16 x 20 1.5 inch canvas print.
How is it done?
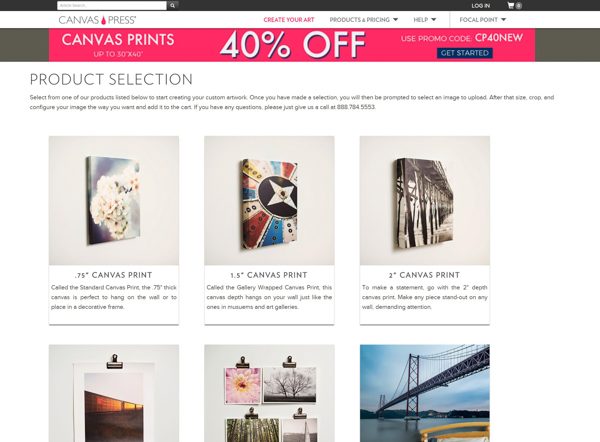
You start by going to their website at www.canvaspress.com and click on the ‘Get Started’ button at the top of the screen. The picture above shows you the various products they have available. They offer .75 inch, 1.5 inch, 2 inch and non stretched canvas prints. I clicked on the 1.5-inch Canvas Print option.
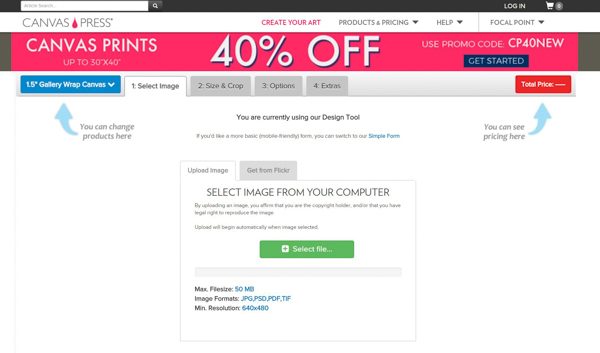
I was then presented with the screen above. You have the choice of picking a picture off your computer or you can also download an image from Flickr. They do give the following limits when downloading your photo:
- Max file size of 50 MB
- Image formats limited to JPG, PSD, PDF, TIF
- Minimum resolution is 640 x 480
I choose the photo from my computer and proceeded to upload the photo to their website.
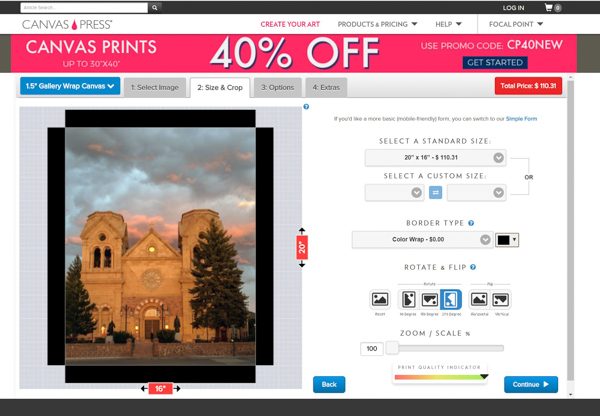
On the next page, I was presented with my photo. I could easily rotate the photo to the proper perspective. I could also place my mouse on the picture and move the picture around as necessary. The first thing the site asked was what size I wanted for my print. I chose 16 X 20 but they do offer the following sizes:
- 8 x 8
- 10 x 8
- 14 x 11
- 20 x 16
- 24 x 18
- 30 x 20
- 30 x 24
- 36 x 24
- 40 x 30
- 40 x 36
- Custom size of your choosing
They also offer multiple options when it comes to the border type on the canvas print. The standard is a mirror wrap option. Depending on what is in your picture different options might make more sense. On the canvas print I made a few years back I chose the ‘image wrap’ option where the image was carried around to the sides of the photo. This option works great if you have a lot of extra image to wrap around. They also offer a mirror image option where they replicate pieces of your picture on the sides. This would not work for the image I was using. In my case, I chose ‘color wrap’ and then picked the color black. This will give me black on the canvas edges as you can see above. One thing to note is that at the bottom of the screen they are showing you a print quality indicator. Depending on how many pixels your image is, the print quality can get really poor if you try to print large images or zoom in too much.
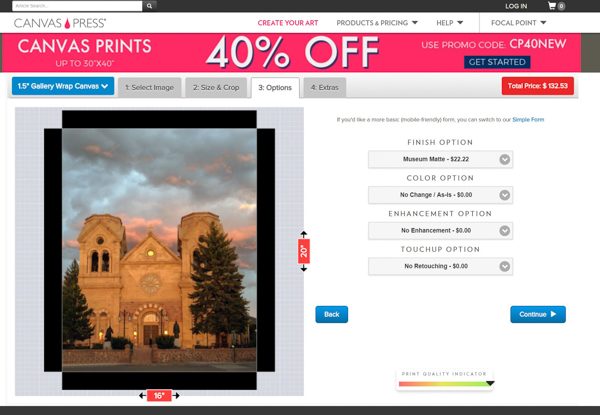
The next page presented me with several options. The first was the ‘Finish Option’. The ‘Standard Canvas’ is the default no charge option. The next option is ‘Museum Glossy’. The website states this will give you a smooth surface and deep rich blacks. Since this print would be going into a room with lots of light I chose the next option of ‘Museum Matte’ which would give me the matte finish and not have so much shine to it.
The next option is ‘Color Options’. I defaulted to the ‘No Change/As Is’ option which is how I had the previous version of this picture printed. I wanted to try to compare the two using the same options I could. There are several other choices such as black and white, sepia and blue suede shoes.
The third option is called ‘Enhancements’. I left mine with no enhancements. They offer such options like ‘Oilworks’ where they can make your picture look like a painting, pop comic and various other options that are a lot like some of the filters you see in apps like Snap Chat.
The final option is retouching. Here I left the setting at the default of ‘No Retouching’. I did not have my first print of this picture retouched so I wanted to be sure they just printed what I gave them. You can pay extra for things like minor or major retouching. The major retouching will do advanced things like background replacement and large object removals from the picture.
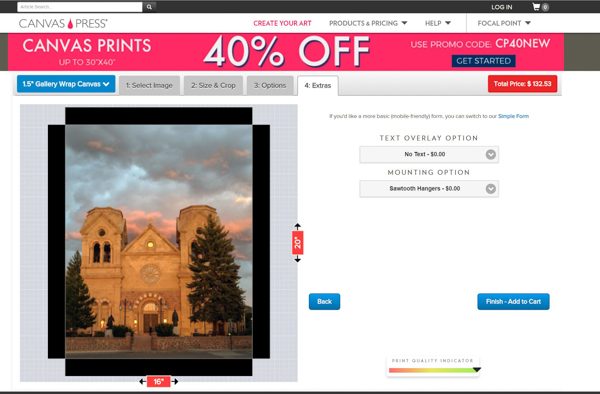
The last and final page only includes two options. The first is a text overlay option. This option will add a text label to your picture. I chose none, but if you do choose to add text, it lets you pick the font, size, and color of the text. The website then lets you position the text wherever you want it on the image. It is actually a pretty cool idea. The last and final option is your mounting choice. I left it at the default ‘Sawtooth hanger’, but you also have the choice of wire, security (in case you think someone will still your print!) or no hanger at all. The last thing you do is click add to cart and you pay for the print.
I did all of this on a Sunday. I chose the standard ground shipping which cost me $12.58. I found the picture waiting on my doorstep the very next Wednesday. I found out the company is located in Houston, Texas and I am located in San Antonio, Texas. This explains the really fast turnaround I experienced. It does speak well that my picture was printed and shipped the very next business day.
What it looks like

The above picture was the print on metal from another printing company.
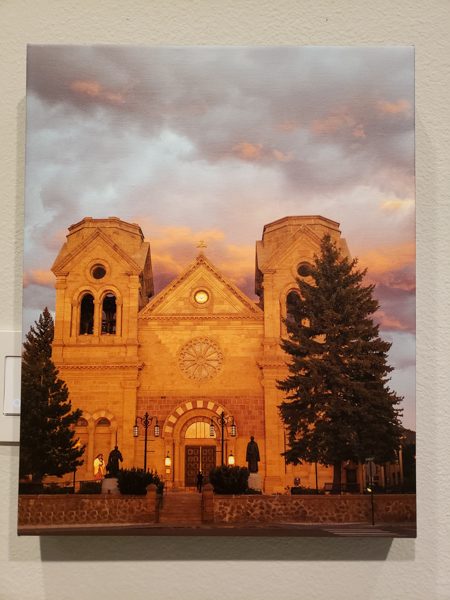
The picture above is the same picture in a smaller format on canvas from Canvas Press. Notice I did not choose any type of touch-ups or enhancements, but they did lighten the image. The trees are more distinct, but the church itself is now, in my opinion, a bit too yellow/orange looking. Because the entire picture has been brightened we also lost some detail in the clouds. I still think it is a good print and I know my friends will love it, but I do wish they had printed it exactly as I sent it to them. I believe the top print was more true to the original scene. The sun was setting but the church itself and the clouds behind were bathed in a nice glow. The trees are just a part of the frame for the church in my mind.
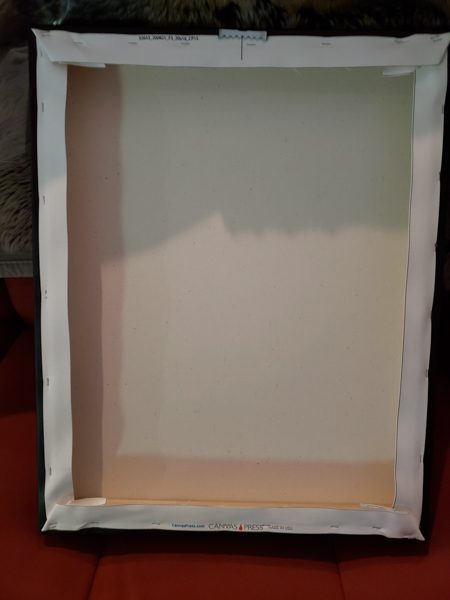
I took a picture of the back of the print to show you how they mounted the canvas to the frame. This is pretty standard with another canvas print I have at home. The sawtooth hanger is also pretty standard and works well.
What I like
- Super fast printing
- Lots of options when deciding what and how you want it printed.
- Prices are comparable to other canvas print sites
- Canvas quality is great and the picture is stretched tight over the frame.
What needs to be improved
- Don’t touch up the picture if I ask you not to. NOTE – this may not be an issue with other folks and they may appreciate this and call it a feature.
Final Thoughts
Overall I think they delivered a very nice product. I have seen some canvas prints from other companies not be stretched tight enough across the frame, but Canvas Press did a great job with this. They also had next day printing and shipping when I ordered on a Sunday. I also loved the plethora (I love using that word!) of choices when designing your print. I think if you are looking for a place to try printing on canvas I would certainly give them a try.
Price: $132.53 for a 20 x 16 1.5in canvas print. I paid extra for the matte finish.
Where to buy: Canvas Press website
Source: The sample for this review was provided by Canvas Press.
Gadgeteer Comment Policy - Please read before commenting
When I want to have a canvas print made I go to Groupon and wait for a deal from a company that offers free shipping and a much better price, usually less than $35, to come up.
I was quoting the full price on the website. They offer discount codes and right now with a discount code on their website the same picture will cost $44.12. I would recommend checking them out and make sure you are comparing apples to apples. You may be getting the print slightly cheaper but the depth of the canvas may also be a way they are saving money. Plus they offer a lot more options for the print than the company I currently found on Groupon.
Hi Lynn! My name is Cody with Canvas Press. I was checking out reviews and ran across yours. I wanted to talk about color and point a few things out. First, we do not do ANY editing to images if not requested. Unless we see dust spots or things we KNOW the customer didn’t see that would show up in the print and most of the time we make them aware of the changes via email. Second, artificial lighting can change the colors of prints big time, especially warm colors. I encourage you to take the print outside to view the truest print color. We calibrate our printers and screens often so you must take into account your viewing monitor and if its calibrated to the room you’re viewing in when comparing the actual print to your screen. Please reach out if you have any questions about the color calibration process and the variables from screen to print. We are happy to help!
Thank you for your reply. I actually just purchase a monitor calibration tool. I will certainly compare the color of the picture on my monitor to your print and the previous print I had made on metal from another company.
Awesome! We are calibrated to 6500K (industry standard). Also, pay attention to the ICC profile embedded in the file by the camera. When you compare, take the print outside and view in natural daylight. As long as the ICC profiles match up the color should be dead on. Let us know!
Canvas Press
It’s a great confirmation when an author’s job is validated, and they can feel the fruit of their effort.