Science and engineering are cool, right? That’s a matter of opinion, but there is an increasing need in our country for students to study the STEM subjects–Science, Technology, Engineering and Math. And with more information showing a link between technological innovation and creativity, why not foster both in your kids at the same time? Describing itself as, “an open source library of electronic modules that snap together with magnets for prototyping, learning and fun,” littleBits might just do that.
Click any image to enlarge.
Background
My elementary school-aged son is a huge Lego fan. He is quite cleverly creative and also mechanically inclined. While waiting for him to grow into the Lego Mindstorms set we bought him a while back, I thought littleBits might be a great way to get him to branch out and to familiarize him with electrical circuits and small mechanisms.
Packaging
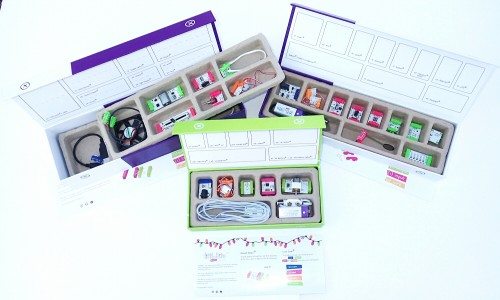
The littleBits packaging is simple and somewhat whimsical in appearance. The box that contains each kit is actually a storage case with a magnetic closure for the lid and with separate compartments for each component. The Extended Kit also has multiple tray layers to accommodate the additional components included (see below). I would mention here that quite a few of the individual compartments are just a bit too small for the components that are intended to fit into them, so there is the potential that they could be damaged when re-inserting them.
Contents
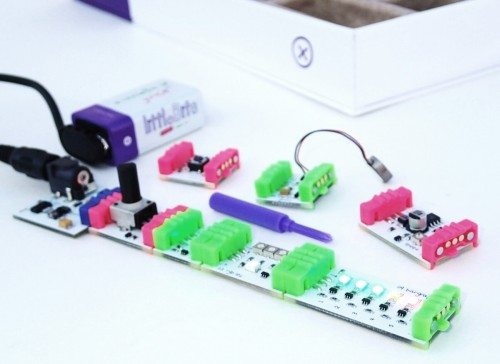
Each littleBits kit contains various components, and are priced accordingly. I evaluated the Starter Kit, the Extended Kit, and the Holiday Kit. There is also a Teaser Kit available, as well as individual modules that can be purchased separately.
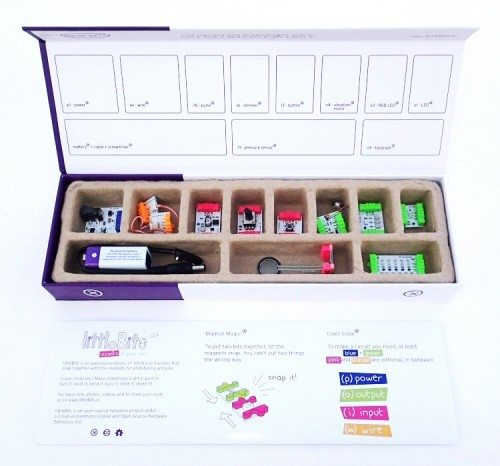
Starter Kit v0.2 ($89; shown below)
- LED
- RGB LED
- bargraph
- button
- dimmer
- pressure sensor
- pulse
- vibration motor
- power
- wire
- custom plastic screwdriver
- 9V battery and cable
- instruction sheet with quick start guide and project suggestions
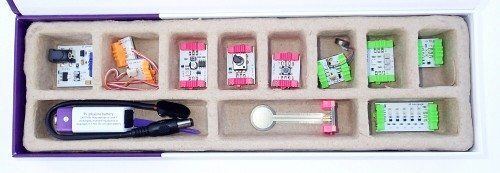
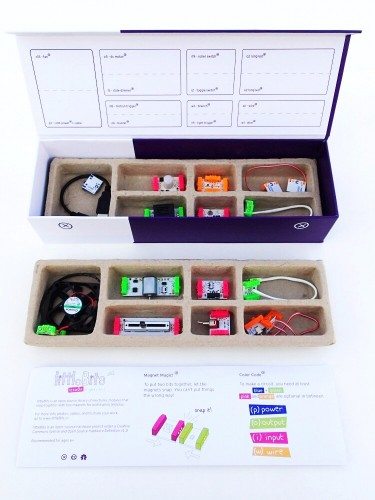
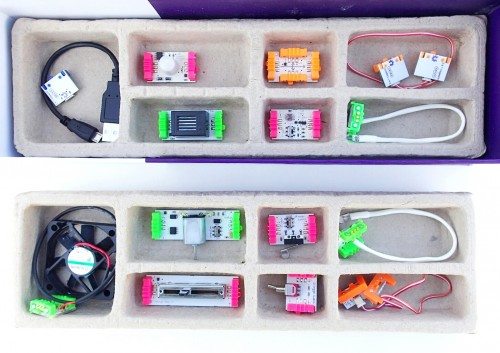
Extended Kit v0.2 ($149; shown below)
- long LED (x2)
- toggle switch
- slide dimmer
- light trigger
- motion trigger
- roller switch
- DC motor
- buzzer
- fan
- wire (x2)
- USB power + cable
- instruction sheet with quick start guide and project suggestions
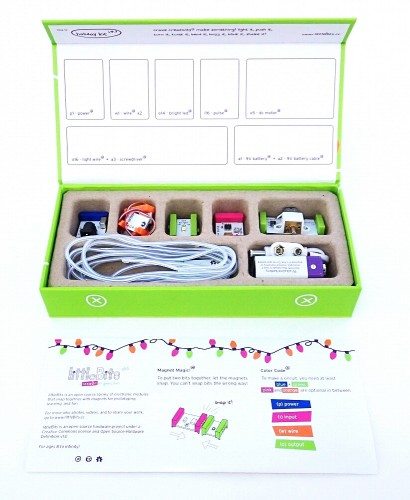
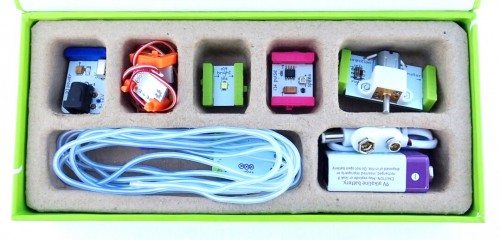
Holiday Kit v0.3 ($49; shown below)
- pulse
- long light wire
- DC motor
- LED
- wire (x2)
- custom plastic screwdriver
- power
- 9V battery and cable
- instruction sheet with quick start guide and project suggestions
Inside the Box
I gave the littleBits kits to my son as a Christmas gift. He had never heard of littleBits before, and the boxes looked interestingly mysterious. Upon opening the littleBox the three words that popped into my head were “cool”, “cute”, and “delicate”.
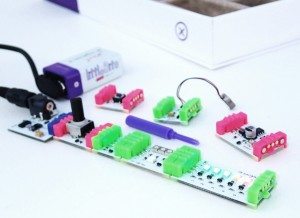
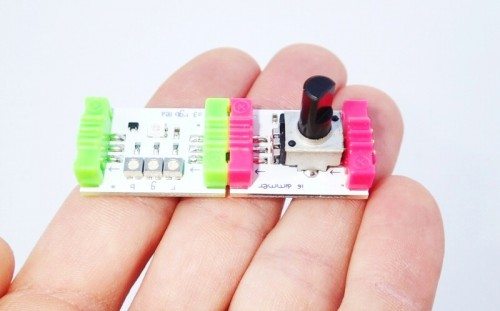
Cool because the littleBits components, or modules, have a very technical appearance. They basically look like printed circuit boards with some additional gizmos and greeblies sticking off the sides and top. So “cool” in a bit of a geeky fun sense. Cute because of the colors and size of the littleBits. They definitely have a bit of a toy-ish appearance. And delicate because they look a bit flimsy, as if any amount of abuse – or even use – of any kind might render them inert immediately. My son’s reaction was simply, “Cool!” and he immediately began building with gusto.
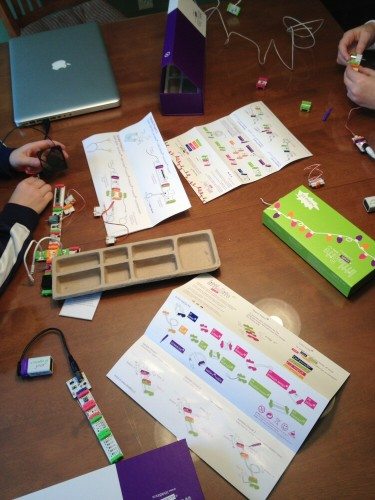
Within minutes, it looked like a littleBits bomb had exploded on our kitchen table, with several of us bellied up to it and building our own creations. In fact, around the table were my elementary school-aged son, my middle school-aged daughter (who isn’t typically interested in toys like this), my father-in-law (a career mechanical engineer, now retired) and me (a mechanical engineer). So we were geeking out pretty hard.
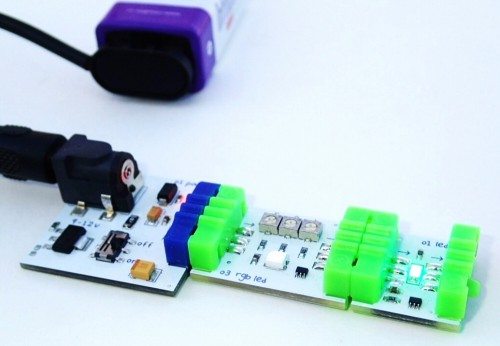
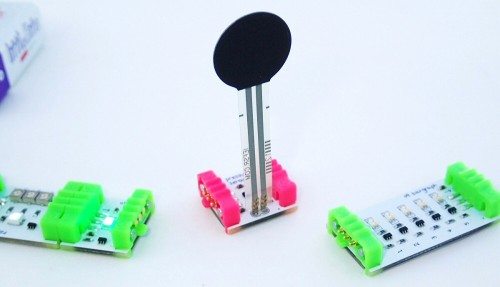
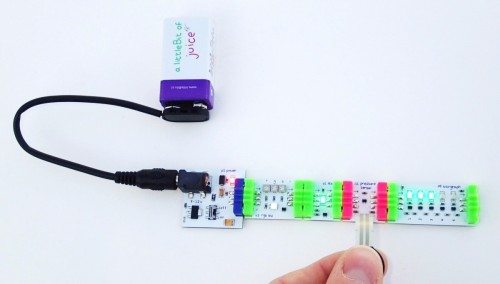
The littleBits are small, individual gadgets attached to printed circuit boards. They are designed to be modular, attaching to one another with small magnets, completing an electrical circuit and operating the devices on each littleBit. Due to the way the magnets are arranged, they force the littleBits to attach to one another only in an orientation that will allow it to make an electrical connection and complete a circuit. This intuitive connection functionality allowed us to start using littleBits to create little gadgety, circuity things in just a few minutes. The modules include features like LED lights, switches, fans, pressure sensors, and extension wires, just to name a few.
Initially, it was quite fun to just grab a littleBit out of the box, attach it to your power source (either one of the supplied 9V batteries or a USB connection to our MacBook) and see what it would do. This enabled several minutes of “Cool! Look what this does!” behavior. After working out the function of each of the littleBits and attaching them together in various combinations, there was a bit of a lull in interest. It was only then that we began to open quick start guide booklets, more to see the project suggestions than for any real need for instructions. My son wasn’t particularly interested in any of the suggested projects, which I suppose is the whole goal anyway, to enable creativity. He promptly began planning his own designs.
Since Christmas day, my son has pulled out the littleBits several times to build new inventions with them. However, on only the second invention session, we noticed that one of the littleBits modules was already faulty. An LED light wire was broken at its connection point to the circuit board. I was not happy with this. Also, my son had been extremely careful with the littleBits and they had only been used under my supervision. I took this as evidence that, unfortunately, my initial assessment of the delicate nature of littleBits seemed to be confirmed. One of my initial thoughts for a great application for littleBits would be in a classroom setting, to teach basic circuit design and so forth. However, considering how fragile the littleBits seem to be, I’m not sure that they would last long in a classroom full of excited young inventors. Additionally, the cost would probably be prohibitive for most schools.
Conclusion
littleBits is an interesting product. It’s a toy that is technical, yet intuitive to use. This plus its modularity enables quite a bit of creativity. However, its components are quite delicate and the kits are fairly expensive. At our house, adults and kids had a lot of fun with littleBits, but we were all wary of breaking them. Does littleBits promote kids’ interest in science, technology, engineering and math? Maybe, maybe not. But it couldn’t hurt.
UPDATE – May 3, 2013
Not long after posting the review above, the folks from littleBits commented (see below) that the review had been done with v0.2 of their product, and that the new v0.3 featured some updates, including improving the somewhat easily breakable wiring connections which I had noted in the original review above. They offered me the opportunity to evaluate their littleBits Extended Kit v0.3, which I accepted.
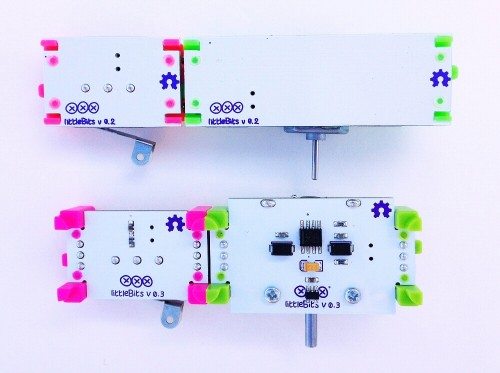
First, in addition to slightly reducing the overall footprint size of each component, most of the main electronics on the littleBits have been moved from the top of the circuit boards to the bottom. This visually cleans up the design and may protect the components from damage.
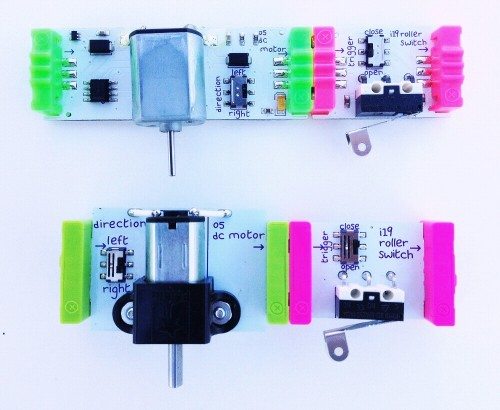
Bottom: v0.3
Second, where the littleBits components previously sat flush with the working surface, the new design includes a small “leg” at each corner that elevates them slightly and keeps the now underside-mounted electronics from touching the working surface.
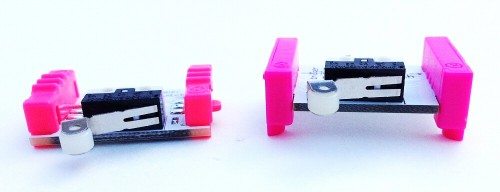
Third, some of the components themselves, for example the small motor, have been upgraded to include more robust attachments.

Finally, as mentioned above, the wire connections to the tethered components have been made more robust. In fact, the newer style mechanical connectors appear to plug into the small connector box, therefore potentially being replaceable.
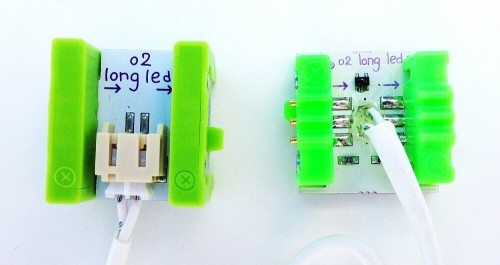
Finally, I noticed that the v0.2 and v0.3 styles are fully compatible with each other, with synchronized magnet locations, as seen below. This is means that old versions of littleBits do not become obsolete when a new version is released.
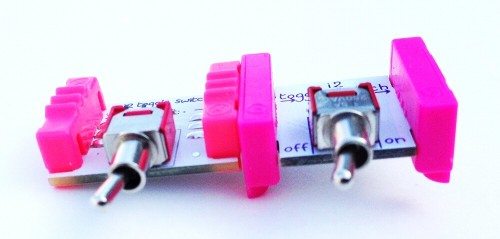
Do the improvements in v0.3 described above make littleBits perfect? Not yet, but they are certainly steps in the right direction, and increase the durability and therefore the value of the product.
Updates 04/09/15
My son really liked littleBits and played with them quite a bit for a while, but their fragile construction was not enough for my 10-year old and the components eventually started to get a bit worn out and some even broke.
Source: The sample for this review was provided by littleBits. Please visit their site for more info.
Gerber Gear 22-47162N Fast Draw Folding Assisted Opening Pocket Knife, Fine Edge, Black
$42.66 (as of 12/25/2025 17:22 GMT -06:00 - More infoProduct prices and availability are accurate as of the date/time indicated and are subject to change. Any price and availability information displayed on [relevant Amazon Site(s), as applicable] at the time of purchase will apply to the purchase of this product.)Gerber Gear EVO Jr. Folding Knife - Serrated Edge [22-41493]
$28.99 (as of 12/25/2025 17:19 GMT -06:00 - More infoProduct prices and availability are accurate as of the date/time indicated and are subject to change. Any price and availability information displayed on [relevant Amazon Site(s), as applicable] at the time of purchase will apply to the purchase of this product.)Product Information
| Price: | varies by kit (As reviewed: Starter $89, Extended $149, Holiday $49) |
| Manufacturer: | littleBits |
| Requirements: |
|
| Pros: |
|
| Cons: |
|



Gadgeteer Comment Policy - Please read before commenting
Hey thanks for the review! We really appreciate it.
I just wanted to point out that most of your review seems to be using our v0.2 Bits — the new v0.3 Bits, which we introduced in December, have some improvements specifically to address your comment about littleBits’ durability. For more info, have a look at our announcement post: http://littlebits.cc/version-03-is-here
There’s a photo in there that shows how we’ve redesigned the wire connection to the boards: https://s3.amazonaws.com/littlebits-wp-uploads/2010/12/-4.jpeg
So far, based on the feedback we’ve been getting, it does seem like the new connector has really helped out with issues like the one you experienced. The connectors are also a lot more robust in general.
And don’t hesitate to email us at [email protected] with any questions!
In a high school class we learned about electronics. We had breadboards, capacitors, transistors, etc. Only thing that we had to do ourselves was cut various lengths of wires to use with breadboards and components, then strip, flux and solder the ends so they would fit into the holes of the breadboard. That may be a cheaper and sturdier way. IOW make your own kits. You could use a cheap fishing tackle box to keep all the parts in.
I agree with Dee this probably would be a more affordable solution . The price of the little bits solution is a bit high!!! when you think about the cost of the components themseleves !!
IMO, the genius of Little Bits is their marketing and targeting the right audience, essentially those with more money than sense, To this audience, the more it costs, the better it must be. A breadboard with discrete components and a few spools of solid wire is a much better and cost effective alternative, even if you bought the components from Radio Shack and paid their exorbitant prices.
@Techfun – There may be some merit to this. However, while I agree that a breadboard, wire and discreet components may be more cost effective (perhaps even much more cost effective), as someone who has used the LittleBits, I can vouch for the fact that they are pretty darn fun to snap together and get all the little components running. I do still think that LittleBits would be a tough sell for schools, both for the relatively high price and also for how delicate the components are.