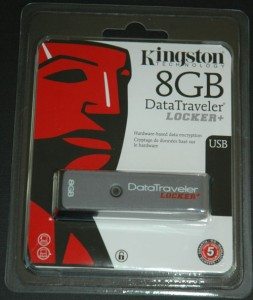
 The Kingston DataTraveler Locker+ series of USB flash drives provide the expected level of performance for a USB memory stick, with the added security of password protected access and 256-bit AES Hardware Based Encryption, for a slight premium in cost over non-secure storage. In exchange for this protection you give up the ability to boot from the stick, and the ability to use the device (or share data) with your Linux brethren. If you’re prone to leaving a trail of memory sticks (and the data they hold) behind you, then this could be the product for you. The plus (+) is significant, as it means this drive is 100% encrypted and password protected. There is a non-plus version where you can set aside some portion of the storage as “public” (viewable without password) – that’s not the version I’m reviewing here.
The Un-wrapping
The Locker is sold in plastic wrap packaging meant to hang with all the other memory at your local Buy More. Once you extract it from the package, you’re left with a 2” stick with a pivot cover, much like any other. You also get a few pages of instructions, which you can more or less ignore.
Setting the Code (first time use)
To get the ball rolling, plug the Locker into any available USB 2.0 port. On a windows box (Windows 7, for these screen shots) you’ll see the usually flurry of hardware detection and installation messages, and once that quiets down you will have two new removable drives. The actual storage drive isn’t available just yet because you have not unlocked it. Instead you open the read-only DTLplus “CD” drive, which should AutoRun the DTLplus_Launcher.exe application.
If AutoRun isn’t on, or you right click and open that drive, you can get to the launcher and also get to the user manual.
The first time you run the launcher app, or any time after you’ve reset the device, you are prompted to establish a password:
If you’re on a Mac you’ll need to manually install the driver from the read-only drive in the Mac folder, but the procedure is similar.
Logging In
Phew, ok this seems like a lot of work just to get at your USB memory disk, but it’s actually much simpler in everyday use. Normally, you’ll stick the drive in, open “CD” disk that appears and launch the app (or AutoRun will do that for you), and then enter your password. After that, the other drive will show up.
After entering the password correctly, the drive is actually mounted:
From that point on until you eject the stick, or shutdown/reboot, the Locker just works like any other disk.
Changing Your Mind, or Losing It
The Login dialog has just two options. You can put in your password, phone a friend (in other words, give yourself your hint back.) You can also display the contact info associated with the device (covered below) or admit you’ve forgotten your password. Admitting defeat means you have to format the drive and start over, but at least you can still use the drive. If you fail 10 times (or whatever you change the default to for retries) then the drive is locked and you can only format it and start over – there is no way to undo that lock. In other words, don’t forget your password.
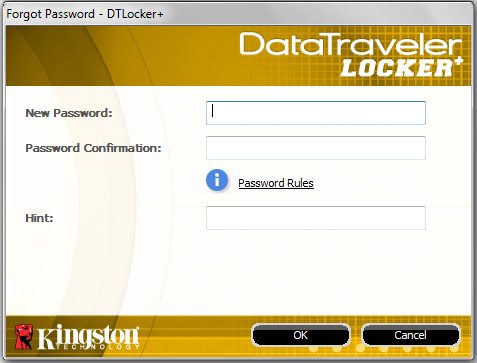
On the login screen, clicking Forgot Password leads you here:
Clicking Ok takes you to the Password Setup dialog we started out with.
Options
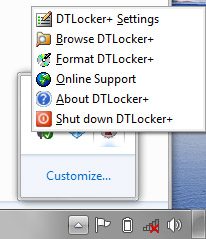
When the Locker+ is unlocked and mounted, you will have a taskbar icon that lets you change the settings for the device:
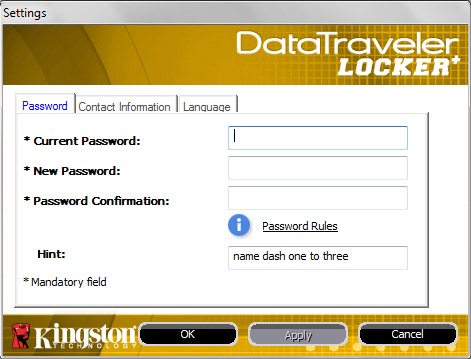
Settings leads to this dialog with three tabs:
The Password tab lets you change your password and/or hint.
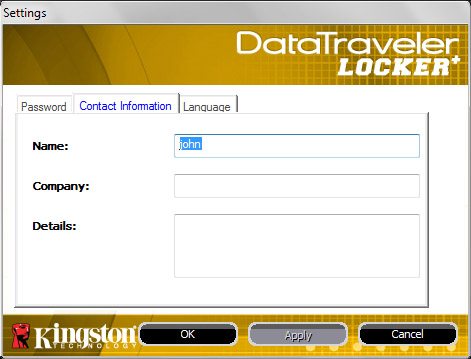
The second tab lets you enter the Contact Information that is displayed when “Contact Information” is clicked on the Login dialog. This would be useful if an honest person finds your lost drive. If a dishonest person finds it, they won’t get your data even if they get your drive.
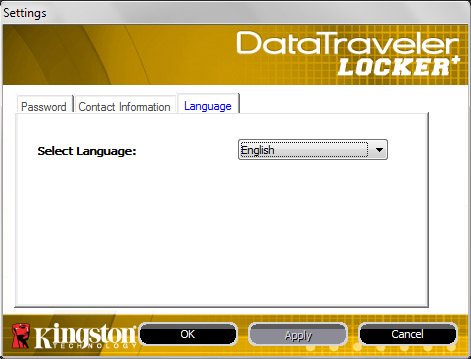
The last tab lets you select the language used by the interface.
How Safe Is It?
In theory, it’s as safe as your password – if you make it too easy to guess, then it’s not any safer then an unprotected drive. The hardware encryption on the device is a nice touch – that should prevent a determined attacker from un-soldering the chips and getting access to the data that way. I’m not sure how many of us need that level of protection, but if you do here it is.
Performance/Ease of Use
On a Windows or Mac machine the Locker+ is only slightly more work to use then a regular drive – you only need to unlock it once and then it remains unlocked until it’s ejected. Once unlocked the data partition performs essentially the same as a non-encrypted drive. The hardware encryption/decryption doesn’t add a perceptible performance hit. For me the only drawback is the inability to use the device under Linux, but it has performed well even when used in virtual machines (Windows) and on the Mac mini.
Conclusion
The Locker+ is a drive with an effective protection system built in. The performance is on par with unprotected devices, and in actual use the password protection isn’t too difficult to deal with. If you need to carry important data on a USB drive, the Locker+ would certainly help keep it safe.
STREBITO Electronics Precision Screwdriver Sets 142-Piece with 120 Bits Magnetic Repair Tool Kit for iPhone, MacBook, Computer, Laptop, PC, Tablet, PS4, Xbox, Nintendo, Game Console
(as of February 18, 2026 17:44 GMT -06:00 - More infoProduct prices and availability are accurate as of the date/time indicated and are subject to change. Any price and availability information displayed on [relevant Amazon Site(s), as applicable] at the time of purchase will apply to the purchase of this product.)WOLFBOX MF50 Compressed Air Duster-110000RPM Super Power Electric Air Duster, 3-Gear Adjustable Mini Blower with Fast Charging, Dust Blower for Computer, Keyboard, House, Outdoor and Car
(as of February 18, 2026 09:11 GMT -06:00 - More infoProduct prices and availability are accurate as of the date/time indicated and are subject to change. Any price and availability information displayed on [relevant Amazon Site(s), as applicable] at the time of purchase will apply to the purchase of this product.)Product Information
| Price: | 8GB - $46.00 |
| Manufacturer: | Kingston |
| Requirements: |
|
| Pros: |
|
| Cons: |
|






Gadgeteer Comment Policy - Please read before commenting
I don’t have the disk and I don’t remember my password who can I on look it
I have a problem cannot get in to DTL Locker … What to do?