“You can never be too skinny or have too much money.” Isn’t that the way the old saying goes? I would like to make an update and reword it to now say: “You can never too skinny or have too much disk storage”. With 10MP digital cameras, digital audio and video, file space can quickly become filled to capacity. I have four computers in my home, and they all have this issue. I also have an issue regarding backing each drive up. Right now I back up my primary computer, but not the others. This is definitely not a good practice. Lucky for me, I found a possible solution for both of these problems, with Maxtor’s Shared Storage II NAS (Network Attached Storage) device.
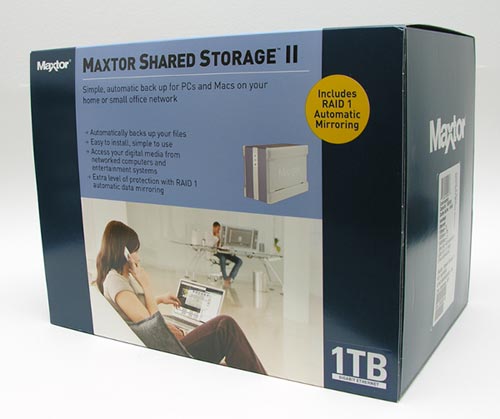
The Shared Storage II drives come in three capacities: 320GB, 500GB and 1TB. Of course, I’m going to tell you about the 1TB version. Did you have any doubts? ;o)
Hardware Specifications
RPM: 7200
Cache Buffer: 16MB
Connectivity: 1 – 10/100/1000 RJ-45 Gigabit Ethernet port, 2 – USB 2.0 ports for printer sharing, storage, expansion or offsite data rotation
Operating Temp: 5C to 35C (41F to 95F)
Dimensions: 5.4 x 3.9 x 8.5 inches (136 x 97.5 x 217mm)
Weight: 6lbs
AC Voltage: 100-240 VAC
Input Frequency: 47-63 Hz AC
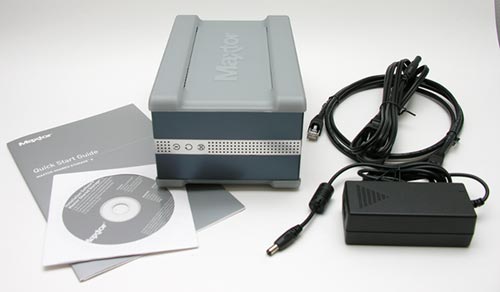
Package Contents
Shared Storage II drive
Maxtor Backup and Easy Manage Software
Ethernet Cable
Power Adapter
User’s guide on CD
Maxtor Limited Warranty
The drive is quite a bit smaller than I had anticipated. Definitely smaller than the 1TB LaCie drive that I had briefly tried out before giving to Rob last year. The reason why I gave away the LaCie drive was due to noise, not its footprint.
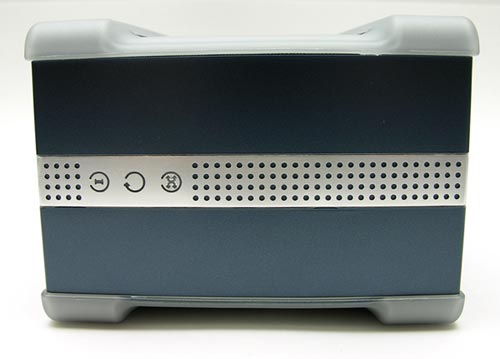
Yes, I know I have the drive laying on it’s side. Let me preface that by saying that I now know that I have it on its side. I guess I was oblivious to the picture on the box and for some reason, I thought this was the correct orientation. By the time I realized my mistake, I already had all the cables unbundled and the drive plugged in for testing. I was too lazy to unhook everything to re-take the pix. Anyway, the Maxtor Shared Storage II drive has a gun metal Blue Aluminum (I think) case with a brushed Silver band across the front. Hard rubber covers the sides.
There are three Green status LEDs behind the Silver strip. From Left to Right, they are Power Activity, Disk Activity and Network Activity.
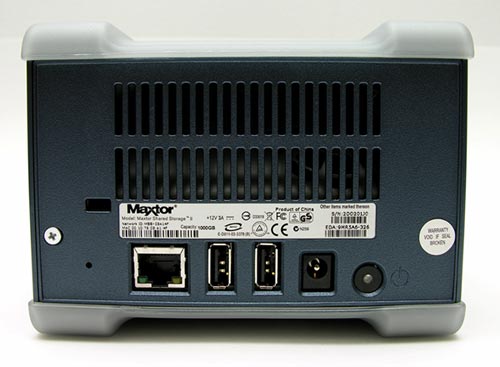
On the back side, you will find a large heat vent, a Gigabit Ethernet port, 2 USB ports, AC adapter port and the Power button. The USB ports allow you to plug in more external storage or even a printer.
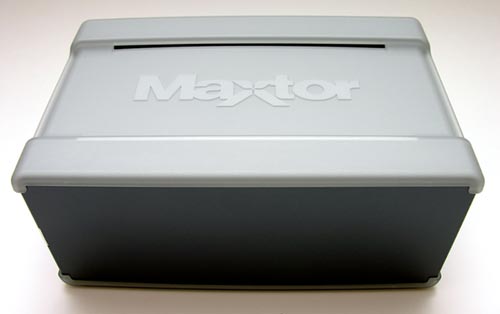
There are also 2 heat vents on either side of the drive, cut into the rubber covering.
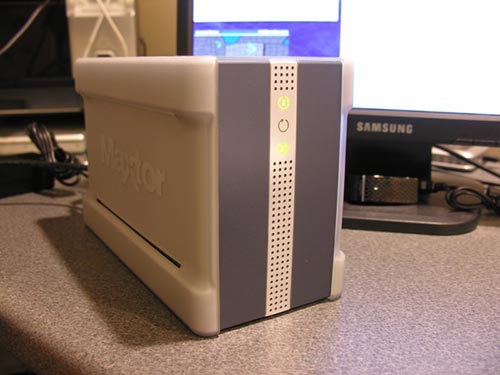
Setting up this drive is a breeze. It actually doesn’t even come with a manual, just a fold open quick start guide. All you really do is plug the included Ethernet cable into the back of the drive and then into a free port on your router or switch. Then you plug in the power cable and press the power button on the drive.
The next step is to install the EasyManage software that is included on CD. There is a separate version for Windows and Mac users. Yay!
Click thumbnail to see full-size screen shot
The first time you click the desktop icon to launch the software, it pops up your browser. It may confuse people that are there two interfaces for this drive. A web interface and then a desktop application.
Click thumbnail to see full-size screen shot
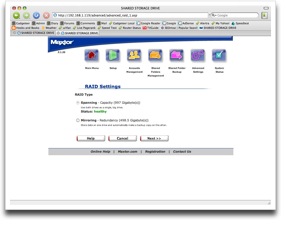
The web interface has most of the settings for passwords, firmware update, user accounts, etc. This is also where you would turn on the RAID feature (it is off by default). RAID (which stands for Redundant Array of Independent Disks) basically allows you to use one of the two 500GB drives inside the Shared Storage II for file storage and then an exact duplicate (mirror) of that drive is made on the other 500GB drive. This mirror happens automatically as you access the drive. Then if one drive goes belly up, the other drive automatically kicks in. With this featured turned off, the drives are set to Spanning mode, which means that they appears as one 1000GB (1TB) drive.
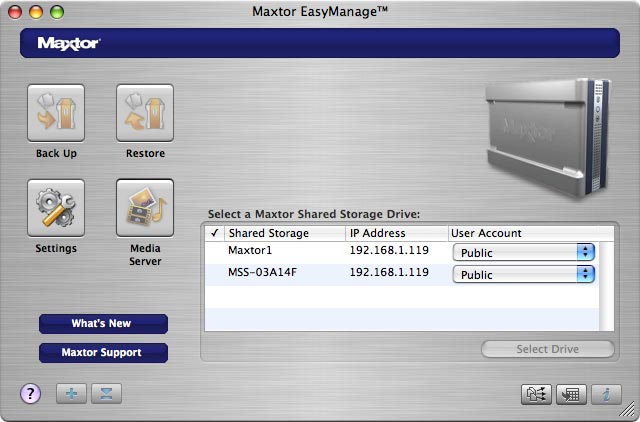
The EasyManage desktop application is mainly for configuring automated backup and restore operations.
If you have more than one computer on your network, you will need to install the software on each computer that you want to have access to the drive. Once you install the software (which requires a reboot after installation), you create a user account that represents the computer.
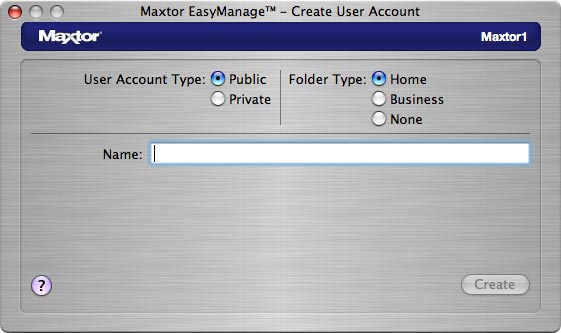
The accounts can be either Public or Private. Public is open to all users on your network and Private is password protected. You can also specify a type of either Home, Business or None. If you choose Home, a default directory structure will be created that looks like this:
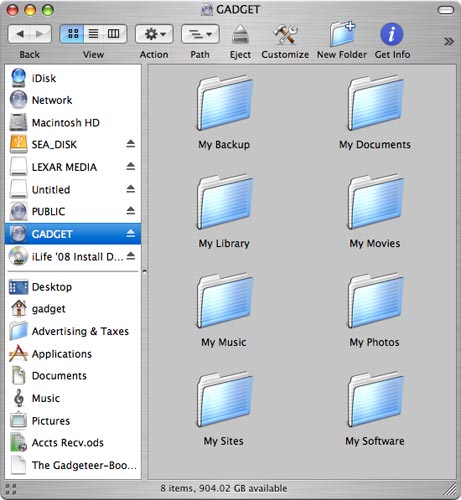
If you choose the Business type, the structure is similar, but with folders such as My Documents, My SpreadSheets, My Presentations, etc. If you choose None, the default structure will not be created. The Home and Business structures help you keep your files organized if you just intend to use this drive as regular external storage. The structure also comes in handy when you use the Drag and Sort feature which I’ll tell you about a bit farther down in the review.
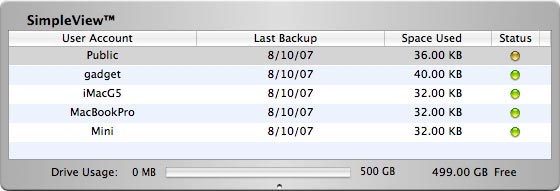
Once you install the EasyManage software on each machine and create an account on each one, you will then be able to see and access the folders for each account from all your computers on your network. If you click on an account name, it will map that share as a drive on your computer. From there, you can copy files back and forth like you would any regular hard drive.
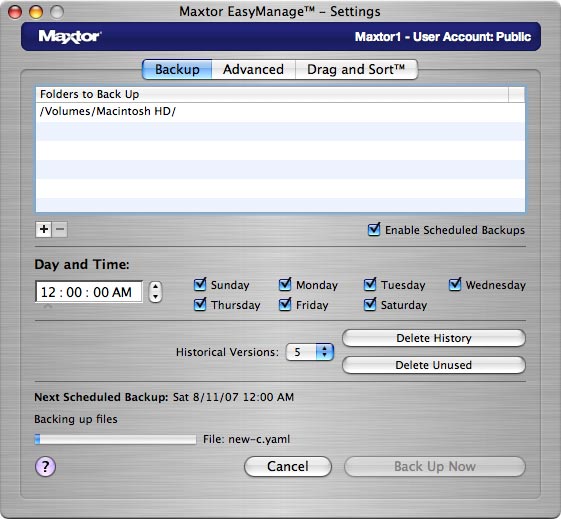
Network file storage is a great feature, but what I like even better is the ability schedule automatic backups for all your computers on your network. It is very easy to setup, you just specify which folders you want to be backed up, what time the backups should occur and on which days. You can also specify how many backup versions to keep.
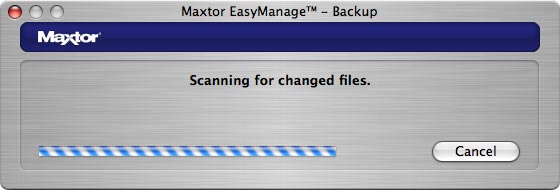
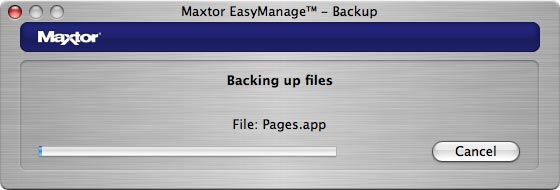
When a backup is initiated, it will first scan the computer for changed files and will then start the backup process. I don’t have Gigabit Ethernet here at Gadgeteer HQ, so backups probably could be a lot faster if I upgraded. Accessing the drive from various computers on my network seemed quite fast though. No noticeable lag navigating folders, listening to music files or viewing videos.
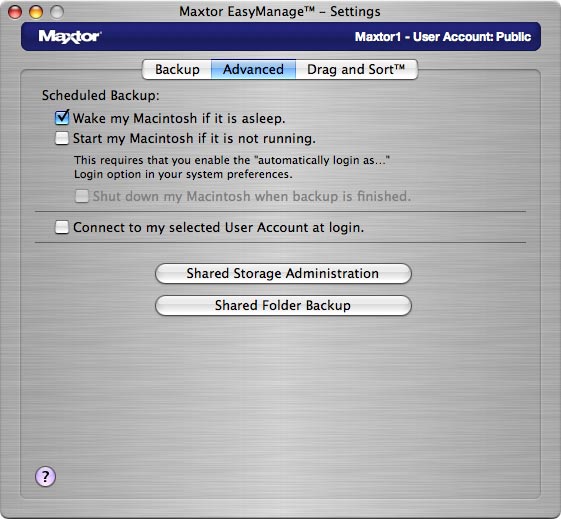
With the Mac version (not sure what features are available with the Windows version) of EasyManage, you can tell the software to wake the Mac or even start the Mac when it’s time for the backup operation to begin.
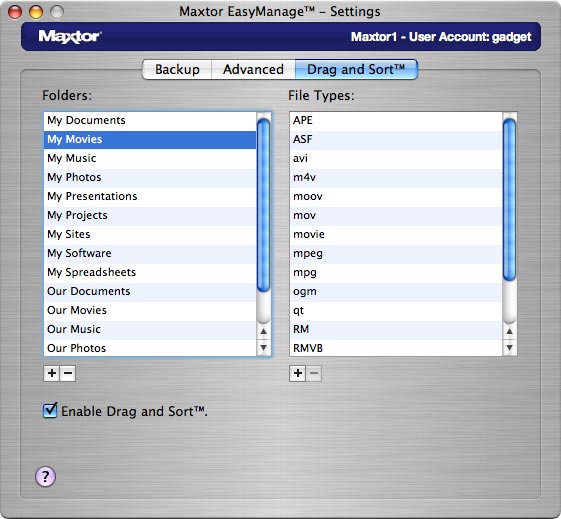
The Drag and Sort feature is supposed to allow you to drag files to the drive icon for the Shared Storage II and have it automatically sort the files and place them in the appropriate folder (My Photos, My Music, etc.). You can specify which file types go in which folders and can even add new types. The problem is that I could not get this feature to work on my Mac. I tried and tried but was not successful. Whenever I would drag and drop files on the drive icon, they all ended up in the root of the account folder instead of the individual folders. I poked around in the included User Guide.PDF file and didn’t find much info at all to help me troubleshoot the problem. Basically all I could find was an explanation of the feature.
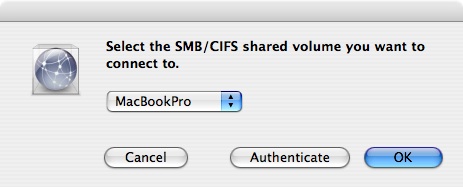
At one point, my iMac was in a continuous loop asking me to connect to an SMB/GIFS drive (whatever the heck that is). I had to reboot my machine and then reboot the Shared Storage II drive to get that condition to go away.
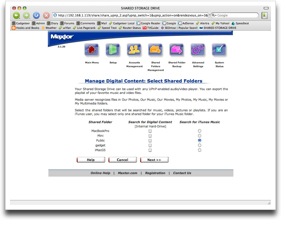
Click thumbnail to see full-size screen shot
I wasted quite a bit of time on another feature mentioned on the box… “Get more enjoyment from your home entertainment center. Access your digital entertainment without ever turning on your computer. Built in media streaming allows playback of digital photos, music and video to our networked home entertainment system“. Again, in trying to understand more about this feature, I went to the documentation only to find that there was a severe lack of it. I finally found out that you have to connect the drive to a UPnP certified digital media adapter for this feature. Unfortunately, I do not have such an adapter, so I was unable to test the functionality…
I like the physical size of the Maxtor Shared Storage II and also appreciate how quiet it is. You can hear the fan running, but it’s not overly intrusive. As a network drive, it works as advertised. The EasyManage software is very easy to use for scheduling automatic backups. The easier setup is, the more likely a person will use it, so that’s a good thing. I do wish the documentation was a little more robust for some of the features such as Drag and Drop and Media Streaming. But all and all, I have found this device to be a welcome addition to network.


Gadgeteer Comment Policy - Please read before commenting
Post your comments on the Maxtor Shared Storage II Network Hard Drive review.
http://www.the-gadgeteer.com/review/maxtor_shared_storage_ii
Just click the POST REPLY button on this page.
I really want to like this product. But for some reason, I am locked out of access to the log file. Somehow there is no one alive at Maxtor any more and my inquiries to the Seagate site brings no response. I am happy to redo everything except removing and reinstalling MSS software does not fix the problem. I cannot figure out how to do this and have about given up on the Maxtor/Seagate software. As I have another backup program that works, and really wanted to put the function on my network not my main computer, I may be stuck with the Maxtor MSS until I can figure out how to unlock my access. Yes I am working at the administrator level and all that. I can use any help in debugging the MSS or advice on using another backup program on the drive. I am not even sure that I can reformat a networked drive.
CBS
Should I go NAS or the DROBO? It is a decision I will be making within the next 6 months. The trouble with RAID is it’s TOO complicated and not user friendly.
I don’t know anything about DROBO drive arrays… Sorry. This Maxtor drive is my first time using RAID.
The DROBO is a triumph of marketing over technology, IMHO. Their claim that RAID is complicated is nonsense – I use a QNAP TS-201 NAS box, and setting up RAID1 on it was a matter of ticking a single checkbox in the setup application and waiting for the box to make the necessary changes. If a drive ever fails, I will be warned by indicators on the front, and an email sent to my address, and to fix it all I need to do is remove the front panel, undo two screws and replace the drive – I don’t even need to power the box down – and the RAID will be automatically rebuilt with no input at all from me.
The DROBO is USB rather than networked, and requires drivers on the host PC if I recall correctly – it is far less flexible than a NAS box for that reason, as it can’t serve files to media streamers, for example, with the host PC powered down – the main use for my (and a lot of people’s) NAS.
I really don’t see what the DROBO offers over a decent NAS to justify the lack of flexibility. Consumer NAS products are not difficult to use or set up these days.
Here’s a watered down (pun not intended) explanation of RAID:
http://keilaron.kicks-ass.org/repository/raid_demystified.jpg
Hahaha! Very very cute! 😀
This should sum up my experience with this drive:
Jeffery H.: Hi, my name is Jeffery H.. How may I help you?
: I have the 1TB version of the SharedStorageII NAS unit. For the past couple of months it has been randomly falling off of the network, unable to be found by the installed software utility and unaccessible via the network share
: if i reset it using a paper clip in the reset hole, it would work for a few hours and die again.
: last night i reset it again
: it appeared to be working last night. this evening it is making a high pitched squealing noise and periodically making what sounds like a chirping sound
: the top light on the front panel is amber
: last night it was flashing b/w green and amber
: the bottom light is randomly flashing green
Jeffery H.: if its squealing and chirriping then you’ve got a failed drive.
: i have only used it for a total of about 6 hours, but am unsure how long ago i purchased it
: can you look up when it was purchased by the s/n?
: what is the warranty on this unit?
Jeffery H.: it has a 1 year warranty and seems to have expired
: i believe i have it configured in raid 10 (usable capacity is 500TB)
: is it possible to get it repaired?
Jeffery H.: We do not have a paid repair service and the drives are not field repairable.
: so it’s a $500 paper weight?
Jeffery H.: Unfortunately at this point.
Jeffery H. has disconnected.
i ve problem,i dont have maxtor shared storage II cd easy manage..so i cant explore my maxtor..can u sent to me the software..and i ve looking at maxtor solution for driver..but still not work..please help me ..reply on email..
I have a Maxtor Shared Storage II NAS version 3.1.28 and after about 4 months it was making a strange noise so I quickly went out and bought a Buffalo Linkstation NAS to copy everything to. After copying everything to it, the Maxtor stopped making the noise. However, I am an expert on this kind of stuff and I found both the Maxtor Shared Storage II and the Buffalo NAS to be lousy (I am being polite.) Maxtor support is difficult to find now that Seagate has taken them over and the Buffalo NAS failed faster (it lasted 2 months) than the Maxtor NAS (both operating in RAID mode). I finally bought a Netgear ReadyNAS NV+ [X-RAID]. NOW, I am happy. I guess I’ll try and sell the Buffalo Linkstation LS-WTGL/R1-V3 on eBay (as is) or take the drives out of them and use them as backup devices…. The Netgear has Linux under the hood and I utilized that capability to migrate. Netgear is going to own this market and X-RAID is fantastic. None of the other systems can even get close. The Netgear will cost twice as much but it is worth it!
I think all problems with this product has do to with heat. This evening I took my disc apart just to discover that the disc is way to hot. My problem is that I can see files on the disc but as soon as I try to read or write some files the hole thing just hungs with an amber steady light. Not one of the alternatives according to the manual, just steady amber. Computer hungs as well as a result of bad networking device. Anyway, now I put an old fan on top of the disc to make it cool and surprisingly it works again. At least for some time so I can copy my data to another disc before I throw this piece of crap in the garbage. I would’t trust a disc that has been overheated for quite some time now.
Any chance, as domain Administrator, to get around the maxtor shared storage account password if it is lost?