REVIEW – Ever since I reviewed the Wizmaker L1 a few years ago, I have been wanting to get a more advanced laser engraver. I have been getting into woodworking the past couple of years, and I want an engraver to enhance several of my projects. WeCreat recently announced their new 45-watt Vision Pro laser engraving machine. It appears to have numerous features built in that can make a maker’s life easier. Read on to see how well it works!
⬇︎ Jump to summary (pros/cons)
Price: Basic: $2399.99, Rotary Pack: $2499.99, Rotary plus Conveyor Pack: $2949.99, Pro Pack: $3799.99
Where to buy: WeCreat
What is it?
The WeCreat Vision Pro 45W is a self-rising 45-watt laser engraving and cutting machine. It has an extra-large working area and can handle material up to 137″ long with an auto passthrough tool. It does not need risers. It also has options for a rotary tool, a 2-watt infrared laser, and an air cleaner.
What’s included?
The basic package includes:
- Vision Pro 45W Machine
- Auto Lifting, No Riser Base Needed (Worth: $199)
- HD Camera
- Laser Bed
- Air Assist (Worth: $159)
- FREE Vision Pro Explore Material Kit (Worth: $99)
The rotary pack includes:
- Everything in the basic pack
- Rotary Pro Tool Kit
The rotary plus conveyor pack includes:
- Everything in the basic pack
- Everything in the rotary pack
- Auto Pass Through Feeder – All in one kit (137″)
The super pack includes:
- Everything in the basic, rotary, and conveyor packs
- AirGuard Ultra Fume Extractor
- 2W Infrared Laser Module for Vision Pro – It can engrave on almost all metallic surfaces, as well as most plastic materials, such as acrylic (plexiglass). If you often work with accessories, jewelry, and plastics, you should also get it.
I was fortunate enough to receive the super pack. This review will cover the Laser Pro 45W machine, the rotary pack, and the AirGuard Ultra Fume Extractor.
Tech specs
45-Watt diode
Can cut up to 25mm of wood
Laser spot size of .08 x .08 mm
Bed size 22.8 x 15.7 inches with a working area of 19.7 x 12.6 inches
Working area with auto passthrough – 18.1 x 137 inches
Auto Lifting – With tray: 100mm Without tray: 140mm
Top-mounted HD camera
Auto Focus for the laser
Compatible with LightBurn and the WeCreat MakeIt software
The rotary tool can do a one-pass full wrap on a 40oz cup
Built in 3d preview
No riser base needed
Design and features
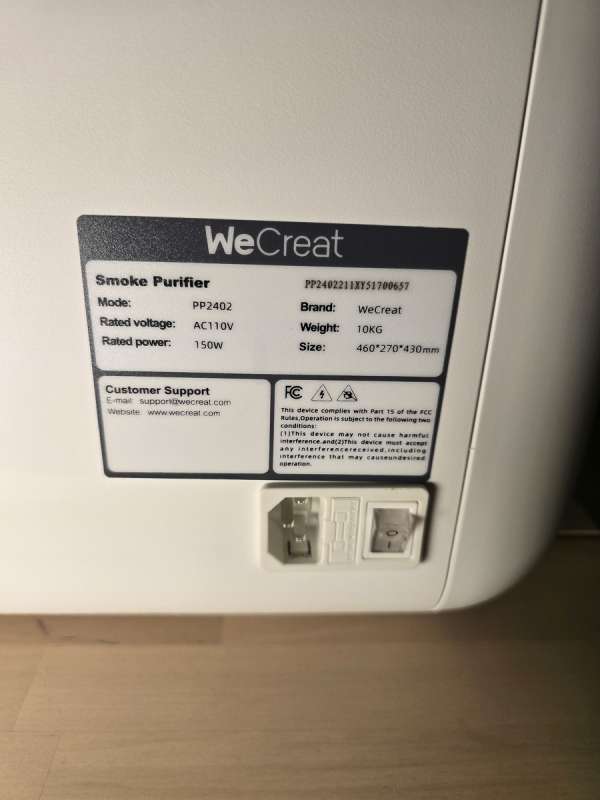
The first thing I will discuss is the AirGuard Ultra. I am so happy they sent this to me. Technically, I have room in my garage, but it is so hot in there that I have no desire to sit there and babysit print projects. (which you should be doing every time you kick off a laser engraver project so you don’t burn your house down!). The specs for this air filter are:
- 1.7kg carbon compound
- 280 m3/h flow rate
- 99.9% PM2.5 removal
- 2100 Pa suction power
- 1000 hr life span on filters
- 5 stage air filtration – This multi-layered defense system, meticulously engineered for maximum efficiency, seamlessly integrates an accordion pleated pre-filter, medium and high-efficiency filters, ultra-dense carbon mesh, and a true HEPA filter.
- This multi-layered defense system, meticulously engineered for maximum efficiency, seamlessly integrates an accordion-pleated pre-filter, medium- and high-efficiency filters, ultra-dense carbon mesh, and a true HEPA filter.
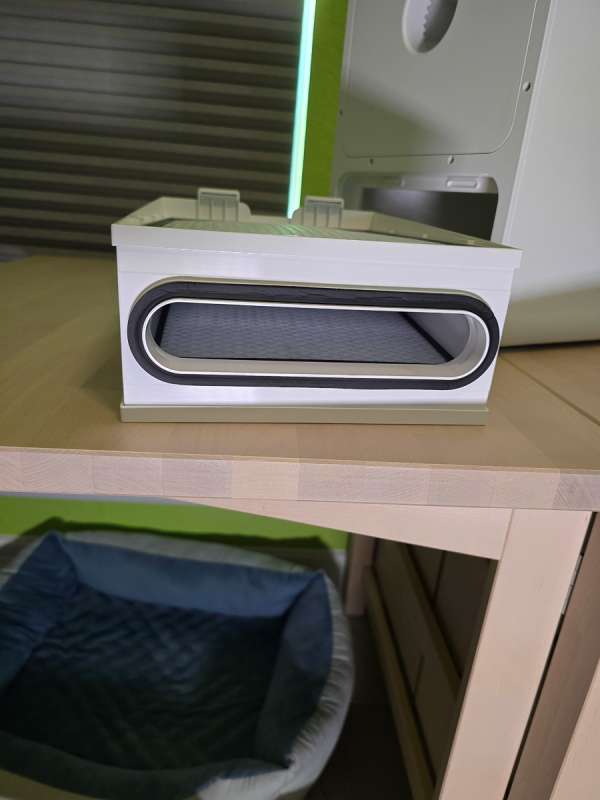
The dimensions of this air cleaner are about 19 inches high, 17 inches deep, and 11 inches wide. It is a pretty substantial machine. It is a very clean and simple unit to operate.
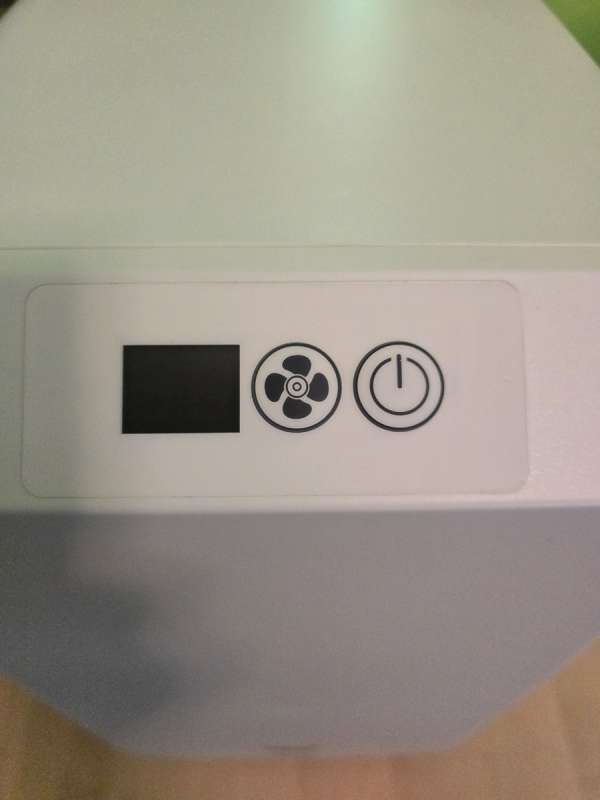
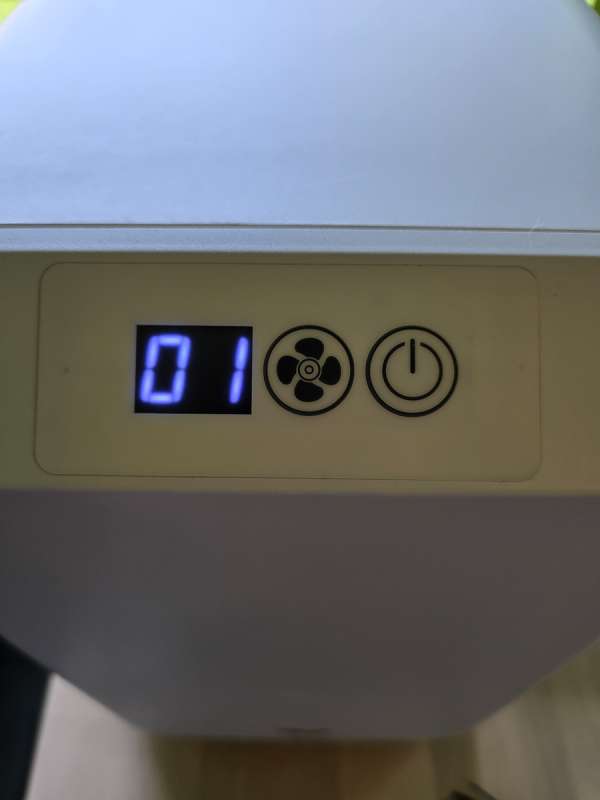
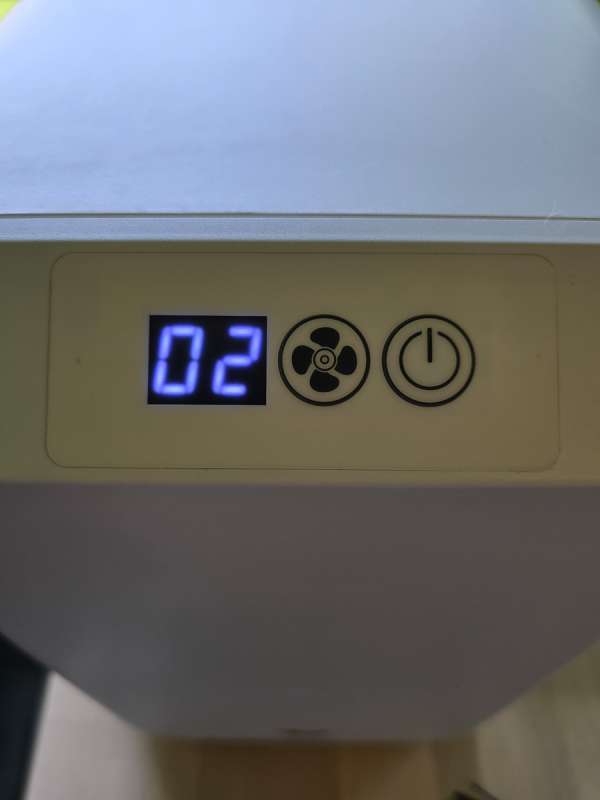
At the top of the front panel, you will find a display screen and two buttons. The one with the fan controls the fan speed with three levels in total. Then there is the power button. The screens below illustrate how the display shows fan speeds.

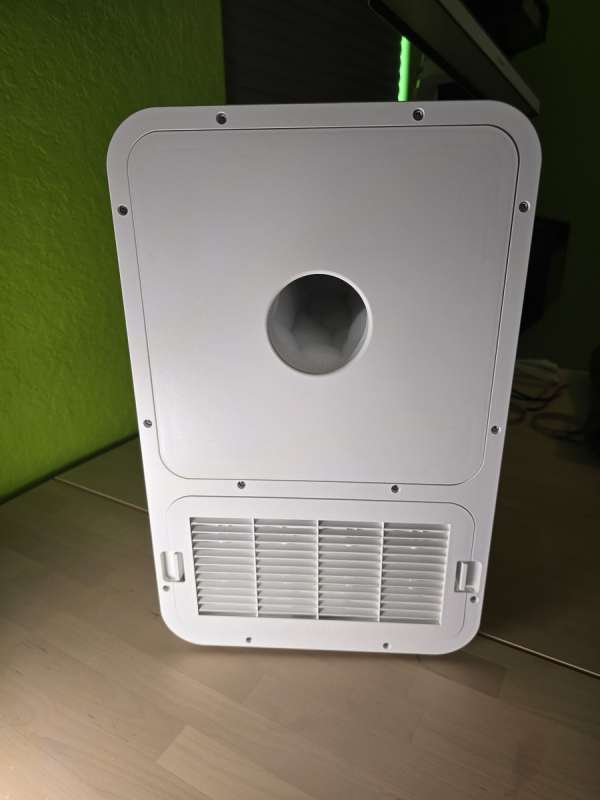
In the back of the unit, you will find the plug for the power cord (yay, no adapter, just a cord) and the main power switch.
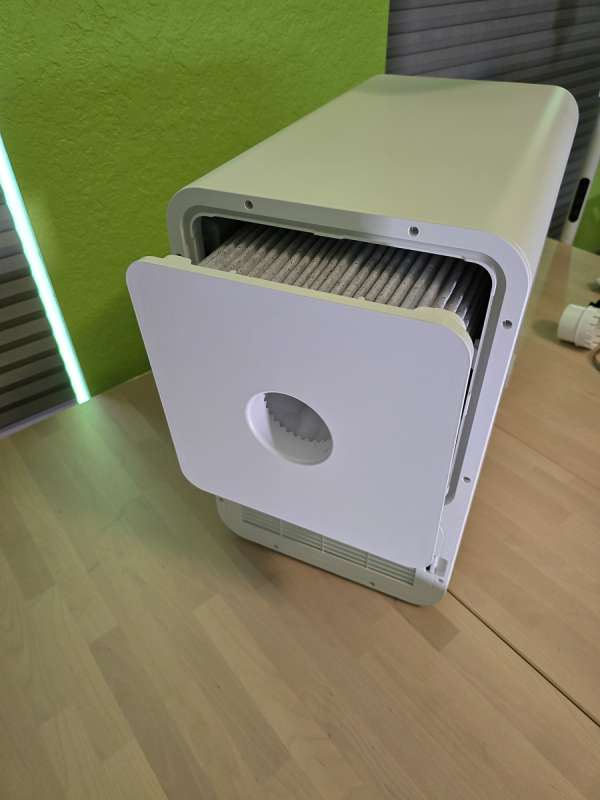
In the back of the unit, you will find the input hole for the air hose and the two air filter compartments. The hole for the air hose is built into one of the air filters.
To access the bottom filter, you press the two tabs on either side to remove the cover.
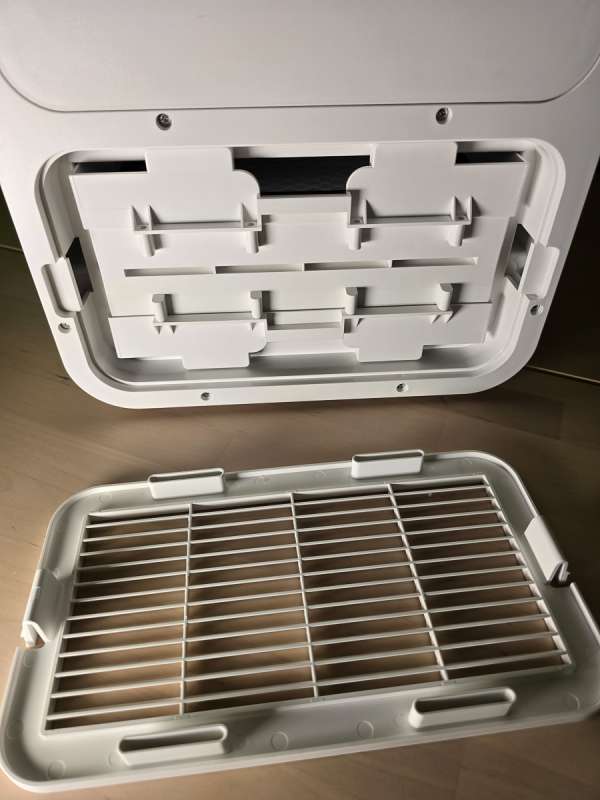
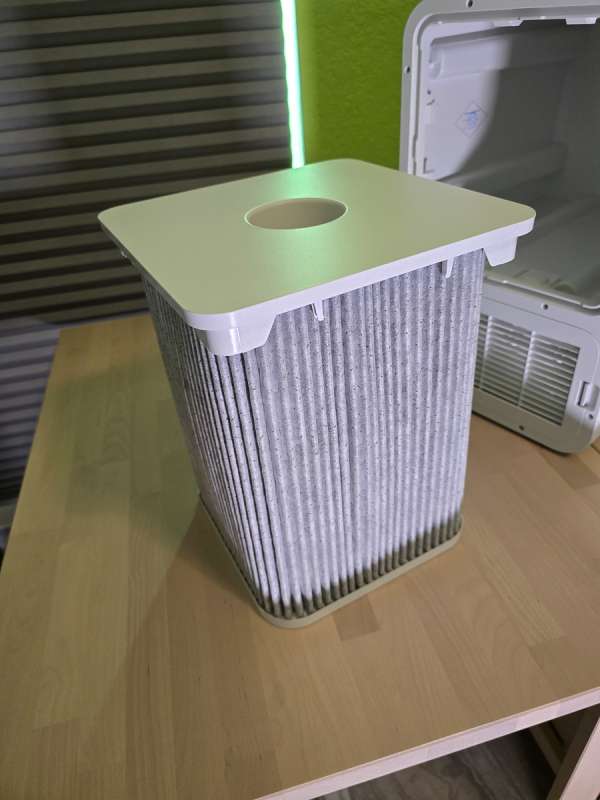
Then you pull out the VBank filter, which has a lifespan of up to 1,500 hours. It features a HEPA, ultradense carbon mesh, a medium-efficiency filter, a high-efficiency filter, and an accordion-pleated pre-filter, all built into it.
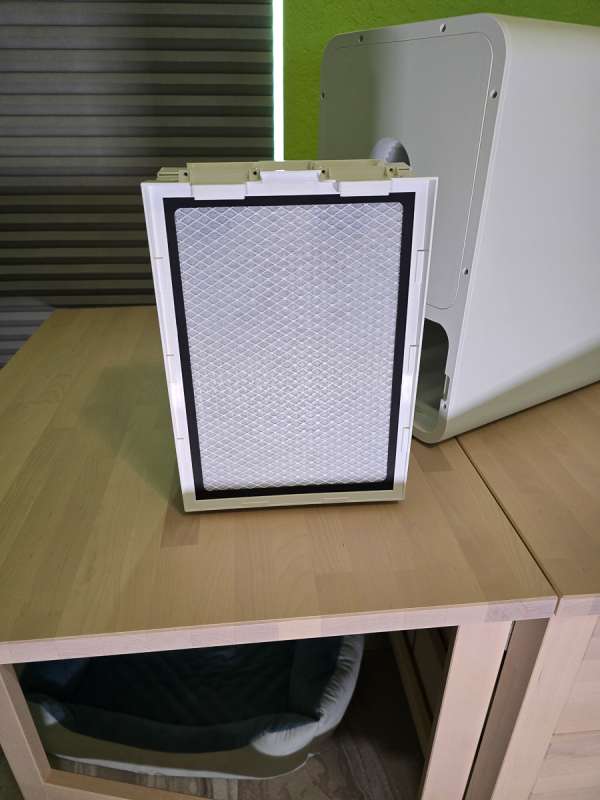
The top filter, where the air hose connects, is the all-in-one filter, which has a lifespan of approximately 1000 hours.
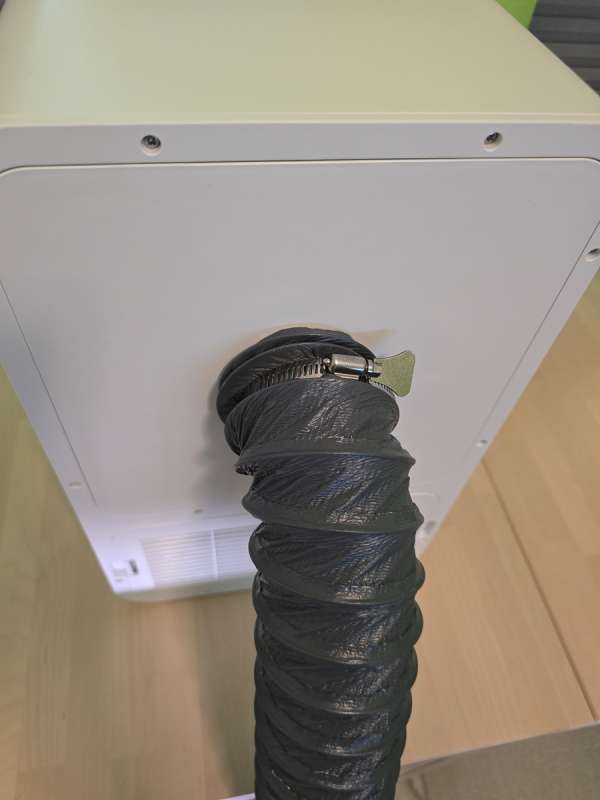
Installing the air hose was easy. I plugged the adapter into the main air filter hole. Then, I attached the smoke extraction hose using the provided hose clamp, which is visible in the picture above.
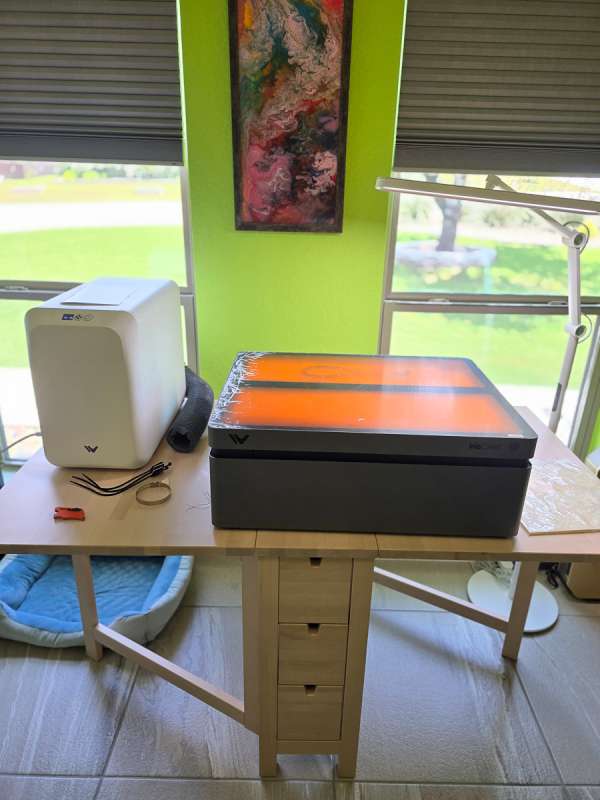
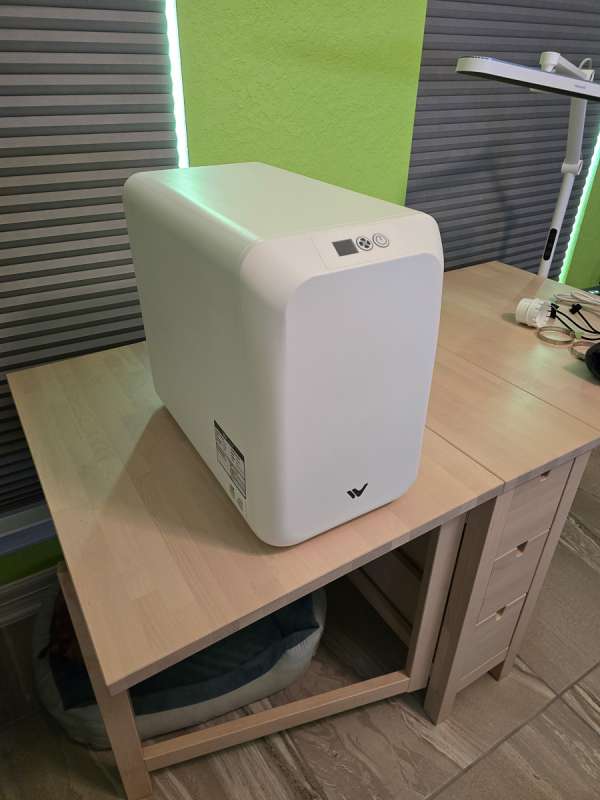
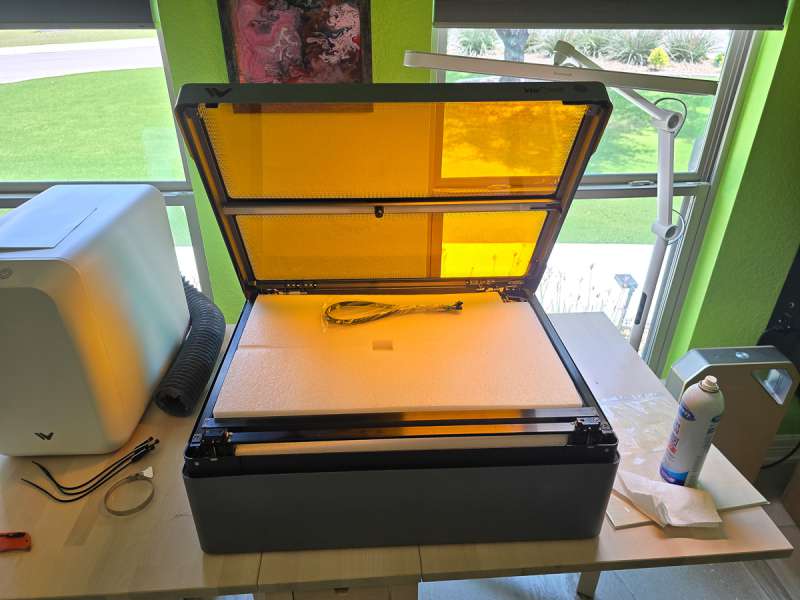
Now that the air filter was set up, my next job was setting up the laser engraver. Unlike my previous laser engraver review of the Wizmaker L1, there was very little setup required. The first thing I had to do was to remove the protective plastic from the top of the machine.
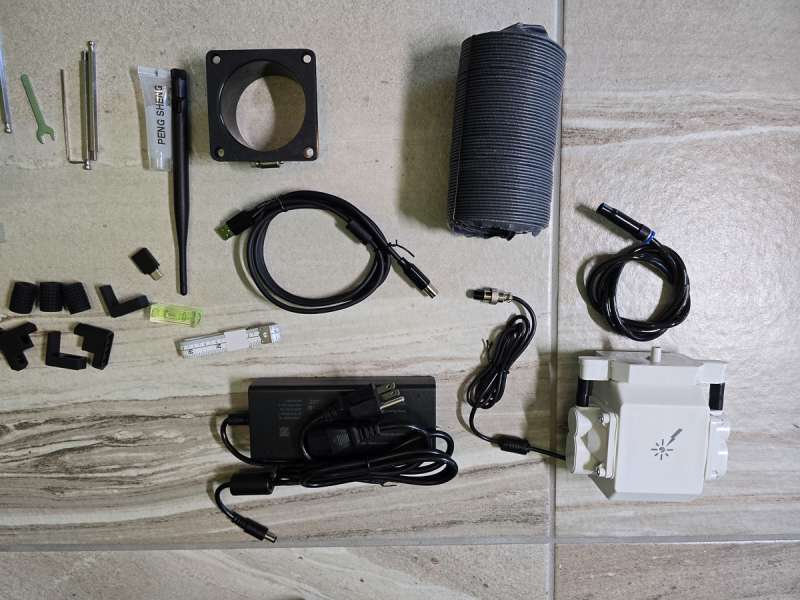
After opening up the lid, I found protective styrofoam and a spare connection wire on top of a huge box with a ton of sample material inside. I have to agree with other reviewers of this engraver that it has to be the most extensive sample collection I have ever seen. The sample set had two dual layer silicone Apple watch bands, four round dual layer PU patches, four rectangular dual-layer PU leather patches, a real full leather sample with snaps to make a tray, a large acrylic sample, two stainless steel credit card bottle openers, two slate coasters, multiple electro plated steel dog tags, and a big sheet of dual layer PU leather.
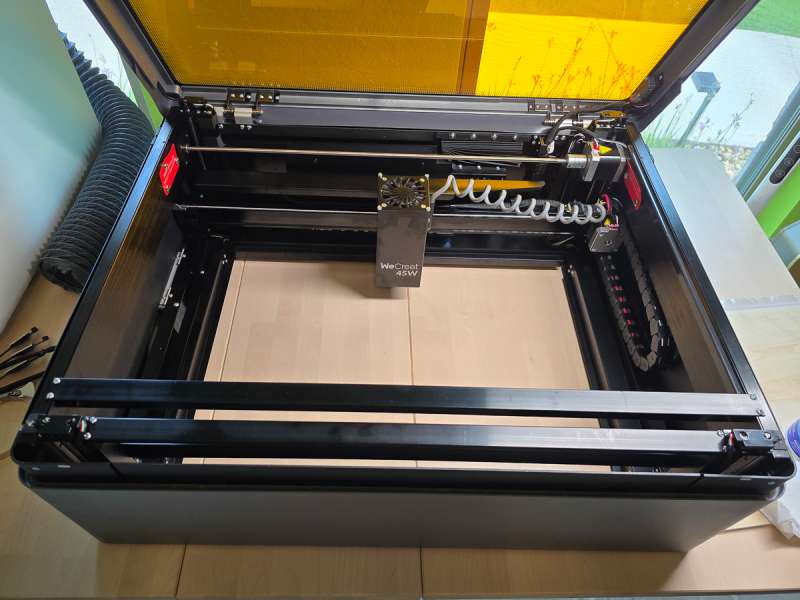
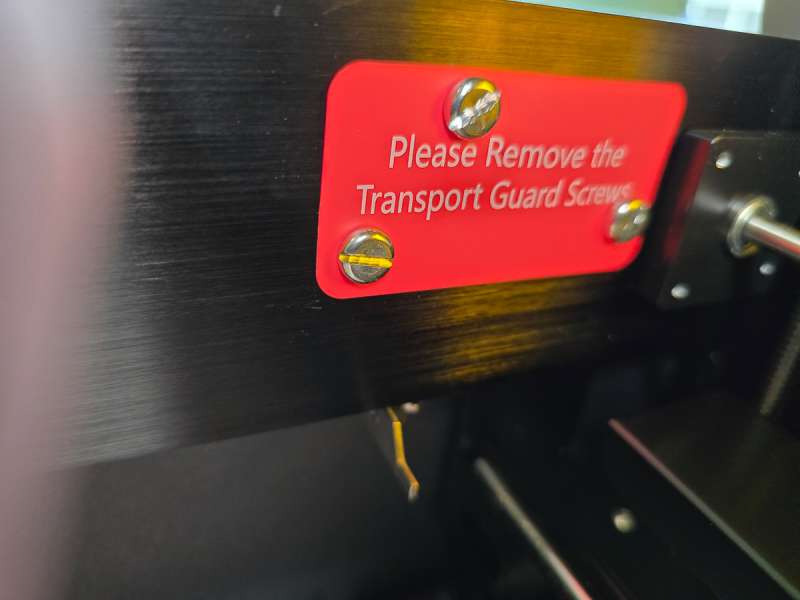
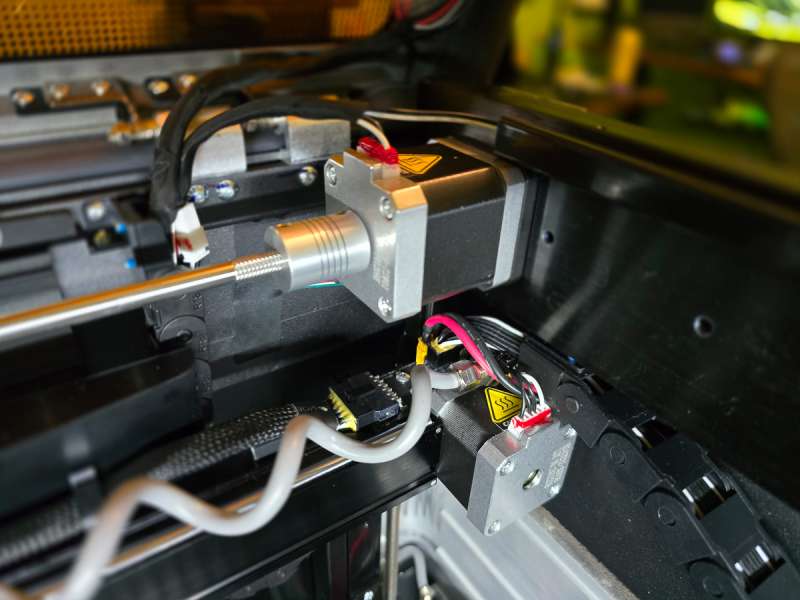
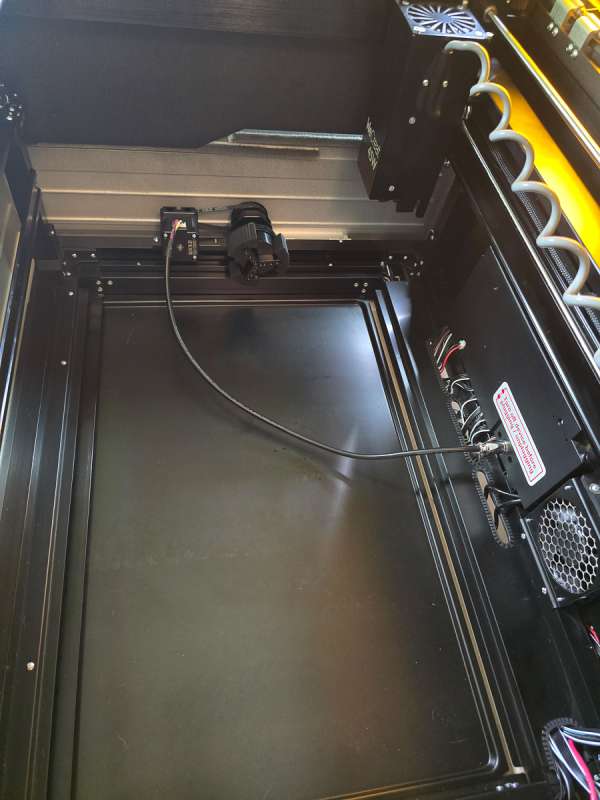
Once I cleared everything out, I was presented with the interior of the engraver. The 45 Watt engraver head was already installed. You can see the two red labels on either side of the unit. The left side had three screws, and the right had two screws that needed to be removed. Those were installed for shipping purposes.
For such a nice machine, it was weird to see a bunch of exposed wires at the back of it.
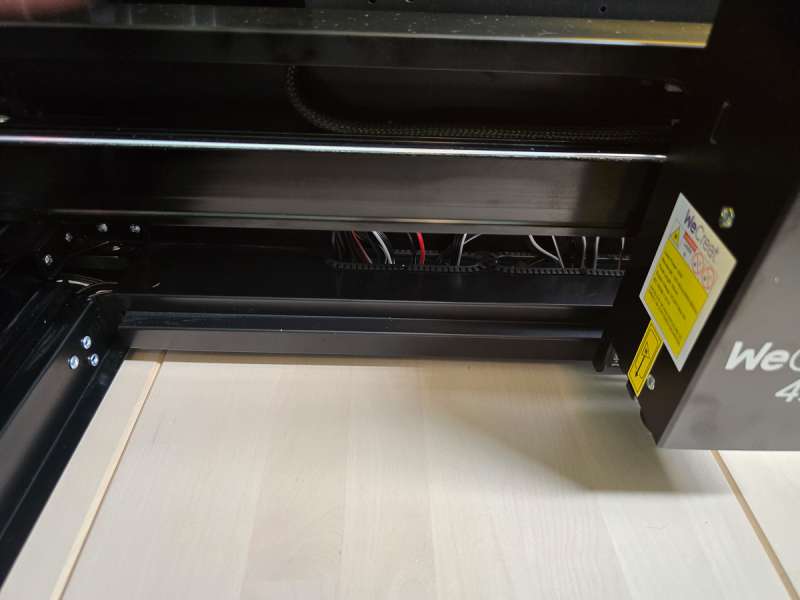
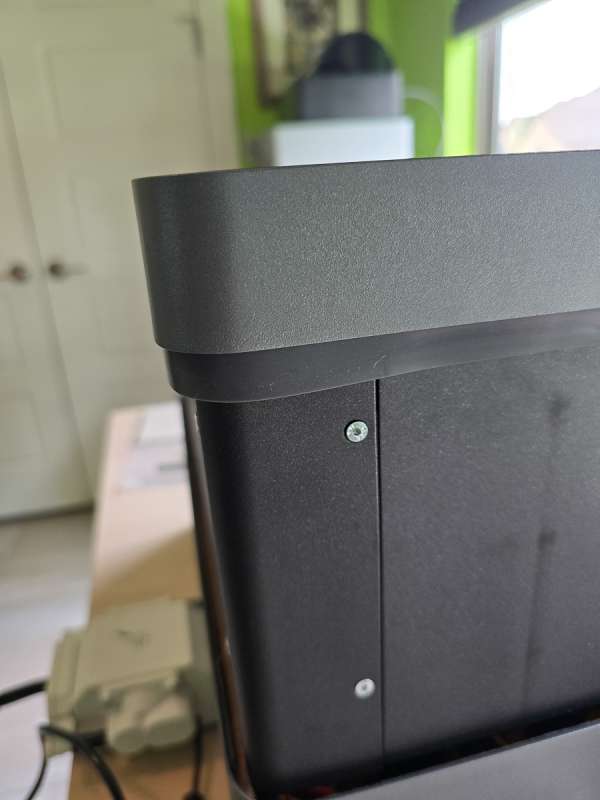
In the back of the machine are a bunch of various ports. They are all nicely labeled. From left to right you can see the air assist power port, the air assist input port, the power switch, the DC adapter port, and the USB port.
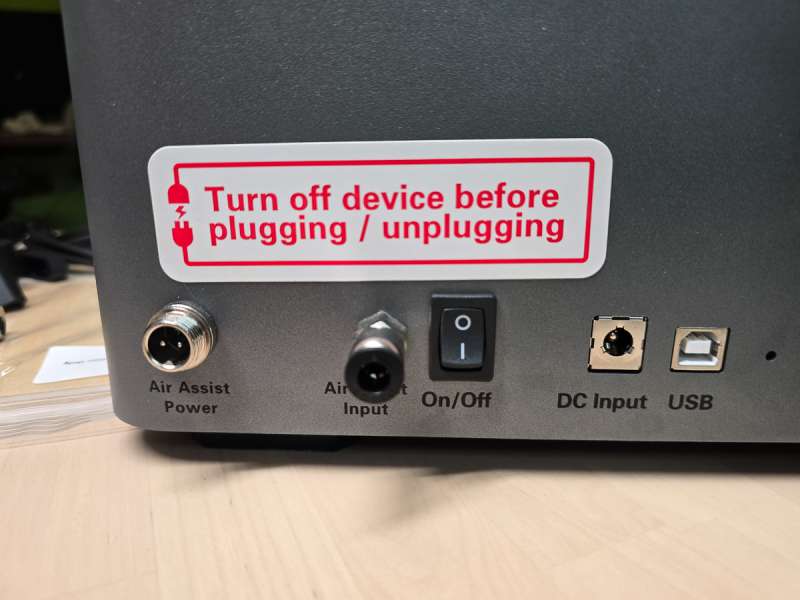
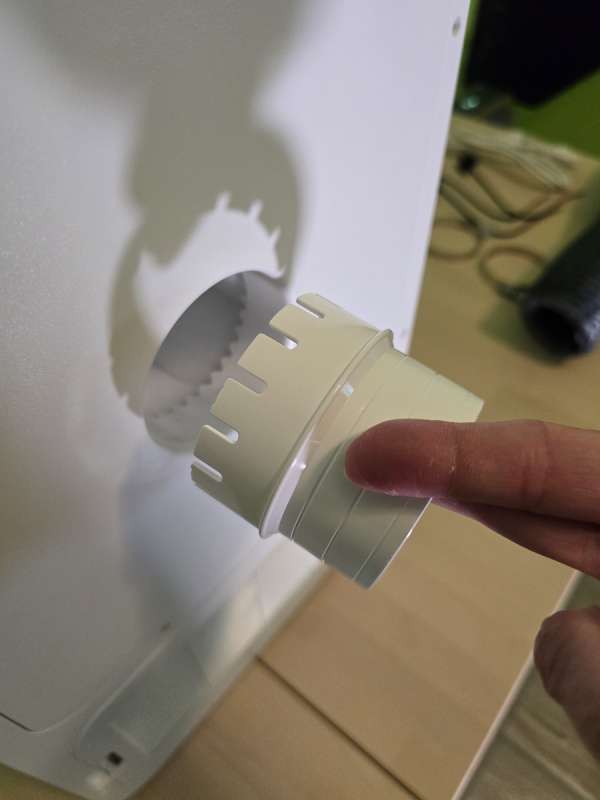
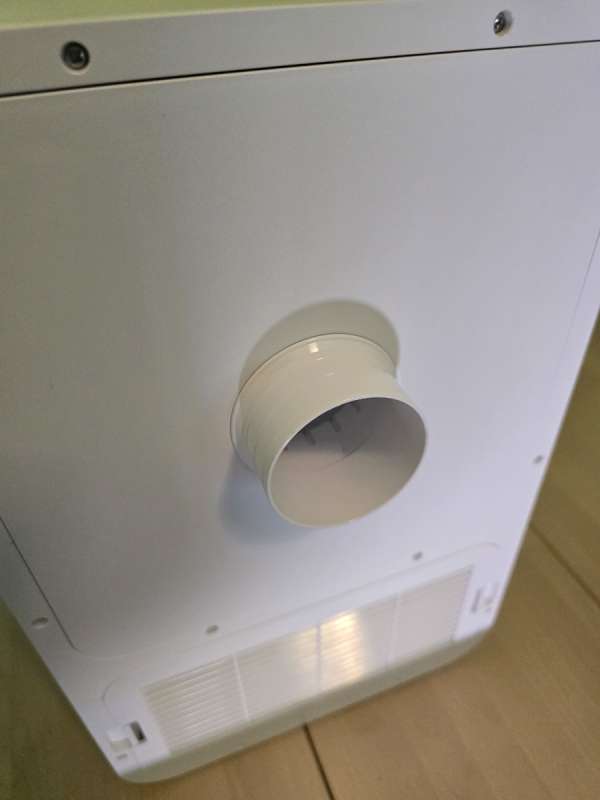
Not pictured, just up and to the right of the USB port is the outlet for the vacuum hose. There is also a port for the WiFi Antenna.
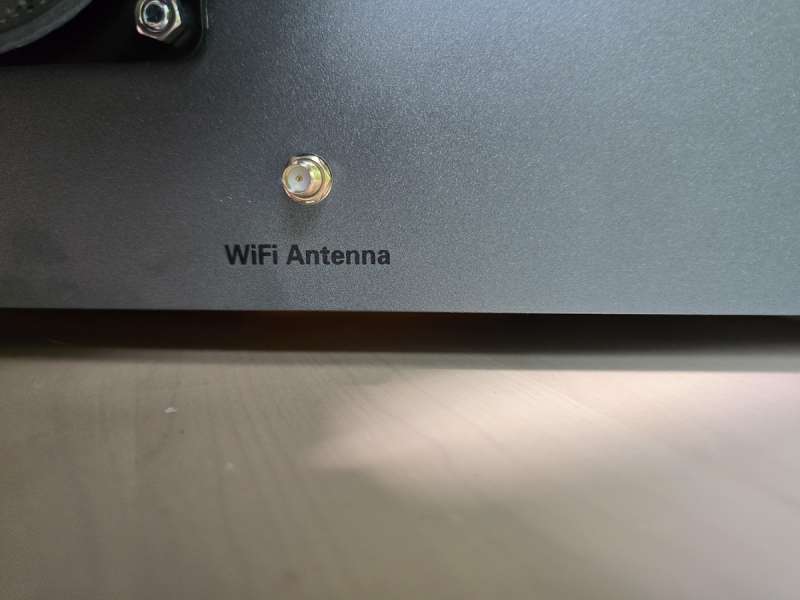
The picture below shows the antenna and the vacuum hose installed.

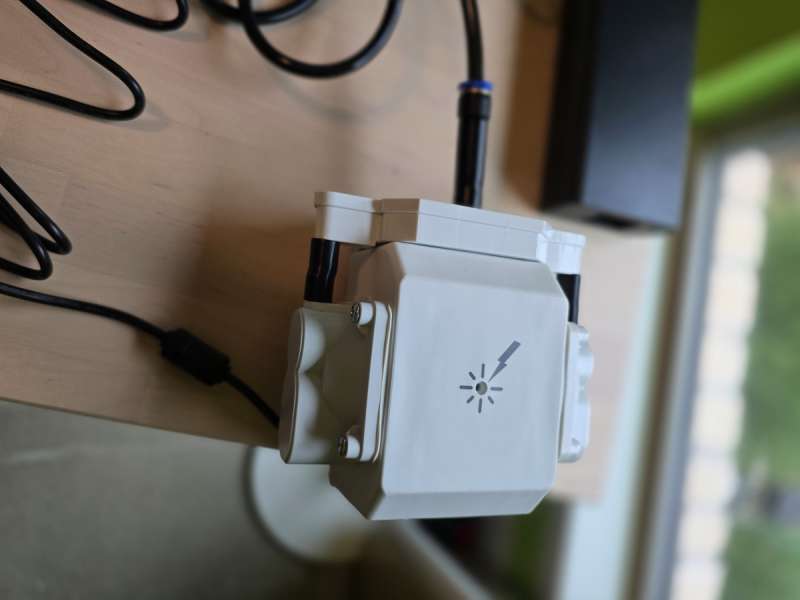
Here is a close-up of the air assist pump. It is nice that it can also get its power from the engraver and does not require its own plug.
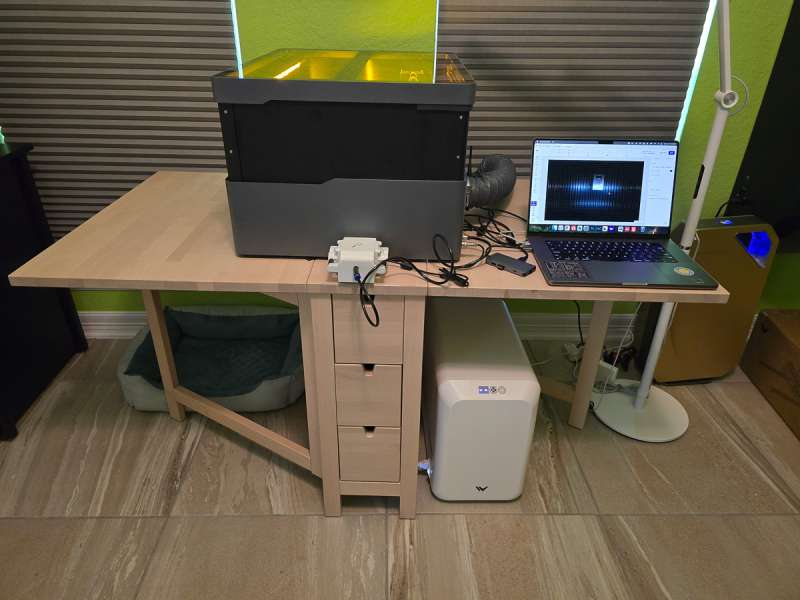
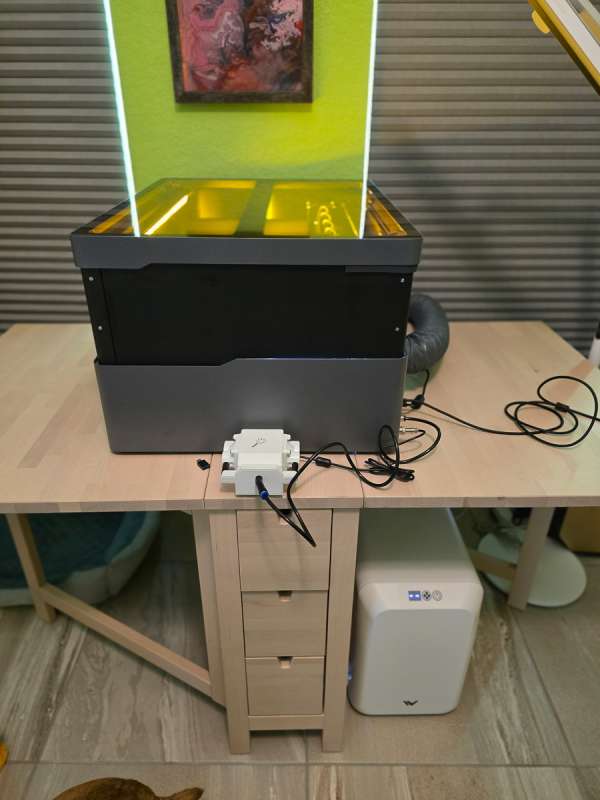
I ended up placing the engraver sideways on my desk because I eventually want to run the auto-feed to the unit. The air assist pump just fits in front of it. The pump has four rubber legs on the bottom that keep it in place when running. That thing does vibrate quite a bit, and the legs hold it in place, keeping it from vibrating the table. I also placed the air cleaner under my table.
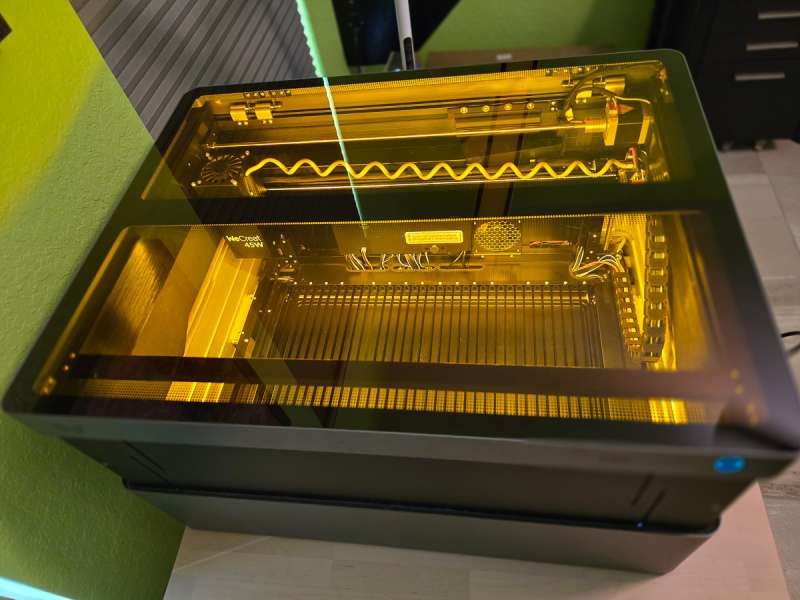
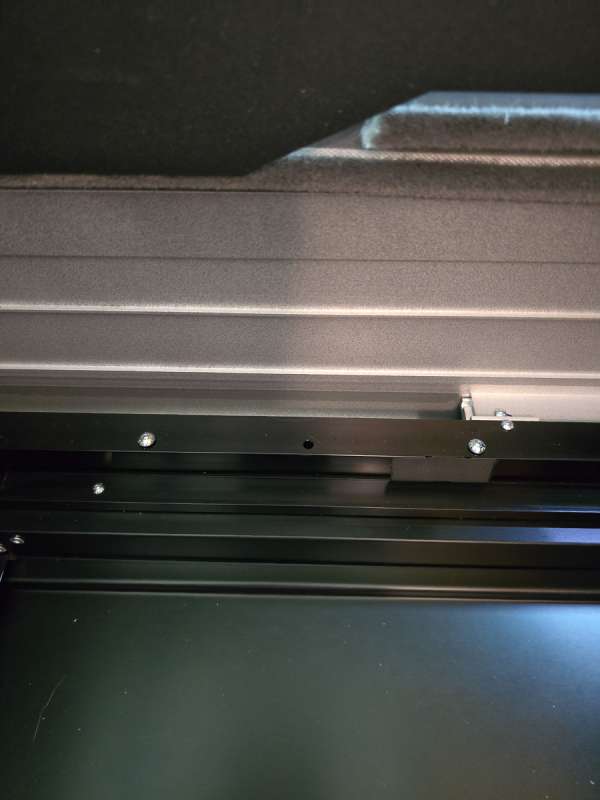
The one thing I wish the Vision Pro had is a honeycomb bed. I realize they are trying to save some money, but they don’t even offer one to purchase aftermarket. I think a honeycomb bed would better support smaller objects, especially when batching them. Their bed consists of two racks with vertical rails. I have one propped up, so you can see there are two separate racks.

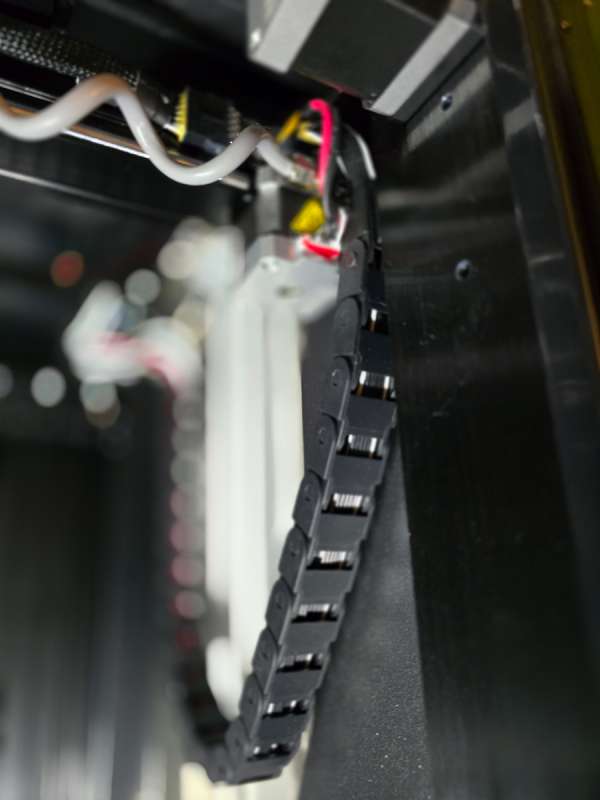
The machine is really well built. I like the protective cover they have over the drive chain.
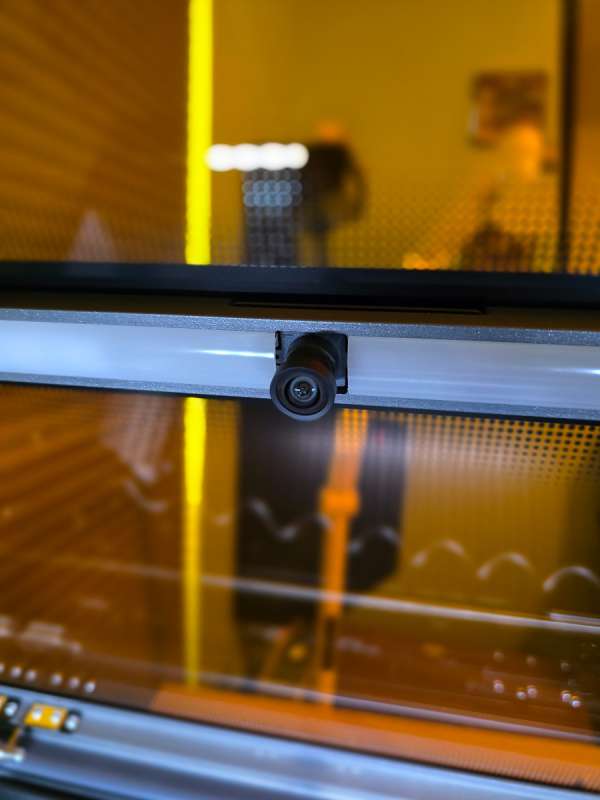
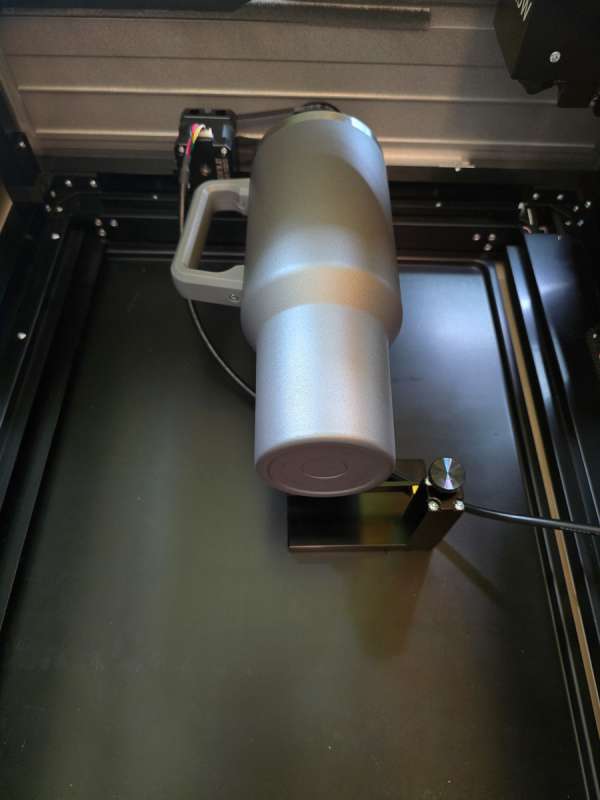
The HD camera is in the center of the lid. On either side of the camera, there are two LED light strips.
Here is a close-up shot of the power motors.
When you close the lid and flip the power switch at the back of the unit, the entire unit will rise to its highest position, and the lights will turn on. You can see the single button located in front of the unit, which is illuminated by a blue LED light ring. There is no emergency stop button on this machine. To power the unit off, flip the power switch located at the back of the unit. The button in front of the machine is only used to initiate the print process after you have sent your design to the machine.
The next item I want to discuss is the rotary tool. It comes in two pieces. One attaches to the left side of the Vision pro via two screws. That piece will hold the cup or item you want to engrave. The other piece sits at the end of the thing you want to engrave like a cup to provide support. The first picture below shows the two screws and the alignment hole that are on the left side of the Vision Pro. You will need to remove the two grates before installing the rotary pro tool. Then you remove the two screws.
This is the rotary pro. You can see the silver alignment prong in the middle of the bar. That will insert into the alignment hole on the left side of the printer. On the front right of the tool, you can see the rubber grips that will grab the cup. You spin the inner ring with multiple holes to adjust the grips from wider to narrower. When a cup is on the grips, you can tighten them by slipping the end of the Allen key into one of the holes and turning the ring until it is tight.
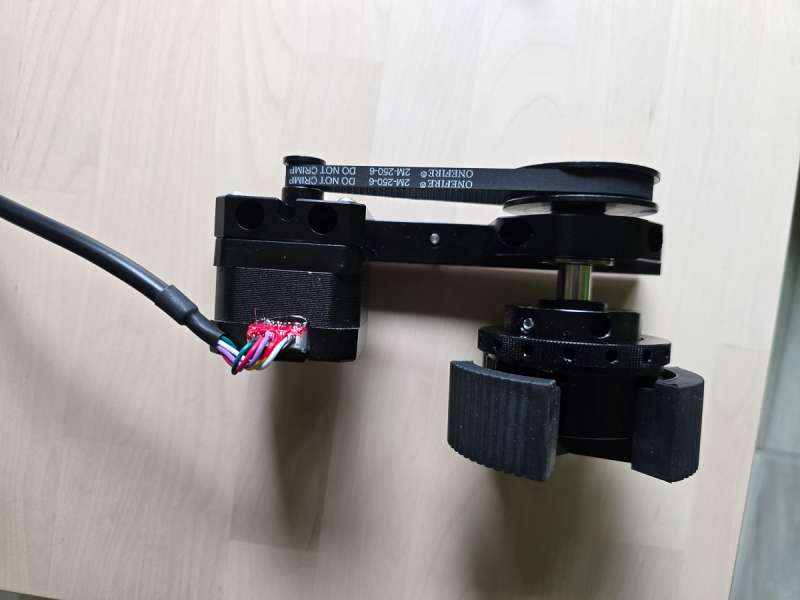
You can’t see real well, but the two screws that were removed go back into the bar on the rotary pro on either end to hold the tool in place. In the middle of the rubber grips, a series of holes is visible. In those holes, you can mount the three metal rods to hold items like rings. They also offer single and multi-step chocks that can be attached to hold smaller cups and thermoses.
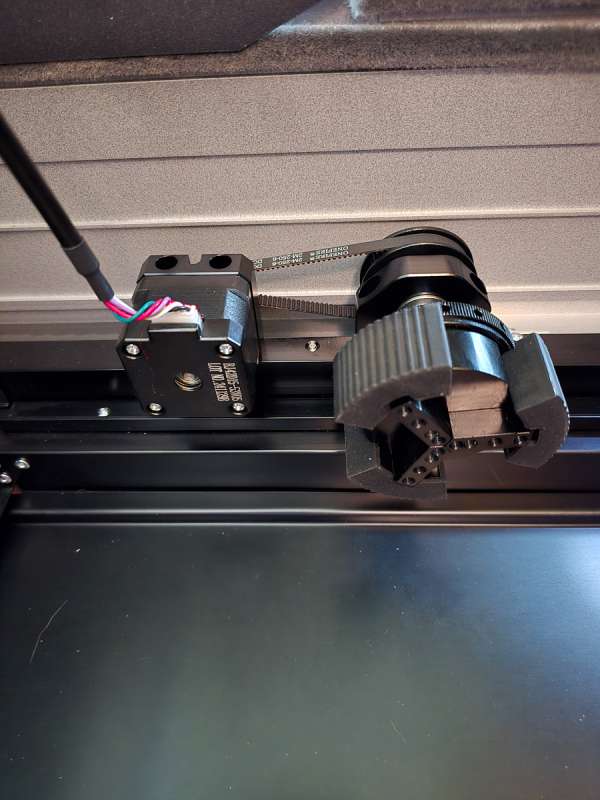
The power plug then runs over to the center of the machine to plug in. The manual shows the power plug running along behind the rotary pro, but it is not long enough to run that way and still plug in. You have to be careful of the power cord’s position as you go to engrave an object.
Here you can see a cup mounted in the rotary pro tool. Yes, I did realize that I could remove the handle before engraving!
Performance
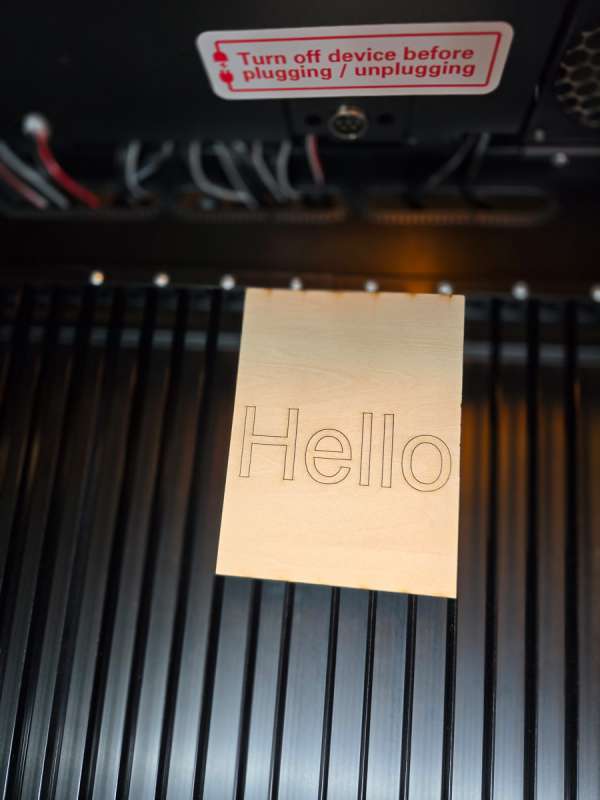
For my first print, I did a very simple Hello test on a piece of the sample wood. It was very easy to use the camera to align what I wanted to print on the wood.
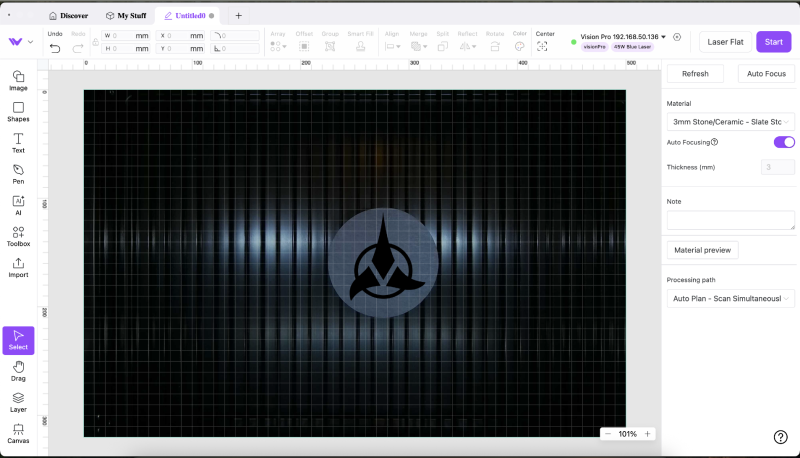
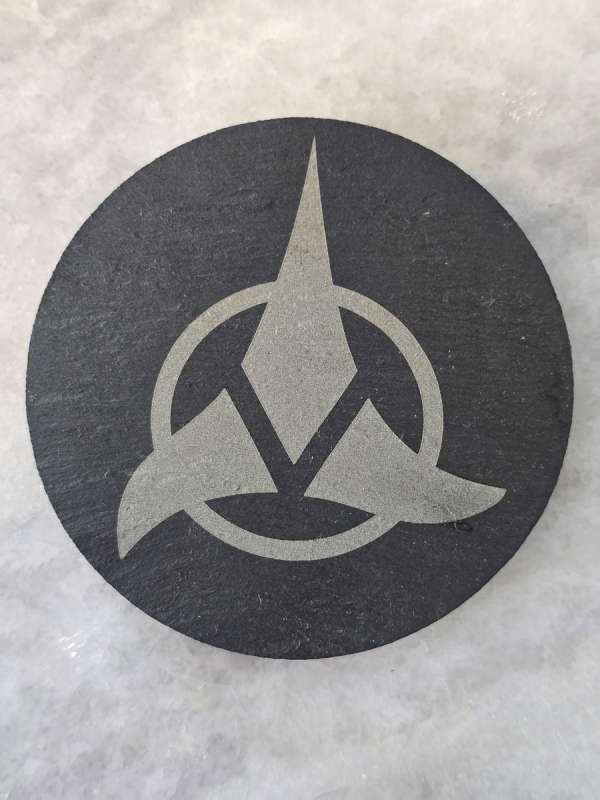
Next, I decided to try to print on one of the provided slate coasters. Here is a screenshot of the MakeIt software. You can connect to the printer with either USB or WiFi. However, you must first connect via USB to set up WiFi. I found that if I turned the machine off and later turned it back on, the WiFi did not always work. Sometimes that was because the printer received a new IP address from my router. Other times, even though it still had the same IP, it would not reconnect. I ended up always using the USB connection to my MacBook. Once you are connected, click the refresh button located at the top right of the screen. That will activate the camera and show you what is inside the engraver. In the picture below, you can see the slate coaster inside the printer. I clicked the import button on the left side of the screen and brought in the icon I wanted to print on the coaster. (Yes, I am a huge Star Trek fan!). This is significantly easier to use than the previous printer I have used. They have a variety of preset materials to choose from, so I selected the slate stone option. You then press auto focus, and the laser will move to the center of the item and lower down to the point it needs to be. Then you press the start button. At that point, you must go to the printer and press the single button at the front of the machine to start printing. So there will be no remote starting of this printer. I am sure this is a safety feature. You never want to run a laser engraver without being there in person to monitor it.
Here is the slate coaster after it finished printing. Yes I had the air assist and the air cleaner running. There was still a bit of residue on the coaster.
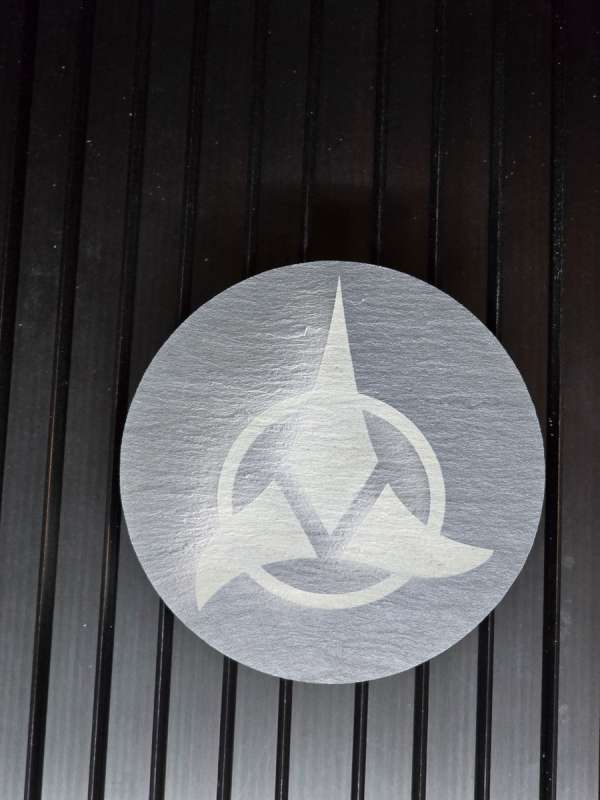
Here is what it looked like after I gave it a good scrubbing. I love how it came out.
I also printed my husband’s company logo on a rectangular slate coaster. His logo has a lot more detail and it came out great. The camera was having a bit of trouble getting a clear shot on the edges, but I can confirm the print was perfectly sharp all of the way around.
Next, I wanted to print something on one of the provided PU Leather patches. I used the black circular patch. Here is where I noticed a flaw in the software or possibly the printer. When the item you are engraving is dark colored, it makes it very hard to see where it is on the engraver platform. If I had multiple of these patches around the bed, they would have been almost impossible to see.
I did manage to get what I wanted printed centered, and it came out perfect.

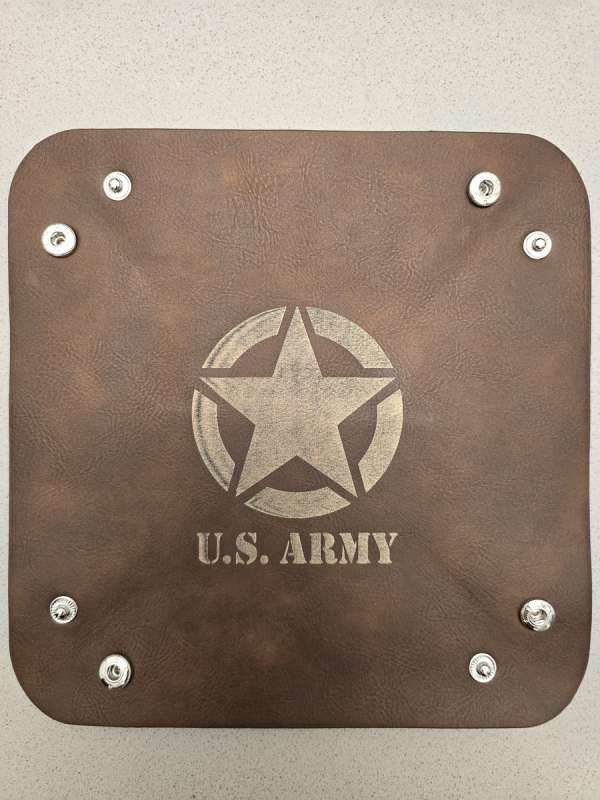
One of the nice test products WeCreat provided was a full leather valet tray. I have a friend who was in the Army, so I downloaded the logo and printed it on the tray for him. I’m not quite sure why the edge line on the left side of the logo appeared. It should have been solid like the rest of the circle around the star. It is only on the left-hand side of the print. It may have been that the leather was not sitting completely flat when I made the print. I did push all of the snaps together to see how the tray looked before I printed it, and that may have caused the issue.
I then decided to use the rotary tool to print some names on cups we received at work. You can see in the software I changed the mode to Laser Cylindrical in the top right corner. That switched the view to a horizontal mode.
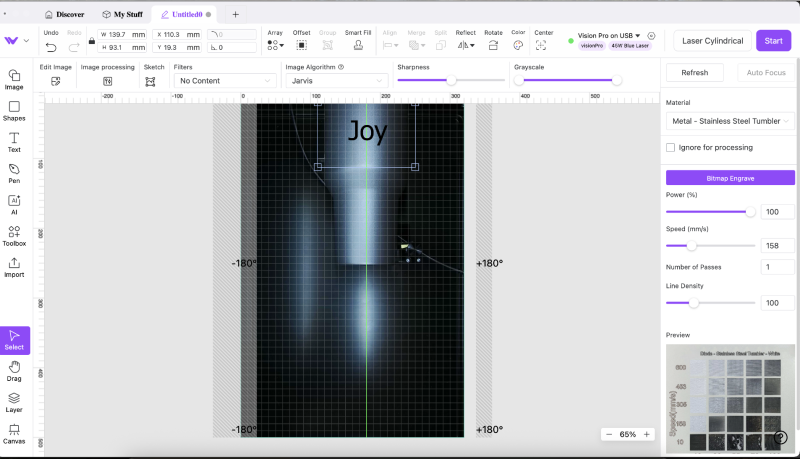
They came out really nice. I was told after the fact that using a ‘Magic Eraser’ sponge can make it easy to clean up prints afterward.
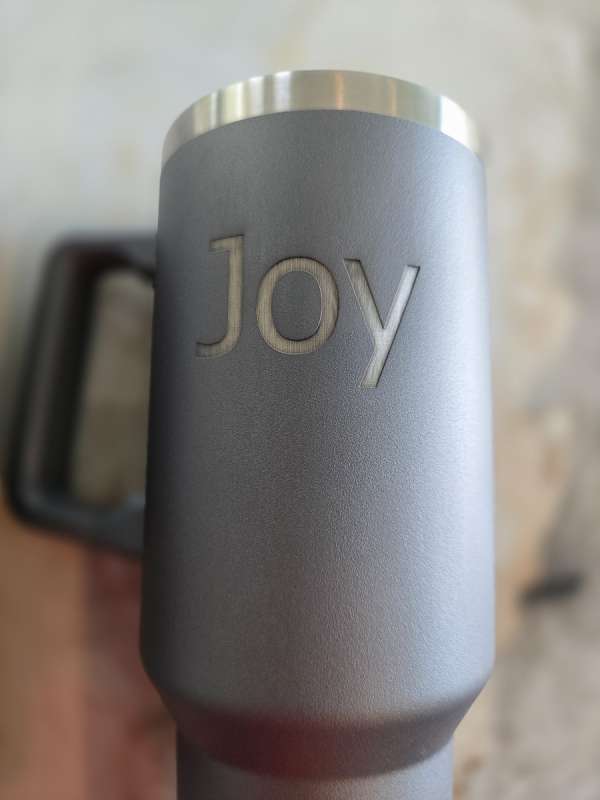
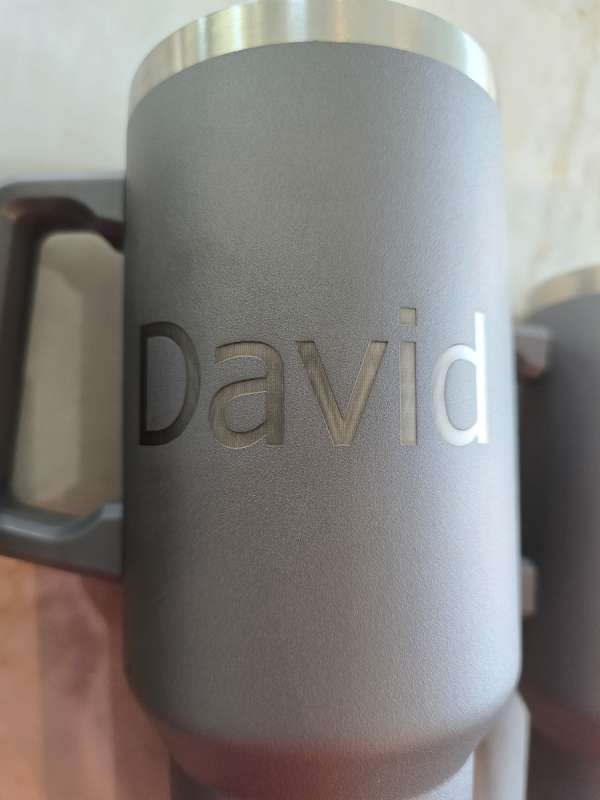
My husband got jealous so I had to print out his name on his tumbler.

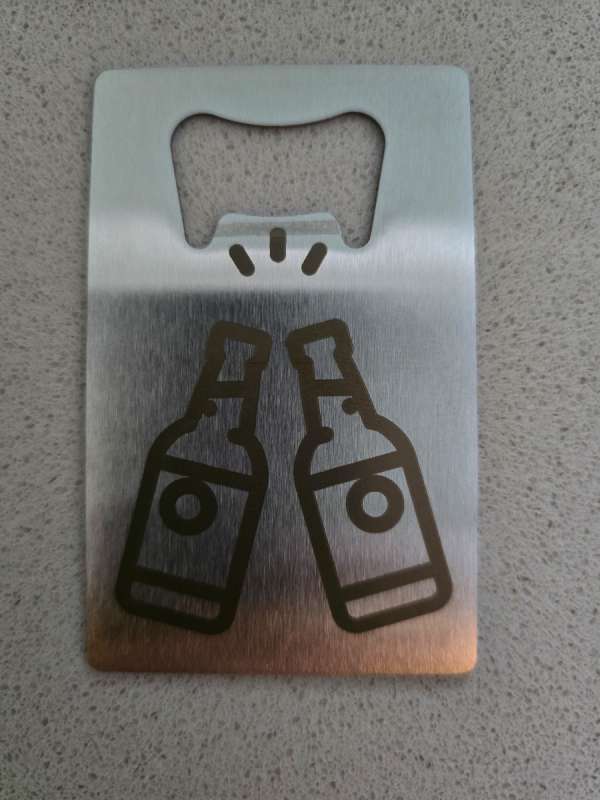
I also got to test engraving stainless steel. I used one of the credit card bottle openers that WeCreat provided.
Finally, I got to test what I want to use the engraver for. I want to use it for my woodworking projects. Eventually, I will be using it to engrave my logo on the back of my projects. I will also use it to engrave quotes or other things. I was able to get some cheap cut-off pieces of hardwood from the scrap bin at the Rockler store. I then milled them down and engraved both of them. I then routed a chamfer edge around them.
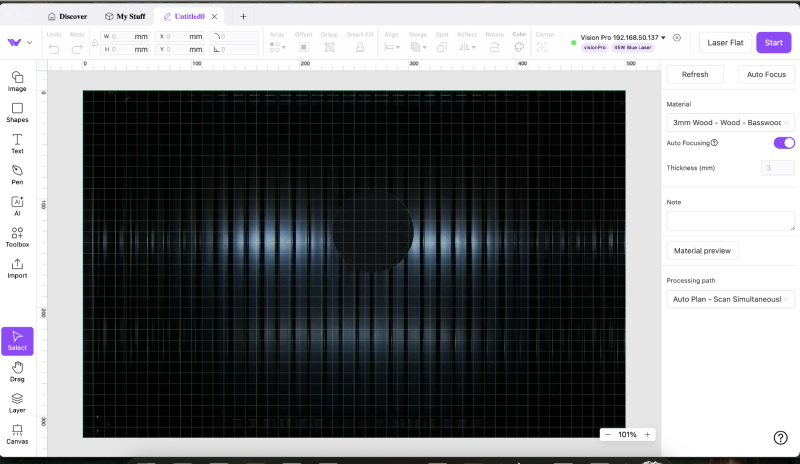
Since I was unsure of the type of wood that I was using, I used the test array option that the MakeIt software provides. I had a cut-off piece of wood that I used as a template to print on. The test array is below. You can see the bottom right corner really burnt into the wood. At 100 percent power at 20mm speed, it is right at a quarter inch deep.
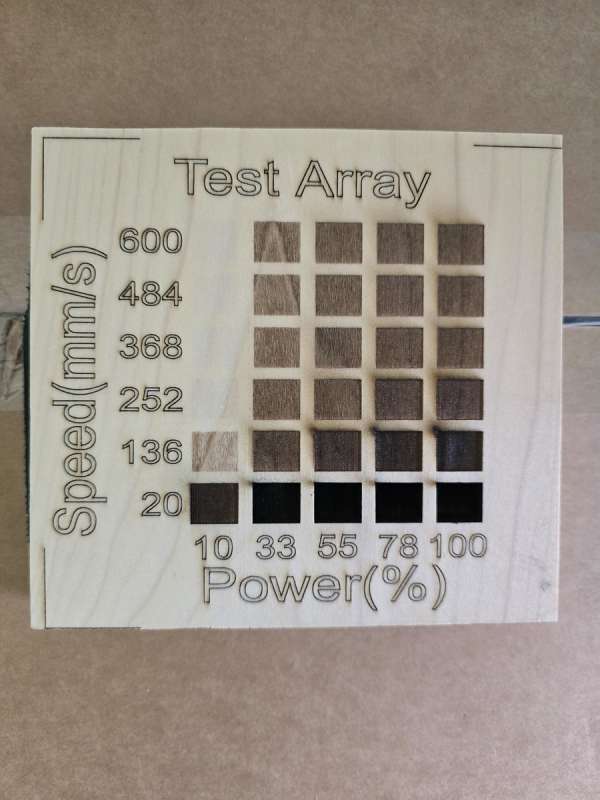 This sign went into my office since I am a data analyst and a big data nerd! I put a satin polyurethane finish on it so some of the letters are showing a slight glare. They all came out at a uniform depth.

One thing I did want to mention even though it was a small issue was that the rubber gasket around the edges of the printer will get caught on the corners as the printer lowers down and comes back up.

I had to run my finger along the edge to get it to pop back out. I want to make sure it keeps a good seal to keep the smells out of my office.
Final thoughts
The WeCreat Vision Pro is the easiest and most flexible laser engraver that I have ever used. It can handle a very tall and large object on its bed with no risers required. It features great accessories, including the Rotary Pro and AirGuard Ultra air cleaner. I only had the very faintest hint of leather when I engraved the valet tray. I think the MakeIt software is a good companion, but it could use a bit more refining. This engraver is ideal for anyone, from beginners to professional hobbyists, looking to sell items at a craft fair.
What I like about WeCreat Vision Pro engraver
- Built-in self-raising mechanism. No lift kit required.
- Built-in camera. No guessing about where your item is on the bed or how it will print.
- The rotary tool can handle a variety of cups and mugs, as well as smaller items like rings.
- The air cleaner is phenomenal. I had no noxious fumes in my office.
What needs to be improved?
- MakeIt software was a little glitchy. I had to reconnect sometimes to get it to refresh properly.
- I wish the lighting and or camera were a bit better so that dark objects show up completely on the print bed.
- The gasket around the edge of the engraver needs to be a bit longer so it does not catch when it raises and lowers.
Price: Basic: $2399.99, Rotary Pack: $2499.99, Rotary plus Conveyor Pack: $2949.99, Pro Pack: $3799.99
Where to buy: WeCreat
Source: The sample of this product was provided for free by WeCreat. WeCreat did not have a final say on the review and did not preview the review before it was published.
Check out these other engraver reviews!
- AlgoLaser Pixi smart laser engraver review – A great deal for crafters
- Acmer P2 33W laser engraver cutting machine review – Powerful!

Ruilogod 32" 2-in-1 Light Mulit Collapsible Disc Reflector 80cm Silver Gold
(as of July 1, 2026 20:03 GMT -05:00 - More infoProduct prices and availability are accurate as of the date/time indicated and are subject to change. Any price and availability information displayed on [relevant Amazon Site(s), as applicable] at the time of purchase will apply to the purchase of this product.)