REVIEW – Hanging pictures has always been something I dread. I am the worst at getting them level. Command strips made this even harder because you only have one shot at pressing that picture to the wall. I recently completed the Lego Milky Way picture and want to hang it above my desk in my office. I kept holding off because the picture requires two screws about 10 inches apart. I have several levels at home, but with limited space to work with in front of my desk, juggling a level, pencil, and tape measure would make it difficult. I could not use Command Strips because the picture is very heavy. I was happy to offer to review the Hozo M-Cube 02 Anti-Gravity laser level to see if it could make this job easier for me.
⬇︎ Jump to summary (pros/cons)
Price: $239
Where to buy: Hozo Design
What is it?
The Hozo Design M-Cube 02 Laser Level Pro is a powerful modular solution for precise wall measurement and alignment. It works on various wall surfaces without causing damage and frees your hands for maximum convenience. It generates both a horizontal and vertical laser and can provide several different measuring functions.
What’s included?
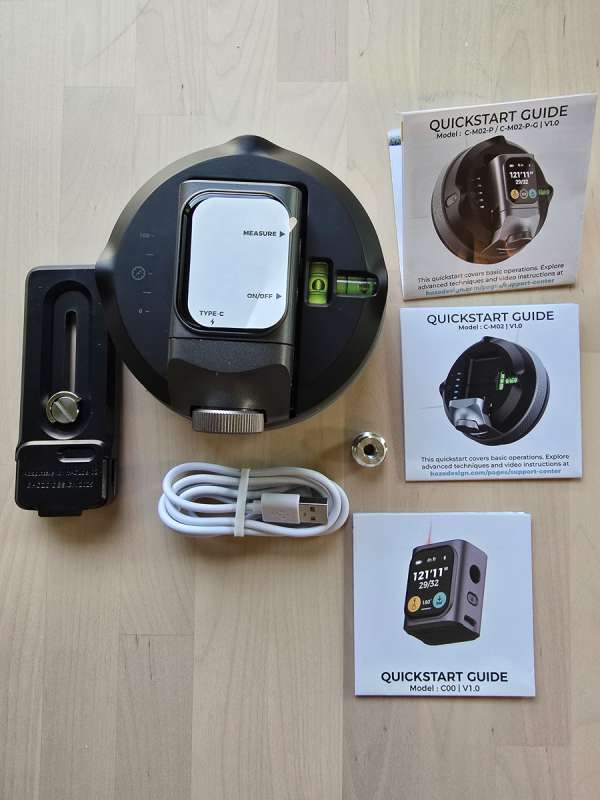
- AdaptMate plate that allows for the holding of other lasers on the Hozo M-Cube 02
- M-Cube 00 Laser Measure – already mounted on the Laser Level
- M-Cube 02 Laser Level
- USB-C to USB-A charging cable
- large screw adapter for the AdaptMate
- Several quick start books
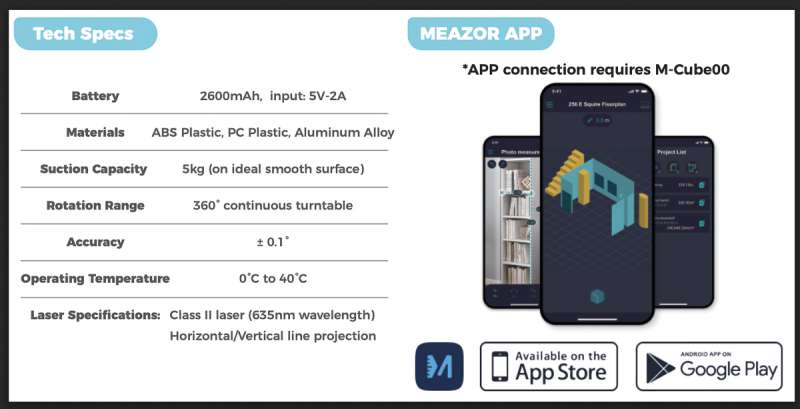
Tech specs
Design and features
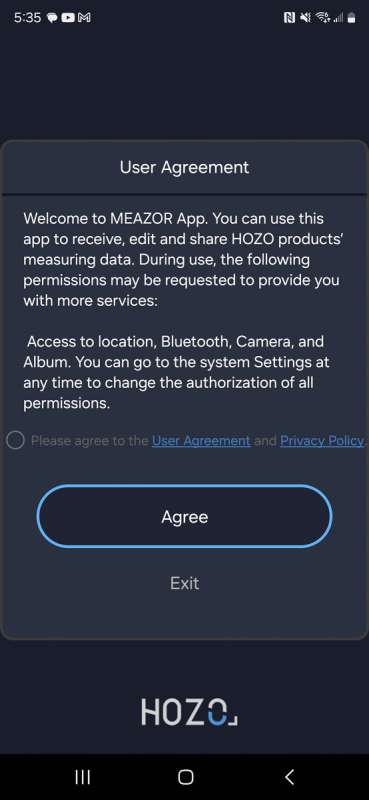
The quick start guide first asks you to download the Meazor application on your phone. The app does not ask you to create an account, which is nice. It also does not try to connect to your Wi-Fi. It will use your phone’s Bluetooth, camera, and album.
It then asks you to connect the app to your Hozo device. I ensured my Bluetooth was on, the M-Cube 00 Laser Measure was turned on, and I pressed the connect button on the app.
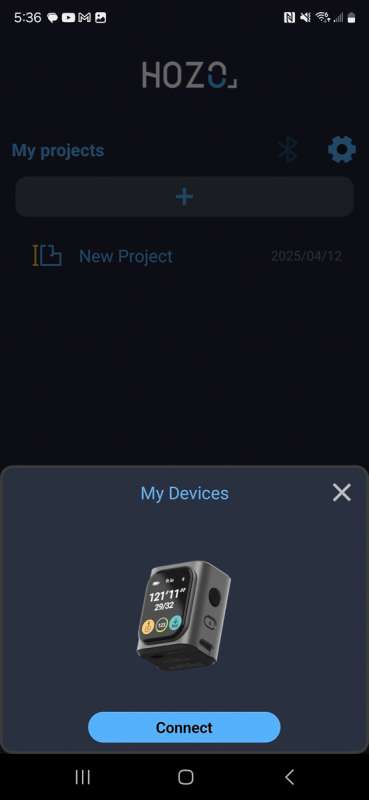
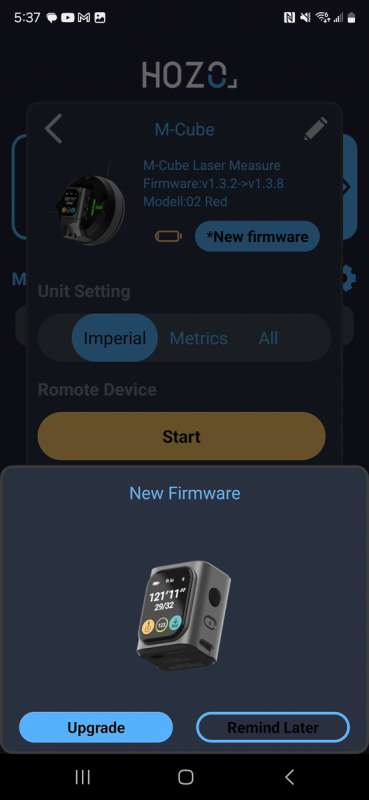
It connected right away and let me know new firmware was available.
I clicked the new firmware button and was presented with the following screen. I clicked Upgrade and the upgrade process began.
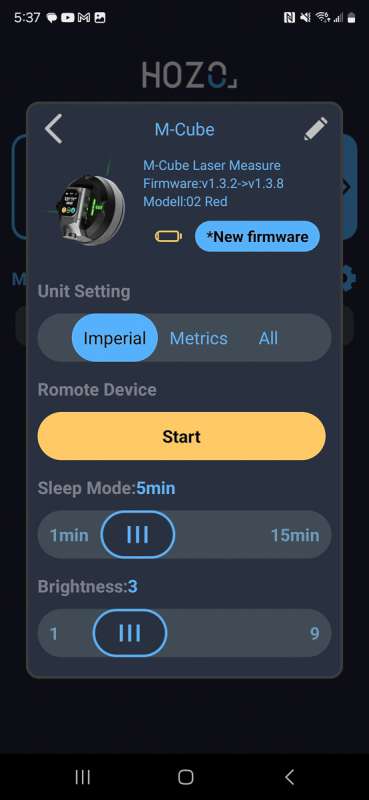
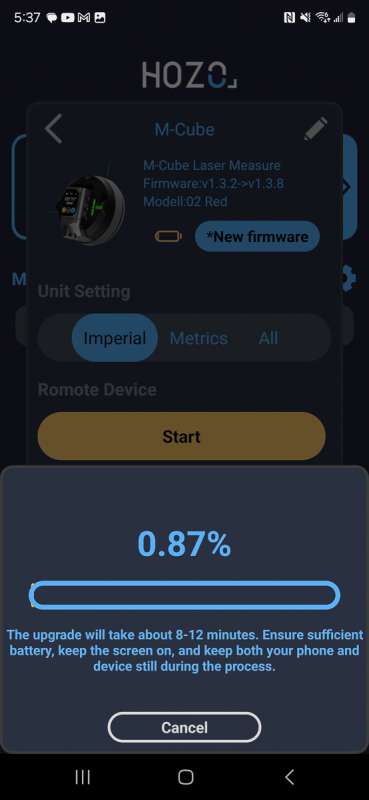
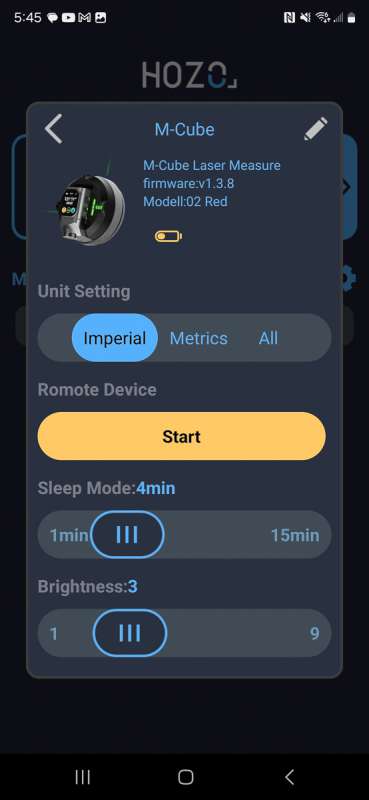
When the upgrade was complete, I was on the latest version of the device. The Laser Measure attachment will let you measure in Imperial or Metric. If I said all, I could only get it to display in centimeters or meters. If you look closely, there is a misspelling on the display. They meant to say ‘Remote Device’ and not ‘Romote Device’. The other important thing to note is the sleep mode setting. I could bump it to 4 minutes but not any lower. You can turn off the laser measure tool by pressing and holding the power button, but the laser level has no power button. It wakes up when it senses movement and makes a vibrating noise. This noise freaked me out when I picked up the package from the post office box. It was vibrating and beeping!
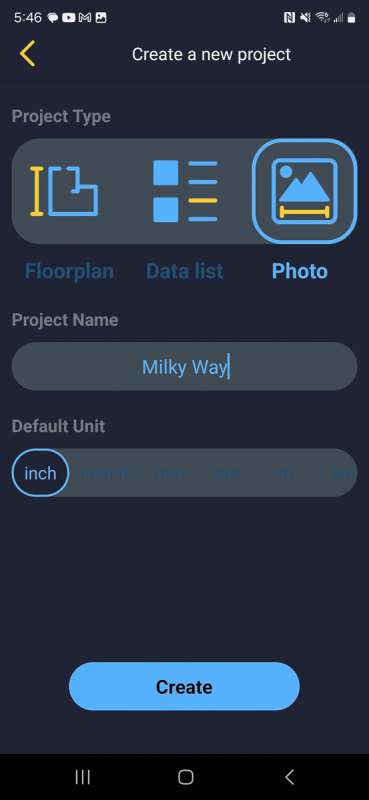
There is a project area in the app. The project type of photo just lets you store photos. The Floorplan project will let you draw up a floor plan. It has walls, doors, windows, basic lines, arcs. I played with it a bit, but I think if you are already comfortable with some other CAD type program it would be easier to use than the app.
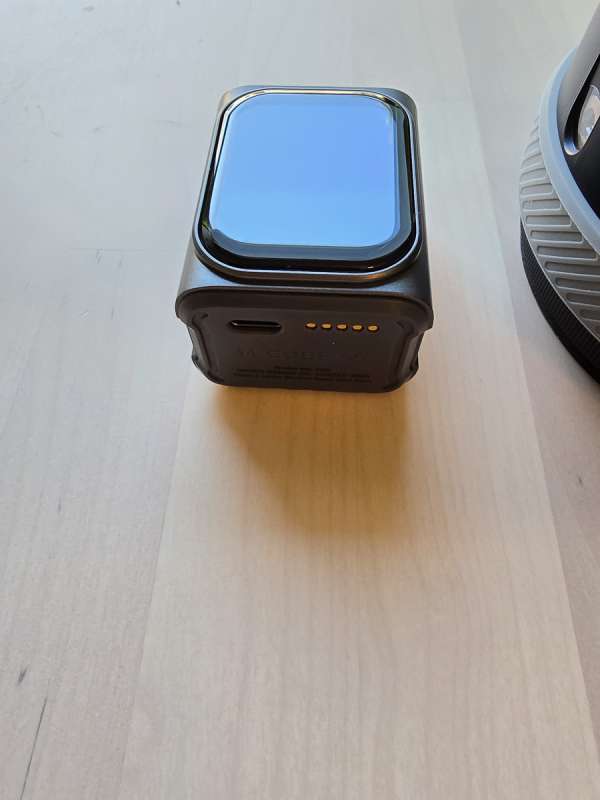
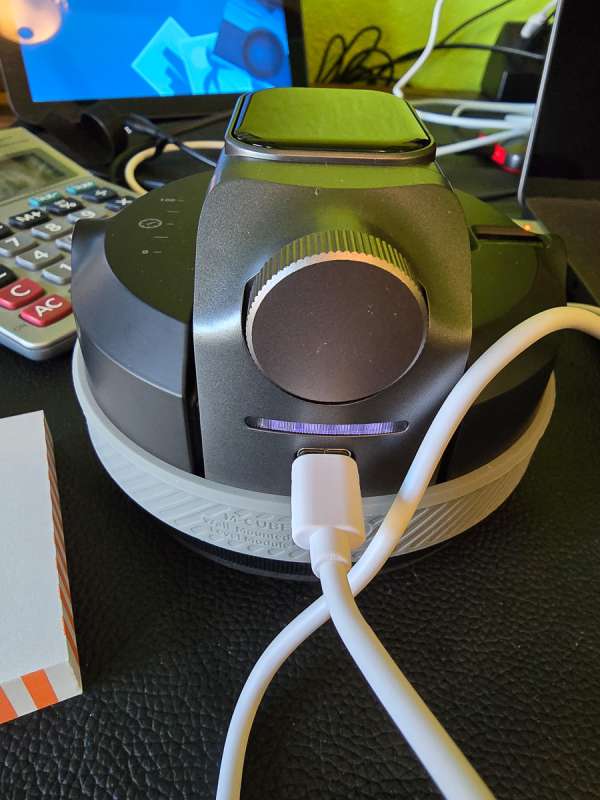
As stated earlier in my review, the Hozo Design M-Cube 02 has two pieces. In the picture below, the M-Cube 00 Laser Measure is on the left, and the M-Cube 02 Laser Level is on the right.
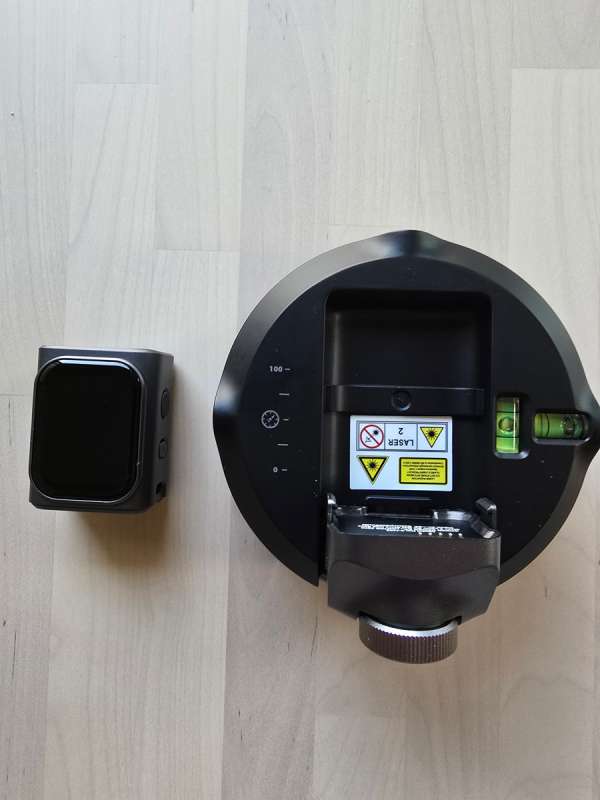
The Laser Measure snaps into the Laser Level using magnets, and the two notches on the side of the Measure go into the hooks of the Level. The measure has a USB port, but it will also charge through the USB port on the Level.
On the right side of the measure, there’s a power button and a button you can press to start measuring distance.
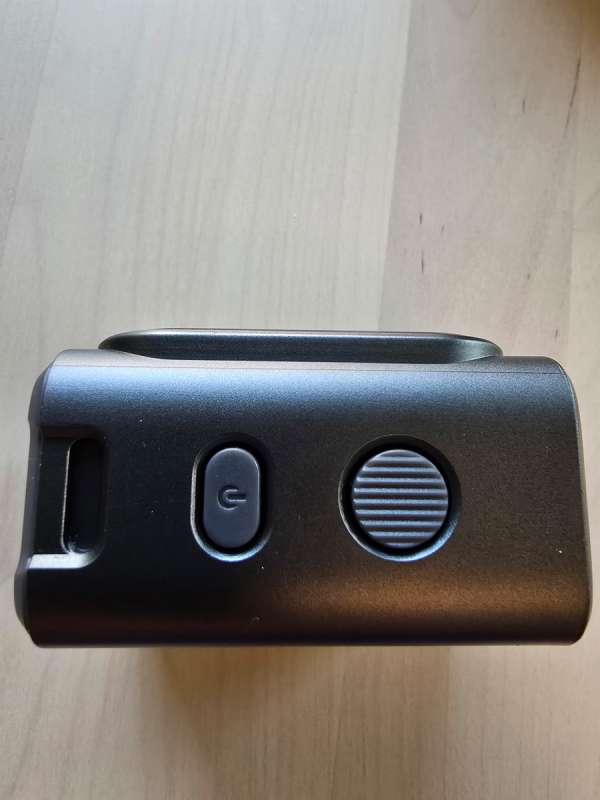
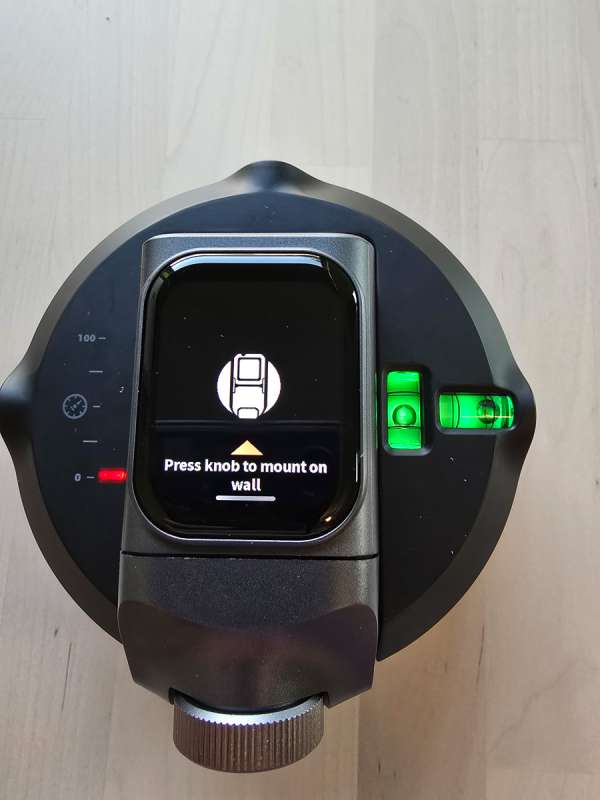
Pressing and holding the power button for two seconds will turn the Measure on. Pressing and holding it again for two seconds will turn the Measure off. Because these are essentially two different devices, you can turn the Measure on and off by pushing in the dial button below the Measure on the Level for five seconds. The Level has two bubble levels to the right of where the Measure sits. One is positioned horizontally and the other vertically. To the left of the Measure, you will see a gauge. In the picture below level zero is lit red to indicate that there is currently no suction running on the device. When you first turn the Measure on, the image below displays. The metal knob at the bottom of the Level needs to be pressed in for two seconds to activate the suction. As pressure is built, the gauge to the left will light up in purple as pressure increases. When it reaches 100, you let go of the button, and the gauge will light up in blue. Over time, the level may lose suction, and you will see the indicator drop down. When it reaches 50%, you can hear the suction motor kick in, and the gauge will rise to 100 percent. This worked great on textured walls where suction can be hard to maintain.
When the level is by itself without the Measure attached, the dial button, when rotated, will activate the vertical and horizontal lasers.
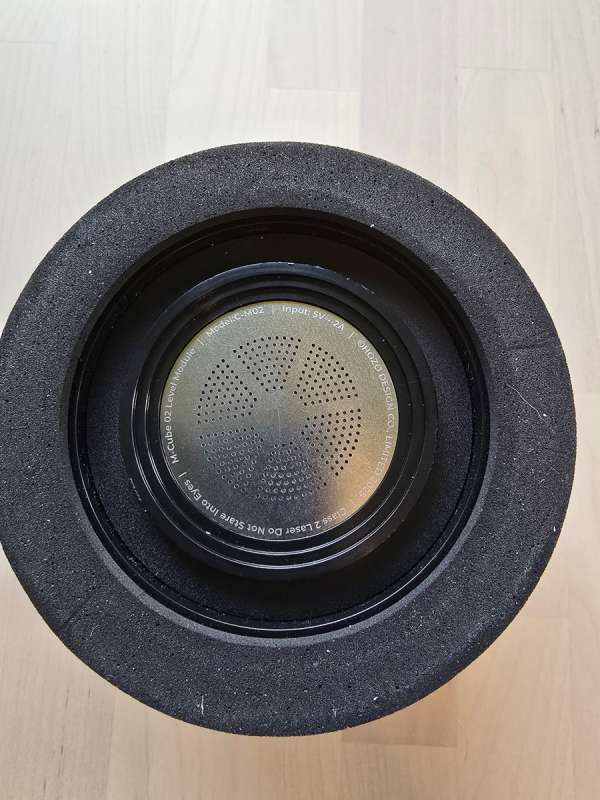
This is a picture of the bottom of the level. The base is a firm foam-type material. In the center, you can see the air holes where the suction is provided.
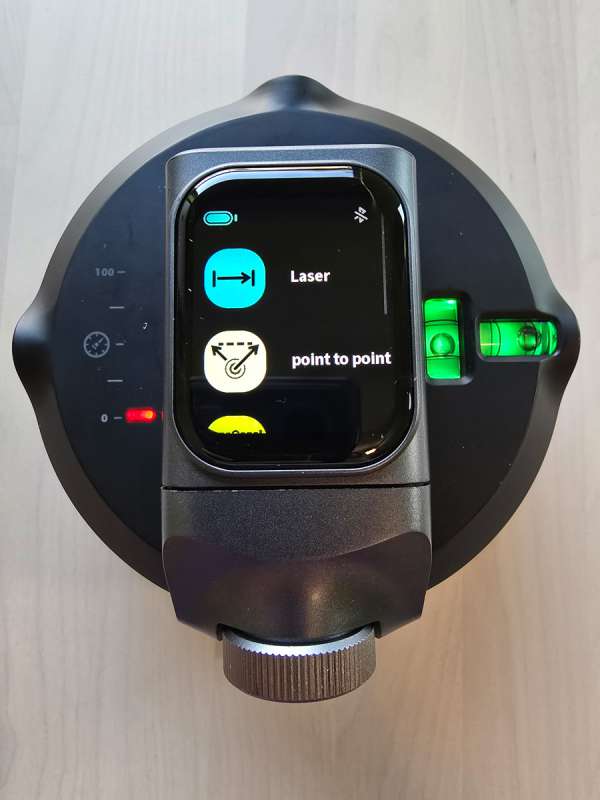
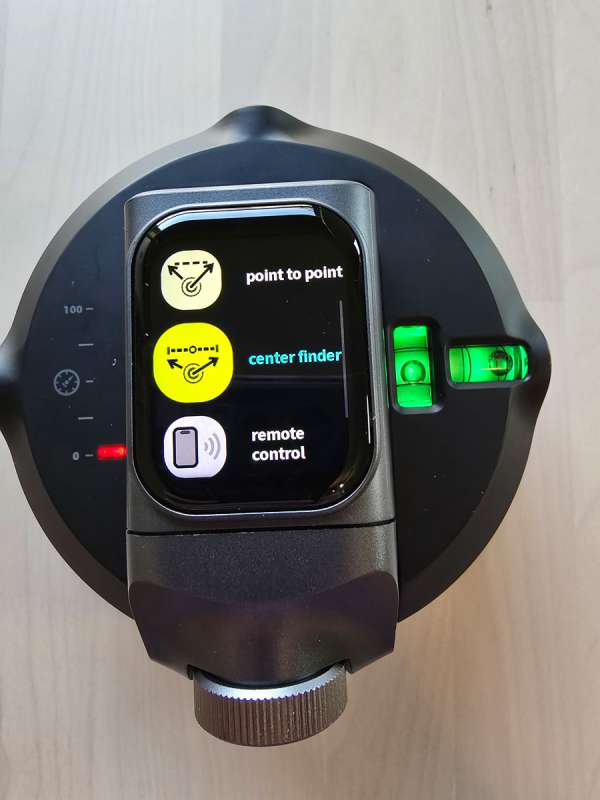
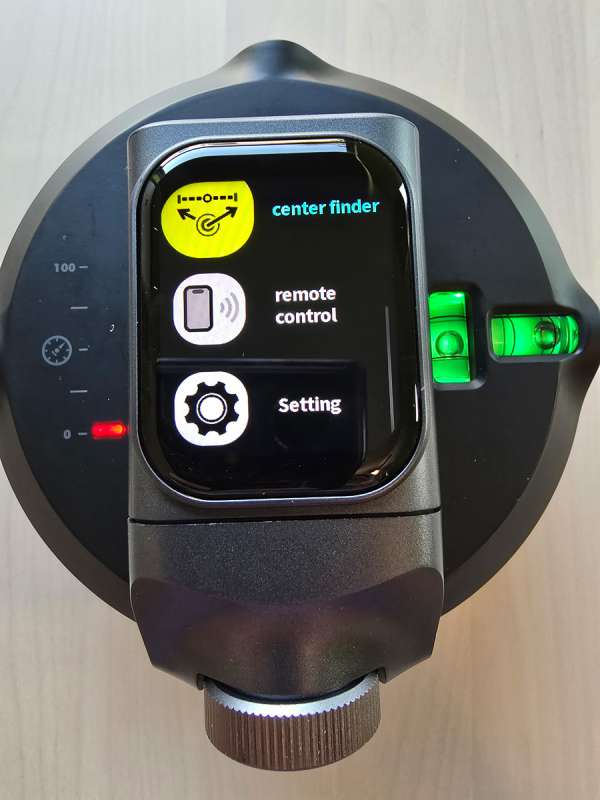
The menu of the Measure has the same features as the app. You can run all of these features on the level or through the app acting as a remote device.
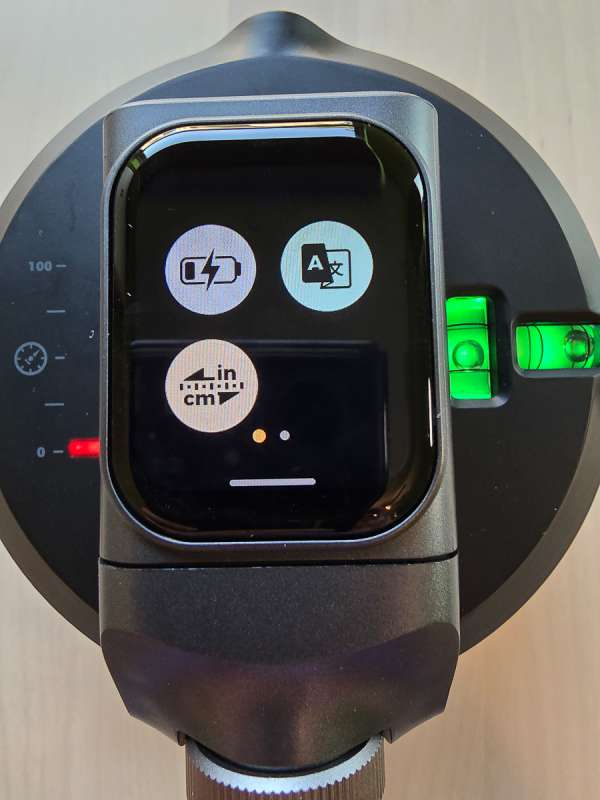
In the settings section, the first icon lets you adjust the brightness level and the timeout setting for when it will automatically shut off. I could set it to 1 minute in this setting, unlike the minimum of 4 minutes in the app. The ‘A’ icon will let you choose your language. It is defaulted to English. The third setting will allow you to measure in mm/cm/m or in/ft.
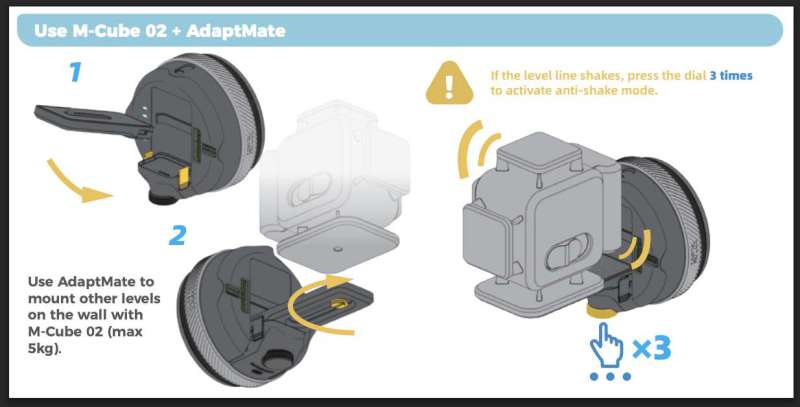
Below are the instructions for using the AdaptMate to mount another laser level to the M-Cube 02.
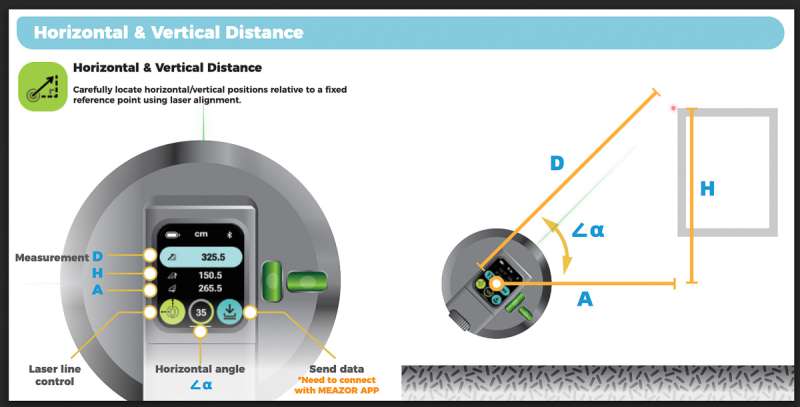
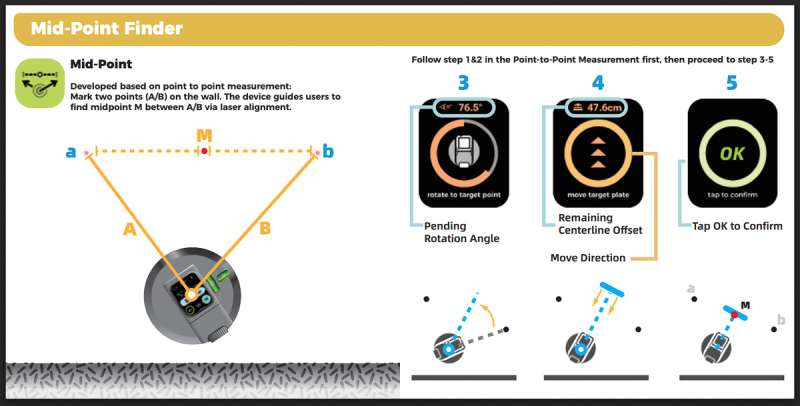
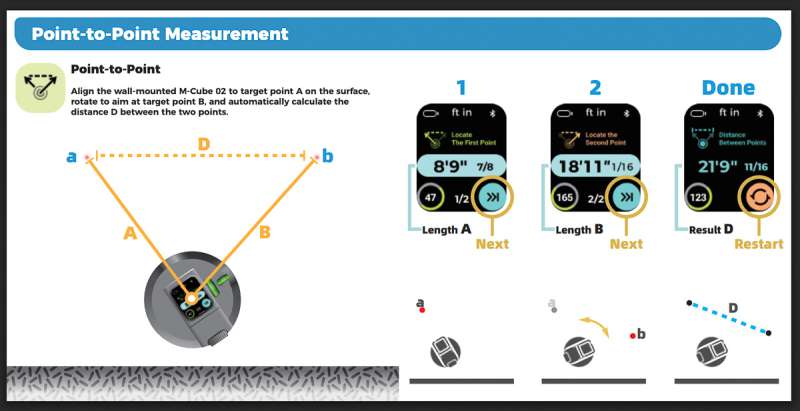
The Hozo Design M-Cube 02 has several different methods for measuring. I have included screenshots of the various ways it can measure.
Assembly, Installation, Setup
I made sure the Laser Measure and Level were fully charged by plugging it into power using the USB-C to USB-A cable. When they were fully charged all four LED lights lit up in purple.
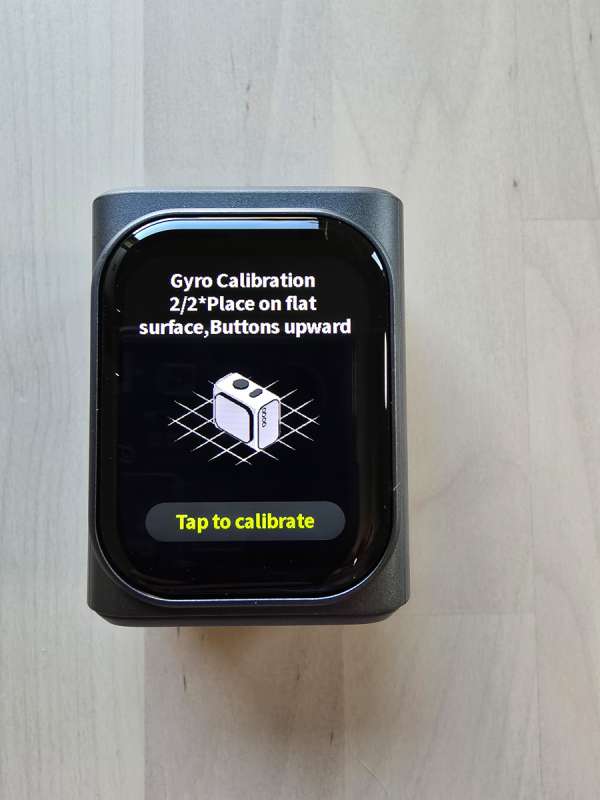
The next step was to calibrate the Gryo in the Laser Measure. I had to remove it from the Laser Level and place it on a flat surface. I then went to the settings and pressed the calibrate icon, which only shows up when the Measure is separated from the Level. I was presented with the first screen. I tapped to calibrate.
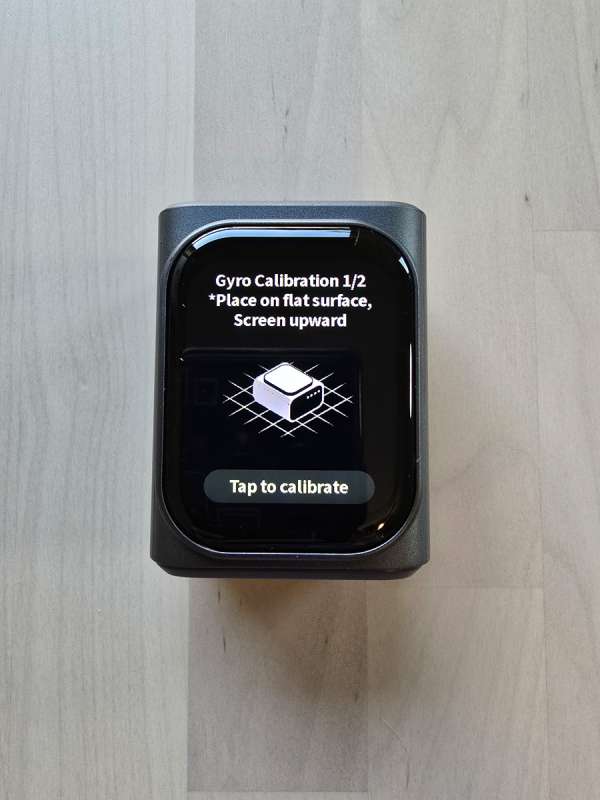
I was then presented with this second screen, on which I had to put the device on its side and tap the calibrate button again. It was done in a few seconds. I attached the Measure back to the Level, and I was ready to use it to hang my picture.
Performance
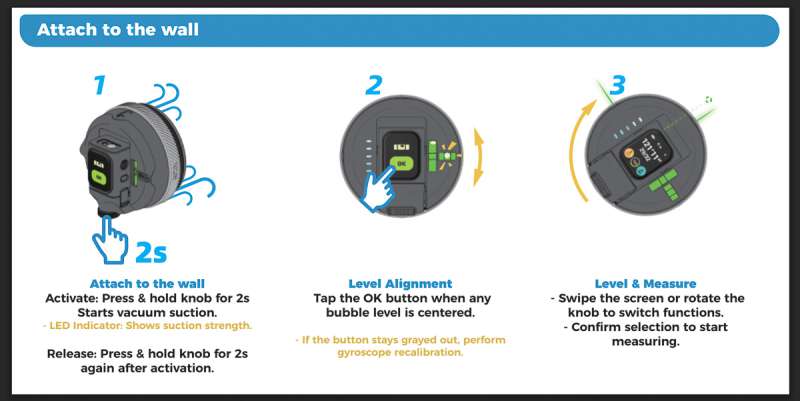
The first thing I did was to try to use the Measure to find the middle of my wall. I have a textured wall with a semigloss paint. I got the Level to stick to the wall by pushing it into it as I pressed the dial button to activate the suction. I had to press pretty hard as the texture gave it a bit of a challenge. Once it was on the wall, it had no issues staying on the wall. I then had to ensure it was level by using the horizontal level to the right and pressing the OK button when it was set.

Below are the steps to attach the level to the wall.
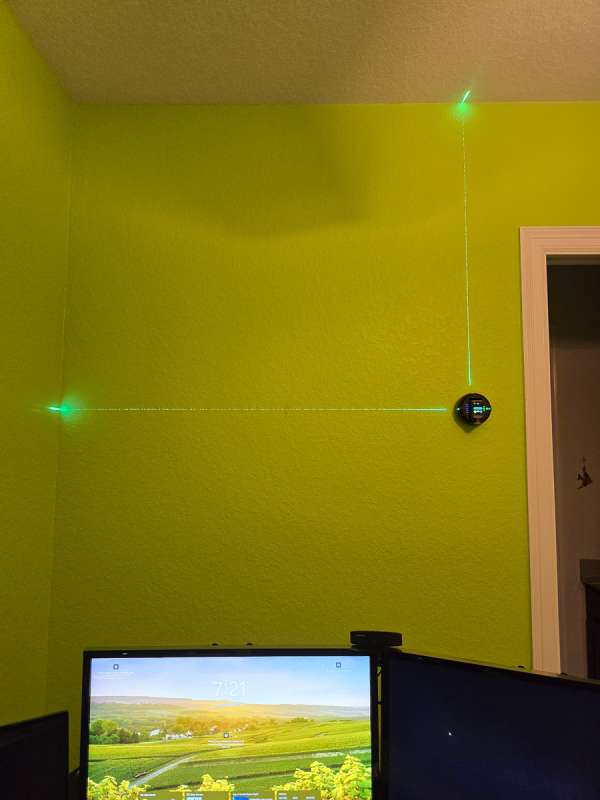
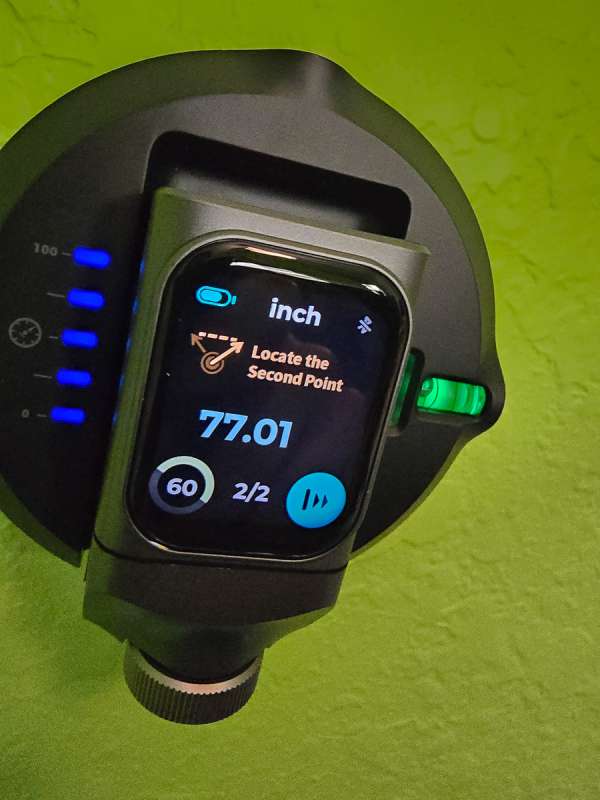
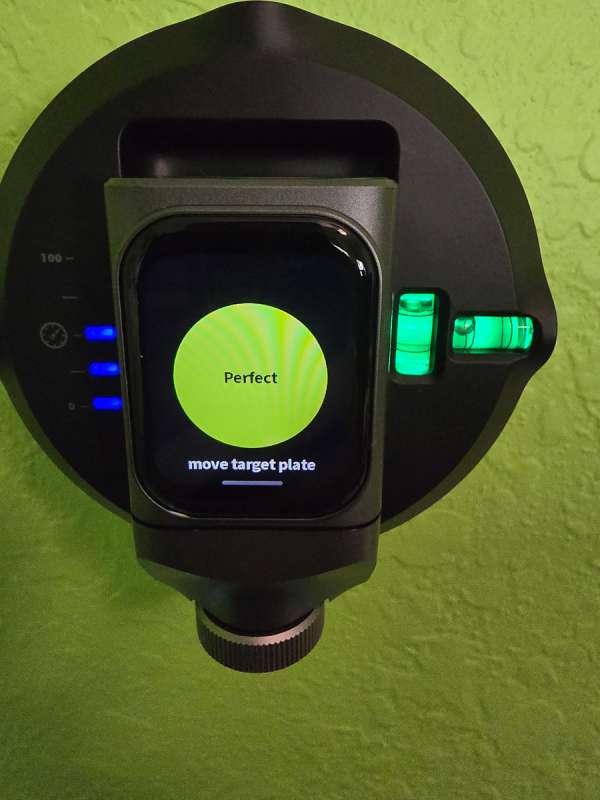
Once it was mounted in the center of my wall, I selected the Mid-Point Finder. I had to rotate the top laser so it pointed at my first point, which I picked as the left wall.
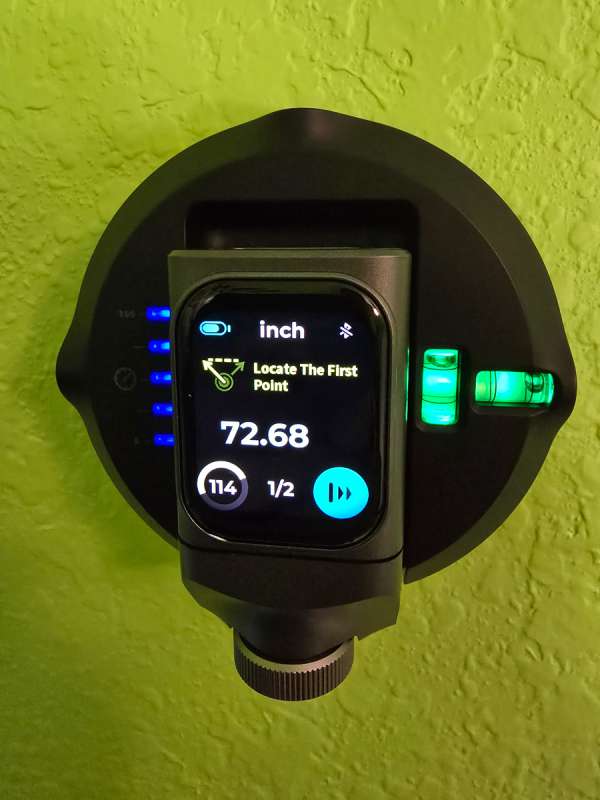
It then asked me to pick my second point. This took a bit of guesswork on my part since there was no wall, and I had to try to find the point where the door started.
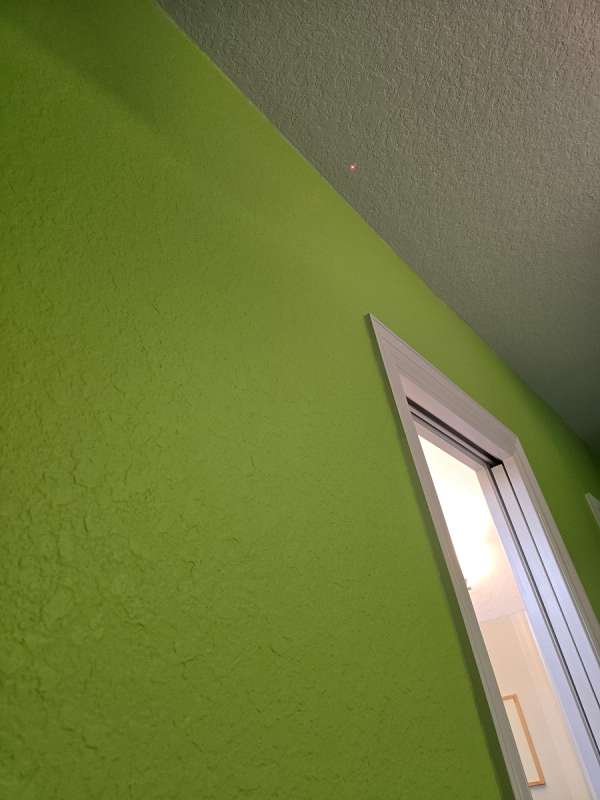
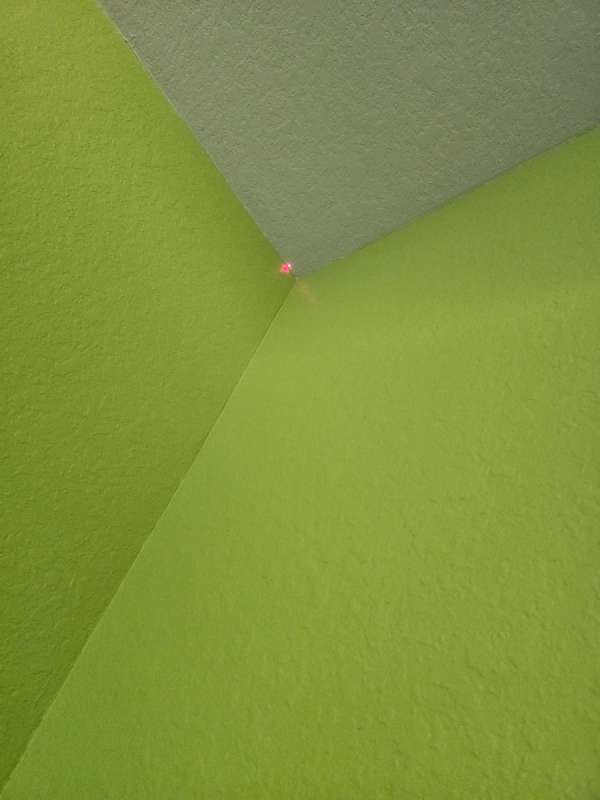
The Measure calculated the center point, and I had to rotate the laser to that point. As I rotated, the green circle on the display filled in. If I had a target plate or some way to mark it, I could have done so at this point. However, it really didn’t help me in my situation, so I simply used a tape measure to determine the midpoint of the wall.
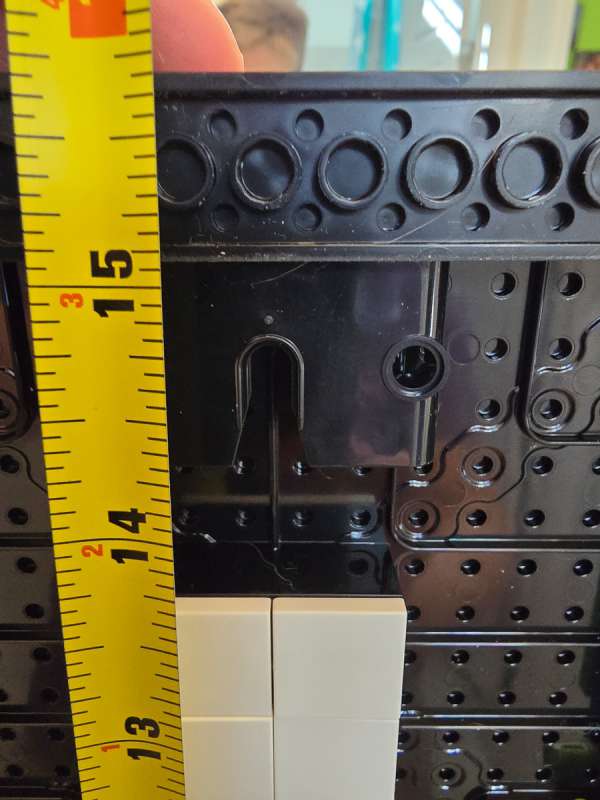
I used a tape measure to measure the distance between the two mounting points on the back of the picture. It was right at 10 inches. The image below is a little off, and it was 10 inches exactly. I also measured the distance from the bottom of the picture to the top of the mounting point.

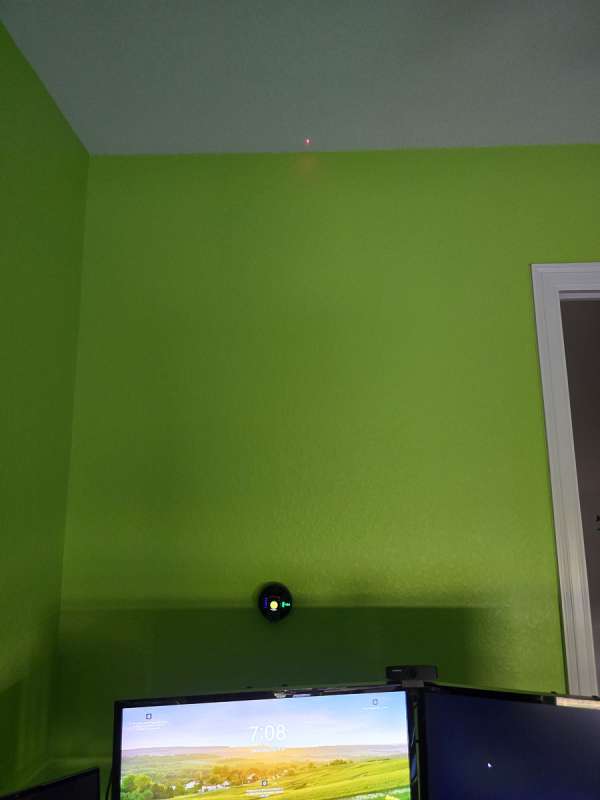
I knew where the bottom of the picture should be on my wall and where the middle of the wall should be. I then set the laser to point across where the middle of the wall was marked. I then used the laser line to mark x’s five inches on either side of that center line mark. I knew they would be in perfect line with each other.
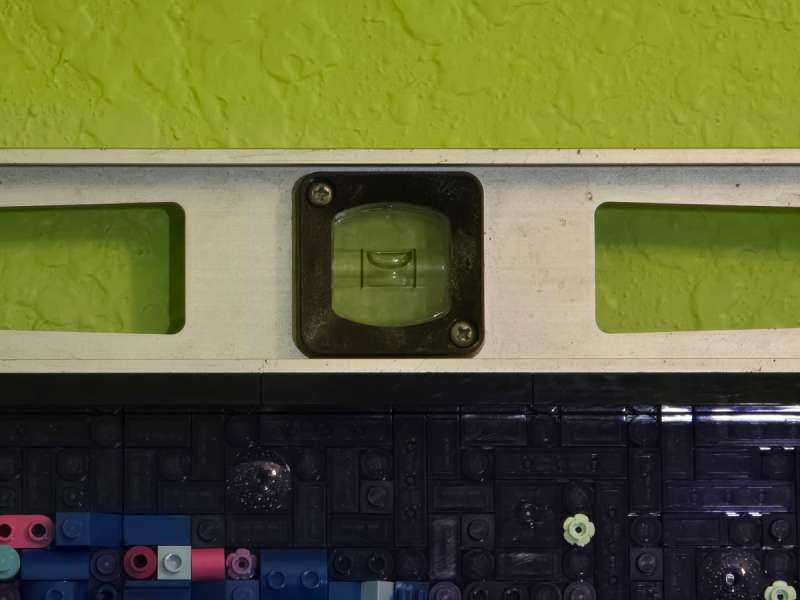
I used two sheetrock anchors, and mounted two screws into the wall. The two screws slid into the slots on the back of the picture perfectly. I took out my manual level and put it on top of the picture to check the balance, and it was spot on!
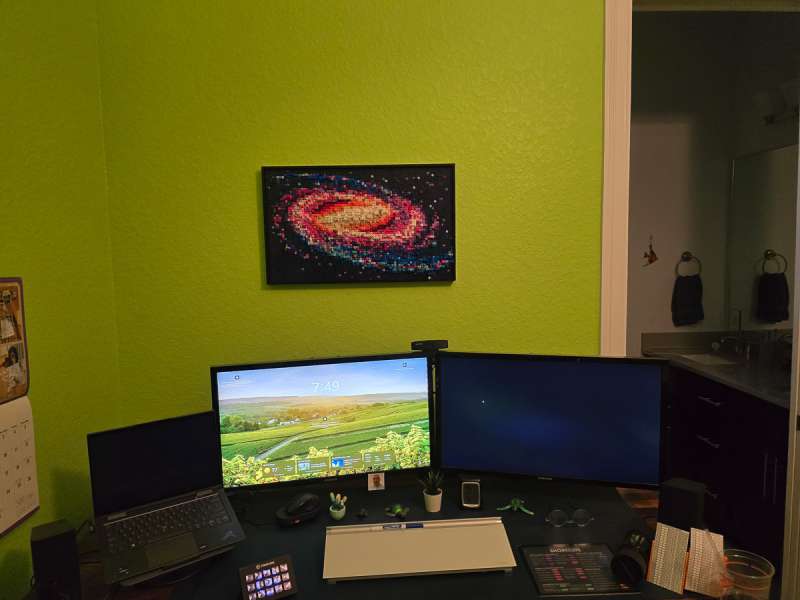
Here is my final result.
Final thoughts
I really enjoyed using the Hozo Design M-Cube 02 Laser Level and Measure. It made what is a stressful job for me very easy. It would be nice if they made a plate allowing the level to sit on it and then mount it to a tripod. Then it could be used to easily find the middle of the wall, where I could mark it on the wall. It has many measuring functionalities that I may or may not use. I was impressed with the Level’s ability to stick to even a flat-painted textured wall. I had to press a bit to get the suction started, but once it was there, it was set.
What I like about Hozo Design M-Cube 02
- Sticks really well to a lot of surfaces. Allows for hands-free usage.
- Has lots of measuring capabilities.
- It can hold another laser if need be using the provided adapter.
What needs to be improved?
- Somehow keep it from turning on when being shipped so it does not sound like a bomb in a package!
- Create a plate that would allow the level to be used on a tripod.
Price: $239
Where to buy: Hozo Design
Source: The sample of this product was provided for free by Hozo Design. Hozo Design did not have a final say on the review and did not preview the review before it was published.
Check out these other tool reviews!

Zip Ties Assorted Sizes(4”+6”+8”+12”), 400 Pack, Black Cable Ties, UV Resistant Wire Ties by ANOSON
(as of June 16, 2026 20:06 GMT -05:00 - More infoProduct prices and availability are accurate as of the date/time indicated and are subject to change. Any price and availability information displayed on [relevant Amazon Site(s), as applicable] at the time of purchase will apply to the purchase of this product.)
Gadgeteer Comment Policy - Please read before commenting
You might also consider Levelsure, who can provide custom laser levels to suit any job you need.