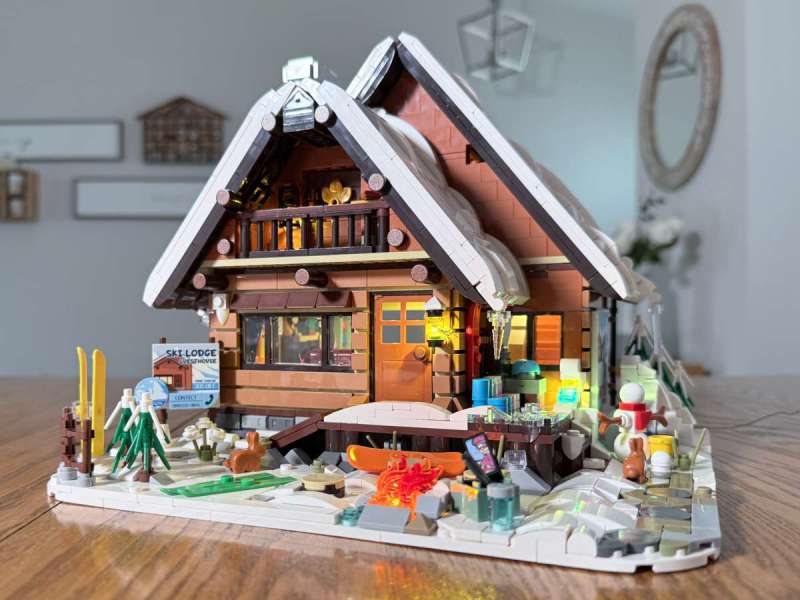
REVIEW – Winter is fast approaching, which means I’ll be outside less and inside more. I should have more time for building fun while listening to the sounds of Christmas music. Funwhole’s newest box of building blocks, the Ski Lodge, is the perfect seasonal set to spent a couple afternoons constructing away.
What is it?
The Funwhole Ski Lodge is a LEGO-compatible build block set with over 2100 pieces that features a two-story house with a removeable roof, a rear wall that swings open, and four mini figures, everything a kid needs to play! There’s a lot of smaller pieces, mostly in white or shades of brown, used to create a detailed setting, as well as Funwhole’s signature component, lights! The Ski Lodge is part of their Retro House series, and their goal is to “bring everyone the whole happiness of day and night.”
What’s included?
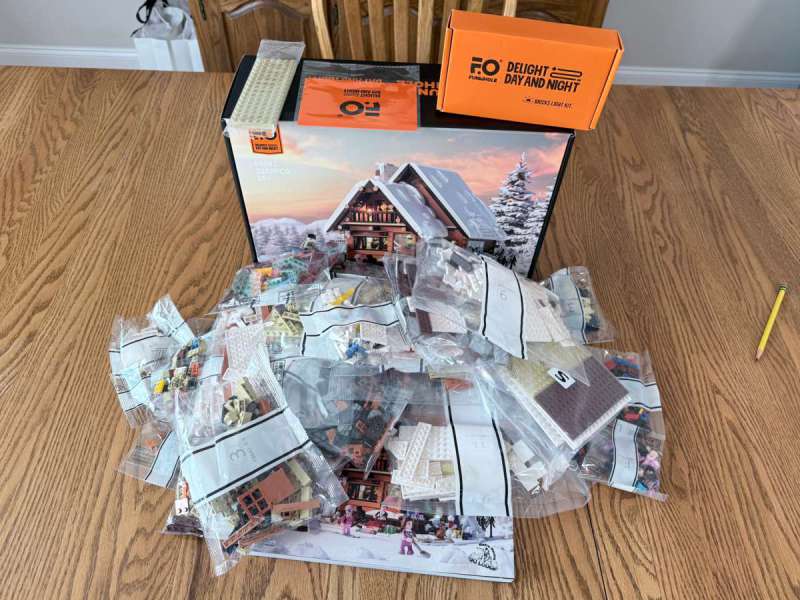
The following items are included:
- 2187 pieces
- Lights with battery box and USB connector
- A tweezers for the light connectors
- Massive 360-page manual
- Brick separator
Design and features
When it comes to the design of LEGO alternatives, there are a handful of questions that always need to be answered:
Are they compatible with LEGO? The building blocks are 100% compatible with LEGOs.
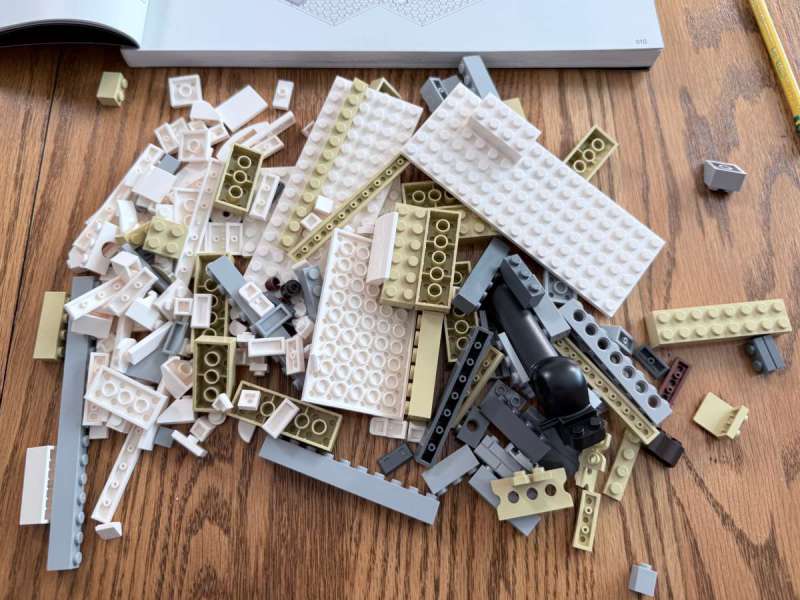
Are they of the same build quality? They are almost but not quite as good. I noticed that nearly every large flat piece, which were used to build the base, were slightly warped and did not lay flat on the table. While this did not affect the final build, it’s a common problem with alt-LEGO pieces. Overall, however, these are still really good pieces that would fit right in with any kid’s collection.
Do they fit tightly, or do they come apart easily? These pieces are tight, and I did not find any loose pieces.
Are they cheaper in cost than LEGO? Lower cost is one of the best reasons to buy building blocks from someone other than LEGO. I did a quick search on LEGO’s website to find similar-sized buildings and calculated their cost per brick:
- The Nightmare Before Christmas is 9.1 cents/brick.
- The Alpine Lodge is 6.6 cents/brick.
- The Sanderson Sisters’ Cottage is 9.9 cents/brick.
Funwhole’s set is only 5.6 cents/brick, anywhere from 15 to 43% cheaper. That makes this set a good deal, especially since it includes lights, something LEGO has not yet figured out.
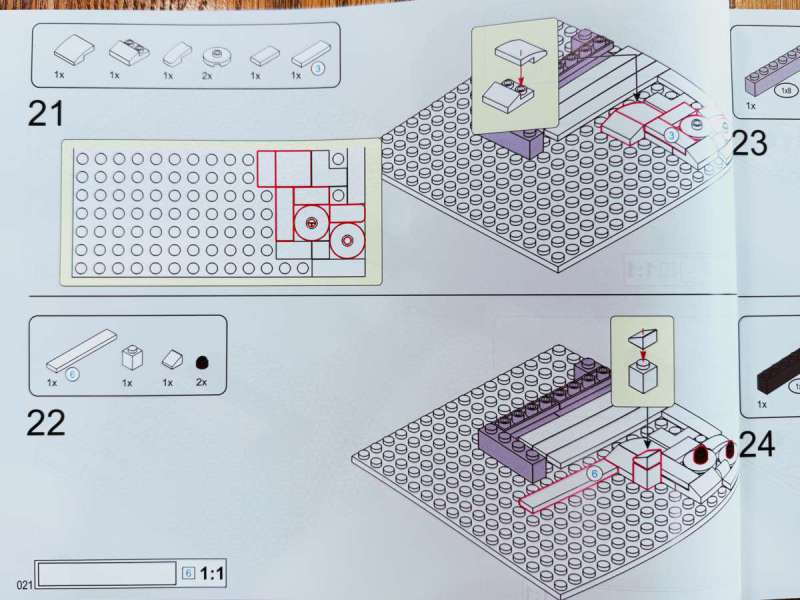
How do the instructions compare? I like these instructions, and I did not have any problems with them. Funwhole is careful to limit the number of bricks added on each page, and new additions are highlighted in red to make them easy to find. In some pages, such as step 21 above, Funwhole uses a top-down view to make it easy to see where some pieces go. LEGO fans will have no problems building this set with these instructions.
Assembly, installation, and setup
The Ski Lodge arrived in a hefty box with a ton of plastic bags inside. As I sorted the bags, I couldn’t help but wonder if this was an area where Funwhole could improve their sustainability by replacing the plastic bags with something that will decompose. The bags are numbered from 1 to 12, correlating to the major sections of the build. There also one bag labeled F for mini-figures, I suppose, another labeled S for “someone forgot to put these baseplates in with the other bags,” and even 2 baseplates that arrived outside of the Ski Lodge box; oddly enough, these extra baseplates were not actually used for anything. It looks like Funwhole is having some packaging issues, a problem I haven’t seen before with their sets. The lights were well-protected in a sturdy orange box.
The manual is large and in charge. It opens with a backstory about four friends on a ski trip and then recommends that I connect all the lights and make sure they are working before I build with them, a smart idea. The lights connect to a USB-A cable that can plug into a power box with three AA batteries or into any USB-A charger. I love that the Funwhole uses USB, as it allows me to plug into a smart outlet and control the lights with Apple’s HomeKit. It’s been about two years since I built my first Funwhole set, and by now I think it’s time that they upgrade from the outdated USB-A to USB-C.
After the lights, the next step is to build the mini-figures. I’m very glad that Funwhole added their own particular flavor of minis to the set, as it makes it so much easier for kids to play with.
Section 1
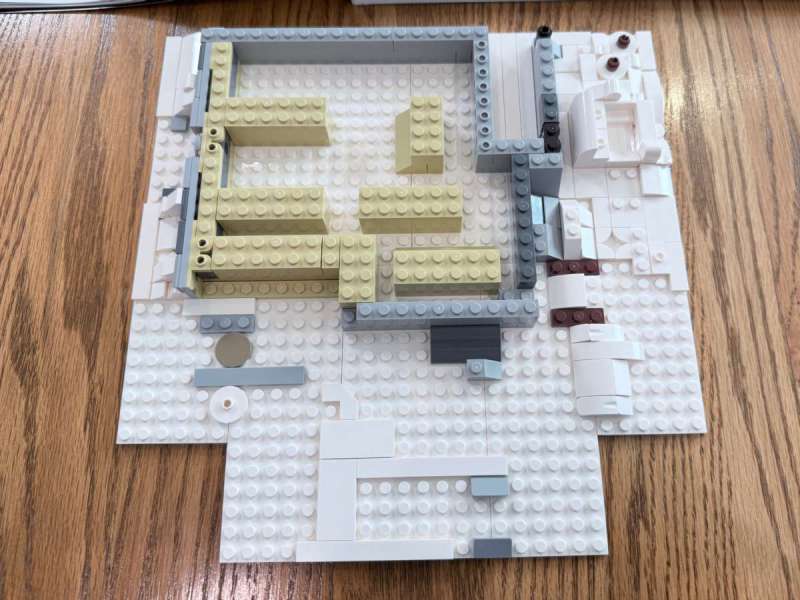
The first section began the foundation of the lodge. There were a total of seven white baseplates that were connected, and all of them had some warping. Despite this, this step was quick and easy to build; in fact, despite the size of this set, I found that everything was easy to build, except perhaps the lights.
Section 2
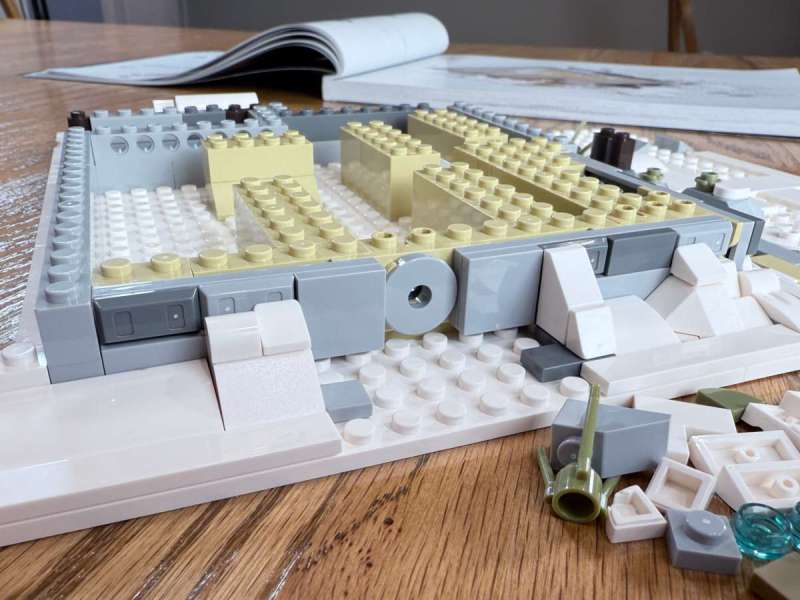
The second section continue to build out the foundation. There was some interesting brickwork along one side of the crawlspace, including a hole that I assumed would be used to run the wires for the lights.
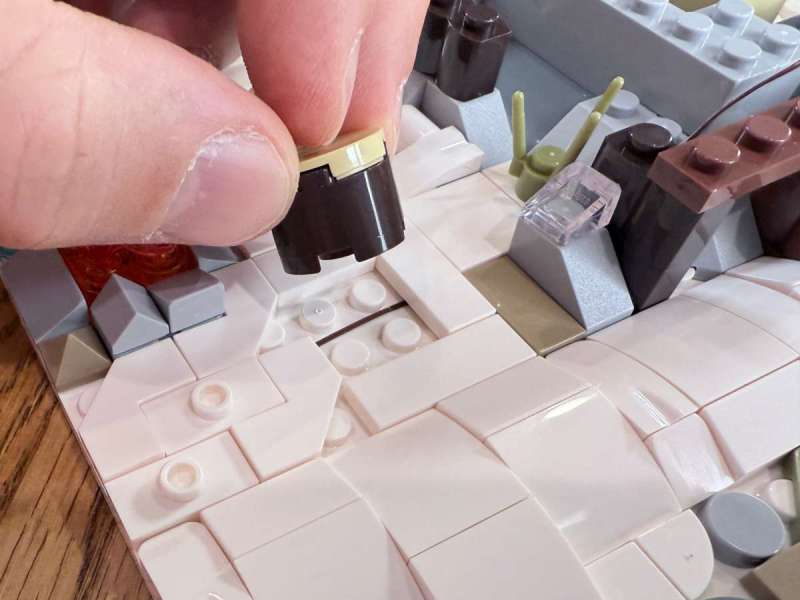
The first lights appeared in this section, and this is where I was disappointed with the designer of this set. When I built the Lakeside Lodge, I complained that the design pushed bricks directly onto the wires of the lights. This is as terrible of an idea as it sounds, because these wires are very thin and easy to break. I recommended that Funwhole use conduits instead, and each set that I’ve built since then has gotten better at doing so. The Ski Lodge is a regression; there are so many places where the wires are pinched by pieces. It seems that the designer of this set hasn’t followed the good work that other Funwhole designers have done. If you build this set, do so carefully if you want to reuse these lights. This set is not for young builders.
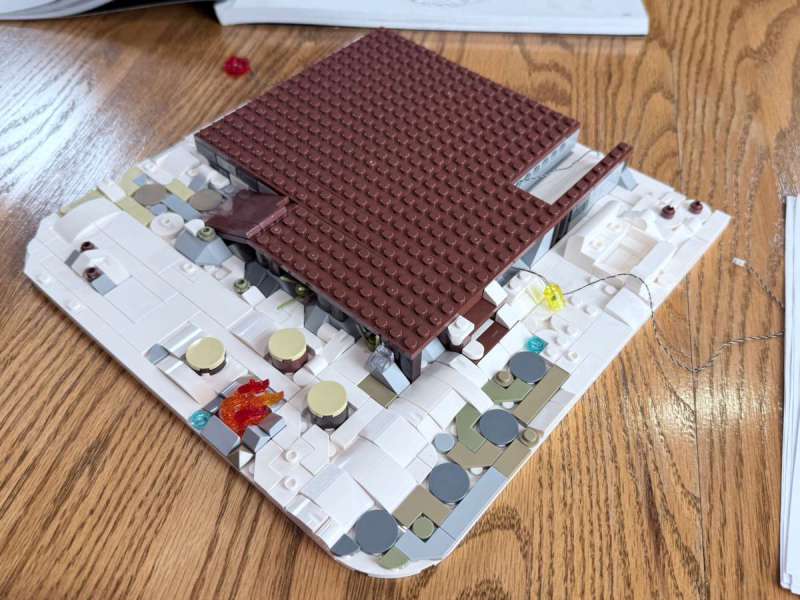
This section finished by placing down the floorboards for the first story of the house. It’s looking good so far!
Section 3
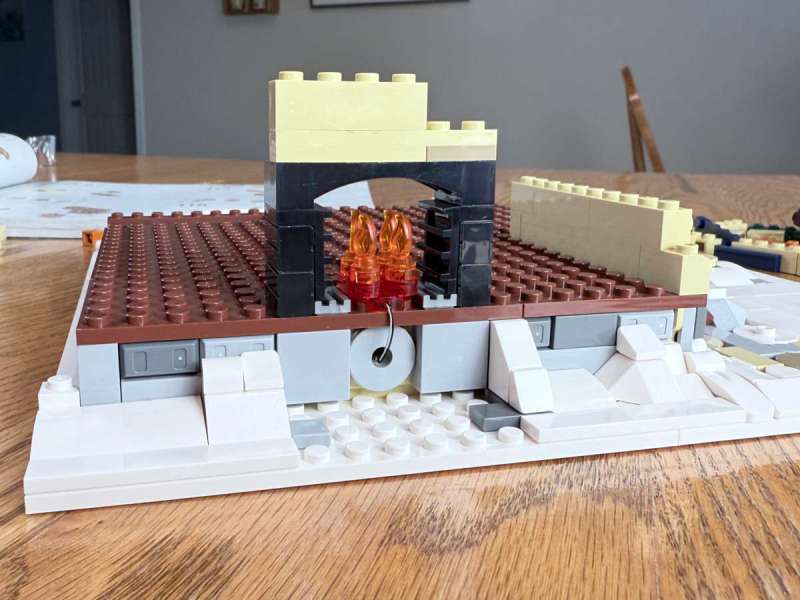
The third section built the walls for the front of the house. It started with the fireplace, and then I knew what that hole in the foundation was for.
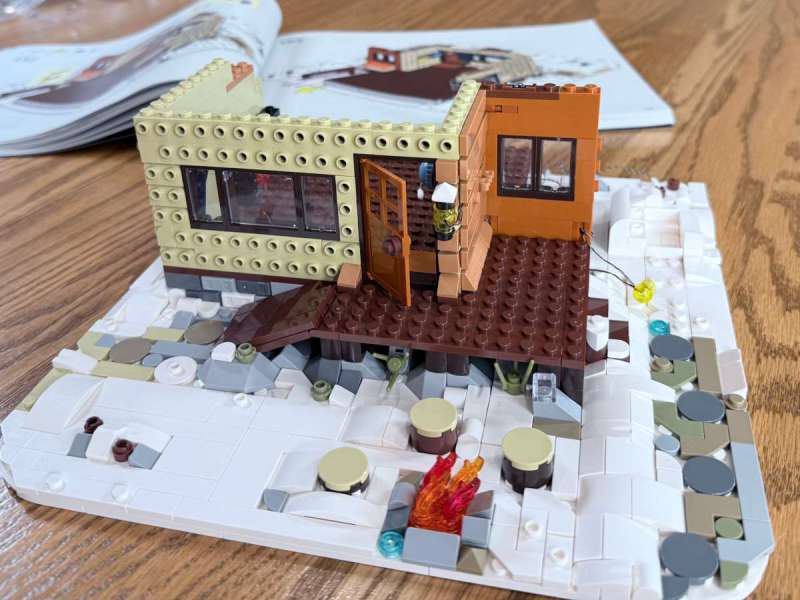
The outside walls make excellent use of the SNOT technique, onto which external siding will eventually be added. I was disappointed to see how scratched up the glass pieces were; they looked like they were used pieces. This section finished with a front door with a light.
Section 4
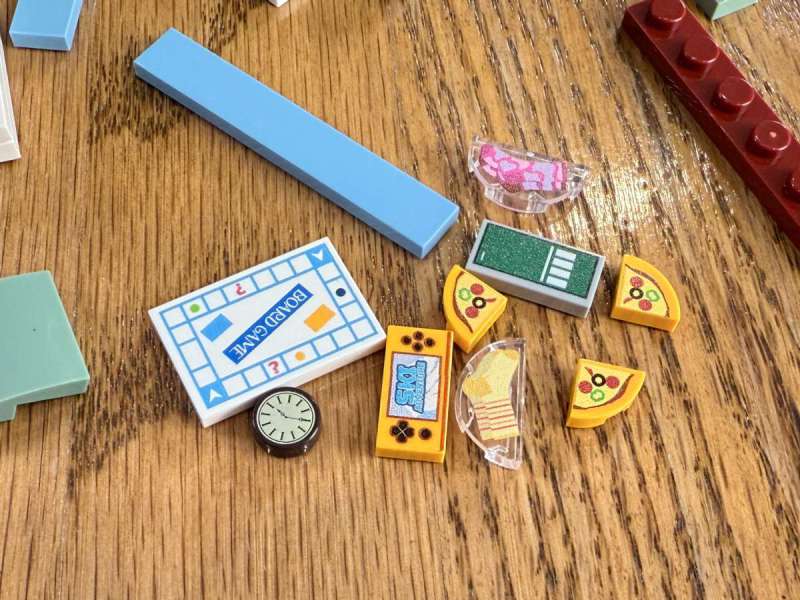
The fourth section added furniture inside the house. It used a lot of pre-printed pieces instead of putting on stickers, a choice that I approve of.
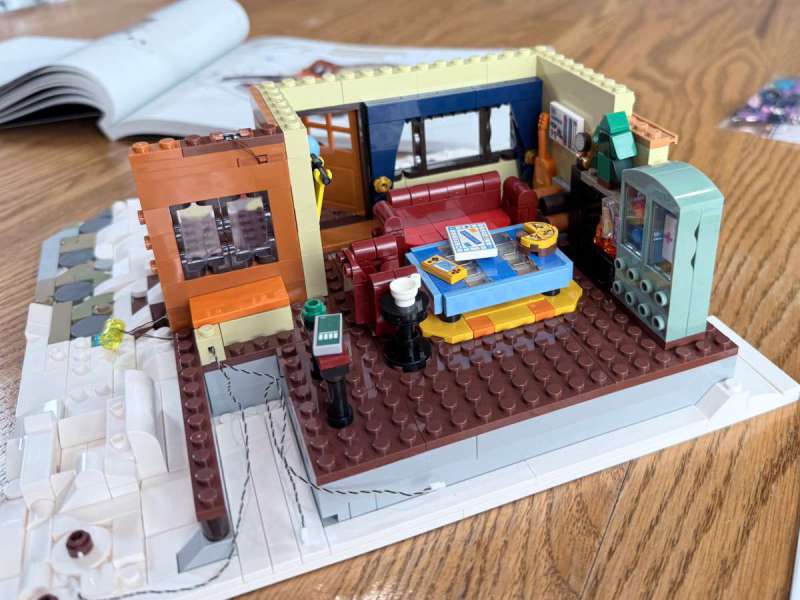
There’s a cute clock, a Christmas tree, and stockings on the mantle as well as a game of Monopoly and a partially eaten pizza on the coffee table, all lovable details. It’s also pretty obvious at this point that the ski lodge is an Airbnb rental home, because surely no one would put such hideously-colored furnishings in their own home. The couch and chair are red, and the rug is orange and yellow. Whoa!
Section 5
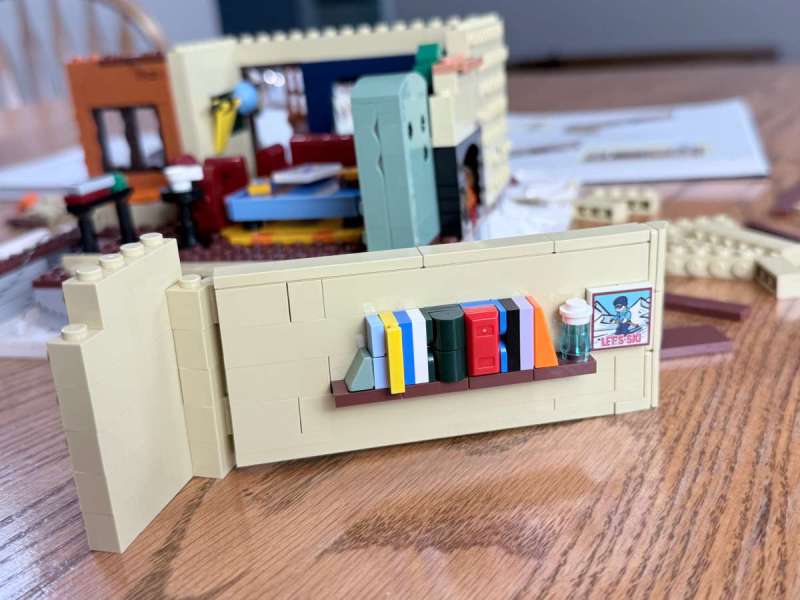
The fifth section completed the rest of the walls for the first floor. The back wall is hinged and features a really cool bookcase on the inside.
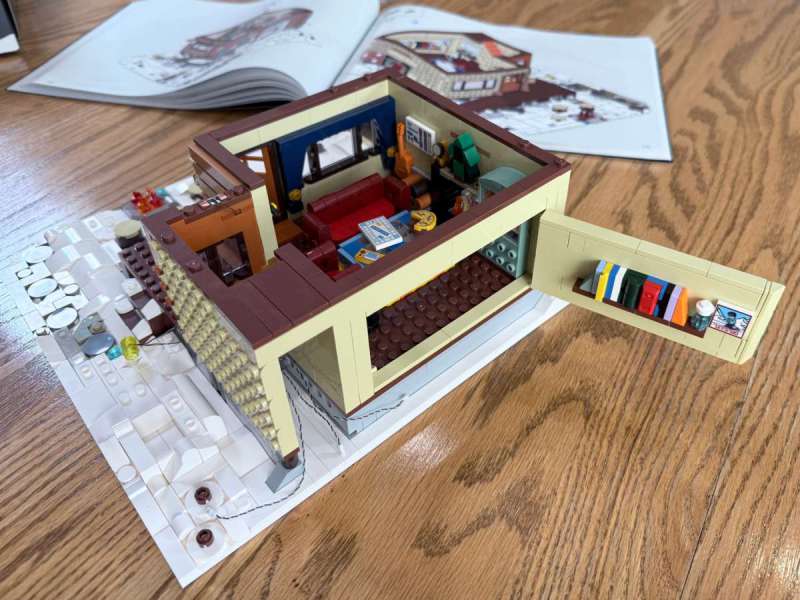
I love the way that the entire back wall opens up! I believe the best building blocks are always those that kids can play with.
Section 6
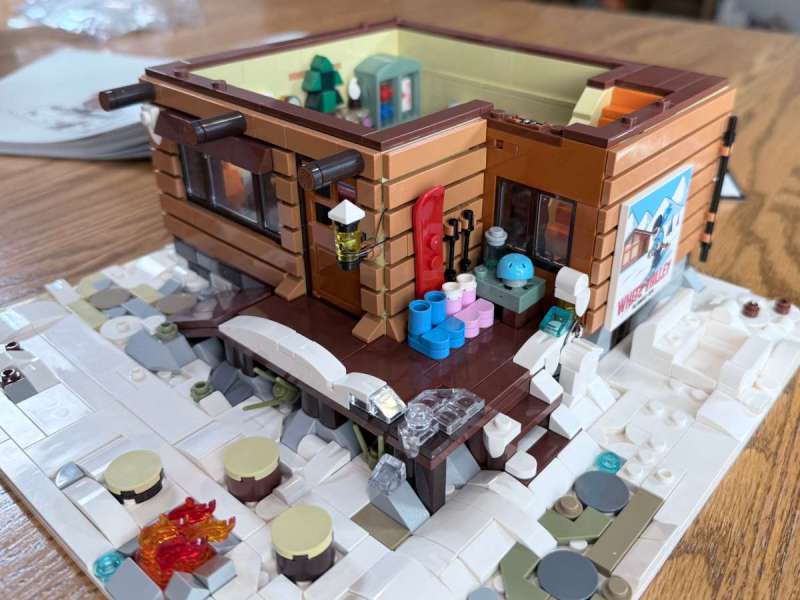
The sixth section was one of the smaller ones and simply added more details outside. For the most part they were related to skiing, such as boots and skis. It also added siding to the outside walls and the exterior fireplace brickwork.
Section 7
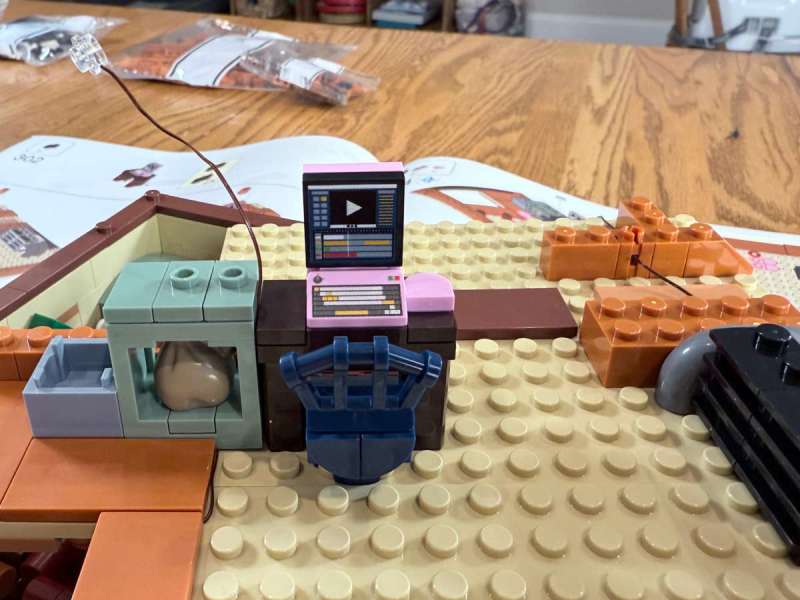
The seventh section started the second floor. After laying down the floors, it began adding the furniture. First piece was a desk with a pink computer. It’s not clear if that’s a Mac or Windows. More wires for the upstairs light were added, and some of these wires were also pinched.
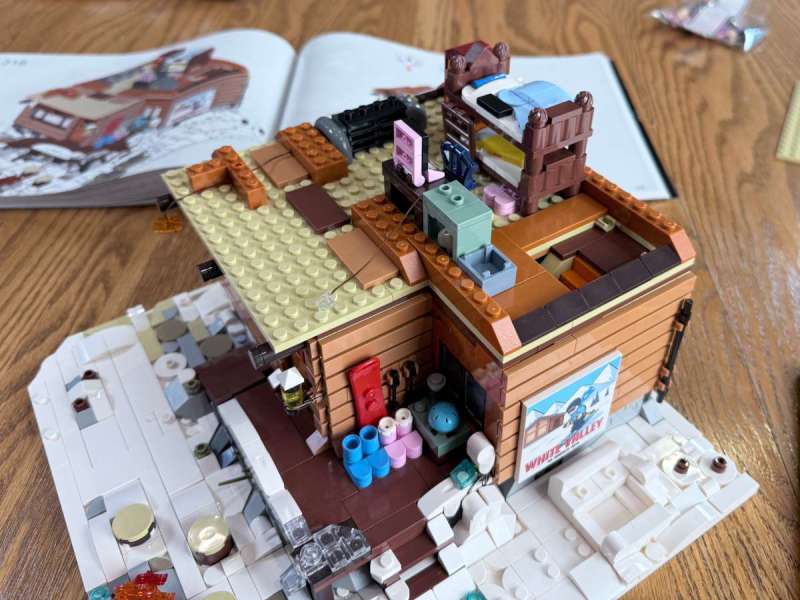
Other furniture included a dresser, a heater, and a bunk bed.
Section 8
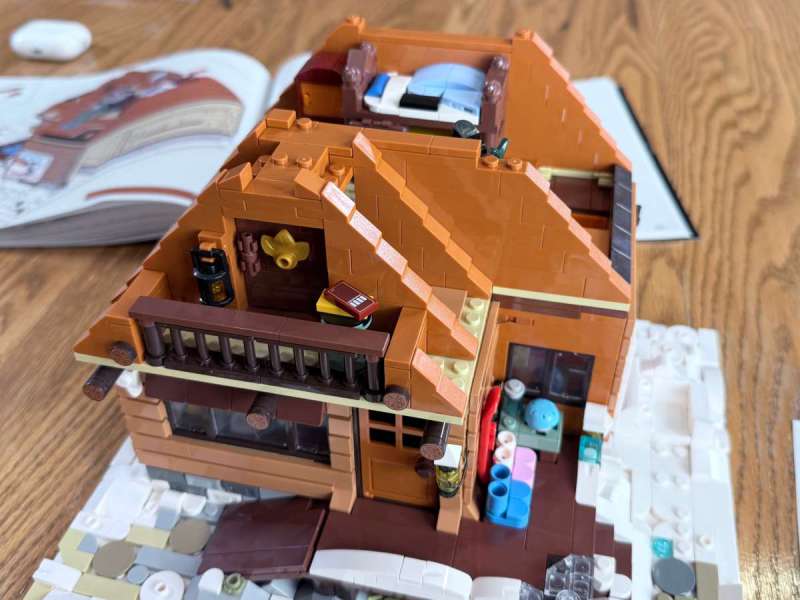
The eighth section added the walls that the roof rests on. This was the only section where I had missing pieces. There were supposed to be two small round pieces from bag F, but I couldn’t find them. I wound up pulling off two pieces from the trees, and that worked out fine.
Sections 9 and 10
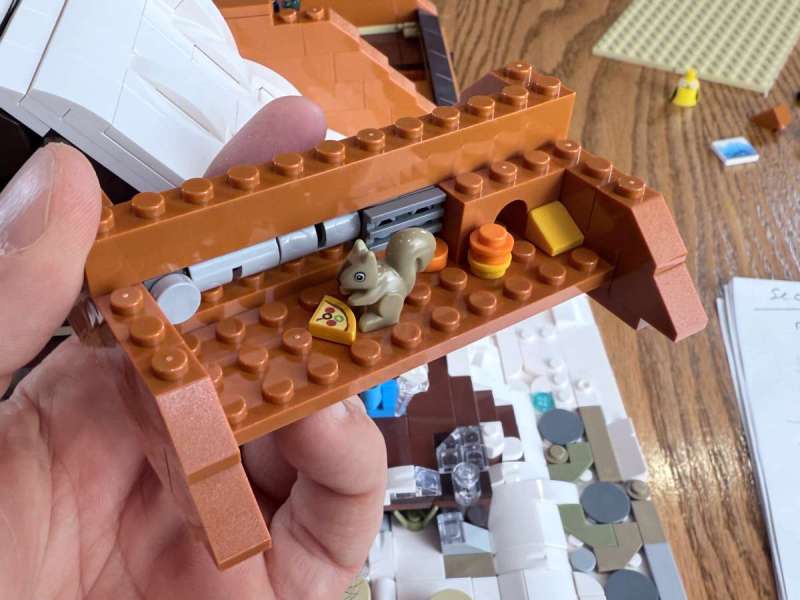
These sections built the roof of the house, and this was the finest part of the design in my opinion. But before we get to the design, we finally see who stole that piece of the pizza from the coffee table!
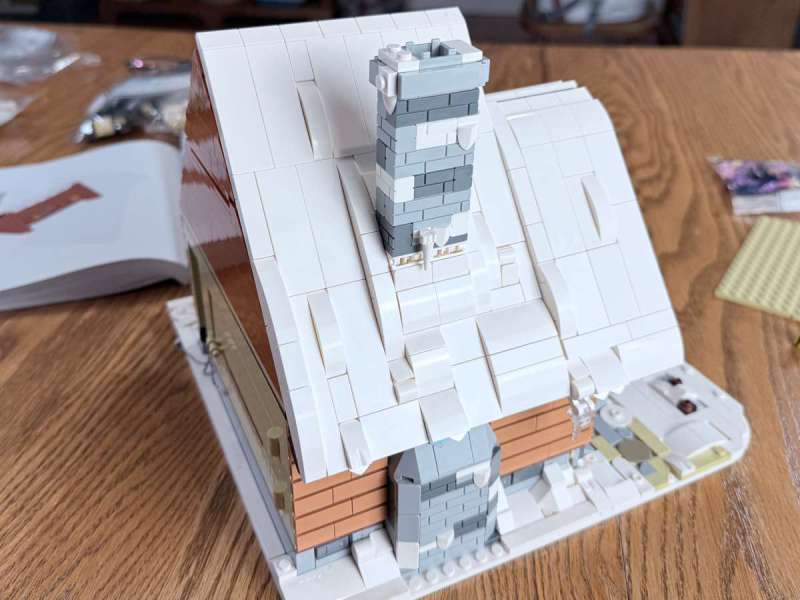
Designing a roof that fits snugly on a sloped house is hard and often results in flimsy work. These roofs were super-solid, fit snugly into place, and can easily be taken off for kids to gain access to the second floor. The designer of this set did great work here.
Sections 11 and 12
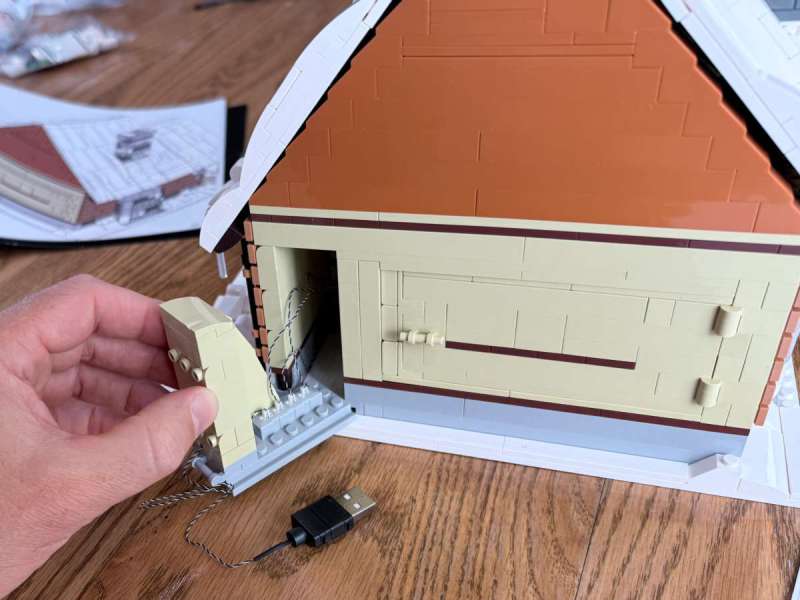
The final sections added all the remaining details outside of the ski lodge. All the wires ran to a connection board, including the USB cable, and it was all tucked away under the stairwell. This is a huge improvement from the rat’s nest of wires that is typically found on the outside of the houses in most Funwhole sets.
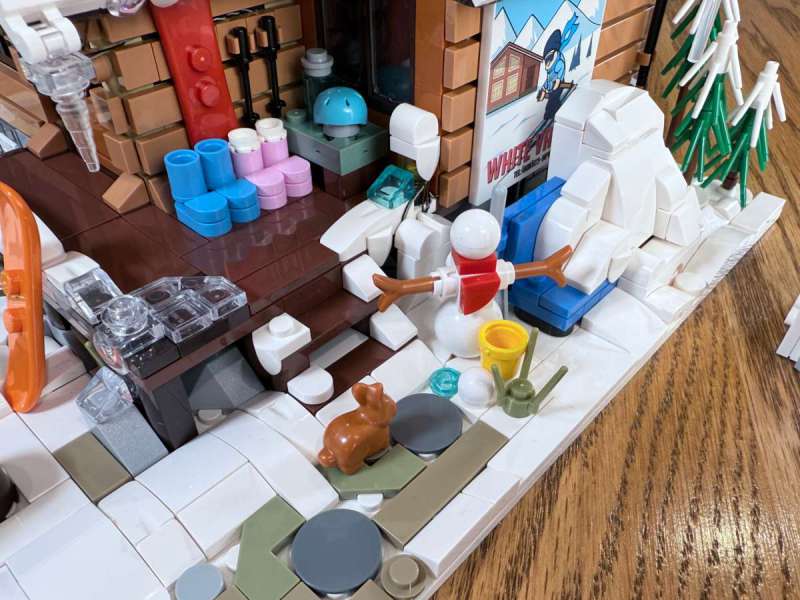
There’s a snowman, trees, and even a rabbit. While these are all cool details, it almost feels a bit cluttered outside the house. This may be a place where less would have been more. The final touch was an extra mound of snow with a snowboard on top and a rotating mechanism to make it look like someone was spinning around.
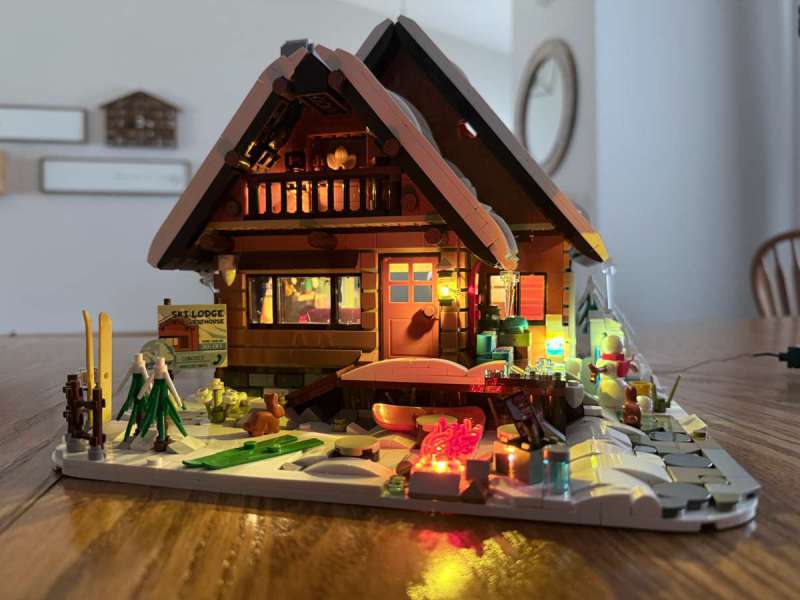
The final result is a well-designed house chock full of brilliant details inside and out. The overall construction is solid and well done. This being a Funwhole set, it’s no surprise that the lights make this set. They light up the living room, bring the fires to life, and give vision around the doors. I love the lighting.
What I like about the Funwhole Ski Lodge
- Quality bricks
- Solid build
- Lots of details
- Excellent lighting
- Quality manual
What needs to be improved
- Design the house with conduits for the wires
Final thoughts
The Funwhole Ski Lodge is an alternative building block set that’s sure to bring lots of joy to anyone who builds it during this holiday season. It has nearly 2200 pieces, most of which are small and could easily be reused for building other things. There’s a lot of careful details in this set, and the lighting is fabulous. Like every set that I’ve built from Funwhole, I enjoyed putting it together and happily recommend it to you.
Price: $99.99
Where to buy: Funwhole and Amazon
Source: The sample for this review was provided free of charge by Funwhole. Funwhole did not have a final say on the review and did not preview the review before it was published.


