REVIEW – Every now and then a product comes along that makes you say “Why didn’t someone think of that before?” The xTool Screen Printer is just such a product. Using a laser to make a screen for screen printing? Why not! Let’s find out if it works as advertised.
What is it?
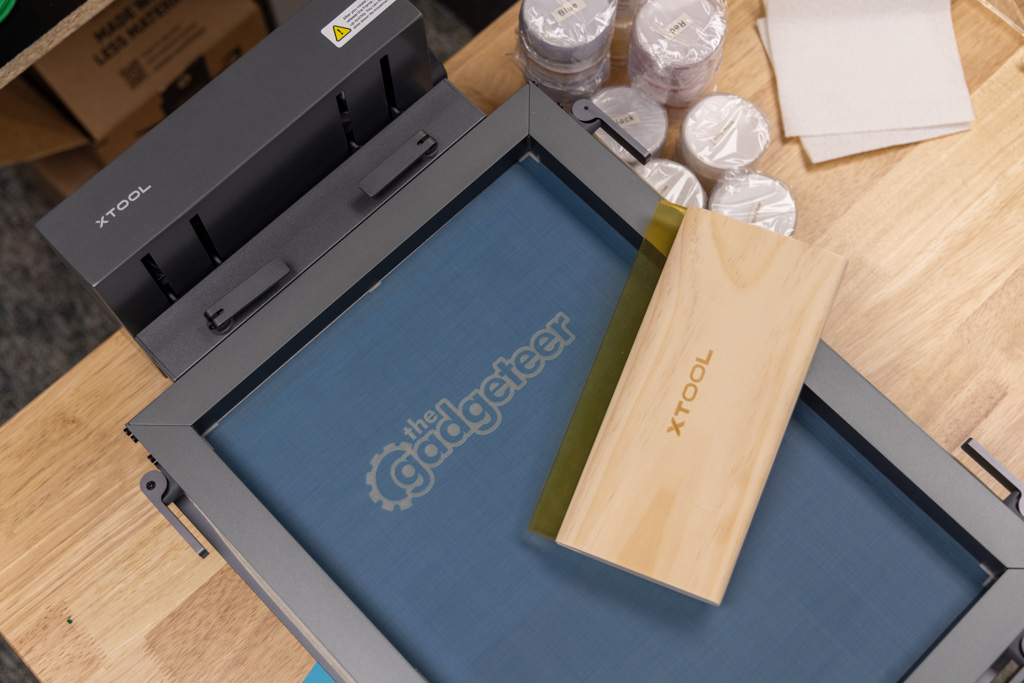
The xTool Screen Printer is a screen printing solution that brings screen printing to the home crafter with an easy-to-use laserable screen, frame, and printing jig.
What’s in the box?
- xTool Screen Printer
- Magnetic Board
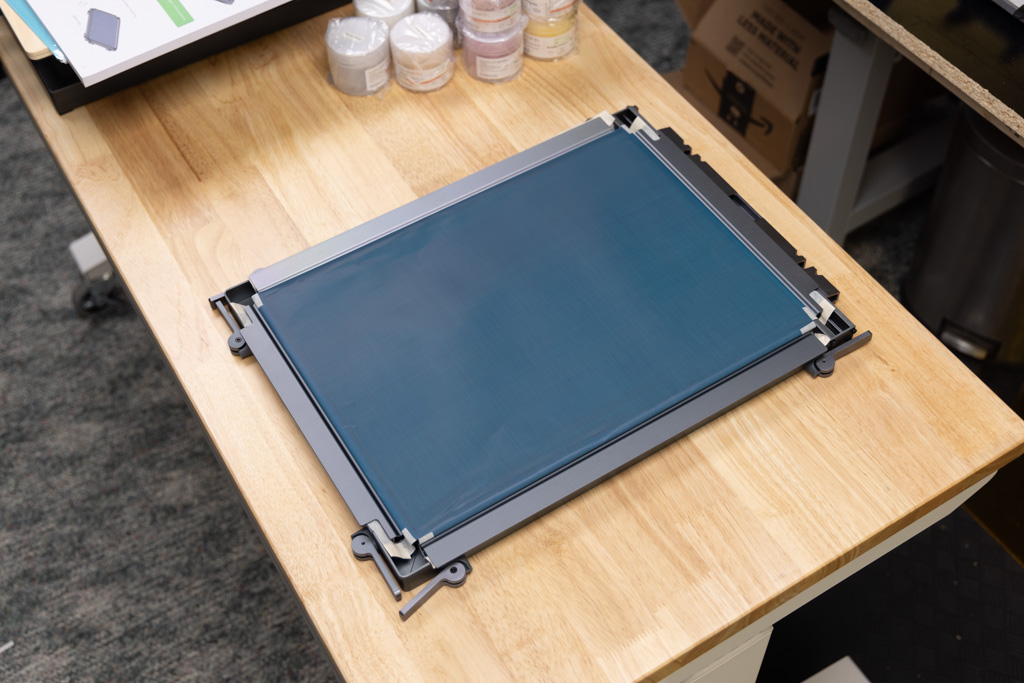
- 11.5″ x 16″ Frame (4)
- Fixing Pins
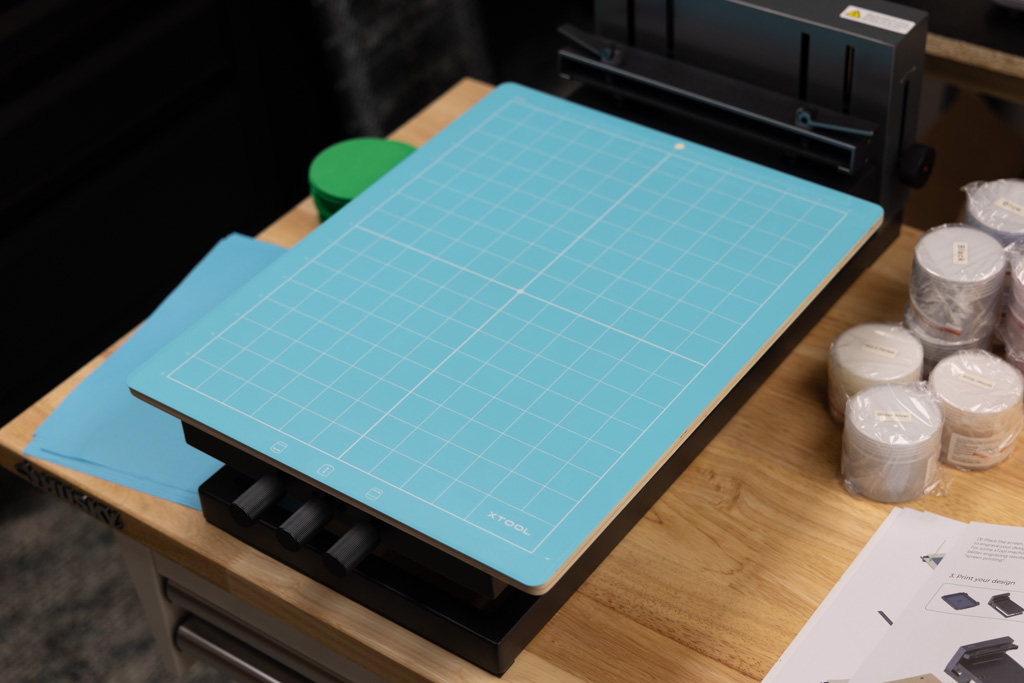
- Cutting Mat
- Squeegee
- Spatula
- Water Based Ink (11)
- 11.5″ x 16″ Screens (12)
- Cardboard
- Canvas Bag
- Locator Stickers
- User Manual
Design and features
When xTool announced their Screen Printer I was immediately interested in giving it a try. I’ve had my eye on screen printing for quite a while, but never got around to getting all of the stuff to do it and I was not particularly keen on messing with the standard screen printing emulsion, film sheets, and developing agents.
The xTool Screen Printer has everything you need to get started, minus the laser engraving machine – you’ll need to already have one. I have several of xTool’s laser engravers, but the xTool S1 was perfectly suited for this job, so I chose it to do my engraving.

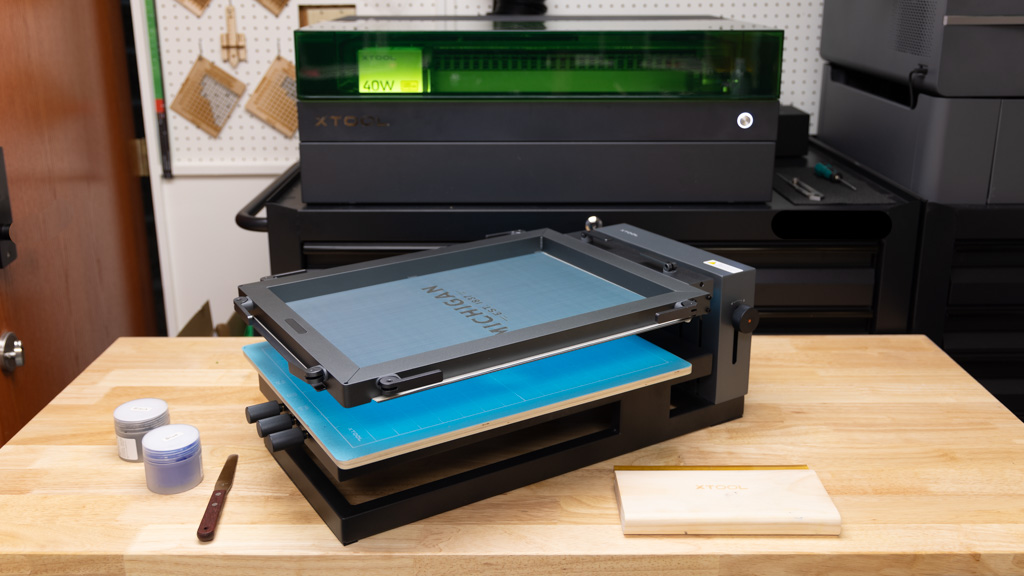
The xTool Screen Printer came very well-packaged. It was surprisingly heavy for its size, giving me the first indication that this device was built well. After unpacking it, I wasn’t disappointed. The heavy-duty welded metal frame is rock solid. Everything appears to be of very good quality.
One of my first thoughts was “Wow, there’s a lot of stuff in here.” xTool sent me the “Multi-Color Kit” which included four frames, twelve screens, and eleven jars of ink. Plenty to get started with.
The xTool Screen Printer takes much of the effort out of the screen printing screen-making process. Instead of the traditional messy, lengthy, and chemical-ridden screen printing process, the xTool Screen Printer allows you to create the screens using your laser engraver. This not only takes the mess out of the process but also makes it much quicker. Traditional screen printing processes take days to make a screen, whereas the xTool process takes just a couple of hours or less (for smaller designs).
The screen printer came mostly assembled, and the instruction manual is very good. On the software side of things, xTool’s Creative Space software has a preset for the coated screen, so there’s no testing involved to find the perfect settings.
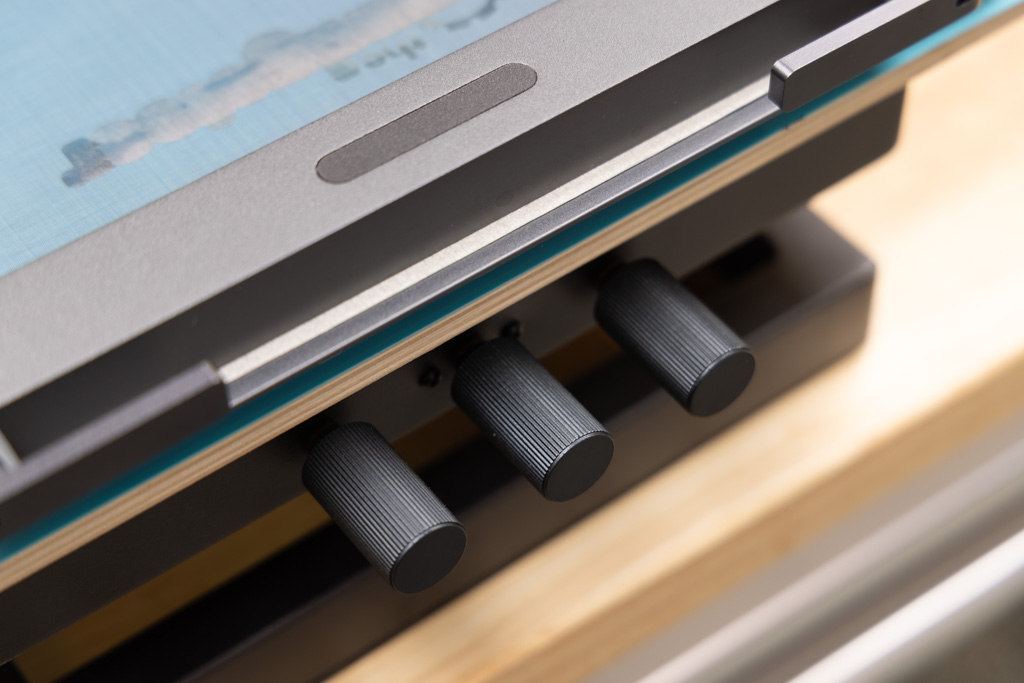
One of the best features of the xTool Screen Printer is that the frames have quick-release clamps, which make mounting or changing screens quick and easy. The frames also have registration notches that make aligning frames a breeze. Multi-frame overprinting is super accurate, making multi-color prints very easy.
The Screen Printer even has a micro registration adjustment via three knobs on the front of the device. This feature is used to align multi-color prints and centering aligning designs.
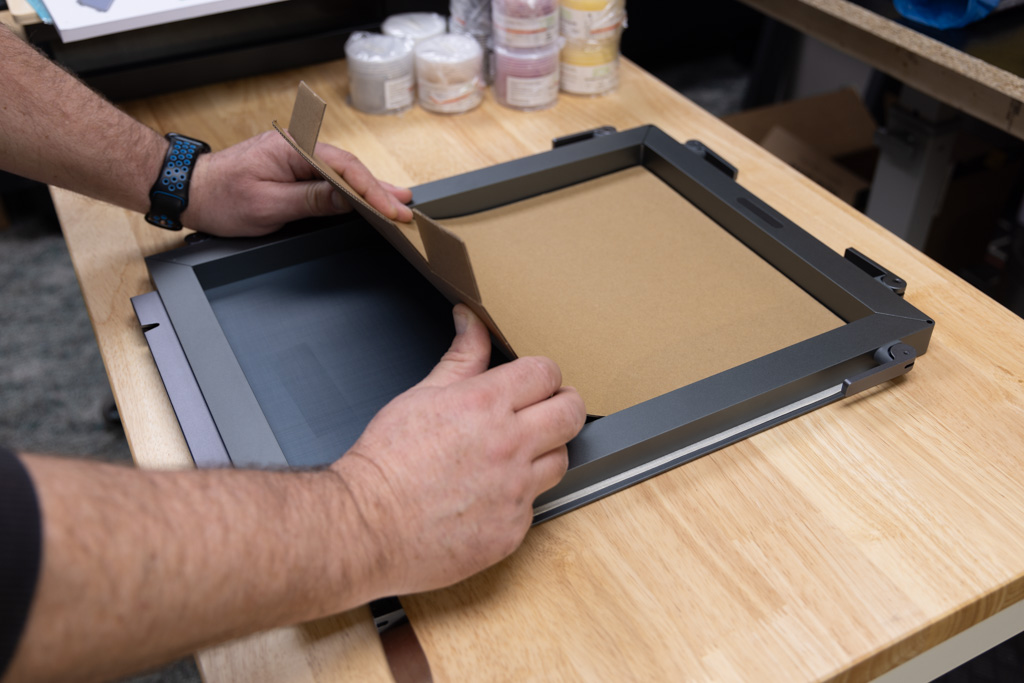
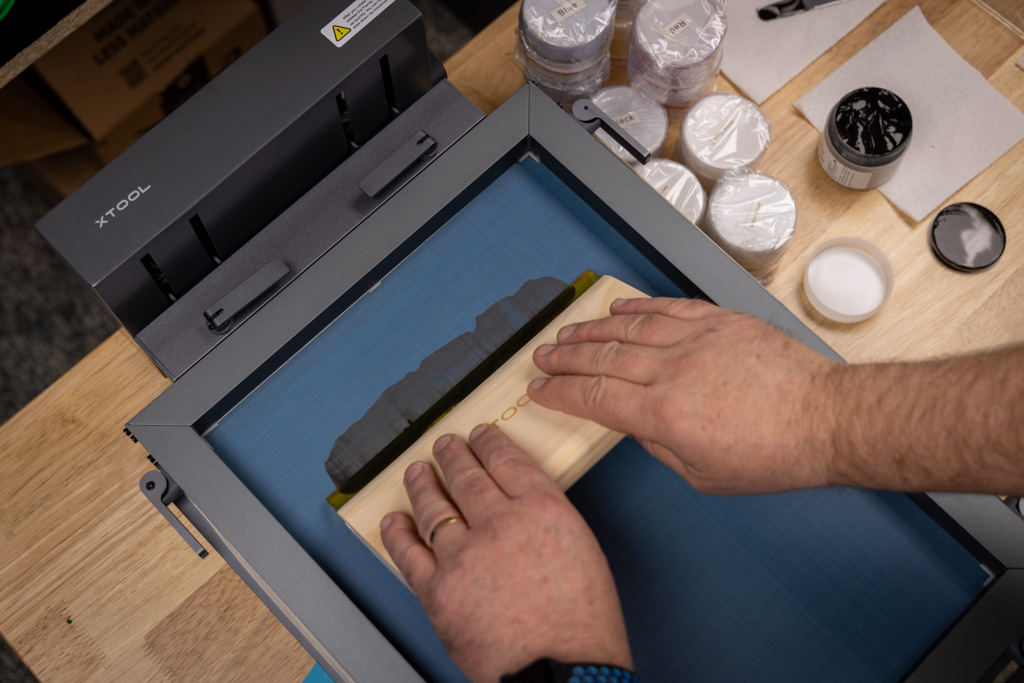
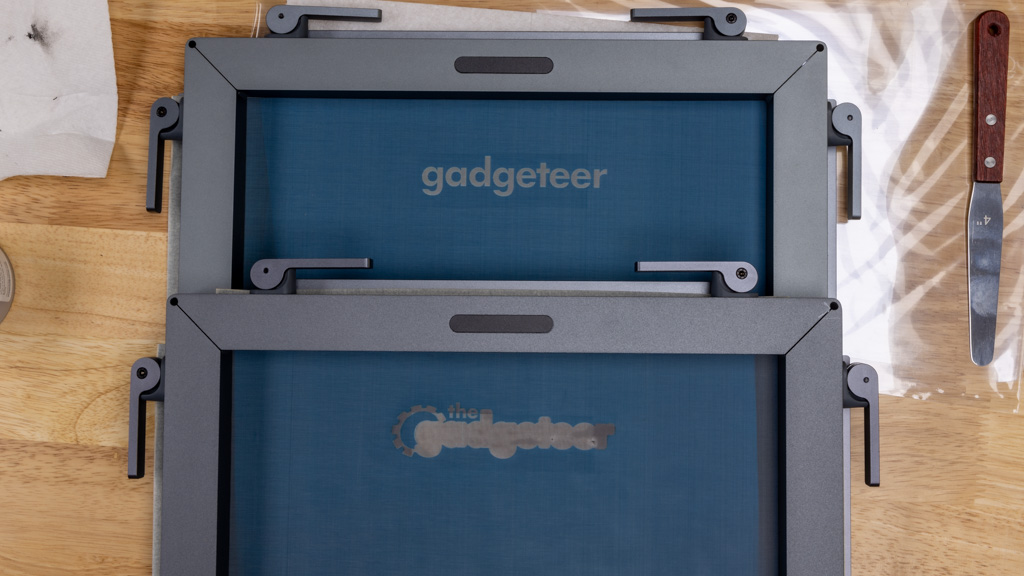
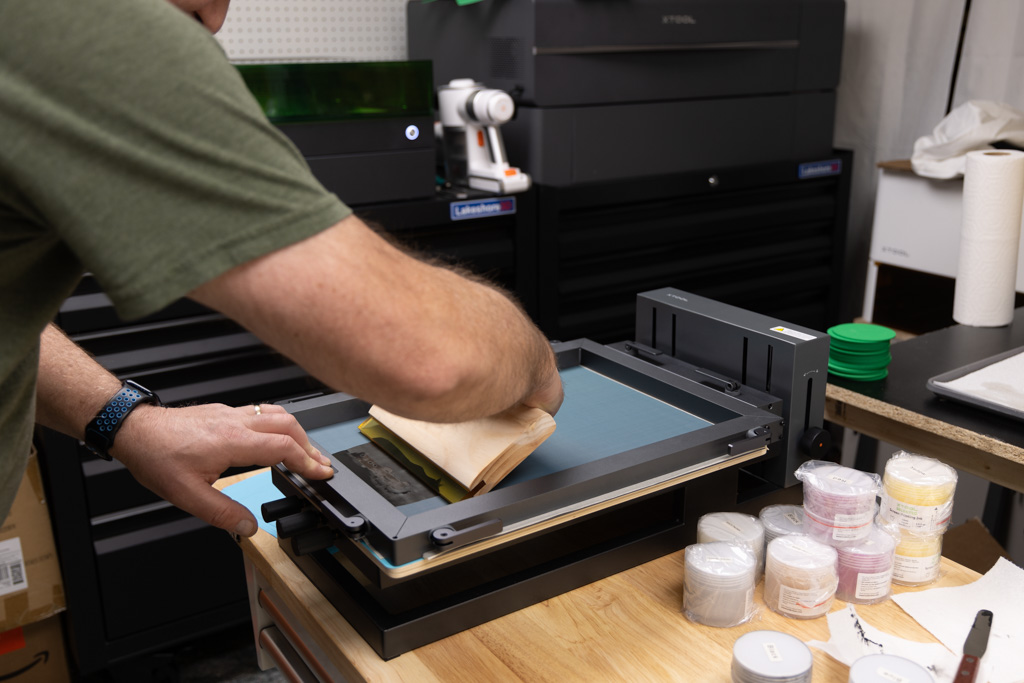
First, you install a screen into the frame, tighten the quick-release levers, remove the cardboard backing, and then engrave your design. You’ll want to mirror the design, as the frame is flipped over after engraving.
Next, place the frame in the Screen printer, and tighten the quick-release levers to hold the frame in place. Place your material on the bed. The tacky cutting mat helps hold the material in place. The frame lowers via a spring-loaded sliding mechanism. Lower your screen down, and tighten the knob on the side. Place some ink on the screen, and use the included squeegee to wipe the ink across the design. It’s that easy.
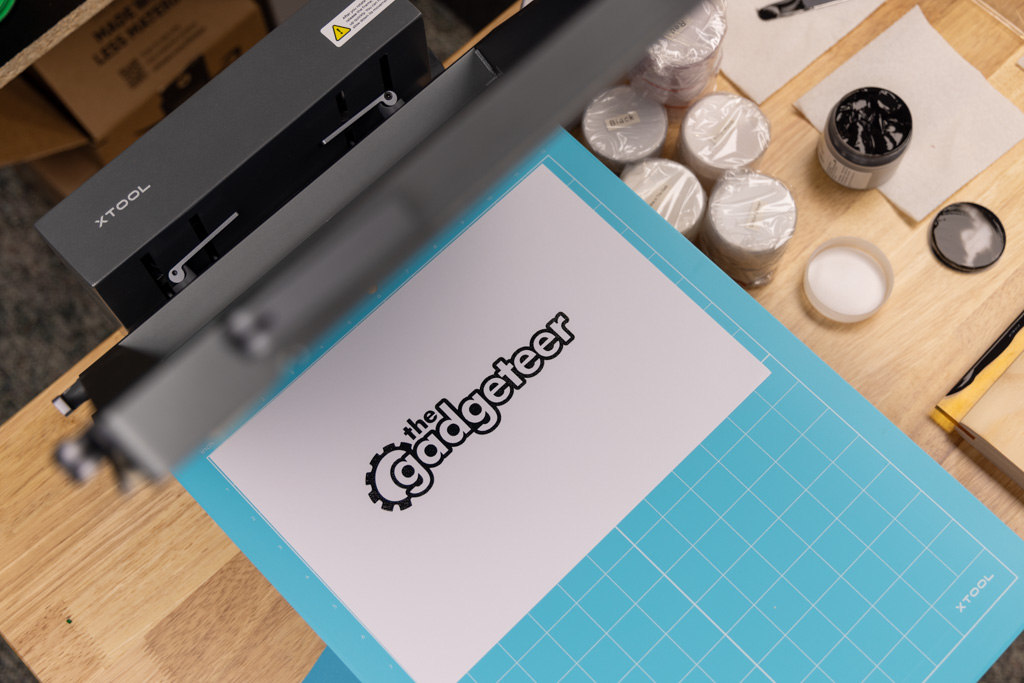
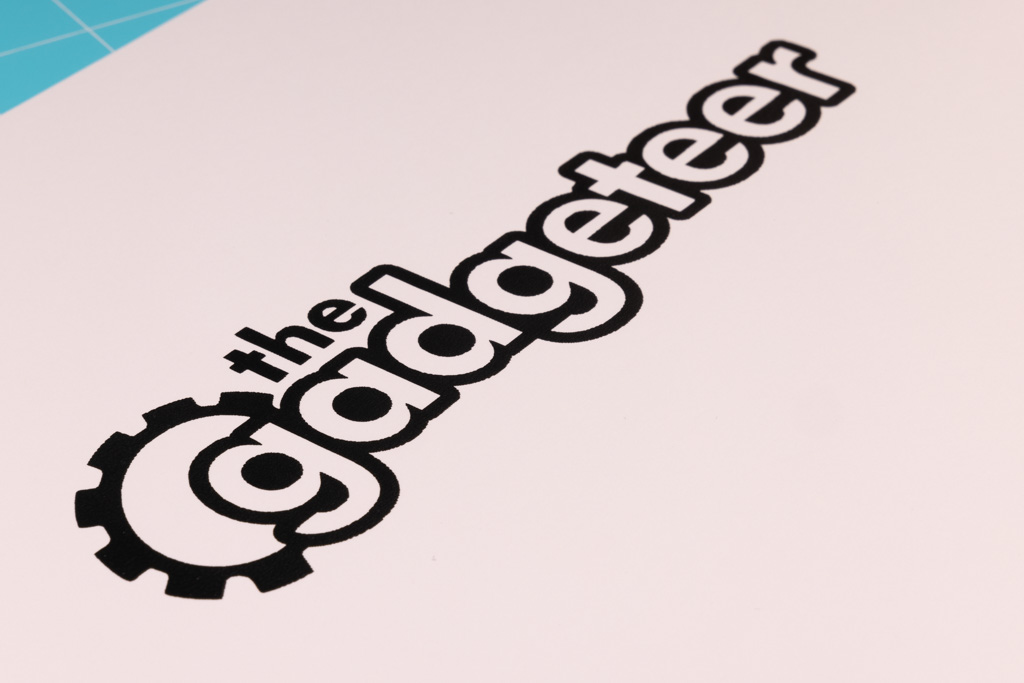
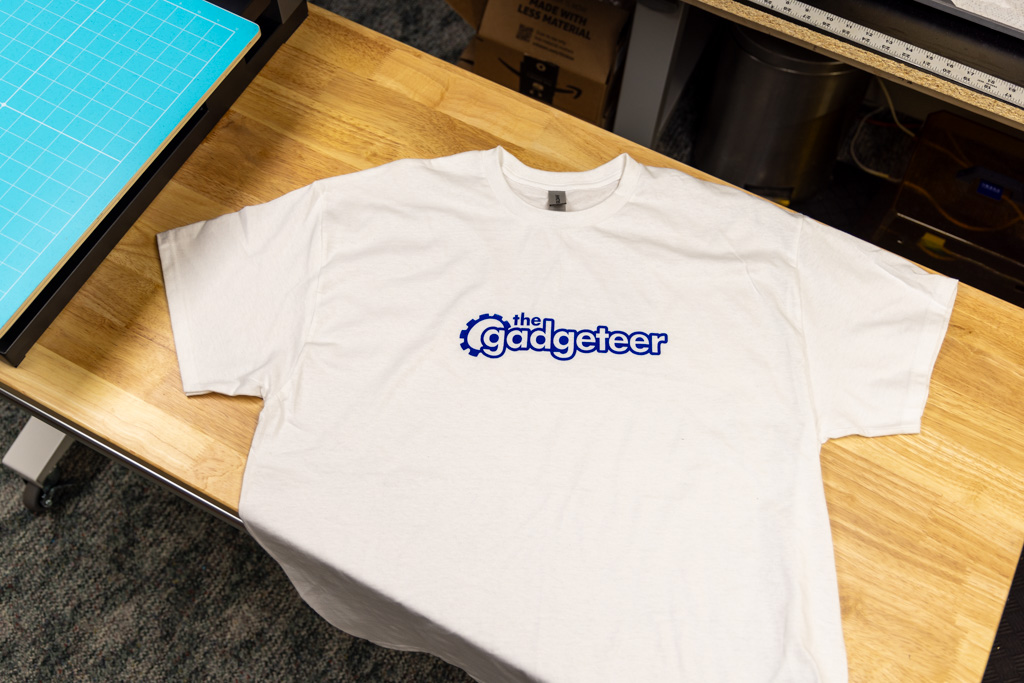
My first project was to simply engrave the Gadgeteer logo and print it onto a piece of cardboard that was included. My first attempt came out great.
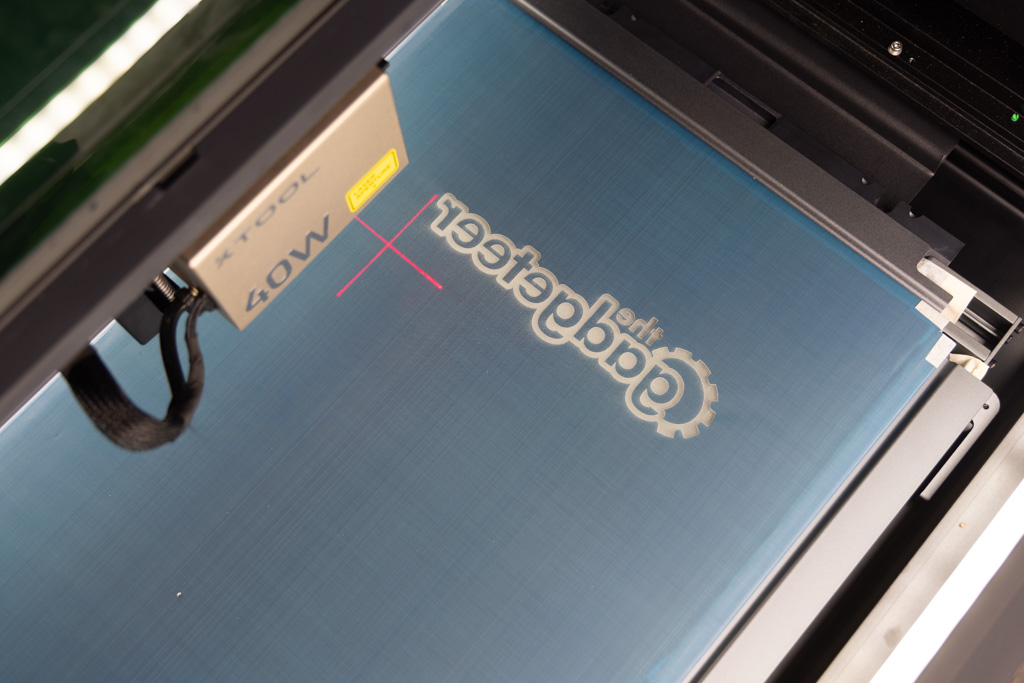
I was quite impressed with the quality and resolution of the design. There is a bit of a learning curve to know how much pressure to use on the squeegee, so practice on the provided cardboard first.
I then printed this same design on a white shirt. I was very pleased with the results.
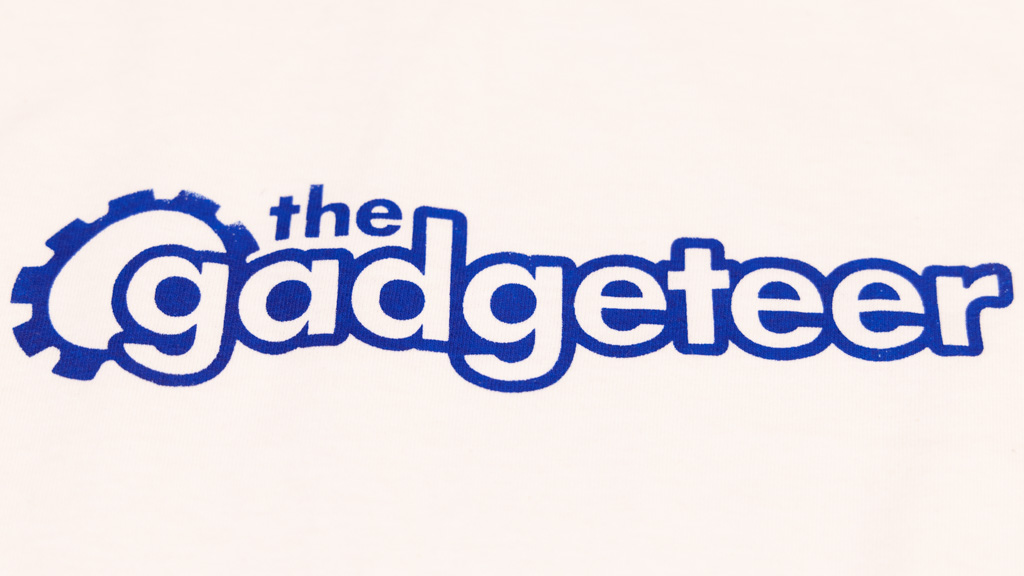
My next test was to separate the logo into its two colors. I printed the entire logo in black, and then the interior of the lettering in blue. The blue turned out a bit dark, but it worked well. I was disappointed that xTool had not included any white ink in the kit, so I couldn’t lighten the blue.
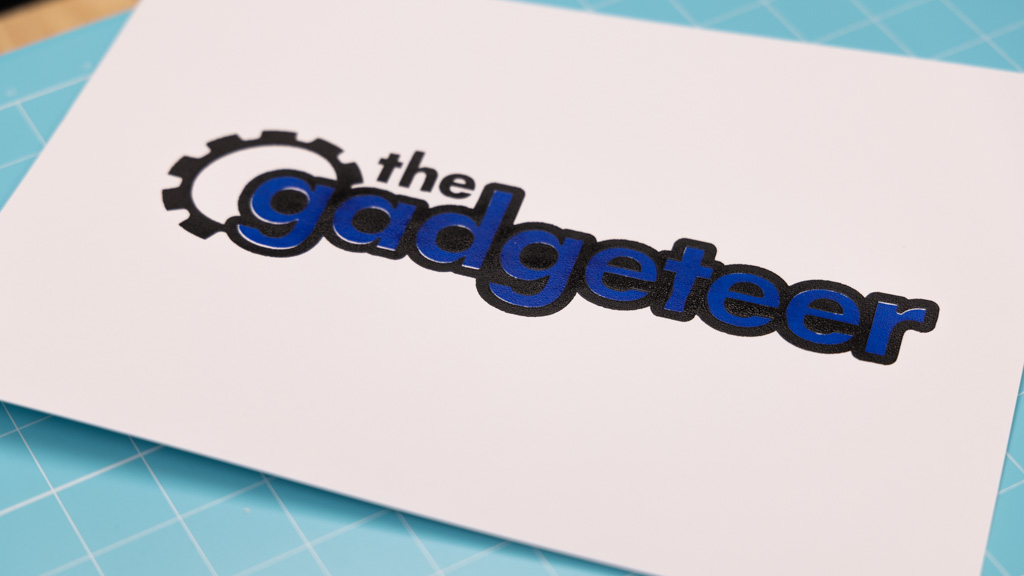
My design was a bit off, but I attribute this mainly to the design of the file I used and the fact that I adjusted the second print incorrectly. I think the inner area of the lettering, where I used blue ink, should have been made slightly larger than the black portion, but I didn’t know exactly how to do that in my graphics program. This highlights the fact that for intricate designs where the colors need to match very close to each other, you may need to modify your design specifically for screen printing.
My next project was a two-color Michigan design. This time, I chose a design where the colors would not need to align exactly with each other. I found that although the glitter gold and glitter silver ink provided by xTool was quite a bit thinner than the other colors, I did like the effect.
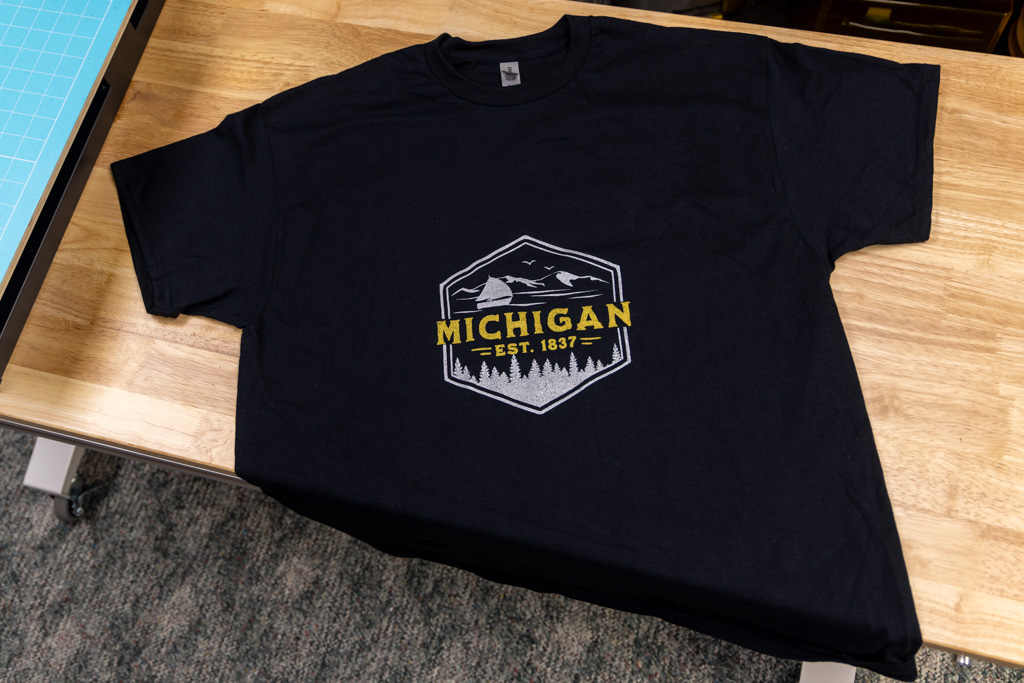

Perhaps one of the hardest things about screen printing is centering and aligning the print. I’ll have to do some research and find out the tricks to getting this perfect every time. This particular print was a little low for my liking, but it’ll work.
I also found that applying the ink to the screen with the included spatula was not optimal. I think xTool should include a different spatula with the kit; the rounded end made it difficult to spread the ink.
There is an entire section on the xTool Support website for the Screen Printer. There are eleven videos to help you get started on your first Screen Printer project.
One of the drawbacks of the xTool Screen Printer design is that the screens don’t go back into the frames exactly like they came out. This means that if you remove the screens and save them for future projects, the design layers may not line up like they did before. For this reason, I suggest that multi-colored designs be created in such a way that fine alignment of each layer is not critical, like the Michigan design I did.
What I like
- Very well-built
- Easy to make screens
- Easy to mount screens to the frame
- Great way to make simple screen prints at home
What I’d change
- Better Spatula
- Include white ink
Final thoughts
Screen printing is an art. There are many techniques and processes that I’ll need to learn for more advanced projects; however, the xTool Screen Printer made it easy to get a good introduction to screen printing. Also check out my other xTool reviews.
Price: $459 for the multi-color kit as reviewed, $249 for the basic kit.
Where to buy: xTool
Source: The sample of this product was provided by xTool.

GMKtec G3 Pro Mini PC, Intel Core i3-10110U (Beats 4300U/N150) 16GB DDR4 (Dual Channel) 512GB PCIe M.2 SSD, Desktop Computer 4K Dual HDMI/USB3.2/WiFi 6/BT5.2/2.5GbE for Office, Business
(as of June 18, 2026 02:39 GMT -05:00 - More infoProduct prices and availability are accurate as of the date/time indicated and are subject to change. Any price and availability information displayed on [relevant Amazon Site(s), as applicable] at the time of purchase will apply to the purchase of this product.)