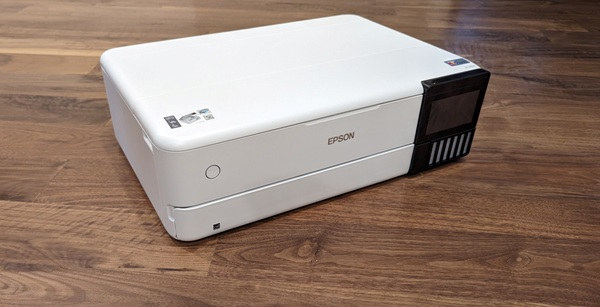
REVIEW – I’ve been enjoying printing photos from my Epson EcoTank Photo ET-8500 Wireless Color All-in-One Supertank Printer. Printing photos using this printer is effortless and fun. However, the maximum size photo I can print is 8×10 and I’d like to be able to print larger photos. I recently got the opportunity to review the Epson EcoTank Photo ET-8550 All-in-One Wide-format Supertank Printer. This photo printer will print up to 13″ x 19″ photos. How well does it work? Fantastically!
What is it?
The Epson EcoTank Photo ET-8550 All-in-One Wide-format Supertank Printer is an inkjet photo printer for amateur photographers and hobbyists that will print larger borderless photos (up to 13″ x 19″), as well as more common size photos. It has auto two-sided printing and it scans and copies.
What’s in the box?
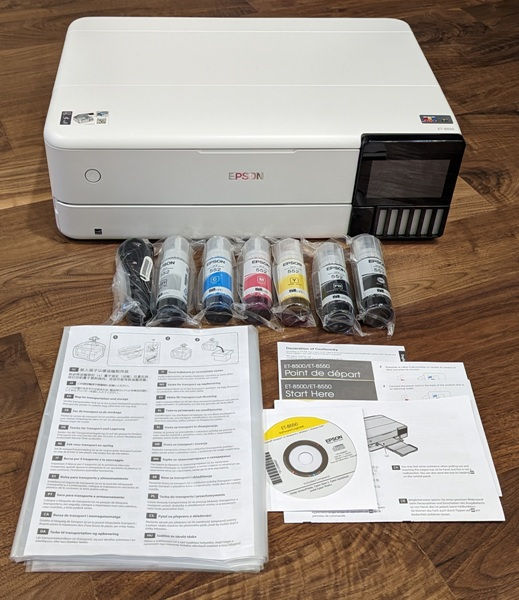
- Epson EcoTank Photo ET-8550 All-in-One Wide-format Supertank Printer
- Quick Setup Guide
- Power Cable
- CD-ROM (User Guide, software: Epson printer drivers, Epson Scan 2, Epson ScanSmart, Epson Photo+)
- 1 bottle of 552 Photo Black (70 mL), 1 bottle of 552 Black (70 mL), and 1 bottle each of 552 Cyan, Magenta, Yellow, and Gray (70 mL)
- Bag to transport the printer (in case you need it)
Hardware specs
Click to expand Epson ET-8550 hardware specs
- Print
- Printing Technology: 6-color (BK, PB, C, M, Y, Gy)
- Printer Language(s): ESC/P-R
- Maximum Print Resolution: 5760 x 1440 dpi
- Print Speed: Black 16.0 ISO ppm / Color 12.0 ISO ppm
- 2-sided Print Speed: Black 6.0 ISO ppm / Color 5.0 ISO ppm
- Borderless 4″ x 6″ Photo Print Speed 15 seconds (Draft Mode, Premium Glossy Photo Paper)
- Mobile and Voice-activated Printing
- Epson Connect™ Solutions: Email Print, Remote Print, Scan to Cloud
- Applications: Epson Smart Panel app, Epson Print Layout app (iOS), Epson Creative Print app
- Other: Apple® AirPrint®, Android printing, Mopria® Print Service
- Voice Activation: Siri®, Epson Connect, Amazon™ Alexa
- Copy
- Copy Quality (Number of Colors)
- 256 gradations/16.7 mil colors
- Maximum Copies 99 pages
- Copy Resolution (Max.) 600 x 600 dpi (input)
- Maximum Copy Size: Legal
- Copy Features: Copy Resolution (Print) 360 x 360 dpi, 720 x 720 dpi, Automatic 1-sided to 2-sided copy, Reduction/Enlargement 25 to 400%
- Scan
- Photoelectric Device: CIS
- Scanner Type: Flatbed color image scanner
- Maximum Hardware Resolution: 1200 x 4800 dpi
- Scan Size, Maximum (flatbed): 8.5″ x 14″ (216 x 355.6 mm)
- Maximum Resolution: 9600 dpi interpolated
- Scanner Bit Depth (color): 48-bit color input / 24-bit color output
- Scan Compatibility: TWAIN, WIA, ICA, TWAIN Reading
- Resolution: 75~9600 dpi (1 dpi step), TWAIN Output Format: PDF, JPEG, PNG, TIFF, Multi-TIFF, BMP (Windows), PICT (Mac®), Scan to Computer Epson ScanSmart, Scan to Memory Device
- Standard Connectivity
- Hi-Speed USB
- Wireless: Wi-Fi® 512, 802.11 b/g/n/a/ac
- Wired Ethernet: Ethernet (10/100)
- Wi-Fi Direct®: Yes
- Memory Card Slots: SD Card, USB
- Operating Systems: Windows 10 (32-bit, 64-bit), Windows 8.1 (32-bit, 64-bit), Windows 8 (32-bit, 64-bit), Windows 7 (32-bit, 64-bit), Windows Vista® (32-bit, 64-bit), Windows Server 2003 SP213 or later, 2003 R2, 2008, 2008 R2, 2012, 2012 R2, 2016, 2019, Mac OS® X 10.6.8 thru 11.x.14
- Paper Handling
- Paper Sizes: 13″ x 19″ (A3+), 11″ x 17″, A3, Legal, Letter, A4, Executive, 8″ x 10″, 5″ x 7″, 4″ x 6″, 3.5″ x 5″, A6, Half Letter, #10 Envelope, User Defined (2.2″ x 3.4″ to 13″ x 78.7″)
- Max. Paper Size: 13″ x 19″ (A3+)
- Max. Paper Weight: Plain: 64-90 g/m², PPPG: 102-300 g/m²
- Max. Paper Thickness: 1.3mm (Rear Straight Pass)
- Borderless Printing: 13” x 19”, A3+, 11” x 17”, A3, Legal, Letter, A4, 8” x 10”, 5” x 7”, 4” x 6”, 3.5” x 5”
- Paper Types: Plain Paper, Bright White Paper, Photo Paper Glossy, Premium Photo Paper Glossy, Ultra Premium Photo Paper Glossy, Premium Semigloss Photo Paper, Ultra Premium Photo Paper Luster, Presentation Paper Matte, Premium Presentation Paper Matte, Velvet Fine Art Paper, Thin Paper, Card Stock
- Envelope Types: No. 10
- Input Paper Capacity: Front Tray 1: 20 sheets photo 5×7”, Front Tray 2: 100 sheets plain Letter/A4, Rear: 50 sheets plain or 5 sheets photo A3+, Rear Straight Pass: 1 sheet
- Output Tray Paper Capacity: 50 sheets (plain paper, Letter), 20 sheets (PPPG)
- Direct CD Printing: Yes
- 2-sided (Duplex) Printing: Automatic
- Weight and Dimensions
- Printing dimensions: (W x D x H) 20.6″ x 29.8″ x 16.9″ (523 x 758 x 430mm)
- Storage dimensions: (W x D x H) 20.6″ x 14.9″ x 6.7″ (523 x 379 x 169mm)
- Weight: 24.5 LB (11.1kg) printer only
- Packaging dimensions and weight: (W x D x H): 25.9″ x 18.1″ x 10.3″ (660 x 459 x 263 mm); 31.9 lb (14.5 kg) box
- General
- Display: 4.3″ touch LCD
- Temperature Operating 50° to 95 °F (10° to 35 °C)
- Temperature Storage -4° to 104 °F (-20° to 40 °C)
- Relative Humidity: Operating: 20% – 80% RH, Storage: 5% – 85% RH
- Sound Level (ISO7779): Sound Pressure/PC Printing (Plain Paper default) Color: 48 dB(A) or less
- Rated Voltage: AC 100 to 120 V
- Rated Frequency: 50 to 60 Hz
- Rated Current: 0.7A
- Power Consumption:
- Standalone Copying: (ISO/IEC 24712 Pattern) 17W
- Ready Mode: 7.5W
- Sleep Mode: 0.8W
- Power Off Mode: 0.2W
- Typical Electricity Consumption (TEC): 0.15kWh
- Safety Approvals Safety Standards: UL60950-1, CAN/CSA-C22.2 No.60950-1, FCC Part15 Subpart B Class B, ICES-003 Class B
- Country of Origin: Indonesia
- Ink
- Replacement Ink Bottles:
- 552 Black pigment ink bottle (70 mL) yield: 6700 pages;
- 552 Photo Black dye ink bottle (70 mL) yield: 7300 pages;
- 552 Gray dye ink bottle (70mL) yield: 46,600 pages;
- 552 color (Cyan, Magenta, Yellow) dye ink bottles (70 mL) yield: 6200 pages
- Epson strongly recommends the use of genuine ink to ensure optimal print quality and performance.
- Replacement Ink Bottles:
- Eco Features
- ENERGY STAR® qualified
- RoHS Complaint
- End-of-life options available
- Epson America. Inc. is a SmartWay® Transport Partner
Design and features

The Epson EcoTank Photo ET-8550 All-in-One Wide-format Supertank Printer is larger than the Epson EcoTank Photo ET-8500 Wireless Color All-in-One Supertank Printer that I reviewed last year. Both printers are nearly identical. They both have the same design, have refillable ink tanks, use the same six types and colors of ink, have the same 4.3″ color LCD touchscreen control panel, and have the same print, copy, and scan resolutions. The differences are the ET-8550 is larger, weighs more, and prints, scans, and copies larger photos and documents – which is exactly what I wanted.
The Epson ET-8550 measures 20.6″W x 14.9″D x 6.7″H (523 x 379 x 169mm) as shown above. However, when printing with the output tray and the rear paper tray support extended, it measures 20.6″W x 29.8″D x 16.9″H (523 x 758 x 430mm).
The outer shell is white matte plastic. I like its clean look.
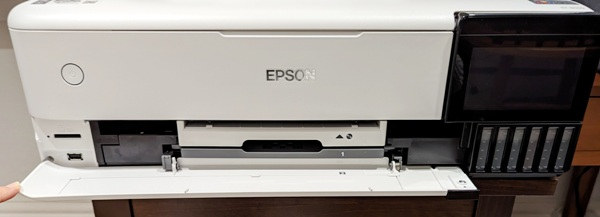
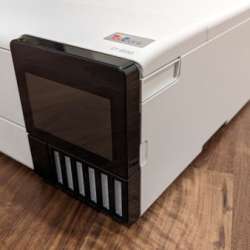
The touchscreen control panel on the front of the ET-8550 makes it easy to print, copy, or scan right from the printer. This panel also tilts upward for easier viewing.
There are slots for an SD card and a USB-A drive located on the left front of the printer if you wish to print from storage devices.
Paper sizes: The printer can print on various sizes of paper: 13″ x 19″ (A3+), 11″ x 17″, A3, Legal, Letter, A4, Executive, 8″ x 10″, 5″ x 7″, 4″ x 6″, 3.5″ x 5″, A6, Half Letter, #10 Envelope, User Defined (2.2″ x 3.4″ to 13″ x 78.7″ (rear feed slot)).
Maximum paper size, weight, and thickness: The maximum paper size is 13″ x 19″. The maximum paper weight is 64-90 g/m² for plain paper and 102-300 g/m² for photo paper and the maximum paper thickness it can print on is 1.3 mm (rear straight pass).
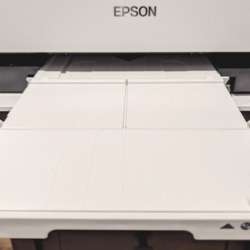
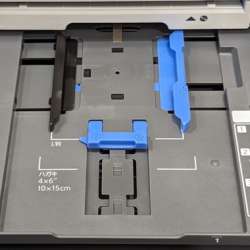
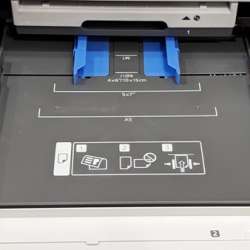
Paper trays: The printer has an output paper tray, two front paper trays with edge guides, a rear paper tray with edge guides, a rear straight-pass slot, and a CD/DVD tray.
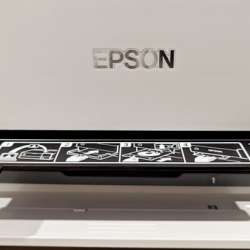
- Output paper tray (first photo above): The topmost tray is the output tray. The output tray extends automatically when printing and you can either push the tray back in manually or touch the “Output Tray” button on the touchscreen panel of the printer to have the printer retract it for you.
- Paper tray 1 (second photo above): Paper tray 1 holds up to 20 sheets of photo paper. You can print on 3.5″ x 5″, 4″ x 6″, A6 (4.1″ x 5.8″), 5″ x 7″, and 16:9 wide using this tray.
- Paper tray 2 (third photo above): Paper tray 2 (third photo above) is capable of holding 100 sheets of letter/A4 and 20 sheets of photo paper. You can print on Letter, A4, Executive (7.25″ x 10.5″), Envelope #10, 8″ x 10″, 5″ x 7″, 4″ x 6″, 3.5″ x 5″, 16:9 wide, A6, Half letter (5.5″ x 8.5″), and user-defined 8.5″ x 11″ using this paper tray.
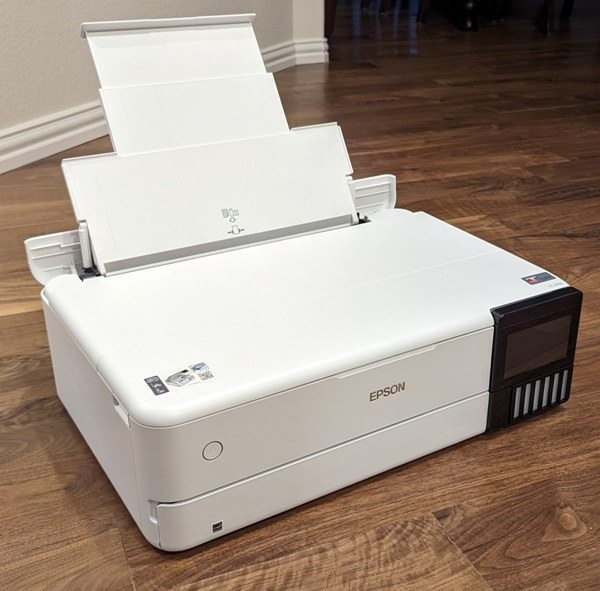
- The rear paper tray: You can access the rear paper tray by flipping up the cover located toward the back of the printer. You need to extend the rear paper support and adjust the edge guides to fit the paper you insert here. It can handle 50 sheets of letter/A4 paper and 5 sheets of photo paper.
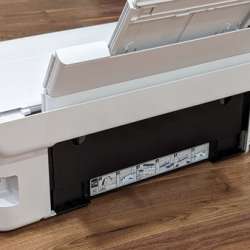
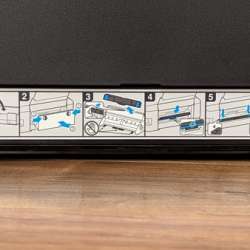
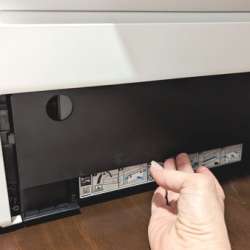
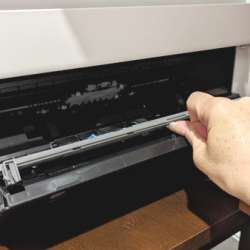
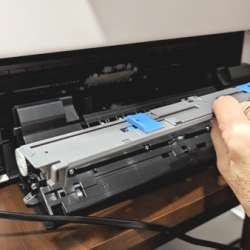
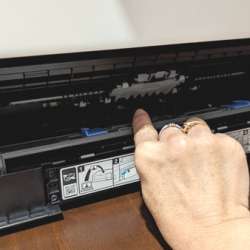
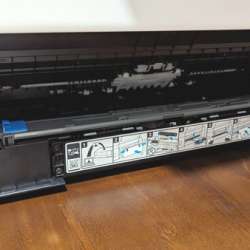
- The rear paper feed slot (or rear straight-pass or manual feed) (shown above): This slot handles longer sheets of paper and thick paper (up to 1.3 mm thickness) and holds one sheet at a time. To use the manual feed, you first need to extract the back of the printer by depressing the spring-loaded tabs. Once removed, there is a light grey paper guide that you pop off with your finger and place just inside the opening where it clicks into place.
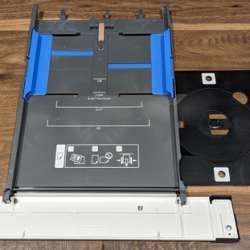
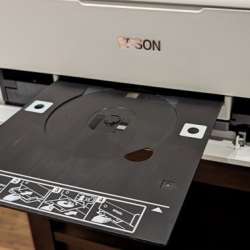
- CD/DVD tray: The CD/DVD tray is stored underneath tray 2 and slides out sideways by pulling on the tab. To use it, you’ll completely remove it and insert it above the output tray.
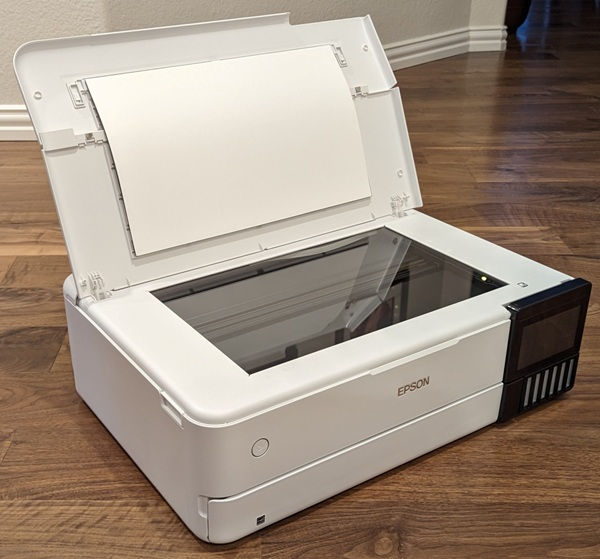
There is no Auto Document Feeder (ADF) on this printer. It has a scanning bed instead which measures 14.25″ L x 8.75″ W and its maximum scan size is 8.5″ x 14″ (Legal).
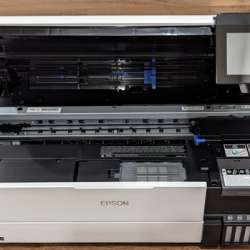
Grasping the indented areas on the sides of the printer (shown in the first photo above) and lifting allows you to access the internal area of the printer where the maintenance box and ink tanks are.
The maintenance box is located front and center inside of the printer (second photo above). This box collects excess ink and will need to be replaced eventually. A message is supposed to pop up on the LCD screen to let you know when you should replace it.
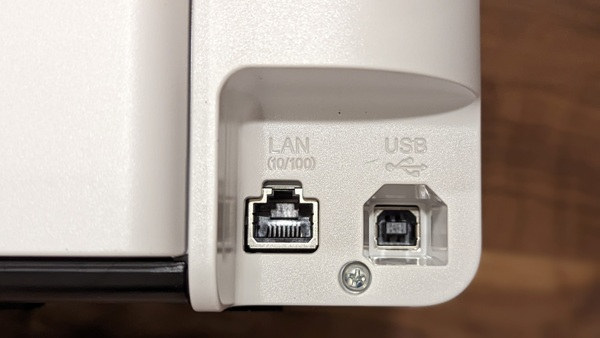
On the back of the printer is an Ethernet port and a USB-B port (shown above). The power port is located on the back as well on the left side.
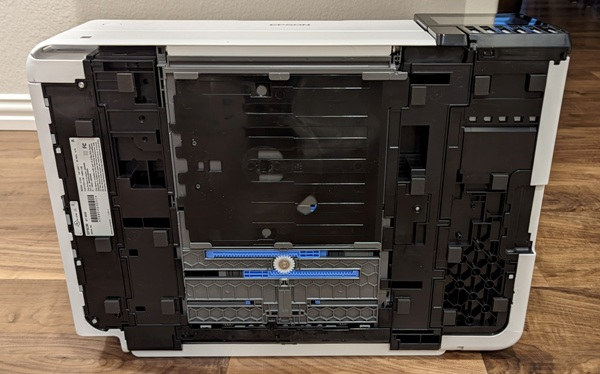
The bottom of the printer has multiple rubber pads to prevent scratching your furniture. You can also see the bottom of the CD/DVD tray and the edge guide gear for paper tray 2.
Setup
Starting with the Epson Smart Panel app and Windows 11 Drivers and Utilities Combo Package Installer
Using the “Start Here” guide, I powered up the printer and followed the on-screen prompts on the printer’s LCD touchscreen panel.
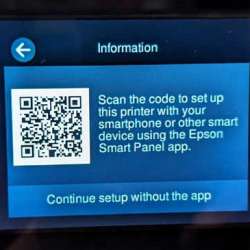
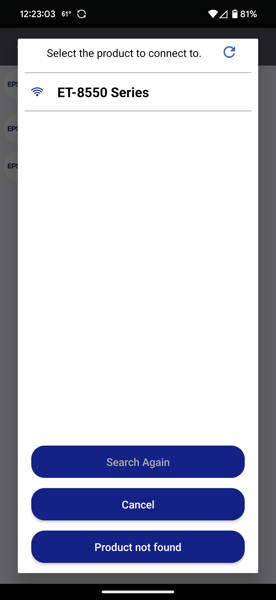
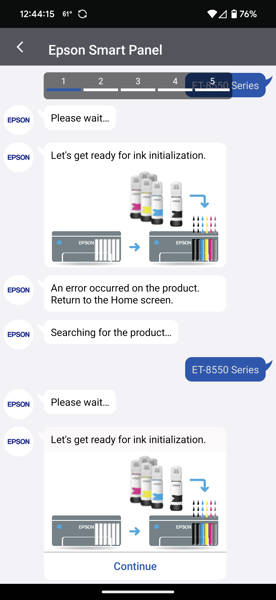
I already installed the Epson Smart Panel app on my Android phone when I reviewed the Epson ET-8500 photo printer. So I launched the app and tapped on “Set Up a New Product” (first screenshot above). The app searched for my printer and I selected it from the list (second screenshot above). From there, I was able to follow the app’s prompts to step through the setup process.
Even though I had already installed the Epson software on my laptop when I reviewed the ET-8500, I still needed to install the driver for the ET-8550. So, I download the ET-8550 Drivers and Utilities Combo Package Installer (ET8550_Lite_NA.exe file) from Epson’s website for my Windows 11 laptop to install the printer driver and software. This took a few minutes as I followed the prompts. It installed the drivers, Epson Photo+ application, Epson Photo+ Tool, Epson Printer Connection Checker, Epson ScanSmart application, Epson Software Updater, and Event Manager.
Filling Ink Tanks and Ink Initialization Process
Epson includes six ink bottles with the printer: one pigment ink which was Black and five other dye inks: Photo Black, Cyan, Yellow, Magenta, and Gray that are individually vacuum sealed.
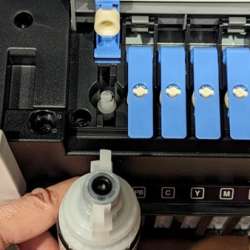
Epson has significantly improved its ink tank and bottle designs since I reviewed my first Epson Ecotank printer, the Epson ET-16500 printer. Their ink bottles now have screw-on caps and rubber valves on the tips to help prevent ink spills. They designed the bottles (they call them Epson EcoFit Ink bottles) so that only the correct ink bottle fits in the correct ink tank (the tank has an opening that only the correctly keyed ink bottle will fit in).
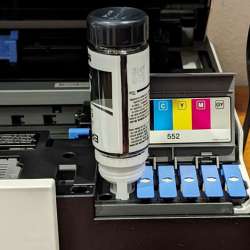
To access each ink tank, you first need to flip open the grey lid that covers all the ink tanks. Each of the six ink tanks has a blue flip-top lid. To fill the Black ink tank, I flipped open its blue lid and inverted the Black ink bottle without spilling any ink because of the rubber valve on the tip. The keyed tip of the Black ink bottle fits perfectly in the Black ink tank filling port.
Once inserted, the bottle started emptying into the tank automatically and stopped flowing automatically when the tank was full. Don’t squeeze the bottles – it’s not necessary to fill the tanks. When finished, I flipped the blue ink tank cap closed and repeated the process with the rest of the ink colors. There was still some ink left in each of the bottles when I finished.
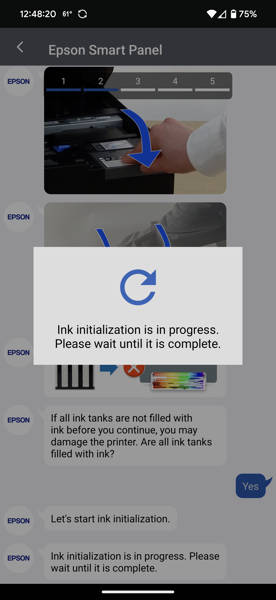
Next, I tapped on “Continue” in the Epson Smart Panel app to continue with the ink initialization process.
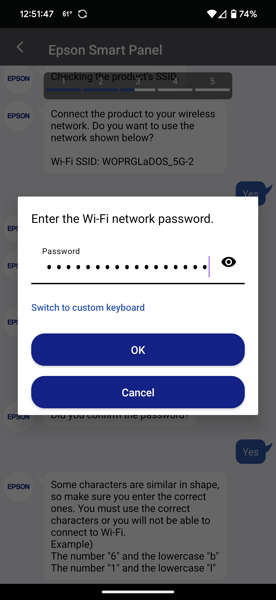
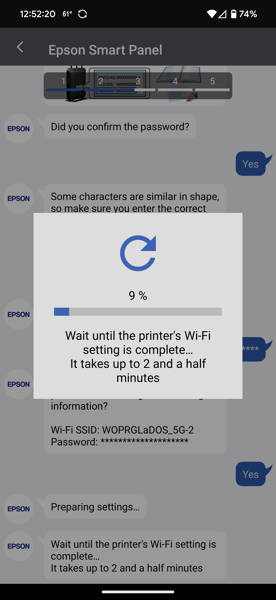
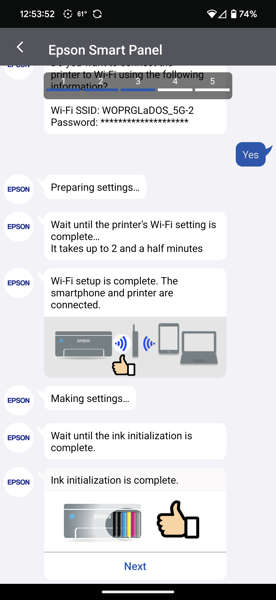
During the ink initialization process, the app asked if I wanted to connect the printer to WiFi, so I was able to complete that process while waiting for the initialization process to finish. About 1/5 of the ink in the tanks was used up during the ink initialization process.
After ink initialization and WiFi setup were complete, I was prompted to do a print alignment adjustment on the printer’s LCD touchscreen panel. To do this, the printer prompted me to print several test prints. From each test, I needed to select the most ideal-looking of the print alignments (e.g. select the number associated with the lines that were unbroken, colored squares that had no white streaks in them and colored boxes that had no overlap or space between them.
Ink Shelf Life: The ink bottles that come with the ET-8550 have an expiration date of June and July of 2028 and should not be used after that date. Note: They can only be stored for one month at 104 °F (40 °C) and will freeze at 3 °F (–16 °C) but can be used after approximately 3 hours at 77 °F (25 °C). So it makes sense that for optimal performance they should be stored at room temperature and away from sunlight, heat, and cold temps.
Additionally, if you go without printing for a prolonged period, the printer’s ink nozzles can become clogged and if that happens you will have problems printing.
Ink Specifications: Just like the Epson ET-8500, the Epson ET-8550 printer uses five dye-based inks (Photo Black, Cyan, Yellow, Magenta, and Gray) and one pigment-based ink (Black). Pigment-based inks (solid particles mixed in liquid) are more fade and water-resistant versus dye-based inks (water-soluble colors mixed in liquid) which are not.
Epson Connect
Epson Connect is a “cloud print and scan service for Epson printers. It allows you to print from any smartphone, tablet, or computer from anywhere in the world”.
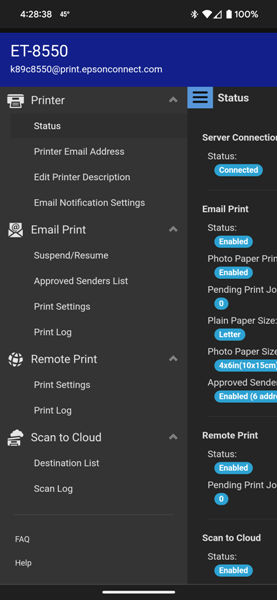
Toward the end of the installation of the driver/Epson software on my laptop, I was prompted to connect the pET-8550 to Epson Connect. Once connected, you can log into Epson Connect through a web browser (you need to set up an Epson Connect account if you don’t already).
Using Epson Connect, you can set up an “Approved senders list” thus restricting who can print to your printer remotely. Additionally, you can choose whether or not to print the sender’s information and the body of the email, set up an “Access key” to allow other remote users to print to the printer as long as they have the key, and set up a Cloud Destination List for when you scan things.
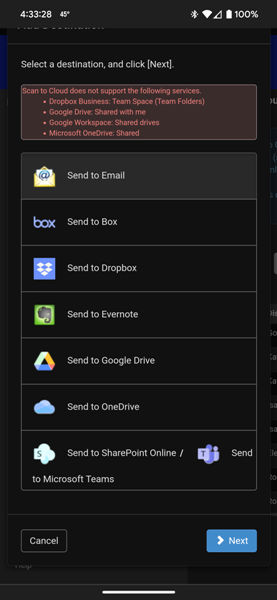
I wanted to be able to send scans to certain email addresses, so I used Epson Connect to set up a “Destination list”. I added email addresses and cloud services like my Google Drive (it also allows you to add Box, Dropbox, Evernote, Onedrive, and SharePoint online/Teams) to send my scans to when using the printer’s touchscreen control panel.
Performance
Printing on the ET-8550
There are several ways to print using the ET-8550. You can print from your computer/laptop, memory devices (thumb drives, SD cards), or your phone, or even use Google Assistant, Alexa, or Siri to print things for you. You can also email the ET-8550 directly to print the email and its file attachments (photos, documents, etc.).
The ET-8550 also prints two-sided pages automatically.
Printing Directly from the Printer
There are several buttons on the touchpad control panel: Copy, Print Photos, Scan, Various Prints, Settings, Maintenance, and Smartphone Connect.
I’ll cover Copy, Print Photos, and Scan later, but what is “Various Prints”?
“Various Prints” control-panel button
By selecting “Various Prints” on the control panel, there were several options to choose from: “Various copies”, “Personal Stationery”, “Greeting Card”, “Copy to CD/DVD”, and “Coloring Book”.
1. Various copies – Copies and restores photos, copies ID cards, makes book copies or other borderless copies. When copying an ID card, the printer scans both sides before printing.
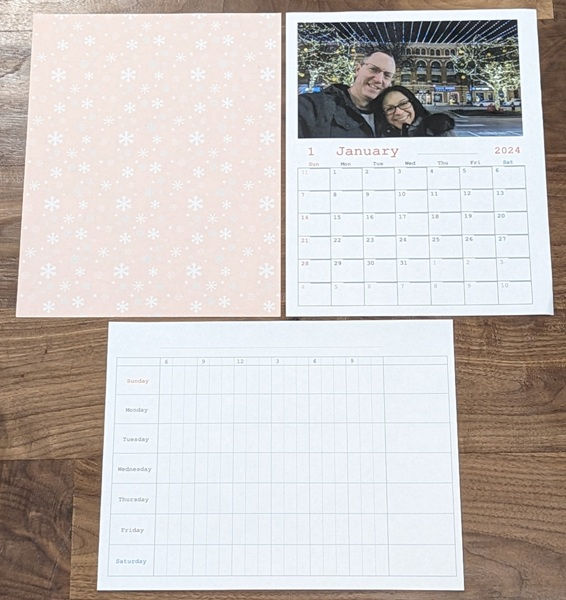
2. Personal Stationery – You can print “Design Paper”, “Ruled Paper” (which includes grid-style graph paper and music staff paper), “Writing Papers” (which is lined paper), “Schedule”, and “Calendar” sheets.
I tried the “Design Paper”, “Schedule”, and “Calendar” prints as shown above. They turned out nicely.
3. Greeting card – You can create and print a photo with handwritten notes and drawings.
4. Copy to CD/DVD – This allows you to copy a photo or print a photo on a CD/DVD label and jewel case index.
5. Coloring book – You can print the outlines from your photos to use as coloring pages.
Printing from my Windows 11 laptop
Printing documents on my laptop: This was as easy as printing to any printer from an application.
The Excel borders printed cleanly, but maybe not quite as clear as when printing from my laser printer.
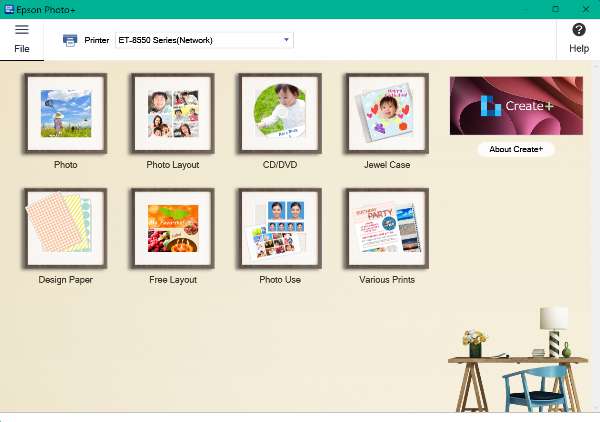
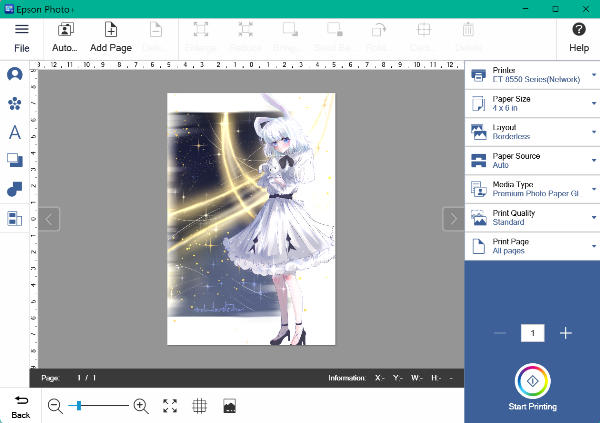
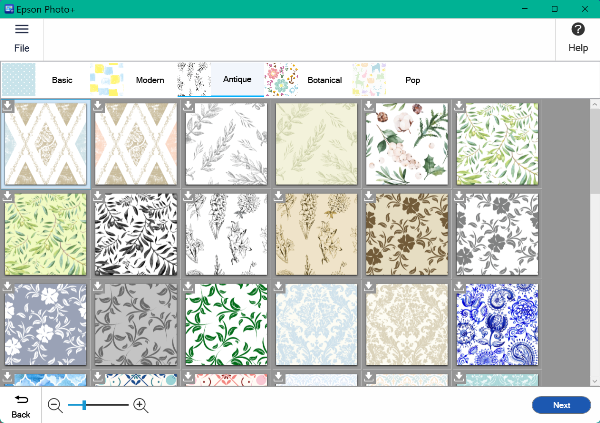
Printing photos from my laptop: To print photos from my laptop, I used the Epson Photo+ application (Windows application shown above) and clicked on “Photo”. I then needed to choose a photo size to print and then I selected the photo I wanted to print from a folder on my laptop.

The above is the result of the print. Nice! And the colors are accurate when compared to the original drawing.
I used “Design Pages” to print several design pages, “Photo Layout” to print a collage of some drawings, and “Various Prints” to print a wedding invitation using the Epson Photo+ application.
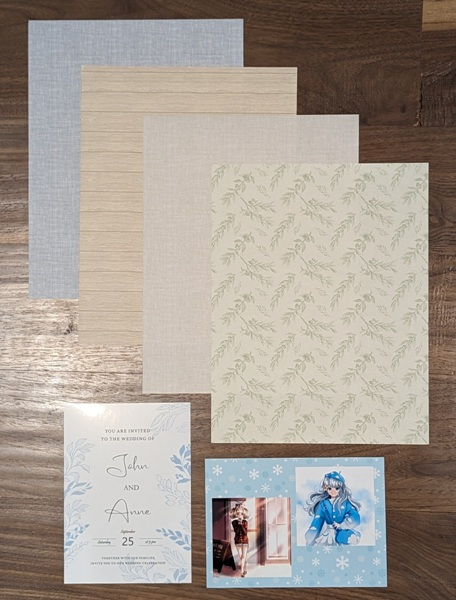
The above are the design pages I printed, a photo collage, and a wedding invitation. I love how all of them turned out!
While you can create your own photo cards using the application, it is so rudimentary that you would have much more success using GIMP or Photoshop.
Epson also provides you with a quick print tool called Epson Photo+ Tool to print a photo immediately or print a selected area of a photo. I haven’t used this since printing from my phone is so easy using the Epson Smart Panel app.
There are so many ways to print to the ET-8550 that I didn’t use this application very much. The only item I may use is the “Design Pages”. Otherwise, I found the Epson Photo+ application to be less useful than the Epson Smart Panel app.
Printing from my phone using the Epson Smart Panel app
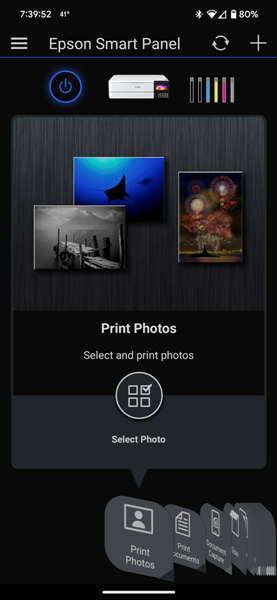
I printed most of my photos using the Epson Smart Panel app (available for Android and iOS) because all my photos are on my phone.
The app contains several buttons at the bottom of the app home screen: Print Photos, Print Documents, Document Capture, Scan, Copy, Preset Copy, Access to Class (print assignments or scan documents from Google Classroom), ID Card, Borderless Copy, Book Copy, Creative Print (this is a separate app that you need to download called “Epson Creative Print”), Fun with Printing, Guest Connection, Help, and Print Head Cleaning.
Printing photos from the Epson Smart Panel app is so easy:
- Tap on the “Select Photos” button (shown in the first screenshot above)
- Select the file location of the photo you would like to print (from locations on your phone like your camera, screenshots, downloads, images from your texting apps, etc.)
- Select the photo to print (center screenshot above)
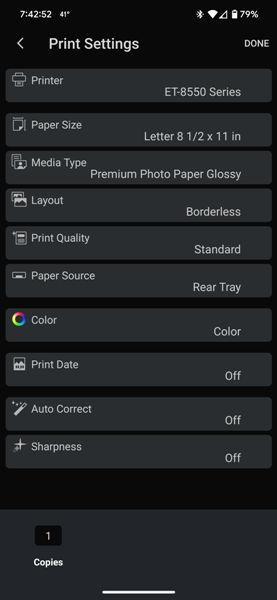
- Before printing, you can check to make sure that all the settings are correct by tapping on the gear icon located in the upper right corner of the screen (last screenshot)
- Tap on “Done” located in the upper right corner in the last screenshot above, which takes you back to the photo (center screenshot)
- Last, tap on the “Print” button
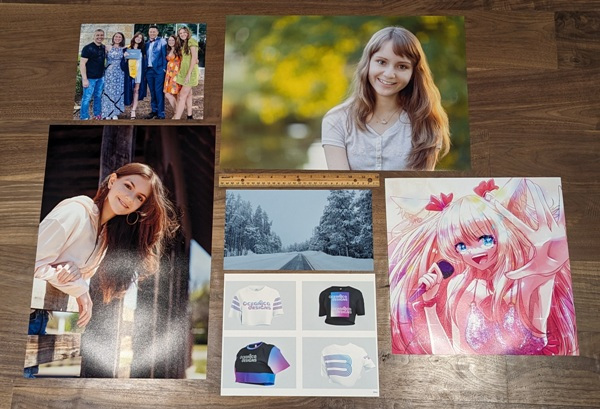
I was ecstatic with the prints of my photos. It was really easy to print them on the ET-8550 with the Smart Panel app compared to my attempts with other non-photo inkjet printers in the past. I love the fact that I can print borderless photos up to 13″ x 19″ (the two largest photos above are 13″ x 19″). I printed some drawings and design mock-ups too which turned out wonderfully.



Check out the details!! Granted, the above are photos of my printed photos, but the prints turned out amazingly!! The colors of the prints seemed to match that of the original photos captured by the photographer (to my untrained eye). If you’re a professional photographer or graphic artist, you may have a different opinion on these results. I’ve read that professional photographers need more colors to adequately represent the full-color gamut. But I LOVE the prints!!
Printing from Memory Device
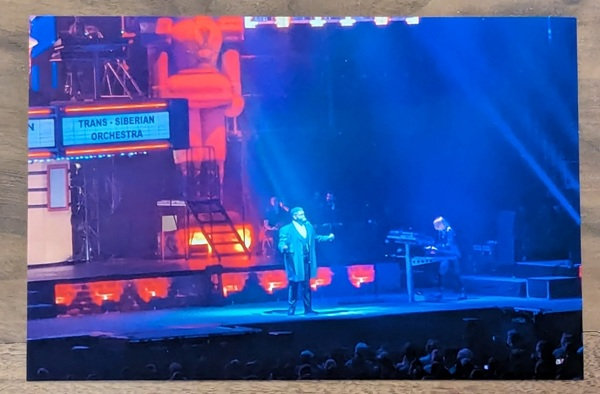
I was able to easily print photos from a flash drive and didn’t have any issues.
Email Printing
You need to set up the ET-8550 printer in Epson Connect to email print jobs to the printer. I did so and was able to email print jobs of documents and photos to the printer without any problems. It’s important to point out that the printouts will use the settings (plain paper and photo paper size) that you select in Epson Connect.
Voice Printing
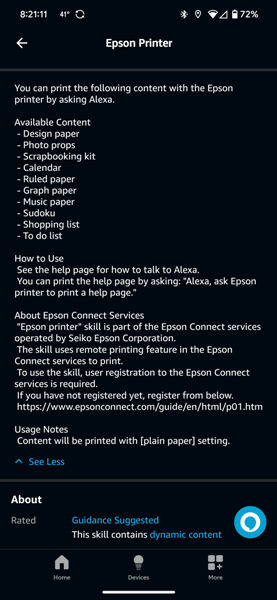
I set up the “Epson Printer Skill” on my Echo device. This voice printing skill allows you to print a few things like sudoku, design paper, or your shopping list. I asked Alexa to print my shopping list and it did (“Alexa, ask Epson printer to print my shopping list”). Although this is an interesting feature, I don’t see voice printing as being practical or something that I will use in the future.
Copying on the ET-8550
You can copy and scan documents using the scanning bed. This printer doesn’t have an ADF.
It can make 1-sided to 2-sided copies, but you have to scan both sides of the document manually by flipping the document over in the scanning bed. However, you don’t need to feed the paper back into the printer to copy on both sides, the printer will do this automatically.
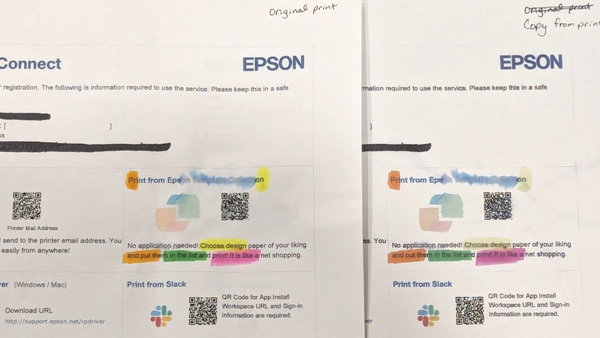
The first document shown above is the original printed document. The second document above is the copy. The original version of the document was the one I used to test how the ink handles drops of water and highlighters. The color inks really bleed but the black bleeds a lot less.
Scanning on the ET-8550
When scanning documents, you can use the Epson ET-8550 scanning bed. You can scan directly from the printer, from your computer or laptop using the Epson Scan Smart software, or from your mobile device using the Epson Smart Panel app.
The ET-8550 doesn’t do automatic duplex scanning. Thus, when I need both sides scanned simultaneously, I prefer to use my scanner which has an ADF and is set up to do auto-duplexing.
Scanning directly from the printer
Tapping on the Scan button on the printer’s touchscreen control panel you can scan a document to a memory device, computer, cloud service, or Web Services for Devices (WSD). To scan to “Cloud”, you must first set up a destination list using Epson Connect which I did. I loved being able to select a location to save the scanned document. After scanning something while standing at the printer I could select an email or cloud destination and have the document on my phone in an instant.
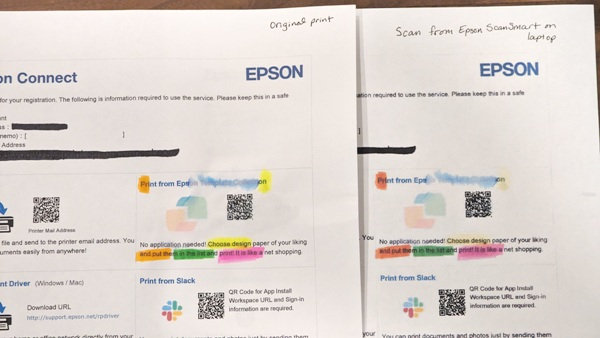
The above is a comparison of the original print with highlighting marks and the printout of the scan. You can see the scanned image has less vibrant colors.
Scanning using a computer/laptop
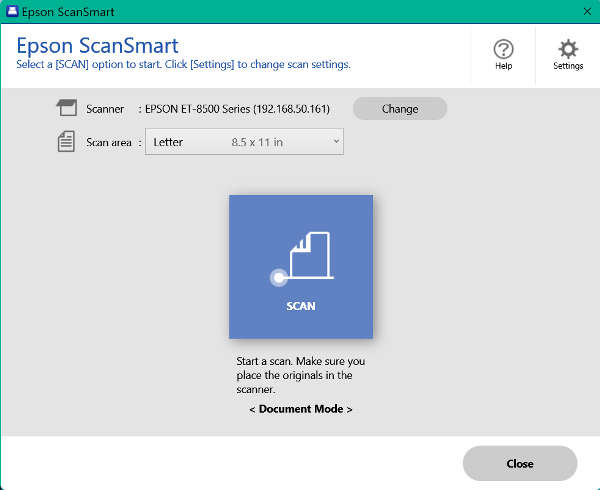
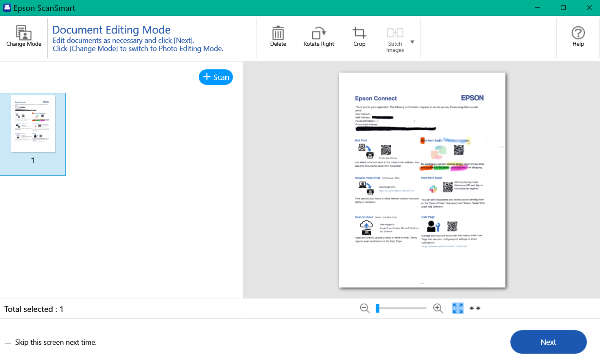
The above screenshots illustrate scanning using the Scan Smart software on a computer or laptop. You can print the image or save the scan to one of your cloud storage areas, save it as an attachment to an email (email services like Outlook, not web email), or save it as a file on your computer. This is straightforward to use and worked well.
Scanning on my phone using the Epson Smart Panel app
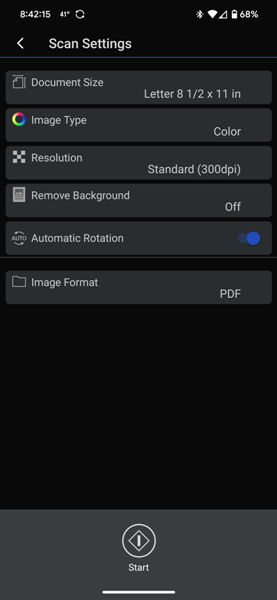
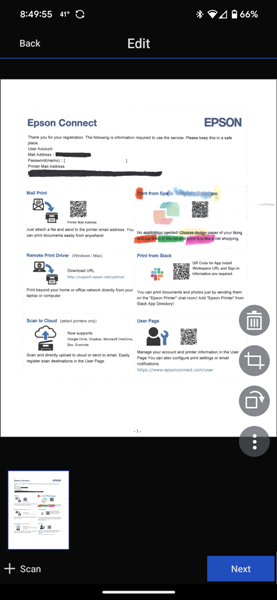
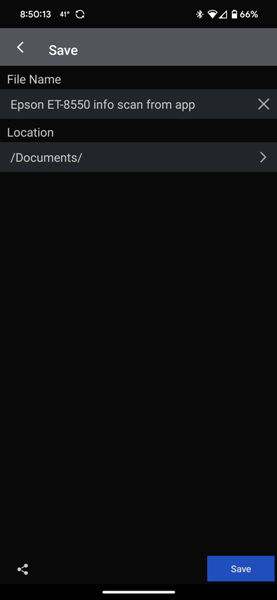
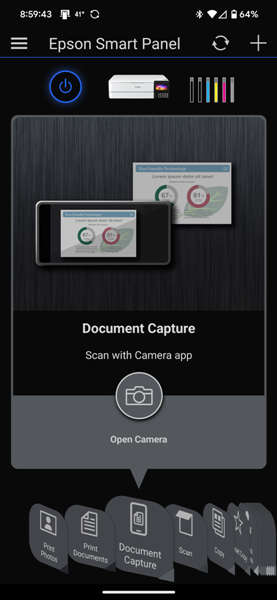
Scanning documents using the Epson Smart Panel app is also easy. I placed my document on the scanning bed, tapped on the “Scan” button in the app (first screenshot above), checked the settings, and tapped on the “Start” button (second screenshot). I then checked the preview (third screenshot) to see if I needed to crop or edit the scan and then selected a location to save to and tapped on the “Save” button (last screenshot).
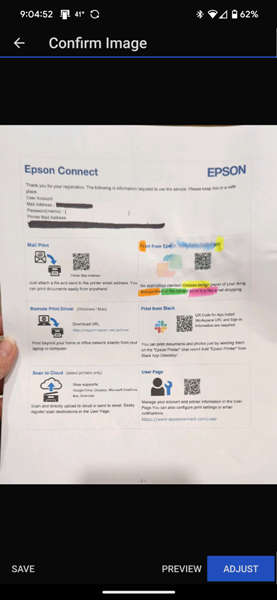
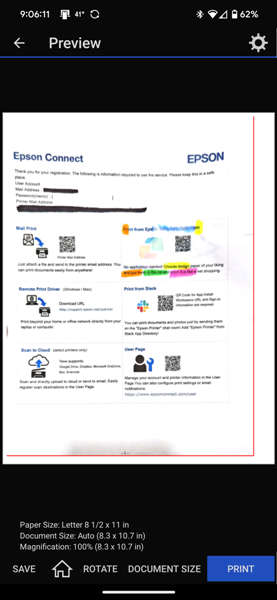
You can also use the “Document Capture” button on the Smart Panel app to take a photo of the document and print it or save it as a PDF.
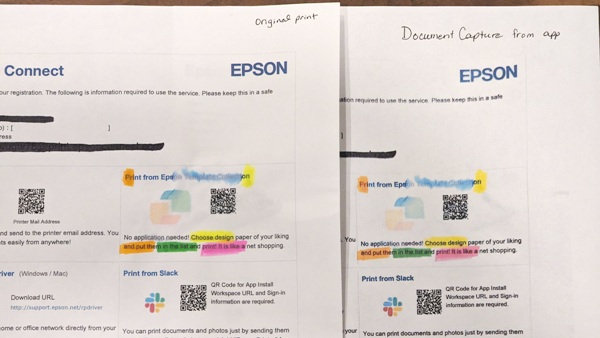
Document Capture better captures the colors of the highlighters than scanning does.
The Epson ET-8550 Wide-format printer can do so many things. Click here to view the User Guide.
What I like
- Setup was easy
- It prints fantastic borderless photos up to 13″ x 19″
- Printing, scanning, and copying documents from the printer, computer, or phone are easy
- The Epson Smart Panel app is awesome
- Filling the ink tanks is so easy
- Has auto 2-sided printing
- Having refillable ink tanks is awesome
What I’d change
- It’s expensive
- The text is not quite as clean and precise as a laser printer
- The ink bleeds when wet (colored ink especially; black is more permanent)
Final thoughts
The Epson EcoTank Photo ET-8550 All-in-One Wide-format Supertank Printer is a wonderful photo printer for amateur photographers like me. It has a lot of functionality. You can print, copy, or scan from the printer, your computer, or your phone. The Epson Smart Panel app is super easy to use to print, copy, and scan. It does automatic two-sided document printing and I love that it prints beautiful, detailed, borderless photos up to 13″ x 19″. In addition, EcoTank printers also save you money on ink because they use refill bottles of ink and you don’t have to refill them very frequently.
There are a couple of downsides. The printer is expensive. Additionally, most printed documents (not photos) look decent but the text is not as clear and precise as that of a laser printer. Also, when water gets on a printed color document (or when you use highlighters), the ink bleeds and smears (mostly just the colored inks).
I love, love, love the photo prints from this printer. It may not have the number of ink colors required to produce professional prints, but I can’t tell so I’m super happy. If you can afford the printer and like printing larger-sized photos, I highly recommend this printer.
Price: $599.99 at Amazon, Epson, B&H Photo, Adorama, Office Depot, Staples
Where to buy: Amazon, Epson, B&H Photo, Adorama, Office Depot, Staples
Source: The sample of this product was provided by Epson.










Gadgeteer Comment Policy - Please read before commenting
Excellent and thorough review Kathleen! You even included a photo of the bottom of the printer. Keep up the great work.
Craig – thanks for the positive feedback! I really appreciate it!
Been using for photos 8×10 glossy for family albums, 13 x19 semi luster & matt 11 x 17. Excellent results almost matches screen (32 in 4k IPS) Boardless on large prints perfect result. I’ve been for last yrs my Epson 7800 pro series. Pigment inks for Pro series 8550 dye base ink. So 7800 allowing to print sizes 24 with and larger, also roll paper. 8550 max is 13×19 flat sheets. Excellent printer and your review was quite amazing. Thank you
Chuck – I don’t have the Epson 7800 pro series, so thank you for the comparison. It sounds like it a wonderful printer that prints even larger sizes (and with pigment inks) than the ET-8550. Thanks for leaving a comment and for the positive feedback on the review!
Had a Epson ink tank printer lasted for fourteen months the stopped working phoned support didn’t want to know as it was out of warranty supposed to book me for service/ repair that was a month ago still not done it poor products extremely poor customer service going back to Brother printer had last one for five years never missed a beat
David – I’m so sorry to hear about your poor experience with Epson customer service. I had to call Epson about my ET-16500 printer (several years ago) and had a good experience with them. Perhaps if you call again, you might get someone who is more helpful.
I have a brother monochrome laser printer that I really like too and it has lasted years so I understand why you would fall back on Brother printers.
We’ll explained and clear
Thank you
Dance – thank you!