REVIEW – I have been growing my 3D printing business for the last 2 years, and it continues to consume my home office to the seams. However, I was able to find a bit of space when I got the offer to review the Chitu Systems PlateCycler C1M Auto-printing Assistance Kit. I’d seen social media videos of automated print plate feeding systems that people had created, but I haven’t had time to DIY a system like that for myself. In addition, Amazon just jumped the forecasted need for my products by almost 300%, so I have months of non-stop printing to catch up with my current printers to meet demand, so any assistance is very welcome.
⬇︎ Jump to summary (pros/cons)
Price: $79.99
Where to buy: Amazon
What is it?

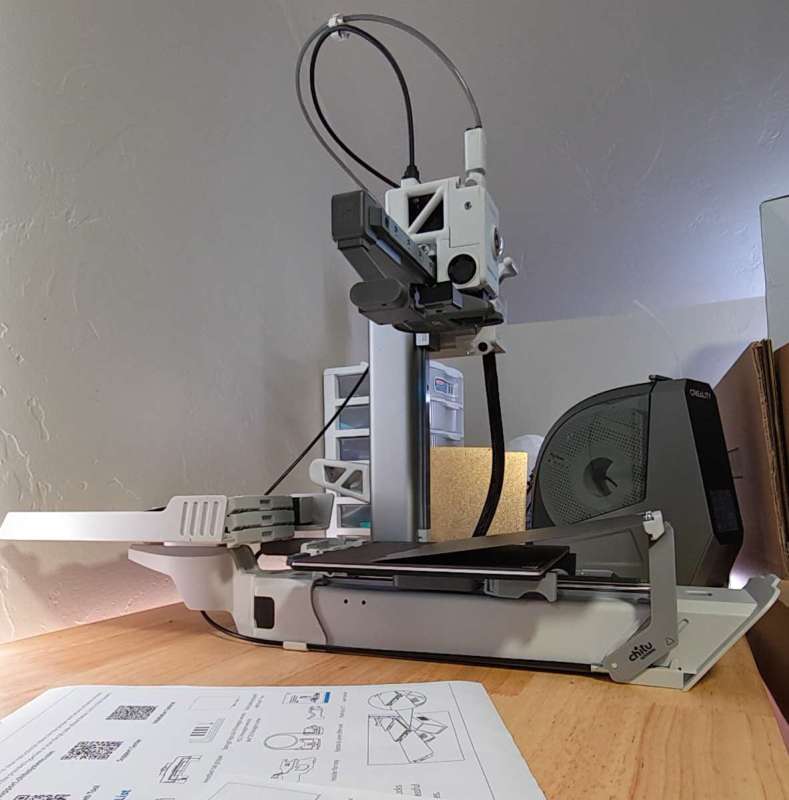
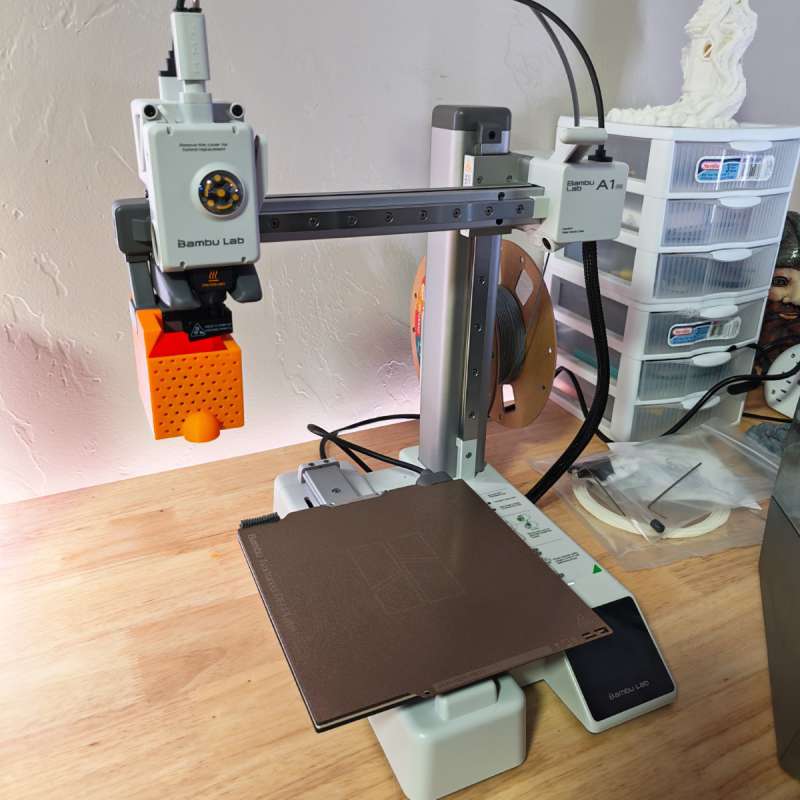
The Chitu Systems PlateCycler C1M Auto-printing Assistance Kit is an add-on kit for the Bambu Labs A1 Mini 3D printer. It adds a plate-feeder tray and other pieces to pull printed trays off the printer and feed new ones on. In effect, you can put up to 10 build plates on the tray (4 included) and then hit “Print” on the printer, and it will print tray after tray until all are complete with no human intervention.
What’s included?
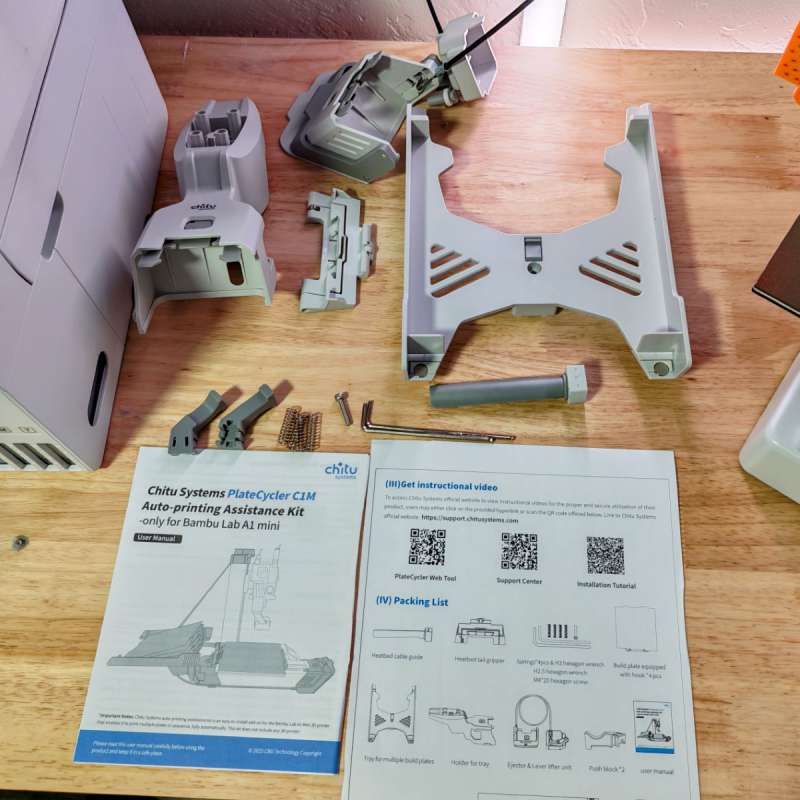
- 4x A1 Mini textured PEI build plates with custom parts pre-installed
- Build plate feeding tray
- Gripper
- Ejector
- Heatbed Cable Guide
- 2x Push blocks
- Holder
- Lever lifter
- 4x springs
- Screw
- 2x Allen wrenches
Design and features

The Chitu Systems PlateCycler C1M Auto-printing Assistance Kit fits perfectly onto the Bambulabs A1 Mini printer. Clever quick release buttons keep the parts secure, and it even matches the color fairly closely to where it looks like it’s just part of the printer. The feeder tray itself can handle up to 10 build plates. Most of the materials used feel similar to the plastics on the Bambu Labs A1 mini printer itself as well, so they seem rugged and built to last.

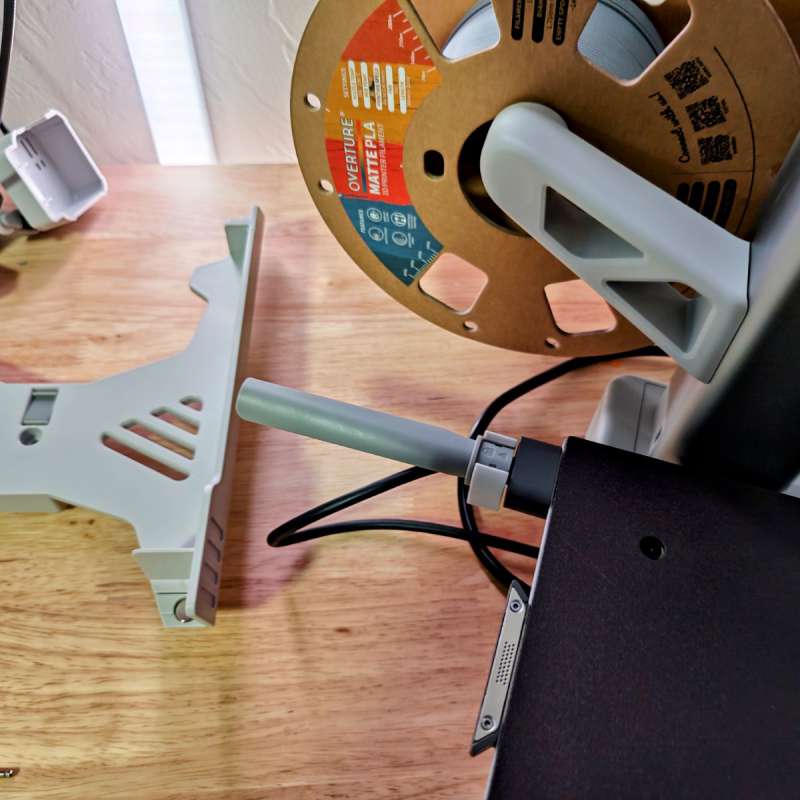
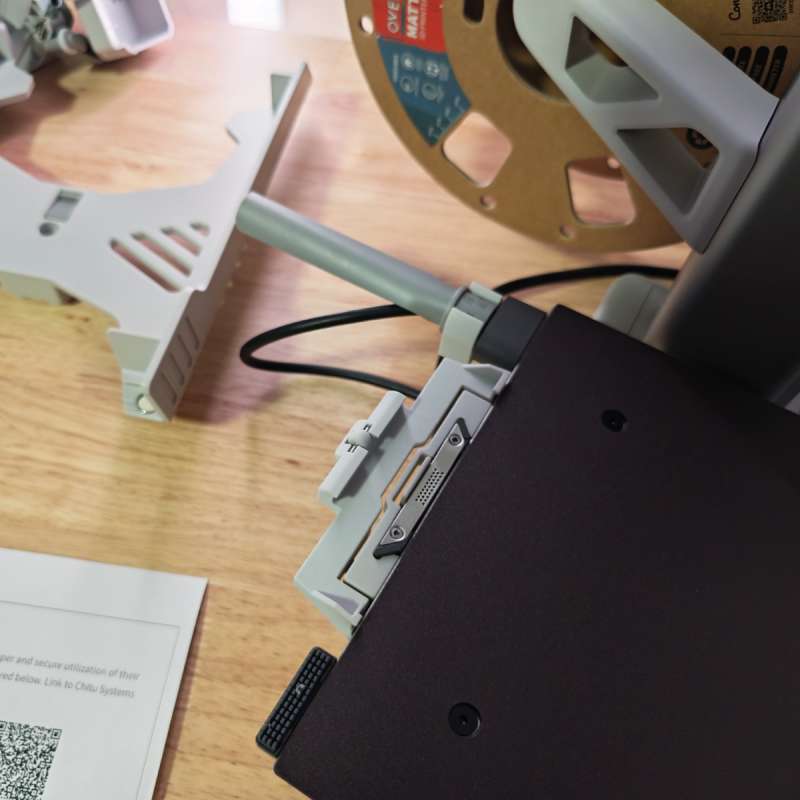
The ejector mechanism clips onto the front of the printer, and cleverly wraps a cable around to the top of the machine. This cable will be “pulled” by the printhead itself during the ejection/loading process.

Under the print bed you add a pair of push blocks that help eject the printed plates. These are 3D printed themselves, the only part of the kit that isn’t injection molded. They aren’t very visible under the printer, and feel very solid.
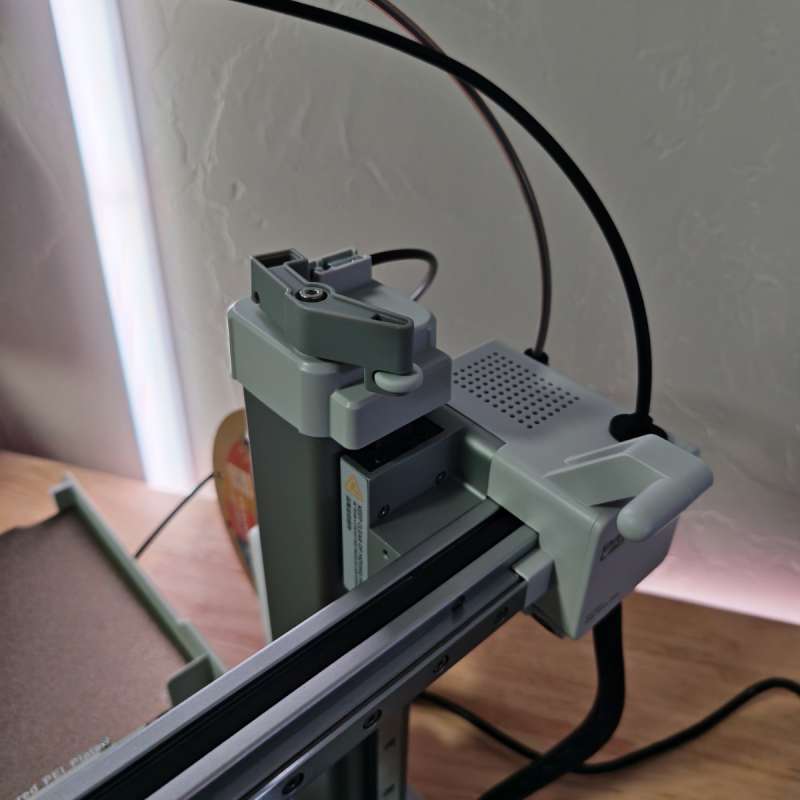
On the top of the printer is the lever lifter, which is pushed by the print head to lift the lever on the ejector when needed to eject the printed plate.
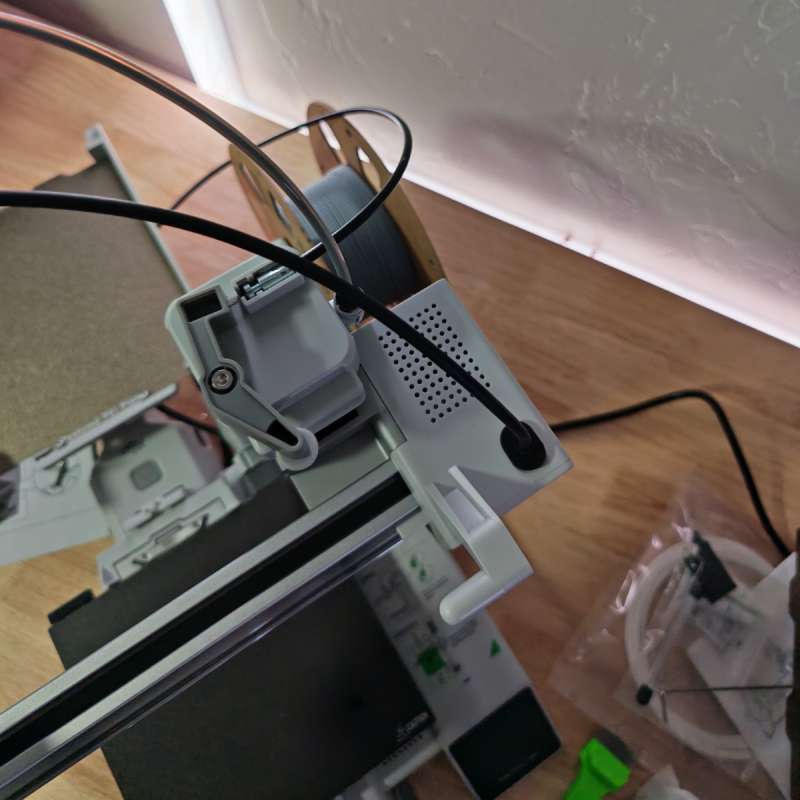
The PTFE filament feeding tube is moved up to the lever lifter assembly (the original placement on the gantry would interfere with the operation of the lever lifter. This new placement works perfectly (and won’t apply if you’re using an AMS Lite multicolor system with your A1 mini printer).
Assembly, Installation, Setup
I purchased a brand new Bambu Labs A1 Mini for this review, since it would fill a needed place on my production line along with the Chitu Systems PlateCycler C1M Auto-printing Assistance Kit. Normally I wouldn’t consider the small A1 Mini for my printing needs, since the smaller print bed makes for more frequent plate changes, but the assistance kit more than makes up for the diminutive size.
Installation is fairly easy; Chitu Systems provides written instructions and an online video to assist. First, a heatbed cable guide is slipped onto the back of the heatbed to prevent the cable from snagging on the feeder tray.
Then the gripper is simply friction-fit onto the back of the heatbed. This gripper will grab the new build plate when needed (and stays down when there’s a plate on the heat bed so it doesn’t prematurely grab new plates).
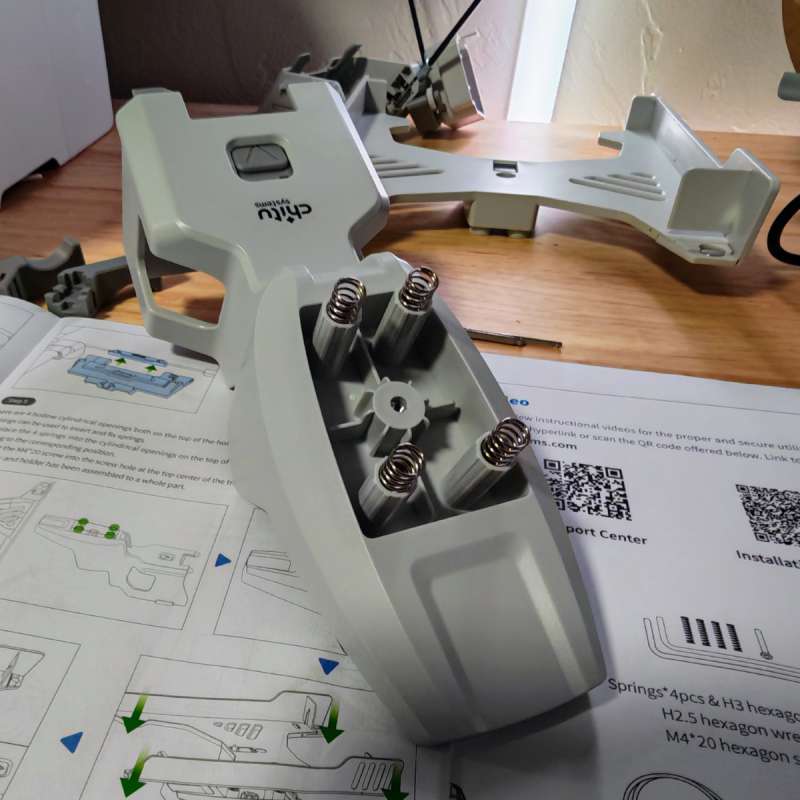
The tray setup requires you to insert the four included springs…
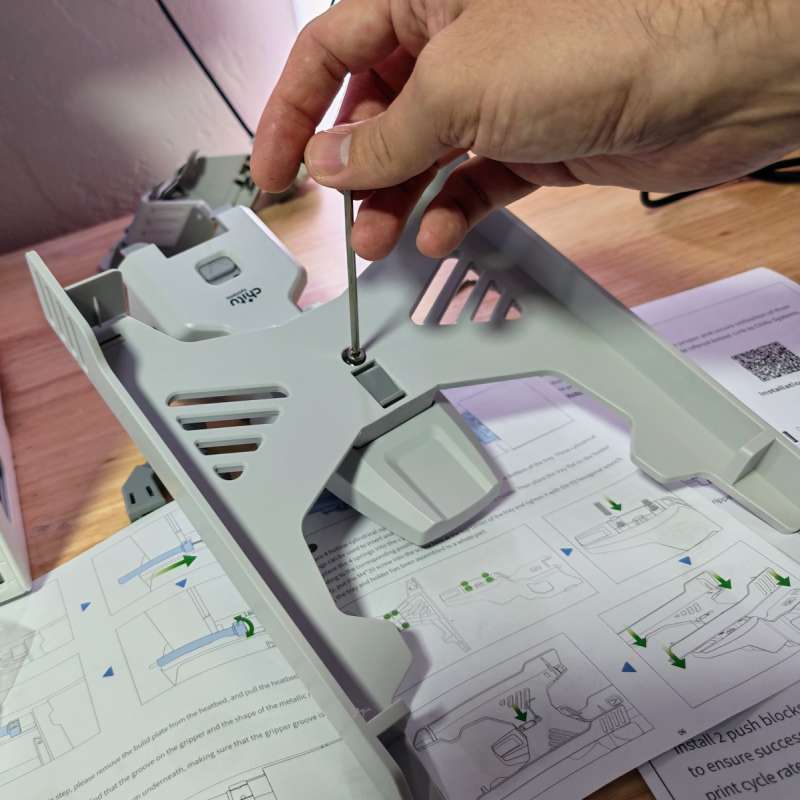
And then tighten the adjustment screw. This screw is important: you tighten or loosen it to adjust the height of the tray which is crucial for the grabber on the heatbed to correctly grab the next plate.
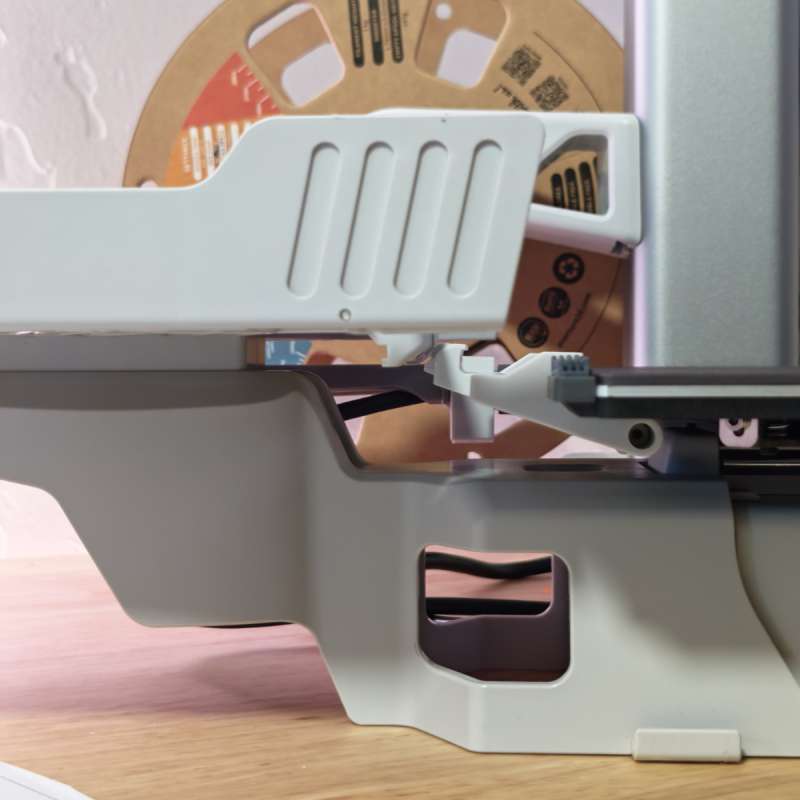
In the photo above, you can see how the grabber on the heatbed grabs the build plate from the tray. If the tray is too high it won’t grab, if it’s too low it will collide and also not grab correctly. Once you have it adjusted to where it’s grabbing correctly and not colliding (you can just manually slide the heatbed to the back and forward again to test it), you should then get the test file from Chitu Systems, which will run through the process of feeding and ejecting the four plates while not actually printing anything. I did this a few times to make sure I had it just right.
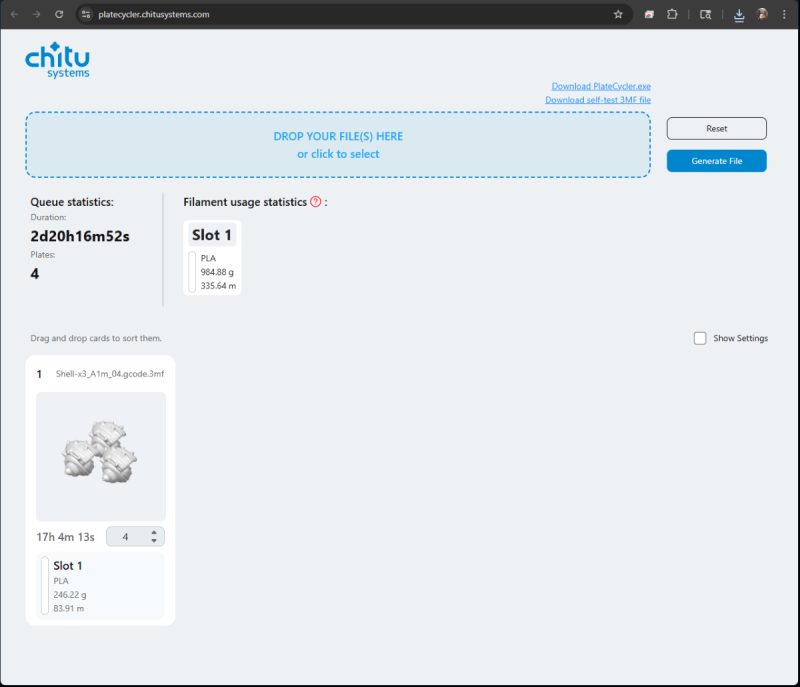
Once you’re sure the feeding and ejecting steps are working correctly, the last step is to prepare your file for printing. Chitu Systems provides both an online file converter as well as a Windows installable version (I tested with the online converter, which was quick and easy). You can set up all sorts of projects, ranging from repeats of a single print like I’m doing, to an assortment of different prints (like a multiple print project). I love that it gives overall time and filament usage statistics up top as you adjust settings for the print batch. I set up a batch print for my most popular item (a hermit crab), I’m shipping 50+ of these to Amazon every month so automating the shell printing is going to be great if it works.
Performance
I was worried about the reliability of the Chitu Systems PlateCycler C1M Auto-printing Assistance Kit over time – all of the various 3D printers I’ve tried out start to have issues at some point (I have 5k-10k hours of print time on some of my printers now), with that much use any product is going to need maintenance, but if it’s finicky and has issues quickly it would be a bad sign. Luckily, the PlateCycler Kit worked perfectly for weeks of non-stop printing during the review period. This bodes well for long term use, though I’ll update as I continue to use it around the clock going forward! Here’s a video of the calibration test file, and then some footage of the changing of the build plate during actual production printing:
Chitu Systems does recommend using a large bin with padding to catch the build plates as they fall and warn against printing tall thin models or models with fragile parts that may be damaged when the build plates fall into the bin.
Final thoughts
I wasn’t sure how well the Chitu Systems PlateCycler C1M Auto-printing Assistance Kit would work when I volunteered to try it out, but after several weeks of non-stop printing, I’m probably going to get another for the other half of my hermit crab production line (the actual hermit crab itself). It was easy to install and set up, the online file converter is easy to use, and it hasn’t had any problems at all. The little A1 Mini has pumped out 3 crab shells every 16 hours for weeks with me only needing to reset it every 3 days or so.
What I like about the Chitu Systems PlateCycler C1M Auto-printing Assistance Kit
- Pretty easy setup and calibration
- Good quality parts that seem built to last
- Included build plates
What needs to be improved?
- If you want to convert any existing build plates to use with this kit, you’d need to drill holes in them and attach parts to the front with bolts – probably easier to just purchase extras from Chitu Systems if you need them.
- No pricing available at time of review – which makes it hard to judge value
Price: 79.99
Where to buy: Amazon
Source: The sample of this product was provided for free by Chitu Systems. Chitu Systems did not have a final say on the review and did not preview the review before it was published.

WOLFBOX MF50 Compressed Air Duster-110000RPM Super Power Electric Air Duster, 3-Gear Adjustable Mini Blower with Fast Charging, Dust Blower for Computer, Keyboard, House, Outdoor and Car
(as of February 17, 2026 09:10 GMT -06:00 - More infoProduct prices and availability are accurate as of the date/time indicated and are subject to change. Any price and availability information displayed on [relevant Amazon Site(s), as applicable] at the time of purchase will apply to the purchase of this product.)