REVIEW – I have always wanted a laser engraver and cutter, but the affordable ones looked like a glorified Erector set, and the powerful enclosed versions would cost a small fortune. Finally, Creality’s Falcon A1 Pro 20W Laser Engraver & Cutter strikes the balance of an all-in-one, self-contained design without breaking the bank. I’ve never owned one, so will it be easy enough for a beginner?
⬇︎ Jump to summary (pros/cons)
Price: $1099 MSRP
Where to buy: Creality Store and Amazon
What is it?
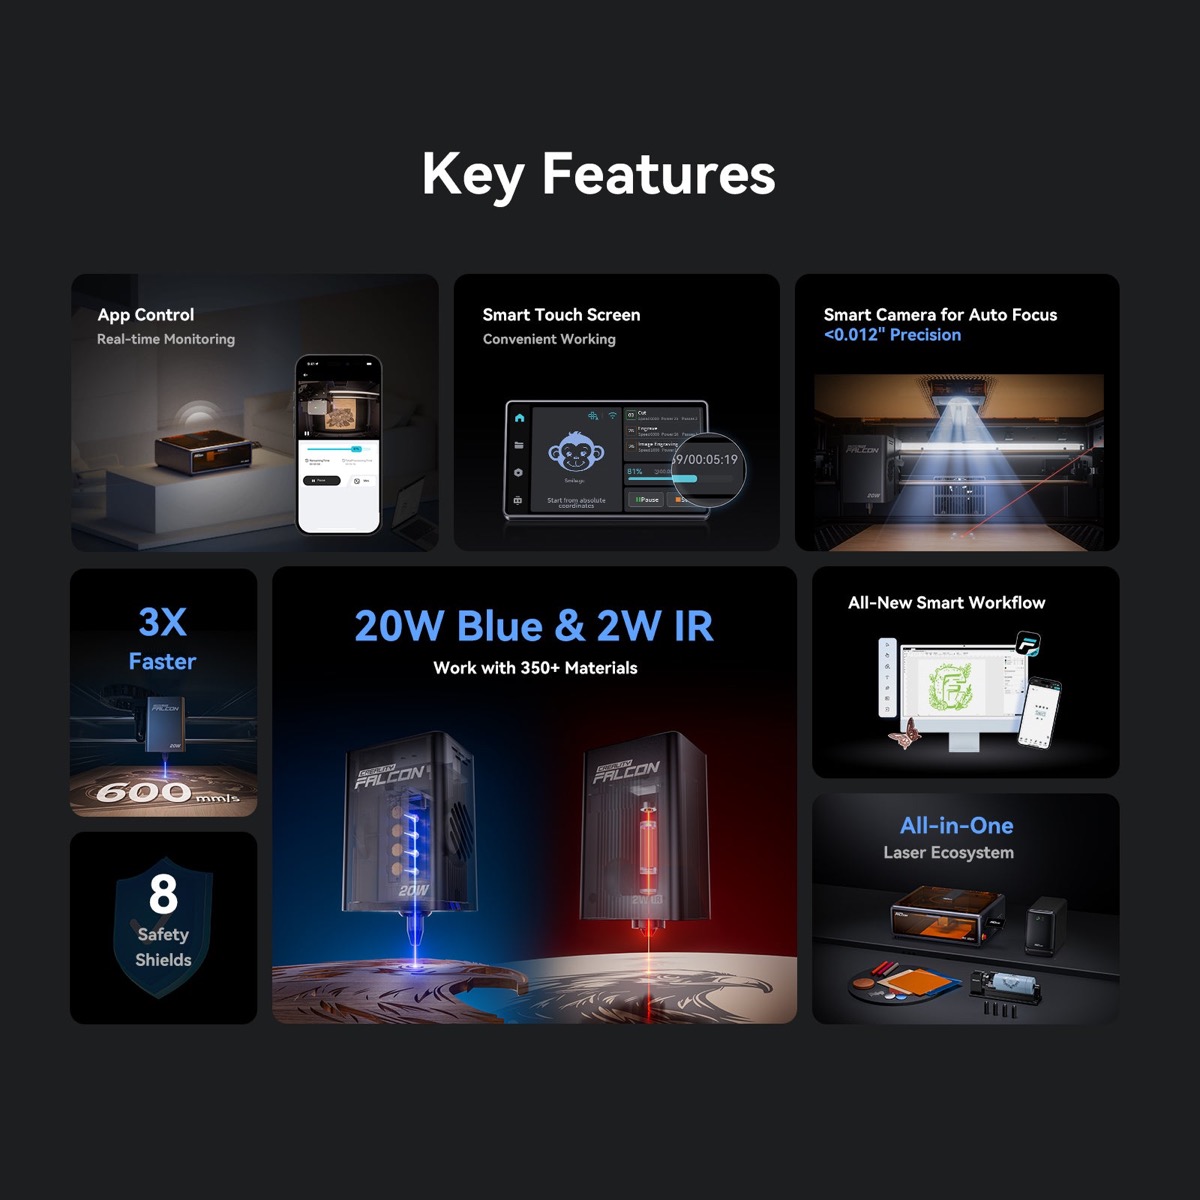
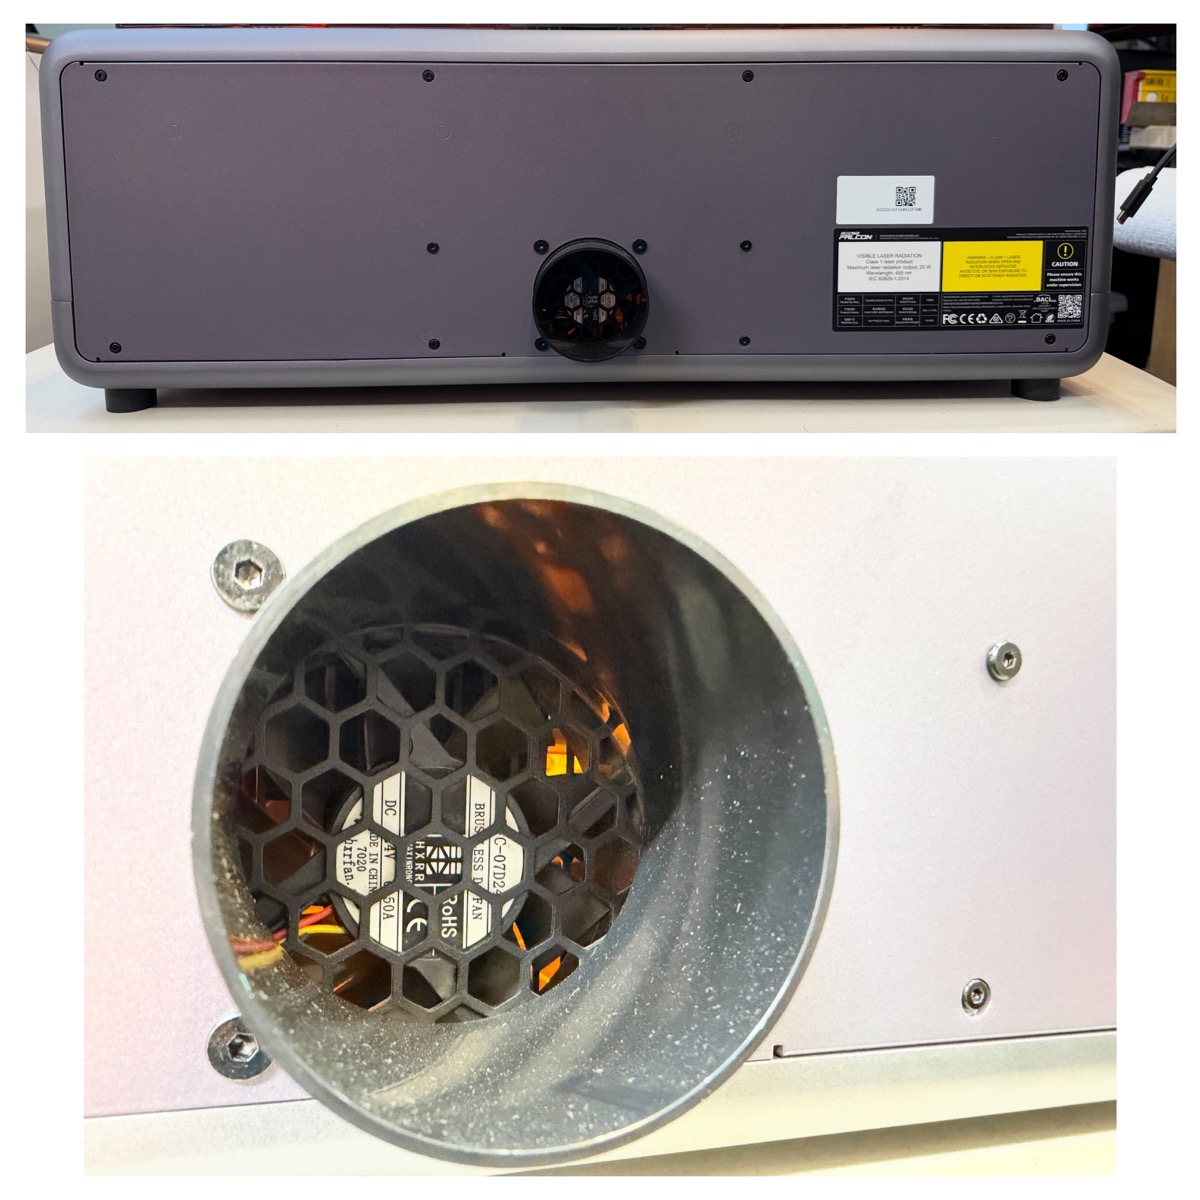
The Creality Falcon A1 Pro is a laser cutter and engraver featuring a 20W blue diode laser in an enclosed chassis. The included 20W blue diode laser is compatible with 300+ materials, including wood, opaque acrylic, coated metal, glass, etc. An optional 2W IR laser is suitable for precise engraving on metals and plastics.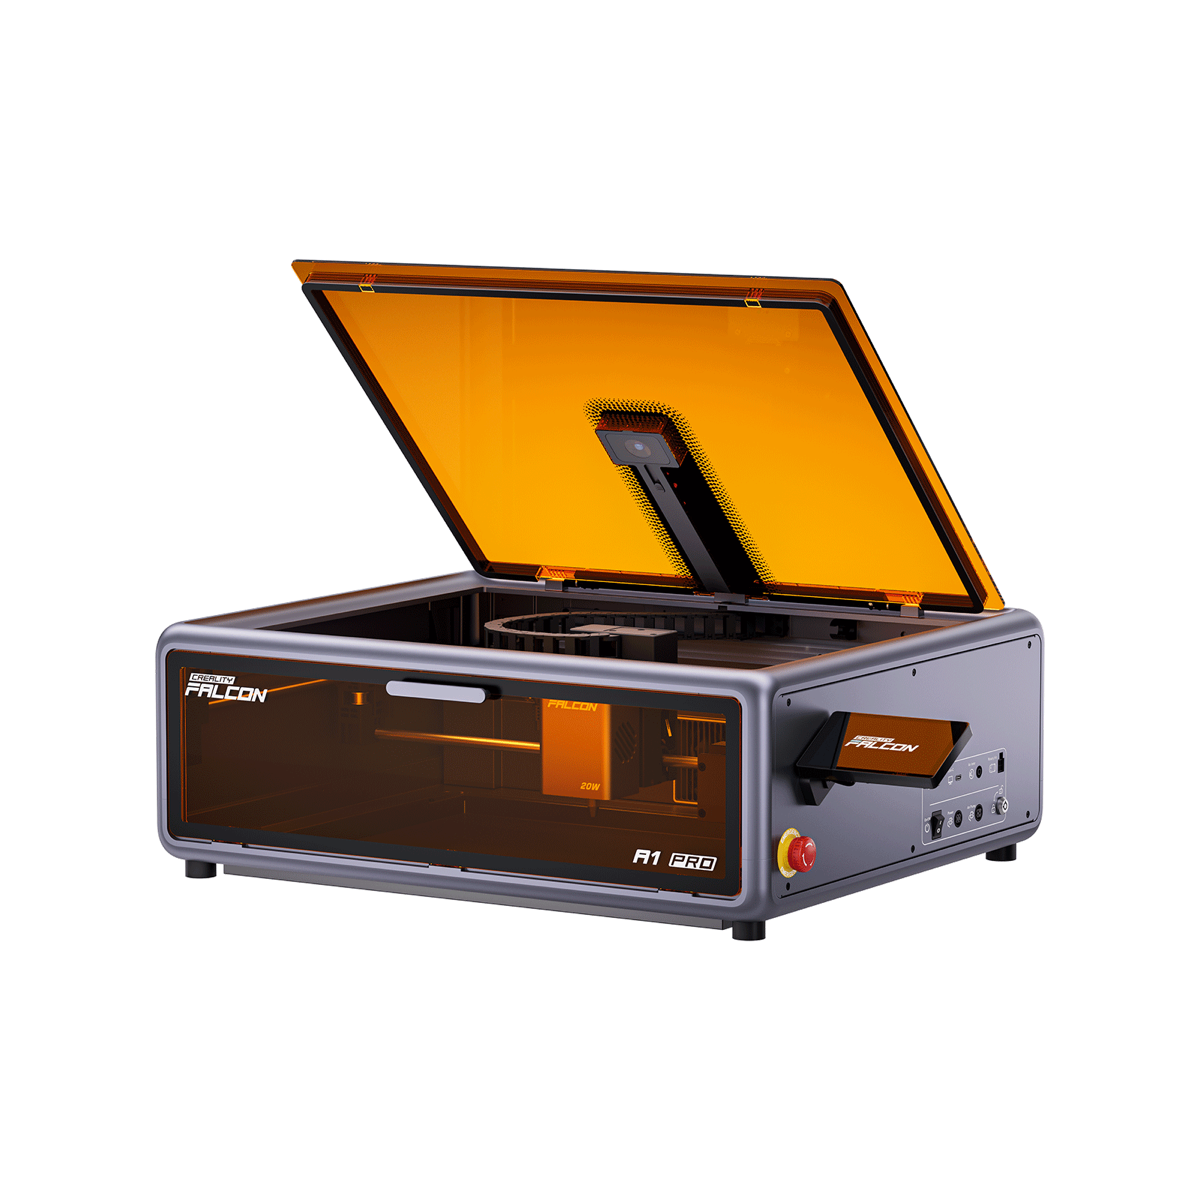
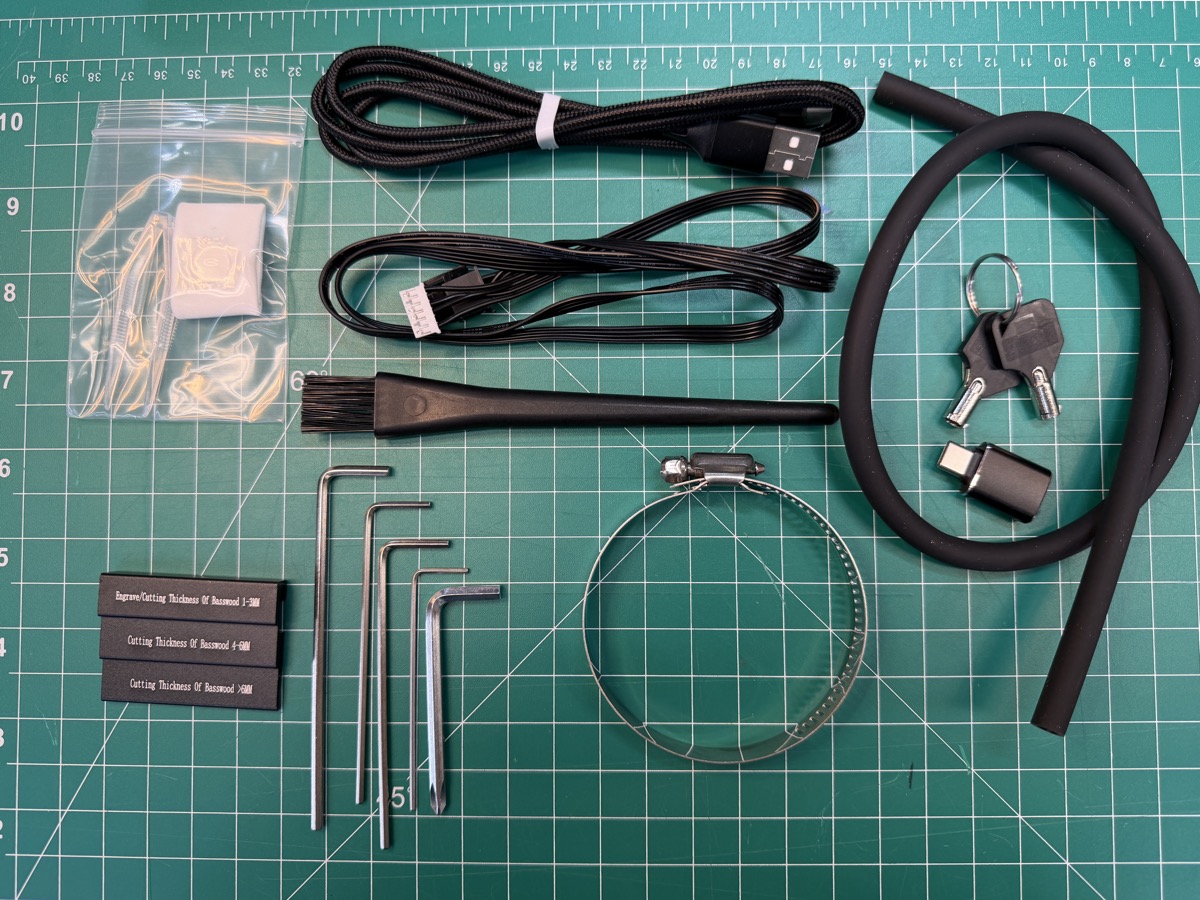
What’s included?
-
- Falcon A1 Pro
- Exhaust pipe
- Hose clamp
- Key
- Silicone tube
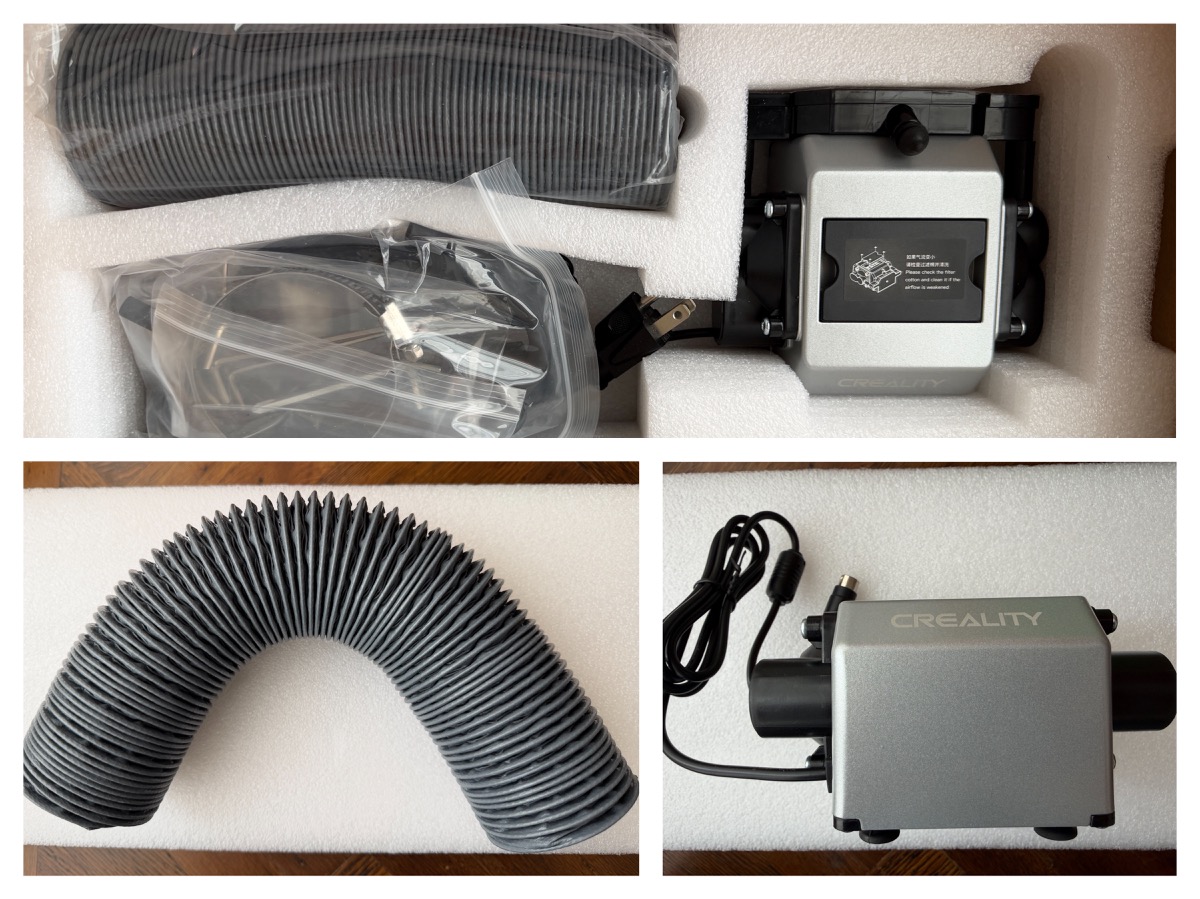
- Air assist pump
- Power supply
- 1 basswood sheet sample (300 * 300 * 3mm)
- Multi-level fixed focus block
- Test calibration card
- Rotary kit connection cable (rotary kit sold separately)
- USB Type A to Type C cable and adapter
- Anti-static brush
- Tweezers
- Dust-free cloth
- Protective lens
Everything comes cleverly packed on the INSIDE of the engraver, which makes sense.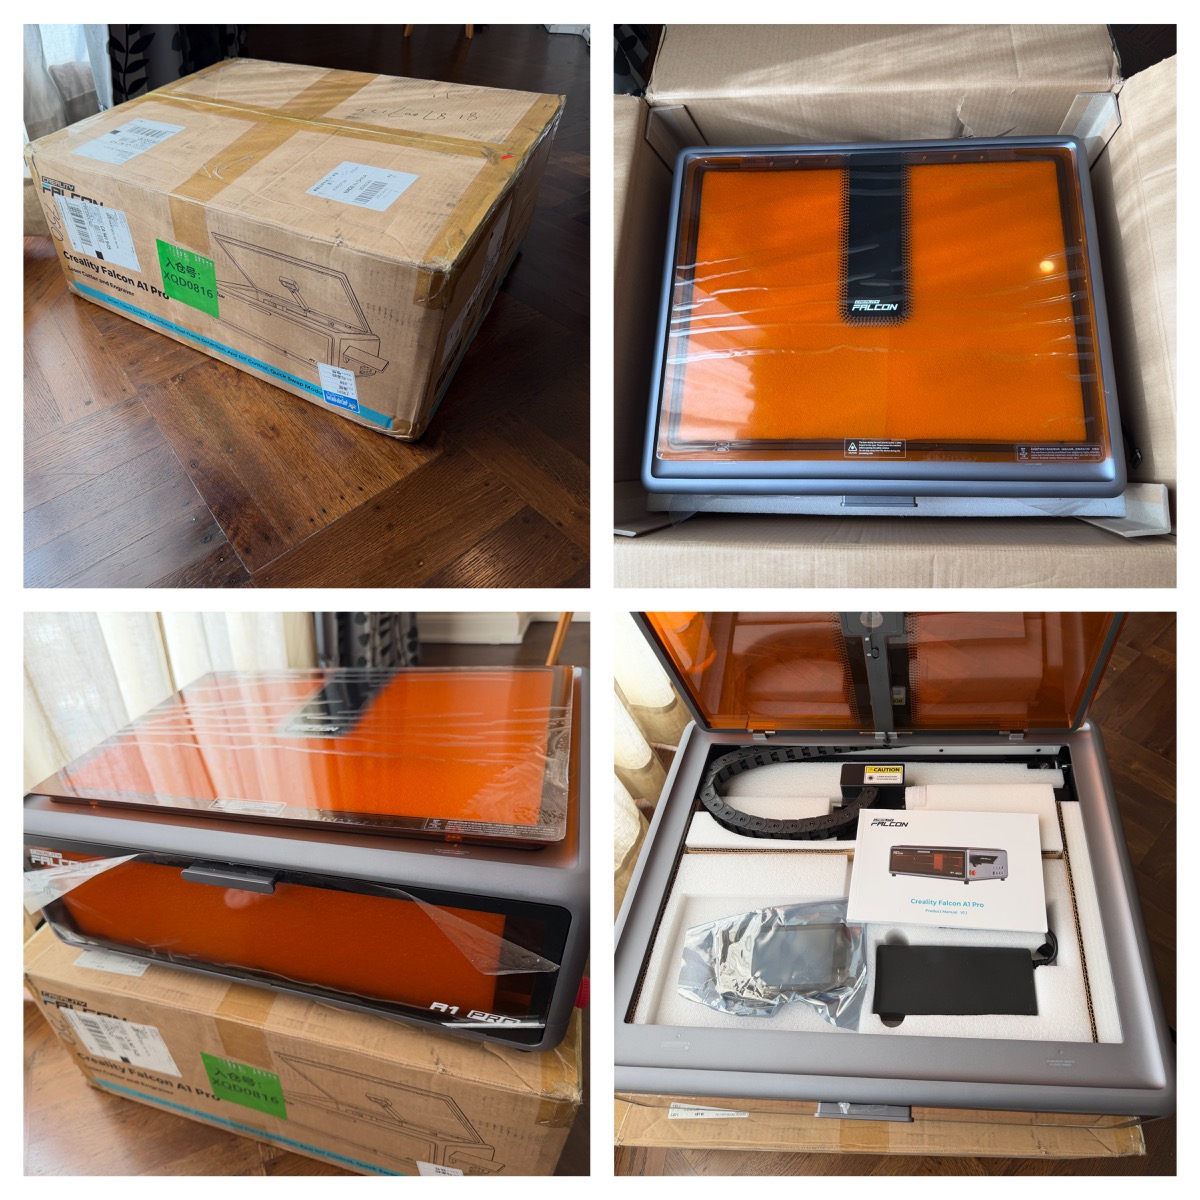
A variety of smaller components are packed in a separate bag.
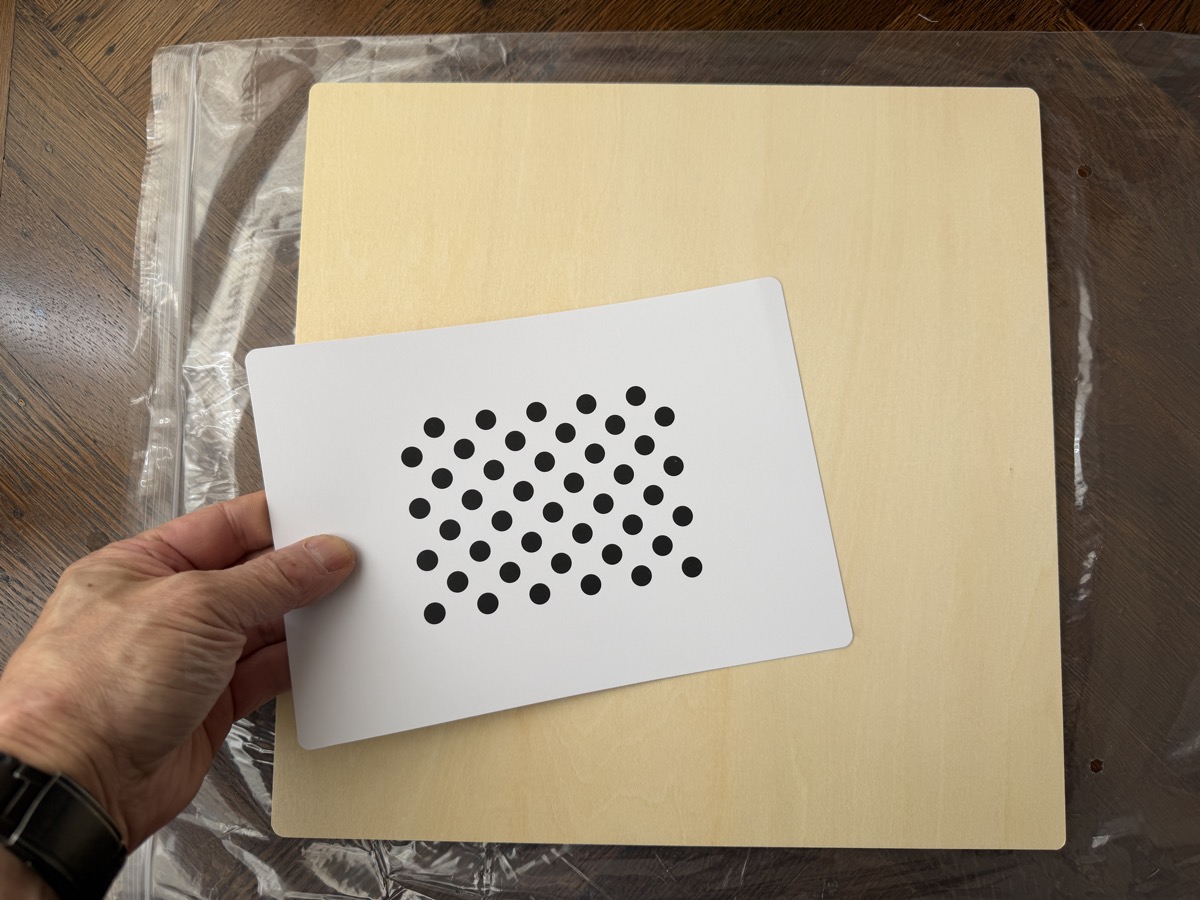
You also get one sample of Basswood (300mm x 300mm x 3mm) and a calibration target card.
Tech specs
Optical Power: 20W
Dimensions: 567*468*211mm
Product size after screen installation: 685*468*211mm
Net Weight: 16.8KG
Input Voltage: 100-240V~ 50-60Hz
Output Voltage: DC 24V 7.5A
Operating Temperature: 5°C-35°C
Laser Engraving Software: Falcon Design Space, LightBurn, LaserGRBL
Supported File Formats: Jpeg, jpg, png, bmp, svg, dxf, etc.
Supported Materials: Cardboard, wood, bamboo, rubber, leather, fabric, acrylic, plastic, etc.
Engraving Area: 268*358mm
Laser WaveLength: 455±5nm
Safety Class: Class 1 (FDA)
Operating System: Windows/MacOS
FalconDesignSpace App: iOS and Android
Design and features
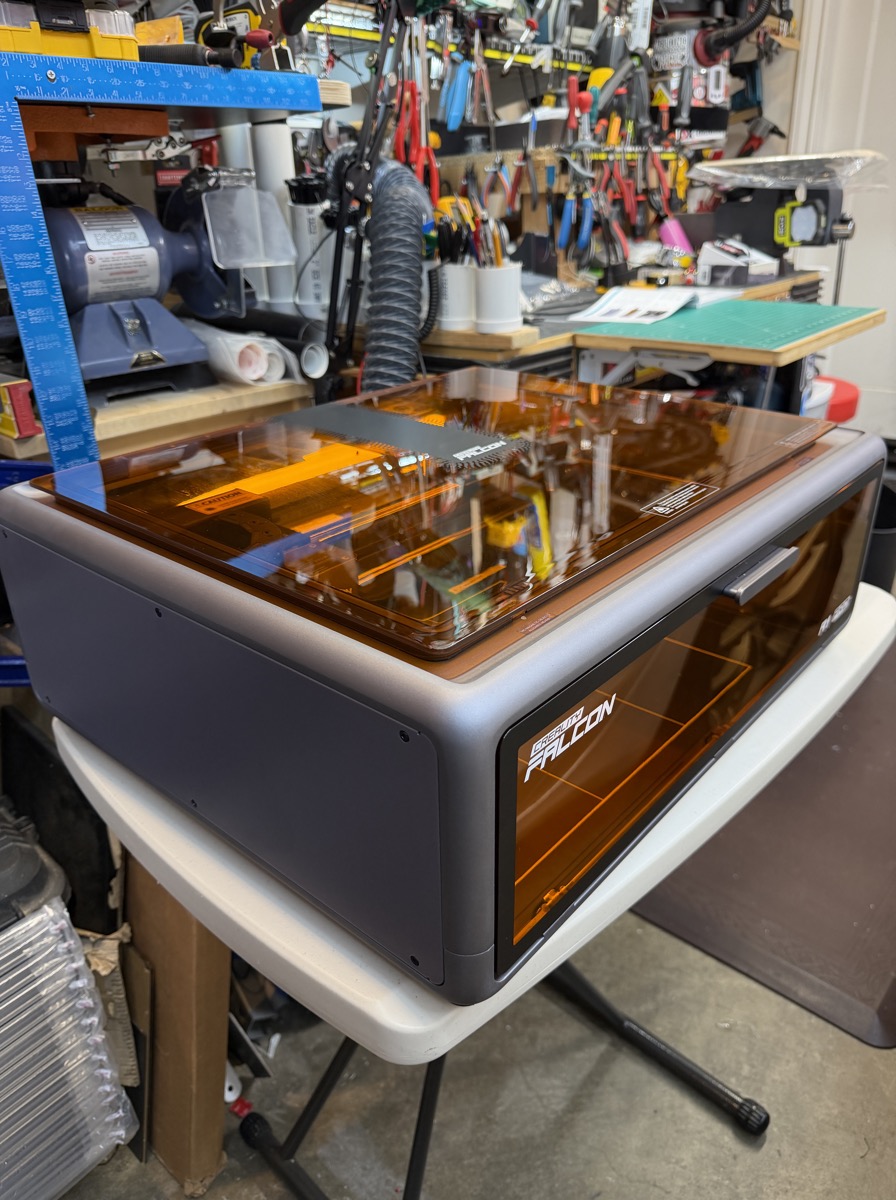
Lift the protective orange lid and you can see the belt-driven gantry where the laser moves around, hovering over a 268*358mm engraving area.
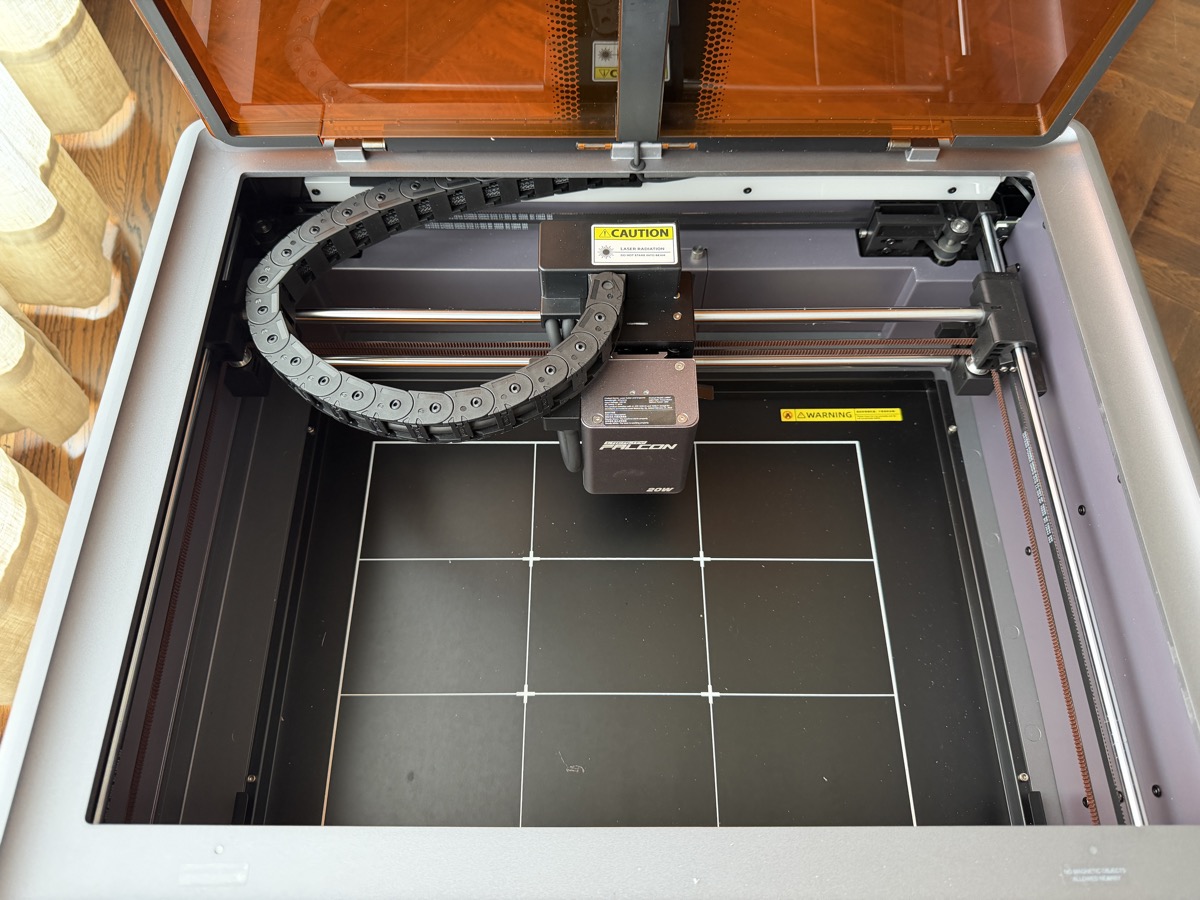
Here’s a better look of the internals. Notice the toothed belts.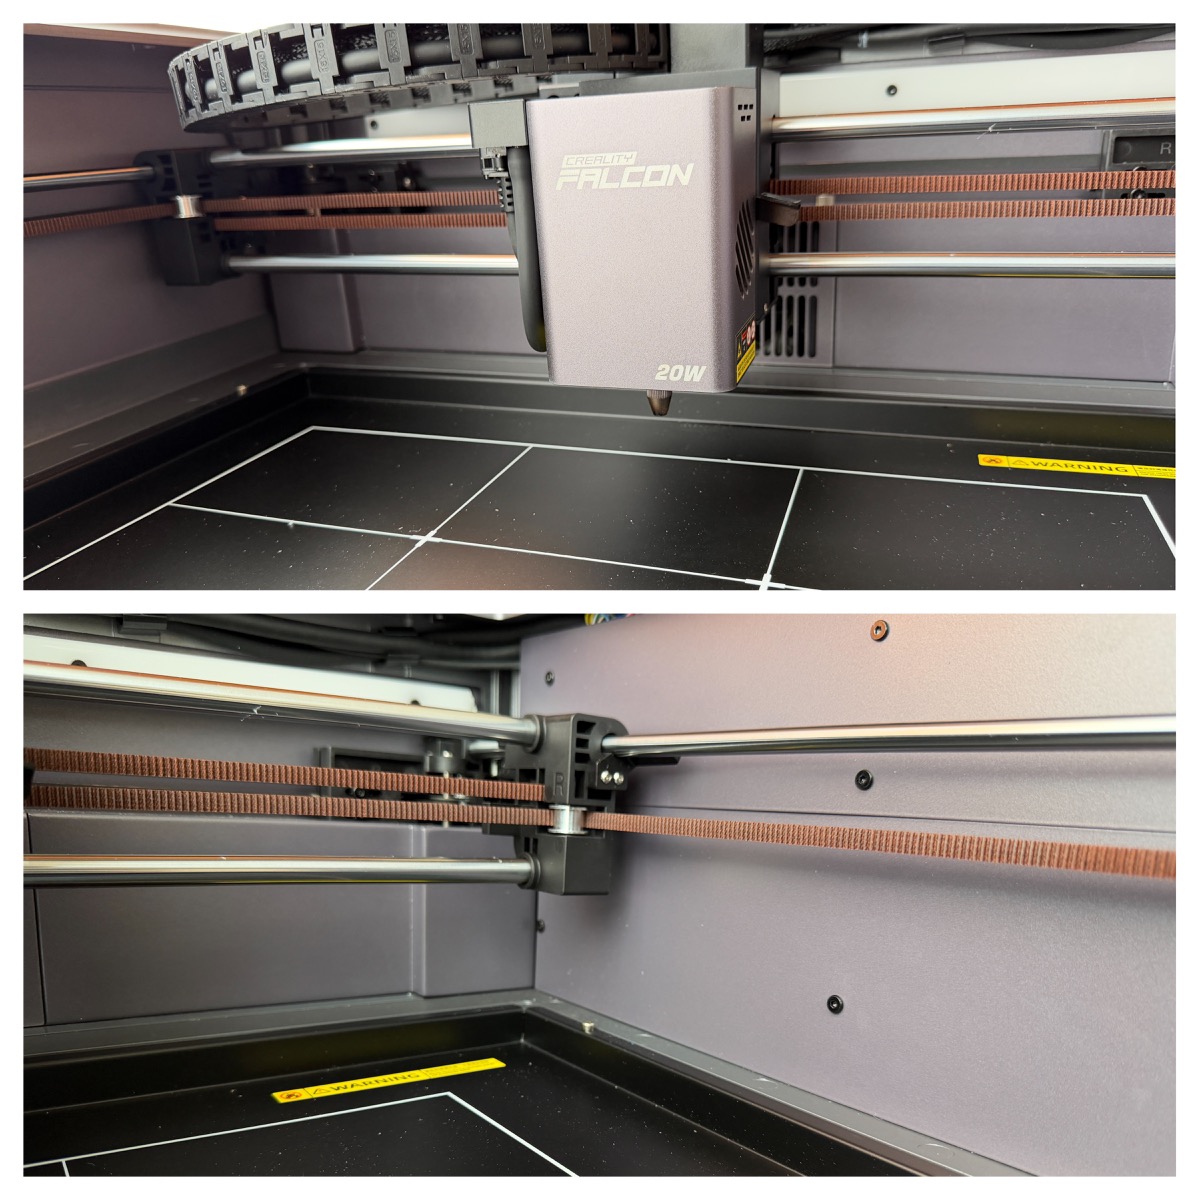
There’s an illuminated light bar on the back, which keeps your project area nice and bright.
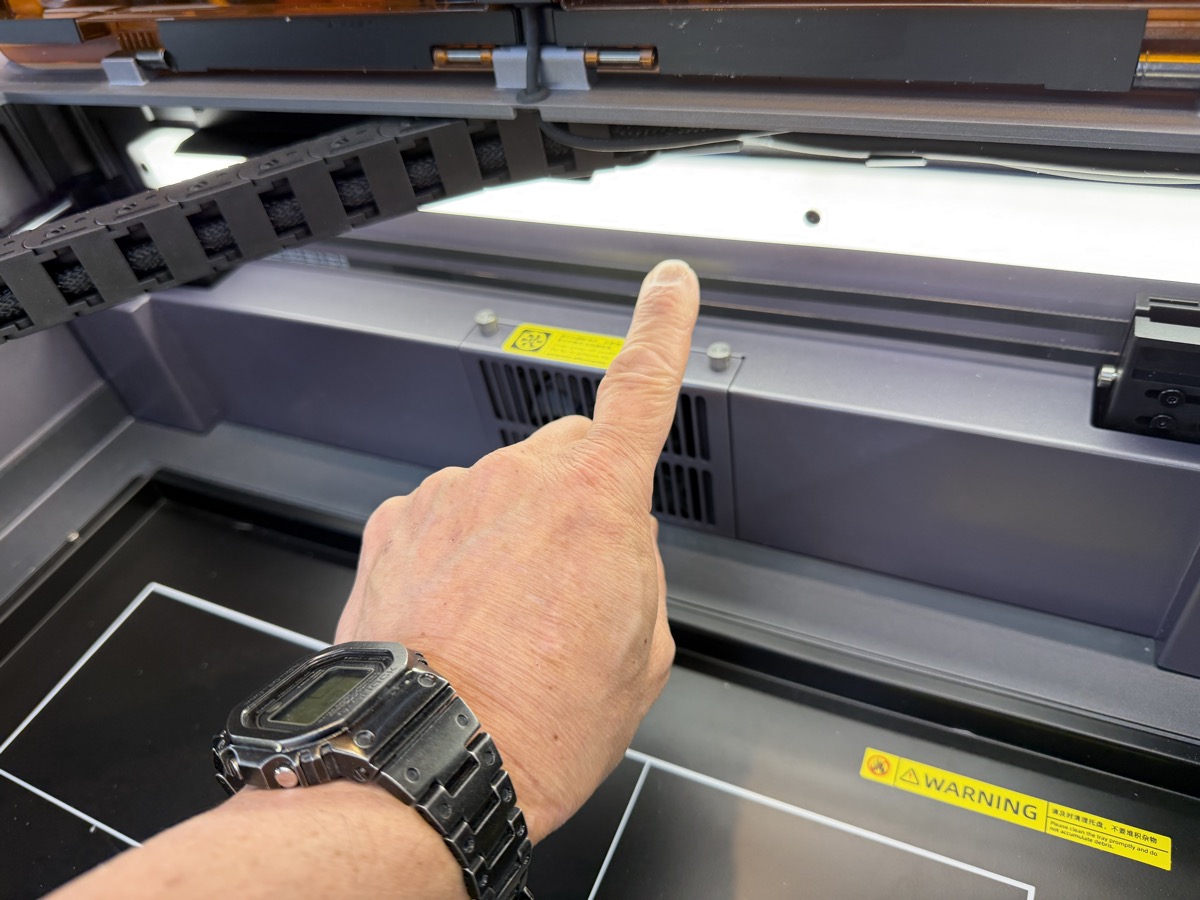
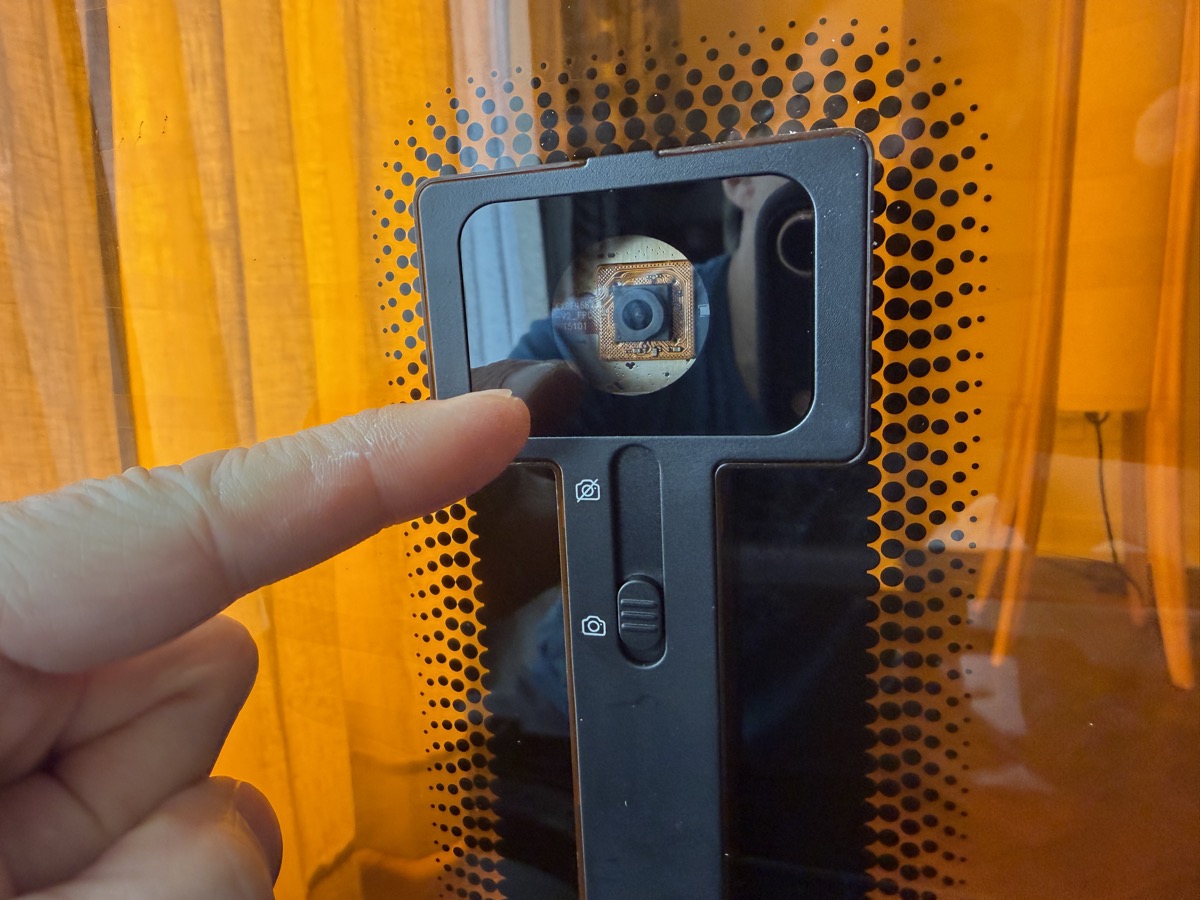
On the underside of the orange lid is a camera which lets the engraver “see”, which greatly simplifies the calibration process.
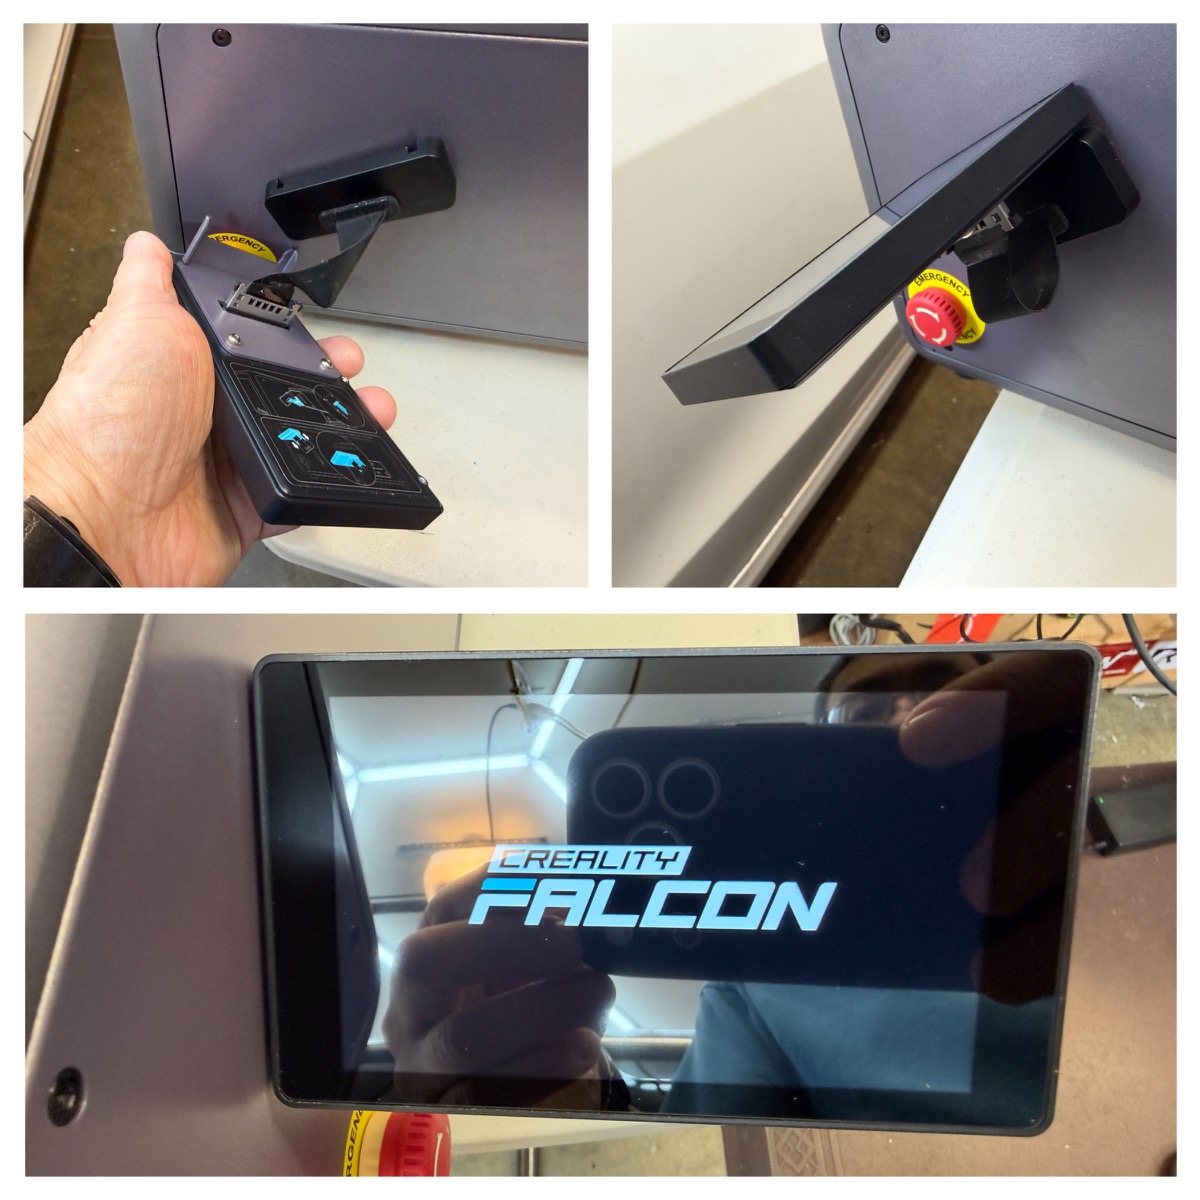
Nearly all of the connections are on the right side. They’re clearly labeled. The emergency stop button is on the left.
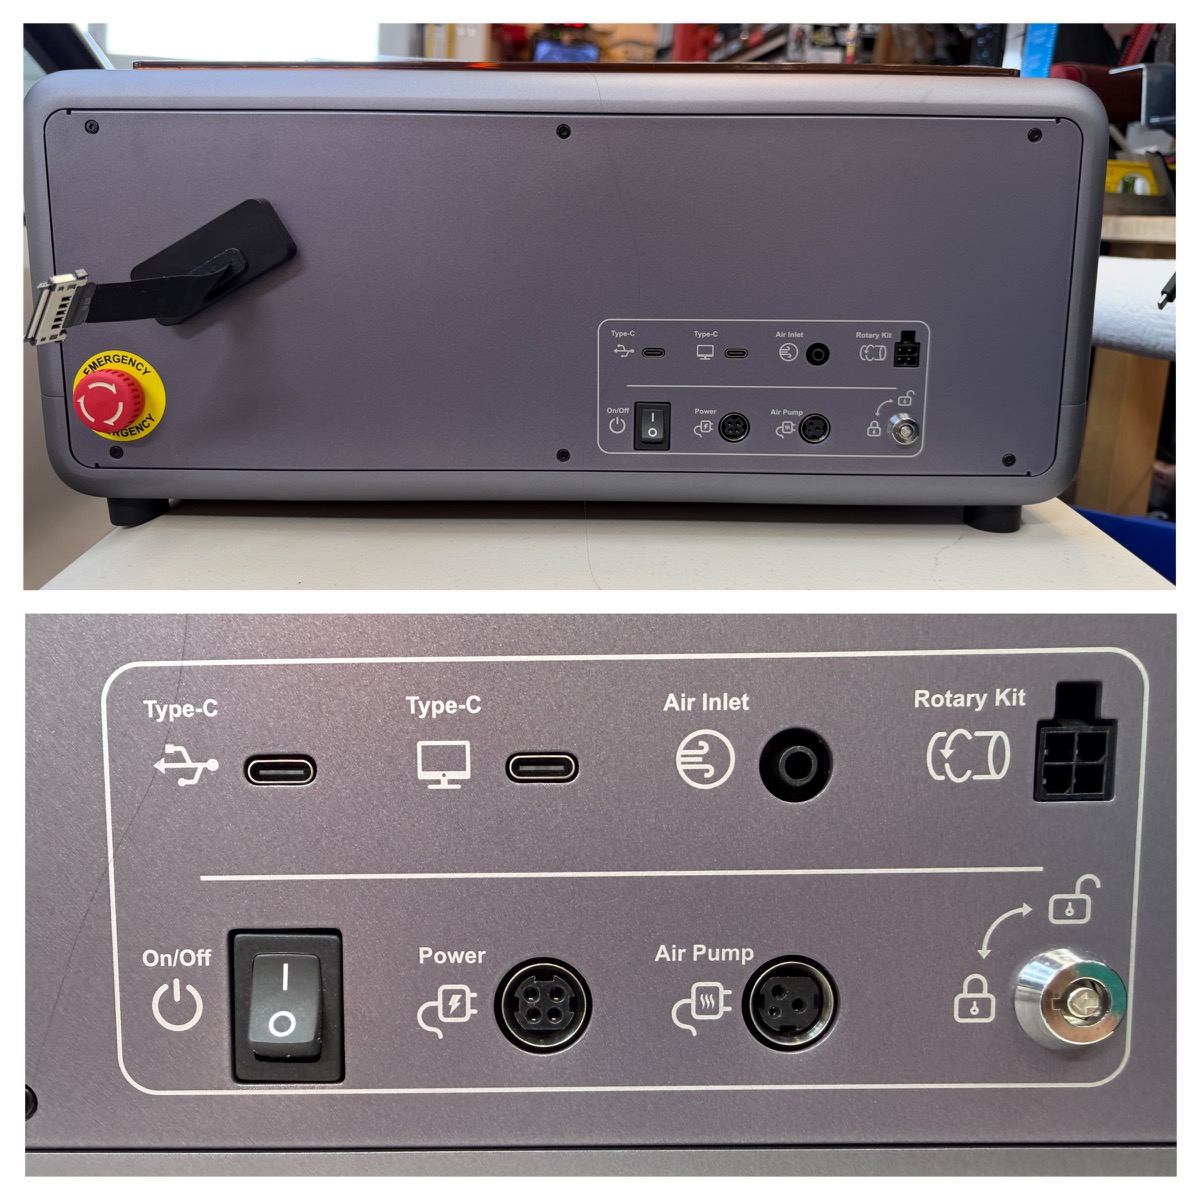
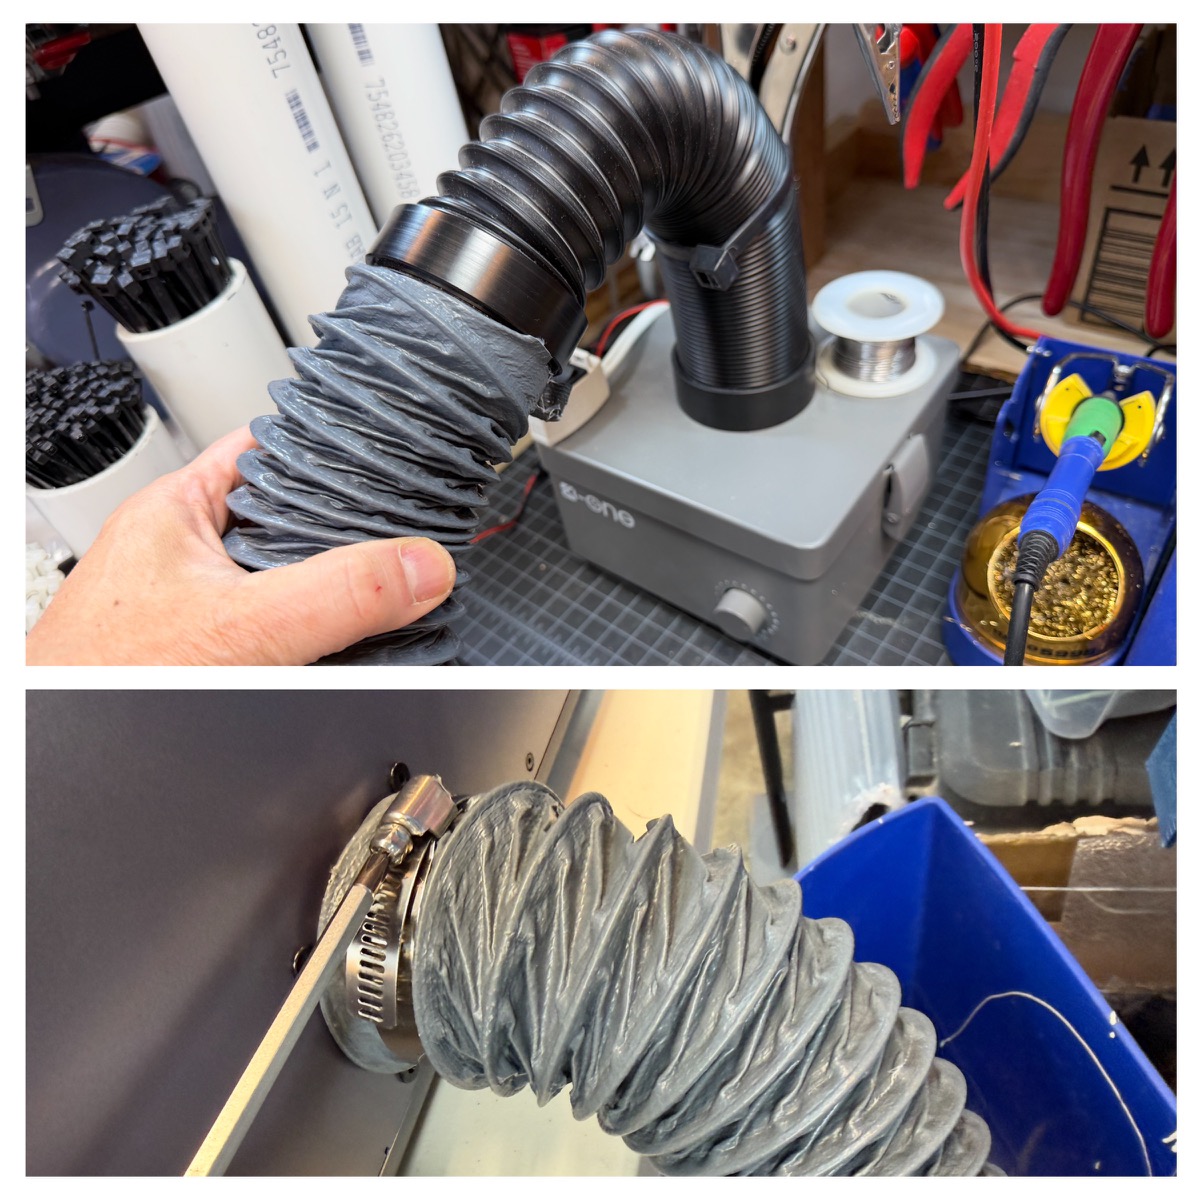
There’s a 2″ diameter exhaust port on the back side. There’s a small exhaust fan built in.
Assembly, Installation, Setup
There’s an LCD touch screen that stick out the side. A ribbon cable snaps into the back, and the entire assembly slides into place. The angle is fixed.
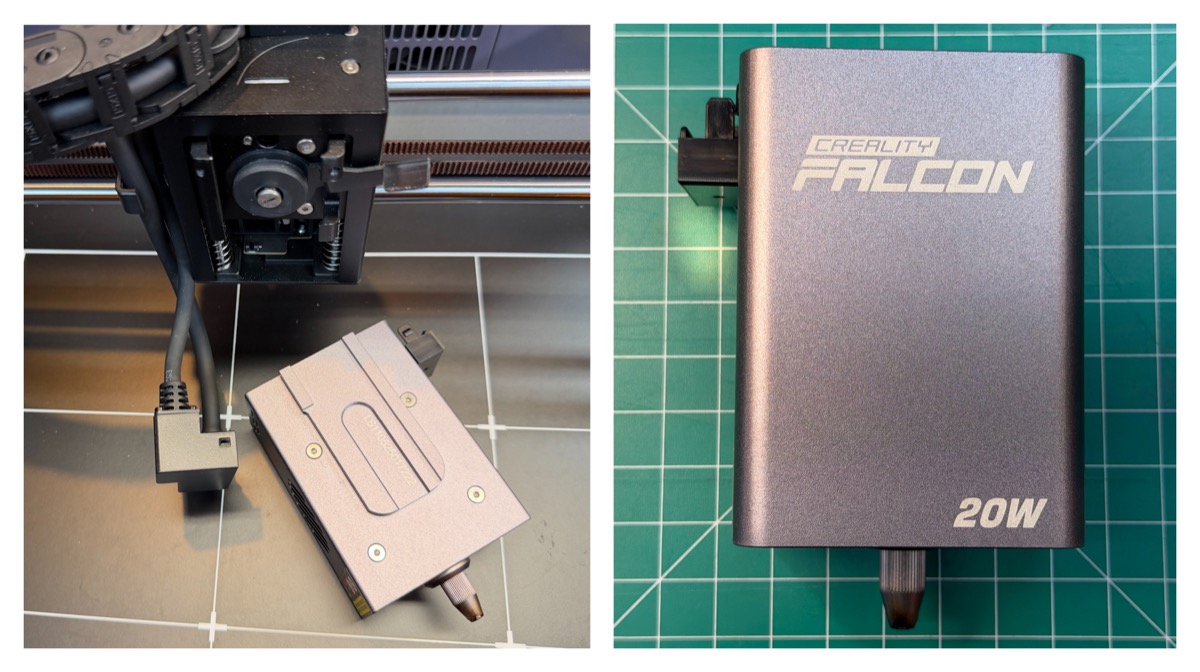
The 20W blue laser comes pre-mounted, but it is easily removable to swap out with the optional 2W IR laser.
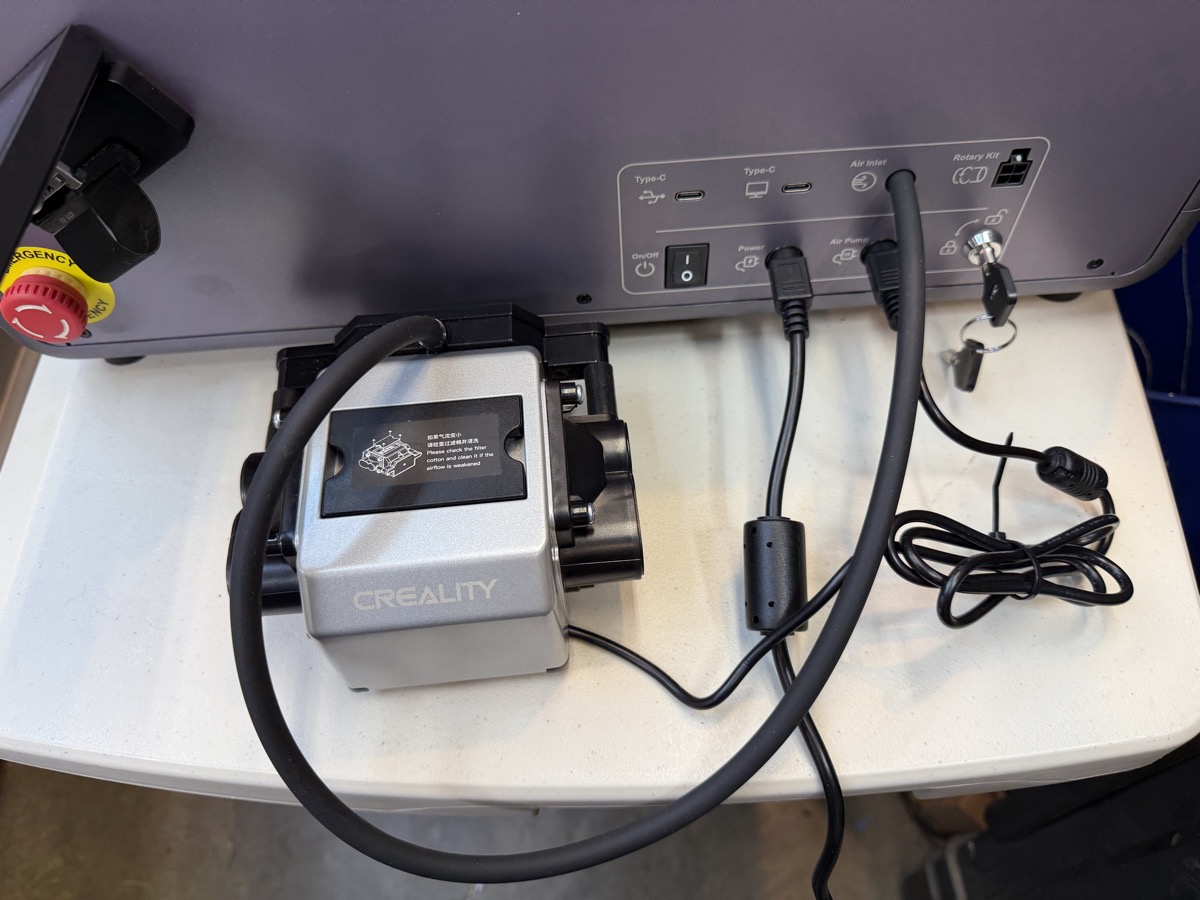
Creality packs an air-assist pump, which pushes air into the rig via a silicone hose. It only powers up during actual work. A pair of keys (provided) locks the machine out from unauthorized use.
The Falcon A1 Pro does not come with a fume extractor, but I have a soldering fume extractor with a compatible hose diameter. It should be noted that my fume extractor is VERY small, and it’s likely you will need something beefier.
The kit comes with a hose clamp to secure the hose to the outlet.
After connecting the engraver to your home wifi (2.4Ghz only), my iPhone connected quite easily.
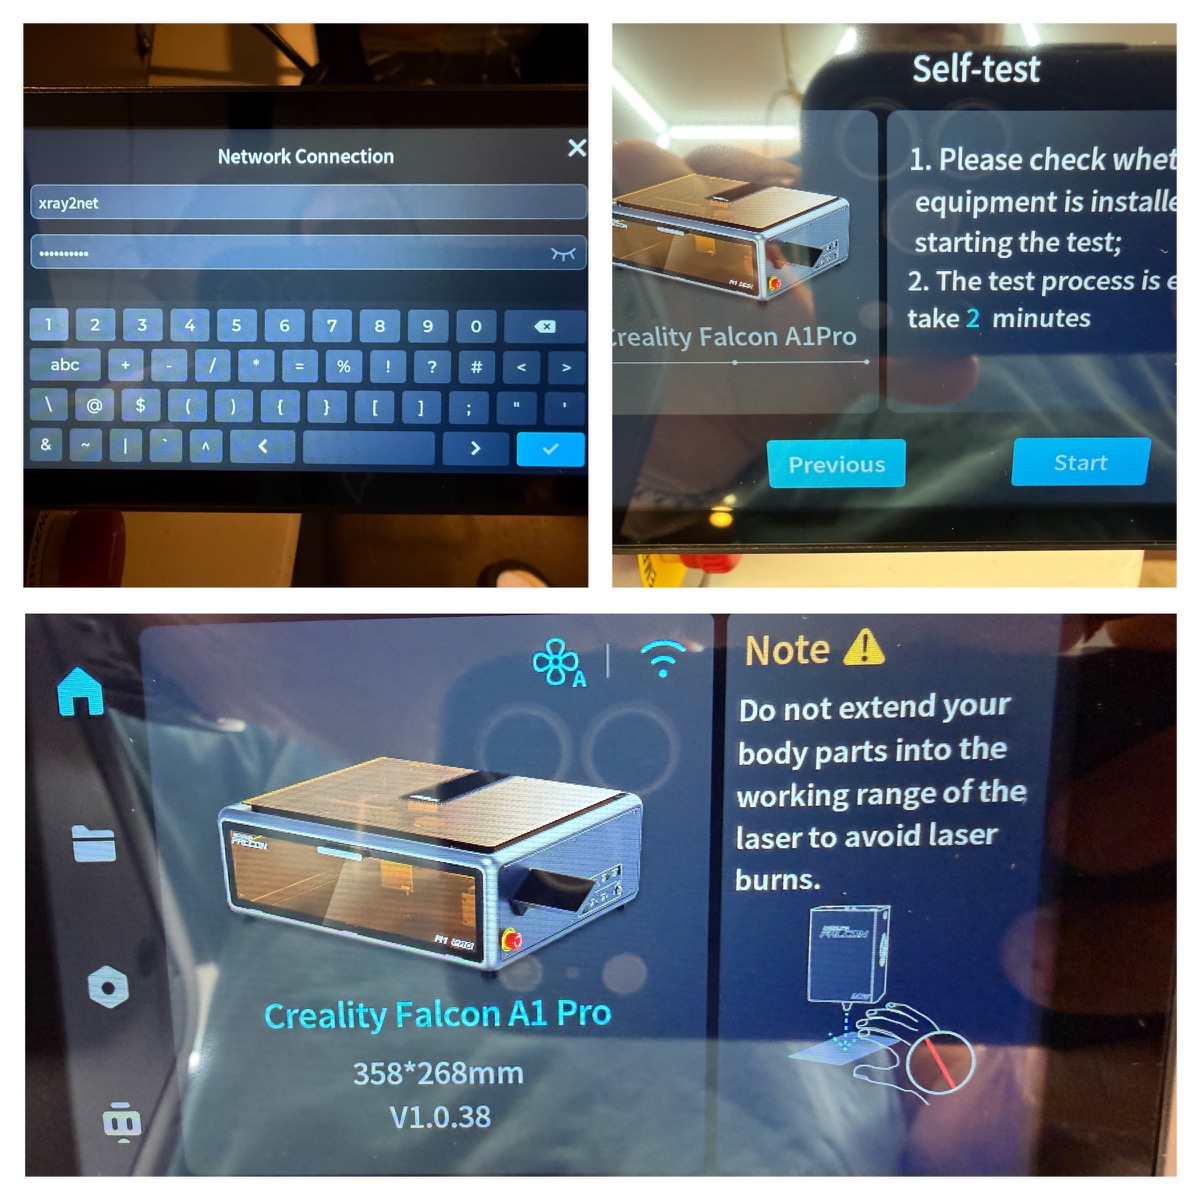
There’s an iOS and Android app called Falcon Design Space that lets you perform setup and download patterns.
Performance
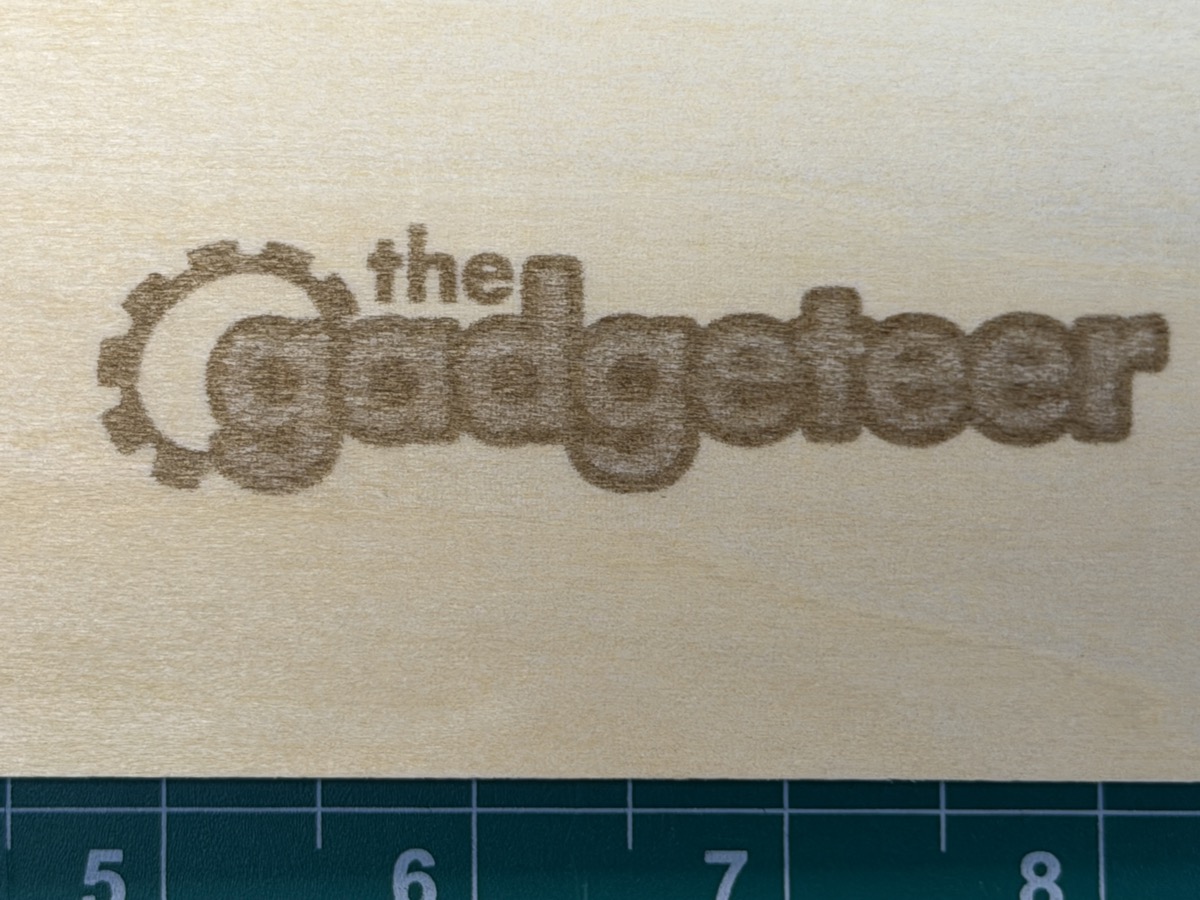
How far could I get without reading the instructions, just by trial and error with the iOS app? I loaded up the Gadgeteer logo and figured out how to send it to the engraver. I had no idea what the settings did, so I set it to just 20% output power. No sense blasting a hole through the center of the earth.
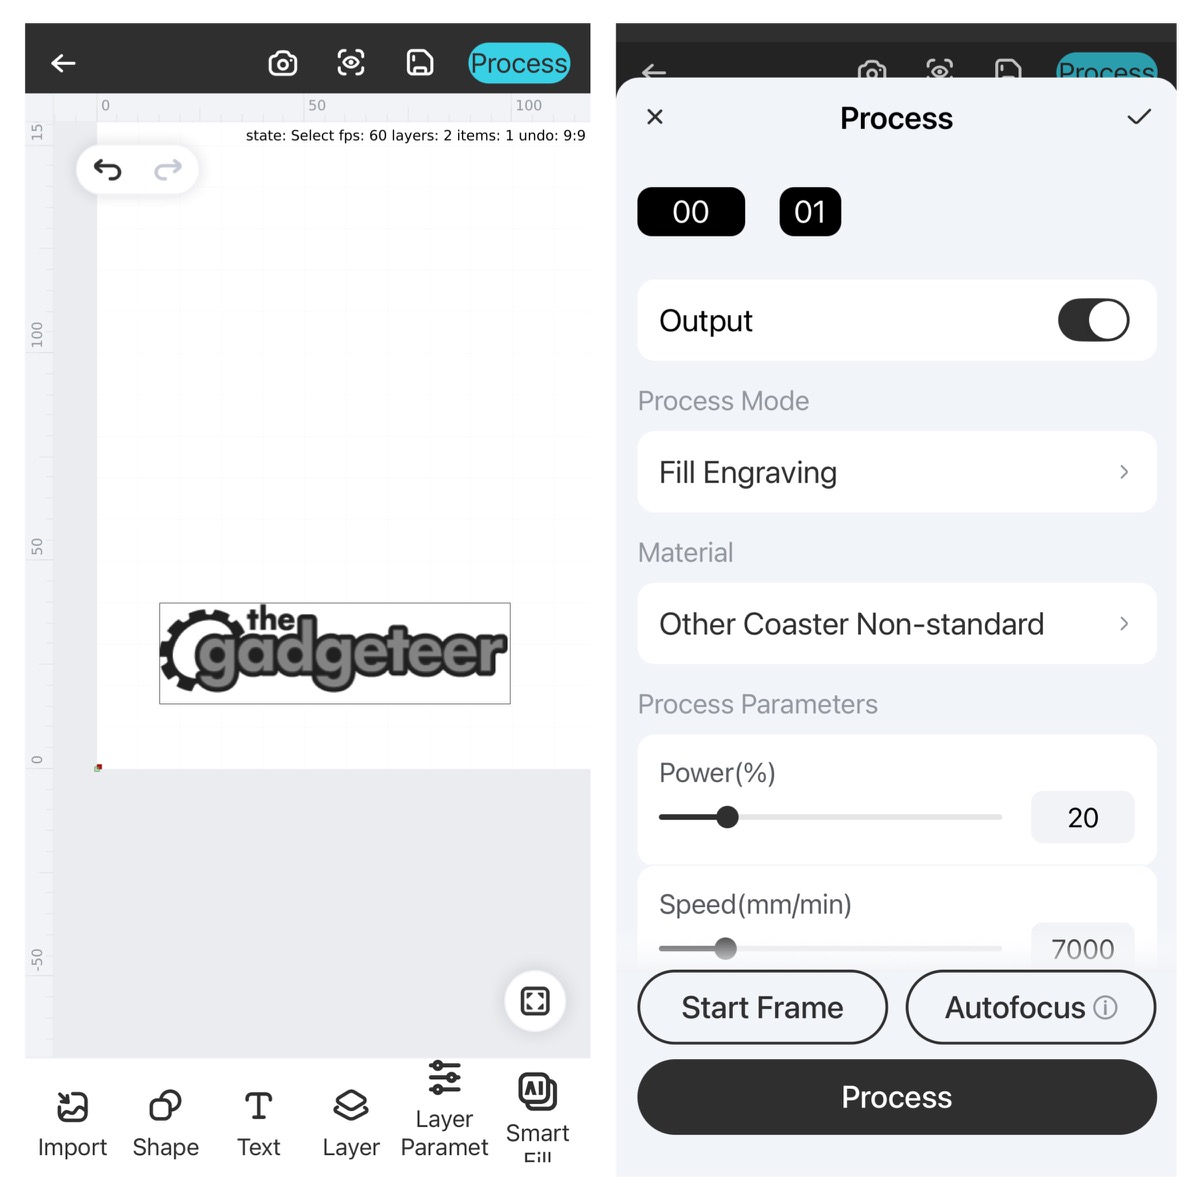
The attached LCD screen showed the pattern, and I was off to the races!

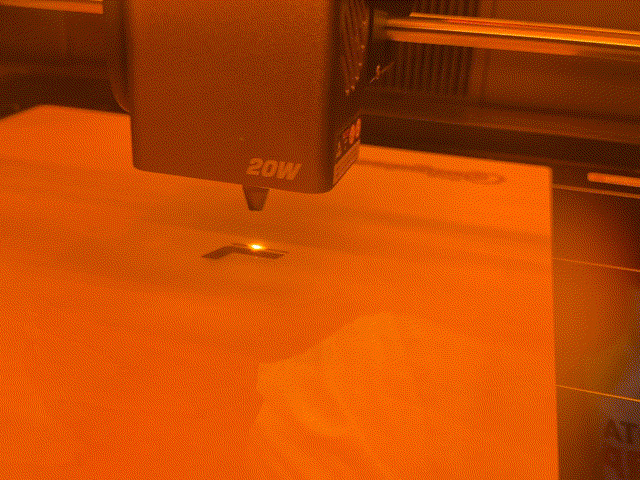
Because I am a laser engraver newbie, I just had to capture the laser at work.
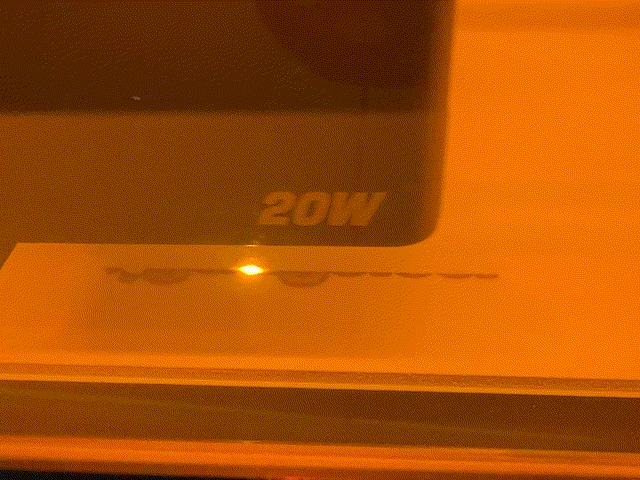
The result was… legible. A little light in the contrast. Considering I hadn’t picked up the instructions, not bad. I wonder what I could do if I read the instructions?
Falcon Design Space is also available for MacOS or Windows. Upon first glance, it looks a lot like the smartphone app
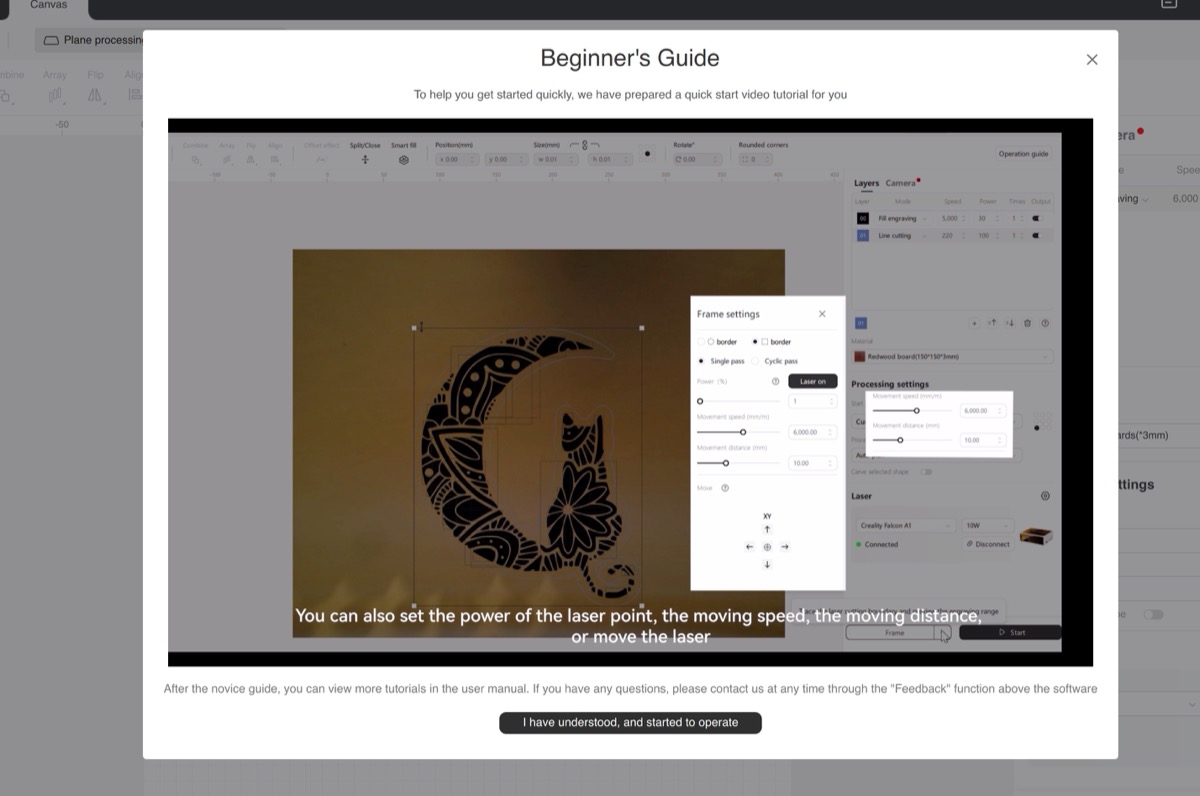
Fortunately for first timers, there’s a Beginner’s Guide that walks you through the steps. If you’re like me, this is a must-watch!
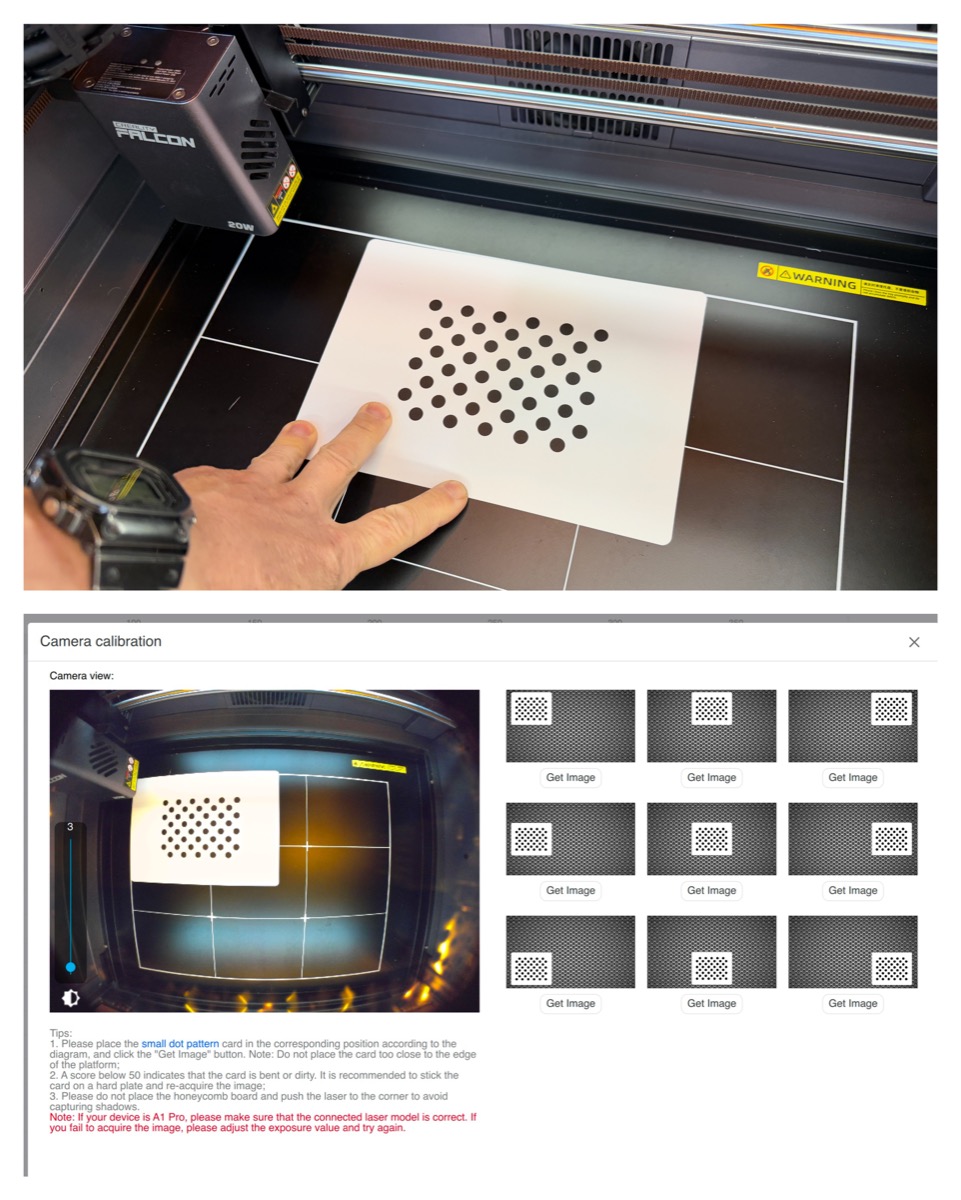
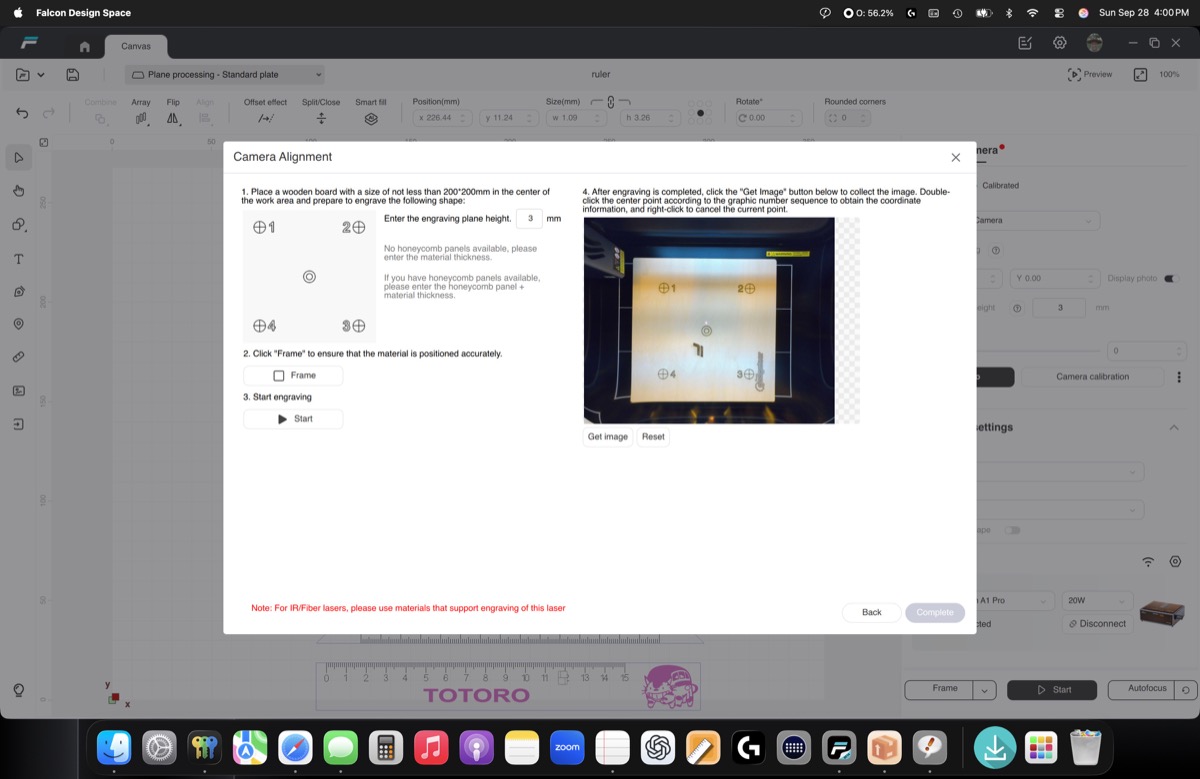
The beginner’s guide showed me how to perform a camera calibration and autofocus setup. It involves using the dotted test card and positioning it on the work area in nine different locations. The camera calibration window on the left is the actual view from the camera on the underside of the lid!
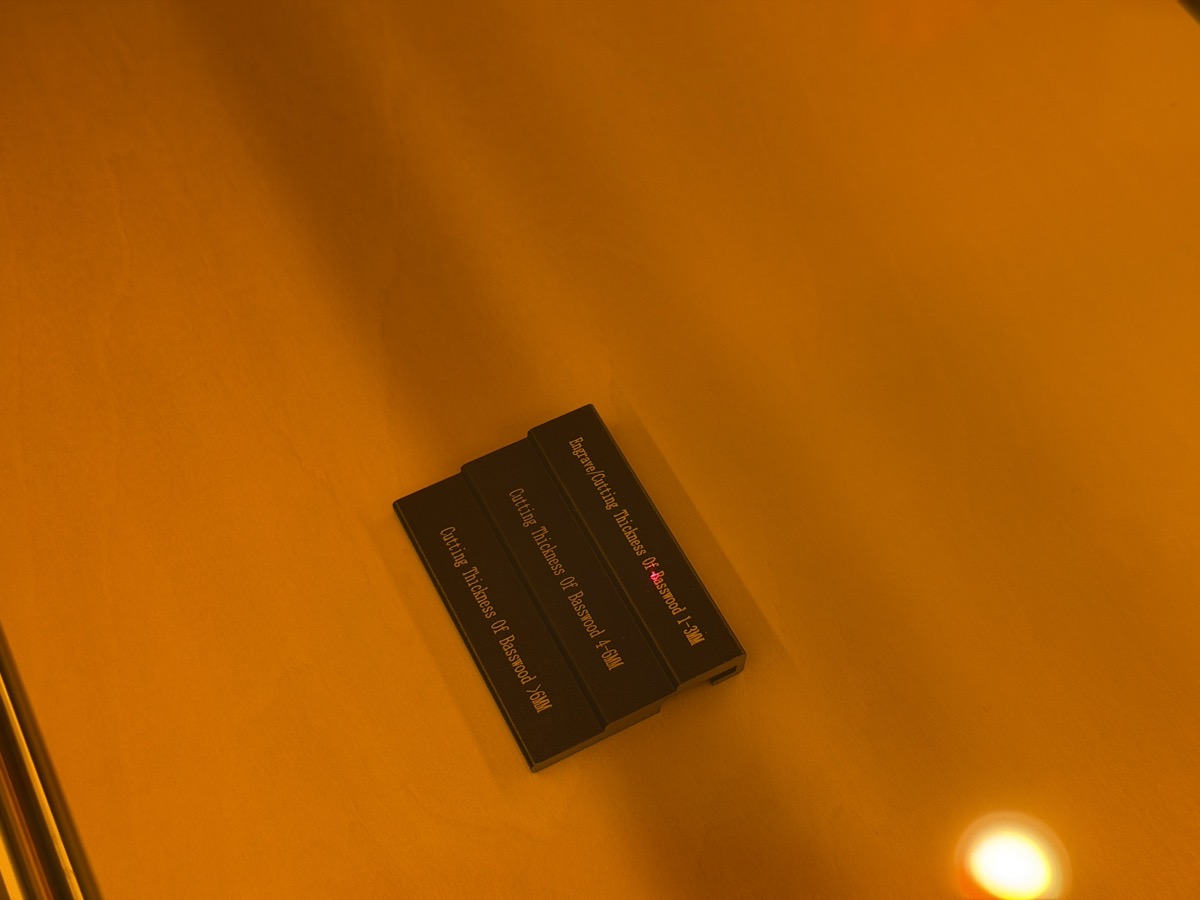
Instead of using a plunger-style pin on the engraving head, the Falcon A1 Pro uses a side-mounted laser. An included metal test jig helps calibrate the thickness.
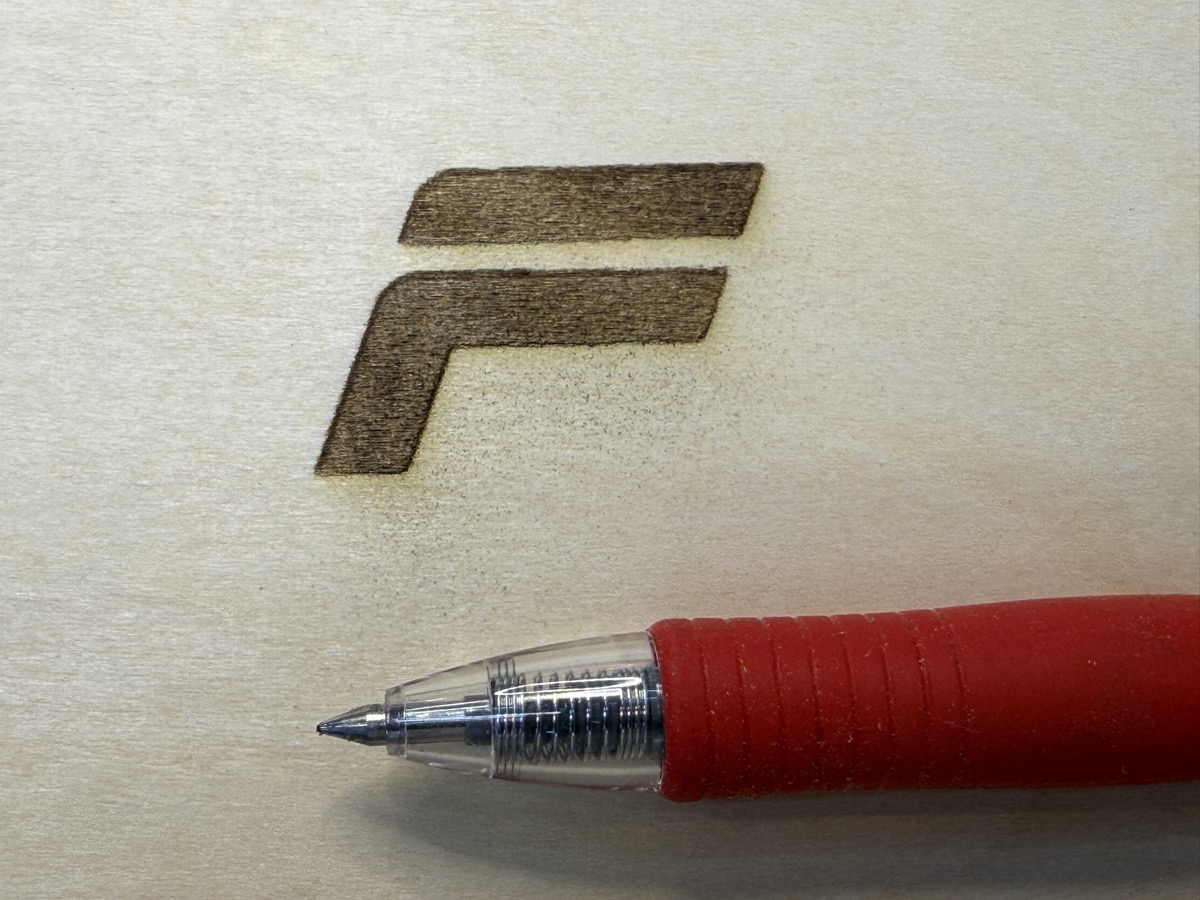
When all the checks are complete, the engraver spits out a test by engraving the Falcon “F” logo.
Definitely much clearer and sharper vs. my first attempt!
It doesn’t stop there. A camera alignment step will engrave a series of five circles. After engraving, you “connect the dots” from 1 through 4 on Falcon Design Space to dial things in. Pretty neat!
Now I wanted to see if I could actually “cut” something out of the sheet of wood. I selected this nifty Totoro triangle and ruler pattern, sat back, and let’er rip!
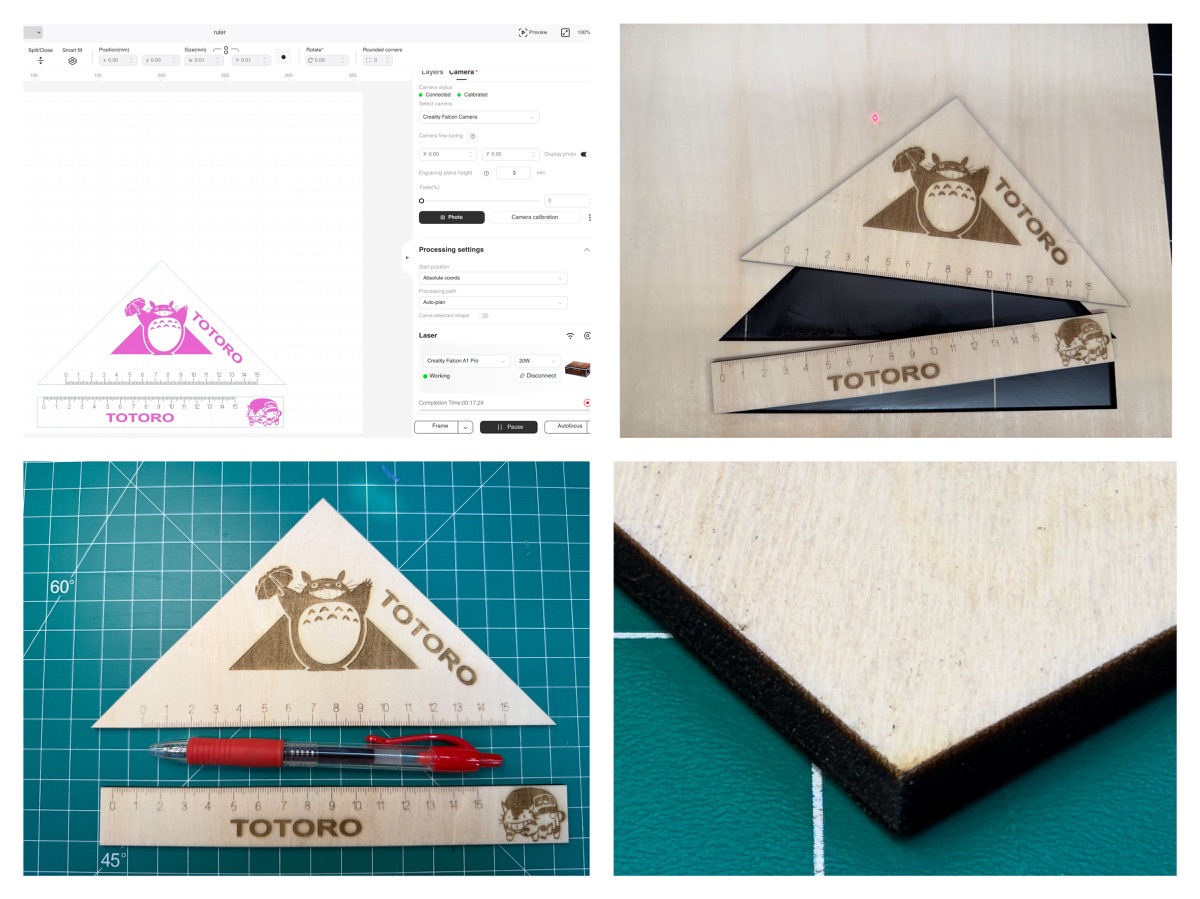
Obviously, someone smarter than me figured out the parameters to get a nice clean cut and legible markings. The cut edges are nice and crisp.
Final thoughts
This is a whole new chapter of my DIY abilities. I wonder what I could make next? With over 300 compatible materials to choose from, the Creality Falcon A1 Pro 20W Laser Engraver and Cutter has earned a place in my garage workspace.
What I like about the Creality Falcon A1 Pro 20W Laser Engraver and Cutter
- Self-contained, all-in-one construction.
- Solidly built.
- Easy enough for a complete beginner.
What needs to be improved?
- I kind of wish it came with a suitable, matching fume extractor, but that would have driven the cost up.
- Read the darn instructions!
Price: $1099 MSRP
Where to buy: Creality Store and Amazon
Source: The sample of this product was provided for free by Creality. Creality did not have a final say on the review and did not preview the review before it was published.
Check out these other reviews!
- OMTech Polar Lite 55W Desktop CO2 Laser Engraver and Cutter review
- WeCreat Lumos Color Laser Engraver review – The magic of color chemistry

HP 14 Laptop, Intel Celeron N4020, 4 GB RAM, 64 GB Storage, 14-inch Micro-edge HD Display, Windows 11 Home, Thin & Portable, 4K Graphics, One Year of Microsoft 365 (14-dq0040nr, Snowflake White)
(as of April 12, 2026 11:30 GMT -05:00 - More infoProduct prices and availability are accurate as of the date/time indicated and are subject to change. Any price and availability information displayed on [relevant Amazon Site(s), as applicable] at the time of purchase will apply to the purchase of this product.)