REVIEW – Dash cams are a dime a dozen. There are hundreds of them out there for your consideration. Most do an adequate job, so how does a dash cam make itself stand out among the crowd? 70mai (pronounced like 70-my) just introduced its new flagship T800 dash cam. So what? What makes it different? It turns out that it is a lot. Read on, road warriors!
⬇︎ Jump to summary (pros/cons)
Price: $399
Where to buy: 70mai ($339 as of this writing); Amazon
What is it?
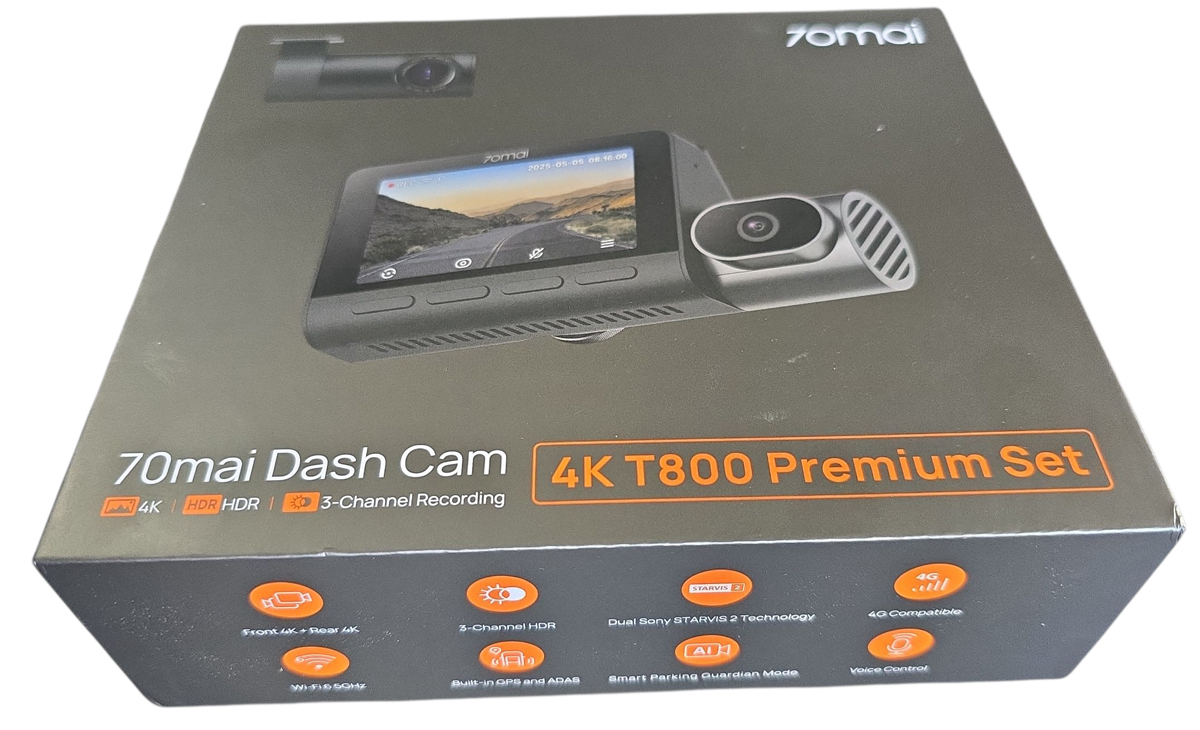
The 70mai 4K T800 dash cam is the world’s first three-channel dash cam that records in stunning 4K 30FPS on both the front and rear cameras. It tosses in an interior camera in full high definition (FHD) for good measure. It has a full-color 3″ display, three cameras, night vision on the interior camera, and optional 4G connectivity with constant power and parking surveillance.
What’s included?
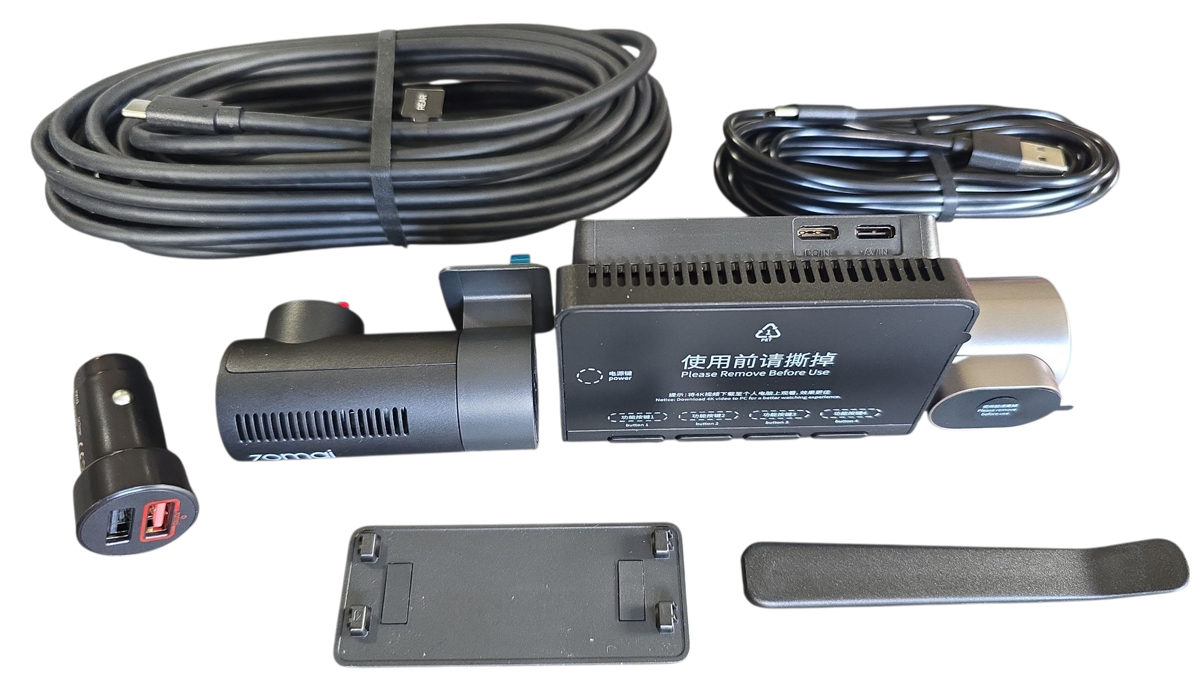
- Long rear camera cable with USB-C connections
- Shorter main unit cable, USB-A/USB-C
- Cigarette lighter USB-A power adapter
- Rear camera with rotating lens and 3M adhesive pad installed
- Main unit with front camera on a slide mount, rotating interior camera, and display screen
- Main unit mount plate with 3M adhesive pad installed
- Trim stick tool for cable routing
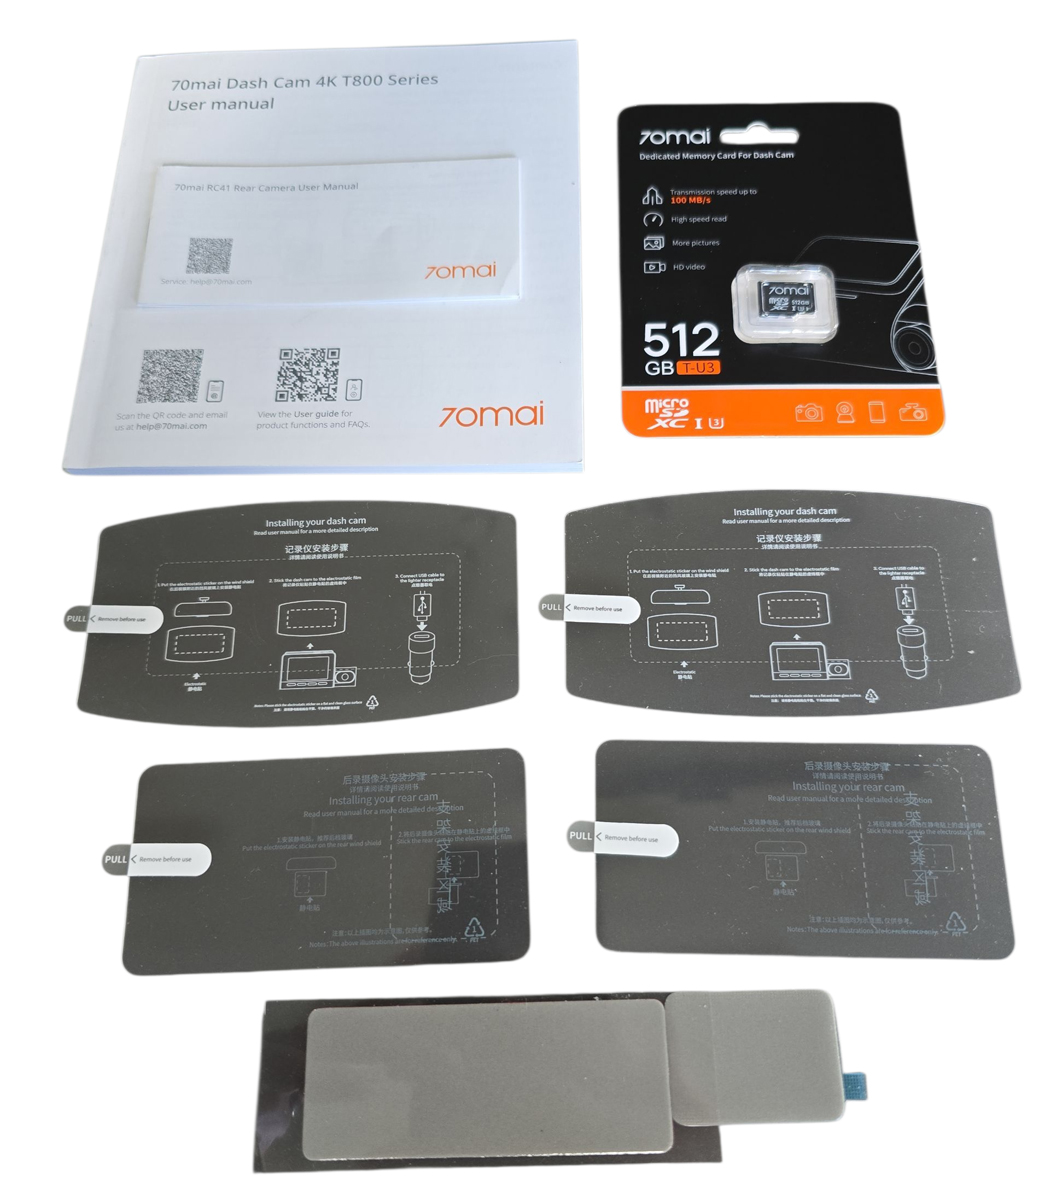
- Main manual
- Rear camera manual
- Electrostatic front unit mount stickers (2)
- Electrostatic rear camera mount stickers (2)
- Spare front and rear 3M adhesive pads
Optional 4G hardwired connection kit
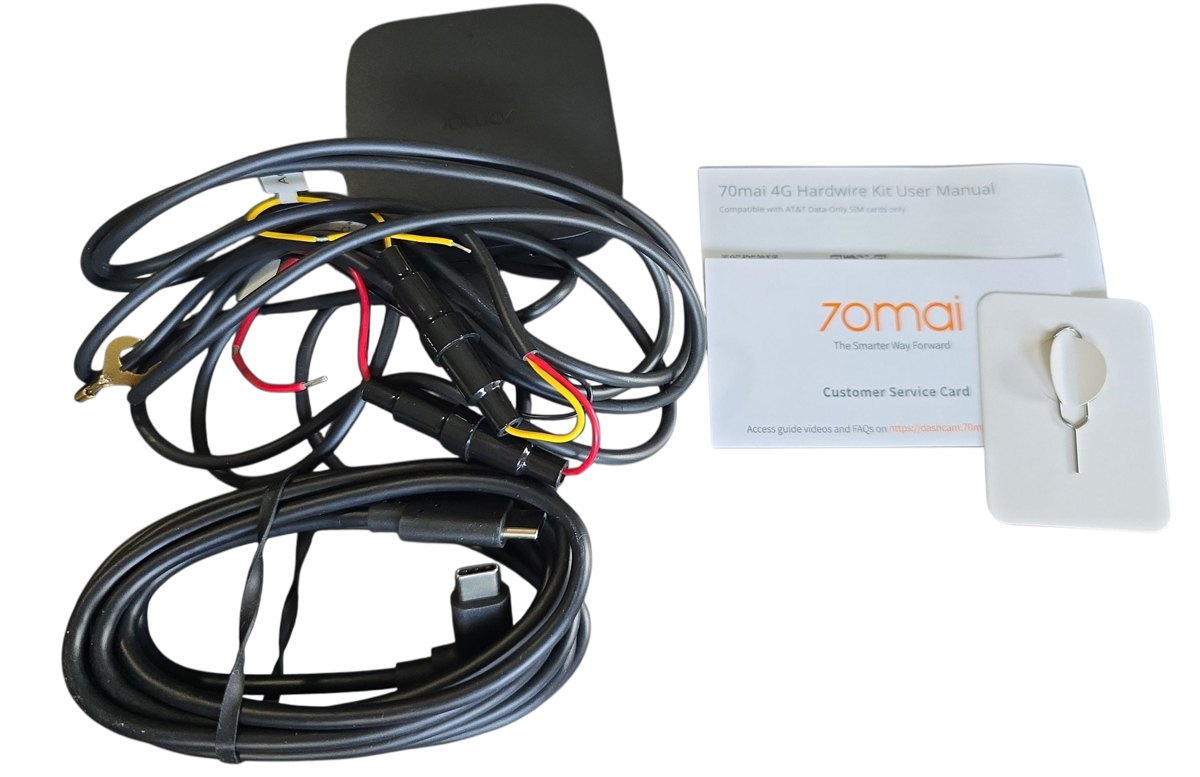
- 4G connection unit with wiring and an inline fuse for connection to the car’s fuse panel
- USB-C/USB-C cable
- User manual
- Customer service card
- SIM card tray removal pin tool
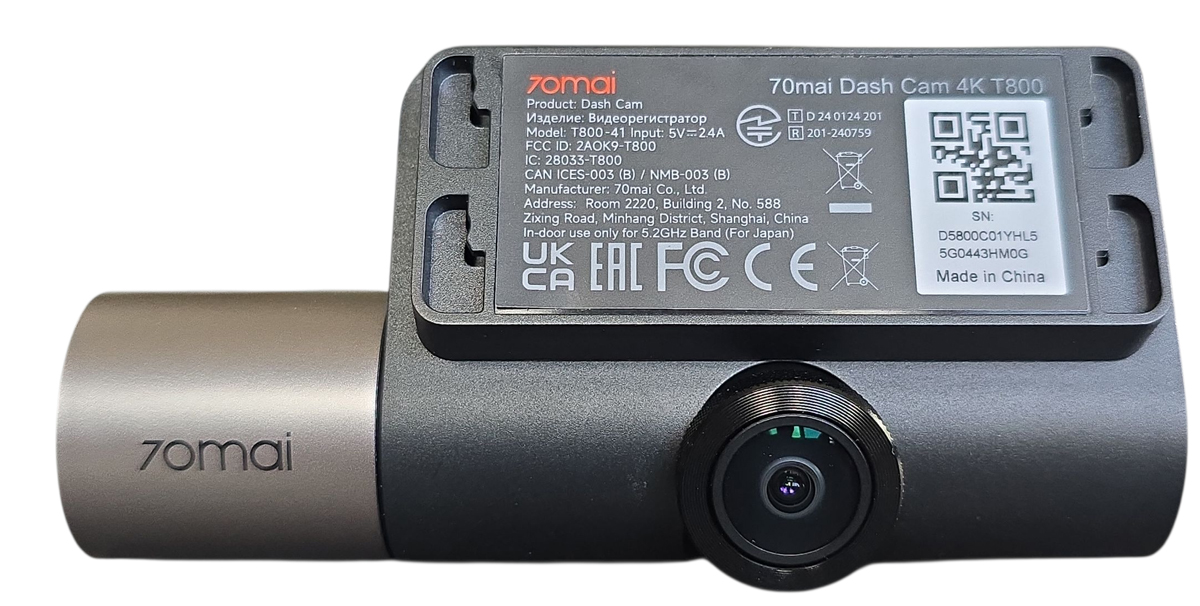
Tech specs
Main unit size: 46x63x123mm
Display: 3″ IPS
Video resolution: front and rear, 3840×2160 4K 30FPS; interior, 1920x1080P FHD 30FPS
Front and rear sensors: Sony STARVIS 2 IMX678
HDR: three-channel HDR
Field of view: front and rear, 146°; interior, 147°
Camera aperture: f1.7
Image improvement: 70mai Lumi Vision and 70mai Night Owl Vision™
Buffered emergency recording: Yes
4G compatibility: Yes, with optional 4G hardwired kit
WiFi: WiFi 6 5GHz and 2.4GHz
Bluetooth: BLE
GPS logger: Yes
Storage: Up to 512GB -512GB card included
Parking surveillance: Yes, with optional hardwired kit
Voice and app control: Yes, voice in English, Chinese, Italian, Japanese
App control: Yes
System languages: 19 languages supported
Battery: Supercapacitor plus button cell
Power port: USB-C
Operating temperature: 14°F – 14-°F
Optional 4G hardwire kit: 4G LTE requires an active SIM card
Design and features
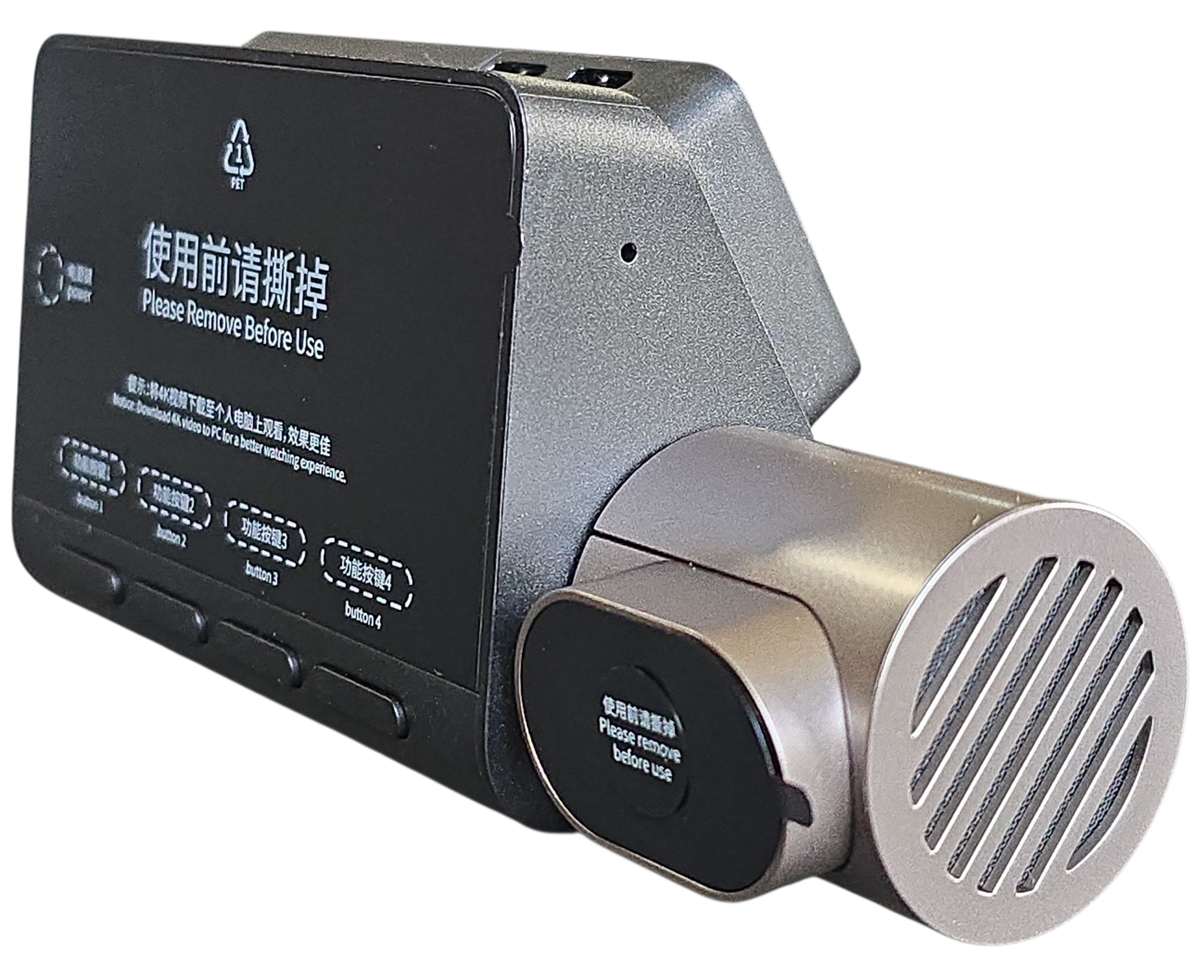
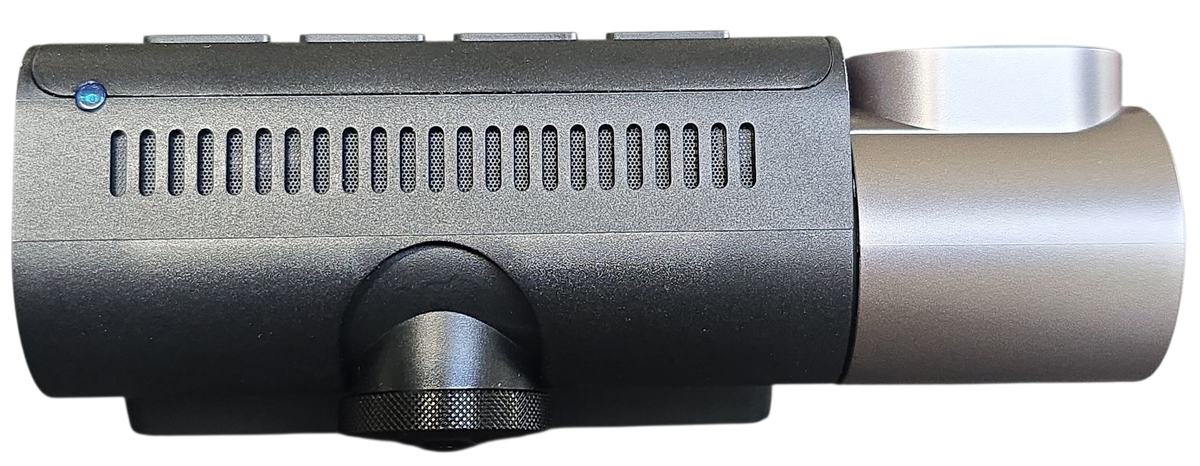
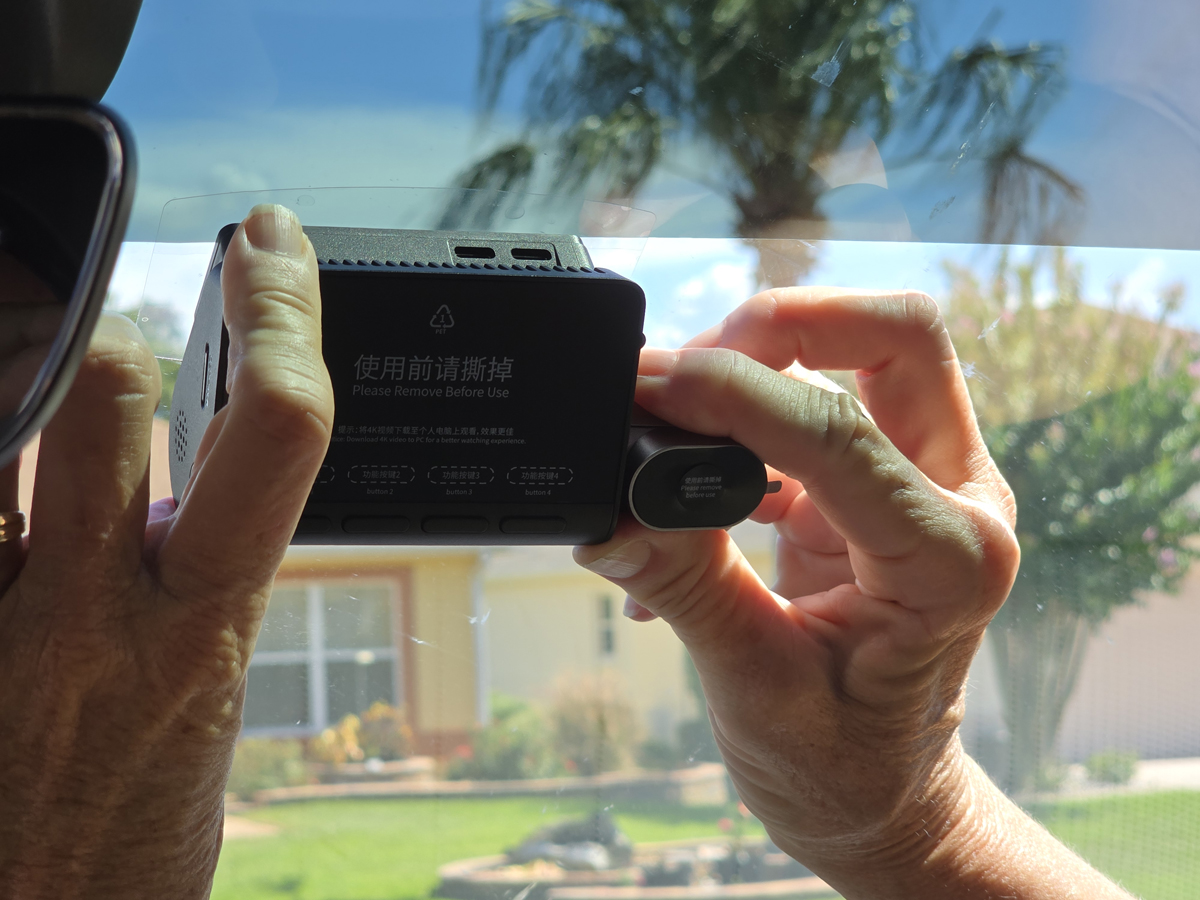
The T800 comes well-packaged and protected during shipping. Let’s start with the main unit. The protective film is still on the 3″ screen and the interior camera lens. You can see the four operation buttons along the lower edge. The protrusion on the right is the interior camera and infrared emitter. It rotates up and down for perfect alignment. The interior camera vent is on the right of that knob. You can also see the small microphone hole on the right side of the main case.
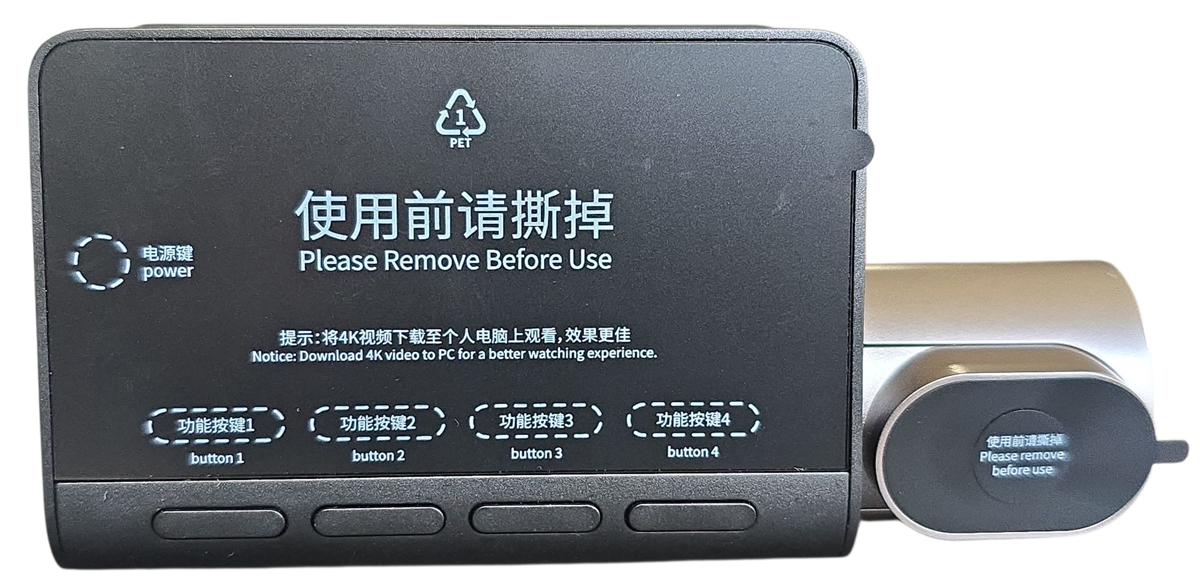
Here is a straight-on view.
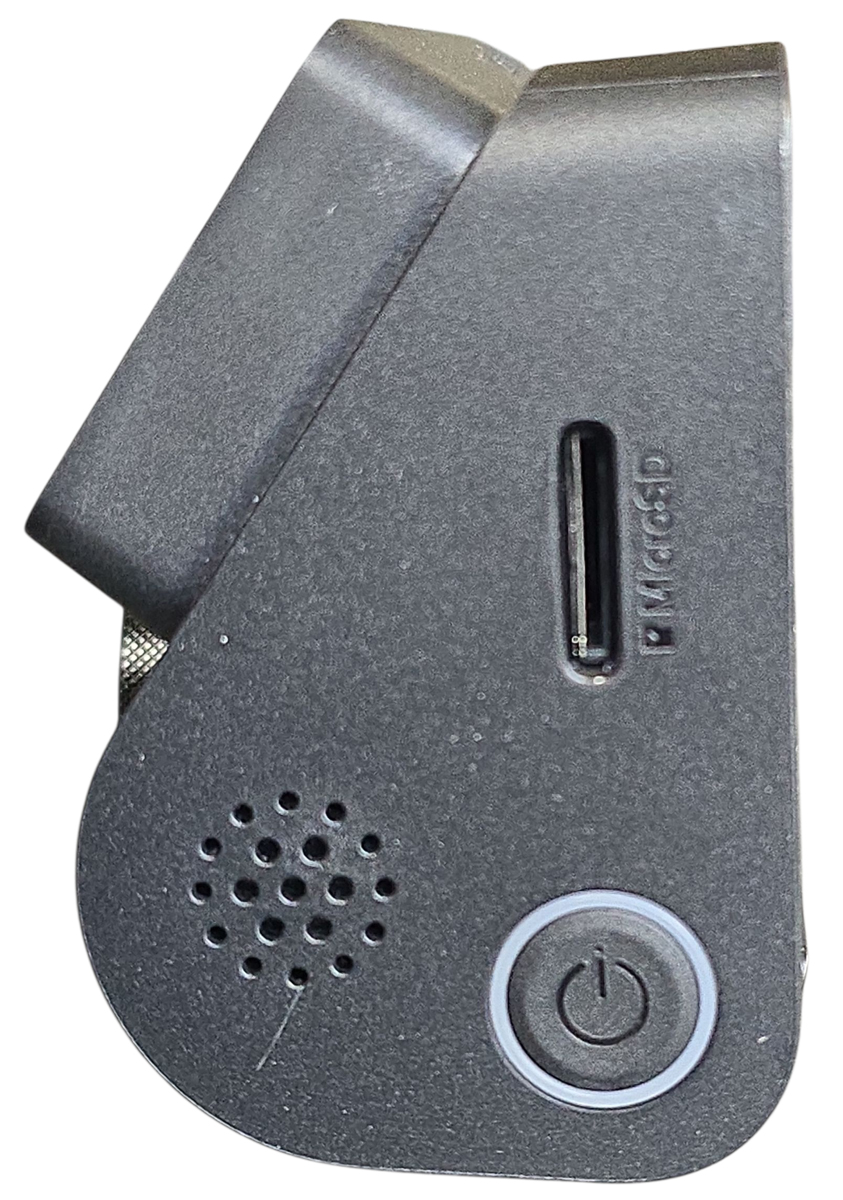
On the left side, we see the speaker grille, power button with ring indicator, and the micro-SD slot.
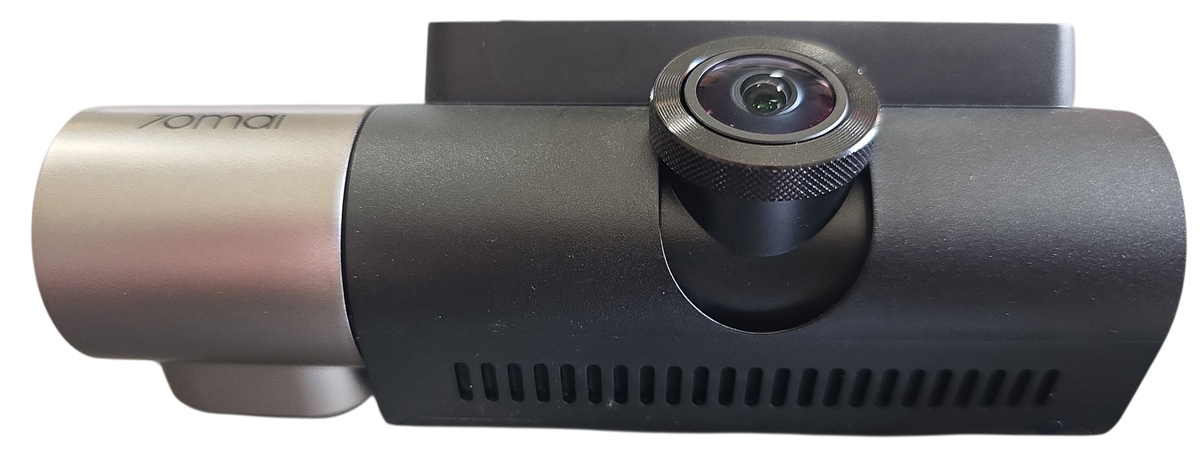
Looking at the bottom, we see more vents, the front camera on its sliding mount, and the blue photo sensor that determines when to activate the interior IR emitter.
Here is another look. You can see the sliding track that allows the camera to move up and down so that it will be level, based on the specific angle of your vehicle’s windshield.
The top has the USB-C power input and USB-C AV/IN input for the rear camera.

The front features the mounting bracket clip that slides onto the windshield bracket.
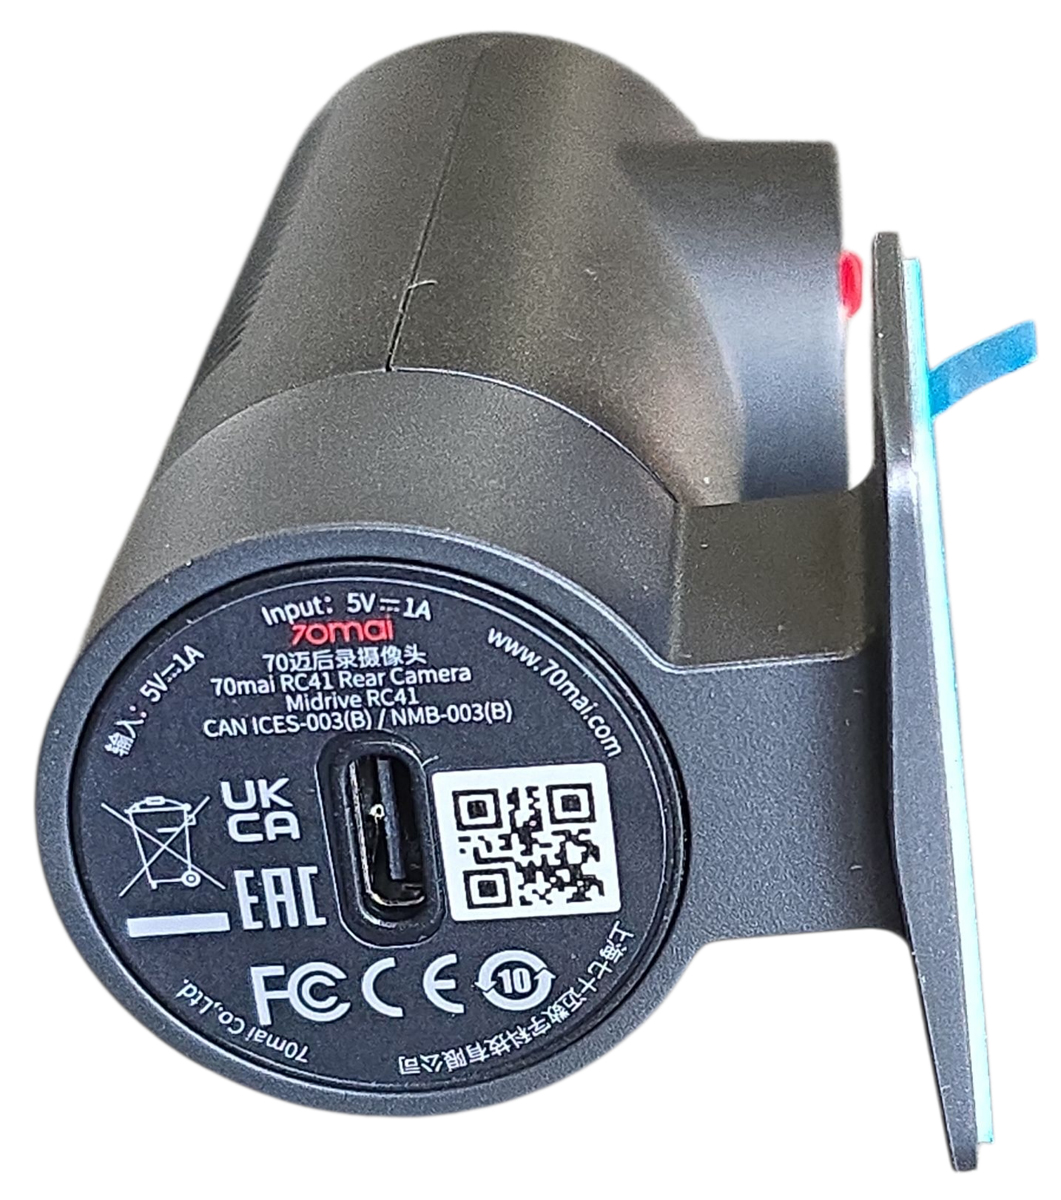
The rear camera is much smaller because it is just a camera. The 3M adhesive pad is on the left, mounted on a rotating bracket. This camera still has its protective film on it.

The back of the camera has air vents.
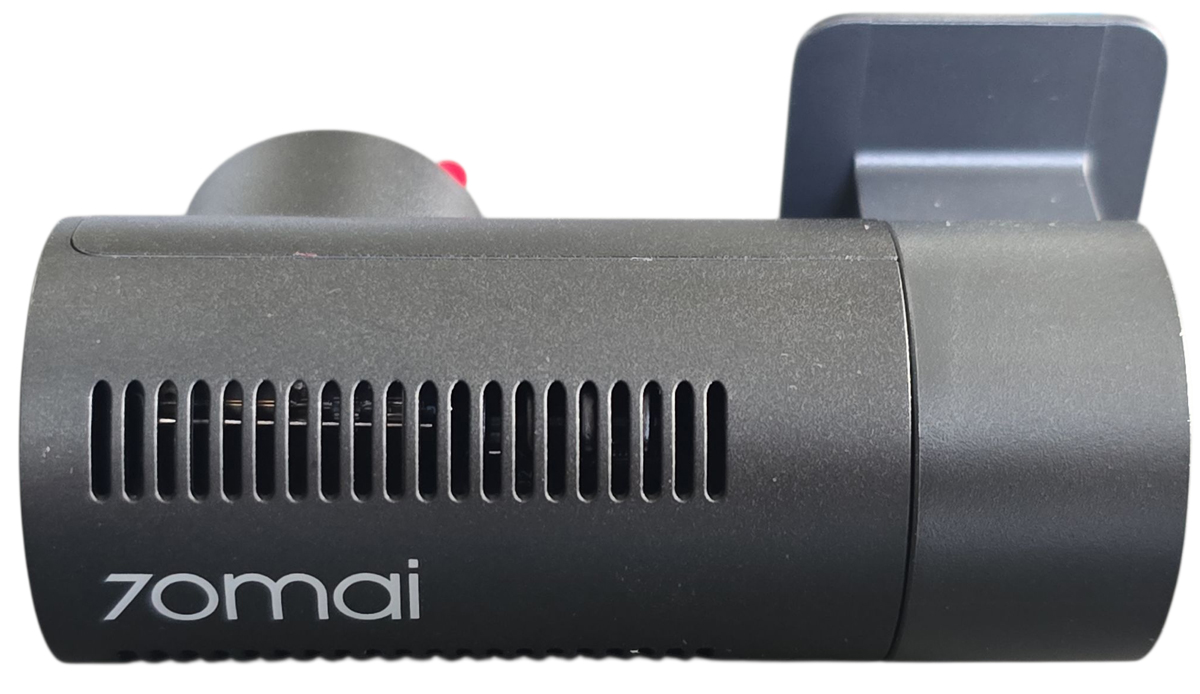
The right side holds the USB-C connector for the camera cable.
Assembly, Installation, Setup
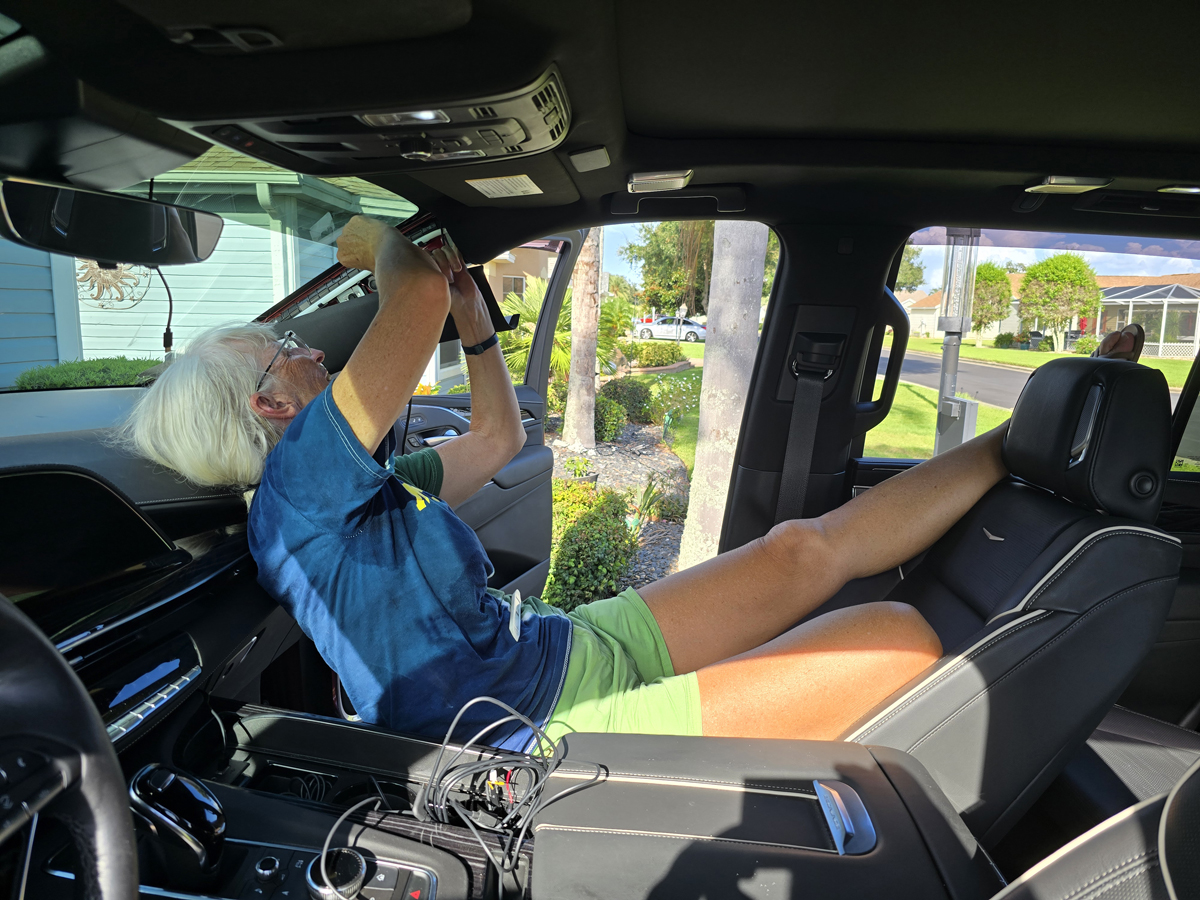
On the surface, installing a dash cam is simple. Stick one on the windshield, another on the back window, plug it into a USB port or use the cigarette plug adapter, and you’re good to go. That works as long as you enjoy a wires-everywhere motif in your ride. If you want a nice, clean installation, it will take some work. Lucky for me, I am married to a retired automotive engineer who happily pulls off panels, climbs under dashboards, and generally loves digging into projects like this. Even though 70mai thoughtfully included a trim stick for prying back panels, my wife comes with her own trim stick, ready for battle. We parked the vehicle out in the hot Florida sun and went at it.
Unfortunately, I didn’t measure the length of the USB cables before she started tucking them away. For reference, we were installing the T800 in a full-sized GM SUV, specifically a Cadillac Escalade. This is the standard wheelbase, not the longer Escalade ESV. We had plenty of cable and would have been able to reach the rear window, even in an ESV.
We started the process by figuring out where to mount the front camera. Then, we cleaned the window thoroughly and let it dry. Next, we peeled the backing off the electrostatic sticker and placed it on the window. By using these stickers, you can easily remove the camera versus scraping off a 3M adhesive pad. Once the sticker was in place, we peeled the backing off the 3M adhesive pad on the camera mounting plate and placed it on the sticker.
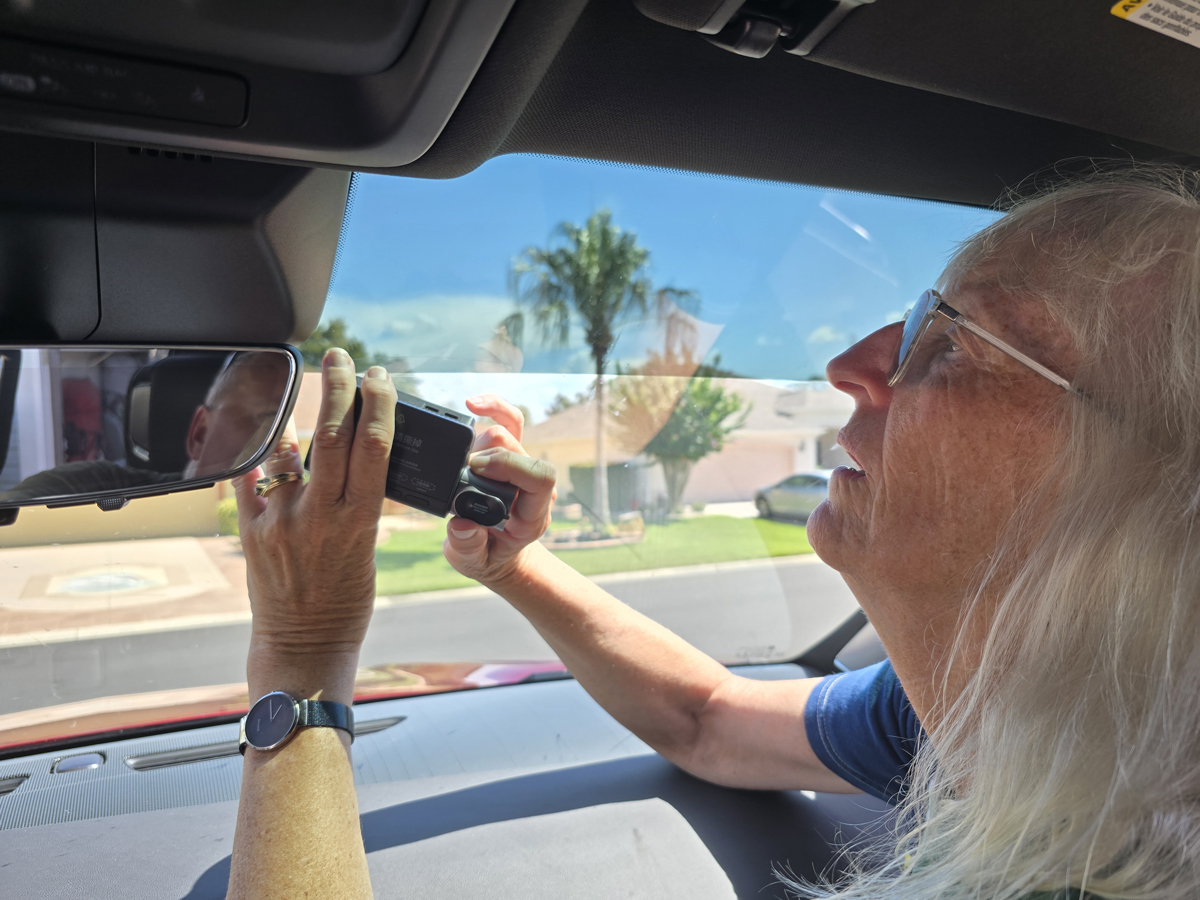
Once it was firmly in place, we could slide the camera into place.
This is where the problems started.
It turns out that, for whatever reason, the electrostatic stickers do not stick to the windshield in our SUV. Five minutes after putting the camera up, it came crashing to the floor. We tried remounting the electrostatic sticker and got the same results. I hit up Google and YouTube, and we are not unique. This seems to be a well-documented issue. I think the T800 is just too heavy for the electrostatic sticker. The 3M adhesive pad stuck like glue to the sticker, but the sticker would not stay stuck to the windshield. We resorted to what everyone else did – just stick the 3M pad to the windshield. Problem solved. I was thankful that 70mai supplied a spare 3M adhesive pad.
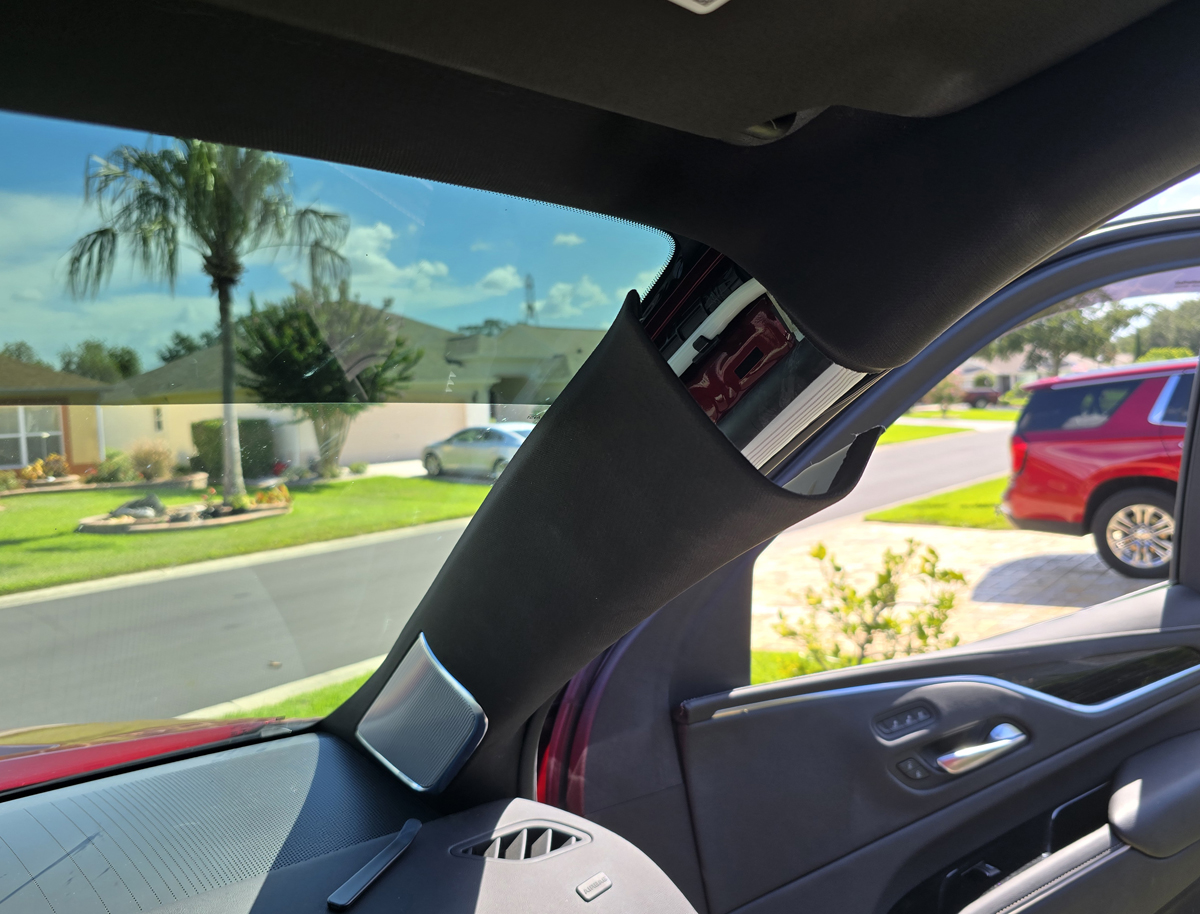
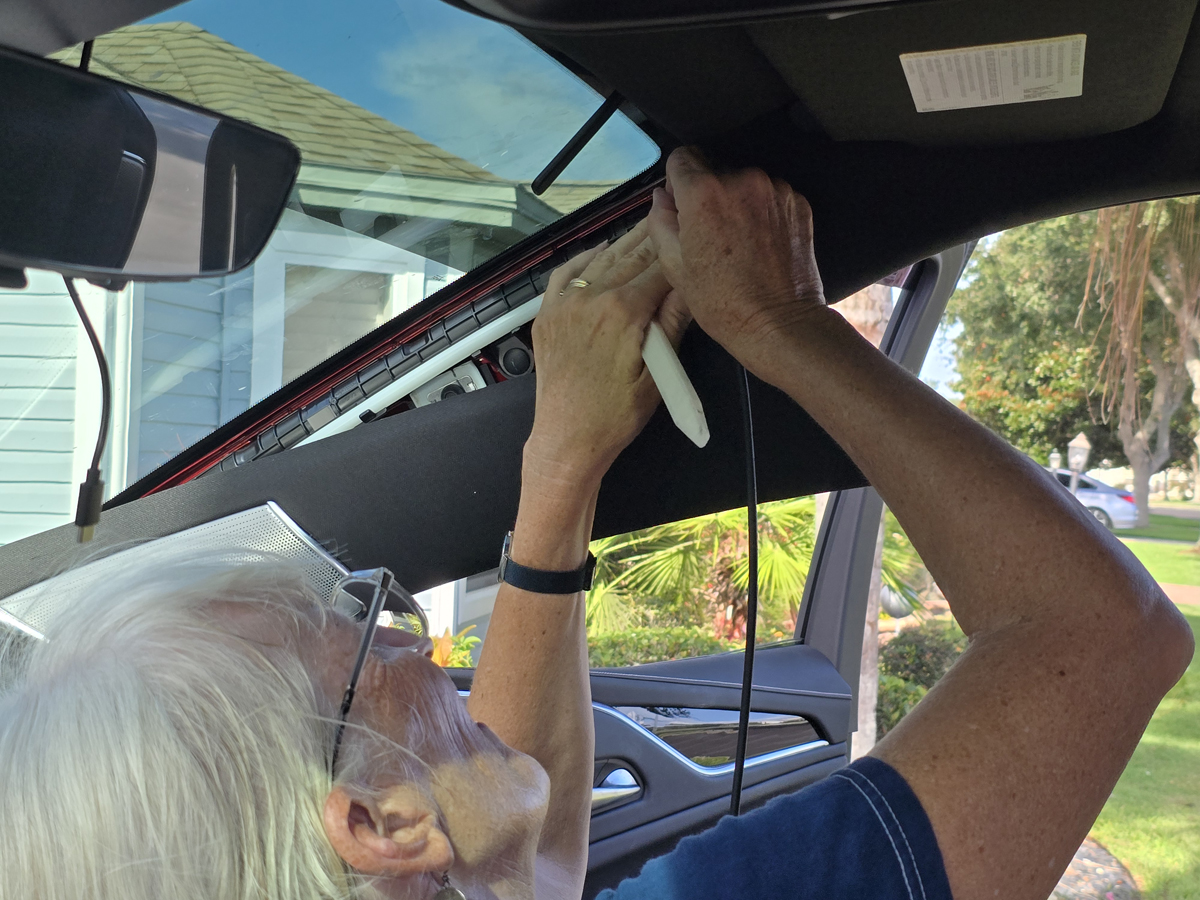
My lovely wife got busy routing cables. She ran the cables along the front of the headliner. Then, she popped off the A-pillar. You have to take care and run the cables so they don’t interfere with the side curtain airbags.
She routed the power cable down to the bottom of the dash.
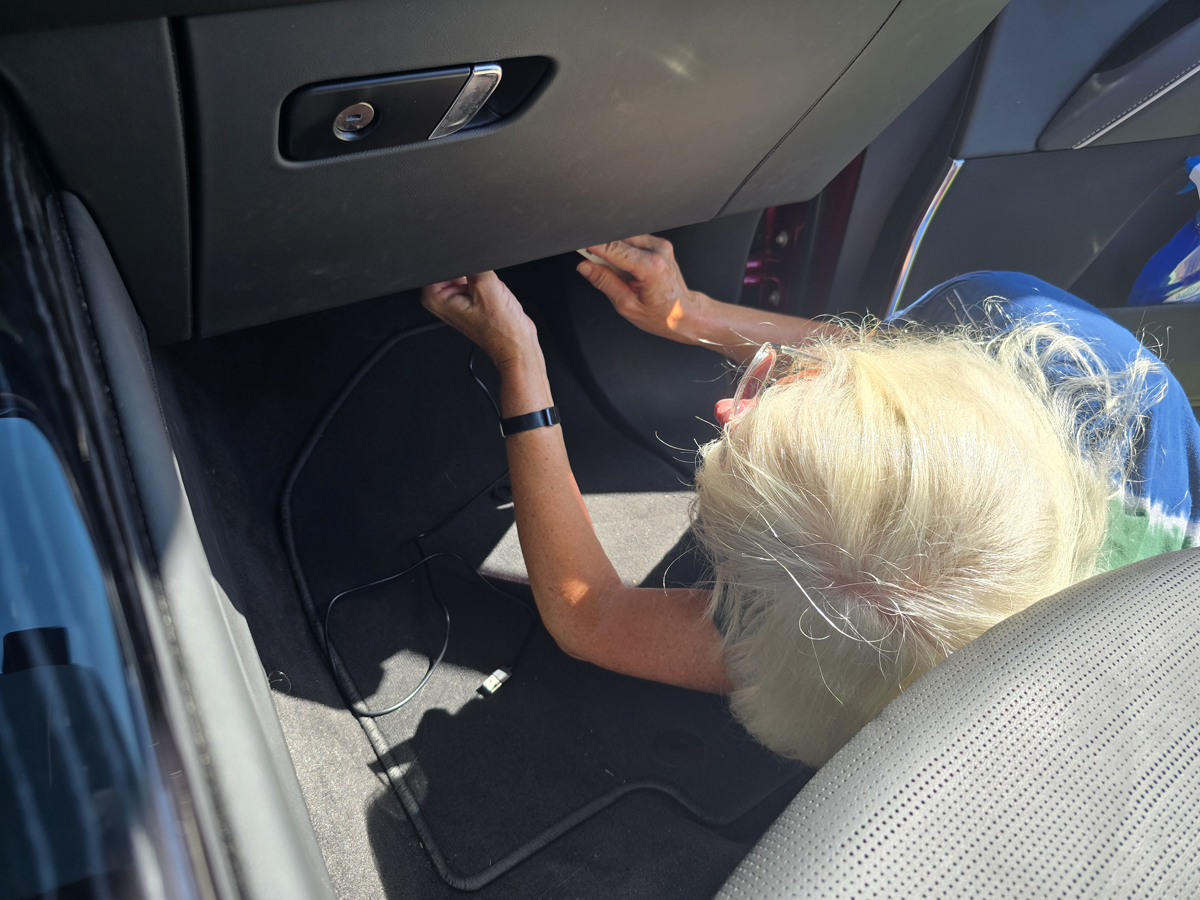
She ran the power cable under the dash.
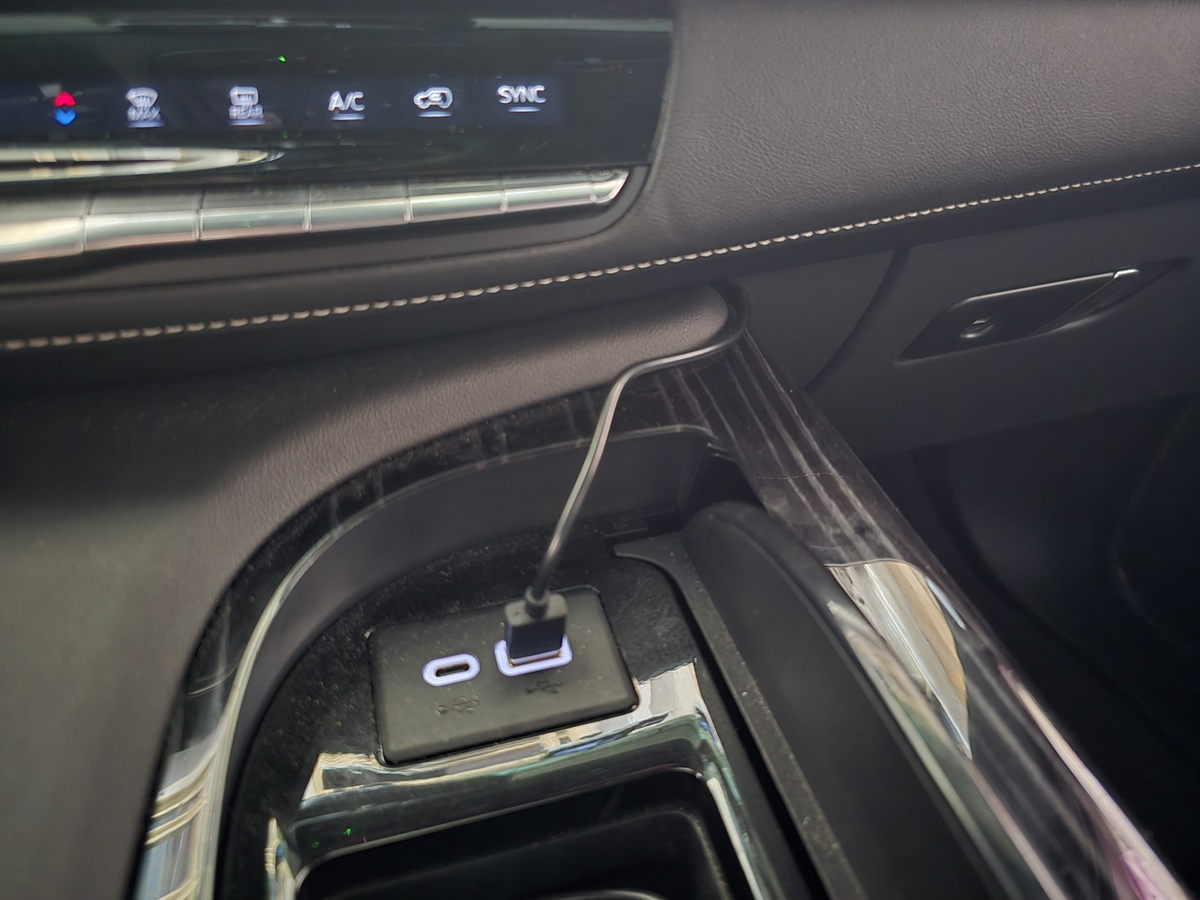
We plugged it into an available USB-A port on the console.
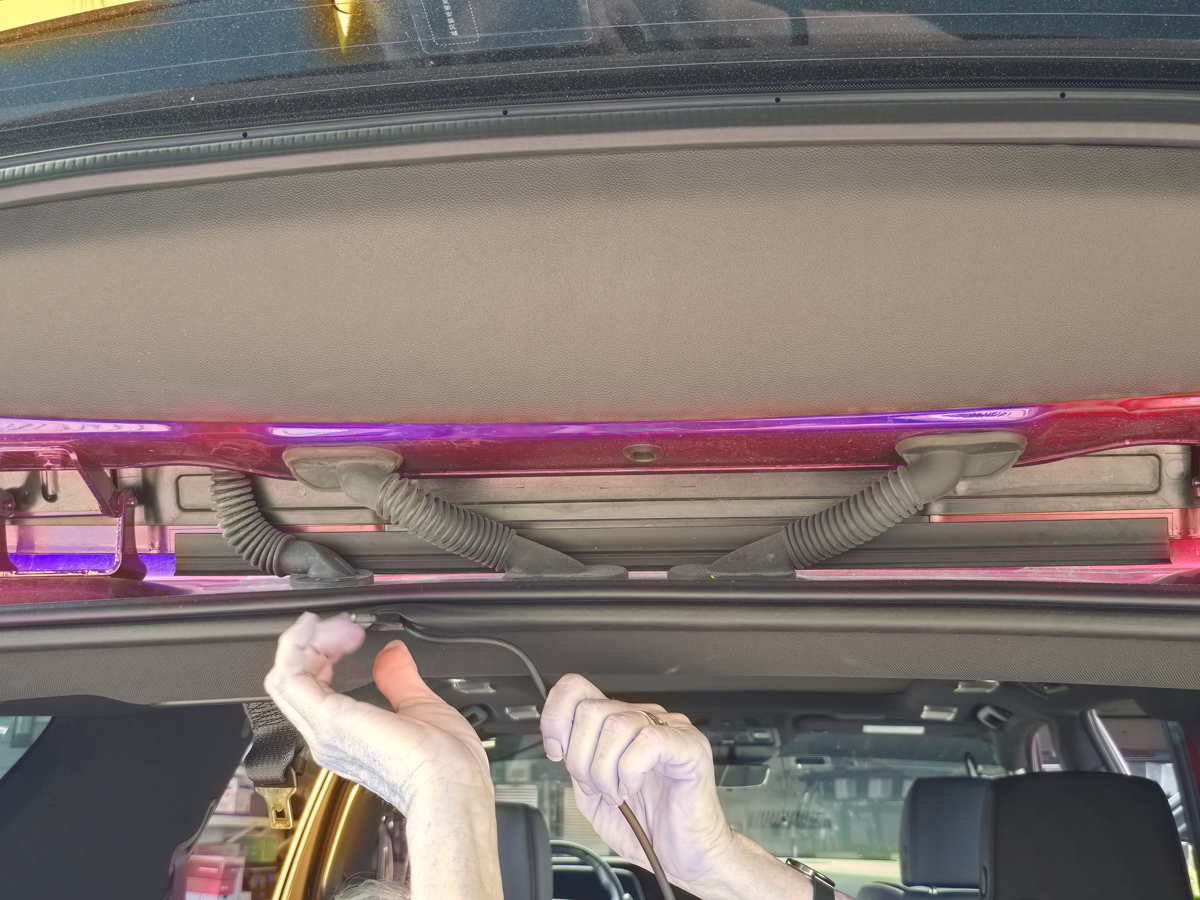
She routed the rear camera cable above the door, tucking it under the headliner.
The trim tools (the included one and hers) let her safely pull back the weather stripping and get under the headliner.

She continued past the back door.

She ran the cable along the top of the liftgate opening, continuing to tuck it into the headliner.
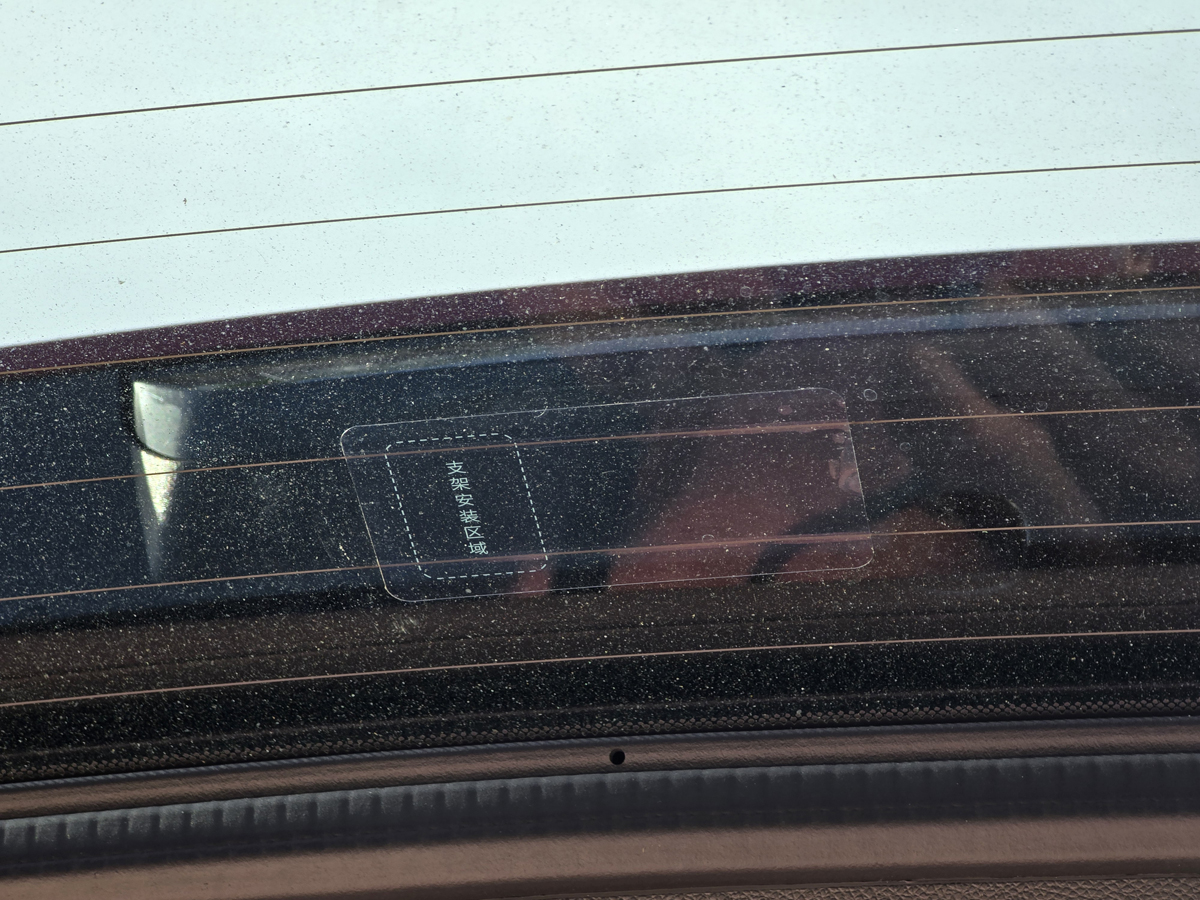
The back camera is much lighter, so I tried the electrostatic sticker. In this case, it worked perfectly. You can see it stuck on the window, waiting for the camera to get stuck onto it.
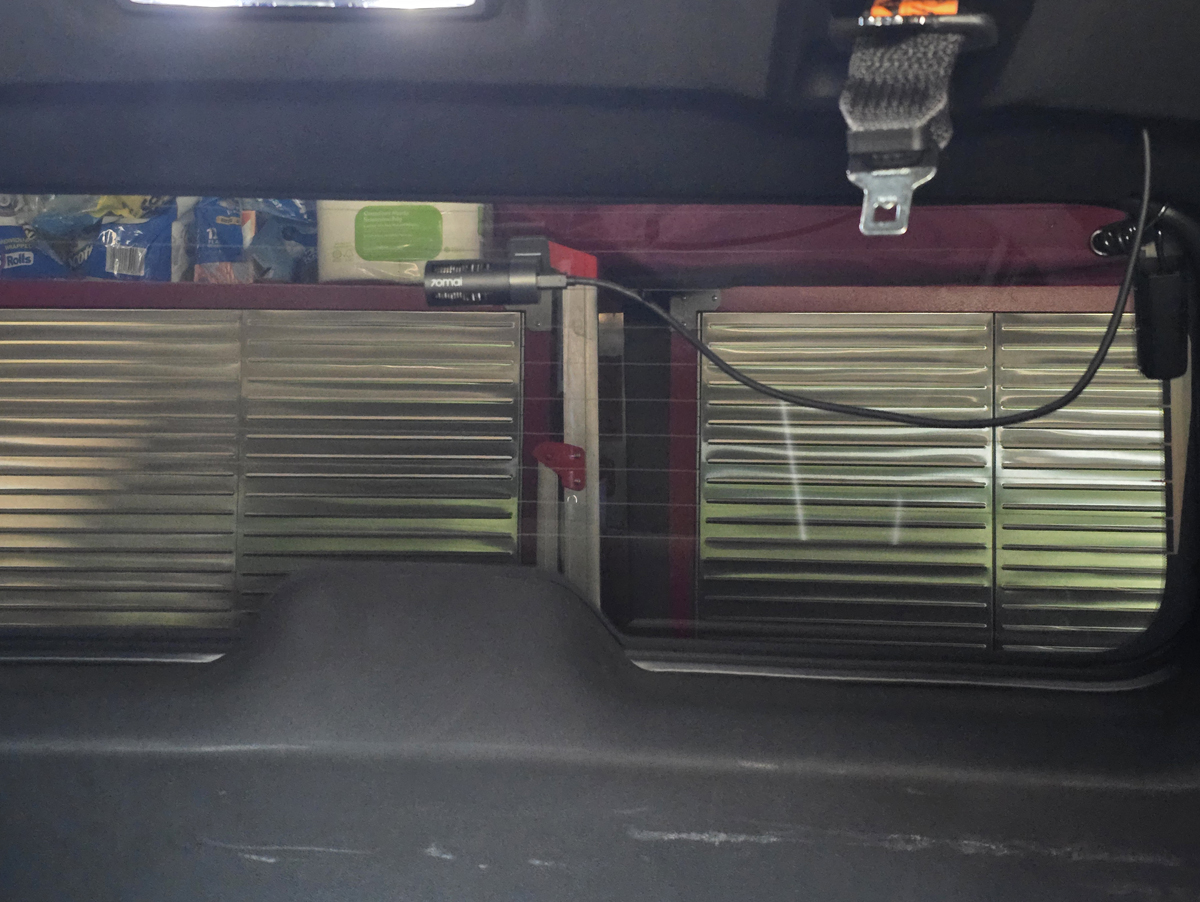
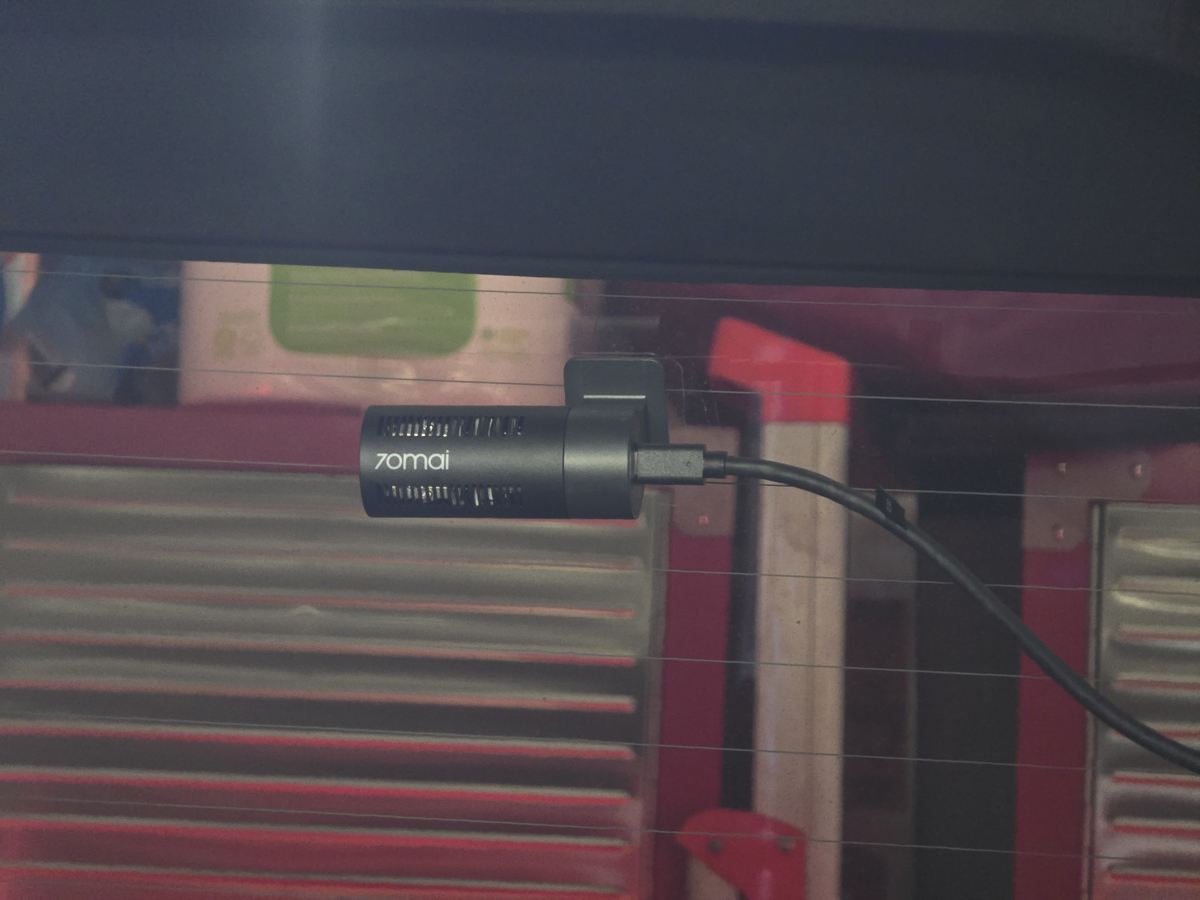
I stuck the rear camera onto the sticker and connected the cable.
After peeling the old 3M adhesive pad from the front camera mounting bracket, I stuck the replacement on, and we placed it directly on the front window. Once it was fully adhered, I slid the camera onto the bracket and plugged in the cables. We were almost ready to start testing.
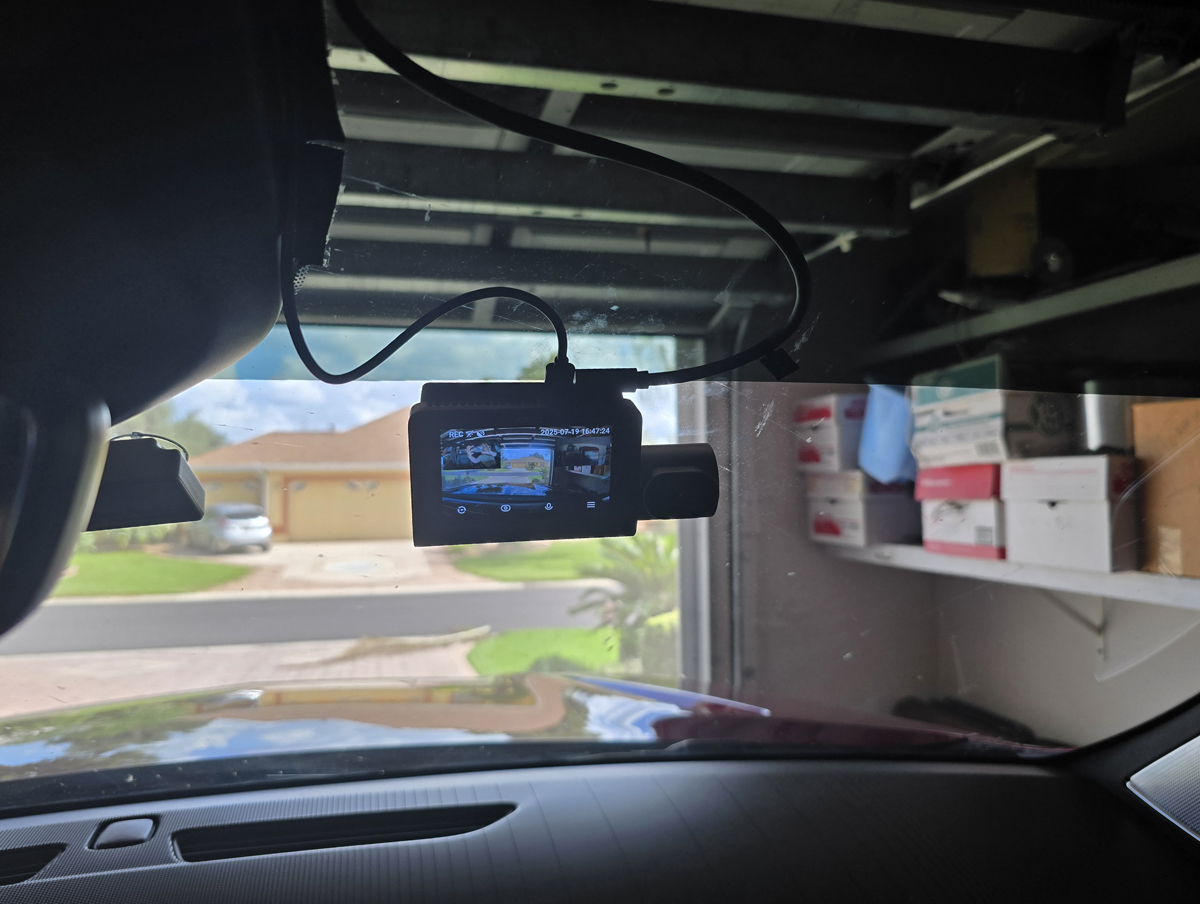
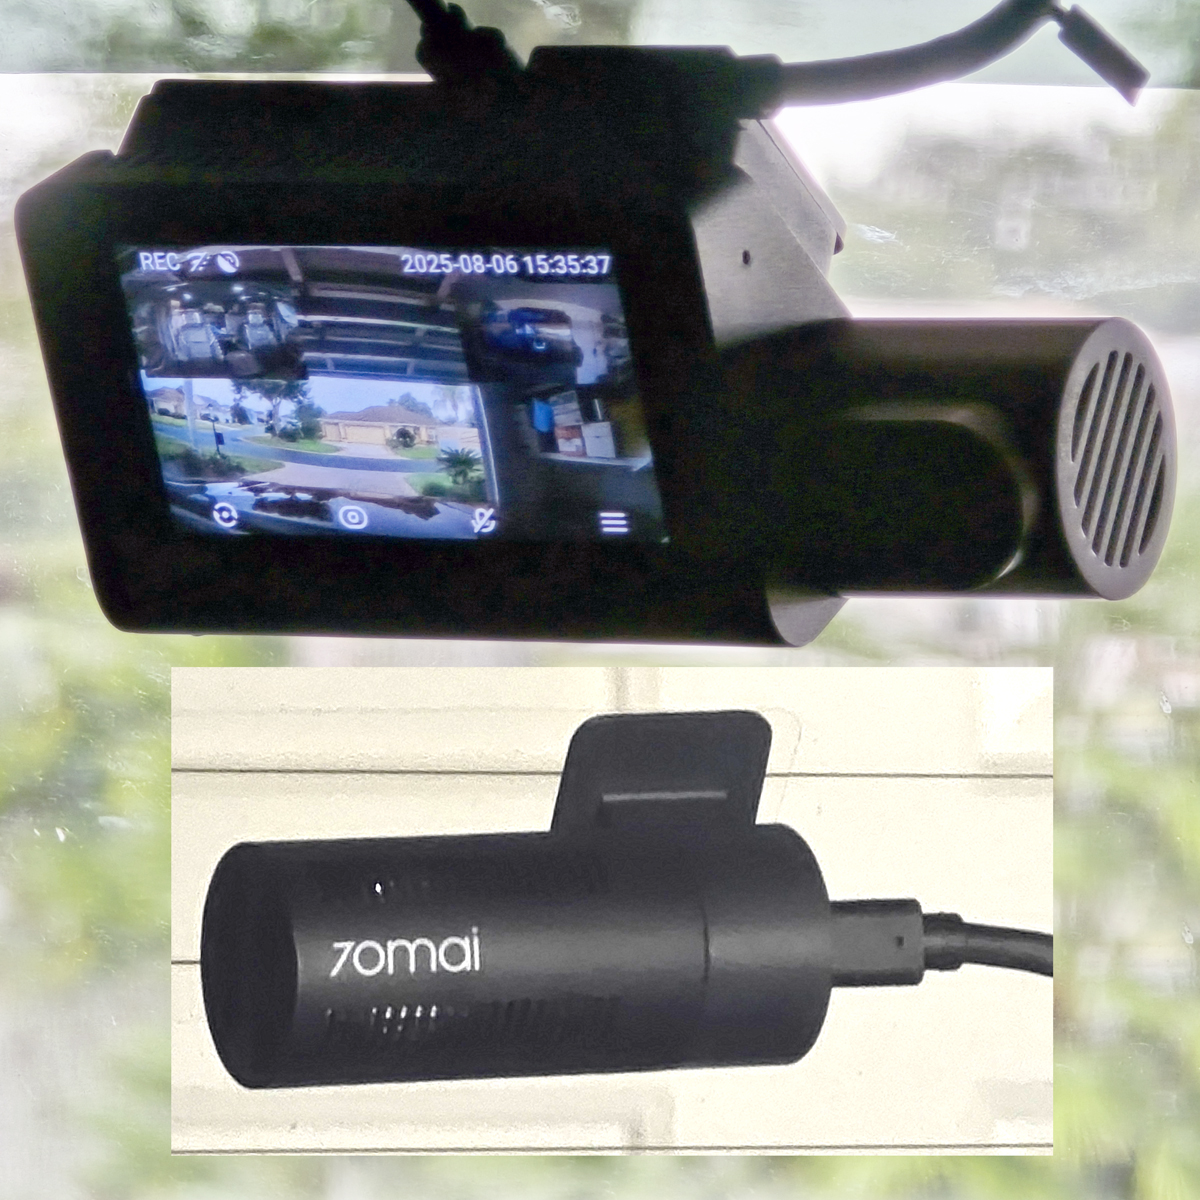
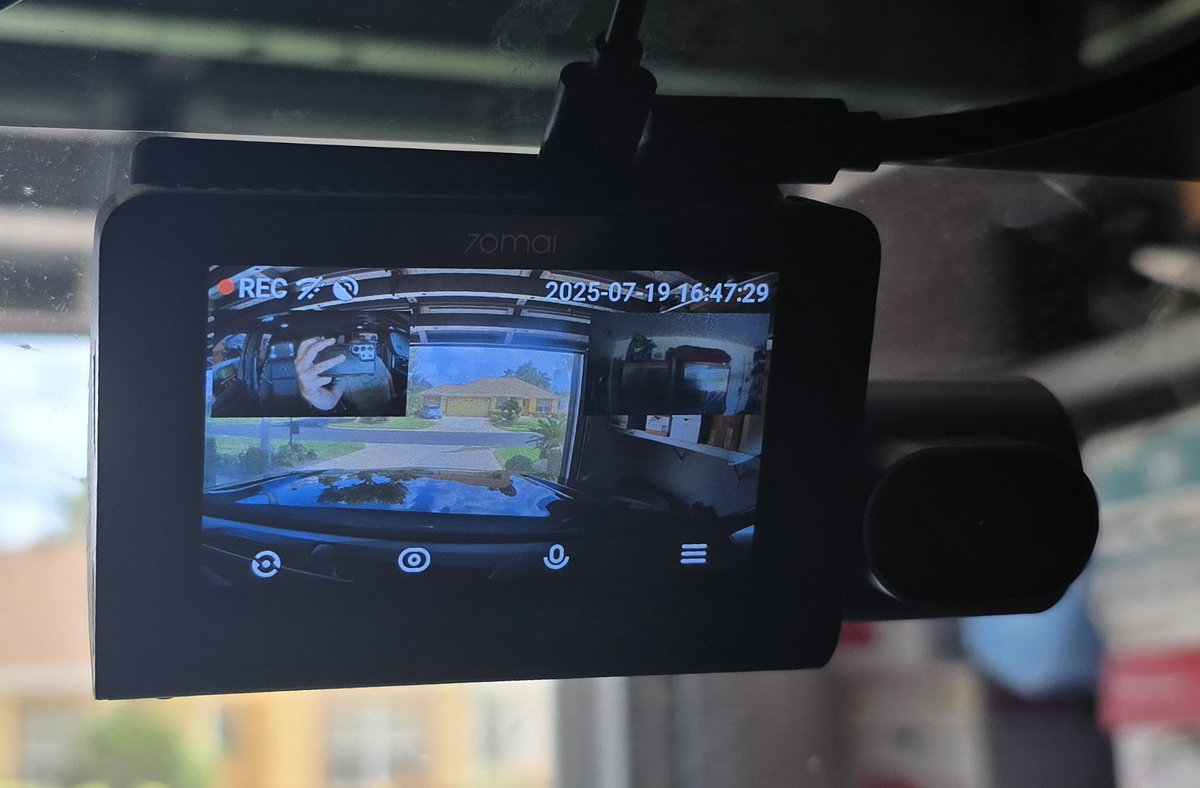
I had the display set to show all views. The front camera is the large image. The interior camera is in the upper left – you can see my phone, taking this photo. The rear view, showing cabinets in my garage, is in the upper right.
The final step was to install the 70mai app on my phone and set up an account. This will let me control the settings of the camera a little easier than stepping through menus on the device itself. Plus, I will be able to directly download videos rather than having to pop out the SD card and bring it to a PC.
Connecting my phone to the camera proved to be a bit of a challenge. The camera is only powered up when the SUV is on. When the SUV is on, my phone automatically connects to the SUV’s WiFi for Android Auto. To connect to the camera, I had to disconnect from Android Auto first and then connect to the camera’s WiFi, accepting the connection even though there was no internet access. It’s cumbersome, but it is what it is. It isn’t the fault of 70mai, but I figured you should know what you’re in for. It would be the same with any camera that you plan to connect to your phone.
Performance
The footage is stored as a series of individual files. You can configure how long each file will be, from one minute to several minutes. This makes each video file larger. I like the one-minute interval, keeping files smaller. When the card fills, the camera will erase the oldest file and replace it with new footage.
The files are stored in a folder structure. The normal footage is stored in a folder called “normal”. There are three subfolders, one each for forward, backward, and in-cabin footage. There are separate folders for on-demand videos, photos, and crash videos. In the event of a crash, footage immediately before the incident is saved in this folder, preserving it from being overwritten.
The system supports voice commands for saving a video or photo, and those are also stored separately.
There are two ways to get the footage off the camera. You can always just pull the card and copy files to your PC. You can also use the app and connect to the camera via WiFi. This required me to disable Android Auto on my phone. When Android Auto is enabled, it forces a WiFi connection to my vehicle. Once Android Auto was disabled, I could connect to the camera and download files to my phone.
I needed to gas up the beast, so I took the opportunity to grab a short video.
Please understand that I edited this in YouCut, adding the two picture-in-picture frames for the in-cabin and rear camera views. This is actually three separate video files. Unfortunately, my dashboard casts a strong reflection on the windshield. A polarizing filter might help with that, but alas, none was included. That part notwithstanding, I think the picture quality is outstanding. I like the metadata along the bottom, showing time, speed, and GPS coordinates. I wish that there was a way to have the app produce this type of video, combining video files with the same timestamps into a single, multiview video, but, alas, that isn’t an option.
I took it out for a night ride. Here’s a look at forward-facing night footage.
I was impressed with the footage. It was clear, bright, and sharp. The rear footage, while still 4K, wasn’t as sharp. Why? Because I’m an idiot.
When I mounted the camera on the static mounting sticker, I oriented it so that the camera was looking through the sticker. Duh. I will be fixing that, and I expect the footage will be noticeably clearer once I’m not shooting through the sticker. Even with my stupid installation, the footage was very good. Learn from my mistake and do it right the first time. At least 70mai provided a second sticker and 3M adhesive pad for morons like me.
The in-cabin footage at night was very interesting.
What’s with all the flashing? My vehicle has GM’s Super Cruise installed. Super Cruise uses an infrared emitter at the top of the steering wheel to illuminate your face and eyes. A camera monitors your face and eye position to ensure you are actively monitoring the road when the vehicle is driving autonomously. During the day, it’s not an issue as the IR light is washed out by sunlight. At night, however, the in-cabin camera picks it up like crazy, making the footage a little annoying to watch. When I was backing into my garage after the drive, the footage cleared up. It makes sense that the emitter is disabled when the vehicle is in reverse. That isn’t the fault of the camera, and would be an issue for any in-cabin camera.
One thing I did not test was the optional hardwired 4G system. This is designed to be permanently attached to the vehicle’s fuse block. It connects to both full-time power as well as accessory power. This lets it know when the vehicle is powered up. The camera’s power cord connects to the 4G kit rather than a vehicle USB port or the cigarette lighter adapter. The 4G connectivity supports only AT&T, and you need to provide your own SIM card. The system does have battery run-down protection. It will shut down the camera to prevent it from draining the vehicle’s battery. What that means is that the system will get you up to a couple of days’ power before it shuts down. We drive our SUV infrequently – typically once every couple of weeks, and many times with even longer breaks. Because of that, the hard-wired system would add little value for me. If we drove daily, having the parking surveillance and online connectivity to the system would make a whole lot more sense. We may reconsider that in the future, but for now, we’re going the USB route.
Final thoughts
This is a full-featured and capable dashcam. It ups the ante on image quality by jumping the resolution for the rear camera to 4K. If you need dashcam footage as evidence in the event of a road incident, every bit of resolution will be a benefit. While I hope to never have an incident on the road, I like the fact that I now have high-resolution video footage of everything happening in front of, in back of, and inside our vehicle.
I’d like to see the addition of a circular polarizing filter to eliminate the reflections from the dashboard. I’d also like to see the app be able to produce picture-in-picture videos, combining two or all three views into a single video. But these are minor shortcomings for an otherwise terrific dashcam solution that I am happy to have installed in our SUV.
UPDATE 10/19/2025
When I reviewed the 70mai Dash Cam 4K T800, I mentioned two things that compromised its otherwise excellent video quality. The first was the absence of a circular polarizing filter to reduce or eliminate windshield reflections. The second was my boneheaded installation of the rear camera, positioning the lens to look through the mounting sticker. Duh.
The folks at 70mai saw my review and graciously sent along the brand-new polarizing filter for the brand-new T800. I installed it. Then, I got my act together and reinstalled the rear camera so it has a clear view out of the window.
Let’s start with the filter. It is a pretty simple device. It installs right on top of the existing lens.
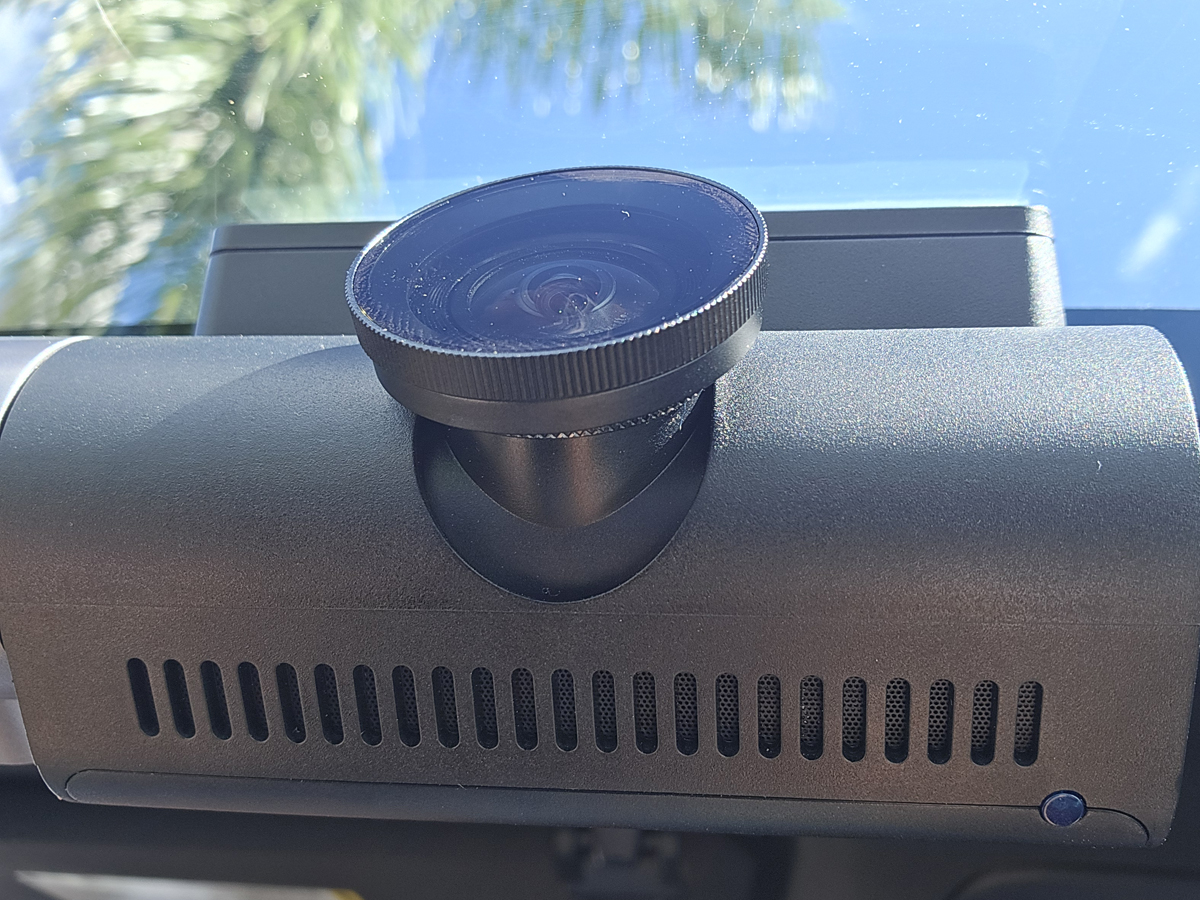
Once installed, I turned on the camera and rotated the filter until the dashboard reflections in the windshield all but disappeared. There are still faint reflections in the lower corners of the windshield, but the filter has completely cleared the main area of the windshield. Nice!
Now that I have properly installed the rear camera, the video there has also greatly improved. It is amazing how much better things work when you install them correctly.
Here is a short video – first, one minute of forward-facing footage, then the same minute from the rear camera. I think that you’ll agree that the video is stunning.
The filter makes what I consider a huge improvement in image quality, eliminating nasty dash reflections and showcasing the excellent 4K video quality of the T800. I definitely recommend springing for it. I also recommend not being a doofus like me and properly installing the rear camera.
Circular Polarizing Filter for 70mai T800 Dash Cam
Price: $19.99
Where to buy: 70mai; Amazon
What I like about the 70mai Dash Cam 4K T800
- Big screen
- 4K video from the front and rear cameras is great (except where I made a stupid installation mistake)
- Having in-cabin video is a bonus, especially for ride-share drivers
- Automatic power on/off
What needs to be improved?
- The electrostatic stickers would not stick strongly enough to our windshield to hold the weight of the T800
- It would be great if you could export a multiview video, combining all three views
- No included polarizing filter
Price: $399
Where to buy: 70mai ($339 as of this writing); Amazon
Source: The sample of this product was provided for free by 70mai. 70mai did not have a final say on the review and did not preview the review before it was published.
Check out these other dash cam reviews!
- Botslab G980H Pro dash cam review – Cover all the angles
- VIOFO A329S 3-Channel 4K dash cam review – You’ve seen the news; you need a dash cam.

HP 14 Laptop, Intel Celeron N4020, 4 GB RAM, 64 GB Storage, 14-inch Micro-edge HD Display, Windows 11 Home, Thin & Portable, 4K Graphics, One Year of Microsoft 365 (14-dq0040nr, Snowflake White)
(as of April 10, 2026 11:28 GMT -05:00 - More infoProduct prices and availability are accurate as of the date/time indicated and are subject to change. Any price and availability information displayed on [relevant Amazon Site(s), as applicable] at the time of purchase will apply to the purchase of this product.)