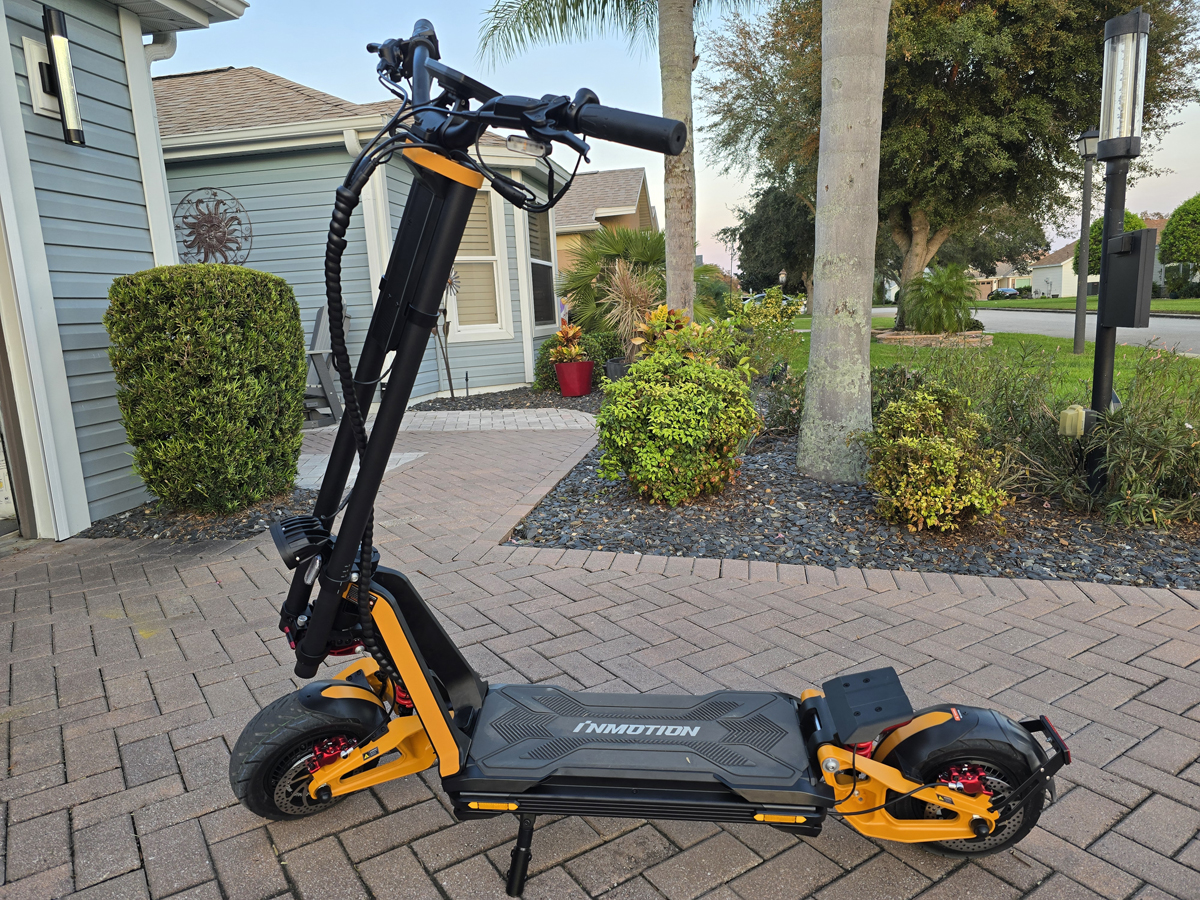
REVIEW – If you are a regular Gadgeteer reader, you’ll know that we love our electric scooters. My wife loves her iSinwheel i9Pro scooter and I love the terrific Climber Scooter from Inmotion. A while back, I mentioned a new release from Inmotion – the RS Scooter. It is available now and I got to put it through its paces. With a claimed top speed of over 68 MPH, I’m hoping to live through the review.
What is it?
The Inmotion RS Electric Scooter is a two-wheeled stand-up style scooter, but this is no kid’s toy. With a claimed max range of 100 miles and a claimed top speed of over 68 MPH, the RS Scooter is a serious transportation tool that is built for fun.
What’s included?
- RS Scooter
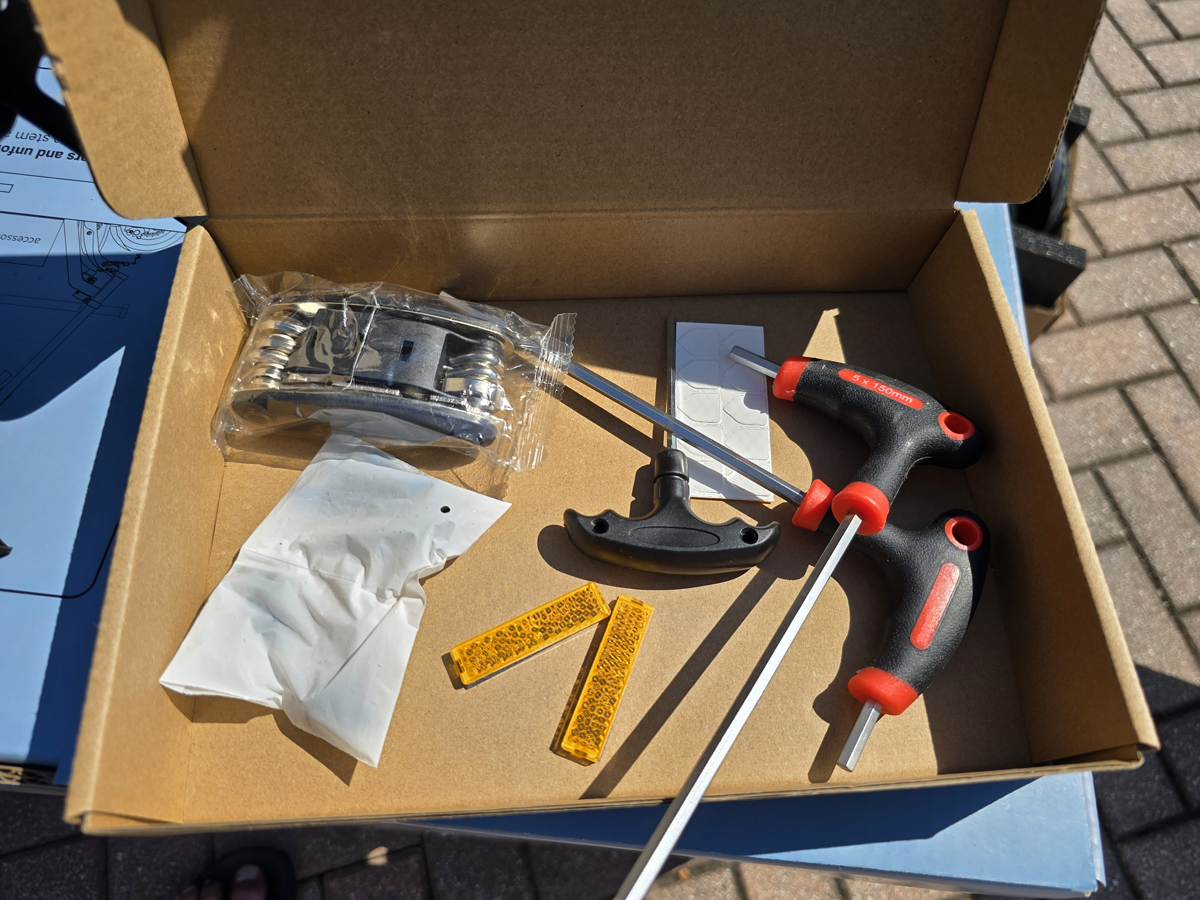
- Reflector stickers (10) (there is no mention in the manual as to where these are supposed to go)
- Various assembly screws
- Combination wrench tool
- T-shaped wrench M5 (2) and one smaller T-shaped wrench
- Reflectors (2) (there is no mention in the manual as to where these are supposed to go)
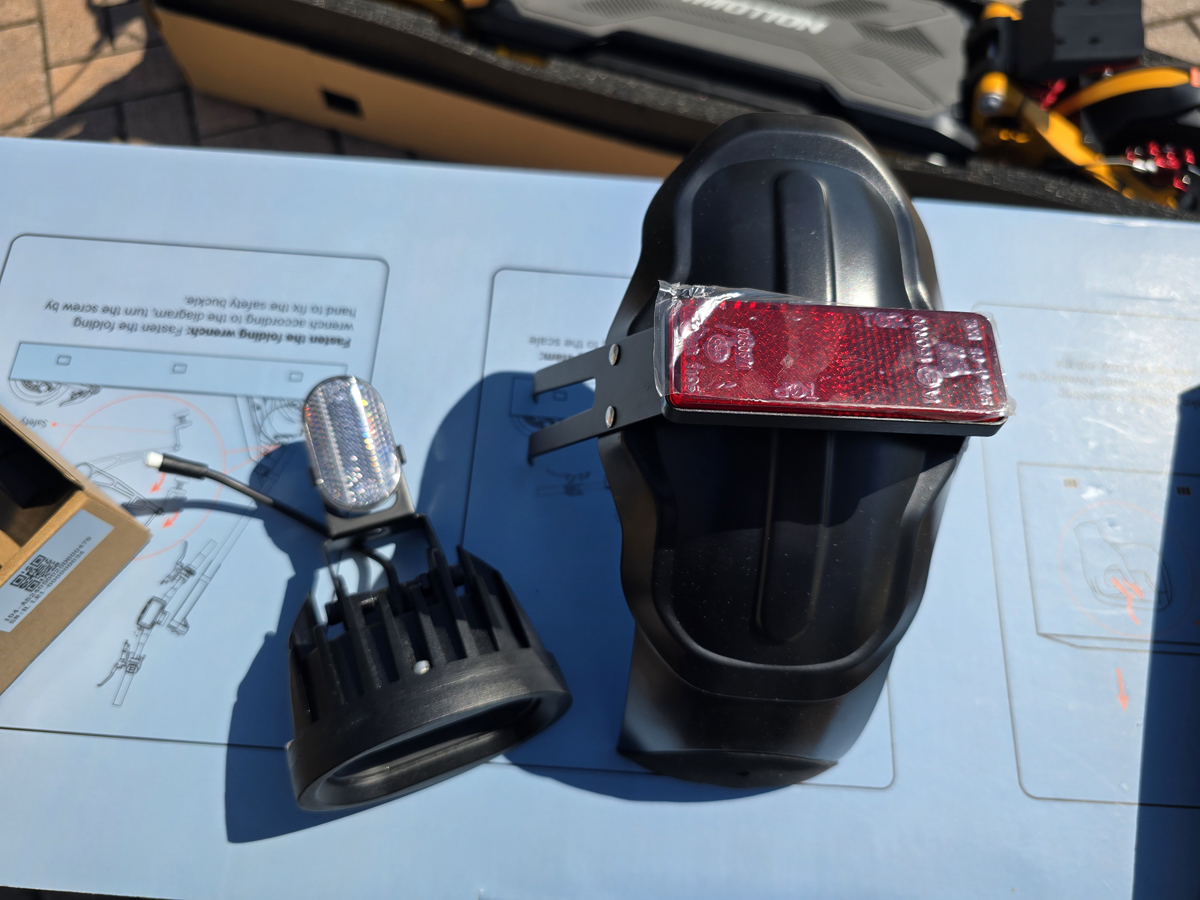
- Headlight assembly
- Mudguards
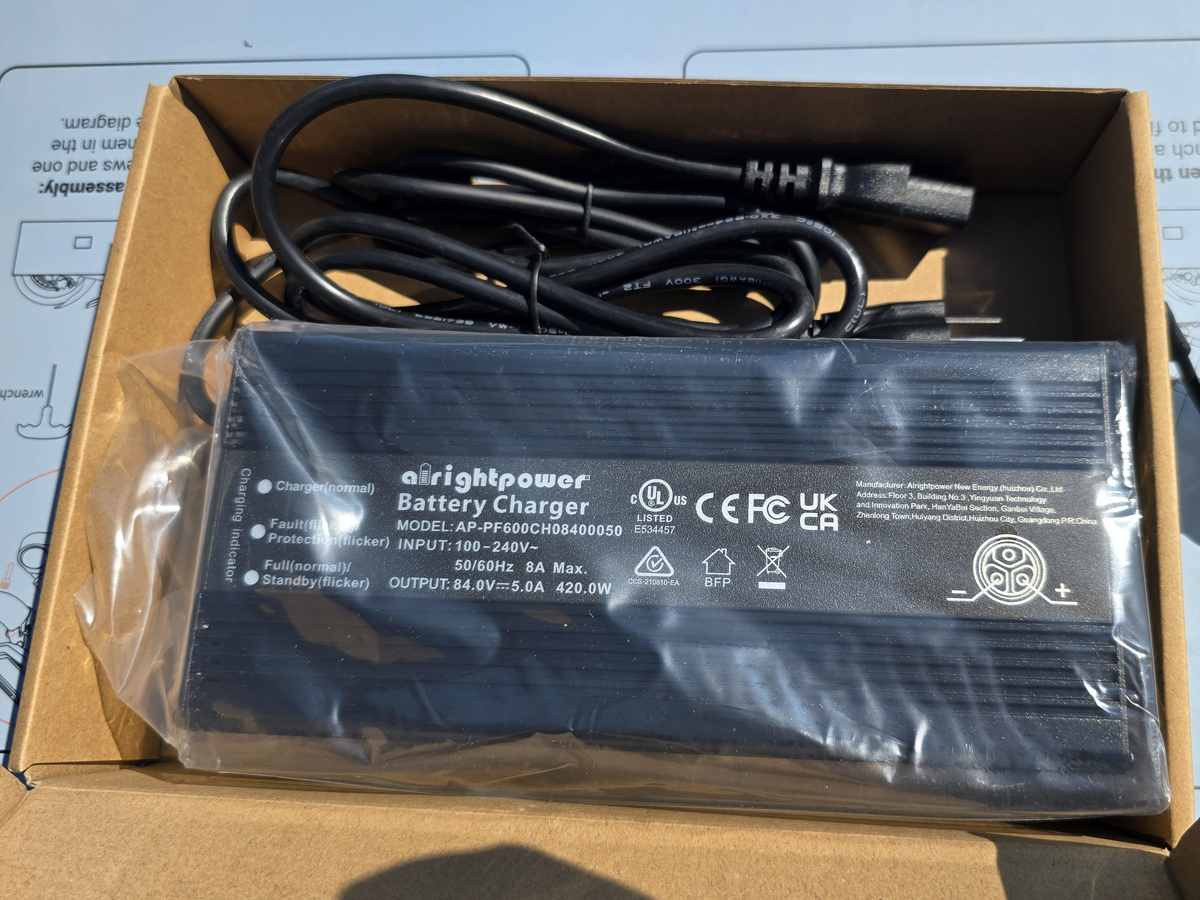
- Charger and cable
- User manual and quick start guide (not pictured)
Tech specs
Click to expand
Dimensions unfolded: 52″ x 28″ x 57″
Dimensions (folded): 26″ x 28″ x 57″
Weight: 128 lbs
Top Speed: 68.3 MPH (Tested on a flat, hard surface with no wind and an ambient temperature of 77°F at full battery and carrying a load of 165lb)
Ride Modes max speeds: 1 – 20mph; 2 – 40mph; 3 – 62mph; 4 – unrestricted up to max
Max Range: 100 miles (Measured under conditions of full charge, 165lb load, ambient temperature of 77°F, and riding on flat, hardened road surface at 12.5~25mph. The range is related to temperature, tire pressure, road conditions, riding habits (such as sudden acceleration, and suspension), etc.)
Tire type: 11″ x 3.5″ tubeless, recommended 40psi
Battery: 72V, 40A, 21700 Samsung Cells, 2880W with battery management system for overcharge, overheat, over-discharge, over-current, short circuit, and overvoltage protection
Charge time: 8 hours (single charger), 4.5 hours (dual chargers)
Motors: Dual 2000W (peak 8400W)
Brakes: Zoom hydraulic, 160mm rotors
Hill climbing: 50% grade
Water rating: IPX6 (body), IPX7 (battery)
Lighting: Headlight, tail light, brake light, turn indicators (front and rear):
Throttle: Twist type (optional thumb throttle conversion available)
Controller: Dual 72V, 50A, sine wave
Display: 4.2″ LCD
Display output port: USB-C, but nothing in the manual explains what it is designed to be used for
Max load: 331 lbs
Suspension travel: 96mm
Suspension dampening: 11-stage adjustable hydraulic dampers from and rear
Deck height: Adjustable to four heights from 183mm to 303mm
Applicable age: 16 – 60 (we’ll ignore that)
Design and features
This looks like a typical two-wheeled scooter. Think Lime Scooter, assuming that Lime Scooter spent years taking steroids and training with Arnold Schwarzenegger. Let’s get it all put together and then we’ll look at the specifics.
Assembly, Installation, Setup
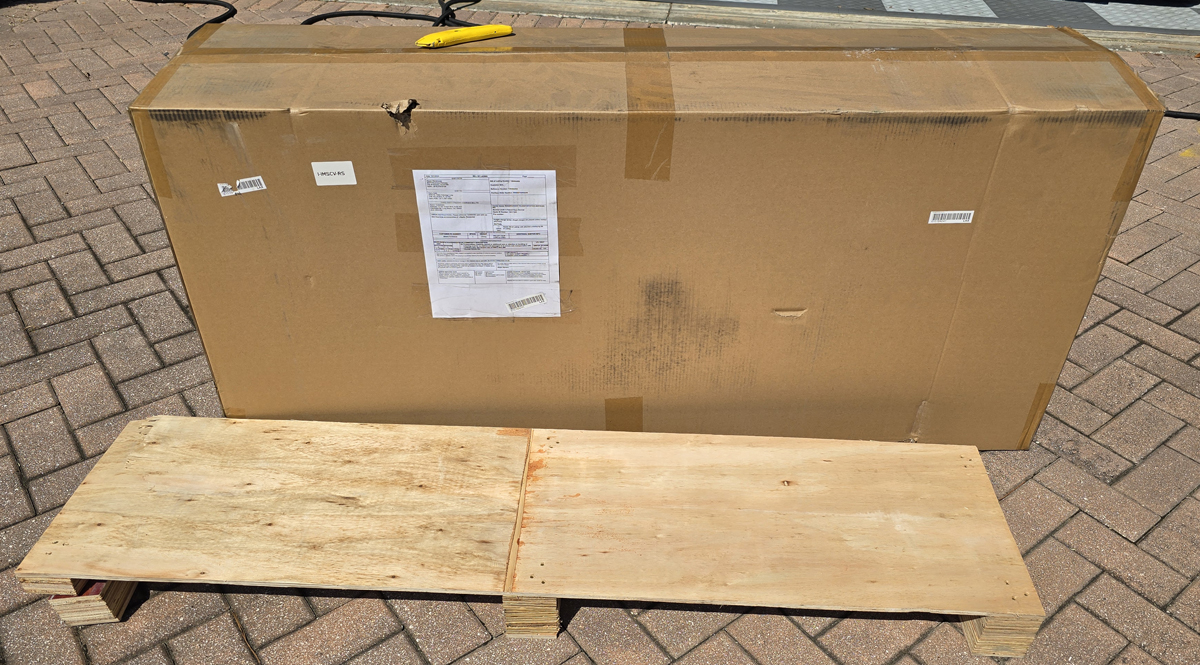
That is what showed up in my driveway – a huge box on a small pallet. I took the photo above after I cut the shipping straps and pulled the box off the pallet. What was in the box?
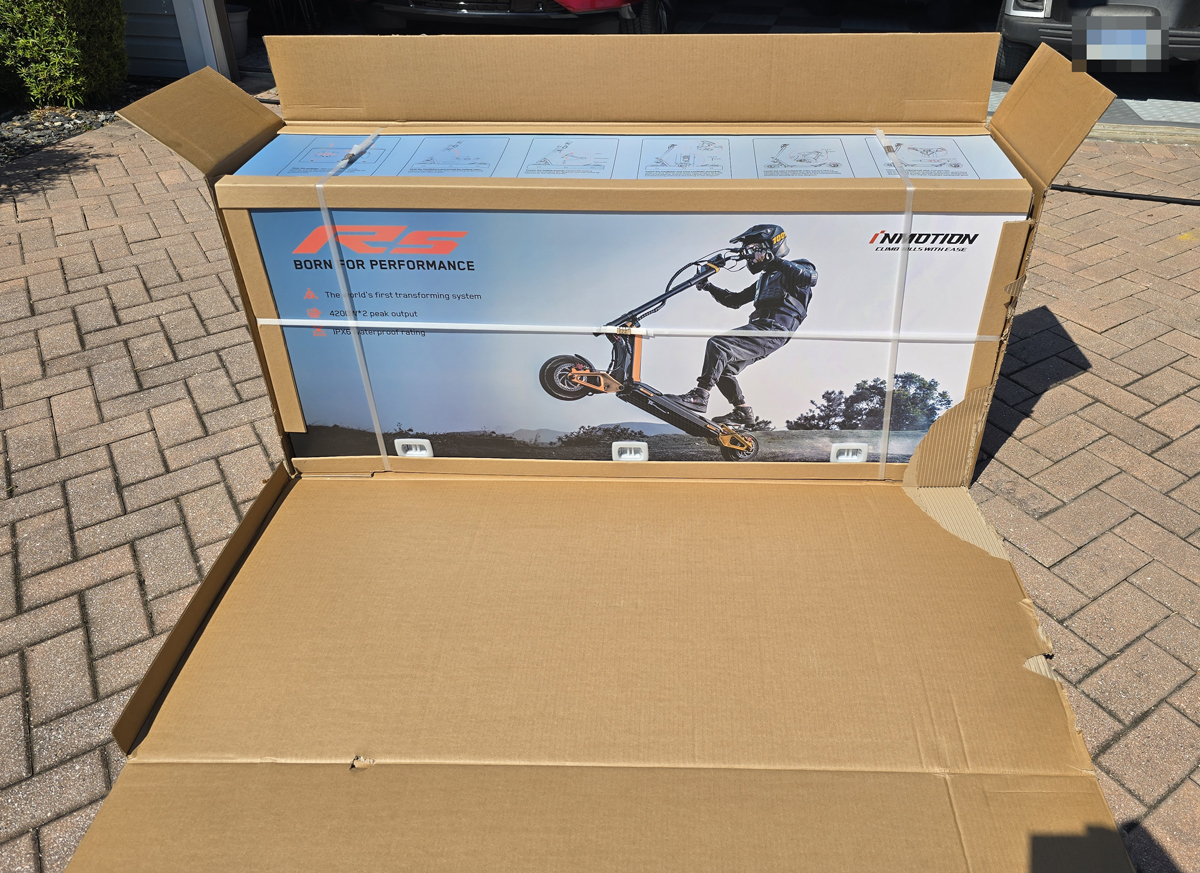
Another box! This is the actual product box. The top of that box is printed with a quick-start guide of sorts.
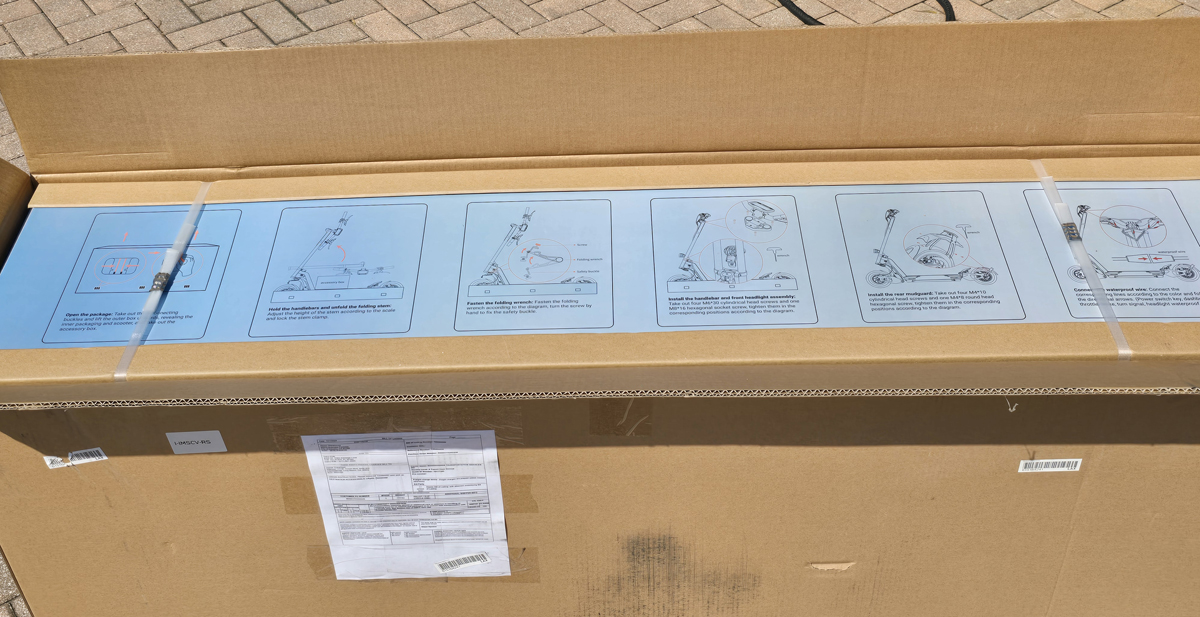
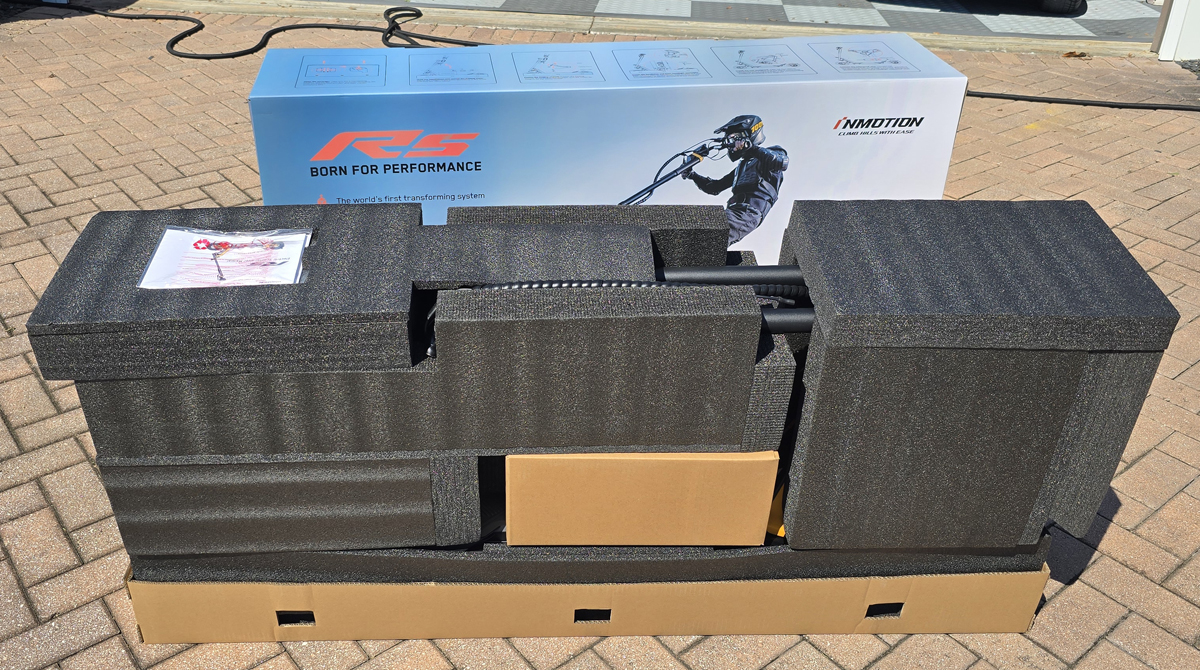
They instruct you to pinch the box clips along the bottom of both sides of the box and remove them. Then, lift off the box. This is what you are met with.
The quick start guide is also included in the user manual.
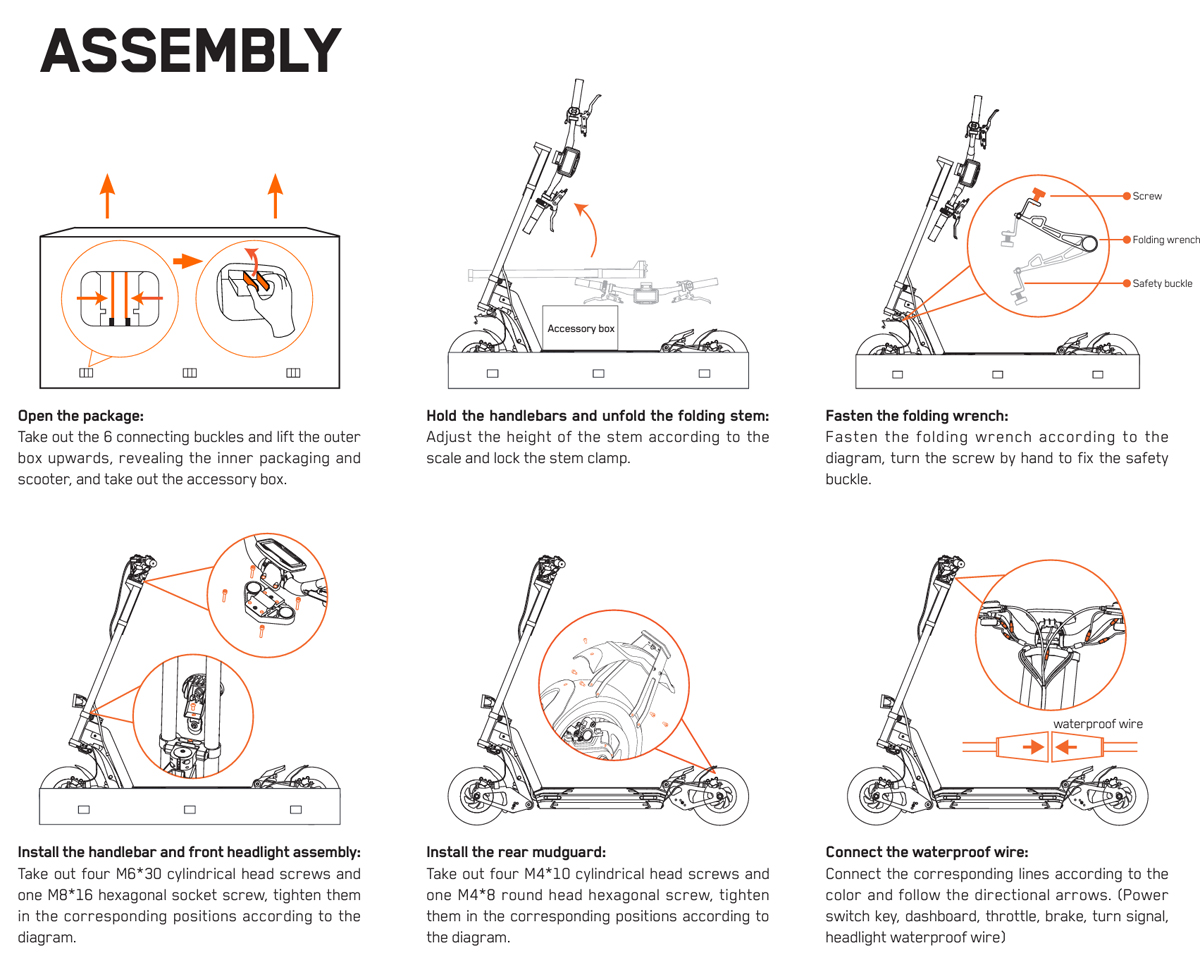
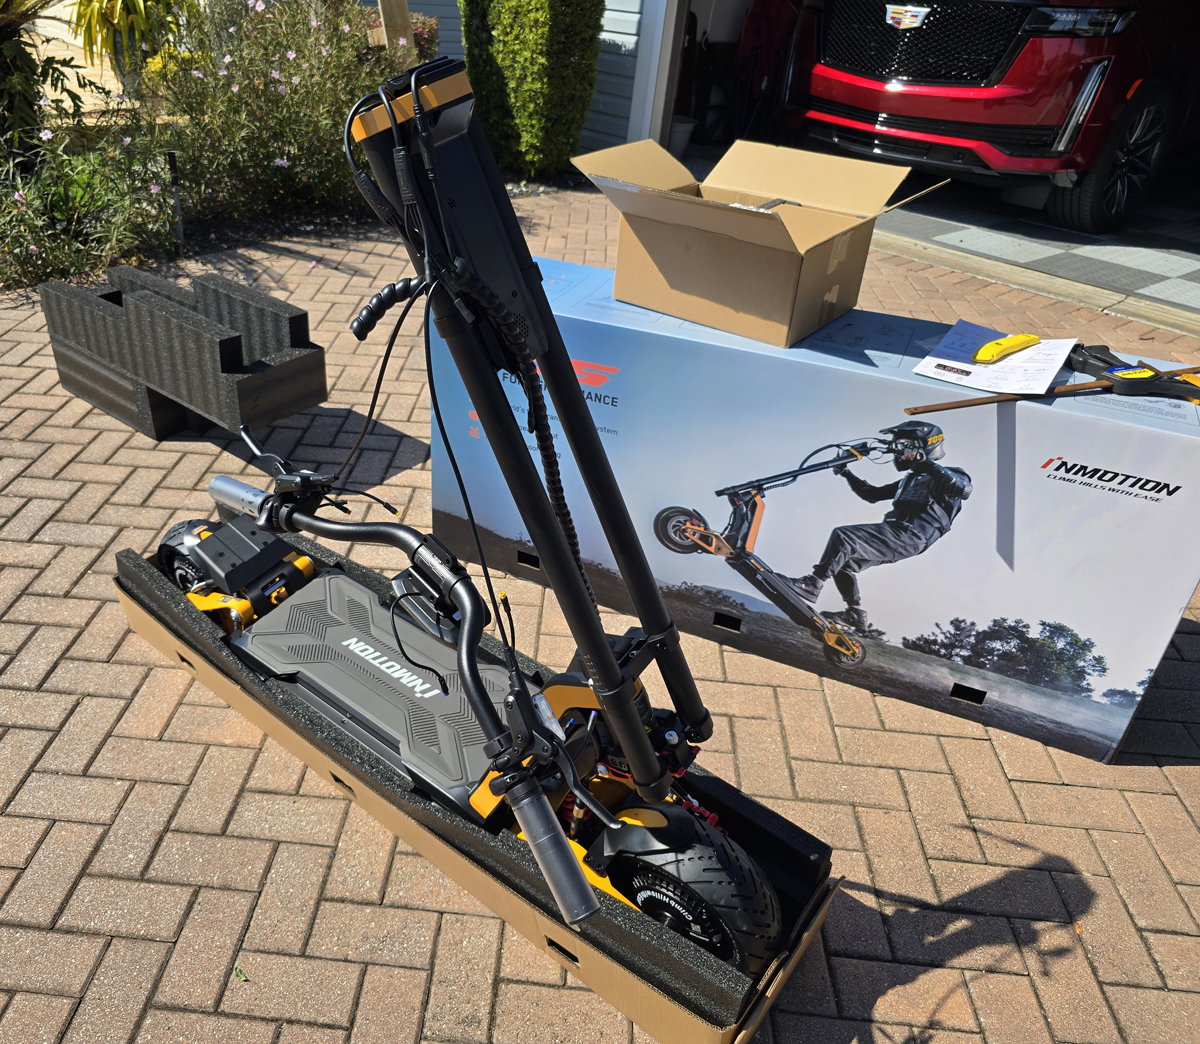
Everything is encased in sturdy foam. That box contains the other pieces, connectors, and tools required to assemble the scooter. To be clear, the scooter is essentially fully assembled. You have to fold up the handlebar stem, secure it, and attach the handlebars, headlight, and rear fender. Then, you plug all of the color-coded connection wires into each other. It all sounded so simple…and mostly, it was.
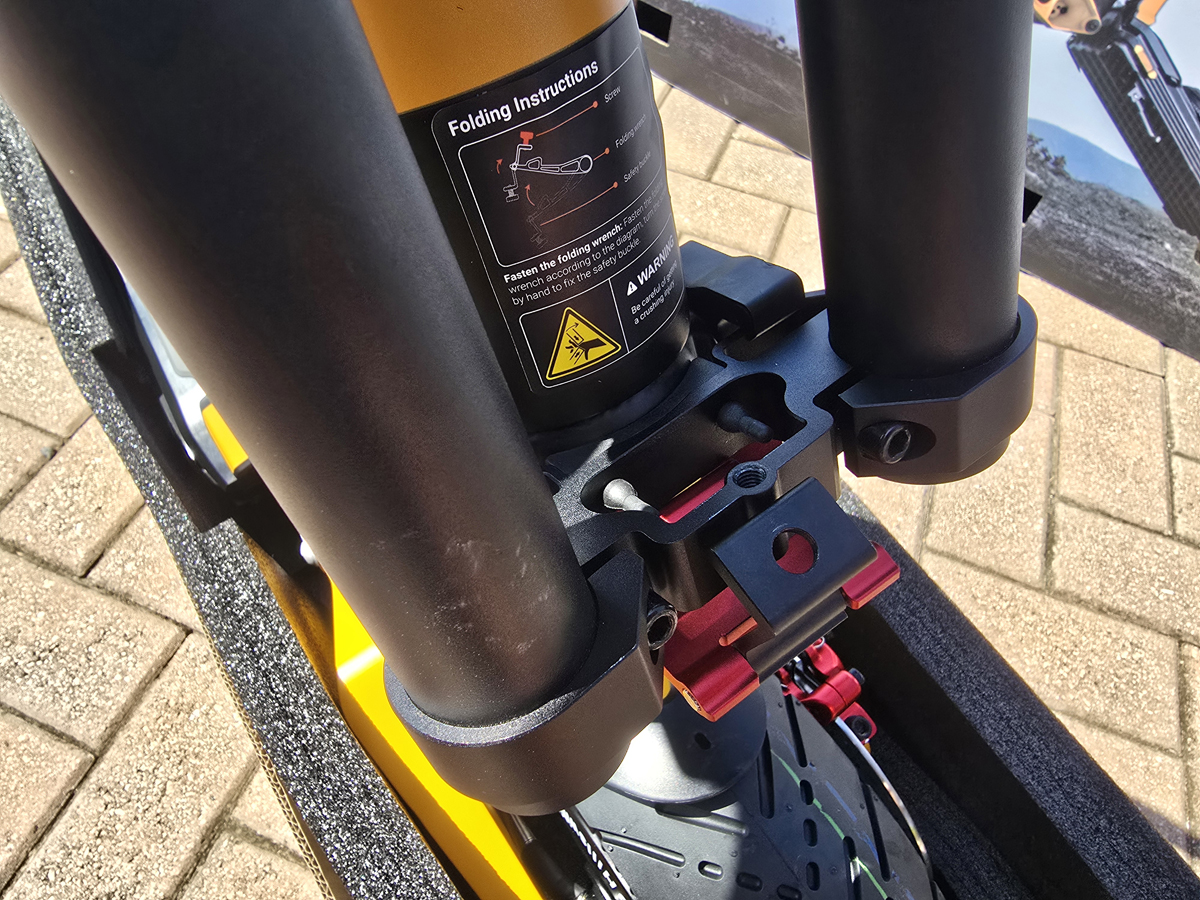
The first step, folding up the handlebar stem and securing them seemed simple. But looks are deceiving. The stem is secured with a flip-up latch and a thumb screw. As you can see from the photo below, the flip-up latch wouldn’t flip up. There were two reasons for this. The first is that the rubber bumper on the back of it is very stiff and wouldn’t compress easily. We worked around that with my lovely wife pushing for all she was worth against the top of the handlebar stem. But that wasn’t the only issue. The red latch assembly was misaligned. Because of that, no matter how hard we pushed and prodded, the tabs wouldn’t slip into place as it was twisted to the right.
A few love taps from my dead-blow rubber mallet made the latch assembly see the light and move into the correct position. After that, I could secure the latch. Here is a look with the thumb screw in place.
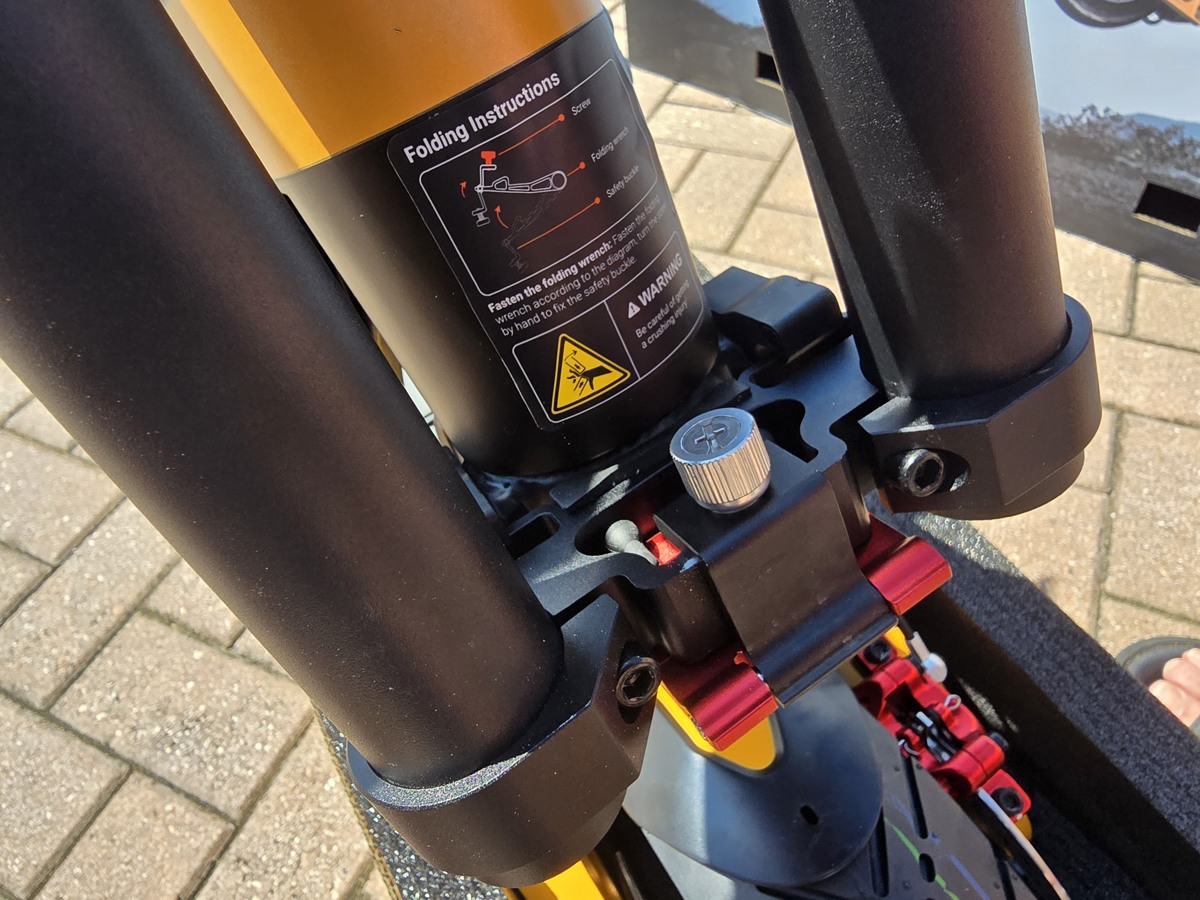
Wow, that was rough. I should note that the handlebars do not look in place when folded, so picking up a folded scooter will be difficult. Of course, the 128lb weight contributes to that difficulty too.
I hoped the rest of the assembly wouldn’t involve coming to blows again, and it didn’t. With the stem in place, I could secure the handlebars with the four provided screws and then tighten the display. The included T-shaped wrenches made that part easy. Next up, I attached the headlight.
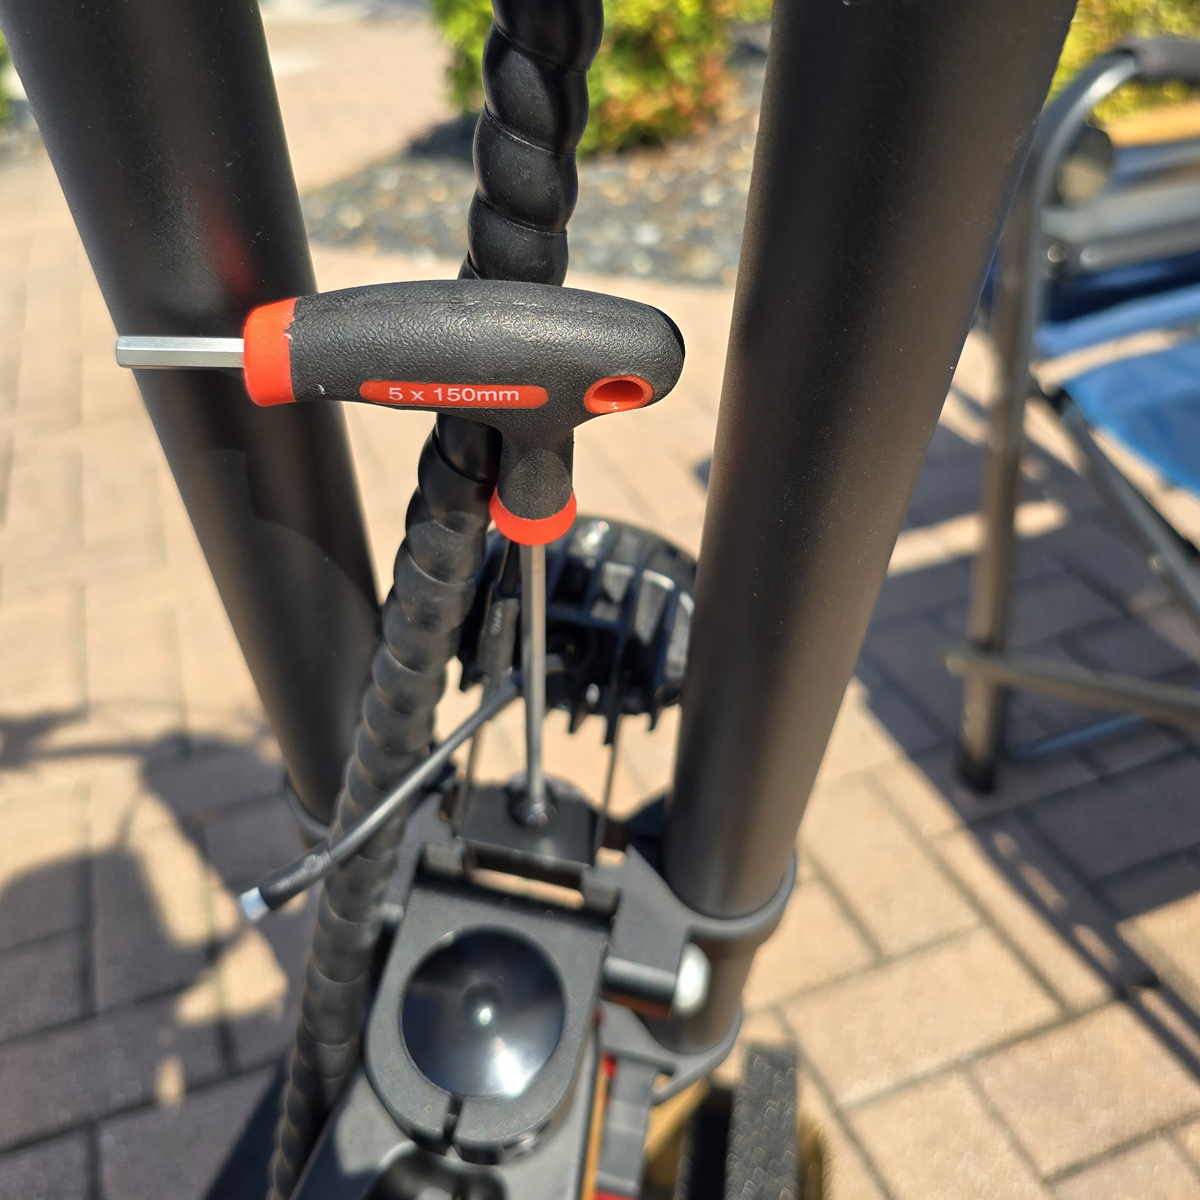
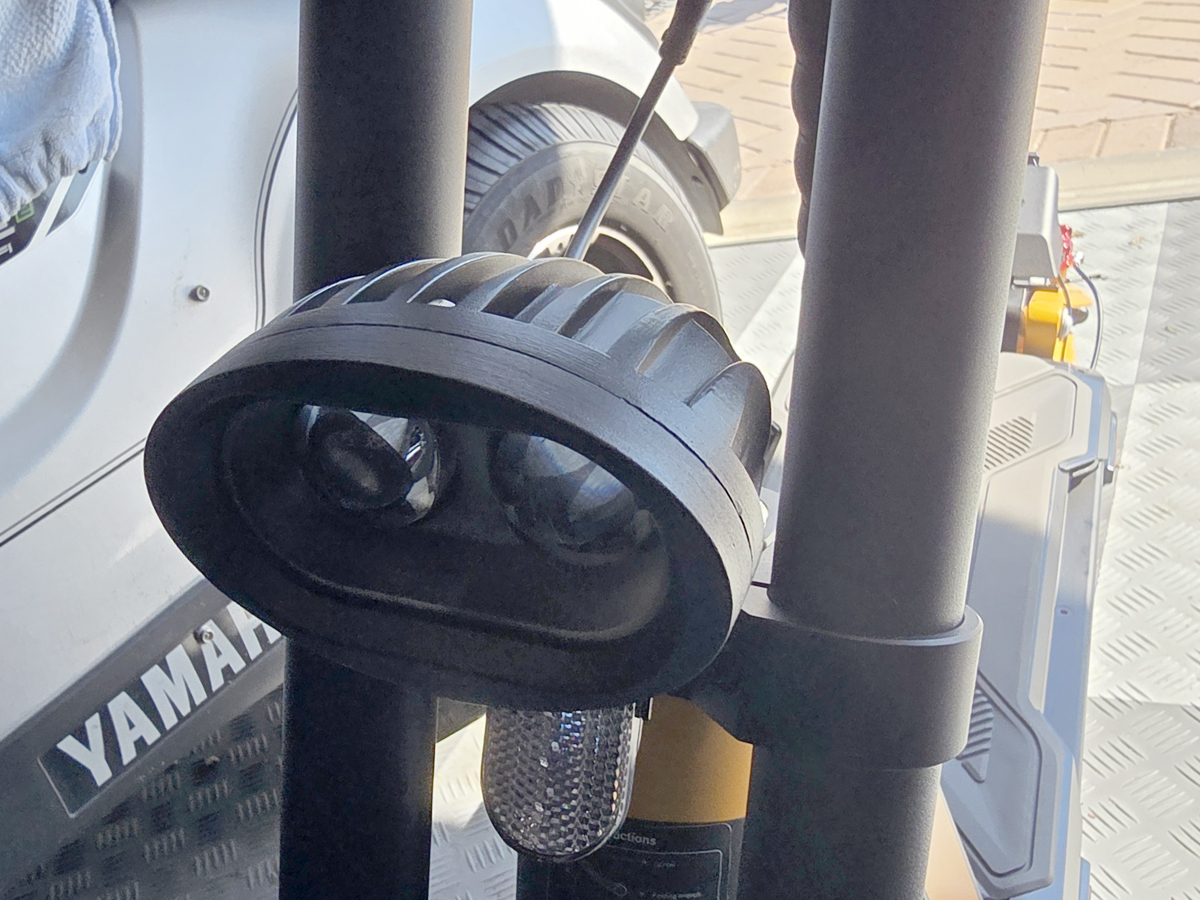
I couldn’t use the nifty wrenches as the design of the handlebar stem would allow it. I had to use the smaller, included multi-wrench. It worked but was more tedious. Here it is, attached and tightened.
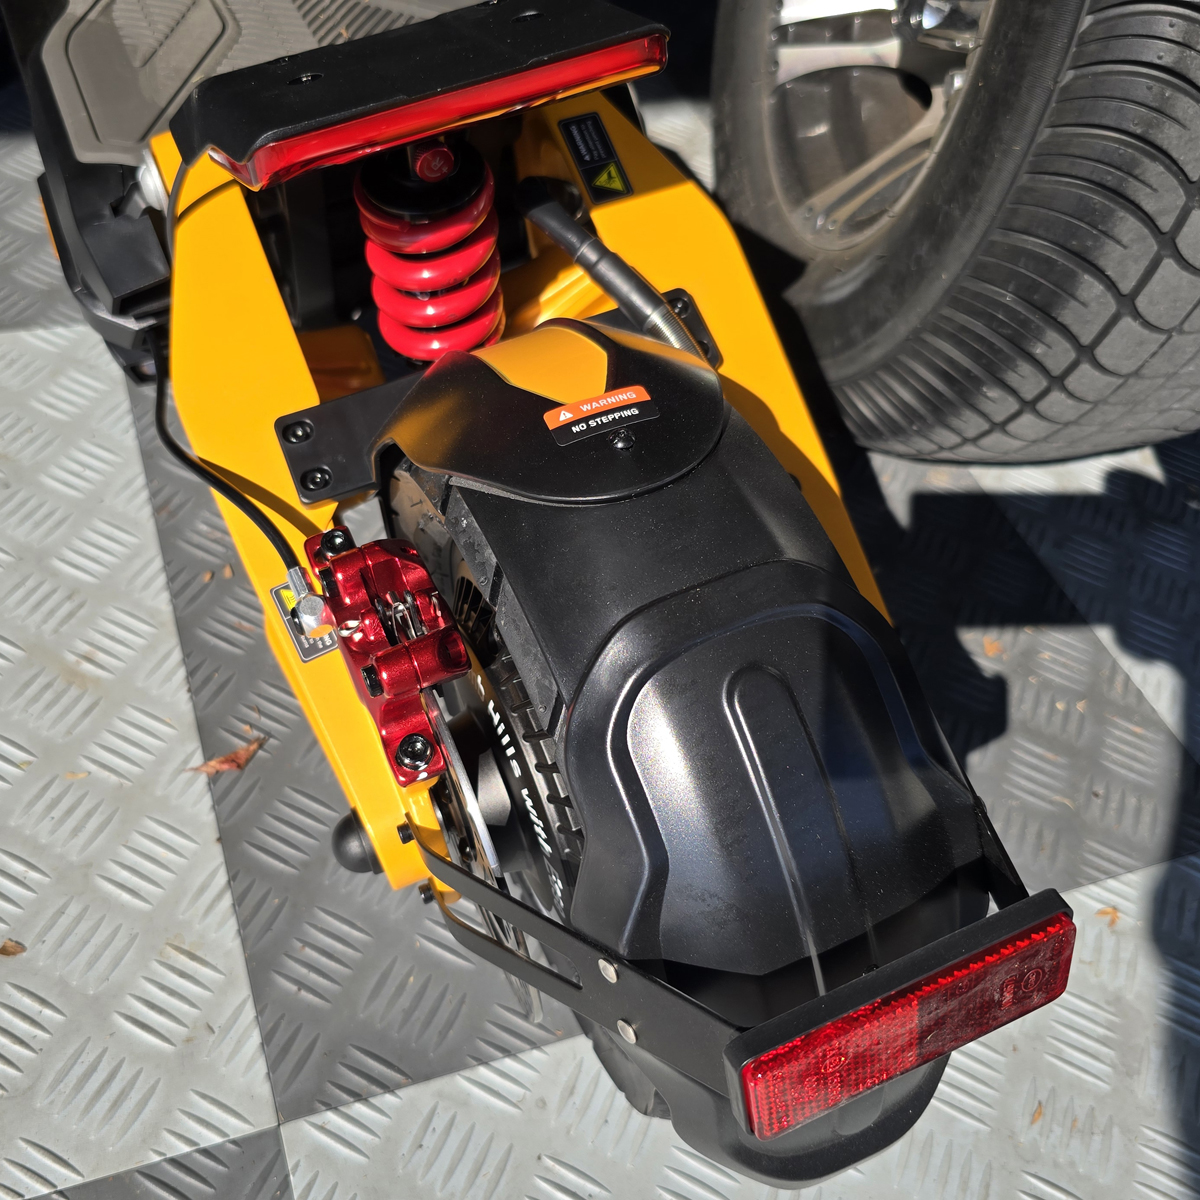
The final assembly step was to install the rear mudguard. It inserts under the rear fender and is secured to the fender with the one small screw you can see just behind the NO STEPPING wording. Then, it secured to the rear structure with two bolts on each side.
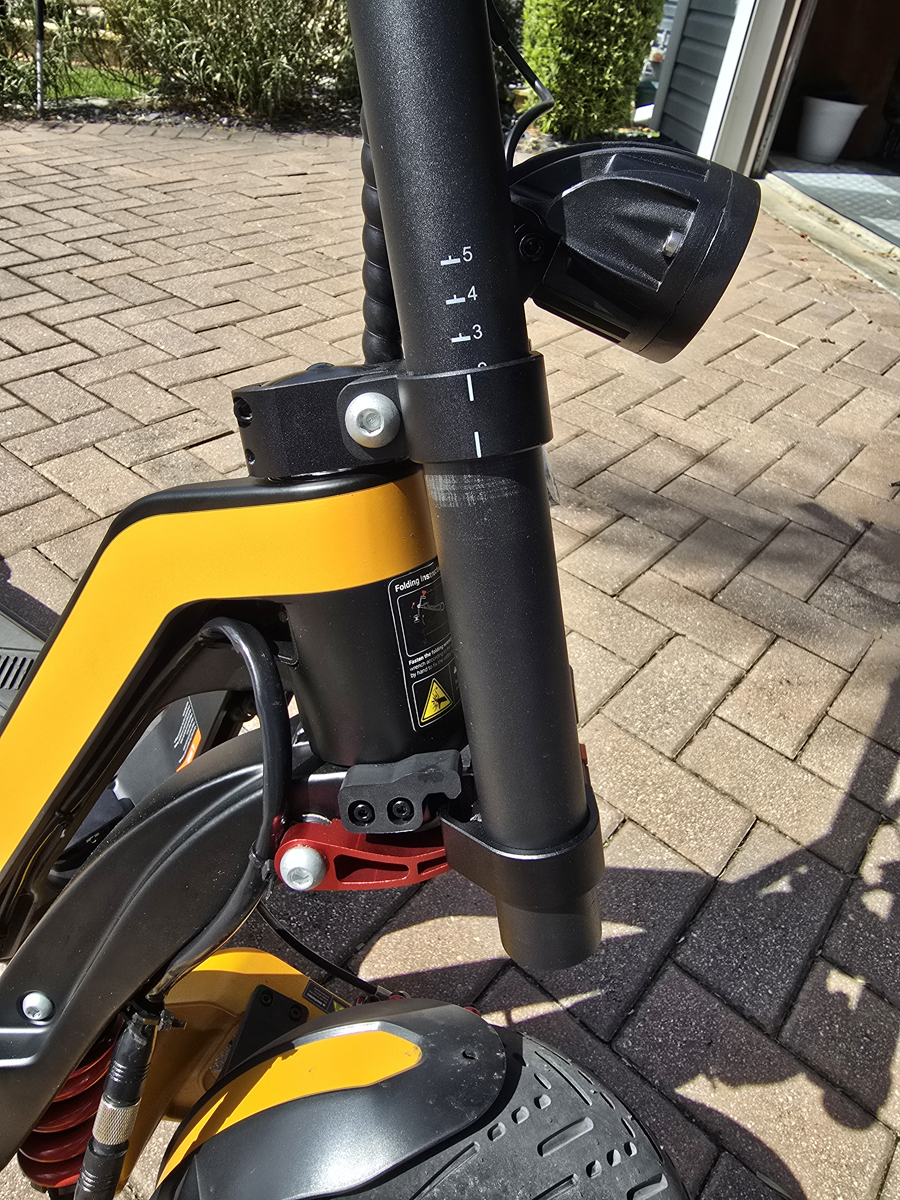
The handlebars are also height-adjustable. To change the height, you loosen the four bolts, two on each of the two brackets – one below the headlight and one at the bottom of the stem.
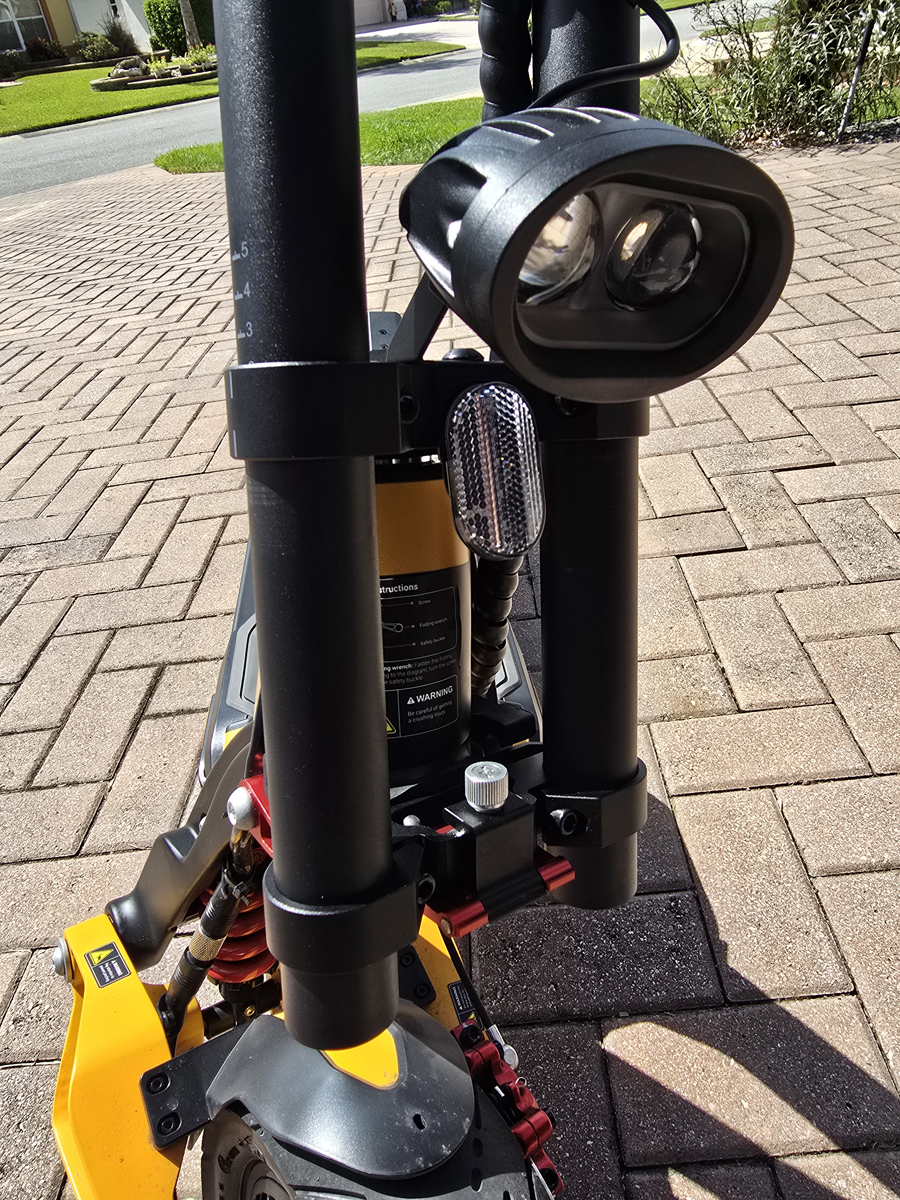
Then you slide the stem down through the brackets, using the markings on the side as a guide. Tighten the bolts again and you’re good to go.
I already had the Inmotion app installed on my phone from my Inmotion Climber review. I turned on the scooter and opened the app. It immediately found the scooter and asked if I wanted to register it. I did and the scooter was activated and ready to ride. It arrived with a little more than 60% charge so I was ready to give it a try.
I only had one more step to take – cut up the shipping pallet and boxes and set everything out for the trash. They’re going to hate me…

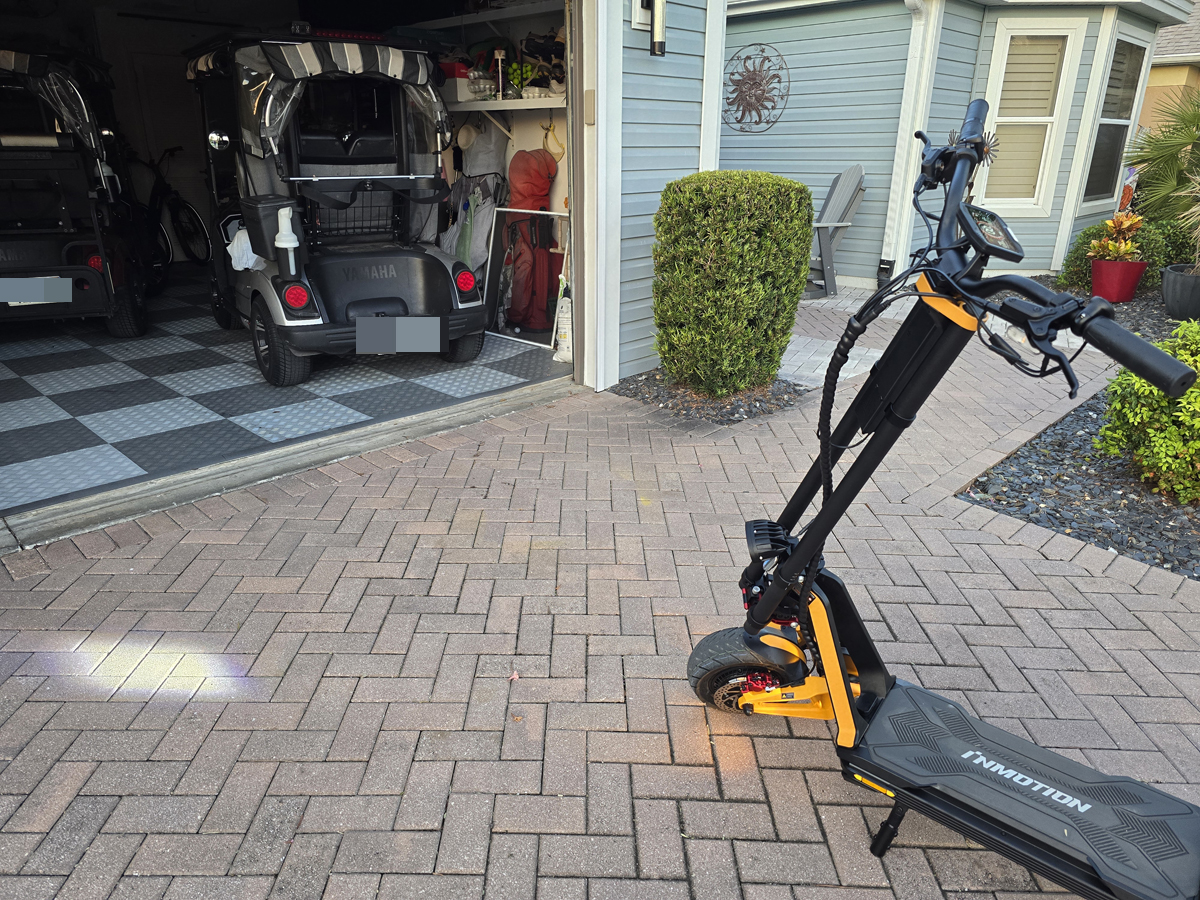
Let’s look at the fully assembled scooter. I have the lights turned on and you can see the position lights glowing toward the front and rear.
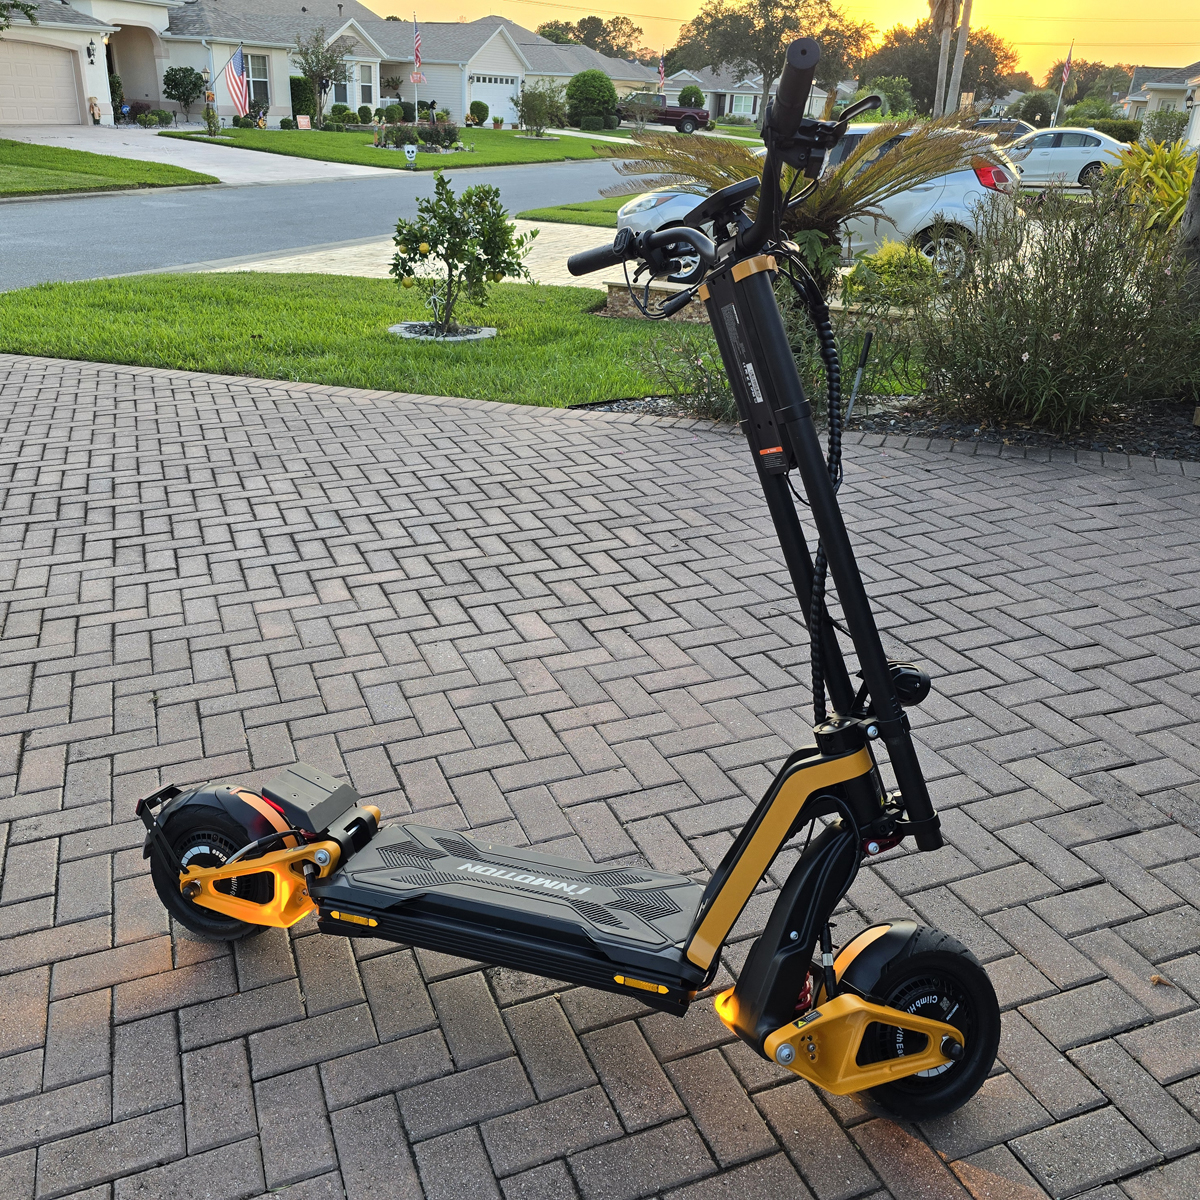
Here’s a look from the other side. You can see the wiring bundle neatly contained in a wrap-around cable manager.
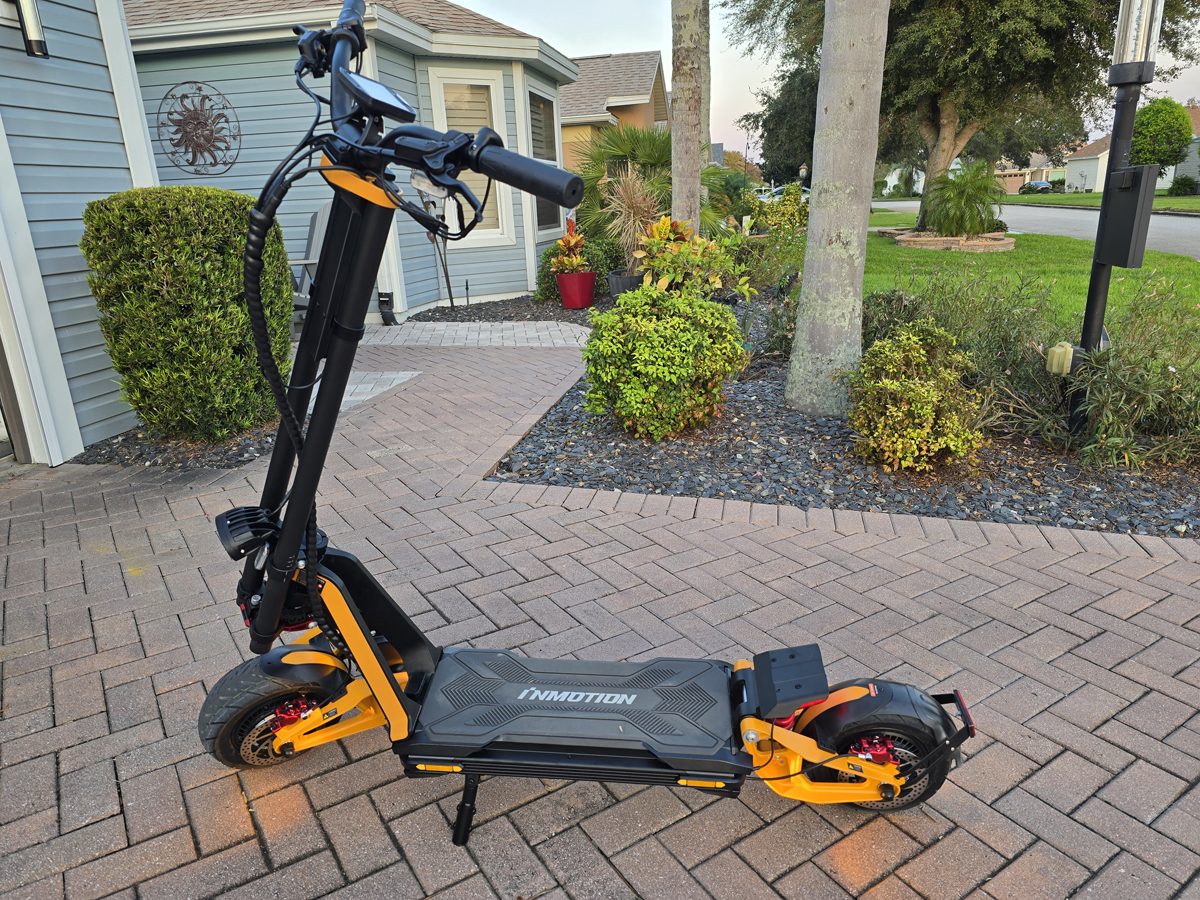
Here is a quick diagram that explains everything.
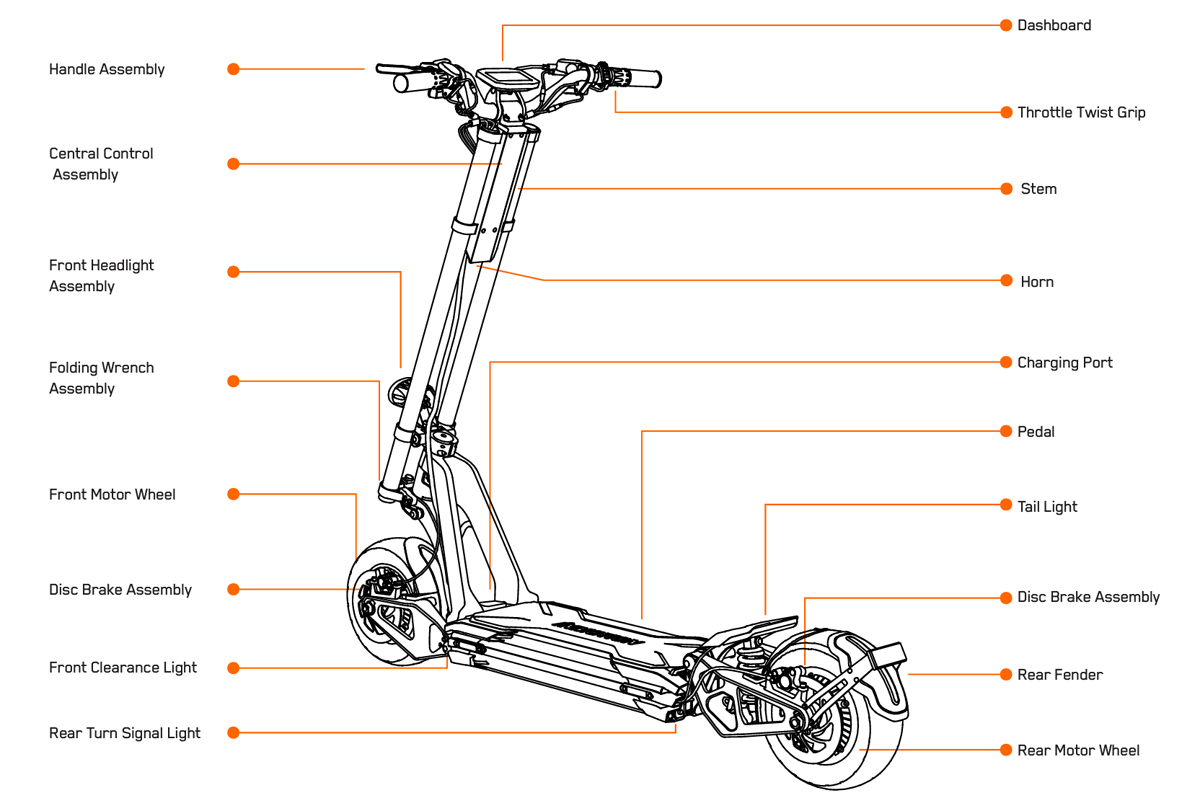
You can see the large, rubber-treaded deck (they call it the pedal) and the rear step with an integrated tail light. Here is a look at the headlight pattern. It is a little deceptive as the light was aimed too low here. It does a much better job once properly aimed.
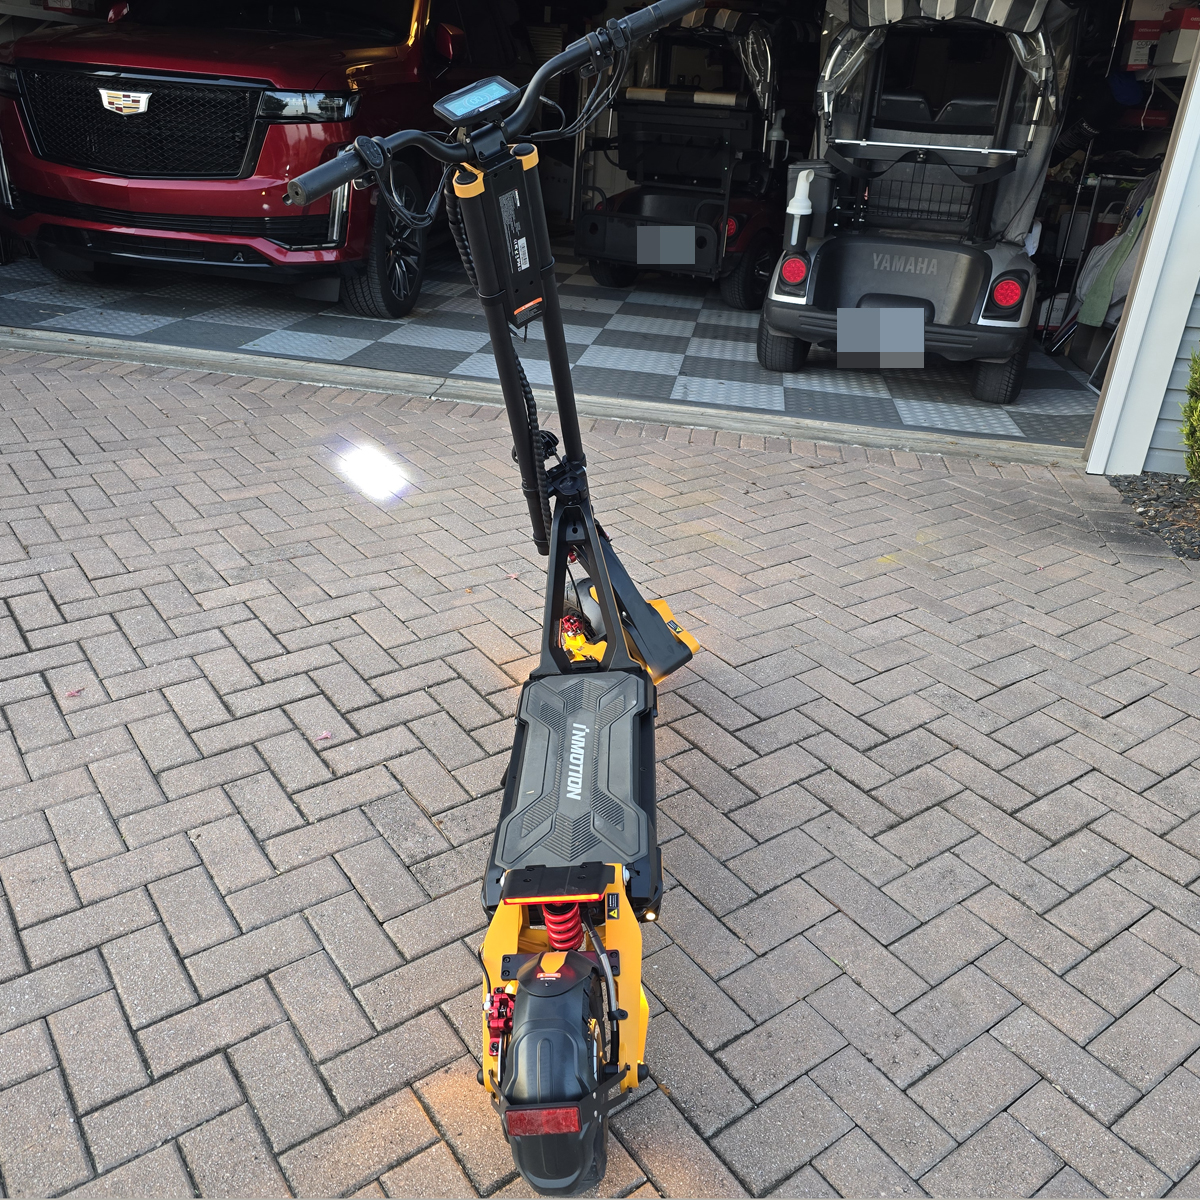
The pattern is narrow, but when you aim it down the road, the spread illuminates the entire lane in front of you.
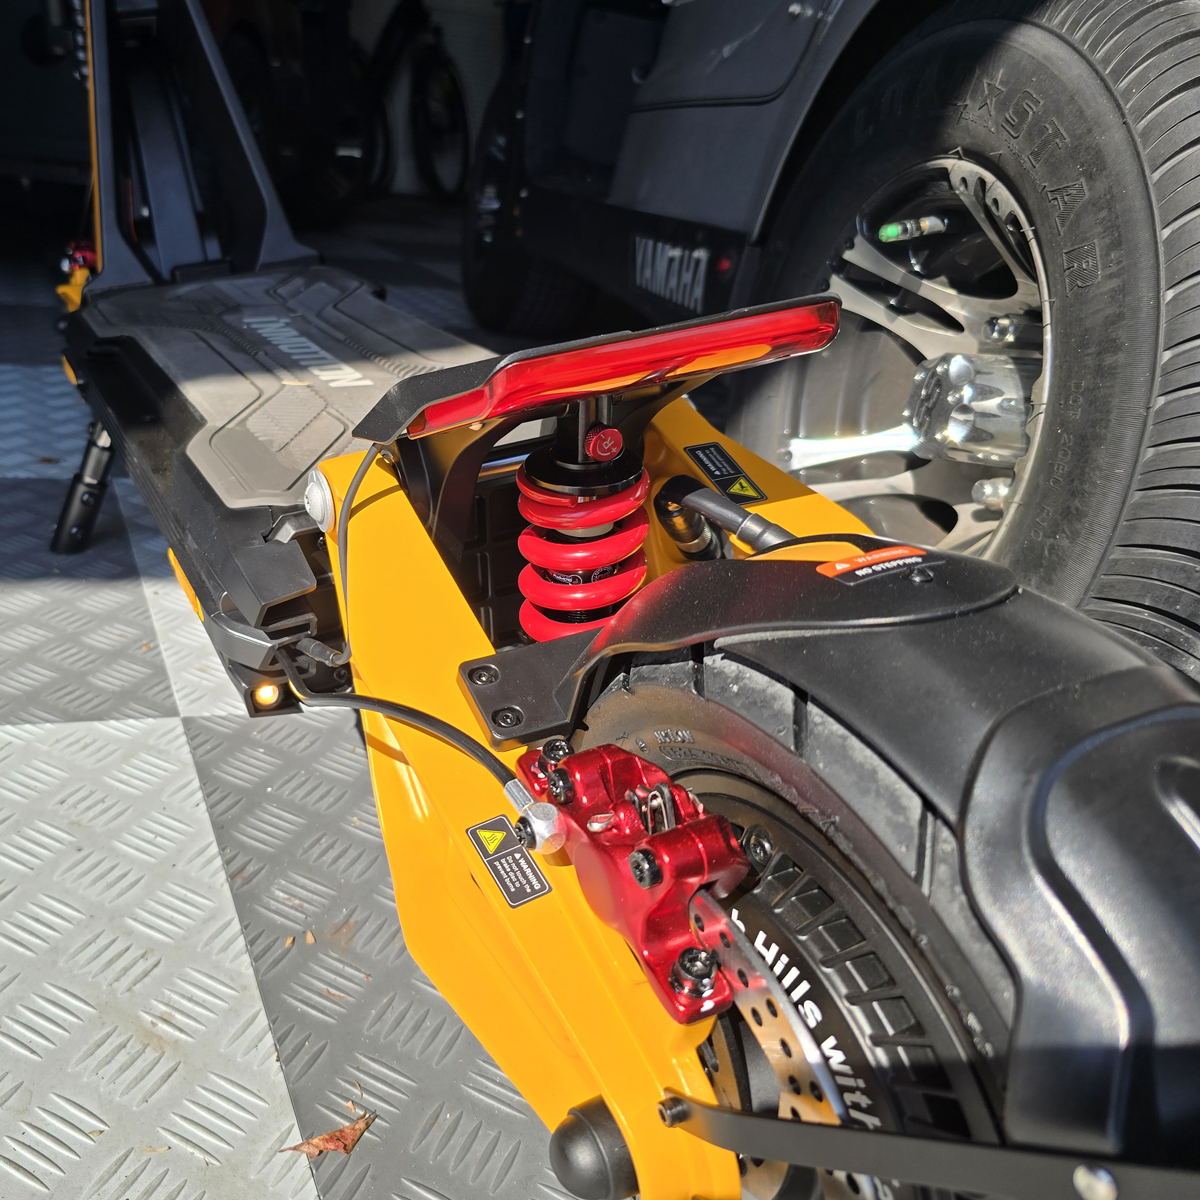
Here is a look at the rear of the scooter. You can see the wide tail light across the width of the rear step. It lights up brighter when the brakes are applied. On the bottom left, you can see the yellow light which is both the position light and turn signal. You can see the robust rear suspension that provides outstanding control. The red thumb screw above the red spring allows you to adjust the suspension dampening. This is available on both the front and rear suspension.
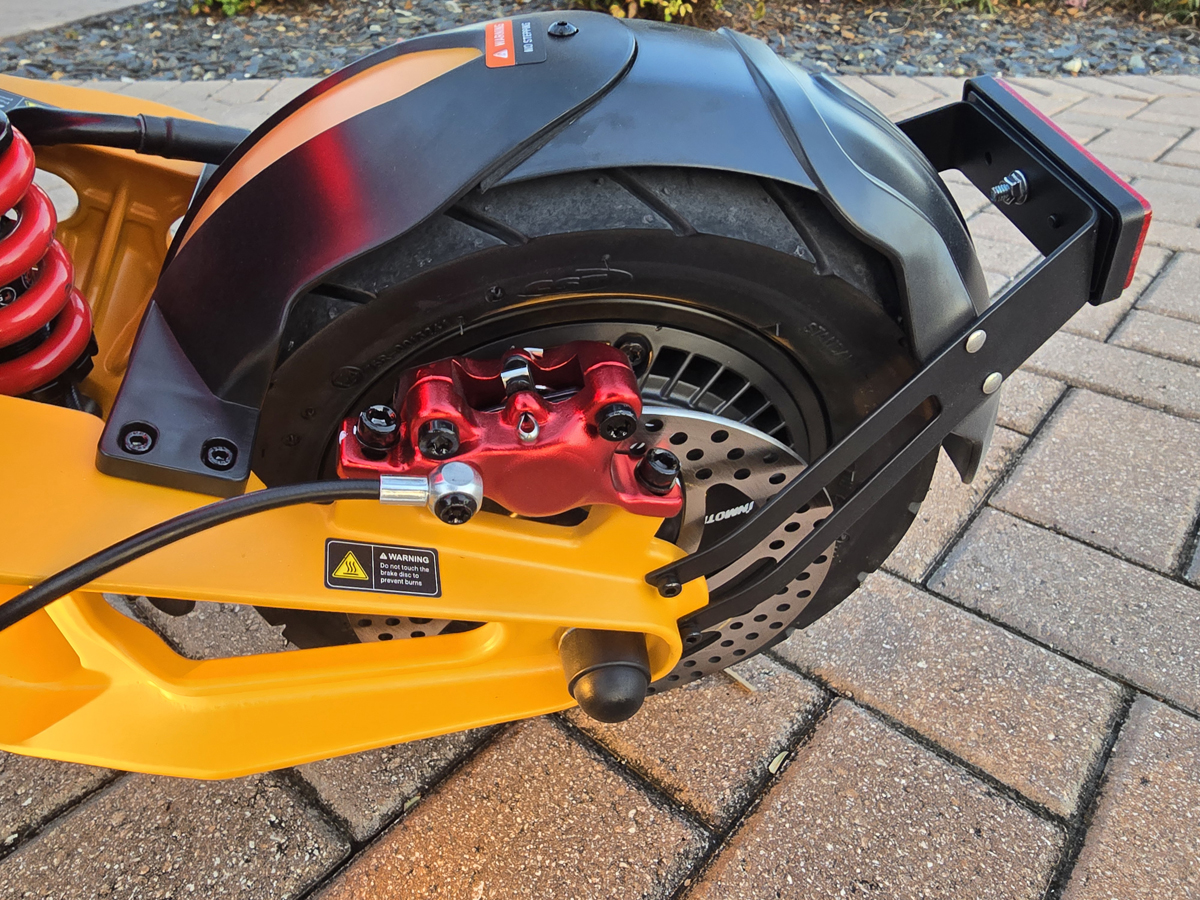
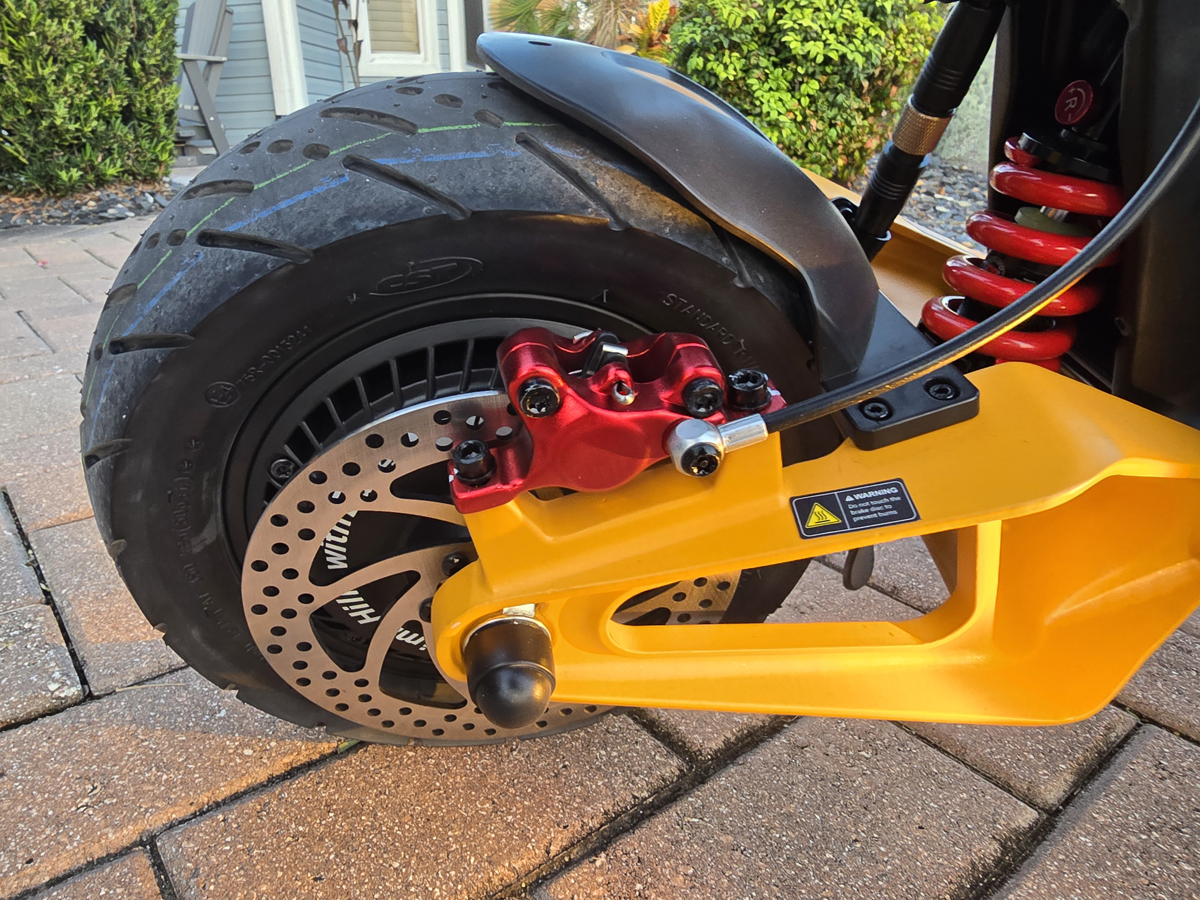
The bright red hydraulic brake caliper sits over the massive brake rotor. The mudguard and rear reflector are mounted under the rear fender and provide terrific protection from road spray.
This is a look at the same features on the front wheel.
Taking a look underneath the Inmotion RS scooter, we can see that the entire bottom is weather-sealed, making rides in wet weather no big deal. You can also see the stubby but stout kickstand. If you look closely at the front edge, just in front of the kickstand, you can see the front position light. The one on the other side is also visible.
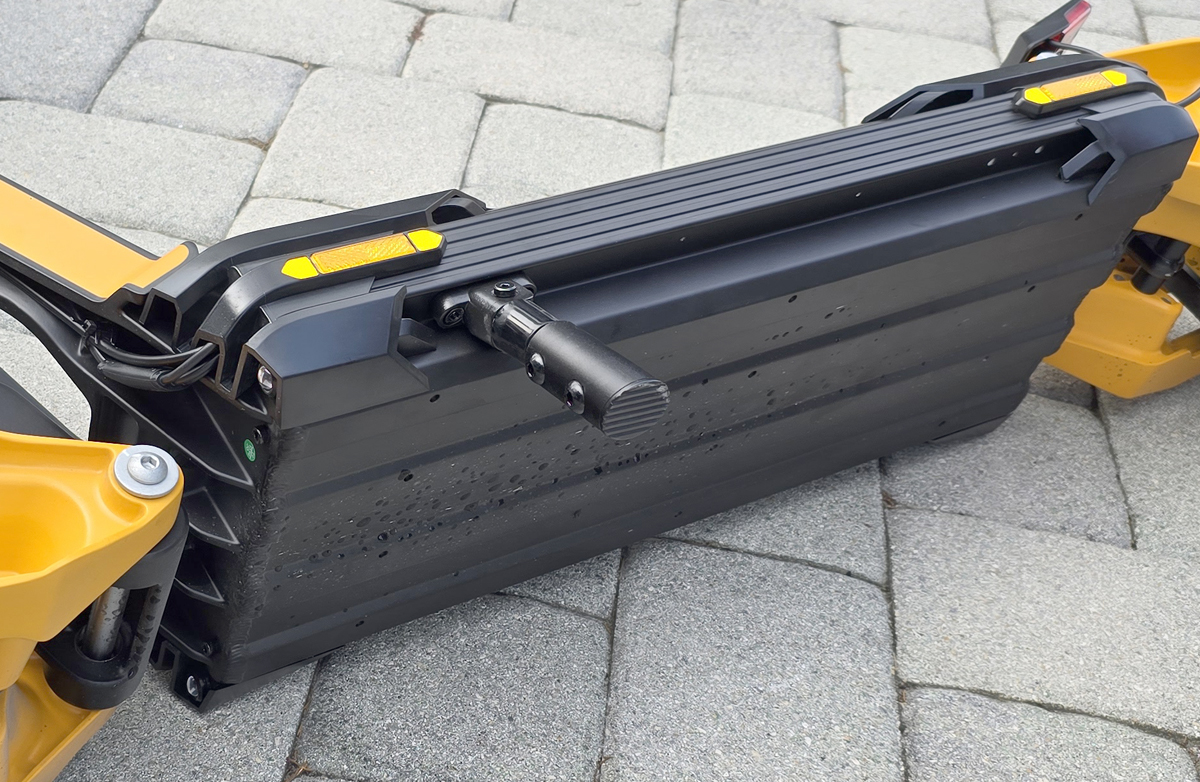
When I tipped it over, I noticed that an error code started flashing on the display and none of the controls would work. It went away when I tipped it upright. I tipped it the other way and the same thing happened, perhaps a little more than halfway over. It appears that there is a tip sensor built in that prevents the scooter from operating when you lay it down. That’s a great feature. You would think that they would document that in the manual.
One of the main differentiators for this scooter is that it is transformable from a road scooter to an off-road scooter. The suspension can be changed between four settings.
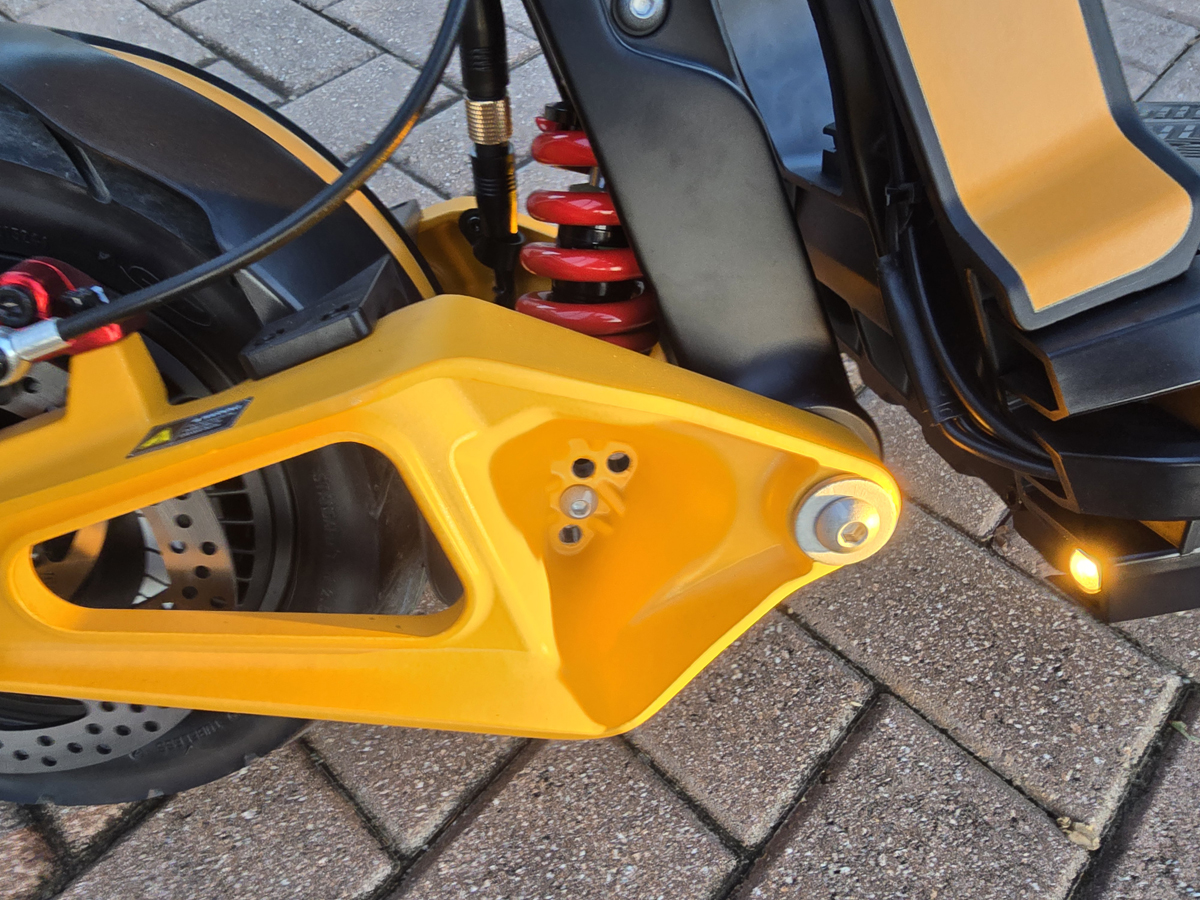
The front and rear can be raised or lowered by pulling the bolt in the four-hole area and moving it, raising or lowering the deck accordingly. This is how it comes from the factory. It runs great on roads while still allowing for things like driveway curb handling. Lowering it would be great for high-speed zero-bump cruising. Raising it transforms it into an off-road monster.
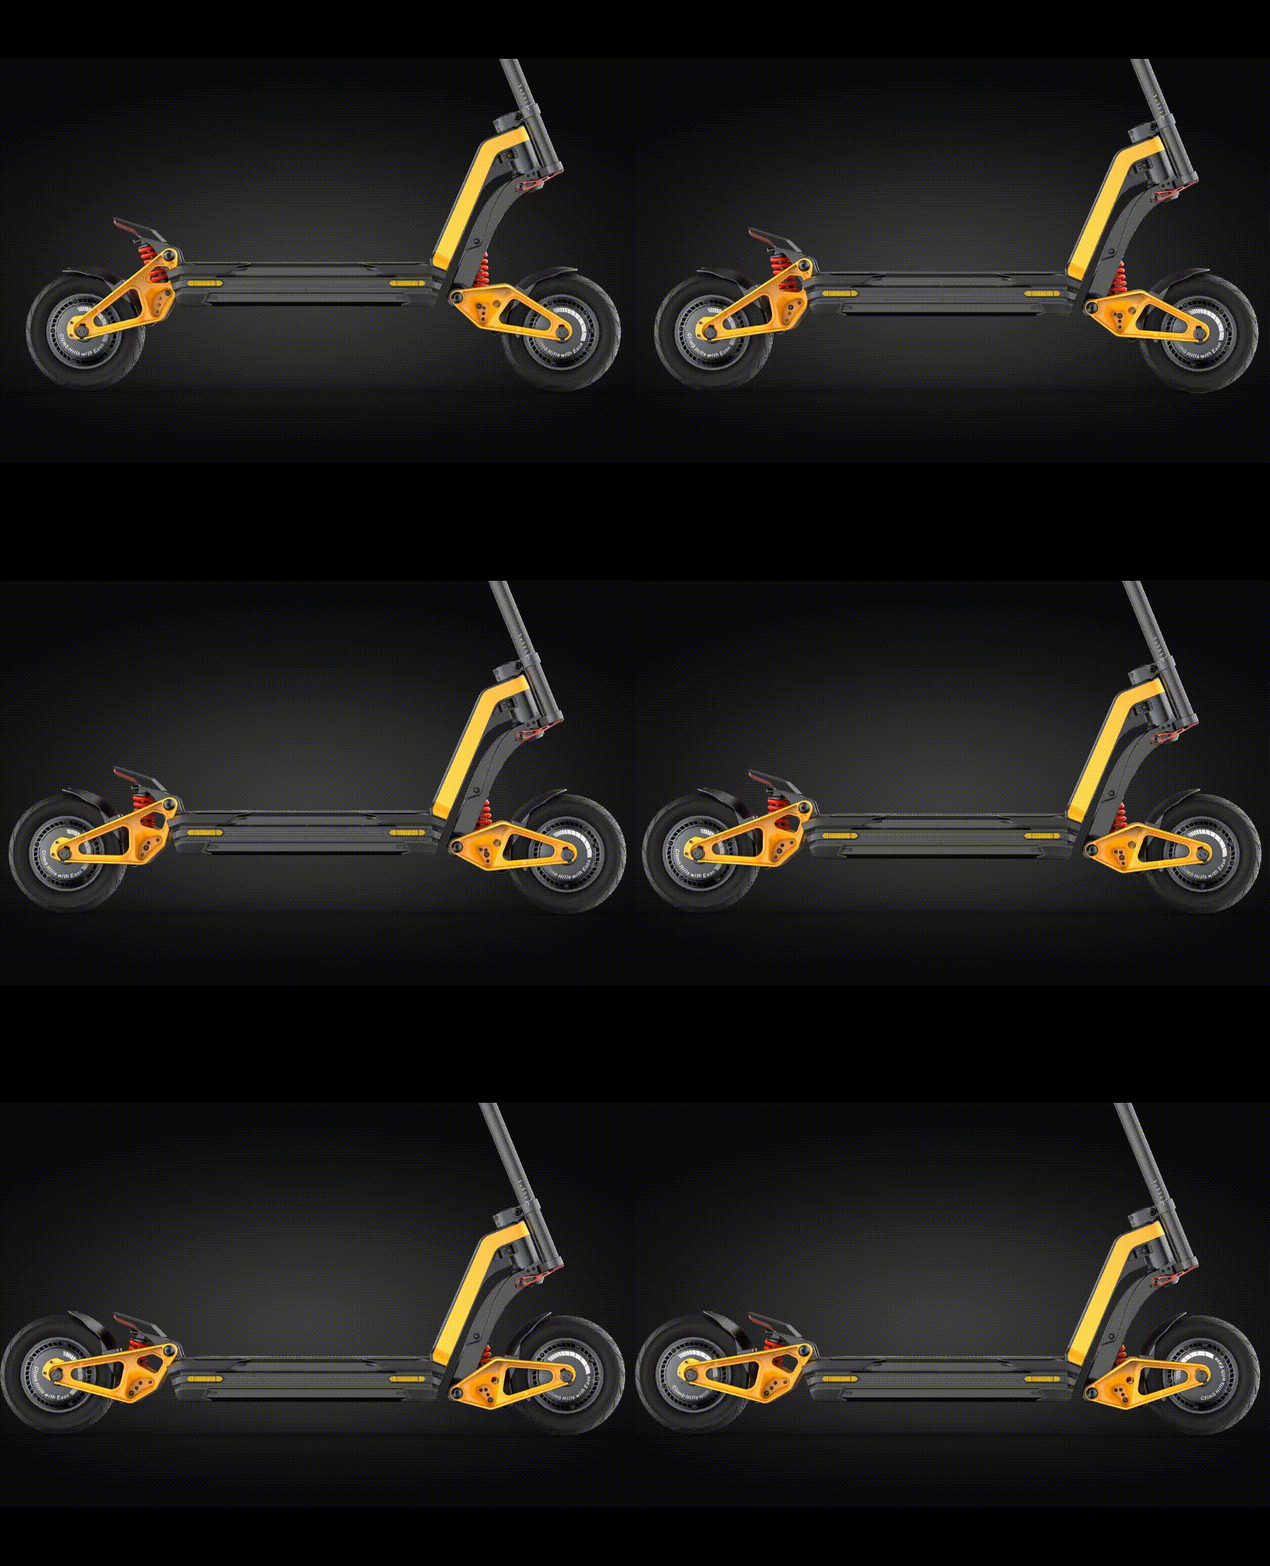
Since I’ll be cruising in a semi-urban environment with driveway curbs, I left it in its original configuration.
Here, you can see the front of the handlebars with one turn signal activated.
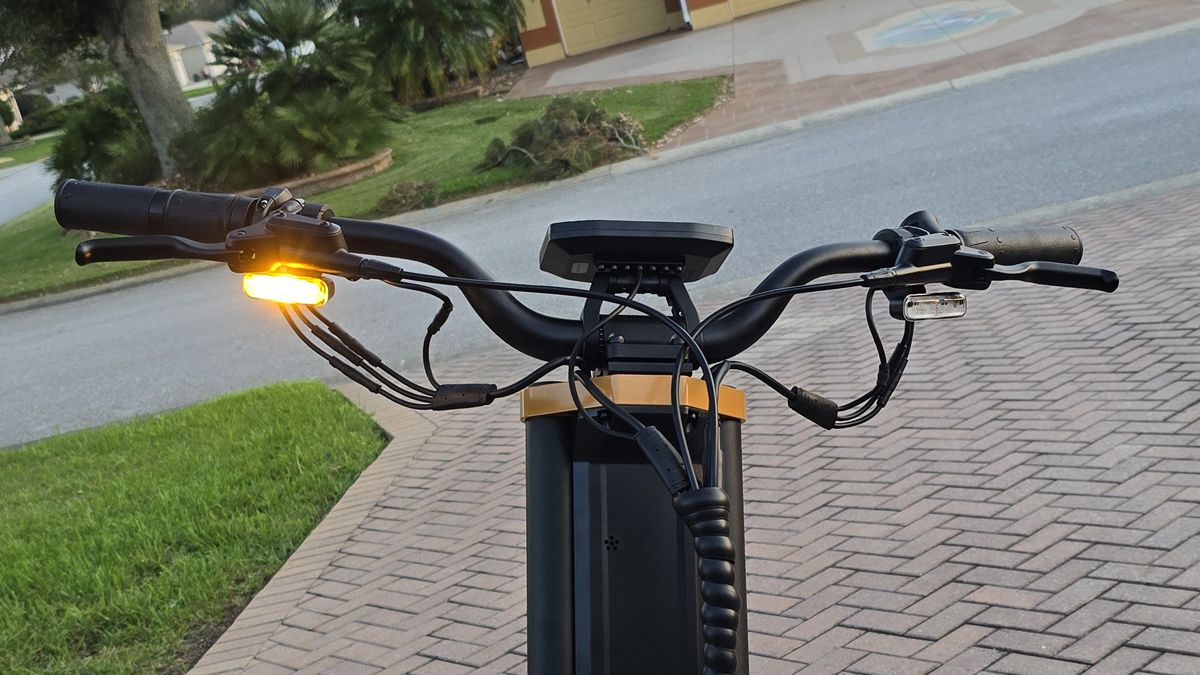
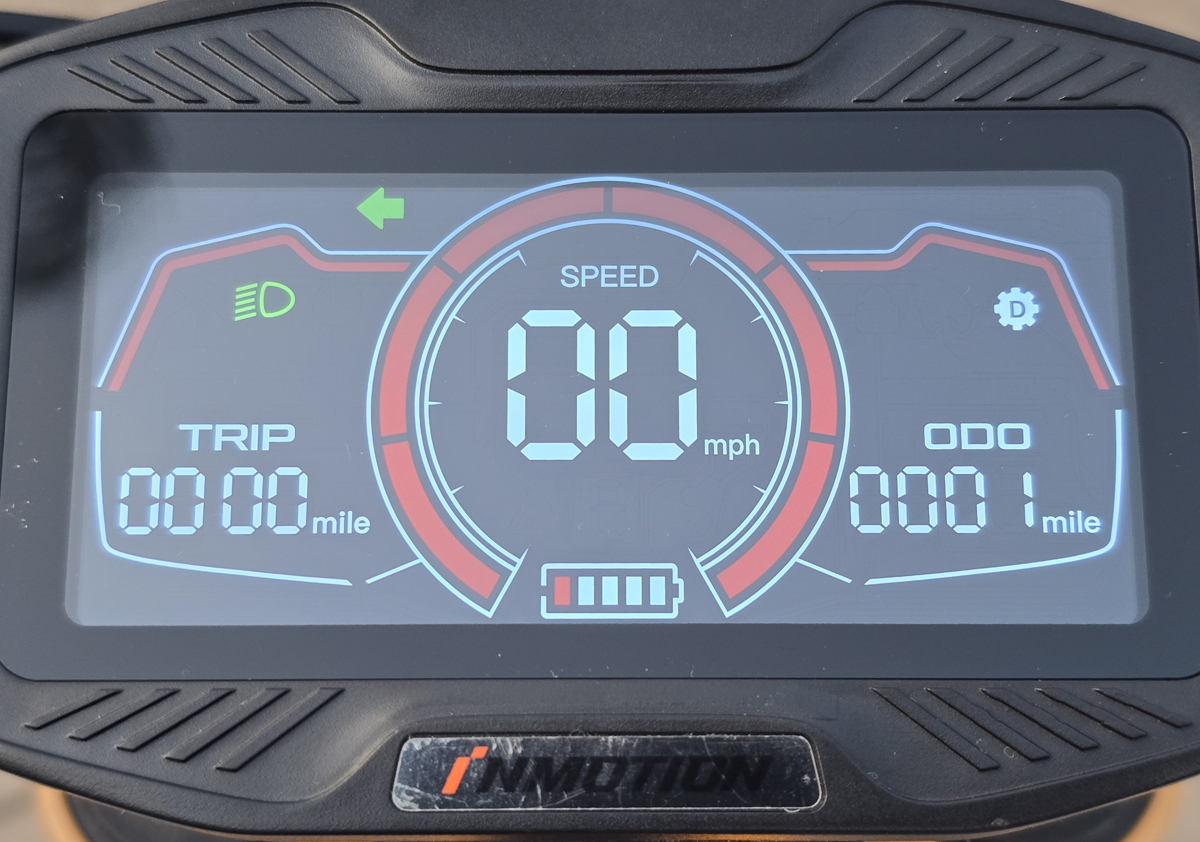
The display is bright and easily readable, even in bright sunlight.
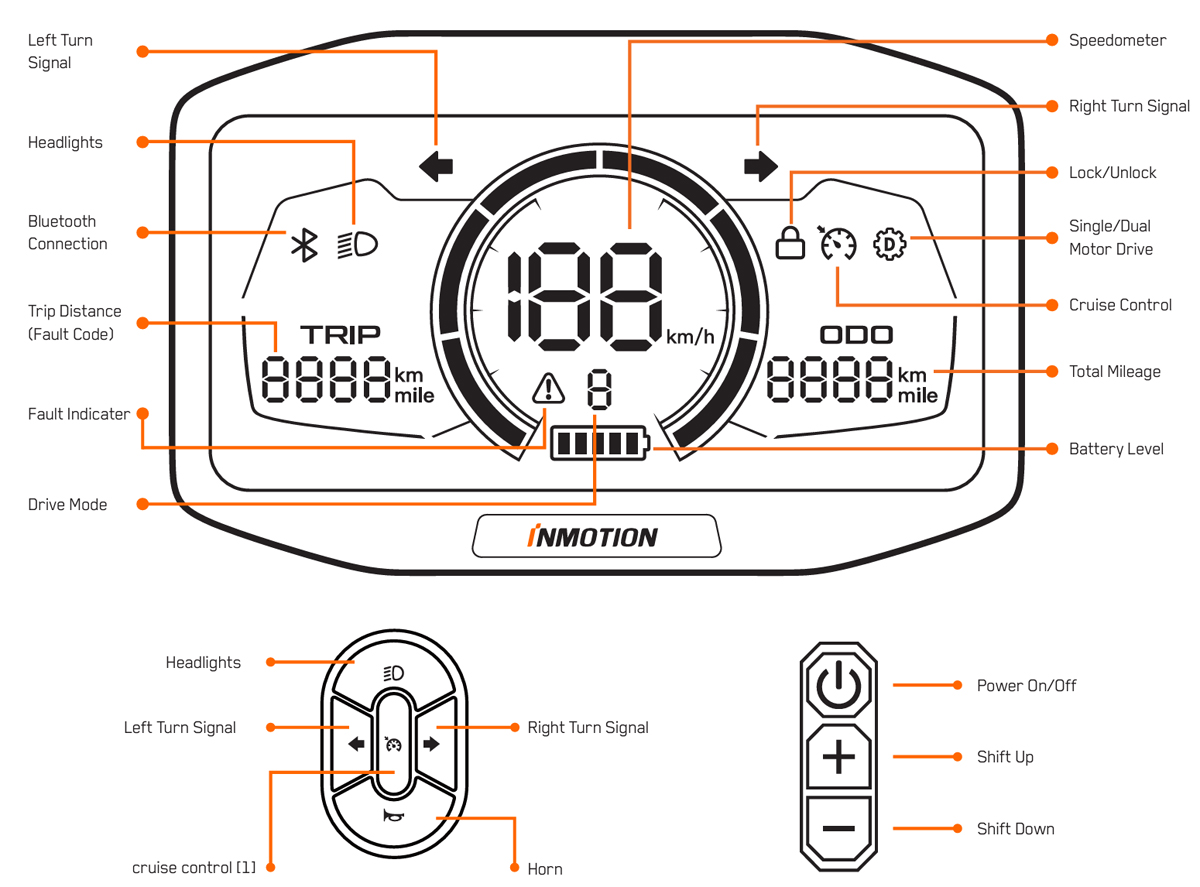
The buttons are mounted on each side of the handlebars.
On the left, we have buttons for the lights, horn, turn signals, and cruise control.
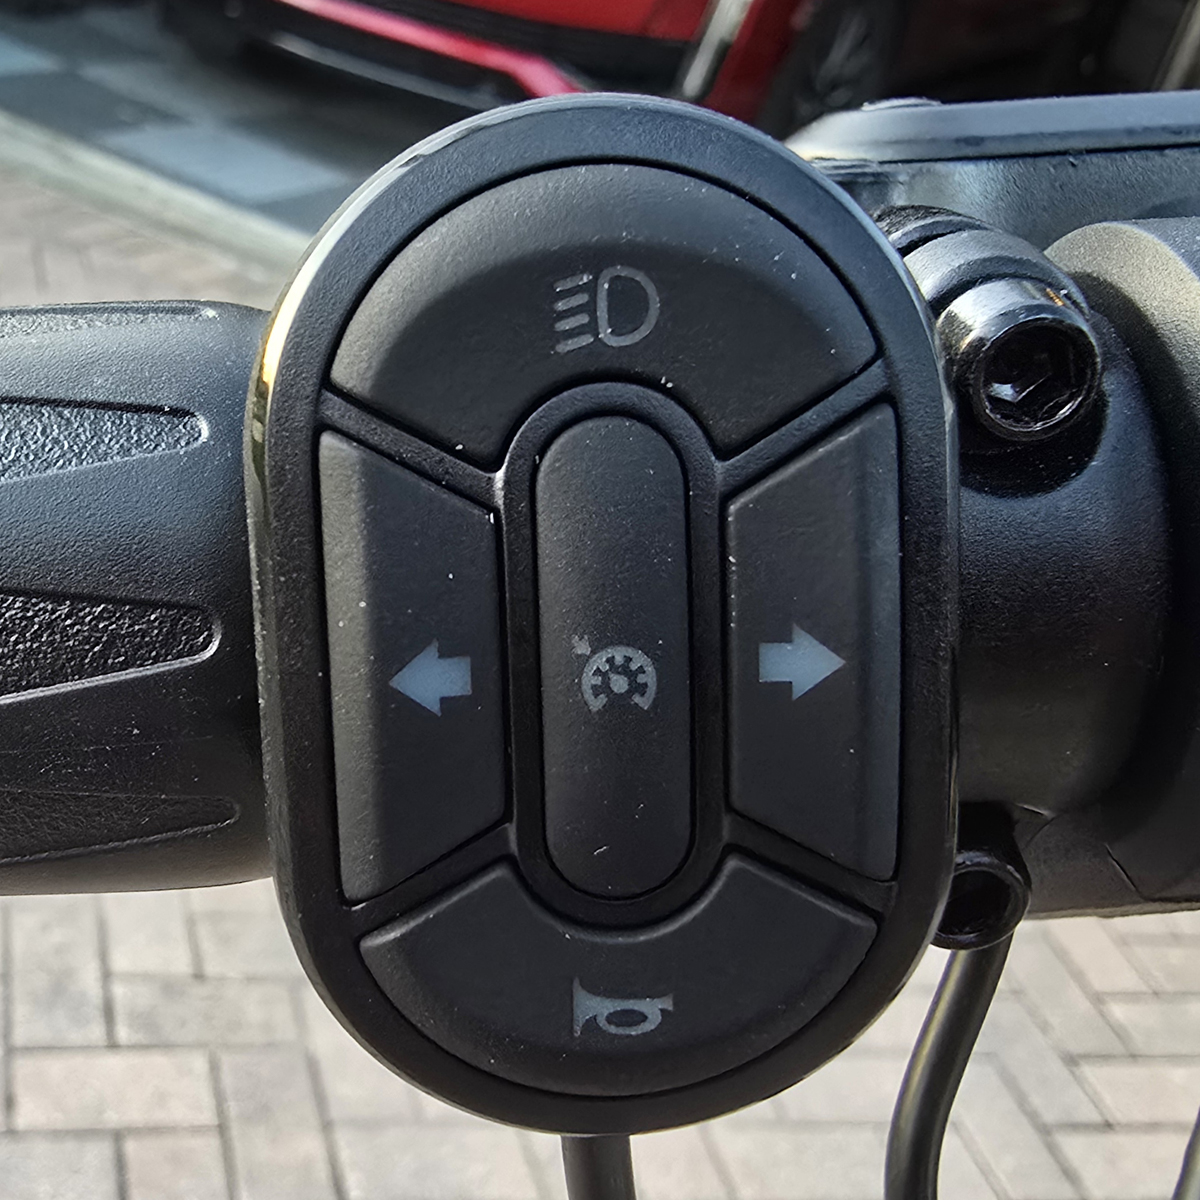
The cruise control button also doubles as the drive mode button, cycling between dual motor drive, rear motor drive, and front motor drive. The less-than-stellar manual says that holding the button will cycle through the modes, changing the indicator accordingly. That’s great but it doesn’t explain what each indicator means. I contacted support and they provided an answer that was incorrect. I know this because I put the scooter up on a stand and tried it. Here’s what the indicators (the gear icon with the “D” in the middle) mean:
- Solid icon – dual motor drive
- No icon – rear motor only drive
- Flashing icon – front motor only drive
The support team flipped the description of the dual and rear motor drive icons.
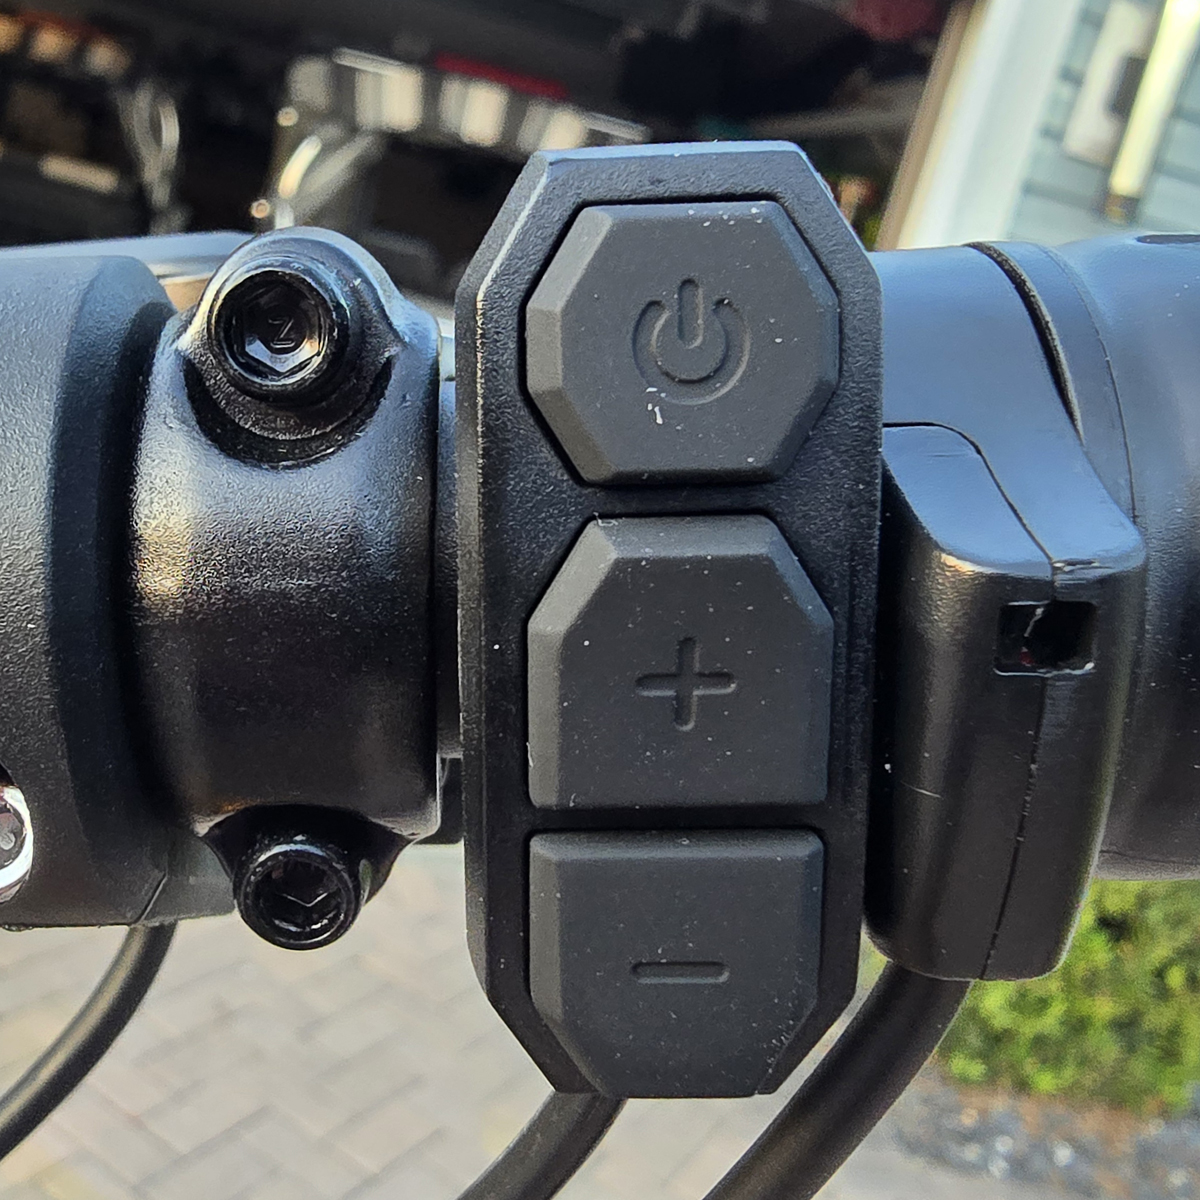
On the right, we find buttons for power, ride mode up, and ride mode down.
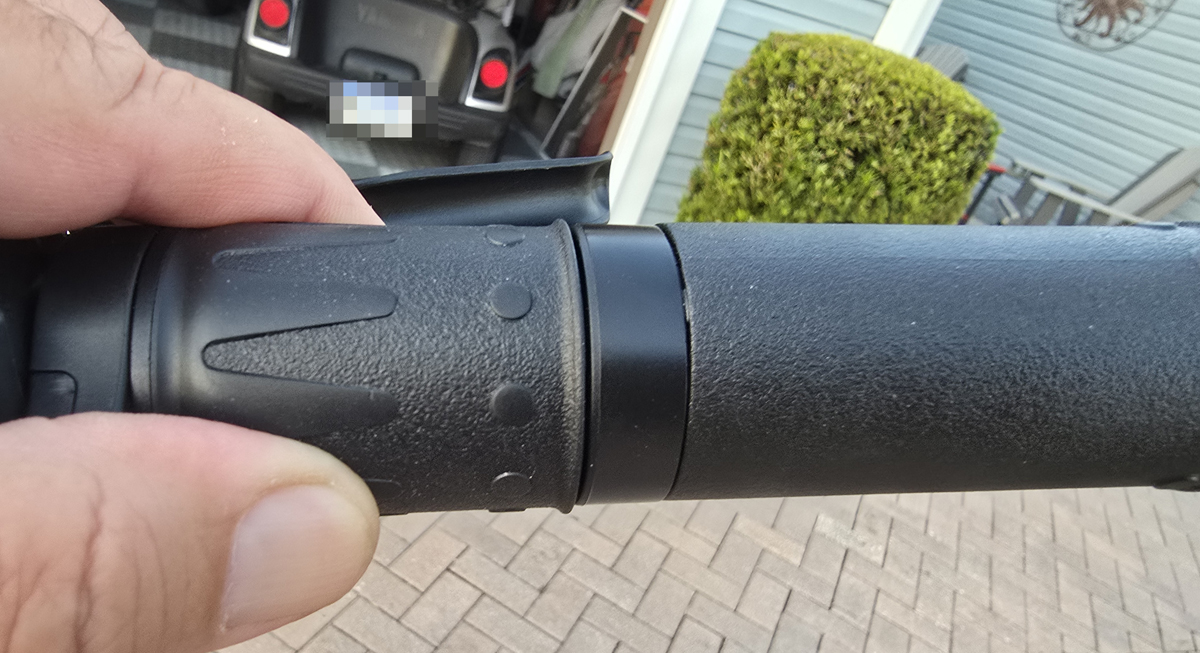
Just to the right of the buttons, we find the quarter-twist throttle. I’m not a fan but there is a solution – more on that below.
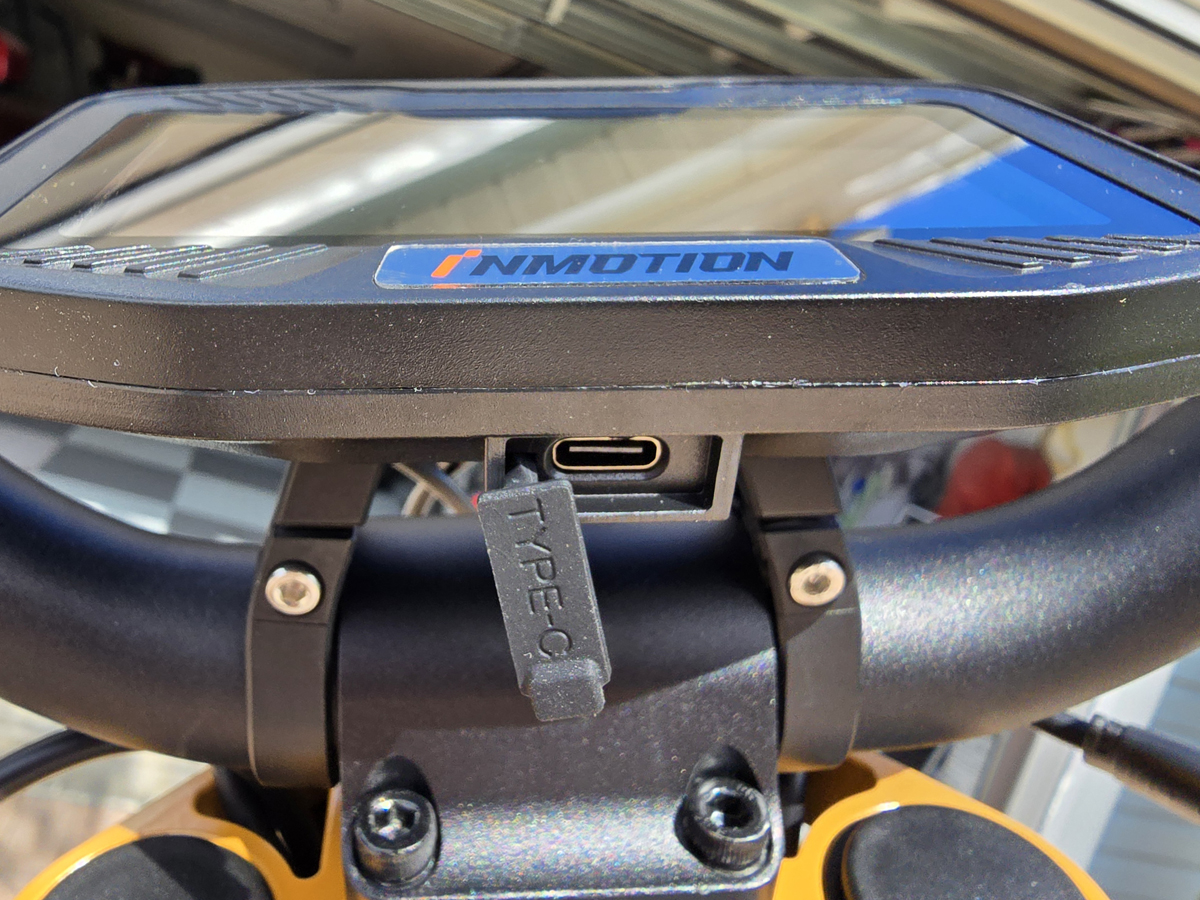
There is a USB-C output port on the display. The manual makes no reference to it.
I thought it might allow for charging a cell phone during a ride. I plugged in my Samsung Galaxy S24 Ultra and this popped up on the phone.
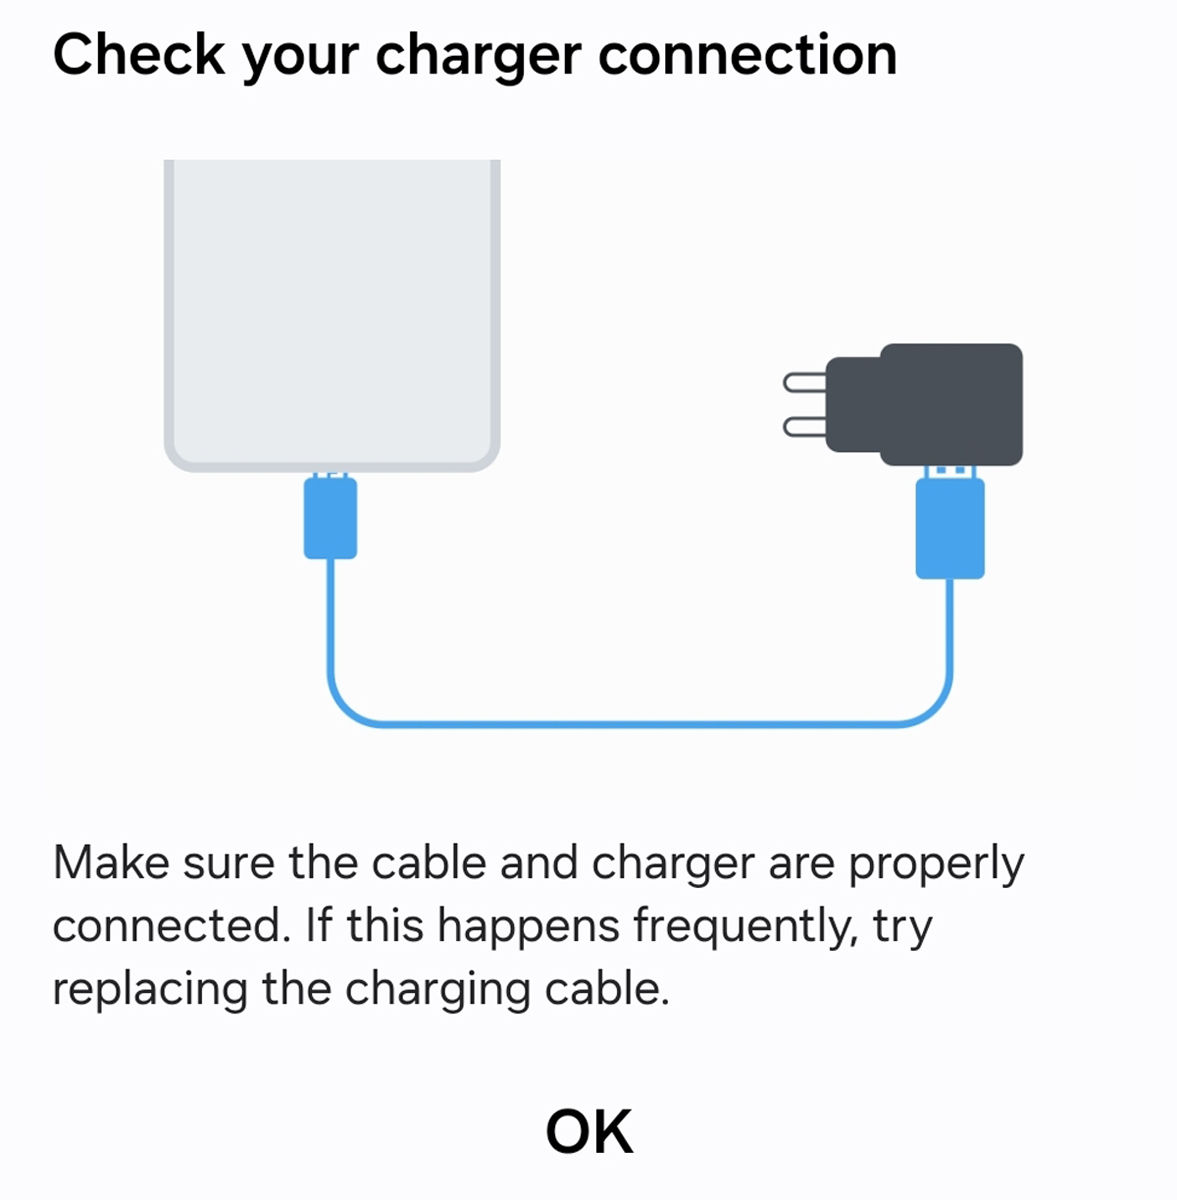
Well, that wasn’t it. I have no idea why the port is there unless it is needed for software updates if the updates via the app won’t work. Who knows?
Here’s a look at the entire handlebar assembly.
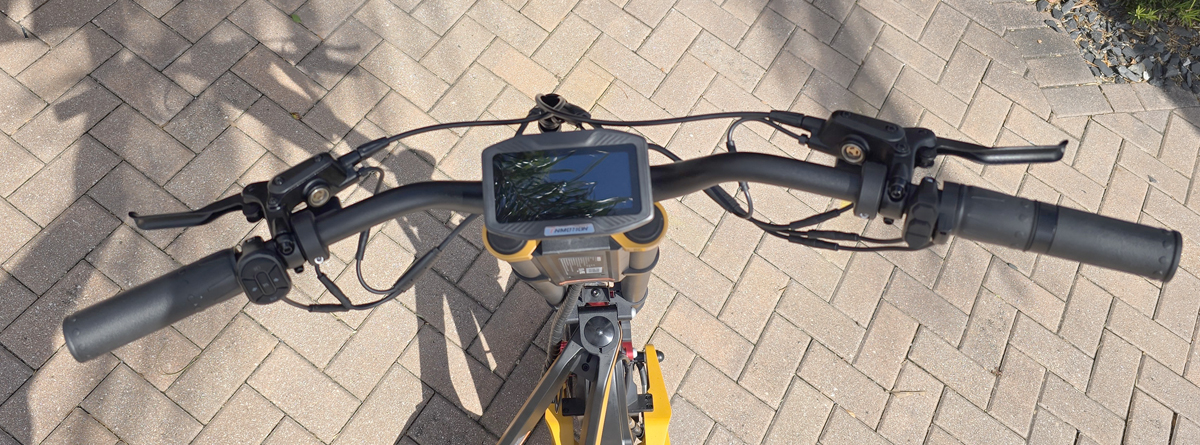
One thing that is noticeably missing is any sort of rearview device. If you will only be using the RS for off-road and trail riding, looking behind you isn’t important. If you plan to use this for street riding, knowing when there is traffic behind you is pretty darn important. More on that below as well.
The dual charging ports are located at the front of the deck. A flip-up cover protects the two ports and their individual rubber covers.
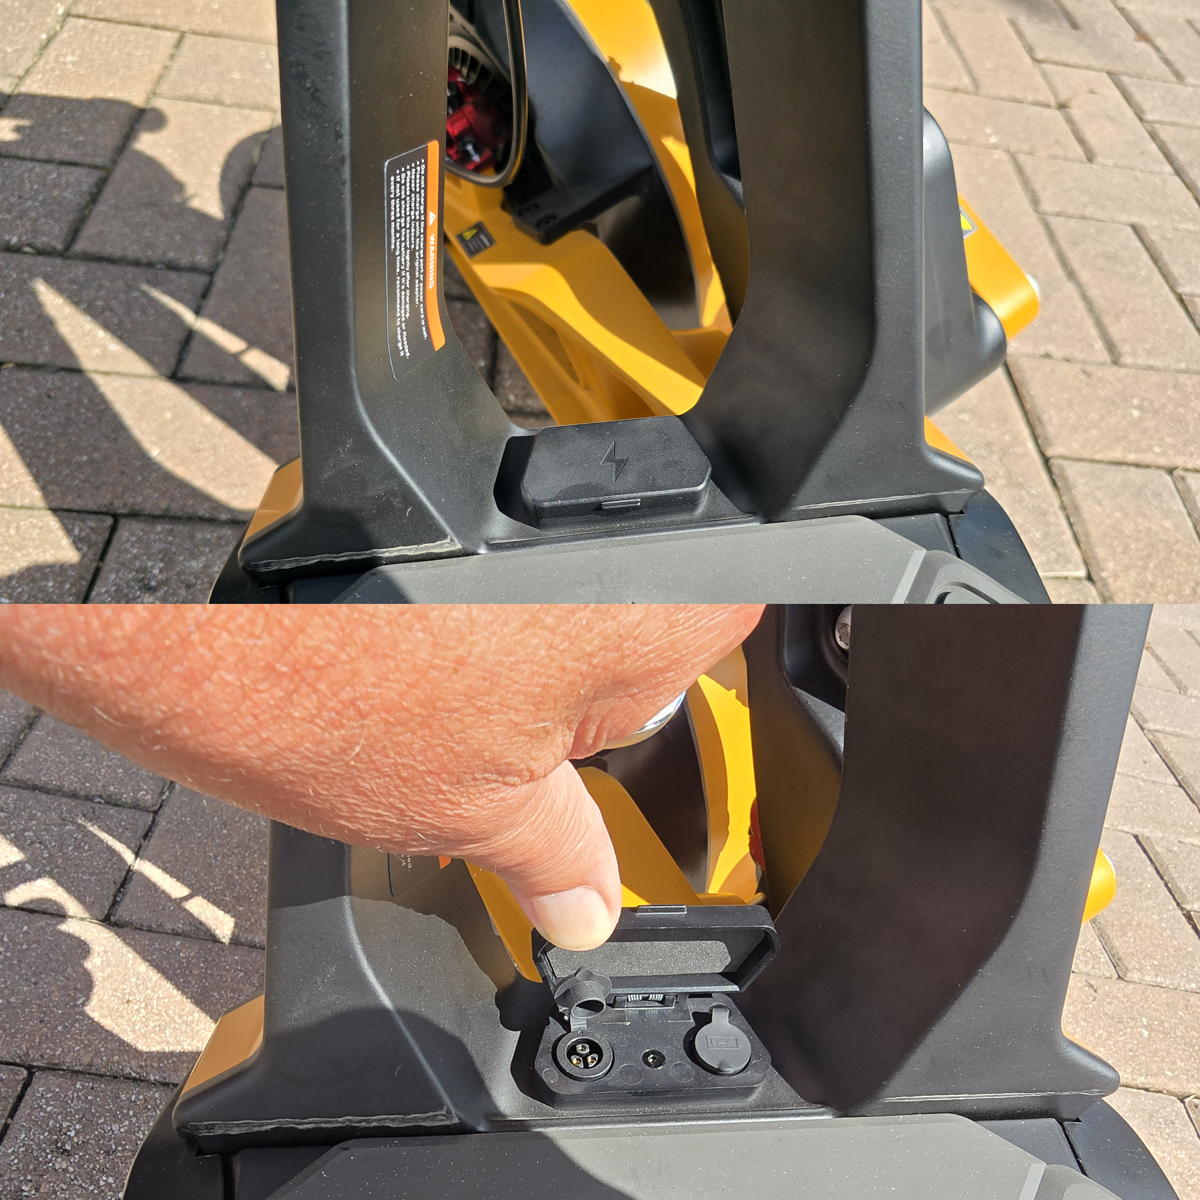
The included charger can charge the scooter from dead in about 8.5 hours. Purchasing a second charger and plugging them both in cuts that charging time in half.
The scooter is managed through the Inmotion app. As I already mentioned, I had the app installed from a previous review so adding this scooter and activating it was simple. Here’s a look at the main screen.
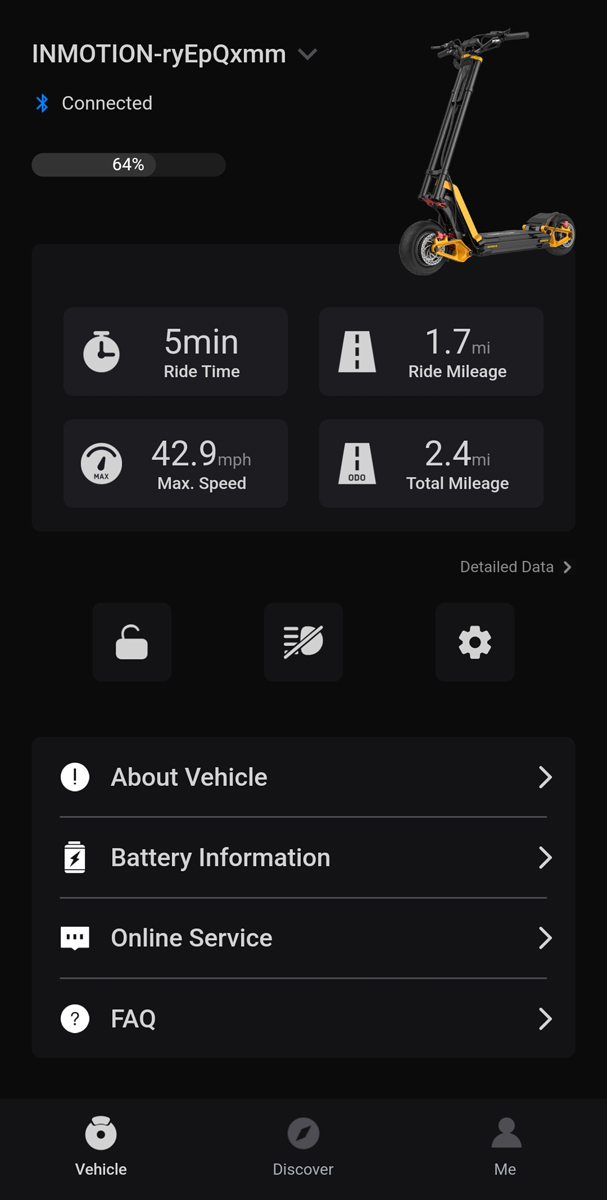
This was from the first few minutes of riding it, and yes, I did go nearly 43MPH on the scooter on day #1. You can see stats from your most recent ride, assuming that you open the app before you turn off the scooter. I wish I could get ride data after the fact if I forget to open the app when I get off the scooter.
The row of three icons lets you lock the scooter, turn the headlights on/off, and access more settings. If you lock the scooter, it won’t run until it is unlocked via the app. If someone moves it while locked, it sets off an alarm. Beyond that, it engages an immobilizer mode where the wheels will not roll. I was surprised at how well it worked. I locked the scooter and tried to move it. The wheels immediately locked, all the lights came on and the horn started honking. I opened the app and clicked to unlock the scooter, and everything went back to normal again. Nice.
I’m not sure why they have a headlight control here since there is a button right on the handlebars.
The setting icon opens up more settings.
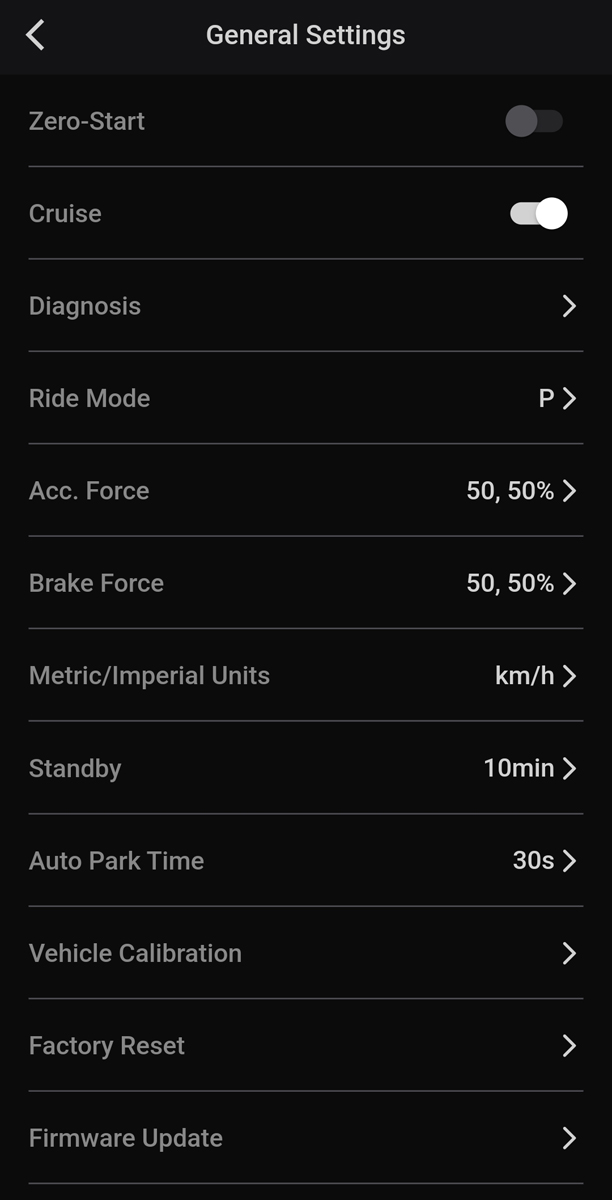
You can control the following settings here:
- Zero Start – when on, the throttle works from a dead stop – when off (my preferred setting), you have to kick off and get moving before the throttle will work
- Cruise – enables/disables the cruise control button on the handlebars – when enabled, pressing the button while at a mostly constant pace engages cruise control so you don’t have to hold the throttle
- Diagnose – runs self-diagnostics
- Ride Mode – you can engage P (park – throttle disabled), 1 (20MPH max), 2 (40MPH max), 3 (62MPH), 4 (unrestricted) – again, not sure of the value here as this can be done from the handlebars (with the exception of Park, but that happens automatically – see below)
- I asked support for a description of what these next two settings actually do but only got a vague response, “They’re the sensitive settings for the throttle & brake.” I asked if that meant 0% would disable the setting and received, “0% does not mean the brakes or throttle won’t work, those settings control how fast you can brake and accelerate. The higher the number the faster it will be.” Well, that clears up…nothing.
- Acc. Force – The sensitivity of the front and rear acceleration – defaults to 50% for each
- Brake Force – The sensitivity of the front and rear braking – defaults to 50% for each
- Metric/Imperial Units – lets you change between KPH and MPH
- Standby – lets you set how long the scooter will remain on and idle before powering down, 1 – 120 minutes
- Auto Park Time – lets you set how long before the scooter automatically shifts to Park, 5 to 120 seconds
- Vehicle Calibration – runs various calibration steps
- Factory Reset – resets everything to initial settings like it just came out of the box
- Firmware Update – updates the firmware – I think this is the first product that I have tested that has firmware and didn’t need an update as soon as I turned it on – nice
Performance
Let’s start with a couple of photos from Inmotion’s website to show you what I will not be doing with this scooter!
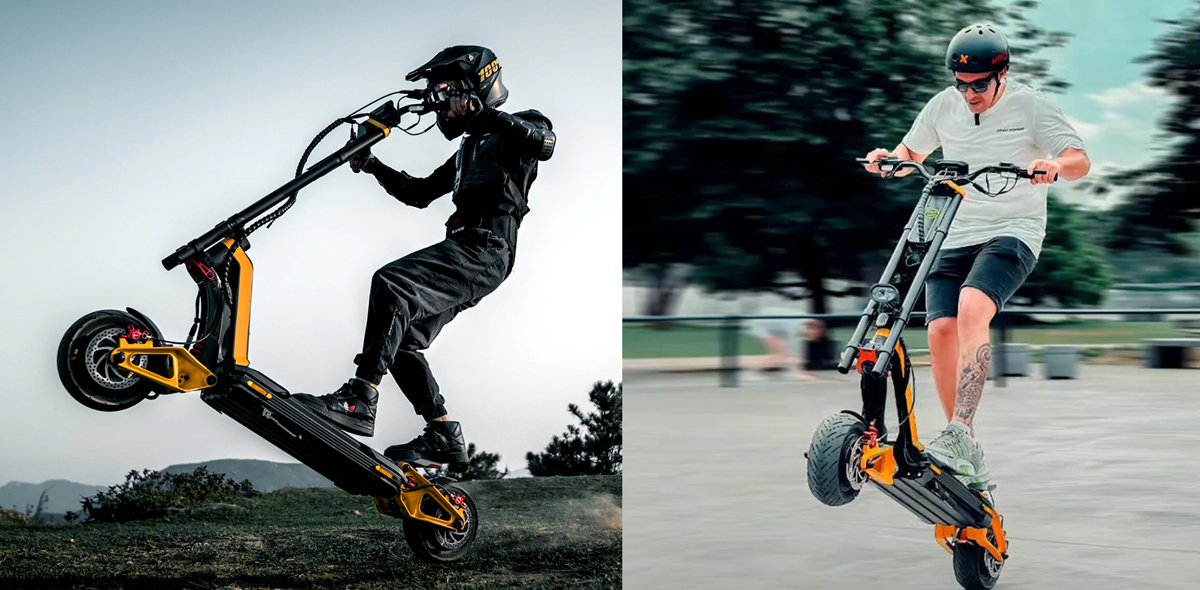
All my tests were run in dua-drive mode, meaning that power was being applied to both wheels. To get started, I set it in drive mode 1, or as I call it, wimpy mode. It maxes out at 20MPH, slower than the 23MPH Imnotion Climber that I routinely ride. The first thing that I noticed when I twisted the throttle was that I didn’t like the twist throttle. My other scooters have thumb throttles and that seems much more natural to me. We’ll see if I change my mind. The second thing that I noticed is that it seems to pull stronger than the Climber. A lot stronger. It just felt powerful, even though it was slower than my old scooter. The suspension really showed up as I went up and down the sloped curb at the end of my driveway. That has always been a little jarring on the suspension-free Climber, but the RS ate it right up. Combining the smooth ride with the absolutely huge foot platform made for an incredibly smooth ride.
OK, it rides nicely, feels good, and seems powerful. Time to experiment. Engage Ride Mode 2! The difference shocked me. 20MPH came and went quickly and I quit somewhere in the upper 30sMPH. Wow! The difference in acceleration was noticeable and I had to shift weight forward to compensate so I didn’t just fly off the back.
I should mention that at the beginning of this test, I only had a bike helmet. I wasn’t willing to go full out without a little better noggin wrapping. But…curiosity got the better of me and I flipped to Ride Mode 3 for a quick run down my street. 40MPH came and went before I knew what happened. I really had to hold on under full throttle. I backed off before I hit 44MPH. Other than the landscape flying by me at a mind-bending pace, the ride itself was incredibly stable. No wobble. No wiggle. Just rock-solid cruising. Again, wow.
I should also mention that I did have to stop from the crazy speeds. Squeezing the brake levers resulted in strong, controlled speed reduction. The brakes are as impressive as the acceleration.
A couple of days later, I took the RS over to a friend’s house. He is an avid motorcycle rider and engineer and he was interested in looking at this little toy scooter. When he came out of the house and saw the RS, he began stammering and said something to the effect of this wasn’t at all what he was expecting. He thoroughly examined it and was suitably impressed by the suspension design, water resistance, and controls. He had never ridden a scooter like this and wanted to try it out.
After a couple of passes up and down his street, he was comfortable enough that he wanted to test out the suspension. We placed a 1.21″ shovel handle in the road and he drove over it at varying speeds up to 12MPH. Here’s how it looked. Note: the noise was not the scooter – there were lawn care workers running mowers and blowers nearby.
As you can see, the suspension easily handled the bump. My friend came away mighty impressed and surprised.
I took the scenic way home, cruising along at 30MPH easily. It is amazing how comfortable the RS is to ride.
I took the scooter out for a quick around-the-block ride to try to capture how fast the acceleration pulls this scooter. The video isn’t terrific, but if you watch closely, you can see how fast the speed increases. One thing to note is that was done in Ride Mode 2 with a 40MPH speed limit until the 2:08 mark. At this point, I flipped to Ride Mode 3 with a 62MPH limit and made two quick runs into the mid-40s.
Another thing to note is that even though the screen is somewhat difficult to read at times in the video, in the real world, the display is bright and readable. I am very impressed with the display.
My wife was jonesing for a bike ride. I saw this as a scooter opportunity for me. We headed out for what amounted to an 11-mile ride. Our path was all paved and on a combination of roads and paved multi-modal paths here in our retirement community. I was able to kick on the cruise control at around 20MPH as I followed her as she pedaled away on her e-bike. Of course, I did a couple of quick blasts up to 35MPH here and there, but I mostly just cruised along between 15MPH and 25MPH. This gave me time to make a couple of observations
First, compared to lesser scooters like the terrific Inmotion Climber that I most recently tested, the deck on the RS is huge.
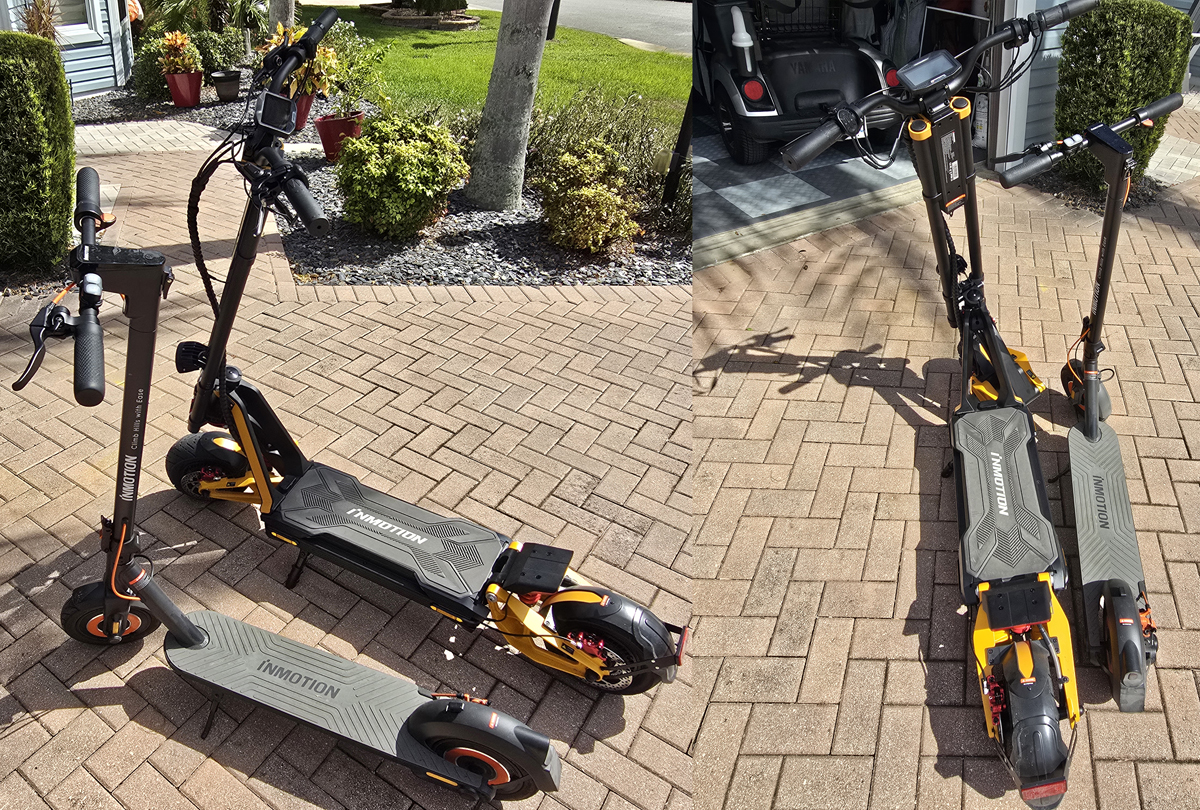
On my ride, I was able to move my feet around, switching positions of each foot from front to back as I rode. The RS’s incredible stability and the huge riding deck made doing that a snap. Being able to reposition your feet makes longer rides more comfortable.
During our ride, a couple of different vehicles started turning out in front of us, despite our bright, flashing helmets. The ding-ding bell on my wife’s bike was all but useless. The horn on the RS was another story. It is shrill and loud and exactly what you want to get another driver’s attention.
The longer ride cemented for me that I did not like the twist-throttle. I needed to accelerate as I went around a corner. The incredible acceleration from the RS meant I needed to hold on tightly as I accelerated. Unfortunately, that also meant I had a death grip on the twist throttle, keeping the acceleration going. It was tough to let off the throttle while still maintaining control of the handlebars.
I like the fact that I have to actively engage the cruise control. Our other scooters have automatic cruise control. It engages whenever you cruise at a constant speed for a few seconds. That can be a little disconcerting thinking that you’re controlling the throttle, and then you let go and the scooter keeps going. Disengaging it can be done by hitting either the throttle or brakes.
Because the ride included multiple turns onto different roads, I used the turn signal frequently. The signals themselves are bright and highly visible to everyone except the rider. The display does include a small, flashing green indicator, but you have to take a good look at the display meaning that you’re looking away from the road. A brief, and optional, audible signal would be a nice confirmation to the ride that the turn signal is on. The signals automatically turn off after five seconds. That’s great so you don’t look like the other Florida drivers (I live in Florida so I know about what I speak of here) who drive for miles with their turn signal flashing. But five seconds simply isn’t long enough. If I turned on the turn signal as I approached an intersection, it turned off before I fully entered the intersection. I’d prefer to have the duration as a settable option or at least ten seconds long. Of course, I could just hit the signal button again, but since I don’t count five seconds, I don’t know exactly when it turns off. That’s where the audible indication would help.
I talked about the intense, almost brutal acceleration of the RS, and of course, that is one of the attractions of this beast of a scooter. But, it does make it difficult to ride smoothly. Just a little blip on the throttle, and *boom*, here comes the power. I decided to play with the undocumented “Acc. Force” settings. I had hoped for a better understanding of what it was supposed to do, but given the empty response from Inmotion Support, I drove it on my own.
The factory setting was 50% for both the front and rear motors. I dropped it to 10% for both and went for a ride. I had a hard time feeling any difference. The acceleration was still strong. I dropped it to 0% for both and tried it again. Once again, it was hard to tell any difference. Then, I dialed it up to 100% and tried it a third time. This time, it sure felt like Superman was pulling the front of the scooter out of my arms. Wow. In addition, to me, the throttle felt more reactive. Just a little blip and *pow*, the scooter took off. I went back down to zero and the scooter felt perhaps a little more tame. That isn’t to say it was tame, just a little more so than at 100%. There is no taming this beast. I went ahead and ordered the optional thumb throttle from Inmotion at my expense. I’m hoping that the thumb throttle will be a bit smoother.
The new throttle arrived about ten days later. As $79 including shipping, it wasn’t cheap, but you don’t want a cheap item controlling all this power. The installation was simple. First, I disconnected the throttle cable. Then, I unscrewed the twist throttle from the end of the handlebar using the included M5 wrench from the scooter. That let me slide the hand grip and throttle off the handlebar as a single assembly. I slid the new throttle onto the handlebar and tightened the set screw. Finally, I slid on the new hand grip and connected the throttle cable. Easy-peasy.
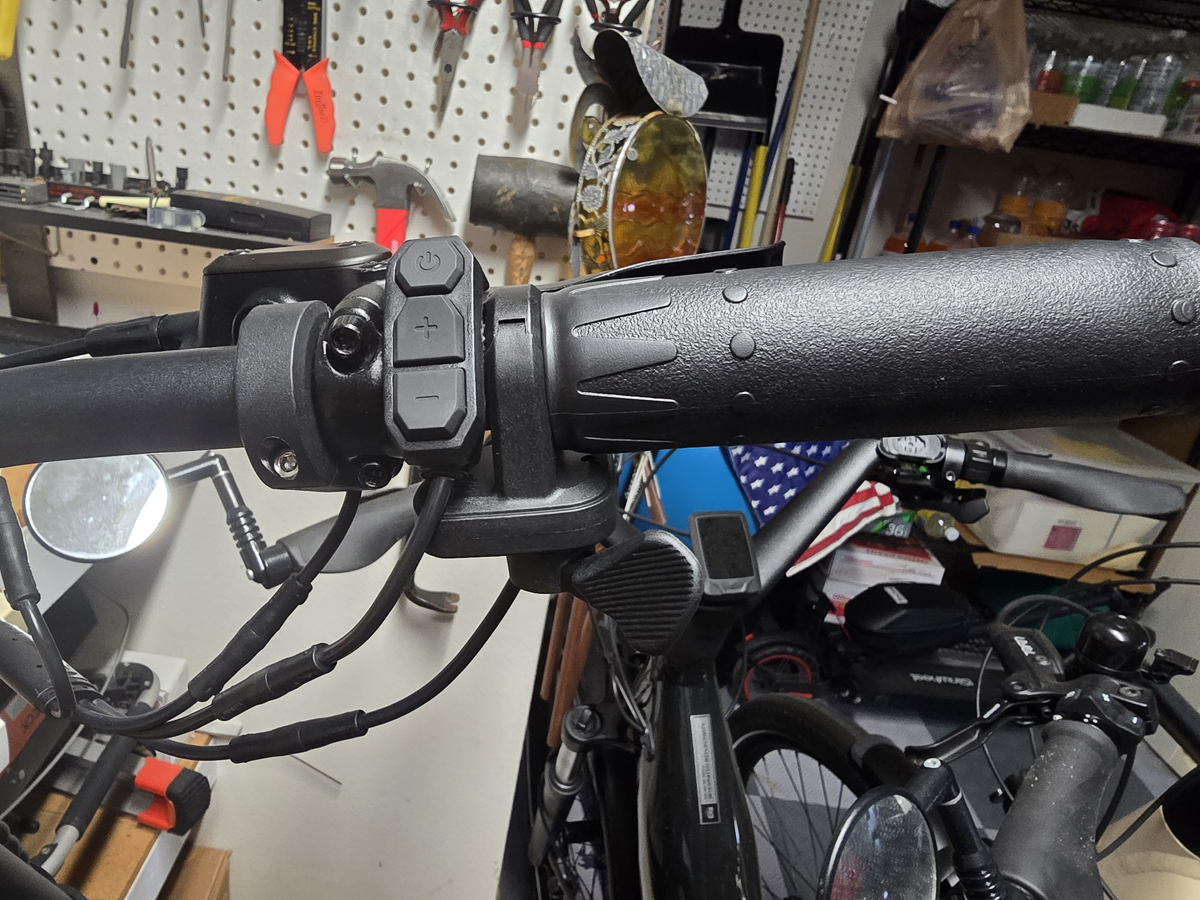
Here, you can see the relatively short throw of the thumb throttle. It is at 0% in the top photo and 100% in the bottom photo.
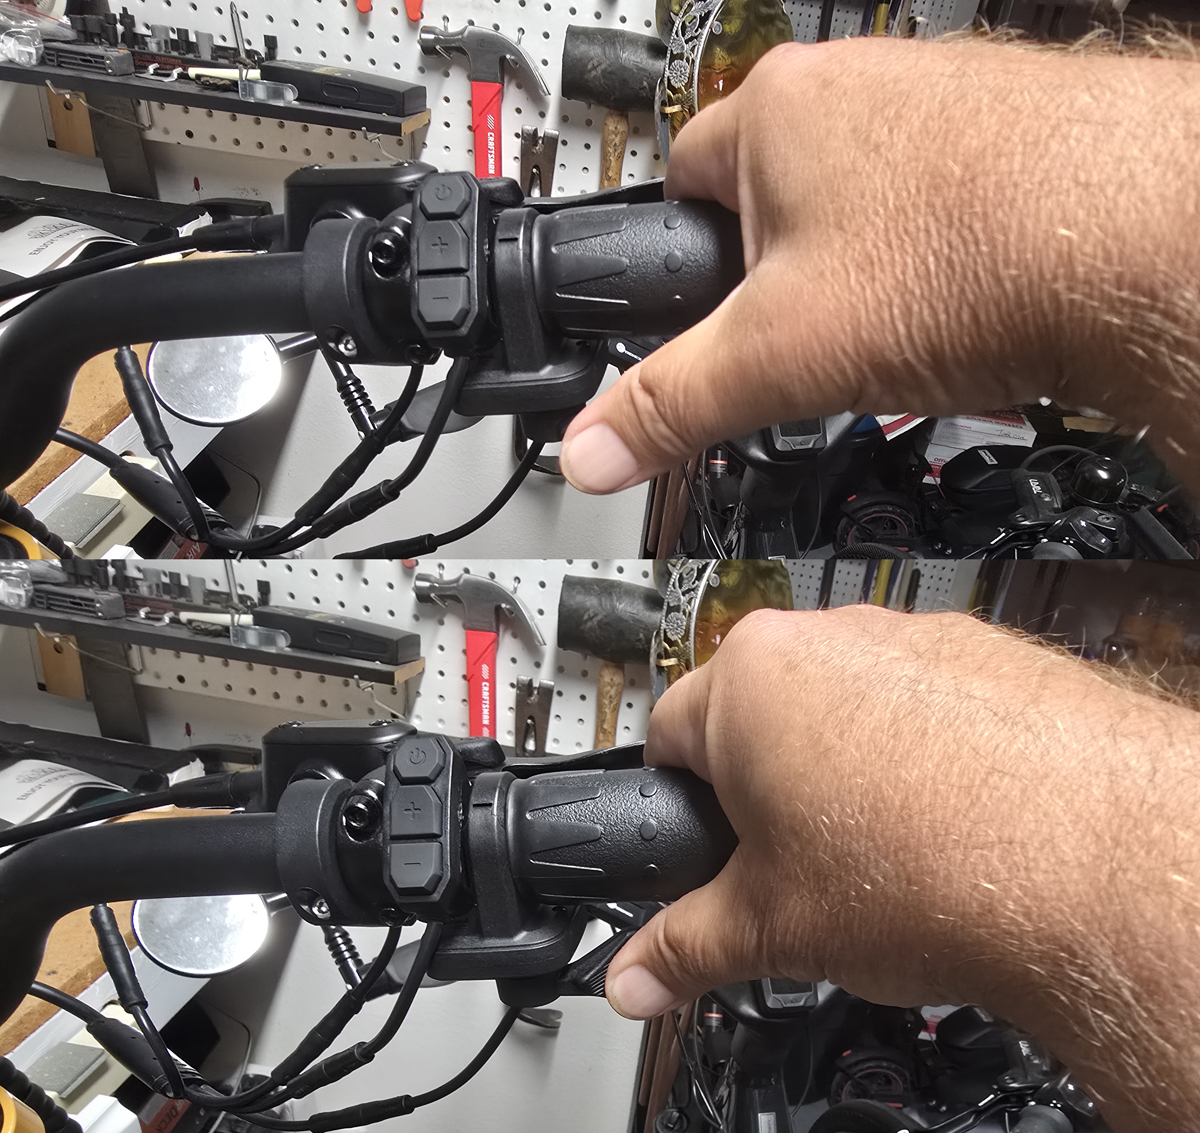
I was hoping that the new throttle would be butter-smooth, but…it wasn’t. It was better than the twist throttle, but there is no getting away from the fact that there is so much torque from this beast that even a little blip produces enough acceleration to make you move your thumb. That makes for a little jerky acceleration. As I said, it is still better for me than the twist throttle, both in smoothness and because I can keep a better grip on the handlebar. The thumb throttle will stay. But read on…
One thing that does help is shifting to gear #1. With a top speed of only 20MPH, the acceleration is more manageable. Once up to speed, I can ship to gear #2 or #3 and deal with the monster acceleration after I’m already doing close to 20MPH.
I took the scooter out for a brief night ride to show off the lighting. You can see me activating the turn signals and the brake light, even though it is a little hard to see in the video. The headlight was still aimed a little low here too.
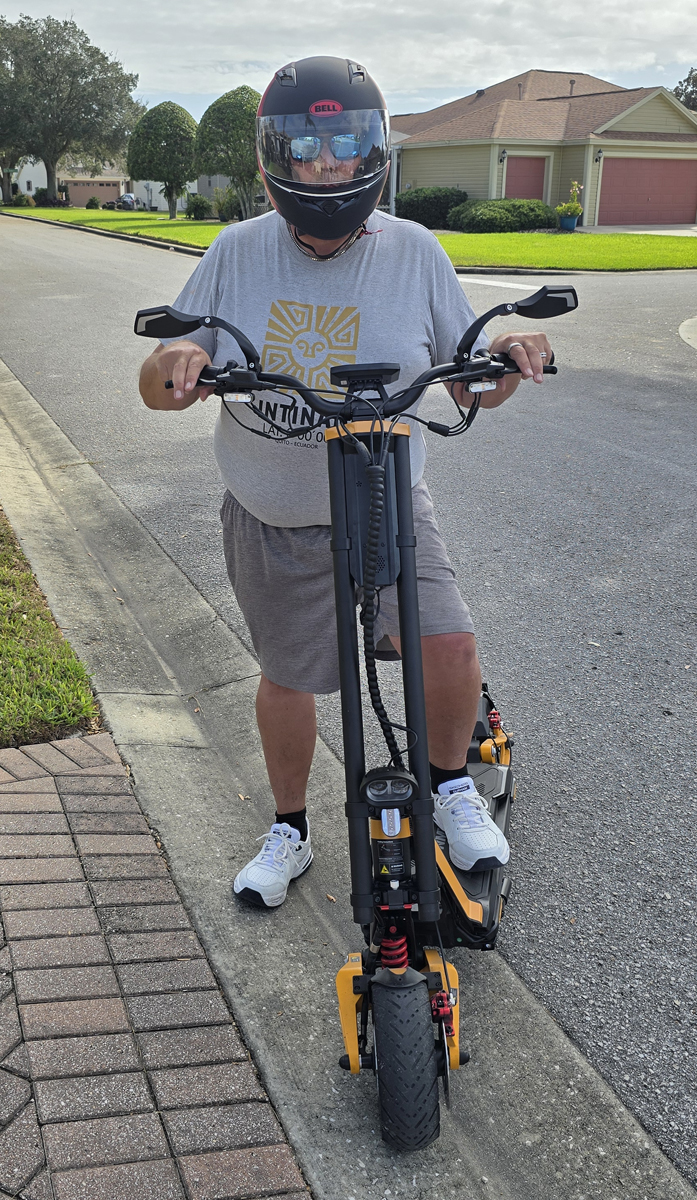
Once I bought a legitimate motorcycle helmet, I took the RS for another ride. The better was at about 50% when I took off.
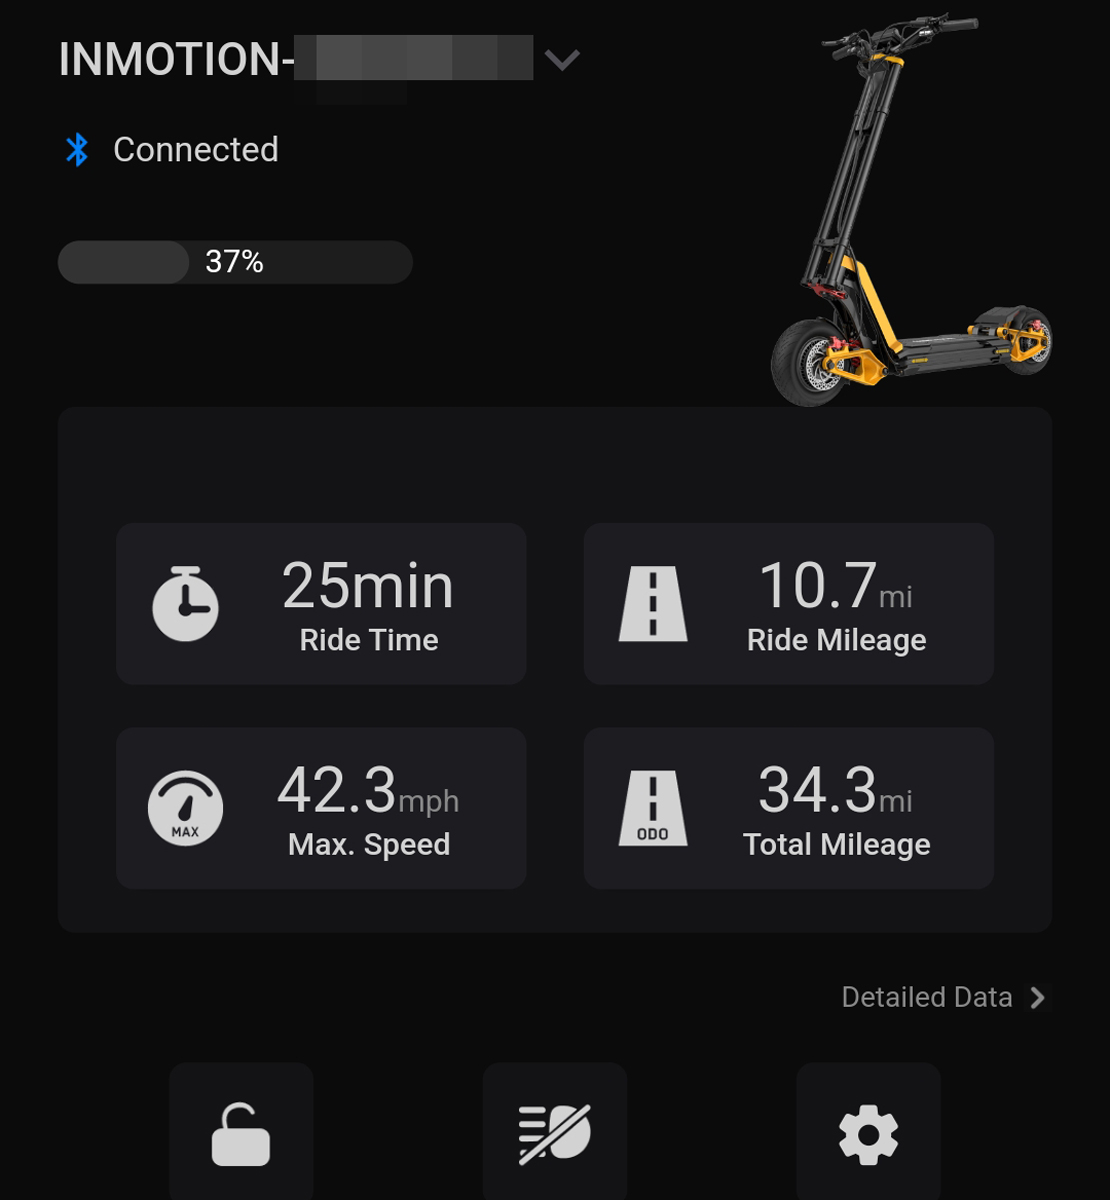
It was my first attempt at a legit road – not just a neighborhood street. I did a couple of miles, zipping along at 40MPH, keeping up with the cars in the next lane. On a scooter. It was surreal. I still didn’t have mirrors so I was sure to stay in the right lane and check traffic often. The overall ride took 25 minutes and I covered 10.7 miles so I averaged 25.7MPH. Again, on a scooter. Incredible.
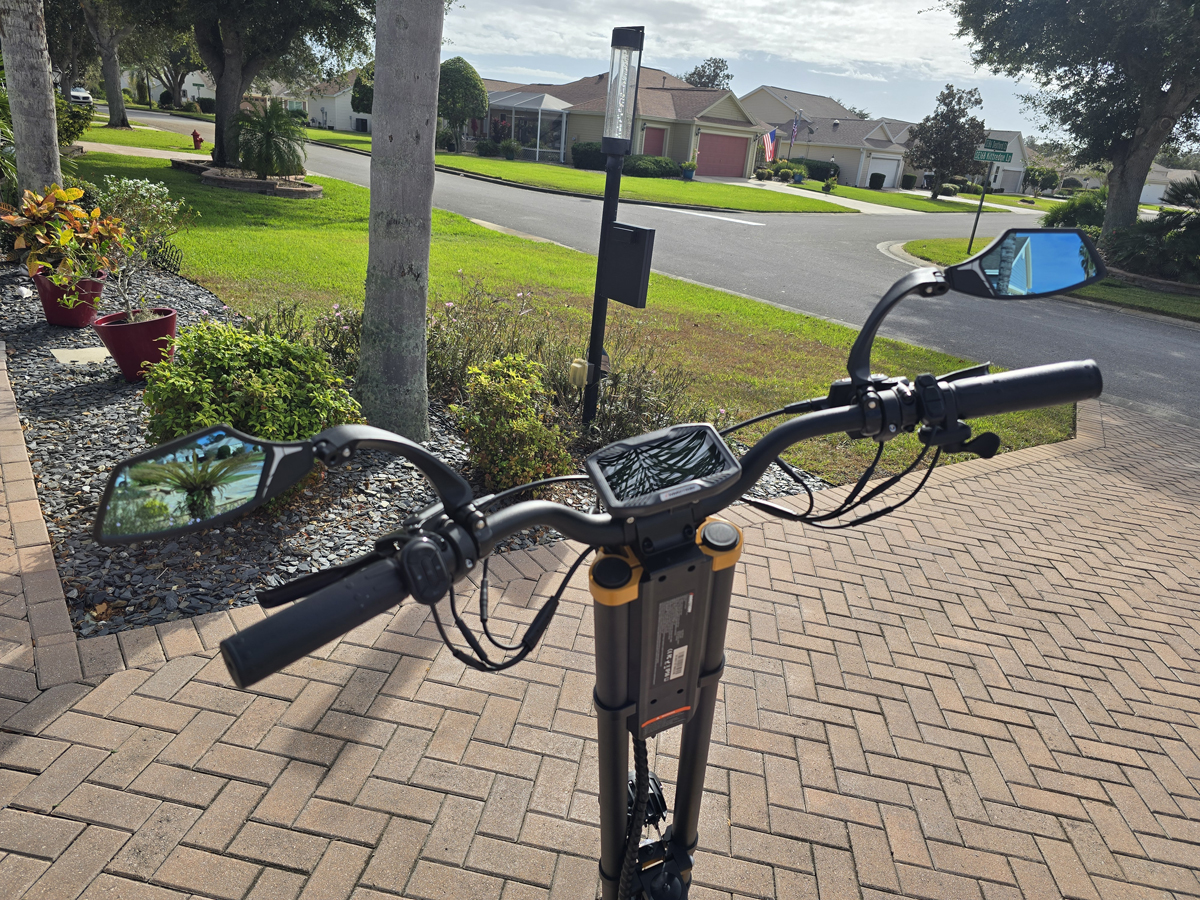
About 30 minutes after completing that road test, Amazon arrived with the mirrors I had ordered. Of course. I installed them and while they aren’t perfect, they were inexpensive and do give me a basic view behind me.
Let’s talk about battery life. I only put a couple of miles on before I fully charged the RS, so all 34 miles came from a fully charged battery. The claimed range is 100 miles, but that is based on a 165lb load, ambient temperature of 77°F, and riding on flat, hardened road surface at 12.5~25mph, Nobody does that. Based on 34.7 miles on 63% of a battery, That equates to a projected range of around 55 miles. This also includes multiple all-out acceleration runs and cruising for several miles at 30MPH to 40MPH. Oh, I should mention that I am more than 100 pounds heavier than that fictional 165lb spec rider. I’m still impressed with the range. In my real-world riding, I expect to cruise regularly between 25MPH and 40MPH without the stops and hard accelerations that I have been doing in testing. I believe that 60 miles is a realistic target range for me to plan for going forward. A lighter rider and slower cruising speeds will most certainly push that range closer to 100 miles.
It was time to push this harder. I charged the battery so I would have full power. The next morning, I donned my helmet and prepared for some speed runs past the house with my lovely wife tracking me as I went by.
I made five passes – three are included in this video.
I tried to get it to go faster but there was only so much room for acceleration before I had to start braking. The scooter was still pulling and on a longer road, I expect I could get to 55MPH or perhaps 60MPH. That’s slower than the advertised 68.3MPH max speed, but keep in mind I am loading the scooter with more than 100 pounds beyond the 165lb perfect test scenario. And, let me tell you, 50MPH is wicked fast on a scooter.
Here’s what the app reported at the end of my passes.
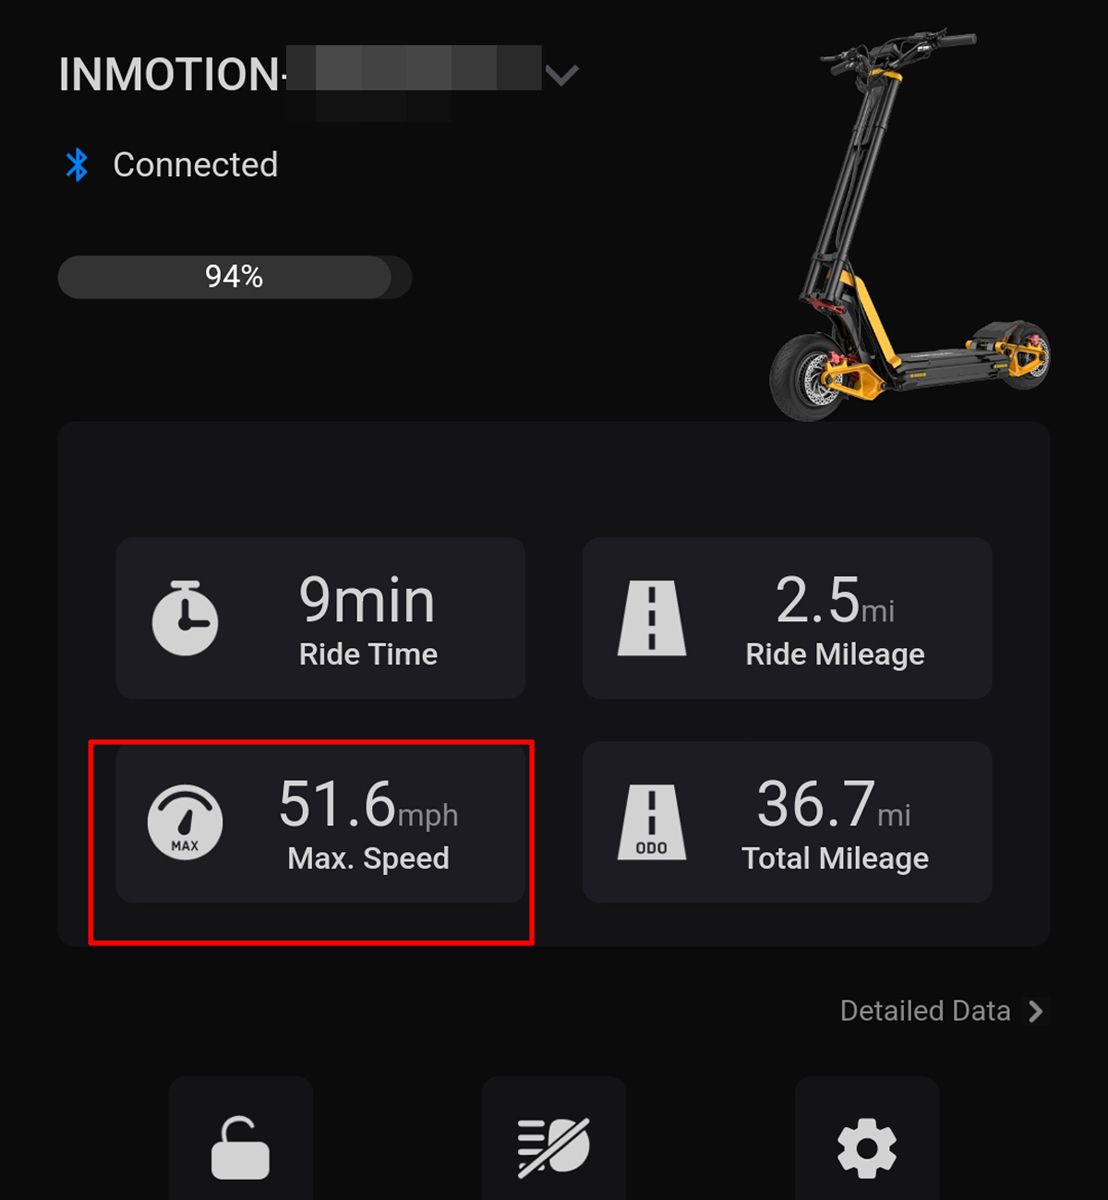
I made a run at 30MPH, another at 40MPH, and three runs at 50MPH for a total ride of 2.5 miles. That burned 6% of the battery. Even running full-out, I expect the battery to hold on for around 40 miles. Crazy. I should also note that the direction I was driving was ever so slightly uphill. It isn’t a major hill, but it is enough that it probably stole a little top speed from the run. Remember when I turned the acceleration force to 0%? I had forgotten about that so I dialed it back to 100% and made one more run. I was a little over 50MPH once again, so I still can’t explain what that setting does.
A few days later, I got to thinking about what would happen if I switched from dual-drive mode to single-drive mode, either the front or rear motor. Would pumping all that power into a single motor give me the extra boost to hit 60MPH? Seemed potentially logical. What happened was the exact opposite. While all the top speed was still there, it took a long time to get there, resulting in smooth and manageable acceleration. It tames the RS, turning into a butter-smooth but still wickedly fast scooter. Nice! Now, I can go for a a nice casual ride, and with the push of a button, change that ride into a wild acceleration blast.
What I like about the Inmotion RS Electric Scooter
- It’s beefy, comfy, stable, and wow, is it fast
- The huge deck makes longer rides much more comfortable
- The lighting and turn indicators are terrific
- The horn is extremely loud and attention-getting
- The security locking mode effectively immobilizes the wheels, flashes the lights, and sounds the horn and is surprisingly effective
- The cruise control is effective and reduces rider workload during long, constant-speed stretches
- The battery life and range are incredible and make this a practical urban commuting machine
What needs to be improved?
- It would be nice if the scooter remembered the last ride data after it is turned off so you could still sync it with the app if you forgot to do so immediately after the ride
- The manual is basic and missing descriptions of several key features and indications
- The answers from the support team were incomplete or incorrect
- I’m not a fan of the twist-throttle – the thumb throttle is a better solution for me
- Even with the thumb throttle, it takes a gentle touch to manage the powerful acceleration in dual-motor mode, but that can easily be mitigated by switching to single-motor mode, either front or rear
- I’d like the turn signal timing to be longer, or settable, and to include an optional audible indicator
- A rearview mirror for road riding would be a great addition – at least there are good aftermarket ones available
- This isn’t necessarily improbable, but it is heavy and that means moving it, especially up the stairs, isn’t practical
- The folding mechanism is hard to use and the handlebars do not lock in place when folded
Final thoughts
At first glance, it looks like I have a long list of improvements for the Inmotion RS scooter, and I do. But if you look closely, most are nit-picky little things. Several are directed at support, not at the scooter. Simply put, this is an amazing piece of transportation technology and is an incredible urban commuting tool, assuming that the 128lb weight doesn’t cause storage or parking issues. The thing that sets the RS apart is that it can be easily configured to also be an off-road beast, ready to chew up the trails with aplomb. I can’t come up with enough ways to express how brutally powerful the RS is. But again, all that is tunable and it can be pacified for a more civilized ride without sacrificing incredible top-end speed.
I am looking forward to using this beast for cruising around our retirement community. The speed and range that the Inmotion RS brings to the table make this a practical reality. That doesn’t sound too exciting until you realize that means cruising around the 57 square miles that make up this community. That includes 750 miles of roads plus hundreds of miles of multi-modal paths for golf carts, bikes, and walkers (and scooters).
There is really only one way to wrap up this review and that is to say that the Inmotion RS scooter is big, heavy, fast, and fun, fun, fun.
Price: $3999 (On sale for Black Friday price for $3699)
Where to buy: Inmotion
Source: The sample of this product was provided for free by Inmotion. Inmotion did not have a final say on the review and did not preview the review before it was published.


Gadgeteer Comment Policy - Please read before commenting
Garry – When you master the wheelie like the box picture, please post video? And get some elbow and knee pads. We like you in one piece !
Yeah, that wheelie won’t be happening, at least intentionally! 🤣
Great comprehensive review. Sprinkling in humor made it an interesting read also.
Thanks, Gerald!