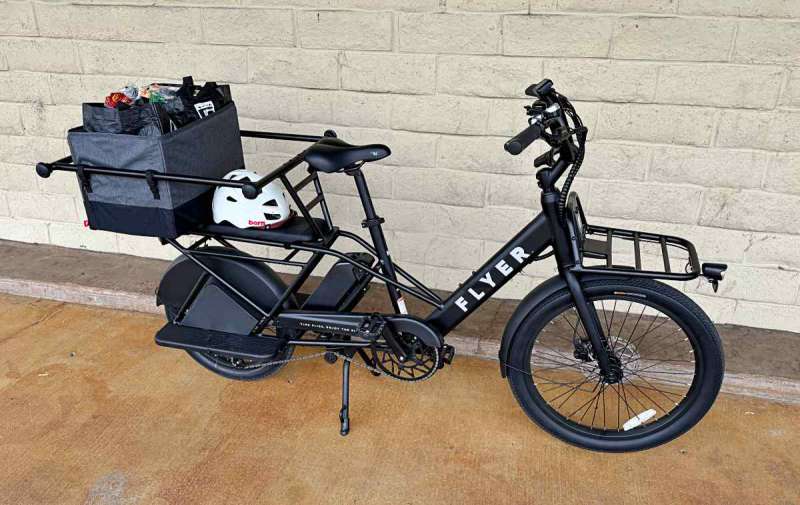
REVIEW – There are few things that bring me as much happiness as riding bicycles. When it comes to running errands, a cargo ebike removes a lot of hurdles and even may create an opportunity for removing the need for a car. The Flyer Via is a great example. It’s a kid carrier out of the box and with extra accessories can become an SUV alternative. I was able to spend the last month checking it out and want to share my thoughts.
What is it?
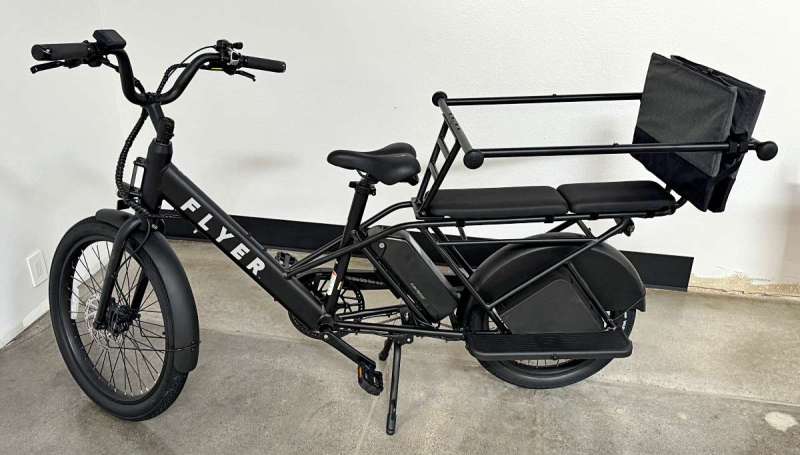
The Flyer Via is a Class 2 eBike with an extended length, smaller rear wheel and kid carrier that will get you where you need to go with pedal assist or throttle at up to 20 miles per hour via its 500W motor. It has built-in brake sensors to cut off the motor and a clear display for updated info and even turn signals.
What’s included?
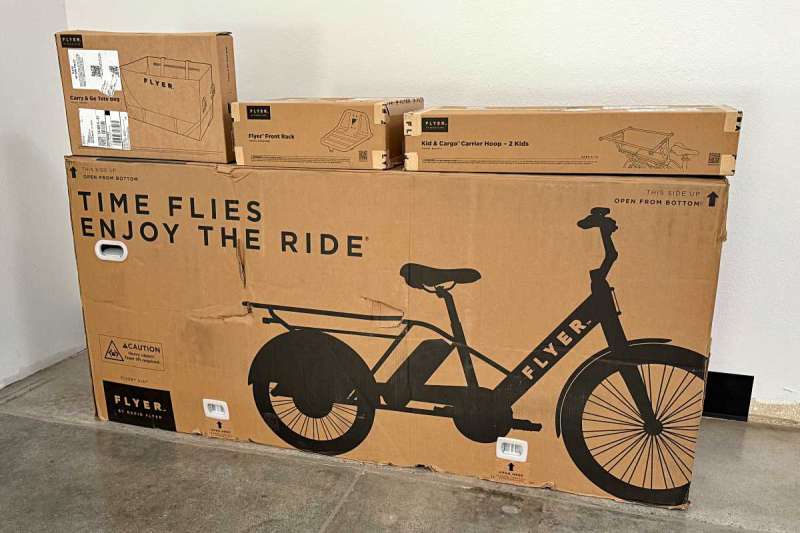
The big box and the top right box are included in the purchase. The Tote and Front rack are available separately.
- Flyer Via eBike
- Front fender, Head light, upright bike stand, pedals, rear foot platforms, assembly tools
- Manual and Charger
- Kid & Cargo Carrier Hoop, assembly screws and tools, padded seats, manuals
Tech specs
Click to expand
Dimensions: 68 lbs, 75″ long (small) | 68.5 lbs, 75″ long (medium) | 69 lbs, 77″ long (large)
Maximum load: 400 lbs
Brakes: Tektro hydraulic brakes w/ 180mm rotors
Derailleur: Shimano Tourney 7-speed
Motor: 500w rear hub motor
Tires: Kenda 24 x 2.4″ Front | Kenda 20 x 2.4″ Rear
Pedal Assist Sensor: Torque Sensor
Certifications: E-Bike Drivetrain tested to UL2849, Li-ion battery tested to UL2271, Charger tested to UL 62368, Frame Tested to DIN 79010
Passenger Age Recommendation: Ages 5-10 for Kid & Cargo Carrier Hoop
Design and features
The Flyer Via ebike is designed with a step-through frame making it very easy for riders of any size to step though and get on the bike. The other thing you’ll notice right away is just how sturdy the double-leg kickstand is. You’ll still want to hold the bike as kids climb up and into their passenger seats, but for loading cargo you won’t need to worry about the bike tipping over as you’re loading.
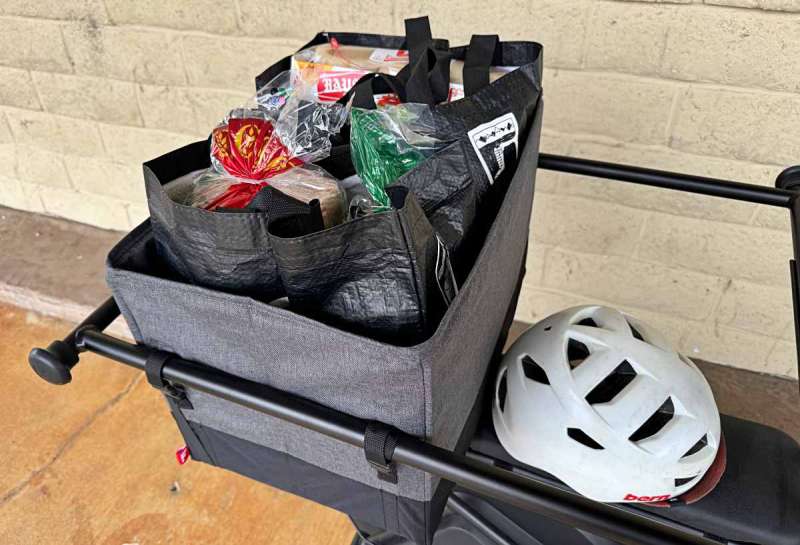
If you opt for the tote shown above, it has these handy elastics to hold the tote in a compressed position if not being used. When deployed and loaded with groceries, it looks like this. I’m already planning to order a second tote for the bigger grocery runs.
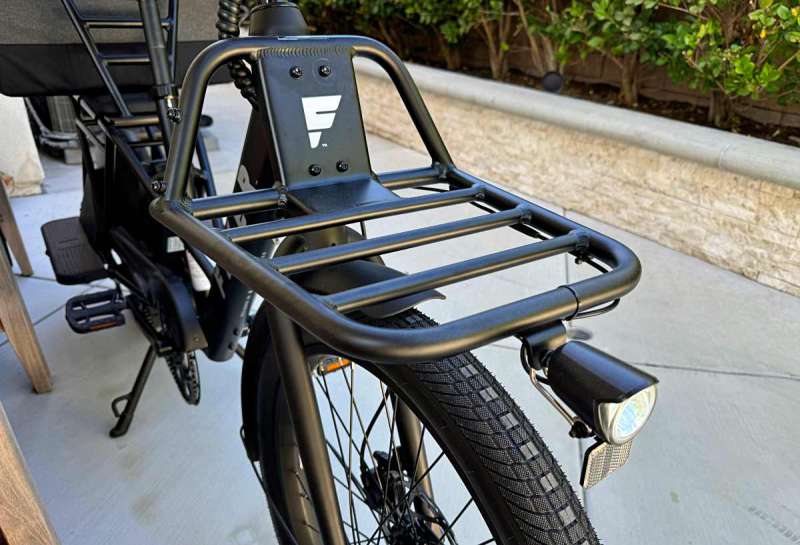
The front rack (also a separate add-on) looks like this fully installed with the headlight relocated. I flipped the headlight on its mounting bracket so that anything larger than the rack would easily clear the headlight.
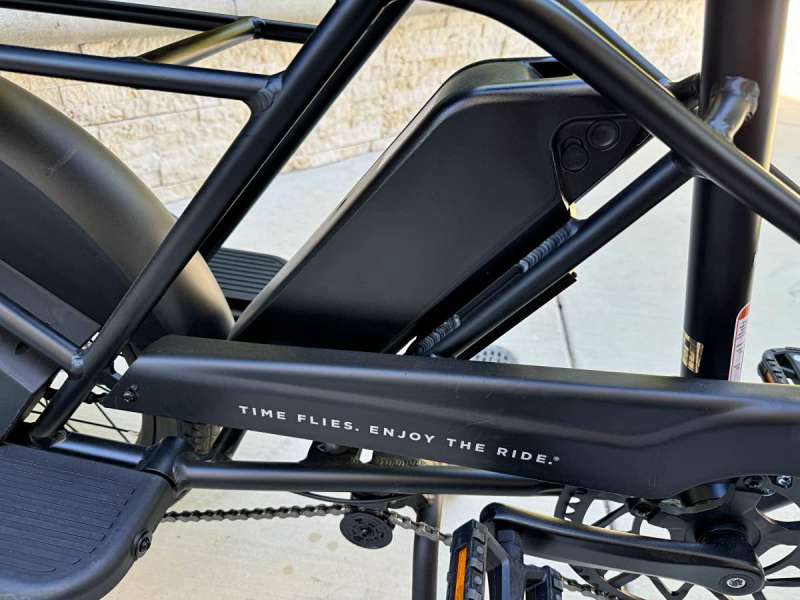
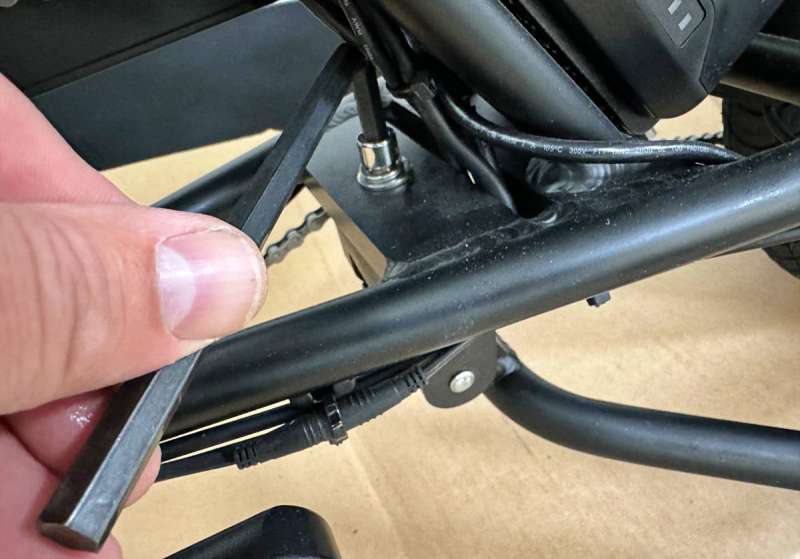
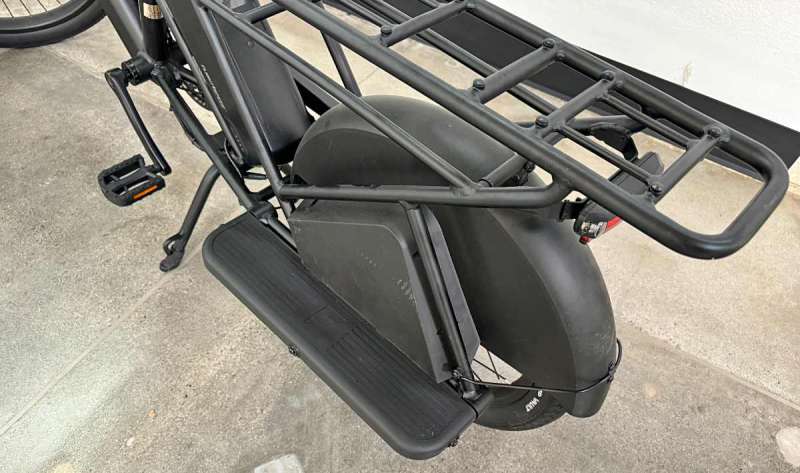
The battery is mounted behind the seatpost down low, which significantly helps lower the center of gravity. This is important as kids and/or cargo will change the way bike handles, so go slow as you learn the bike’s handling behaviors for the different uses you have planned. Eagle eyes may also spot the idler pulley at the bottom of the photo which helps to keep the longer chain (required for the extended bike length) under control and performing well.
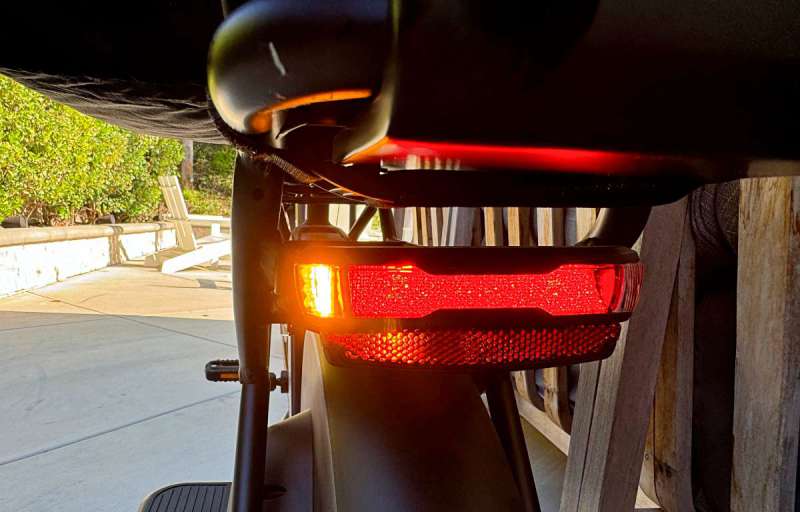
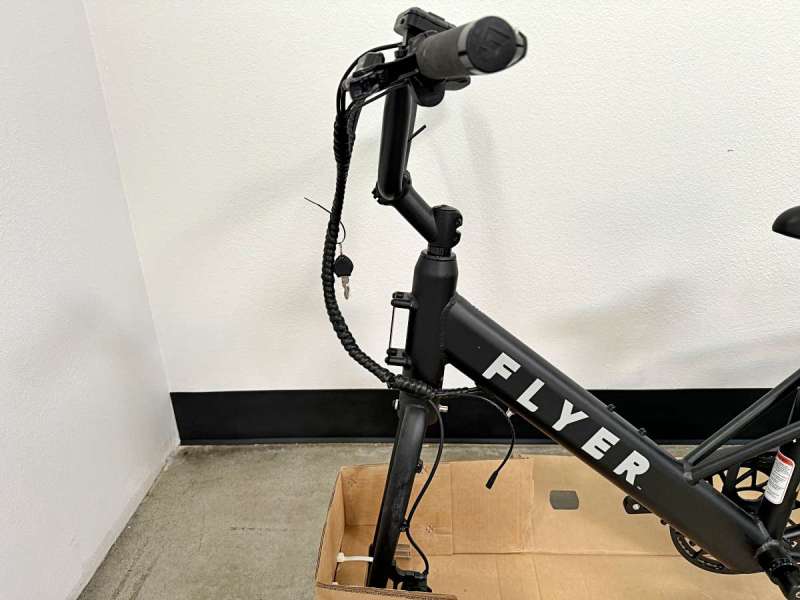
One bonus I wasn’t expecting was rearward facing turn signals in addition to the brake lights. The left turn signal is on in this photo and blinks when activated from the left hand display/controller.
Here’s the controller. Up and Down arrows adjust the assist level from 0 up to 5. Pedal to have the 500w motor kick in and help move you along. The Headlight turns on automatically, but press and hold the Up arrow to turn it off. The Left and Right arrows activate the turn signal. Press the same arrow again to disengage. They also time out after a few. On the right side of the display, there’s even a USB-A port that can be used to charge your phone or a portable Bluetooth speaker.
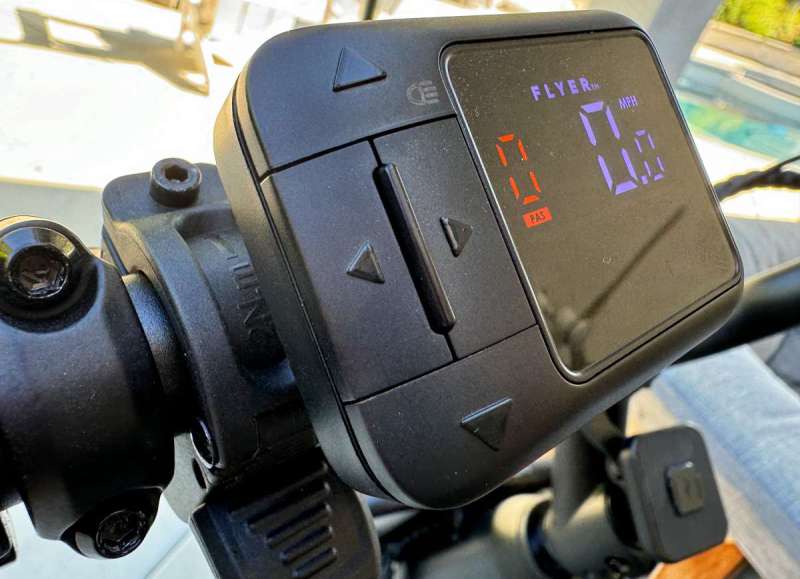
At the bottom left of the image you can see the thumb throttle which will completely let you forgo pedaling if that’s your thing. Keep in mind that the assist (pedal or throttle) is limited to helping up to 20 MPH. The square at the bottom right is a Peak Design Out-In-Front Bike Mount that I flipped 180º to have inside the handle bars and close for navigation help.
Assembly, Installation, Setup
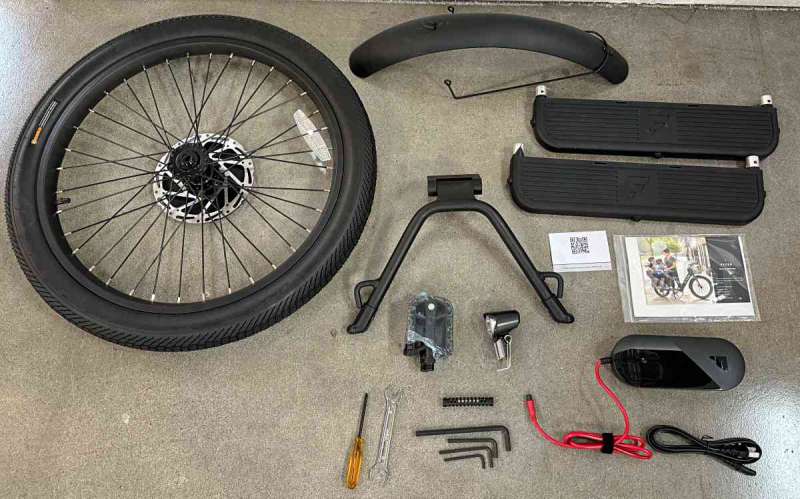
Putting the bike together is pretty straight forward and should be pretty smooth for almost anyone. First step is to unbox by removing the plastic retaining clips at the bottom of the box revealing a very well packed bike.
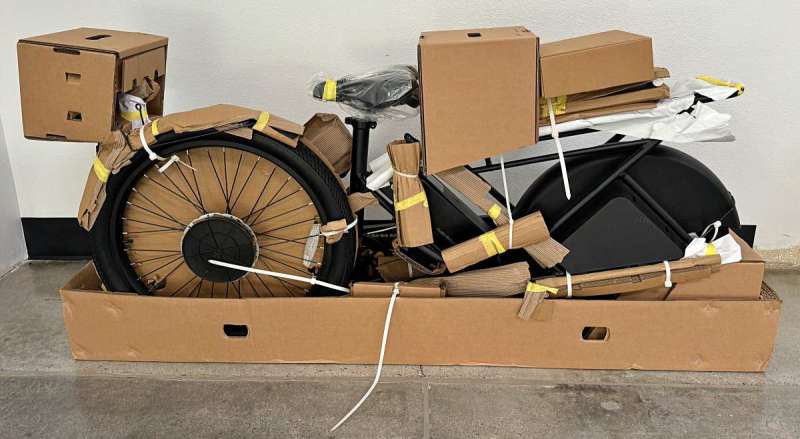
There’s no wrong way to do this, but just go slow and remove cardboard and cut tape or cable ties until you get it down to this.
Remove the faceplate of the stem, put the bars in place and reinstall the faceplate with the included hex wrench.
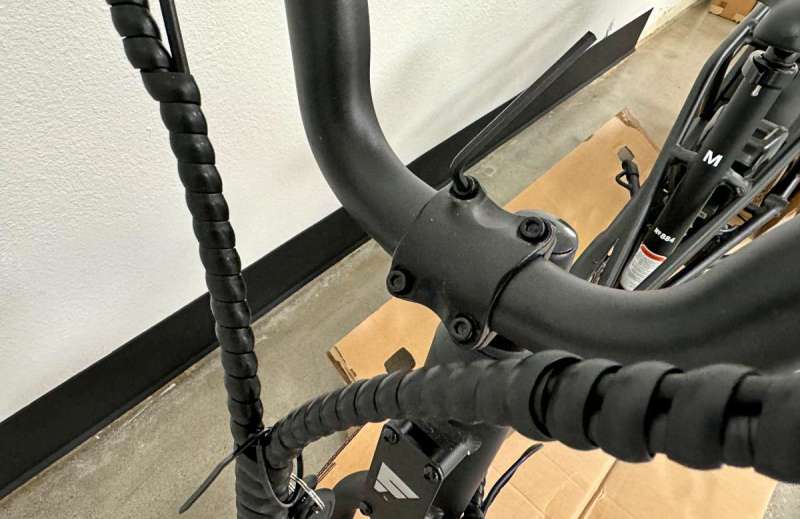
A good starting position is to angle the handlebars to match the angle of the front fork.
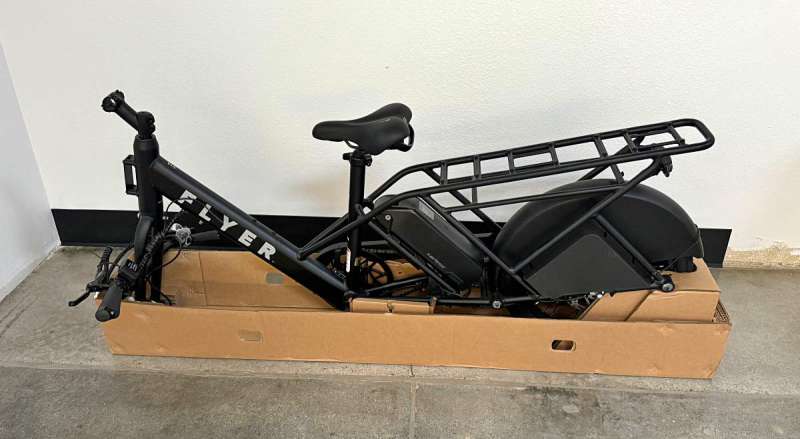
Remove the bike from the lower box and install the kickstand which you can then deploy to help stabilize the bike for the rest of the assembly.
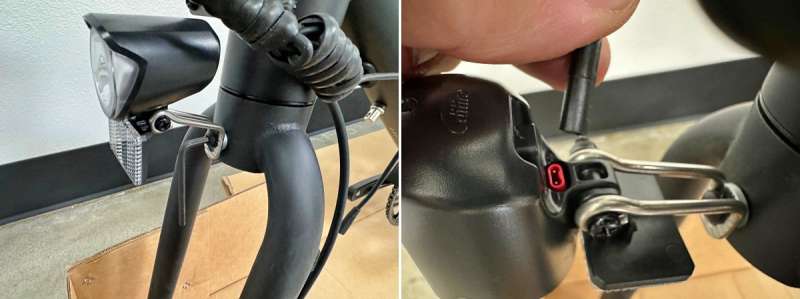
Connect the headlight to the front of the fork as shown, then connect the loose cable with the matching red end before tilting the headlight back into place.
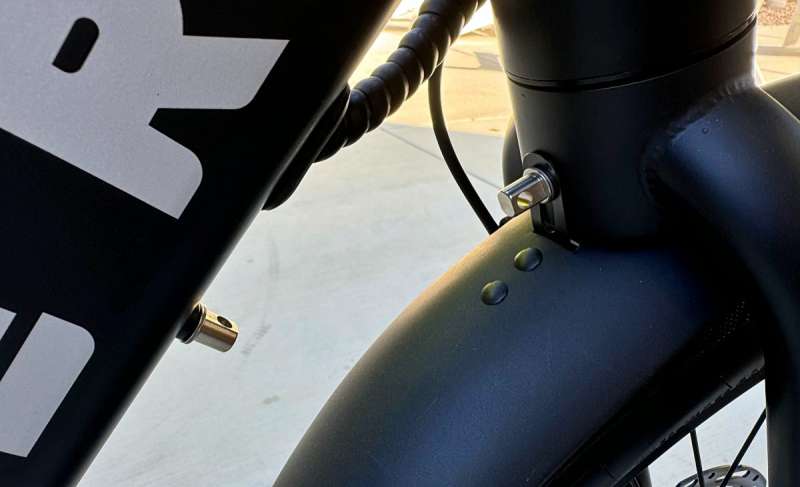
Lift the front fender into place and secure with the nut that also retains the steering spring.

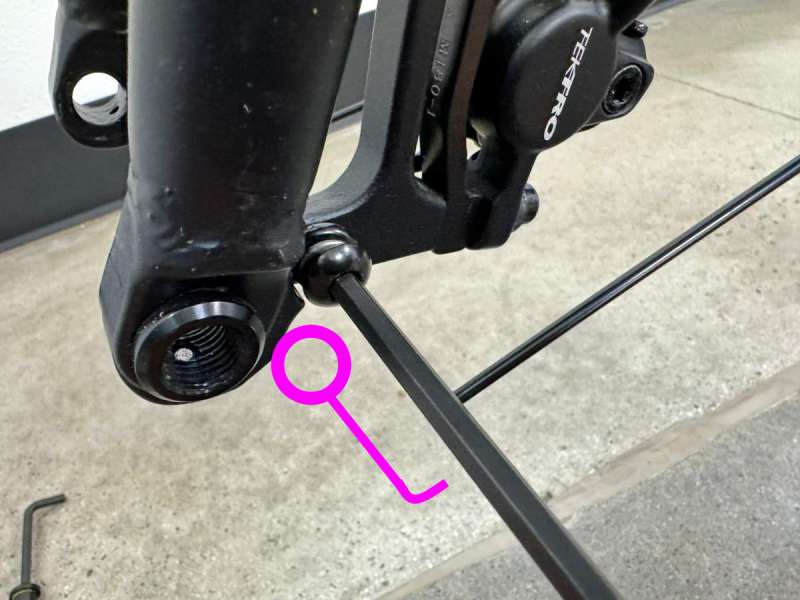
Go ahead and remove the cardboard support for the fork, and then remove the through axle using a hex wrench from the left side.

Attach the support arms for the fender to the mounting points on the fork. I’ve drawn what the end of the support arm looks like in purple below because it’s hiding behind the hex wrench in this photo.
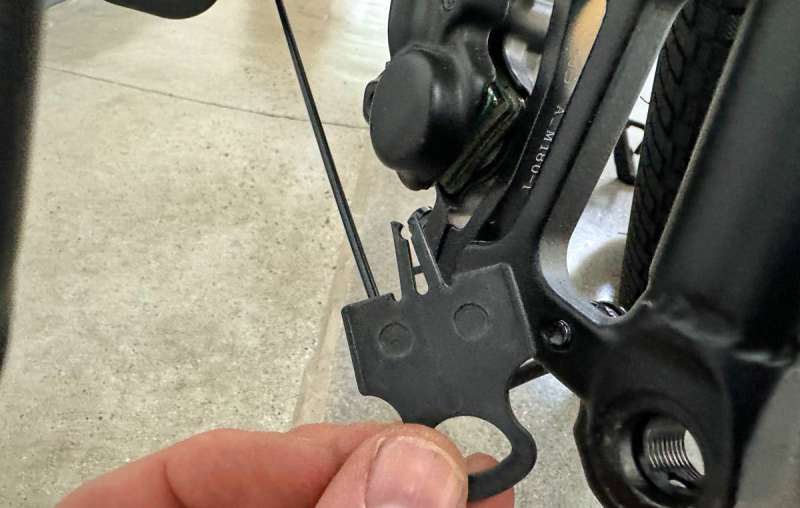
Remove the disc brake spacer from the front brake, and then insert the front wheel into the front fork making sure to align the disc brake on entry.
Remove the silver sleeve from the axle, then reinsert into the fork to retain the front wheel.
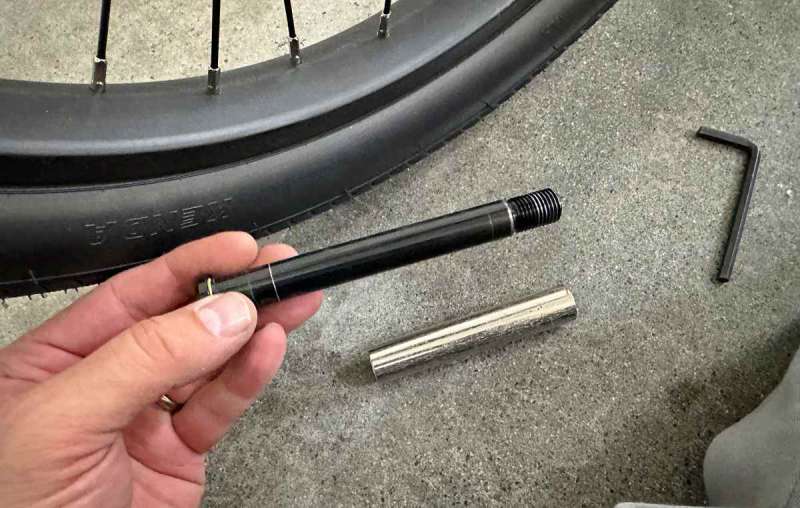
Use the hex wrench to tighten to spec. This photo shows a better image of the fender support arm installed.

Remove the two screws from each of the rear foot platforms, insert the platforms into the receivers on the frame and then reinstall the screws to lock them into place.
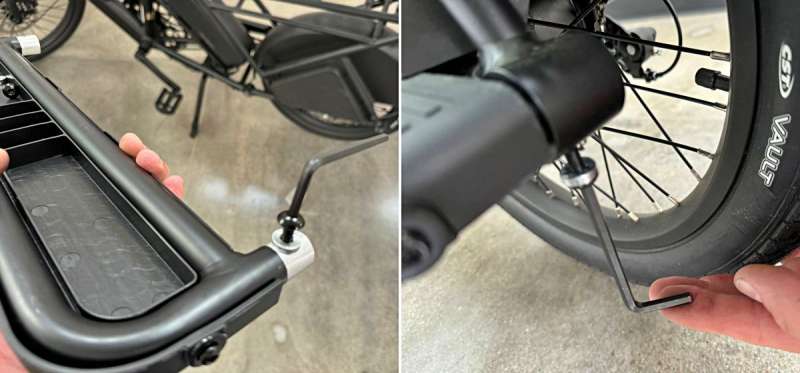
You may need to adjust and snap the triangular wheel covers into place as you’re fitting the platforms. Both these and the full wheel cover fully eliminate any chance of feet coming into contact with a moving wheel.
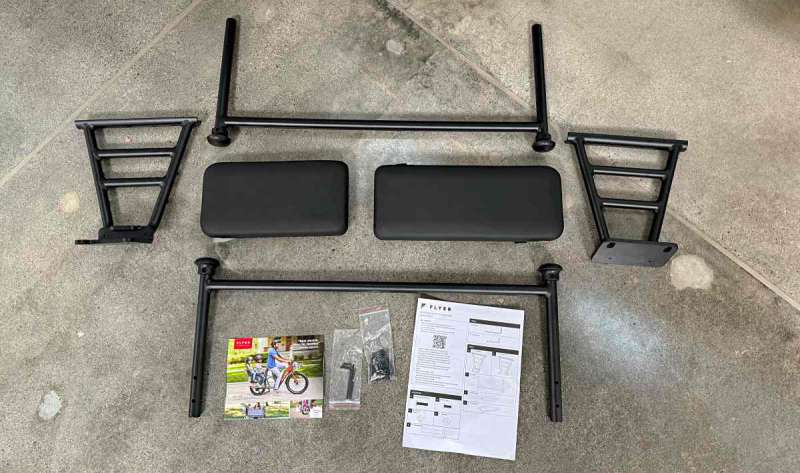
Assemble the Kid and Cargo Hoop as directed taking note to angle the front and back supports toward the rear.
The finished bike looks like this including the additional tote that I installed.
Flyer also sent along the Front Rack for me to check out. It installs directly on the head tube of the bike by removing the flat plate and then using 4 bolts to lock into place. It includes an extension cable for the headlight to help relocate it out to the front of the rack. Flyer did need to send me an updated extension cable as it shipped with one for an older headlight model.

Performance
The Flyer Via cargo ebike arrived in a box that was super well packed. Setup was straightforward except for one thing. There’s a steering spring that helps keep the wheel straight. It hooks onto the two silver stops in this photo. I have aftermarket versions of this type of spring on 3 or four of my bikes. I was not comfortable installing this one at all. It required a lot of force to stretch and the hooks did not allow for easy rotation. Usually there’s a separate knob for increasing tension after installation which this version did not have. Would love to see this improved for ease of installation.
Riding the Flyer bike is great. It’s easy to turn on, adjust the assist levels and from there you just start pedaling, or throttling. The bike moves along well and the hydraulic brakes are responsive and have plenty of power to help bring you to a stop. Super important if you’re hauling precious cargo.
As I mentioned before, I’ll be picking up an additional tote to haul more stuff securely. Two of those will fit in there great. There’s no hook or snap to keep one tote from sliding forward, so you may still want some bungie cords or cable ties to lock one down if you don’t run two. There’s a lot of other accessories for hauling, foul weather and more so check out those options.
Digging the Front Rack. You should know that because it mounts directly to the frame, it does not turn left or right with your handlebars which can be a bit concerning if you haven’t experienced it before. It’s a bit like that car next you starting to back out right as you park and you think you’re the one moving. It’s less concerning when you have cargo and can’t see your front wheel. Either way you get use to it.
As for hauling kids… The foot platforms are great and the rear wheel coverage keeps feet safe. My kids aren’t kids anymore, but I did have my 23 year old son climb in the back for a jaunt around the block. It put us pretty close to the 400 lb weight limit, but the bike did great under pedal or throttle power as well as breaking. The biggest thing I noticed was that if he leaned or moved abruptly, I felt it in the steering. This is normal and clearly exacerbated by the size of my “kid”. I’d just recommend starting slow in an open area and just get used to the different loads you might carry. Similarly, The rear hoop is pretty wide. I had no issues out riding, but navigating slowly through gates or narrow areas took some getting used to.
Last thing is that the Class 2, 20MPH limit is noticeable on this bike. If you’re out on the street with traffic and cars, it frequently feels like you hit that limit right when you need an oomph. I found myself frequently just pegged at 20mph, getting passed by all the local school kids on their eBikes. Flyer’s higher end Via Pro model includes a 750w motor, a suspension fork and 8 speeds, but has the same 20mph limitation to keep it classified as a Class 2 eBike.
What I like about the Flyer Via cargo eBike
- Awesome Kid and Cargo capabilities
- Great 5 level pedal and/or throttle assistance
- 500w motor with good power and solid battery life
- Lots of additional accessories
- Hydraulic brakes with great stopping power
What needs to be improved?
- Class 1, 20mph limitation can be frustrating
- Steering spring difficult to install
Final thoughts
The Flyer Via cargo ebike will let you and the kids get out of the house and anywhere you want to go (within reason) without a car. 30-50 miles of range and hills are easy and great hydraulic brakes make the downhills fun and safe. Pricing is on par with comparable models from other companies, but the Kid & Cargo Hoop is included here. They’re also currently running a special that throws in a front basket and a cargo net. Summer’s here. Get biking.
Price: $2399
Where to buy: flyer.radioflyer.com
Source: The sample of this product was provided for free by Radio Flyer. Radio Flyer did not have a final say on the review and did not preview the review before it was published.

2-Pack LED Video Light Kit, NiceVeedi Studio Light, 2800-6500K Dimmable Photography Lighting Kit with Tripod Stand&Phone Holder, 73" Stream Light for Video Recording, Game Streaming, YouTube
(as of March 16, 2026 10:48 GMT -05:00 - More infoProduct prices and availability are accurate as of the date/time indicated and are subject to change. Any price and availability information displayed on [relevant Amazon Site(s), as applicable] at the time of purchase will apply to the purchase of this product.)