REVIEW – Power is paramount these days, but portability can be a problem. In the past several years, portable power solutions in various shapes, sizes, and capacities have exploded onto the market. A recent addition to this product space is the Anker SOLIX C1000 Portable Power Station. Let’s check it out!
What is it?
The Anker SOLIX C1000 Portable Power Station is a portable, large capacity rechargeable battery station that can be used to power multiple devices for an extended period of time.
What’s in the box?
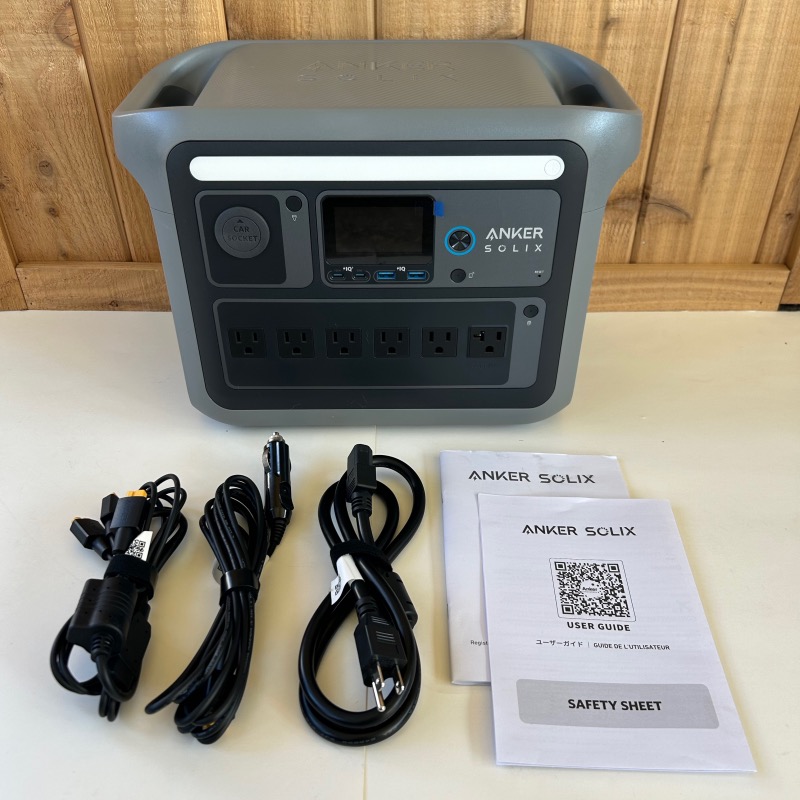
Inside the box were the items shown in the image above and listed below:
- Anker SOLIX C1000 Portable Power Station
- Solar Charging Cable
- Car Charging Cable
- AC Charging Cable
- User Manual
- Safety Sheet
Hardware specs
Per the Anker site, the specs of the Anker SOLIX C1000 Portable Power Station are as follows:
- Capacity = 1,056Wh (Expandable to double capacity up to 2,112Wh)
- Number of ports = 11 (2x USB-A, 2x USB-C, 1x Car/DC, 6x 2-prong 110V AC)
- AC output (Inverter Mode) = 1,800W Pure Sine Wave AC Output (2,400W Loads With SurgePad™)
- AC output (Bypass Mode) = 1440W
- AC input voltage = 120V 12A Max, 50/60Hz
- AC input wattage (Charging) = 1300W
- AC input wattage (Bypass Mode) = 1440W
- Fast charging = HyperFlash™ 110V AC Input, capable of charging 0 to 100% in 58 mins
- Solar/XT60 charging input = 600W Max
- Car charger output = 120W
- USB-A output = 2x 12W
- USB-C output = 1x 100W, 1x 30W
- Battery type = LFP
- Battery cycle = 3,000
- Remote Smart App Control
- Dimensions = 14.8×8.07×10.5 in
- Weight = 28.44 lbs
- 5-Year Warranty and 10-Year Lifespan
Design and features
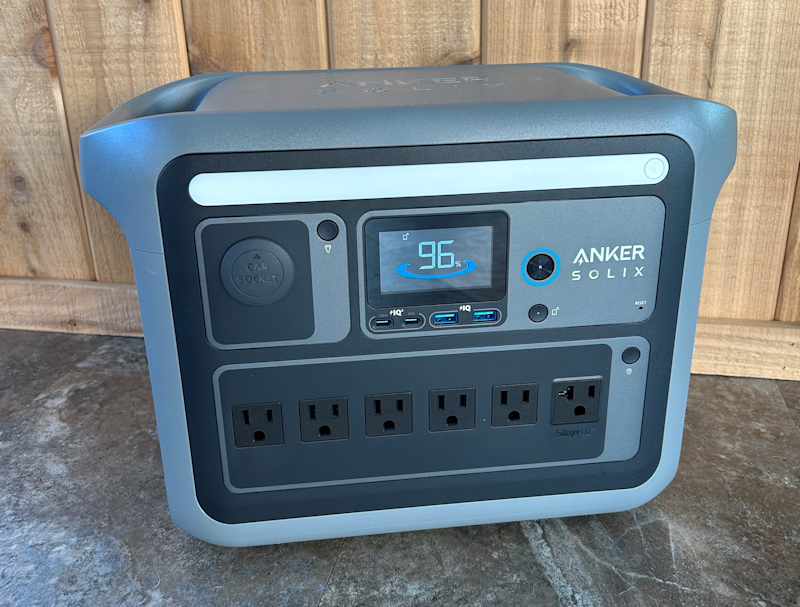
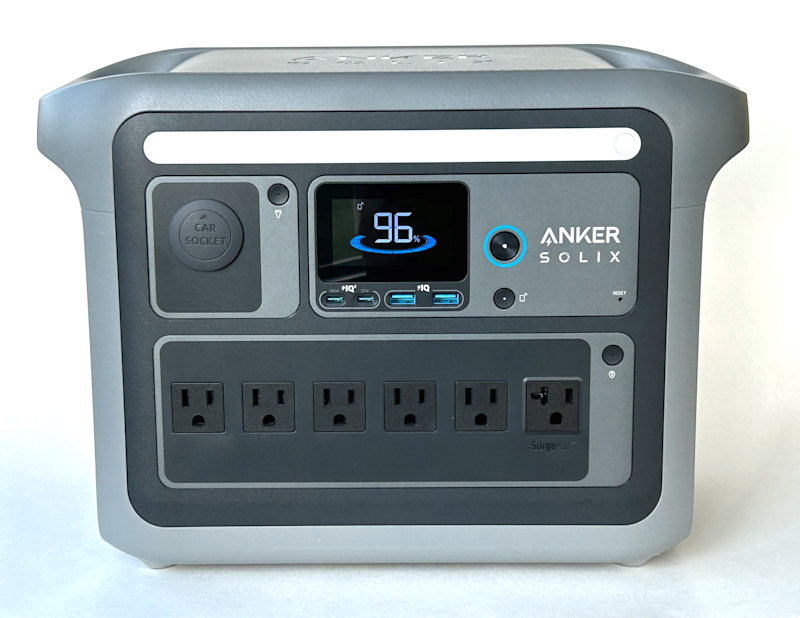
The Anker SOLIX C1000 is a boxy, compact unit in a gray color scheme. It has a small LED display flanked by various buttons, ports, and outlets.
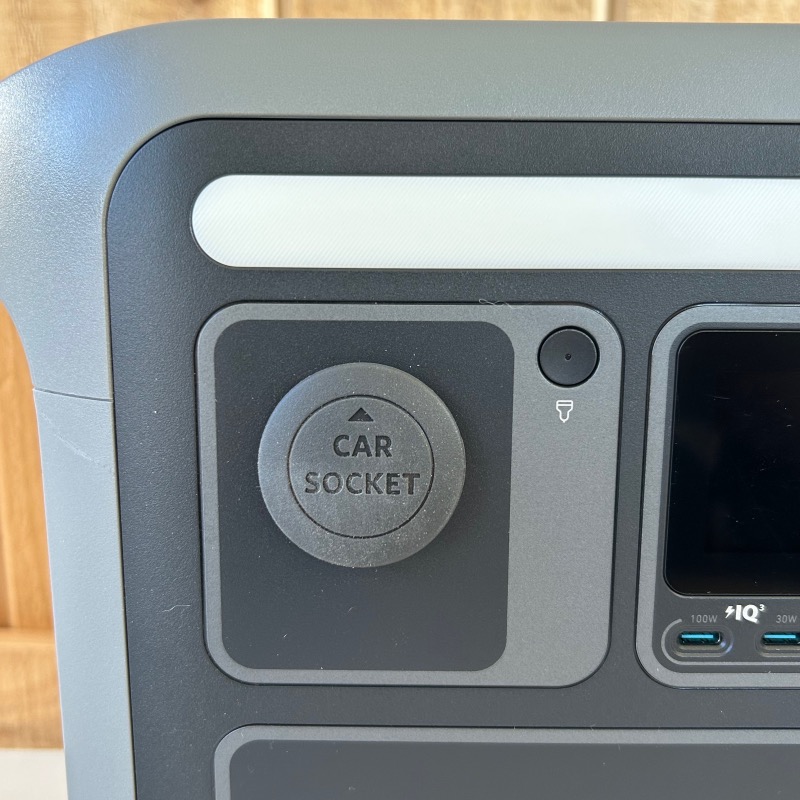
In the upper left is the SOLIX C1000’s Car Socket Port, along with this port’s power button to the upper right of the port.
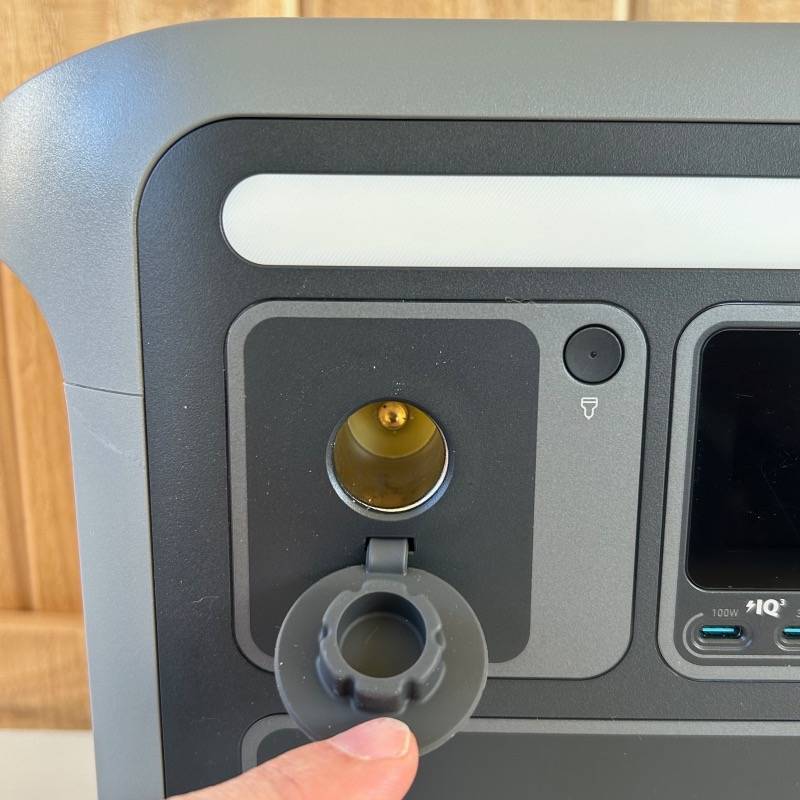
The Car Socket has a silicone protective cover that helps keep moisture and dust out. The cover can quickly be popped open and closed again.
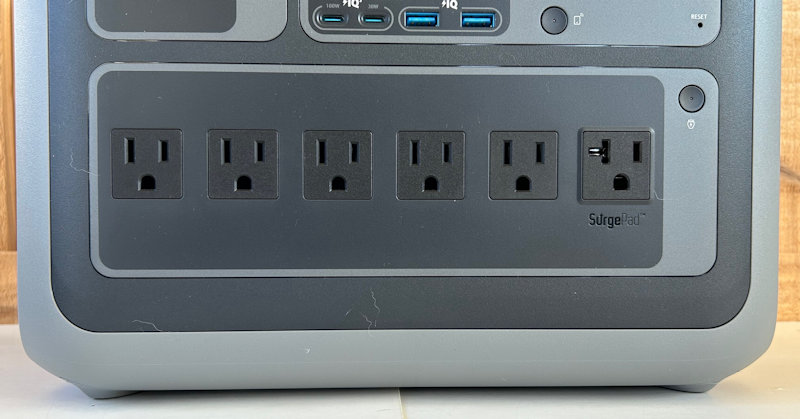
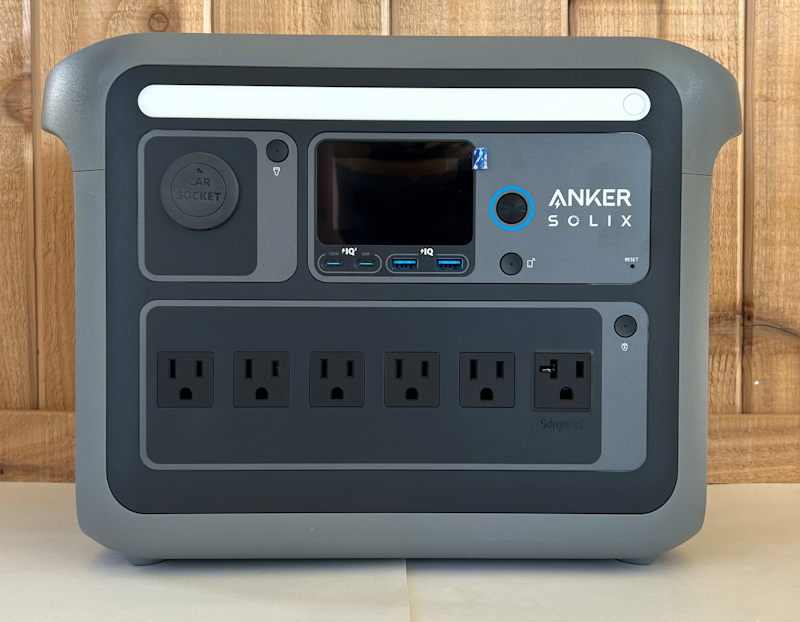
The lower half of the SOLIX C1000’s face is a panel with its bank of six 2-prong 120V AC outlets and this panel’s power button in the upper right of the panel. That’s a lot of outlets. The far right outlet is the SOLIX C1000’s SurgePad outlet. The standard output of the SOLIC C1000 is up to 1800W, which works fine for powering many lower-demand devices, like a laptop, small fridge, coffee maker, and so forth. The SurgePad outlet can provide a boost of up to 2400W of output for shorter periods, allowing it to power higher-wattage devices like hairdryers, air conditioners, and so forth.
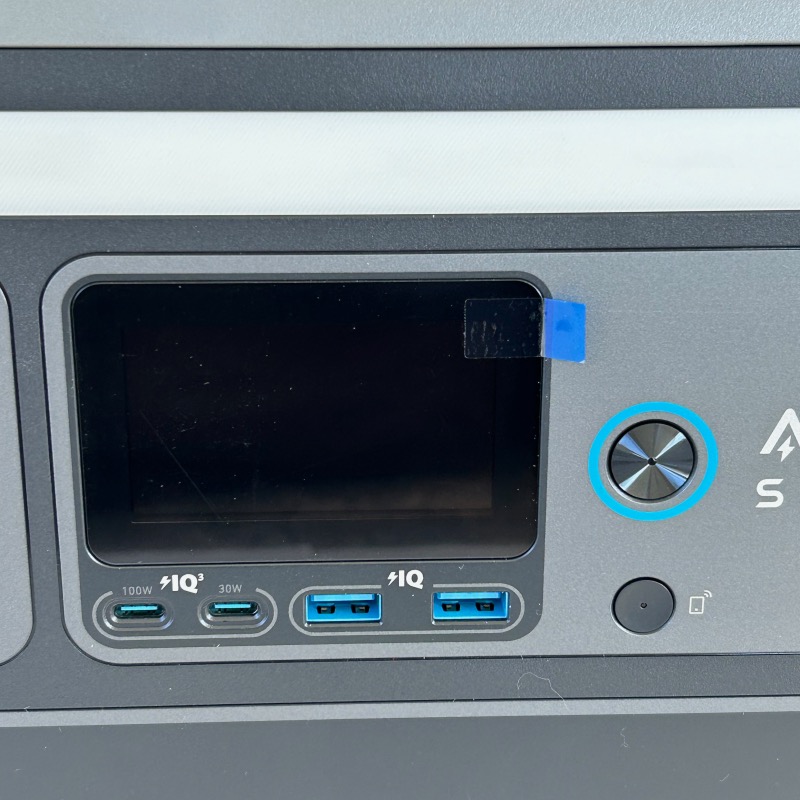
Located in the top center of the SOLIX C1000’s front is its LED display. Just beneath this display is a bank of USB ports as seen in the image above. From left to right is a 100W USB-C port, a 30W USB-C port, and two 12@ USB-A ports.
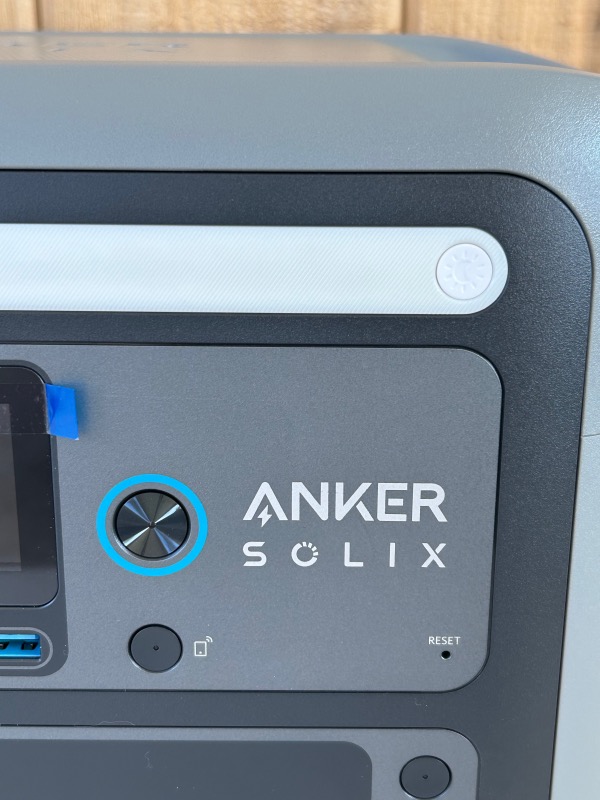
Just to the left of the display screen is a large silver button ringed in blue that is the SOLIX C1000’s main power button. Just below the main power button is the IoT (Internet of Things) button that activates the SOLIX C1000’s wireless connectivity. A few inches to the right of the IoT button is a tiny reset button that can be used to reset the entire SOLIX C1000 if necessary. Additionally, along the top of the SOLIX C1000’s face is a light bar and its small white power button is in the top right corner of the front of the device.
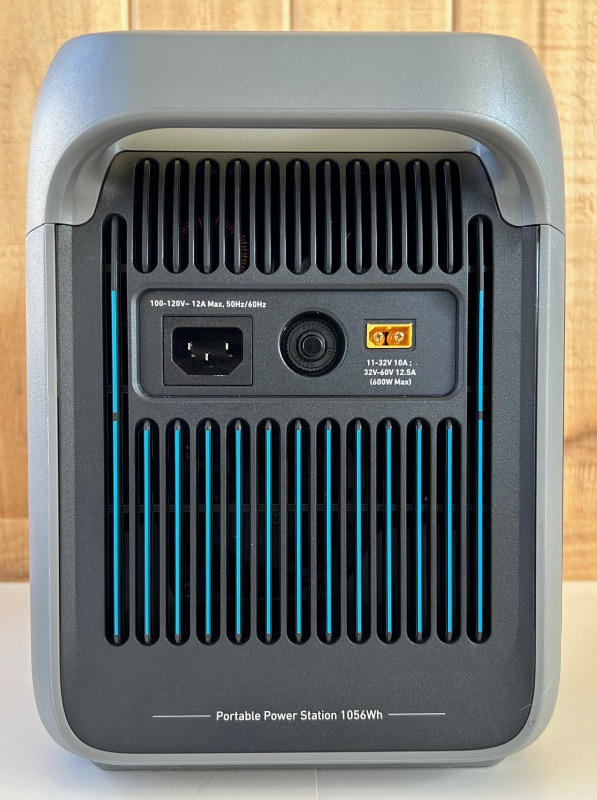
On the left side of the Anker SOLIX C1000 is a panel surrounded by heat venting slots.
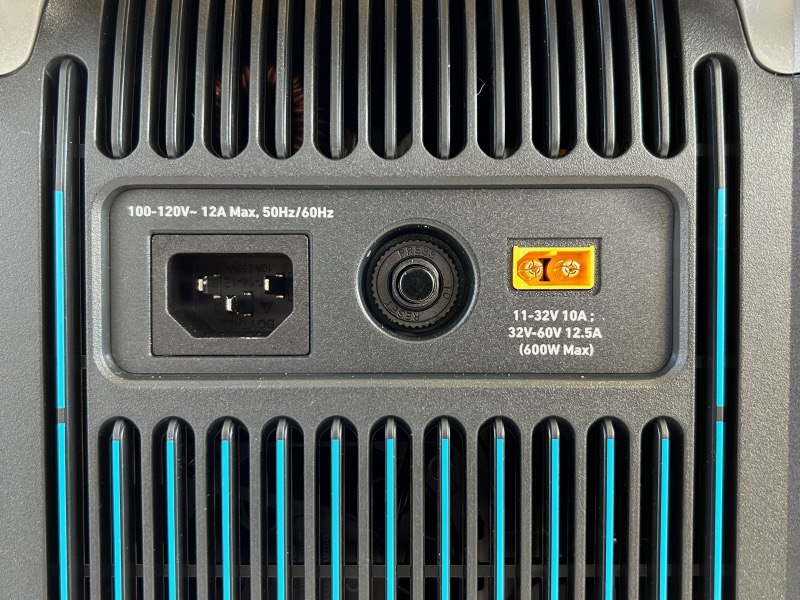
Moving left to right is the Anker SOLIX C1000’s 100-120V input port, an electrical reset button, and the solar panel input port.
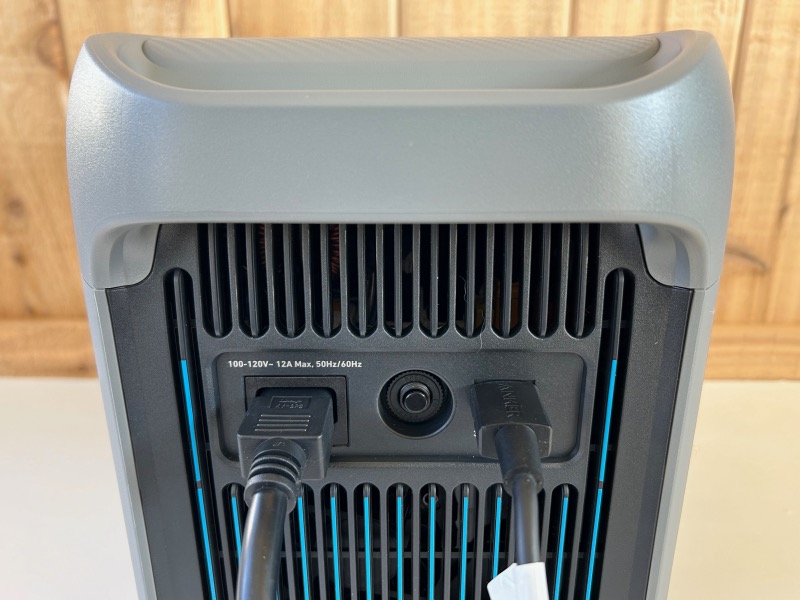
The included AC Charging Cable plugs into the 100-120 V AC port and the included Solar Charging Cable plugs into the Solar Panel Port. However, it should be noted that the Anker SOLIX C100) does not include a solar charging panel. Anker does sell solar charging panels that are compatible with the SOLIX C1000, but it must be purchased separately.
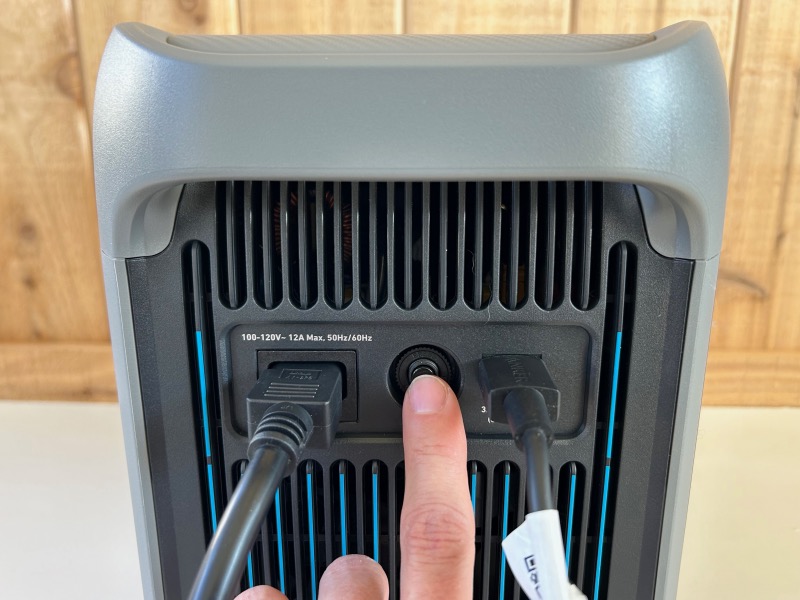
Between the two input ports is a reset button that can be used as sort of a ground fault reset for the SOLIX C1000 should it be necessary to reset the device.
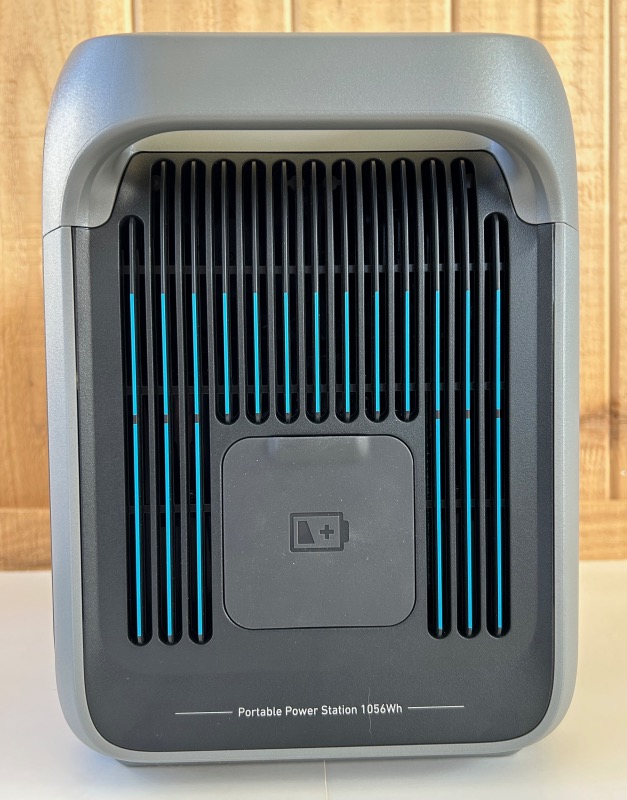
On the right side of the Anker SOLIX C1000 is the expansion port that allows adding a second battery to double the capacity. The secondary “piggyback”-style battery is available separately from Anker.
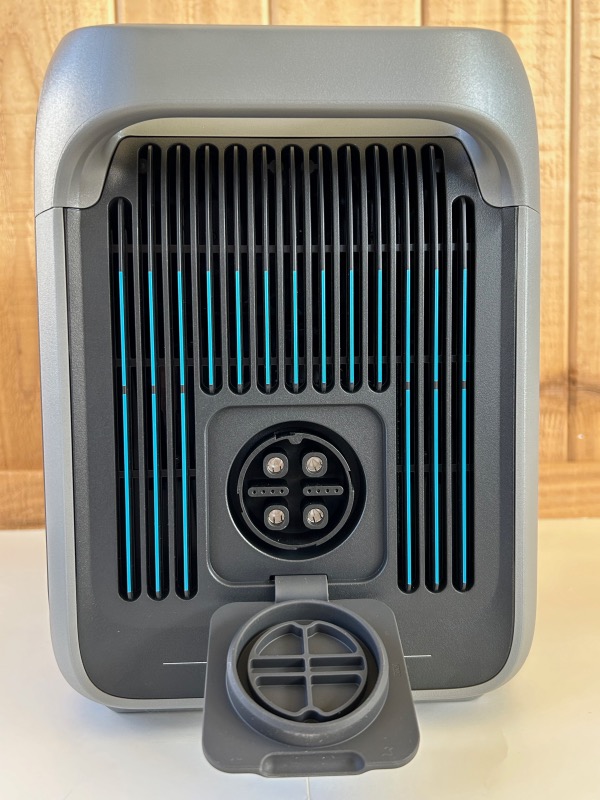
The expansion port has a soft plastic protective cover to keep moisture and dust out of the port’s connectors.

The top of Anker SOLIX C1000 has sort of a “carbon fiber” styled appearance with the Anker SOLIX logo embossed into it. A pair of integrated carry handles are located on either side of the top of the Anker SOLIX.
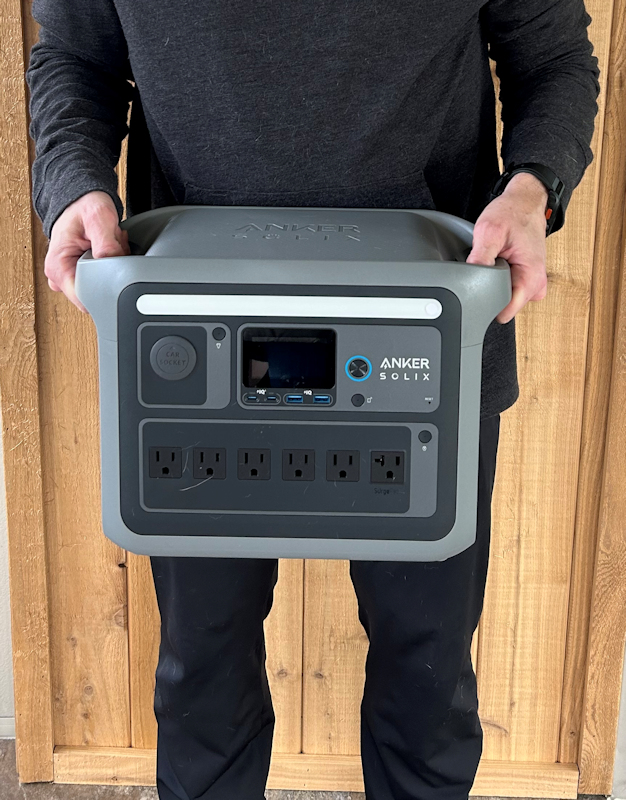
Weighing in at over 28 pounds, the Anker SOLIX C1000 is not a featherweight device and can be a bit bulky and awkward to transport. Using the integrated carry handles to transport the device with both hands is highly recommended. I’d also add that the SOLIX C1000 feels incredibly durable and able to survive lots of bumps and even short-height drops and keep right on chugging along.
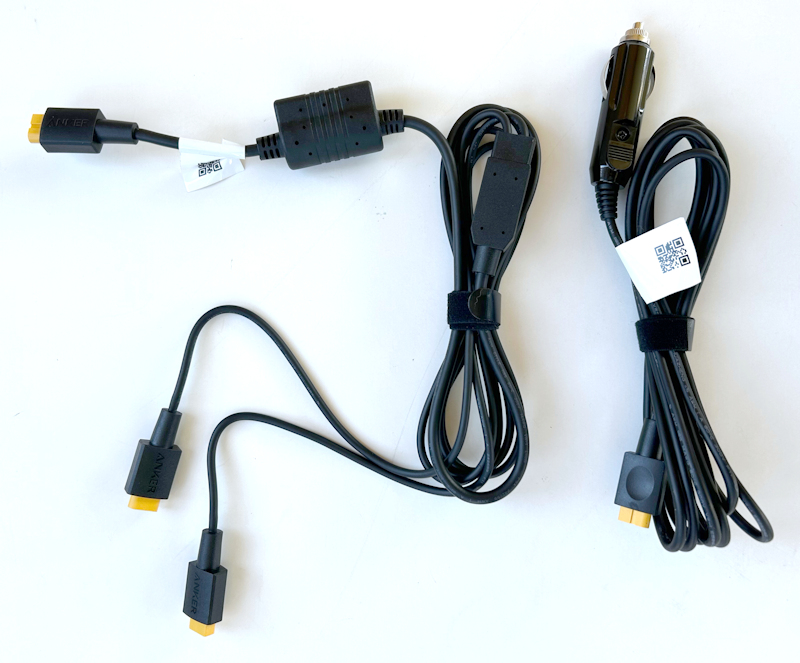
As mentioned previously, the Anker SOLIX C1000 includes three cables. Shown in the photo above are the Solar Charging Cable on the left and the Car Charging Cable on the right. The Solar Charging Cable connects the SOLIX C1000 to any of the solar panel available separately from Anker. The Car Charging Cable allows you to charge the SOLIX C1000 using your car’s DC outlet.
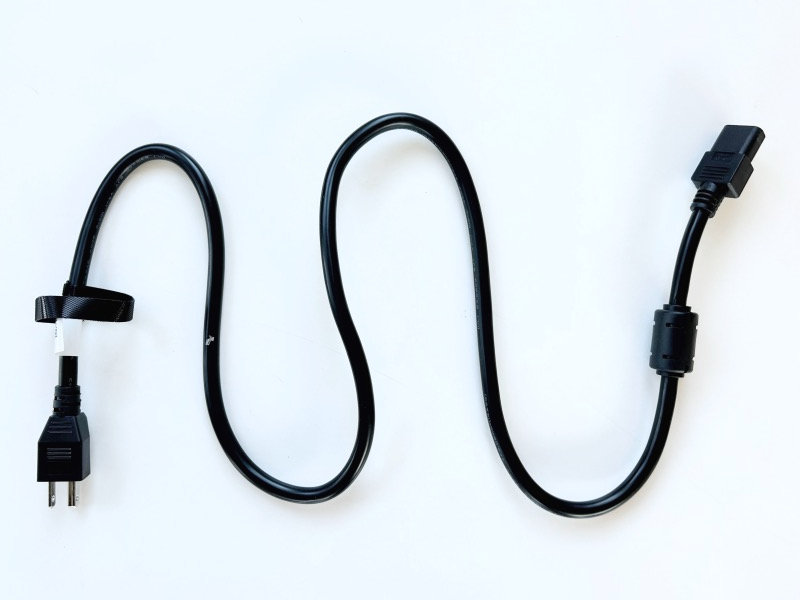
The third cable included with the Anker SOLIX C1000 is its AC Charging Cable that allows you to charge the device from any standard 2-prong 100-120V outlet in your home.
Wall outlet/AC charging
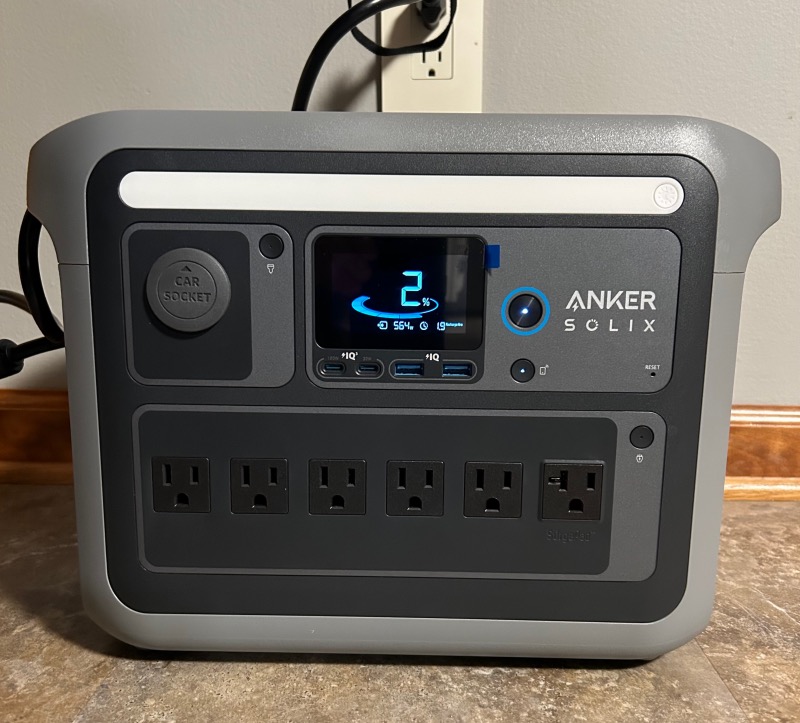
When I first removed the Anker SOLIX C1000 from its well-protected shipping packaging, it was essentially empty and needed a charge. I attached its AC Charging Cable to the port to the left side of the SOLIX C1000, plugged it into a standard 2-prong 100-120V wall outlet in my home, and began the charging process. When plugged into AC wall outlet and charging from a low charge, the SOLIX C1000 makes a fairly audible humming sound. I presume this is from its internal cooling system that keeps the SOLIX C1000 from overheating when a significant amount of current is being transferred into it. The Anker site states that the SOLIX C1000 constantly monitors its internal temperature, checking it up to 100 times per second.
Starting at a charge of 0%, the total time required to reach a 100% charge from an AC wall outlet was about 1 hour and 10 minutes. I thought this was a very fast charging time for a portable battery power system like this one, and I suspect this fast charging is due to the Anker SOLIX C1000’s HyperFlash charging feature.
Car/DC charging
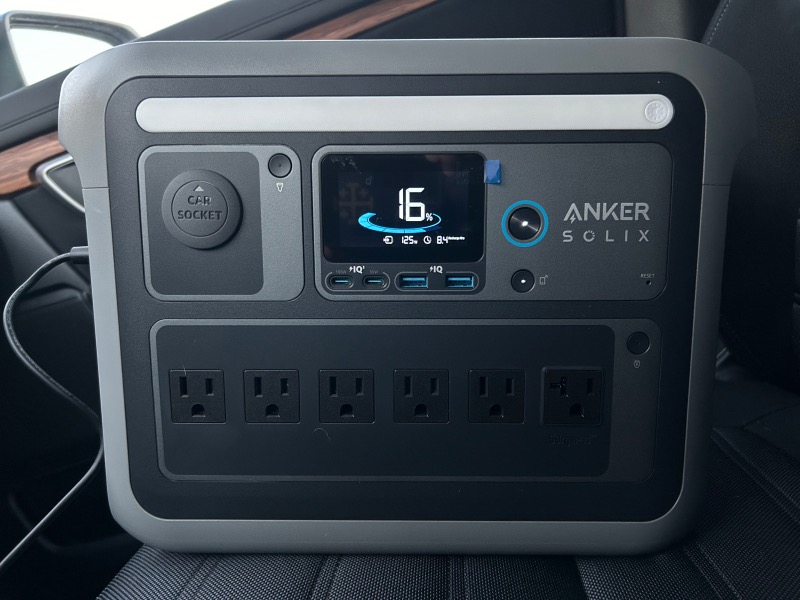
I also evaluated the Anker SOLIX C1000’s car charging capabilities. After using the device for some time and draining the battery down to 0%, I put the SOLIX C1000 in my car and plugged it into my car’s DC outlet using its Car Charging Cable. My daily commute is about 40-45 minutes one way, and after driving into work with the SOLIX C1000 plugged into the car charging outlet, it had only charged up to 9%. At the end of my workday, I repeated this on my drive home, and after another 45 mins of driving, for a total of about 90 minutes, the SOLIX C1000 had only charged a total of 16%. I probably don’t need to point out that this is a significantly slower charging rate than with AC wall charging in your home.
Solar charging
The Anker SOLIX C1000 is capable of being charged with an external solar panel, but this must be purchased separately from Anker, so I was not able to evaluate the SOLIX C1000’s solar charging capabilities.
Ambient LED light feature

The Anker SOLIX C1000 includes a handy LED light bar feature. It has three brightness levels that you can easily cycle through using its small white power button located in the top right corner of the face of the SOLIX C1000.
Test 1 – Quick evaluation with multiple devices
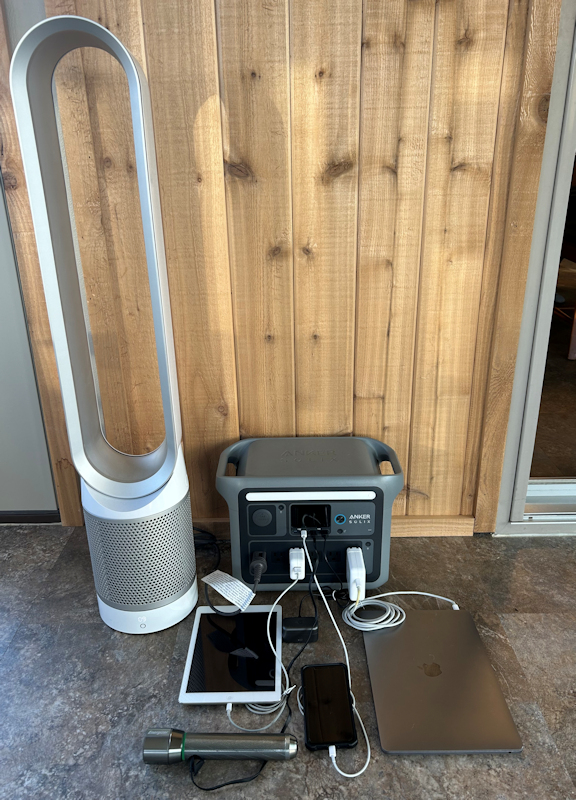
One of the tests I ran with the Anker SOLIX C1000 was to connect several relatively low wattage demand device to it. You can see my setup in the pic above and below.
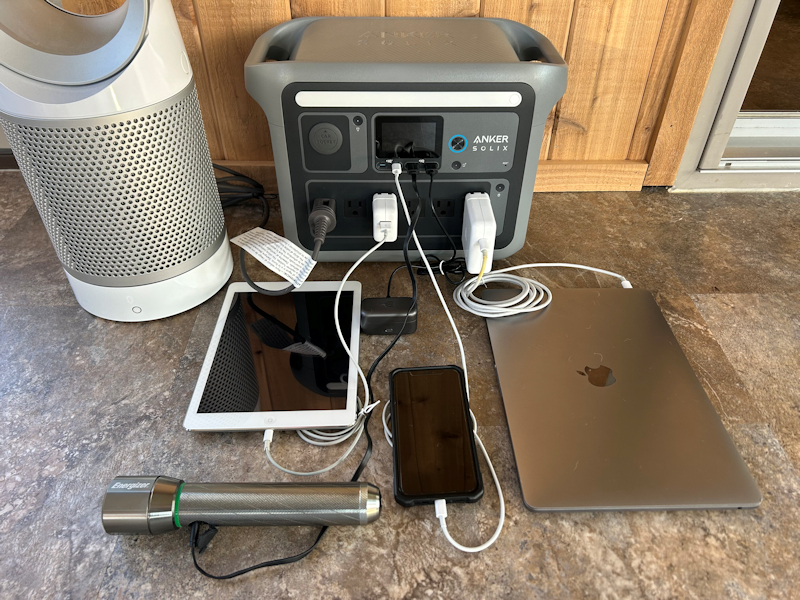
For this test, I connected a Dyson fan, an Apple iPad, an Energizer flashlight that has USB charging capability, my EPOS GTW 270 earbuds in their charging case, an iPhone XR, and an Apple 13″ MacBook Pro.
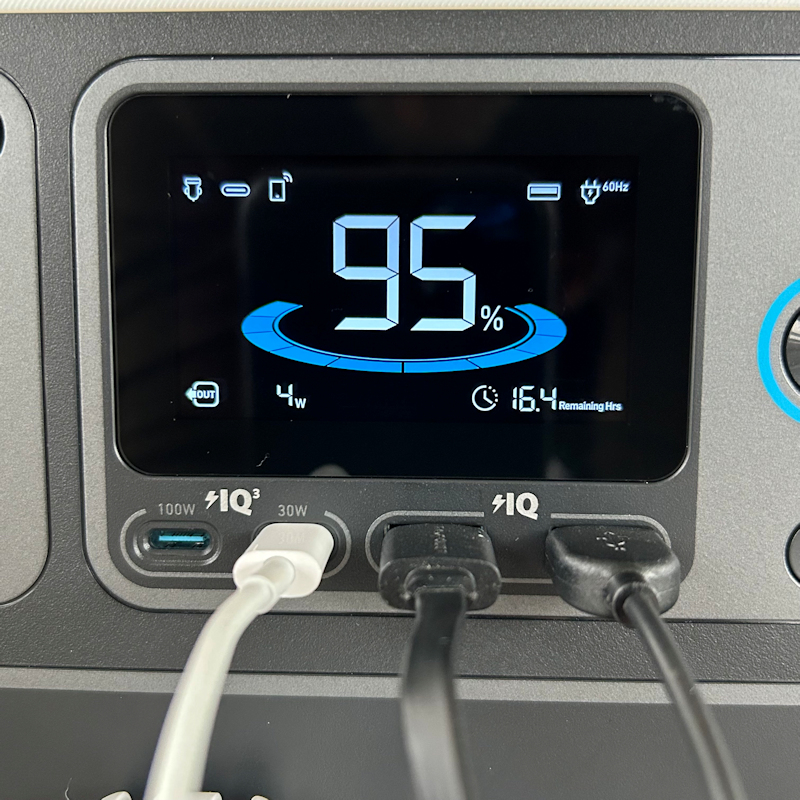
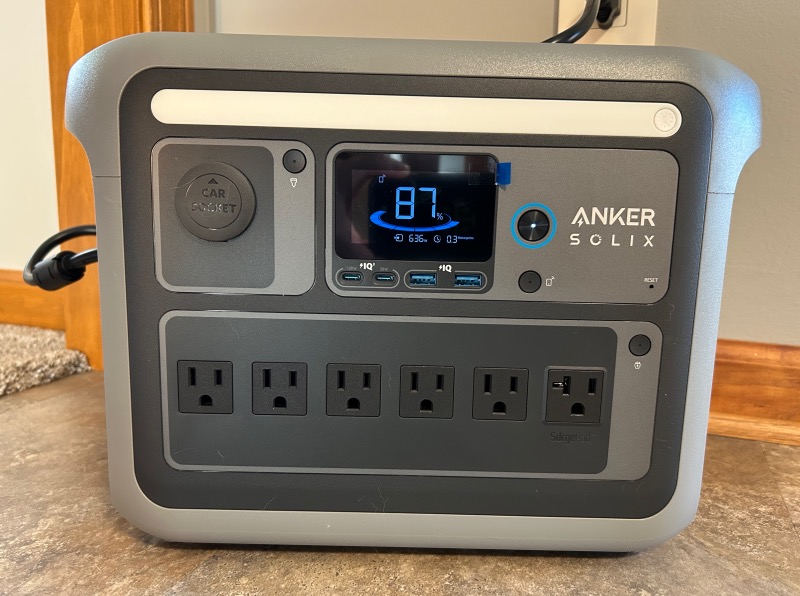
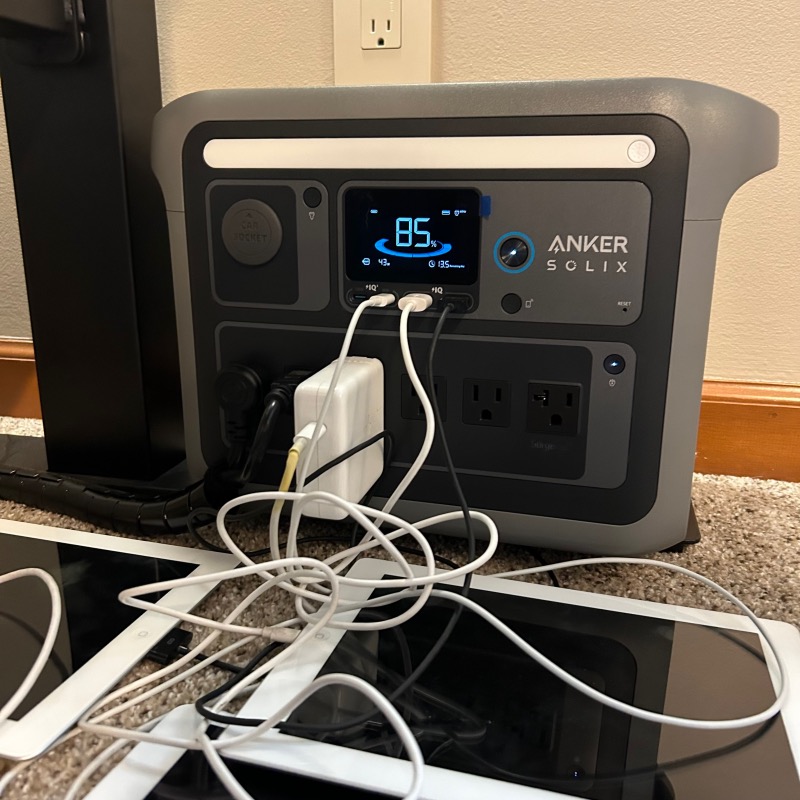
The Anker SOLIX C1000’s LCD display shows several pieces of information, mainly in the form of various icons and numerical values. In general, it shows what is plugged into it and its charge status. Of note here is that the SOLIX C1000 is currently at 95% charge capacity (the big number in the center). Another thing to note is that, with what is currently plugged into the SOLIX C1000, it has another 16.4 Remaining Hours of charge (see the lower right corner).
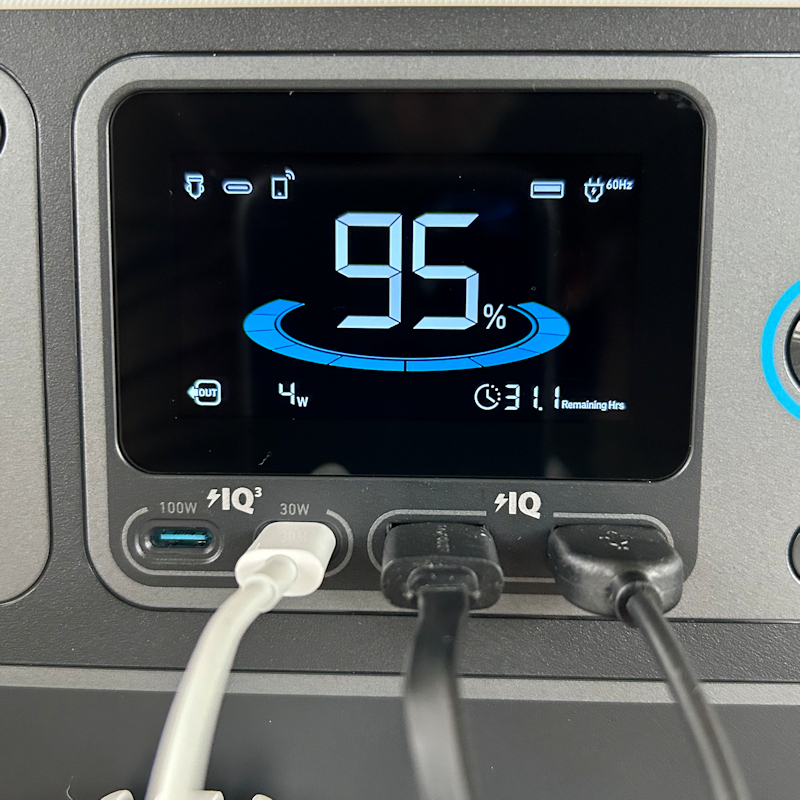
Note what changes when I turn off the large Dyson fan. The Remaining Hours jumps up to 31.1 hours, which is evidence that the Dyson fan was causing almost half the power demand on the SOLIX C1000. This means that the remaining iPad, iPhone, earbud charging case and flashlight can be charged for roughly another 31 hours.
Test 2 – Longer-term evaluation with multiple devices
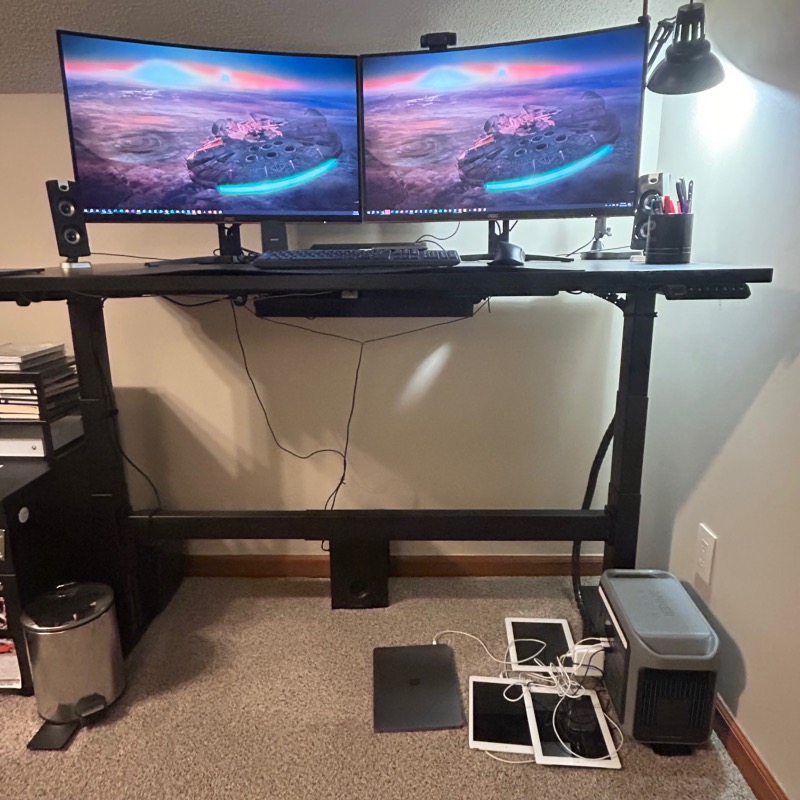
The next test I performed with the Anker SOLIX C1000 had a bit longer time domain. I connected to it my entire work from home office setup as seen in the photo above. This currently consists of a Lenovo X-series 13″ laptop, two AOC 32″ curved gaming-style monitors, a Logitech webcam, an Insignia desktop sound system with satellite speakers and a bass box, an Anker wireless charger for my iPhone, and a desk lamp. For some extra demand, I added three Apple iPads and an Apple 13″ MacBook Pro.
I ran the above setup on one of my work from home days, starting at around 7:15am. This consisted of me using the laptop and monitors essentially all throughout the workday with only a few short breaks, as well as the iPads and MacBook charging on it throughout the day. The Anker SOLIX C1000 powered this entire setup until well into the evening. I think it wasn’t until around 6:15pm that the Anker SOLIX C1000 finally ran down to 0% and shut itself off. This was total of around 11 hours of powering my workday, and would never have noticed that I wasn’t plugged into an AC wall outlet for the entire day. The Anker SOLIX C1000, with its impressive 1056Wh capacity, delivered smooth, uninterrupted power throughout the entire duration of my working day.
Test 3 – Powering two space heaters
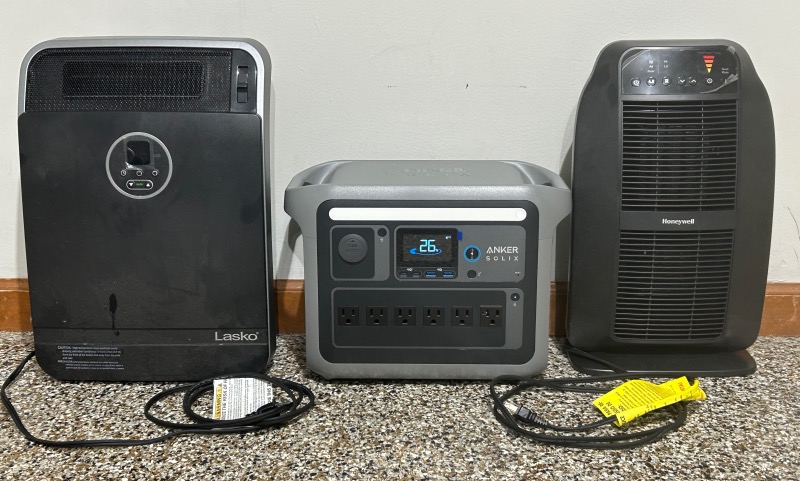
The next evaluation I ran with the Anker SOLIX C1000 was attempting to use it to power two space heaters. Both of these small, portable space heaters are rated at 15ooW. The SOLIX C1000 is capable of providing 1800W of power. When I plugged one of the space heaters into the SOLIX C1000, it powered the heater without any issues. But when I plugged the second space heater into the 1800W-rated SOLIX C1000, this doubled the power demand to 3000W, and it shut itself down. To remedy the situation, I had to unplug one of the space heaters, press the electrical reset button on the left side of the SOLIX C1000, and then power it back on. The Anker SOLIX C1000 is capable of powering one of the 15000W space heaters for some period of time, but not two of them.
Test 4 – Powering a mini-fridge
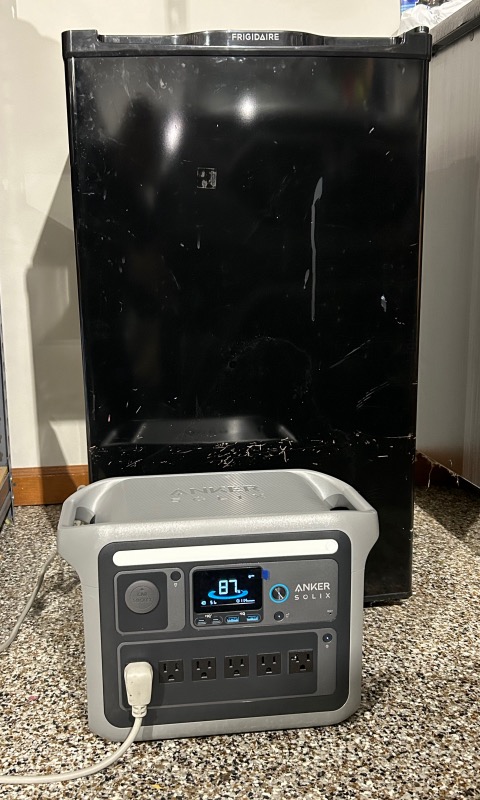
The last evaluation I ran with the Anker SOLIX C1000 was powering my mini fridge, as seen in the photo above. This mini fridge is rated to 1.3A, but it didn’t list its wattage rating. Nevertheless, the SOLIX C1000 powered this mini fridge like a champ. After a couple of hours of the mini fridge being plugged into the SOLIX C1000, its capacity had only dropped 1%. It appeared that the Anker SOLIX C1000 is capable of powering a mini fridge like this for hours on end, provided you are not opening and closing it constantly.
Smart app setup and use
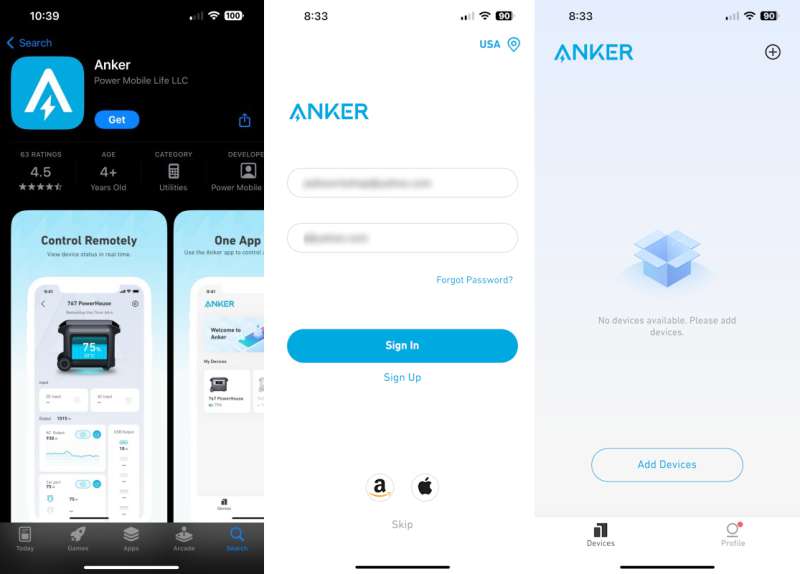
The final feature of the Anker SOLIX C1000 that I’ll cover is its remote Smart App control. The first step was to download the Anker app from the Apple App Store and install it on my iPhone. Next, I had to use the app to create a free Anker account. Once my account was set up, I had to add the Anker SOLIX C1000 to the app.
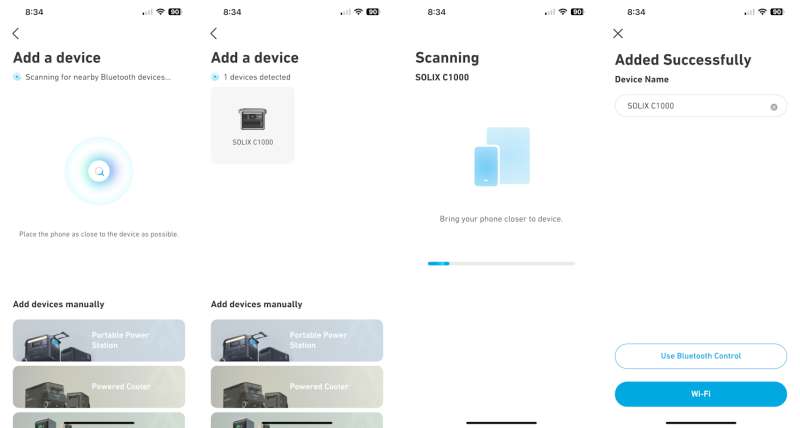
There are two methods for wirelessly connecting the Anker SOLIX C1000 to the Anker app. The first method I tried was via Bluetooth. I tapped Add a device, then placed my iPhone near the SOLIX C1000. An icon for the SOLIX C1000 appeared, and after tapping it, the app began scanning the SOLIX C1000. After a few seconds, the SOLIX C1000 was successfully added to the app. It was a very straightforward and simple process.
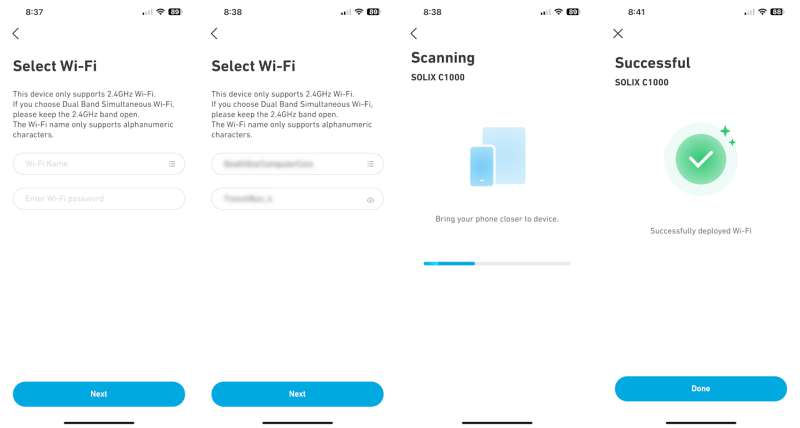
The alternate method of connecting the Anker SOLIX C1000 to the Anker app is using Wi-Fi. I tapped Wi-Fi connection in the Anker app, then selected my home Wi-Fi network, and logged into it. The app then began scanning the SOLIX C1000 and after a few seconds, the Wi-Fi connection had been established.
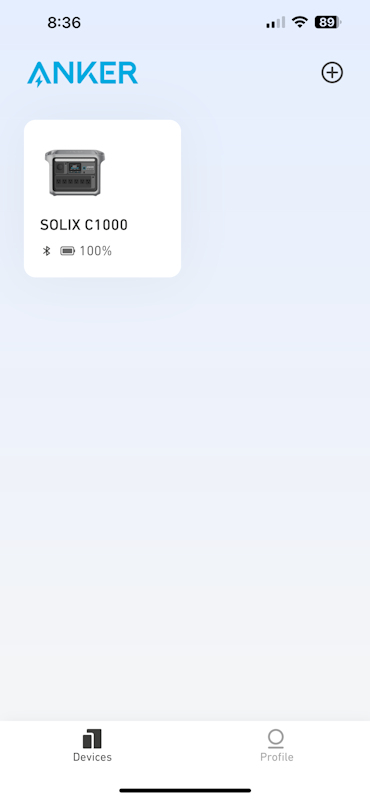
While the Anker app certainly isn’t required in order to use the Anker SOLIX C1000, it does provide some handy remote monitoring and control capabilities.
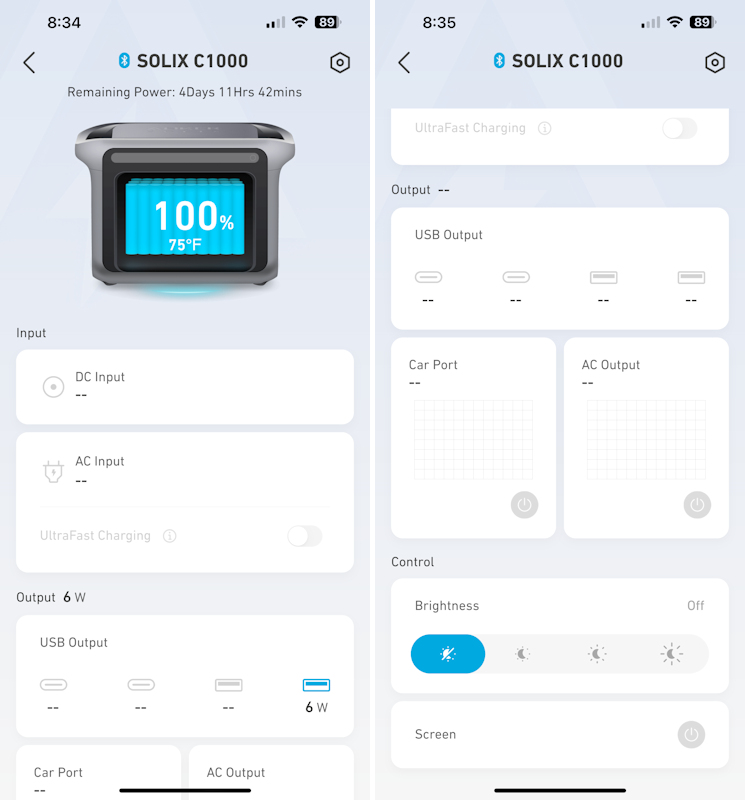
After selecting the Anker SOLIX C1000 icon in the app, the above screen is shown. This is essentially a control panel that displays loads of information about what is happening with the SOLIX C1000. It includes information like remaining power in hours, current charge percentage, and internal temperature. It also indicates what it is plugged into (Input) and what is plugged into it (Output). It can even control the SOLIX C1000’s LED light brightness and turn its display on and off.
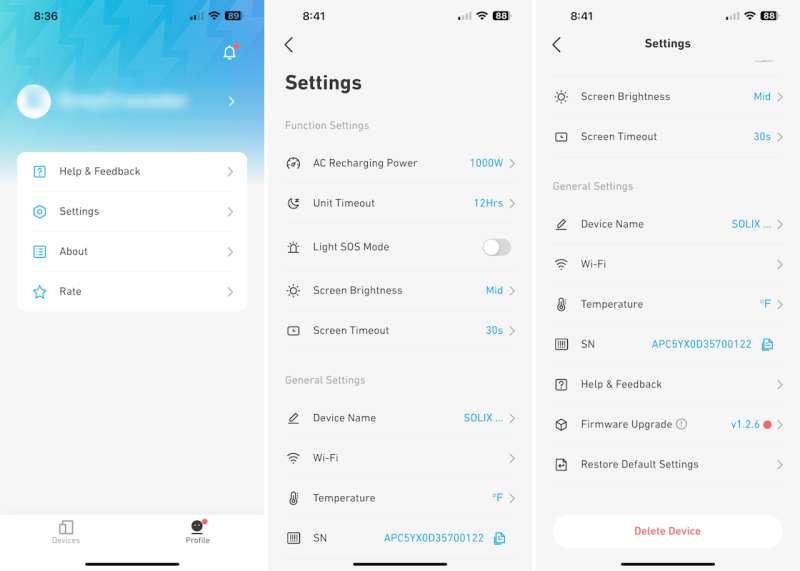
There is also a Settings area in the Anker app that allows you to fine-tune control of the app to your preferences.
What I like
- Impressive battery capacity
- Can charge/power many devices simultaneously
- Can be recharged very fast via an AC wall outlet
- Small, compact, durable design
What I’d change
- It needs solar panels to complete the full suite of charging capabilities
- Slow DC charging
Final thoughts
I found the Anker SOLIX C1000 Portable Power Station to be a solid entry into the portable battery market. It has a very fast AC charging capability and its large capacity allows it to power several devices for many hours at a time. The Anker app, though not necessary to use the SOLIX C1000, adds additional monitoring and control capabilities. The Anker SOLIX C1000 is a solid product on its own, but to really be an outstanding product, I think it would need to be paired with an Anker SOLIX solar panels that can provide ongoing charging if you are unable to charge it via an AC wall outlet. The Anker SOLIX C1000 is normally priced at $999.00, but as of this writing, it is $649.00 via the Anker site, which seems like an excellent price for a device of this quality and feature set.
Price: $999.00
Where to buy: anker.com and Amazon
Source: The sample of this product was provided by Anker.

DJI Power 1000 Portable Power Station, 1024Wh LiFePO4 Battery, 2200W (Peak 2600W) AC/140W USB-C Output, 23db Ultra-Silent, Solar Generator For Home Backup, Camping (Solar Panel Optional)
(as of June 30, 2026 19:32 GMT -05:00 - More infoProduct prices and availability are accurate as of the date/time indicated and are subject to change. Any price and availability information displayed on [relevant Amazon Site(s), as applicable] at the time of purchase will apply to the purchase of this product.)
Gadgeteer Comment Policy - Please read before commenting
I love your straightforward review and concur! I bought one of these a few weeks ago and use it daily with six 100w solar panels to run my window unit air conditioner. My panels have at peak hit 480w input, and it’s able to keep my room in august at 71 degrees. Very happy about it, and this winter plan to use it like you tested–with a space heater to keep my workspace warm during the day while dropping to about 58 overnight while I am gone. I plan to utilize this daily and the whole setup will pay for itself before it is worn out–looks like about 50 months by my local energy costs.
Thank you for a detailed review with pics!