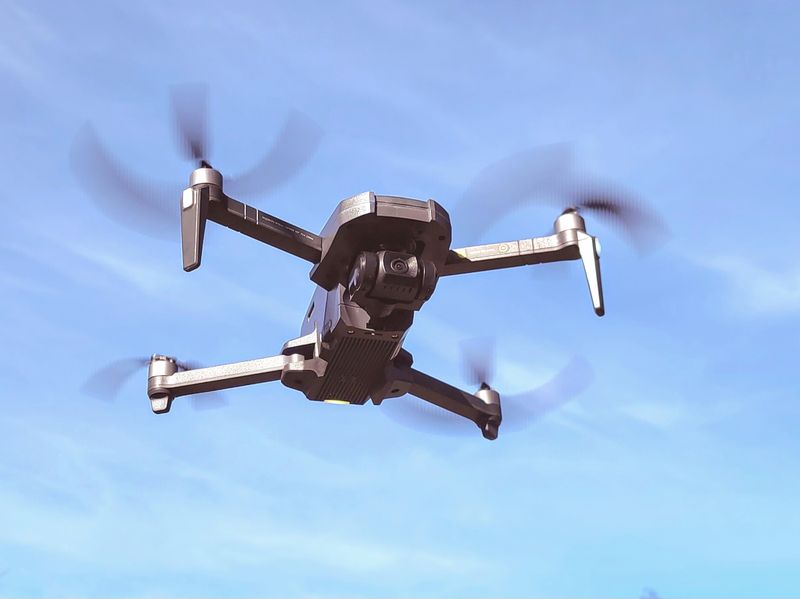
REVIEW – Camera drones rely on banking to pitch forwards and backward or to roll left or right. When the drone banks, so does the camera unless the drone has a 3-axis gimble, like the Holy Stone HS720R, to compensate for the tilting. I have one to review – read on to see what I think!
What is it?
The Holy Stone HS720R is the company’s first model to feature a 3-axis mechanized gimbal. Other drones I have reviewed have either featured a fixed camera, a damped camera mount, or a movable camera. The mechanized camera gimble uses accelerometers, motors, and electronic image stabilization to keep the camera shot steady during flight. Unfortunately, all this mechanical wizardry comes at the cost of added weight. The weight of the drone requires registration per 14 CFR Part 89 Remote Identification of Unmanned Aircraft . However, on the bright side, once the 249 gram threshold is crossed, larger battery capacity is easier to achive without penalty. A fully charged battery lets you take about 26 minutes of 4K video at 30 fps to the TF card. The Holy Stone HS720R can maintain a stable hover using GPS signals. If the GPS signal is weak the drone can use an onboard altimeter and compass to maintain a stable hover. An optical flow positioning sensor can help to maintain position over textured ground cover. The drone has many different video and camera shooting modes that can be used to take selfies (or dronies) without having to simultaneously use the remote control.
What’s in the box?
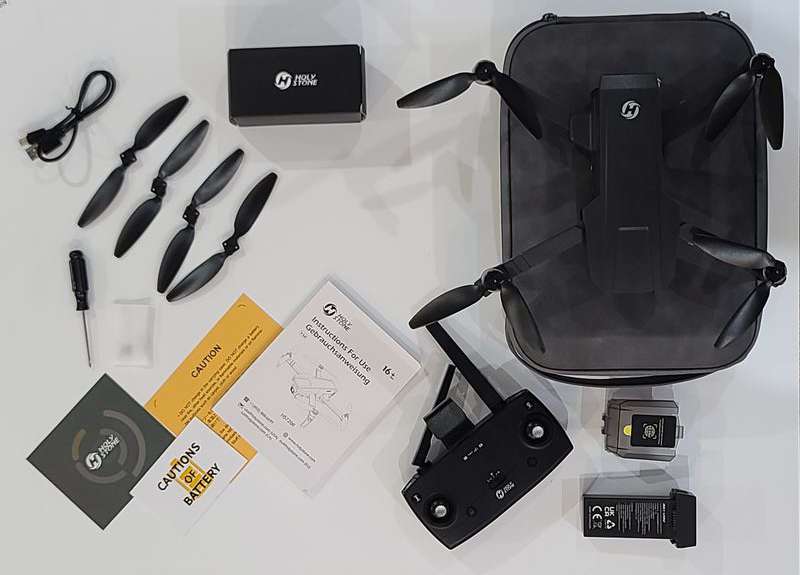
- Holystone HS720R drone
- transmitter
- Drone Battery
- 2 forward spinning airfoils
- 2 reverse spinning airfoils
- 8 airfoil screws
- Screwdriver
- USB-C to USB-A charging cable
- Camera cover
- instructions
- battery warning
Hardware specs
- Model: HS720R
- Weight: 13.72oz / 389g
- FAA-Compliant Remote ID
- Max Flight Time: 26 minutes (per battery)
- Operating Temperature Range: 14°F to 104°F
- Size: 6.6×3.9×2.8 in / 168x99x71 mm (folded) 12×9.3×2.8 in / 305x238x71 mm (unfolded)
- Drone Battery Capacity: 2950mAh
- Drone Battery Voltage: 7.7V
- Drone Battery Type: Lithium-ion Polymer Battery
- Drone Charging Temperature Range: 41°F to 104°F
- Drone Charging Time: about 3 hours
- Transmitter Operating Frequency: 2452-2474MHZ
- Transmitter Charging Time: about 1.5 hours
- Transmitter Usage Time: about 2.5 hours
- Max Flight Distance: 9842 ft (outdoor and unobstructed)
- Transmitter Battery Type: 3.7V 2000mAh
- Max Photo Resolution: 3840 x 2160P (in TF card) 3840 x 2160P (in mobile phone)
- Max Video Resolution: 3840 x 2160P@20fps (in TF card) 1280x720P@20fps (in mobile phone)
- Lens Angle: FOV 140
- Photo Formats: JPEG
- Video Formats: AVI/MP4
- Supported TF Cards: Supports TF Card (Class 10 above) with storage up to 128 GB
- File Systems: FAT32
- USB Charging Cable Input: 5V/2A
- USB Charging Cable Rated Power: <10 W
Design and features
Unboxing
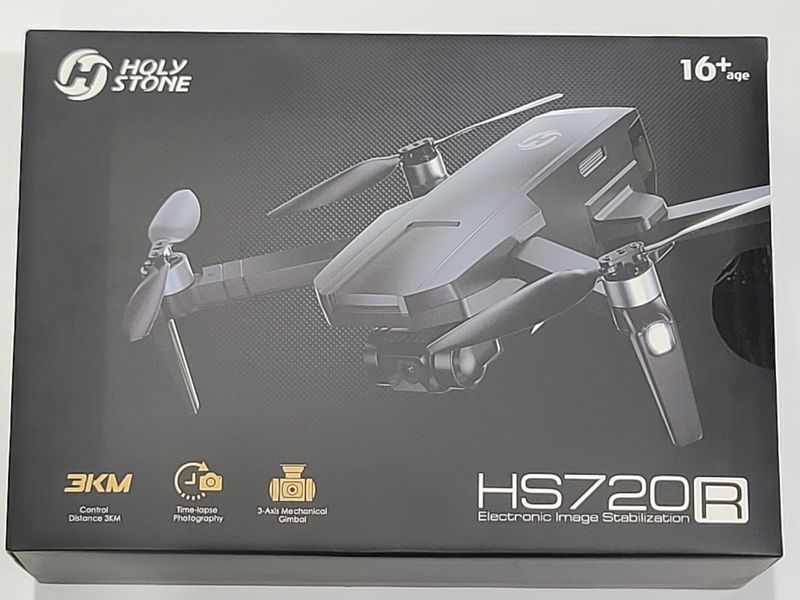
The Holy Stone HS720R drone comes in a full-color printed roll end tray box with a locking cover. The front features a computer illustration of the drone in flight.
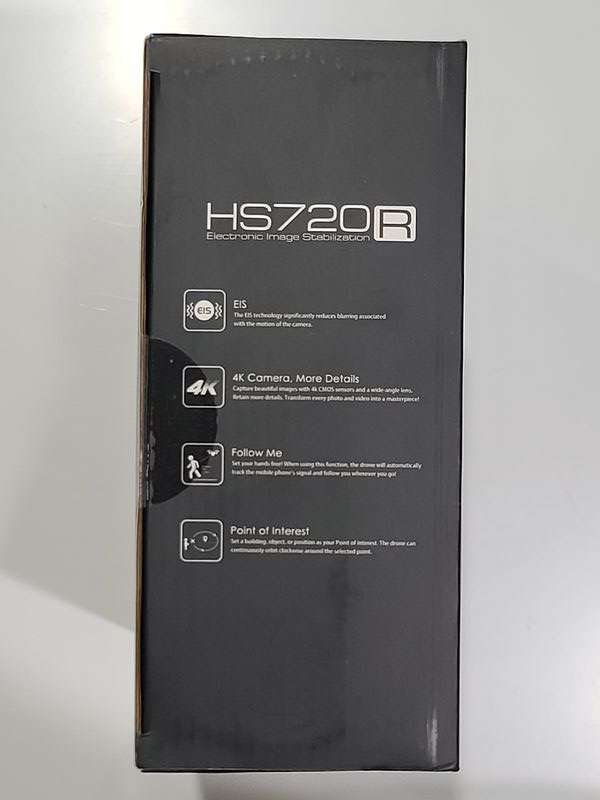
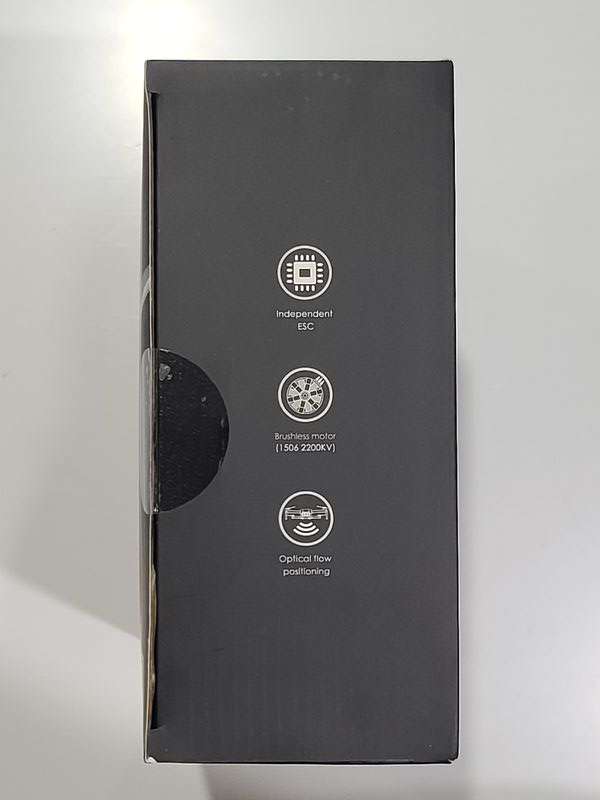
The sides of the box describe some of the features of the drone.
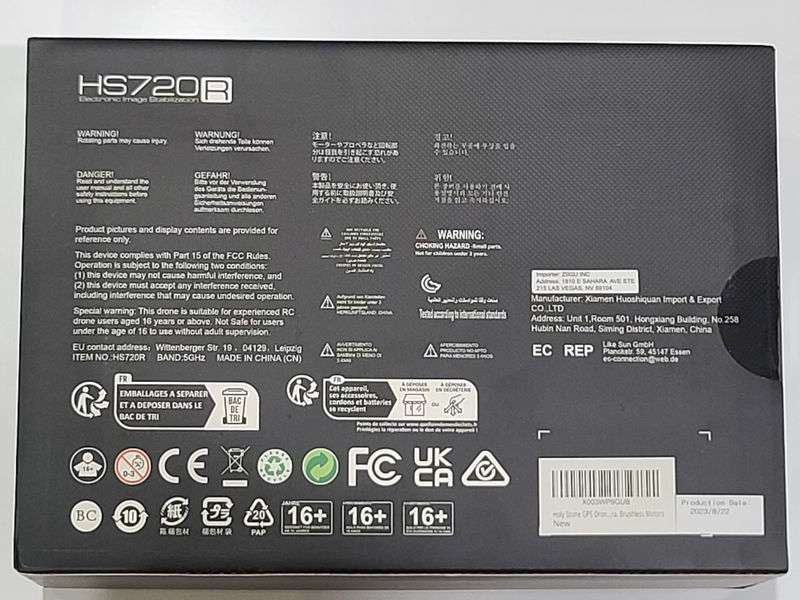
The rear of the box has information about the manufacturer and some compulsory labeling about the battery, radio, and general safety.
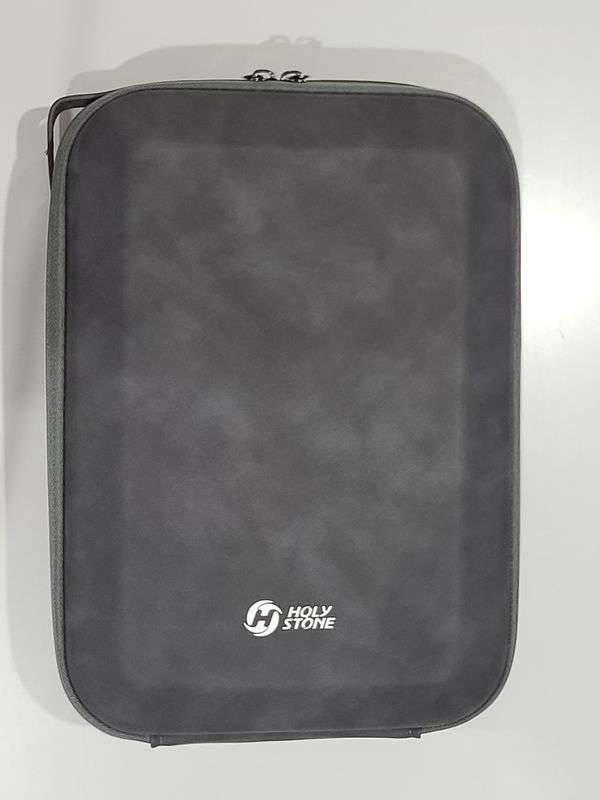
Inside the box is the carrying case, with the Holy Stone HR720R neatly packaged within. The packaging includes a foam sheet and it is unclear if this is needed routinely or if it should be disposed of. The case also comes with a cardboard box that contains the spare propellers, screws, screwdriver, and charging cable.
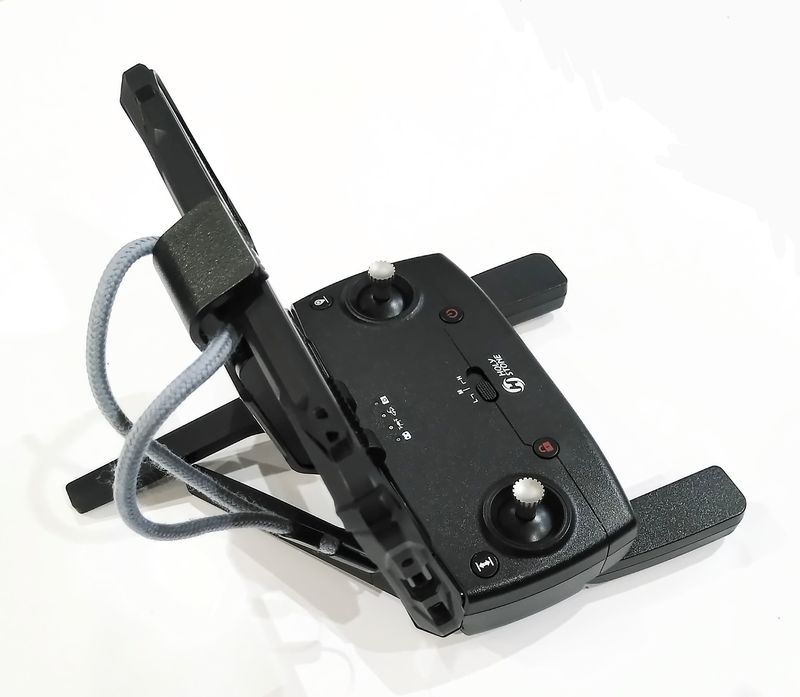
The controller and the drone fit nicely into the carrying case. The case can also be used as a makeshift launchpad if there are tall grasses or large pebbles in the area where the drone is being launched.
Setup
Setting up the Holystone HS720R drone is easy. The first requirement is to register the drone on the FAADroneZone in the United States, or other location internationally, if required. (Europe will require this starting January 2024 and Japan has required this since June 2022.) The HS720R does not have a built-in remote ID transmitter, but starting in October, when you buy any HS720 series model (HS720R, HS720G, HS720E, HS720), simply contact Holy Stone here to receive a complimentary Remote ID module. Once you have the module it is attached by Velcro to the top outside of the drone
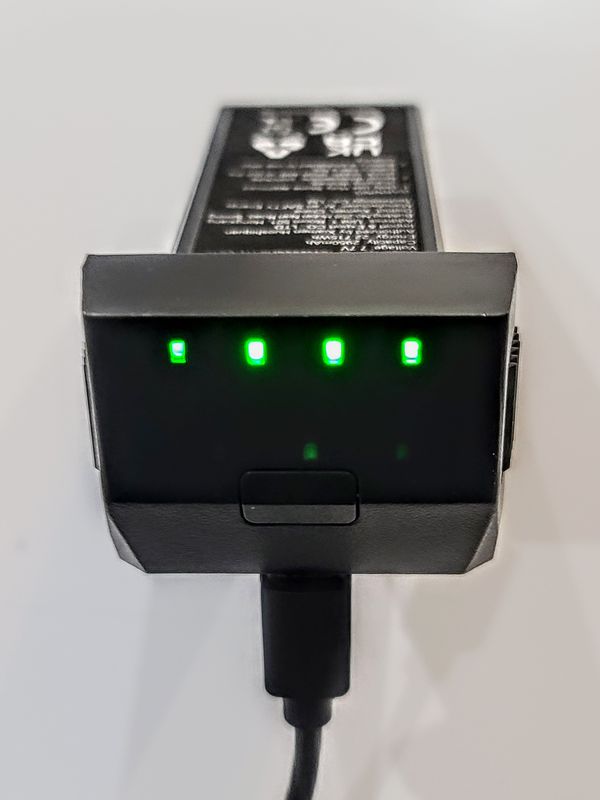
After making sure the drone is flight ready the batteries must be charged. I have several USB-C chargers that are PD compatible, but the Holy Stone will not recognize those devices. The directions say that a 10W charger should be used. I have had success with a 12W charger, but nothing more. The transmitter also has this restriction.
While the batteries are charging the Holy Stone app can be downloaded, a tutorial video can be watched and the instructions can be read, all from this link here.
The connection between the controller and the smartphone running the Holy Stone app is by Wi-Fi. The connection allows the HS720R controller to act as an RF interface between the app and the drone.
One thing that is not available is a place to tether the controller or the phone (or both) so that it is not dropped. I have a wrist lanyard on my phone case and if I put that around the spring retain phone holder on the controller then I can attach a neck lanyard to the wrist tether.
On the Holy Stone drone, the TF card can be installed in the base of the drone. The TF card is installed with the contacts facing up when the drone is in the normal flying position.

The final setup step is to make sure that the internal compass is calibrated. To perform this step, deploy the propeller arms and place the drone on a level surface. Turn on the drone and the transmitter and wait for the transmitter and the drone to connect. The connection process can take up to 25 seconds. The phone can be inserted in the controller and the phone can be connected to the controller Wi-Fi while the connection process is being performed. After the drone is connected push both joysticks towards the lower left corners. This will enable the compass calibration. First, rotate the drone horizontally about its center until the transmitter beeps. The next step is to hold the drone with the camera facing towards the sky and rotate the drone with the camera at the center of the rotation.
To unlock the motors and be able to start the drone short press the unlock button. After this step, the drone can be launched by pressing the up-down arrow or by pushing the left joystick to the top. Takeoff and landing can also be achieved by short-pressing the takeoff/landing button to the left of the left joystick.
Design
The design of the Holy Stone HS720R drone is very similar to models sold by other manufacturers. While researching the HS360S drone and the features it supports, I discovered that the drone has a similar body style and features to drones sold by other manufacturers. The Holy Stone HS720R has a passing resemblance to the MJX Bugs 18 Pro and similar features, but it is not an exact match. Also, the Android app is installed in the directory com.mjx.hs7200g.
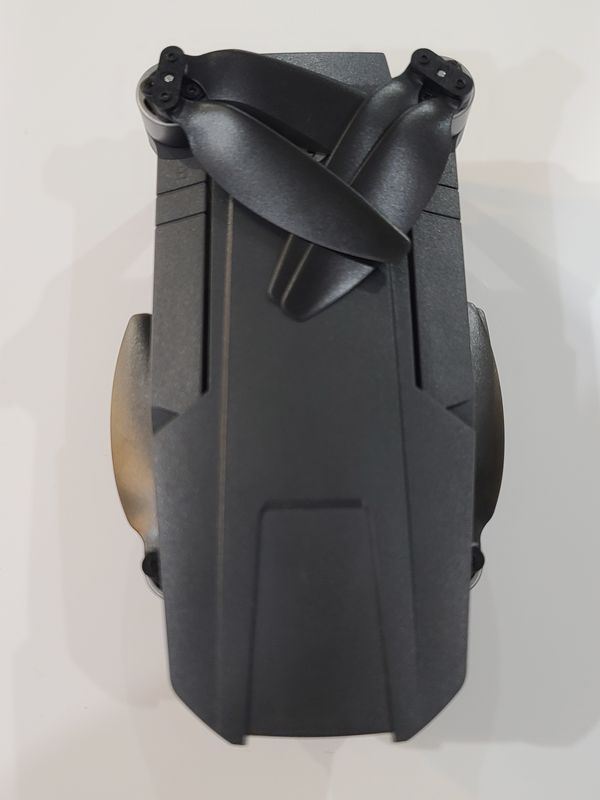
The HS720R has a foldable design that permits easy storage and transportation of the drone. The blades fold towards the center of the drone. The parts seem to all be made of plastic to keep the strength-to-weight ratio high.
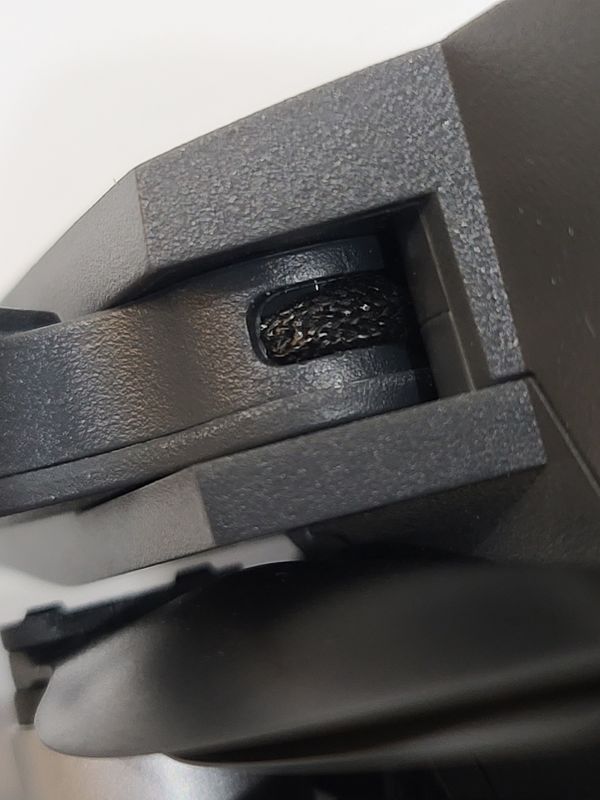
The electrical lines running to each motor are visible at the inside of each joint and are covered in braided nylon which is a nice touch over bare wires or a rubber covering. There are smaller wires visible going to the camera and motors.

Lights on the arms help orient the drone to let the operator know what the heading is so the operator can pilot the drone based on its current heading. The lights are a welcome addition when compared to the HS360S. There is also a status LED on the base of the drone that lets the operator know the connectivity and battery status. These features help a little bit. The best way to identify the heading of the drone is to use the compass on the app.
Some drones have a headless mode, which adjusts the directional input of the drone relative to the orientation it has with the operator on takeoff. The HS720R has a similar feature that lets the pilot position the drone based on the location pointed to on a display of Google Maps.
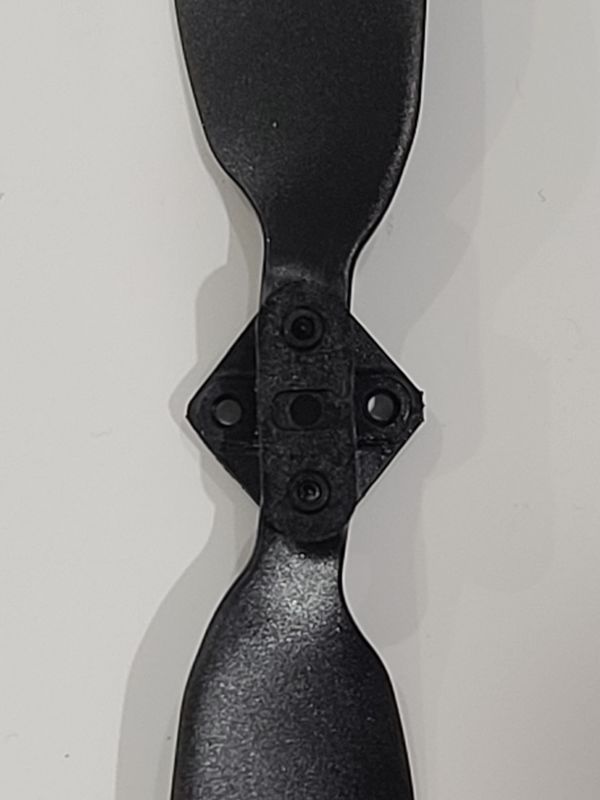
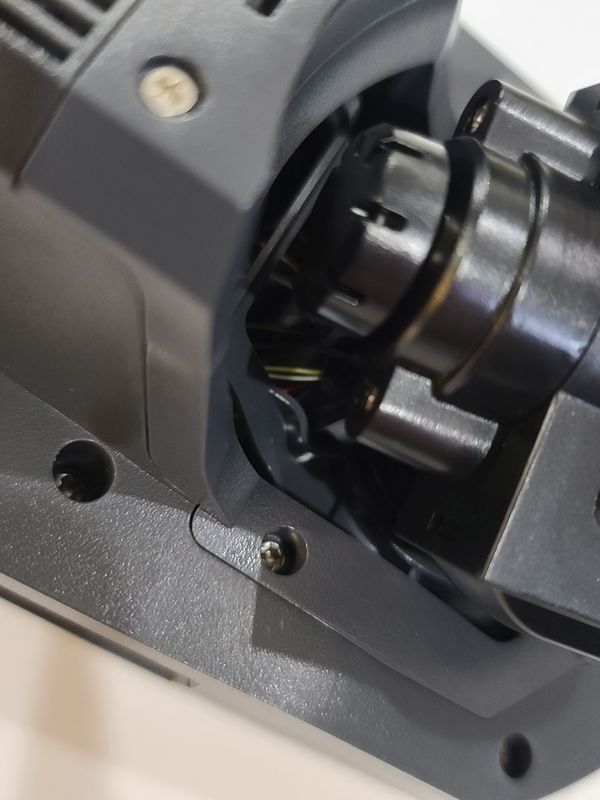
The propellers are two-piece but mounted to a plastic hub that is secured to the motor using two screws. The propellers are marked in the molding at the hub if they are A shaped, for clockwise drive, or B shaped for counterclockwise drive.
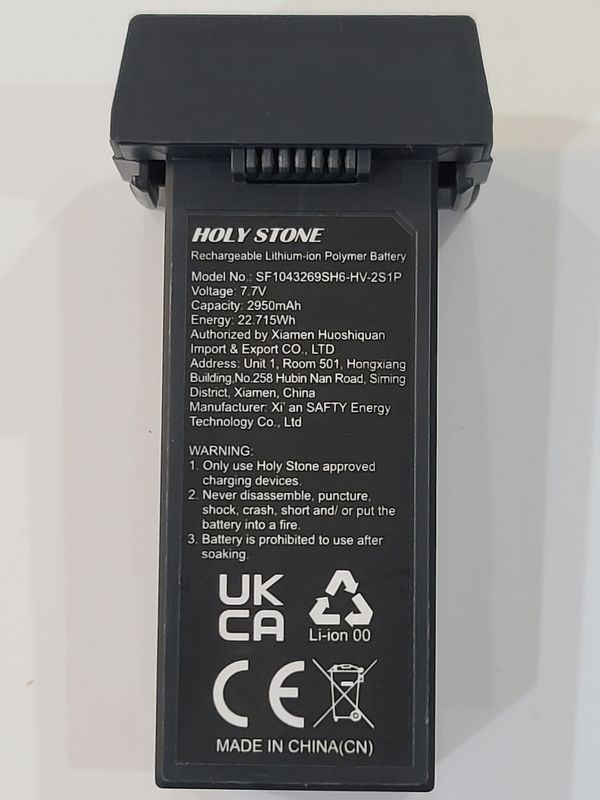
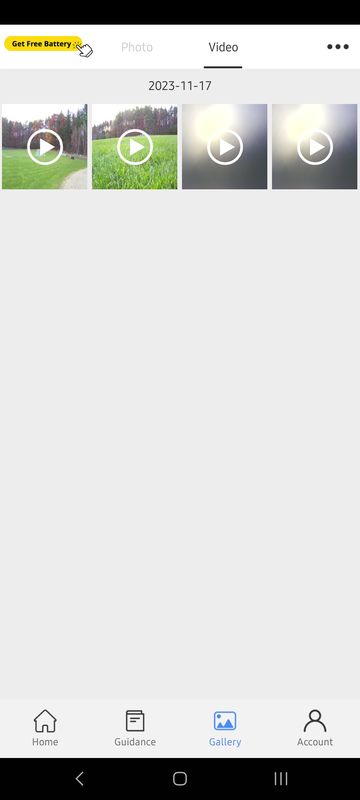
The bulk of the drone body is taken up by the battery. The kit only comes with one battery but a second HS720R battery can be ordered from here. In addition, the app has a button that can be pressed in the gallery to get a free battery. Send “Free Battery” to [email protected] and be prepared to provide the order number, shipping address, and phone number.
The rear of the battery always displays the remaining capacity when the drone is powered on. To turn it on and off the power button is pressed and held for 3 seconds.
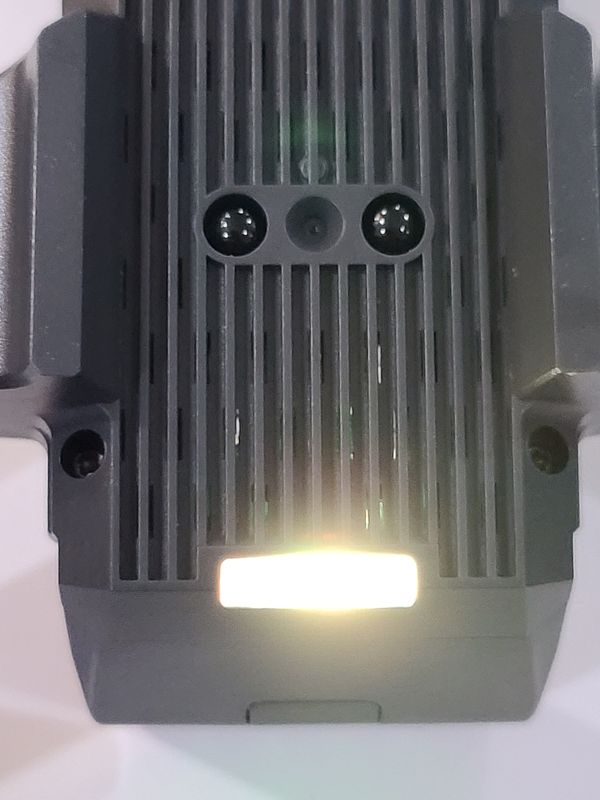
On the bottom of the drone is a status lamp. The lamp mode changes to indicate status.
- blinks yellow – the drone is disconnected from the controller.
- blinks yellow, green, and red – the drone is in initialization detection.
- solid yellow – no or very weak GPS signal.
- solid green – the drone is in GPS mode with a signal.
- pulses red – the drone is in low-power state.
- blinks red – the drone is in critical low-power state.
The bottom of the HS720R also has a tiny camera module that is used for optical flow positioning. This camera can use an image of the ground or floor below to determine if the drone is moving and then correct the speed of the propellers to limit the movement of the drone. This is one of the reasons why the HS720R controller does not have a trim adjustment. The HS720R improves on the HS360S by including IR lamps adjacent to the camera to improve low-light operation.
The drone also has a bunch of vents set up to cool the controller parts. All of the speed controllers for the propellers can generate a lot of heat.
The camera is in a hollow cowl section at the front of the drone that protects the camera from being struck or jostled. The camera is mounted on a gimble that has motor control on all three axes. The motors can compensate for tilt, roll, and pan up to about 30° from a level shot. This is much more stabilization than possible with a damped gimble and will contribute to much more smoothness in the shots.
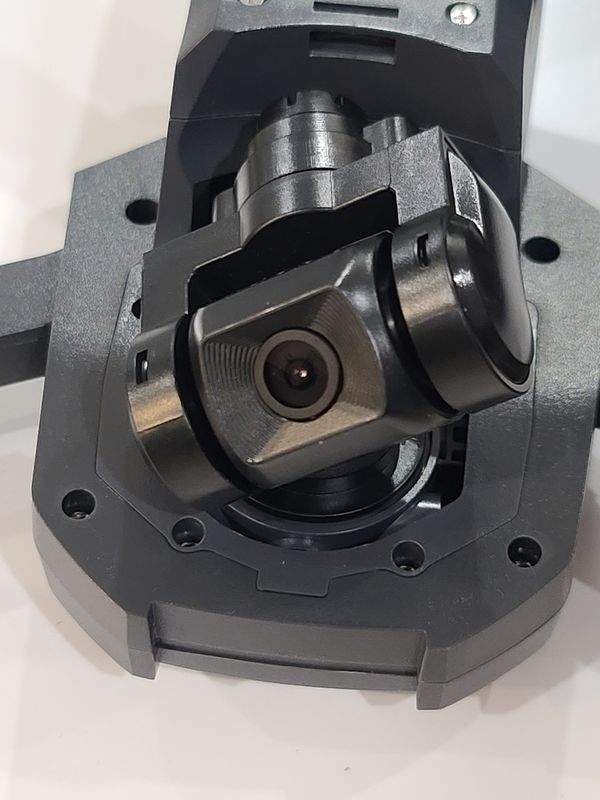
In addition, the vertical (pitch) axis can be adjusted from horizontal with the horizon to 70° down. It is unfortunate that the ultimate pitch is not 90° but the extra 20° is probably reserved for image stabilization when the drone is flying full speed.
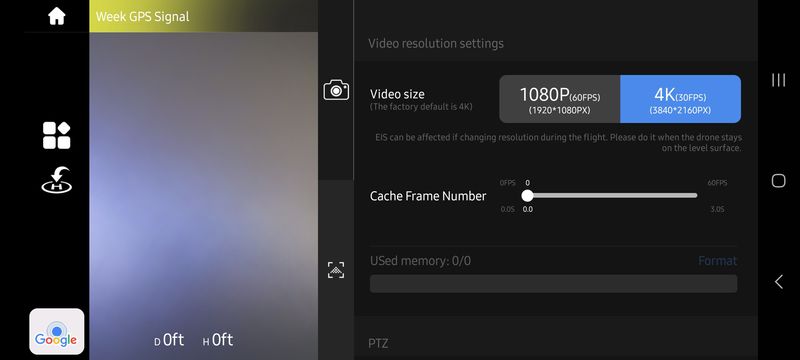
The camera is capable of 4K photos and video at 30 fps and has a 140° field of view. The sensor is listed as a Sony sensor but there are not any other specifics about it. There is not any metadata saved with the photos or videos
A clear cover is included to prevent the gimble from accidentally being struck.

The controller weighs 214 grams without the phone attached and has roughly the dimensions of 5 x 6 inches when opened. The feel is similar to holding a PlayStation controller because there are two fold-up handles that make it easy to use thumbs to control the joysticks. (There are no haptics in this controller like there are in the PS ones.)
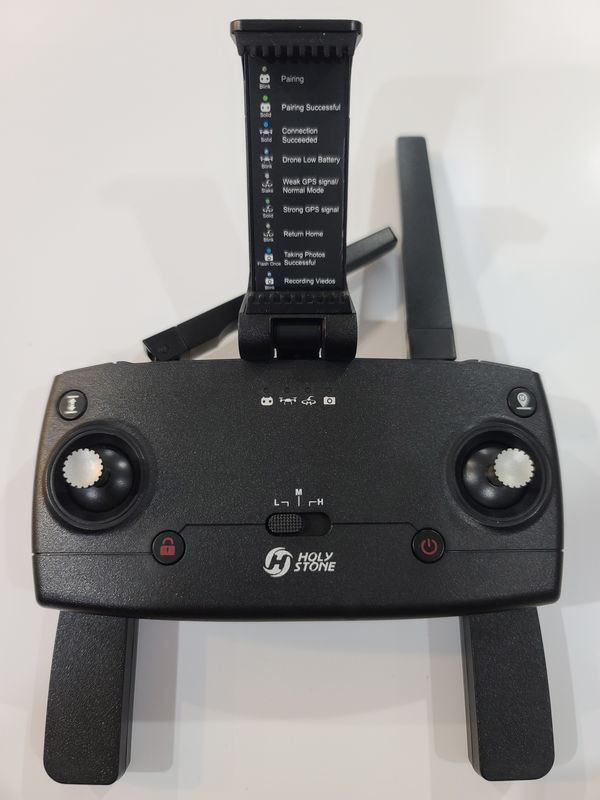
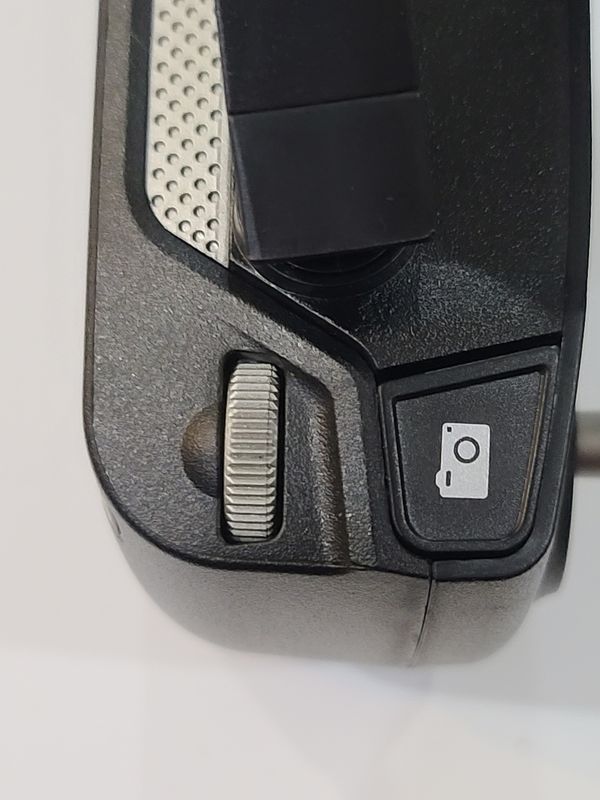
Each of the joysticks is spring-return action to the center. Since the drone is capable of maintaining an altitude, I think that it is ok that the left joystick is spring-return and doesn’t maintain a position. The top of the controller has a dial on the left that can be manipulated with the index finger to adjust the camera angle.
Operation
Once in the air, the HS720R camera angle can be adjusted by scrolling the camera adjustment dial. The camera zoom can be adjusted by scrolling a control on the phone screen. The zoom is only a digital zoom.
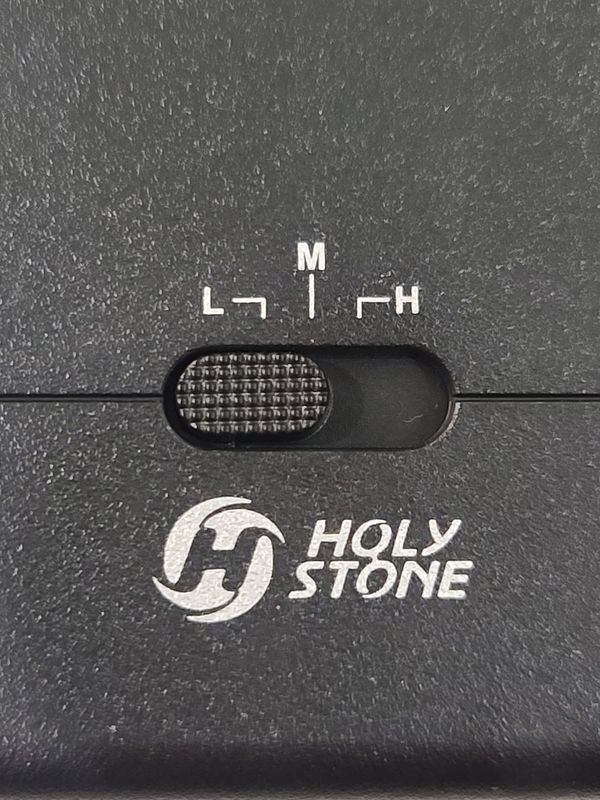
The speed of the HS720R can be adjusted so that a full tilt on the right joystick has different maximum values. A three-position switch on the controller allows easy selection of the control on the fly.
There are a couple of differences between the HS360S and the HS720R remotes. The HS720R remote is only set up in mode 2, there is no way to change to mode 1 or mode 3. Also, there is no way to change from GPS to Altitude mode by the remote.
The buttons to the bottom left and right of the screen are the camera shot and video start/stop controls. When the video mode is active the drone is unable to take photographs.
The rest of the functions are accessible from the app. The app requires registration.
and has a load screen that allows view of the main screen guidance, photos and videos of the flights, and an account that shows flight tutorials and flight records.
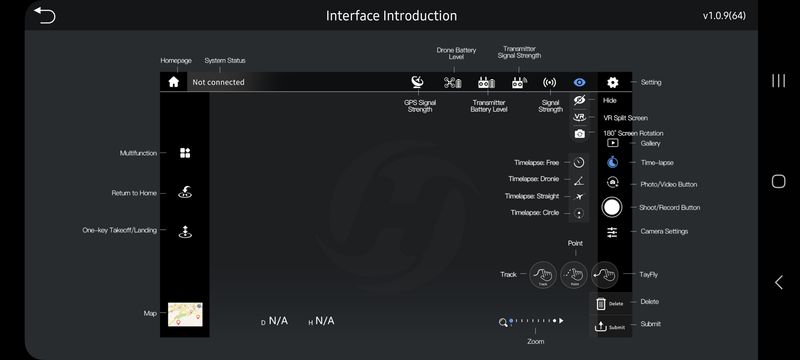
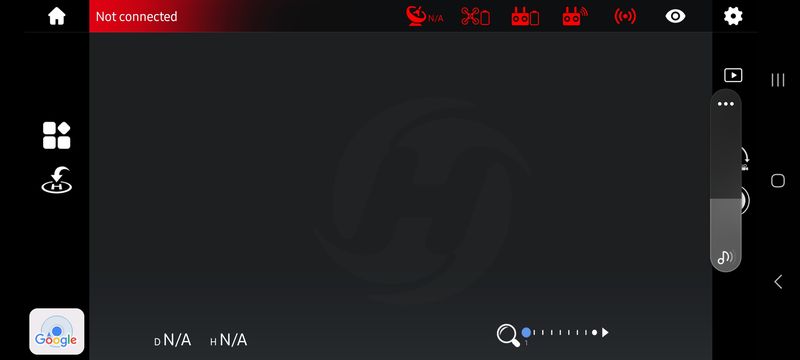
The app screen is mostly a first-person view from the camera but the perimeter of the screen is lined with icons that perform certain functions or bring up submenus. The top of the controls display has a yellow gradient with white text on it in normal mode and a red banner if the drone is not connected. The white text on the yellow background is sometimes difficult to read. The remainder of the top row contains the GPS Signal strength, device batter level, transmitter battery level, transmitter signal strength, Wi-Fi signal strength, viewing mode, and settings. Fortunately, the app has this built in screen to decipher the function of each icon.
The settings can be used to adjust the orbit radius, maximum altitude, and flight distance. The maximum distance selectable from the start point is either 1640 ft or infinite. The controller may work up to 9843 ft away but a low voltage may not permit the drone to be able to fly back to the home point.
There is a flight log on the HS720R but the records are not as thorough as they are on the HS360S. The main purpose of the flight log on the HS720R app is to record the last known position of the drone in case the controller loses signal. The records only include the date, distance, altitude, latitude, and longitude. Selecting the line will open the location on a map program so that directions to the last known location can be obtained.
The settings allow the configuration of the units of measure. Unlike the HS360S, The controller for the HS720R does not have any voice prompts.
Some of the advanced functions of the HS360S are not available on the controller for the HS720R. Gone is the ability to perform image follow, one key ascension, camera filter, spiral up, or portrait. Of these capabilities, only image follow really required any automation to complete. One key ascension requires that the camera be pointed straight down and since that is not possible on the HS720R this feature is not available.
What remains on the HolyStone HS720R drone is the follow me function and the point of interest (POI) function. The follow me function causes the drone to align to and follow the GPS coordinates of the phone attached to the controller. The point of interest function causes the drone to rotate around the location at which the POI was started, at the radius selected in the settings of the app, in a clockwise direction. This is also be accomplished by a skilled operator (by moving both controllers to the same side under controlled conditions) but having an automated system helps.
At the bottom left corner is an icon of the Google map of the area. Tapping this again swaps the video feed and the Google map, filling the entire screen with the Google map. From this view a satellite layer may be selected and the orientation may be switched from fixed north to rotating with the mobile device. Clicking on the reticle image at the top of the map returns the screen to the default view.
Along the bottom of the screen are the flight distance from the controller, flight altitude from the controller, and a zoom selector.
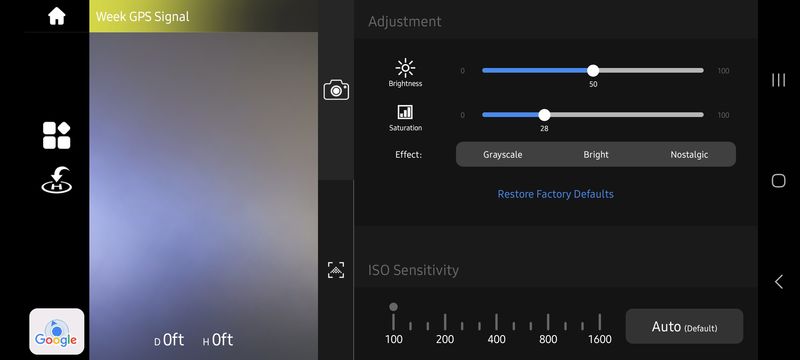
Along the right-hand side is an icon for the settings, an icon to view the in-app media storage, an icon to adjust the time-lapse functions, a button to select if photos or videos are recorded, the camera shoot/record button, and a menu for the camera settings.

If the Google Maps display is selected from the left side then on the bottom of the right side of the screen there is an icon that allows you to program the TapFly and to submit or delete the chosen path.
Eventually, the HS720R needs to come home and this can be done by piloting it or by using one of the return-to-home features. The return to home can be activated by pressing the GPS pin button on the top right of the controller display. The drone will fly to a preset return altitude and then drop vertically onto the starting point. The return altitude should be above anything that might be in the way between the drone location and the starting point.
The return-to-home function will also be automatically started if the drone loses communication with the receiver. If the drone recovers communication or if the manually started return-to-home needs to be canceled, then pressing the GPS pin button will accomplish this. If the battery is running low the Return-to-home feature will be started and cannot be canceled. It is important to remember that there is no obstacle avoidance on this unit and if the starting point is covered then the drone will collide with the cover on the return-to-home trajectory.
Performance
The video below shows that there is little effect on the video stability even when starting and stopping. However, when rotating there is some blurriness.
The video below shows the performance of the follow me. I was not piloting the drone during the flight.
The HS720R is very capable and is starting to be competitive with DJI devices. The HS720R also has some upgrades to the HS260S. Here are some observations I have made during my evaluation.
- The camera has some issues with contrast and brightness. Image quality is one of the most important features of this drone and while this gets passing marks for pixel count, the images have too much contrast and there is a lot of haze in the image. There is also color aberration in the image.
- The 3 axis gimble impressively removes most of the knocks and dips in the drone movement while it is flying. The video that is generated is smooth even when accelerating or when tracking from the side.
- When rotating the drone hard right or left, even the 30 frames a second are not even 30 frames a second is fast enough to prevent motion blur.
- The battery lasted about 24 minutes of the 26 advertised capacity. However, the charging time is very slow, at about 5 hours. A second battery is almost essential for most films.
- The HS720R features are limited compared to the HS360S but work a lot better. The follow me feature, functions but sometimes follows the target with jerky motions.
- The point of interest operates at 49 feet so using it to record items at a low perspective will require a large radius.
Above all the fact that this is a drone that can achieve a very stable hover with just about zero drone piloting experience is a real positive. I remember trying to trim out my first drone, only to crash it and then having to retrim it because of changes to the rotor thrust due to a slightly dented propeller. The electronics and stabilization on this unit have really improved the ability to take it out of the box and have fun with it.
The return to home works really well if you understand how it is supposed to operate; it is important that there are no obstacles above the take-off point to the return altitude. This feature should help avoid losing a drone because of a dead battery.
The battery lasted 16 minutes before requiring the drone return to home. This is the capacity after being charged twice. It still may need a few more cycles before the maximum capacity is available.
What I like
- Similar look and feel to prosumer drones
- very stable hover
- good return-to-home functionality
What I’d change
- improved image quality
- improved contrast on the app status bar
Final thoughts
I opened this review with the concept of a drone being a function of features, quality, and cost. After reviewing the Holystone HS720R drone I can conclude that it is a close competitor to the DJI Mini 2 but the image quality, features, and performance of the DJI dominate the comparison. The DJI Mini is hard to find in the US these days and the closest competitor in the same price range is probably the HS720R. For another $60, or 18%, I would purchase the DJI Mini 3 over the HS720R if you are an experienced pilot or perhaps a less expensive less capable drone if you would like to learn some of the basics of piloting.
Price: $399.99 (Now with a $80 coupon)
Where to buy: Amazon
Source: The sample of this product was provided by Holy Stone.
L39 Ultra Slim UV Protective Filter for Leica Q3 43 Q2 Camera with Moisture-Proof Case & Removal Tool 19 Layers Mulit-Coated UV Ultraviolet Filter 99.3% Light Transmission Water Oil Scratch Resistant
(as of July 12, 2026 23:19 GMT -05:00 - More infoProduct prices and availability are accurate as of the date/time indicated and are subject to change. Any price and availability information displayed on [relevant Amazon Site(s), as applicable] at the time of purchase will apply to the purchase of this product.)