REVIEW – EPOMAKER sent me 3 of their mechanical keyboards to review and this is my second review so far. My first one was the EPOMAKER TH80 Pro review and now we’re taking a look at the EPOMAKER RT100 mechanical keyboard. Will there be a thock and awe or just awwwwww. Let’s crack our knuckles and find out!
What is it?
The EPOMAKER RT100 is a 95% sized mechanical keyboard that has some interesting features including a knob and a smart screen.
What’s in the box?
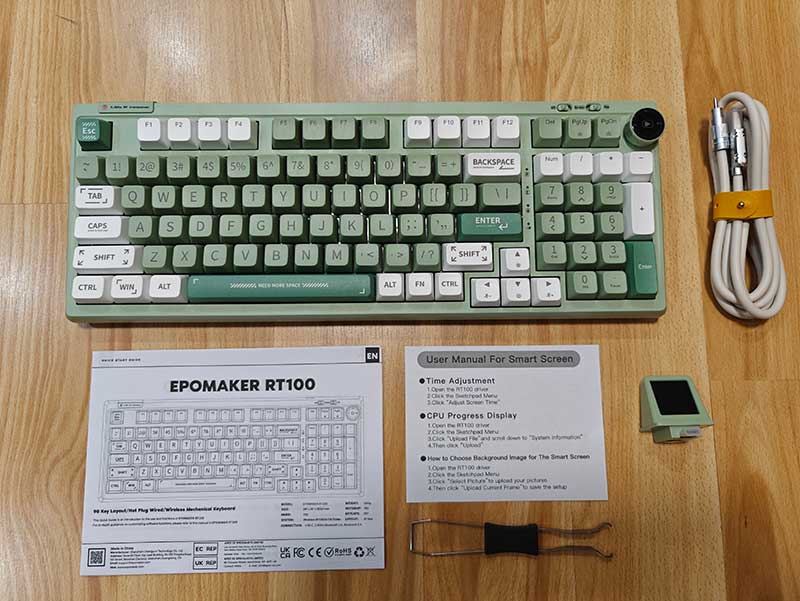
- EPOMAKER RT100 mechanical keyboard
- Smart Screen
- USB cable
- Key cap and switch removal tool
- User guides
Design and features
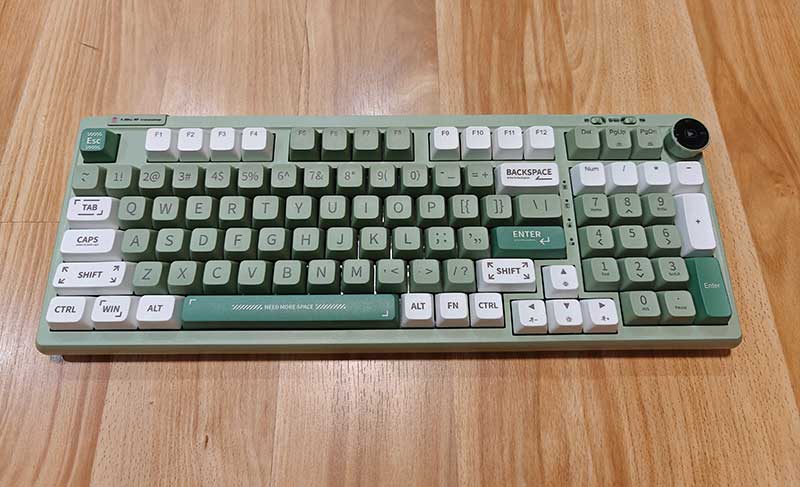
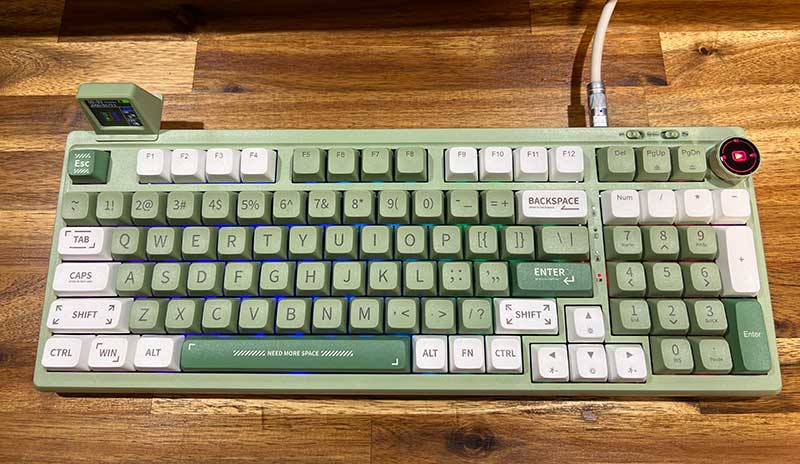
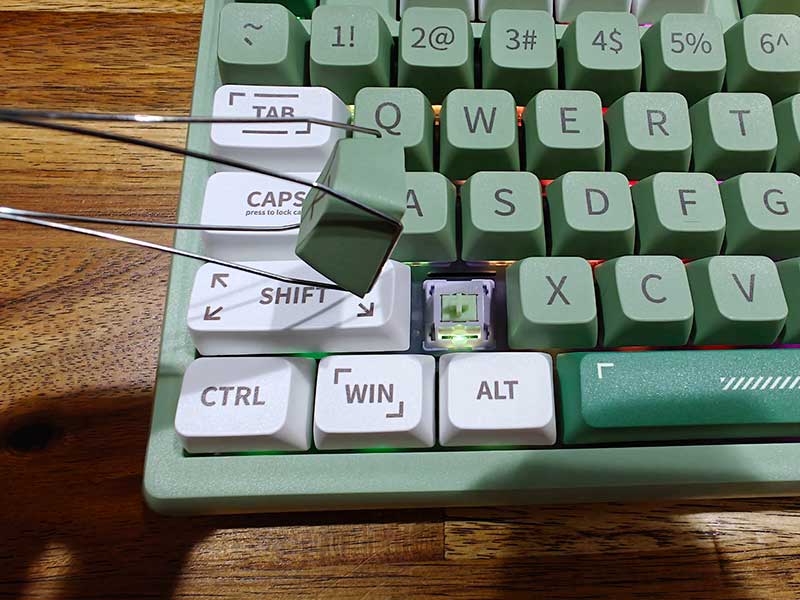
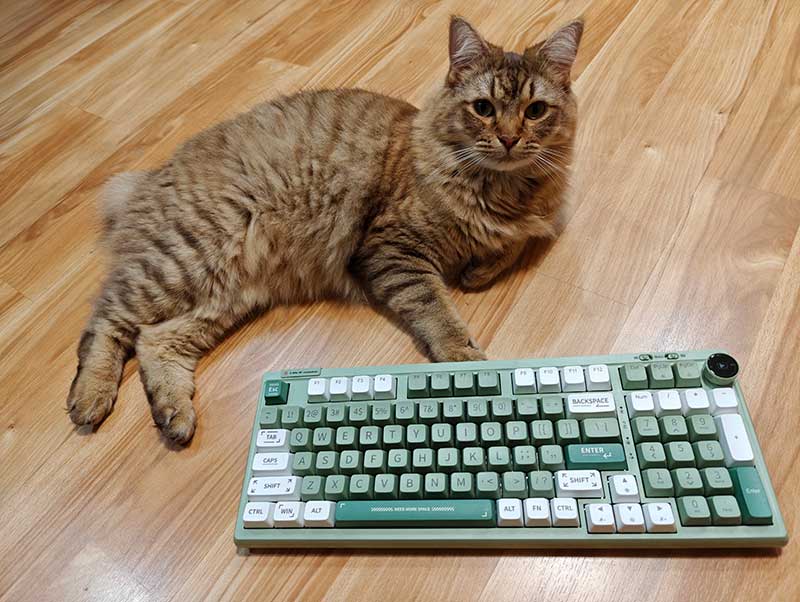
The EPOMAKER RT100 mechanical keyboard is available in 5 different colors and I was sent the RT100 in the green colorway which has two shades of green keycaps along with white keycaps.
The keyboard is 95% size which gives it a dedicated row of function keys along with an inverted T set of arrow keys and a dedicated number pad. This keyboard has a total of 97 keys (98 if you get the ISO-UK version).
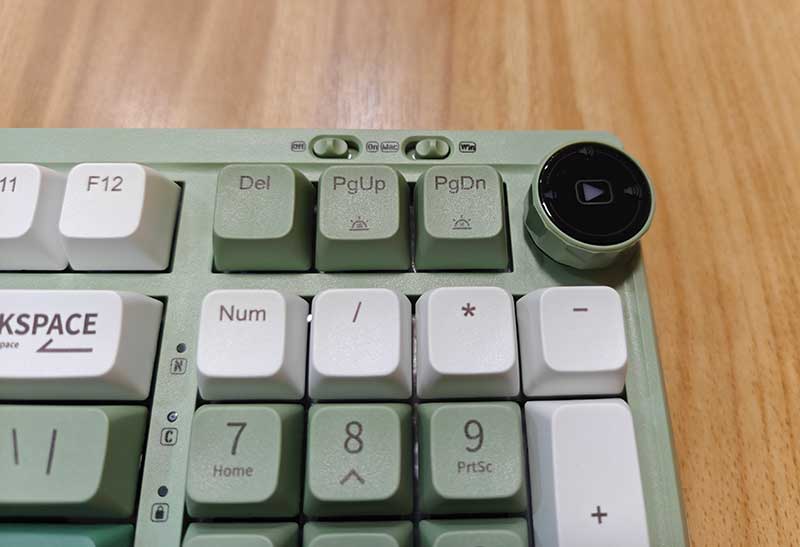
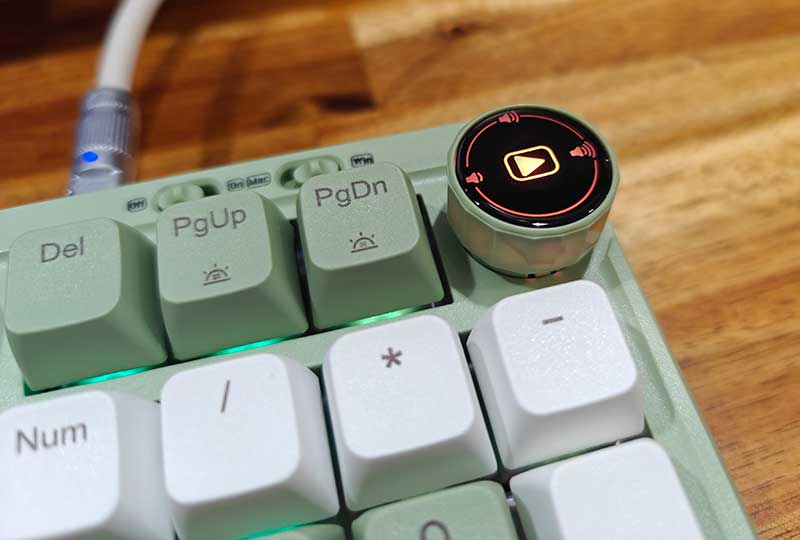
The top right corner has two slider switches that control power to Bluetooth/2.4GHz feature and a switch that toggles between Mac and Windows mode. There’s also an analog knob that clicks when you turn it and press it to control volume levels and toggle volume mute.
In the image above, you’ll also notice a row of 4 status LEDs between the main bank of keys and the number pad. These status LEDs show from top to bottom: Num lock button (doesn’t light up on my keyboard so it might be a Windows thang). The LED below that one is the capslock status button, then there’s a Windows key lock button which I’m clueless about because I am a Mac user, and finally, there’s the charging status LED.
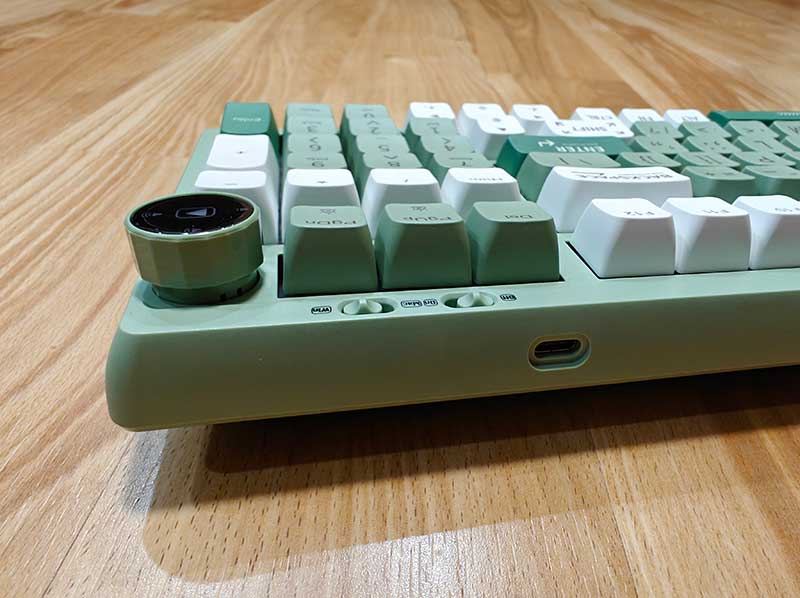
On the back right corner, there is the USB-C port. You can use the included beefy USB cable to charge the keyboard and/or use it hardwired to your computer which is how I have it connected to my MacBook Pro.
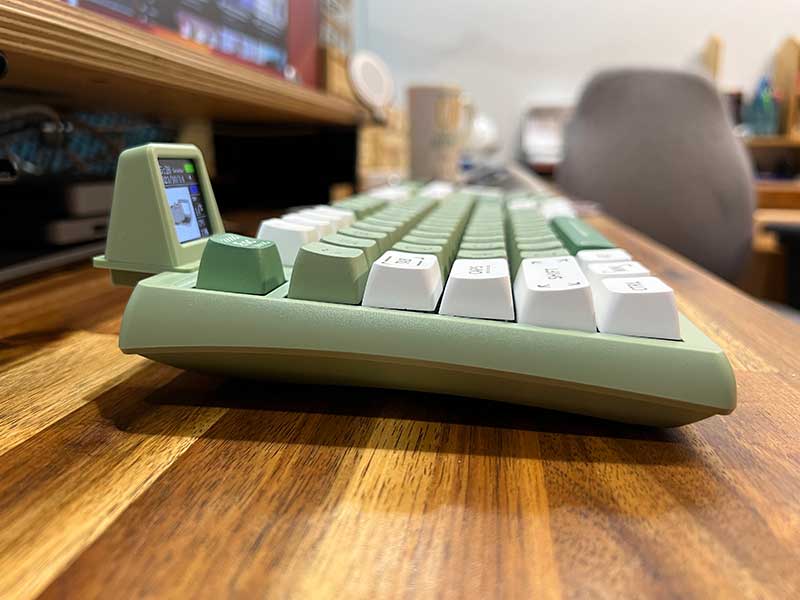
In the image above you will also notice the rounded edges and sides of the plastic case. This gives the EPOMAKER RT100 an interesting style.
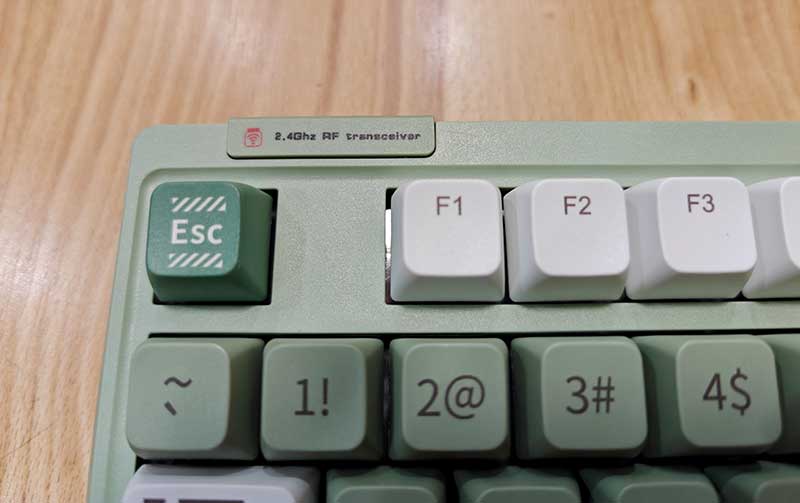
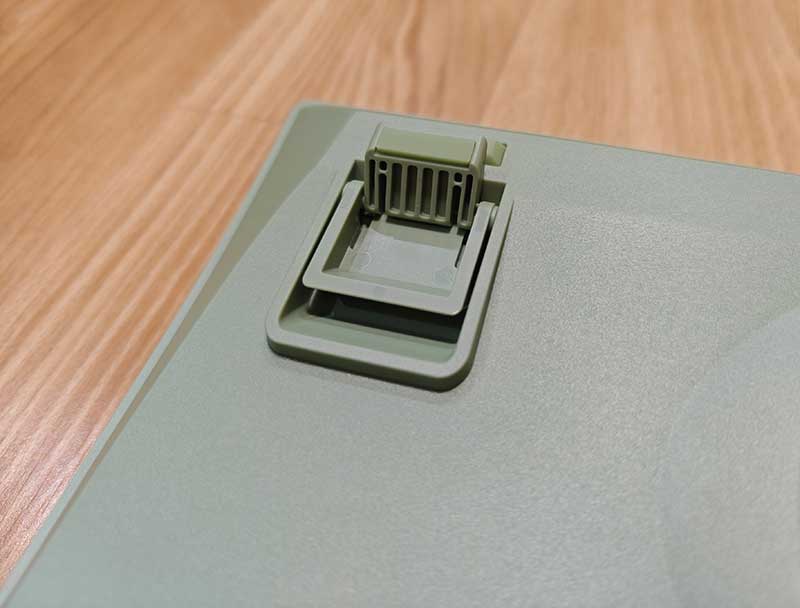
If we look at the left corner of the RT100, we find a removable plastic cover.
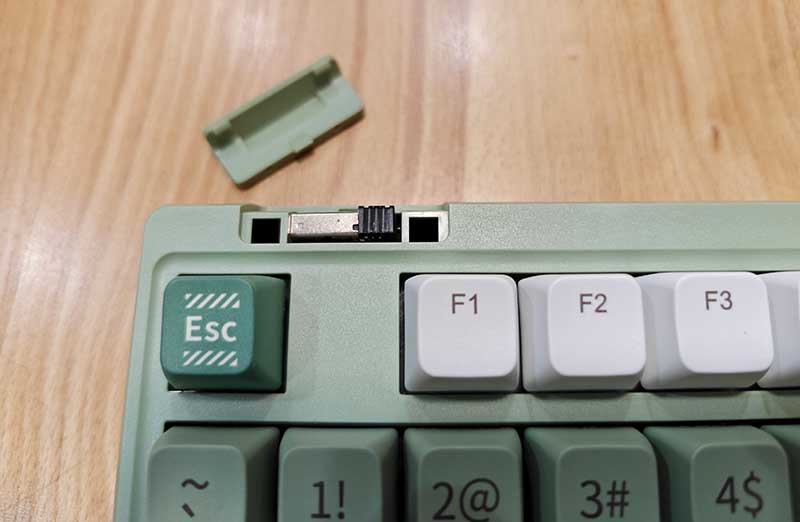
This cover provides access to the 2.4GHz dongle as well as a hidden USB-C port.
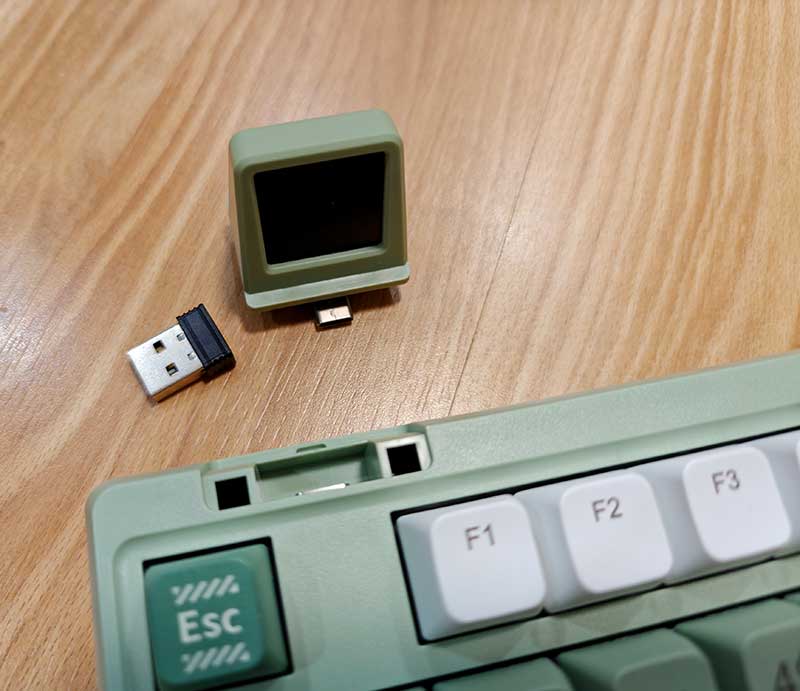
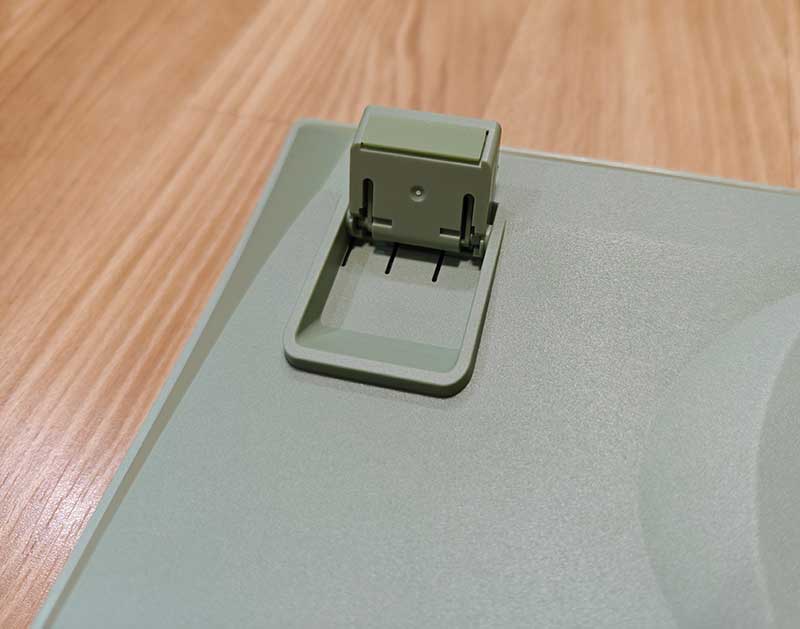
The USB-C port is designed to be used with the RT100’s Smart Display.

Are you getting old-school CRT or Mac vibes like I am? I’ll talk more about the little display later, but I do want to mention one thing…
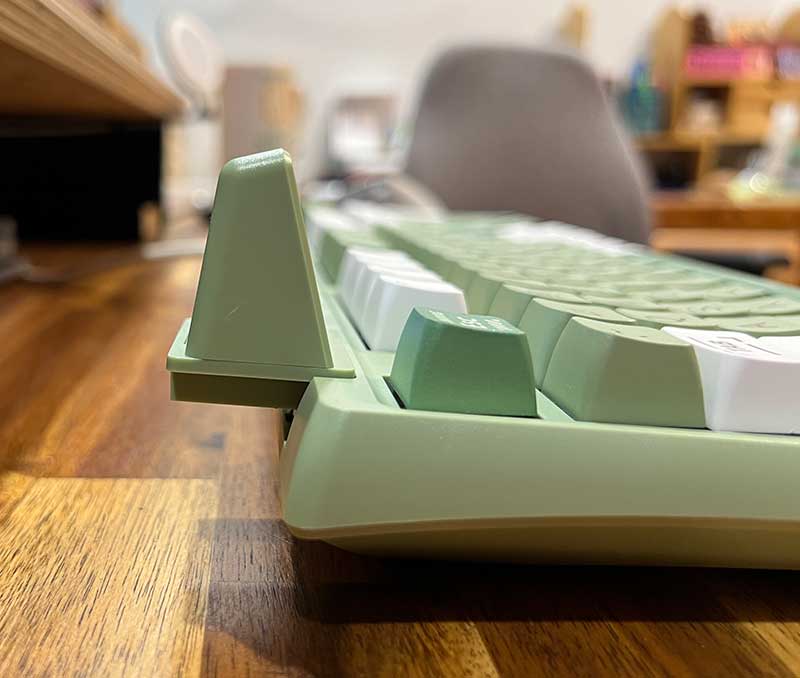
I wish there was more support for it. As is, it’s easy to bump it and unplug it accidentally. Just something to be aware of.

The bottom of the EPOMAKER RT100 mechanical keyboard has non-skid feet.
The feet have two stages of elevation to let you customize the angle of the back edge of the keyboard for ergonomics.
Soft pads on the bottom of the feet help to keep the keyboard from sliding around on your desk. It also helps that the keyboard weighs about 2 lbs.
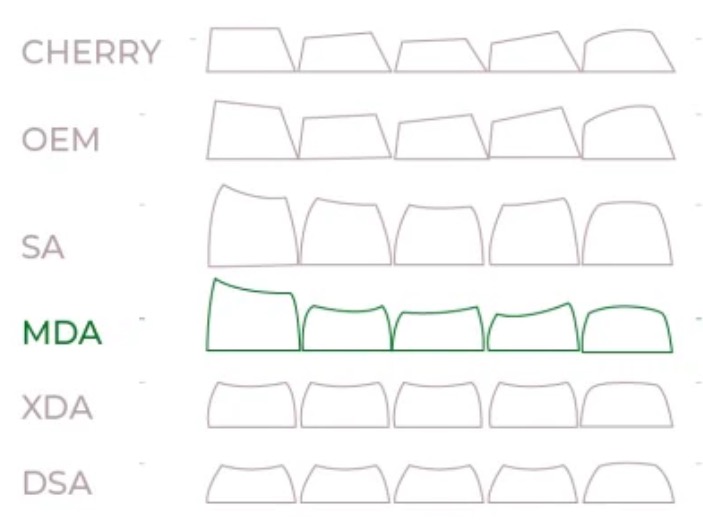
The EPOMAKER RT100 keyboard has an MDA keycap profile which means that the keycap height is stepped with it being lower in the center row. I personally have come to really like the MDA keyboard profile but it’s all a matter of preference especially if you touch type instead of just using a hen pecking style of typing.

As for the keycaps themselves, they are made of thick PBT plastic with a matte finish and clear crisp grey labeling with no light show-through.
The EPOMAKER RT100 mechanical keyboard does offer a variety of RGB backlighting effects with south-facing LEDs under the switches. You can watch the video below where I cycle through the various effects.
Speaking of switches, you can choose from 4 different switches when you purchase the RT100: Epomaker Sea Salt Silent Switches, Epomaker Wisteria Switches, Gateron Pro Yellow switches, or Epomaker Flamingo Switches.

My review sample of the EPOMAKER RT100 came with the Epomaker Wisteria switches preinstalled. The Wisteria switches are linear switches which means that the action is faster, smoother and quieter than tactile switches that have a bump when you press them. Note that the RT100 has a hot-swappable board with a 5-pin Kailh socket that works with a variety of different switches.
I like the smooth feel of the Wisteria switches, but I prefer a switch that takes a little more pressure to register a press because I tend to rest my fingers on the keys while I’m thinking of what to type next, and many times, I find that I’m accidentally typing letters from the weight of my fingers resting on the keys.
When I’m not being heavy-handed, I really like the sound profile and the feel of typing on the keyboard with these switches. It has a satisfying deep thock that sounds great to my ears and really helps me get into the zone while in a long typing session.
This keyboard is gasket mounted which I’m learning (understand that I’m still a relatively newbie when it comes to understanding the nuances of mechanical keyboards) really makes a big difference in how mechanical keyboards sound and how they feel while typing.
Another very important feature of the EPOMAKER RT100 mechanical keyboard is that it is NKRO (N-Key rollover) also known as anti-ghosting. What does that mean? It means that each keypress is registered independently so that you can simultaneously press as many keys as you want. This is important to me because I have some 4-key macros that I use in Google Sheets. I’ve found some keyboards from LoFree and NuPhy that don’t seem to have this feature. So I was very happy to find that the EPOMAKER had problems with multi-key presses. Gamers will also appreciate the NKRO feature.
The standout features of the EPOMAKER RT100 mechanical keyboard are the large 5000mAh battery if you like to use it wirelessly (I don’t… I prefer wired) and then there’s the cool knob in the upper right corner that controls media volume. This knob has really good tactile feedback when you turn it to adjust volume and press it to toggle mute.
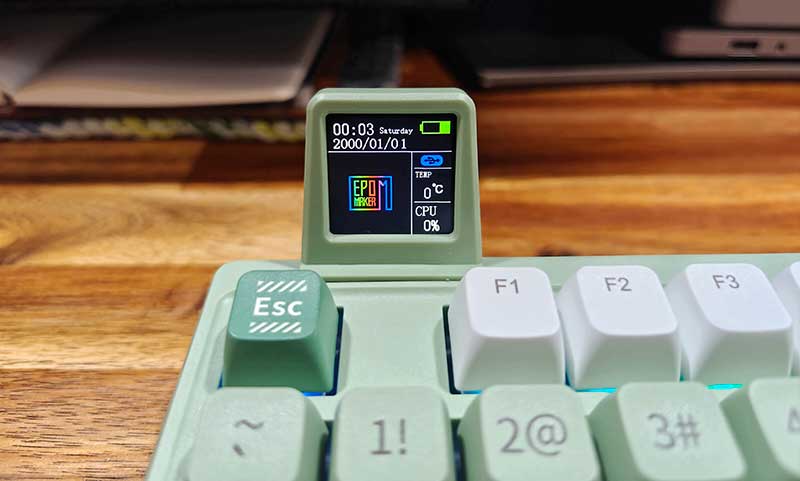
Then the most fun feature is what EPOMAKER calls the Smart Screen which is a little “monitor” that shows the time, date, battery level, connection mode, as well as your local temperature and CPU usage percentage.
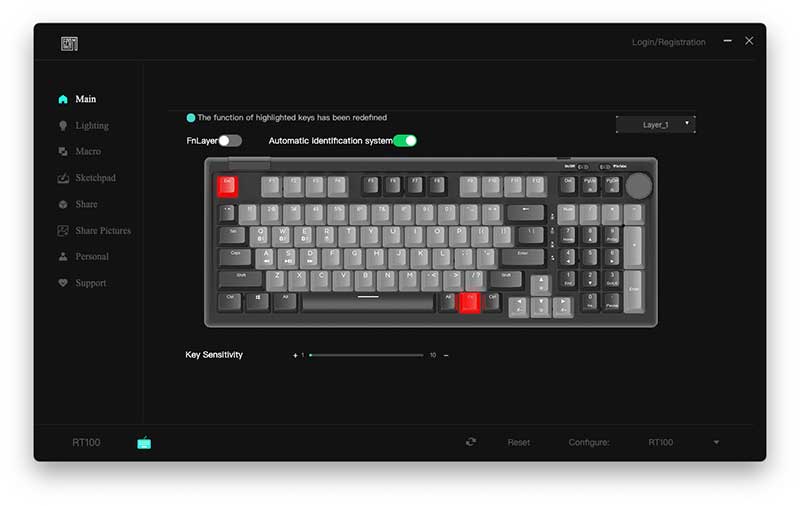
To customize the display as well as re-program the keys and RGB settings, you will need to download and install the EPOMAKER driver software for Windows or macOS.
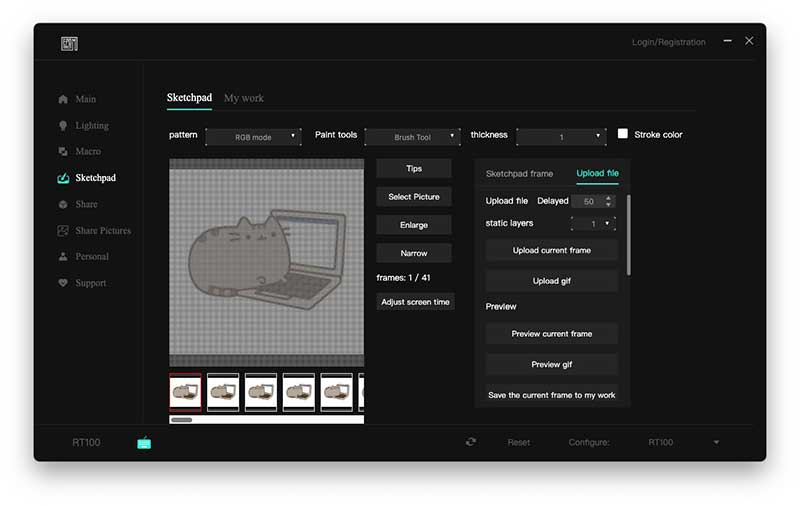
I had fun customizing the smart screen with an animated GIF of a typing Pusheen cat.
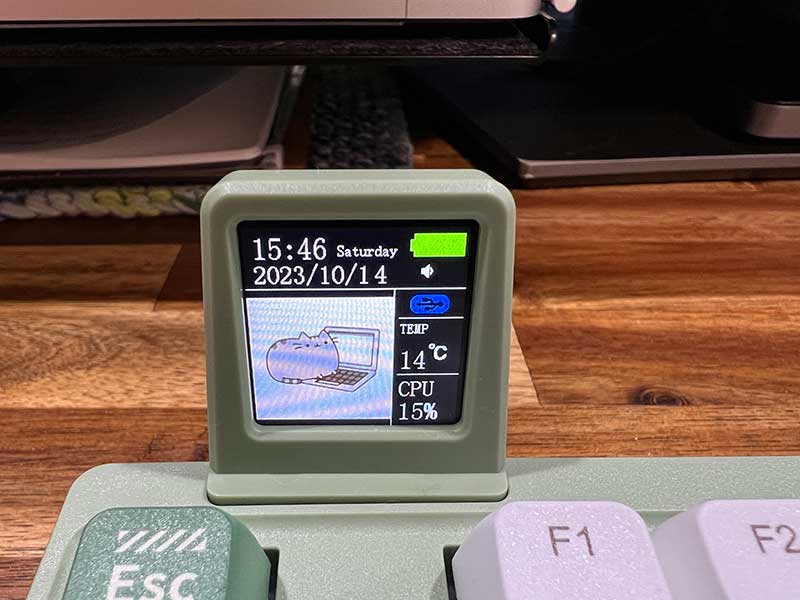
One thing I did notice is that there’s no way to change the local temperature from Celsius to Fahrenheit. You also can’t change the date format or time from 24hr to 12hr format.
As for the CPU %, I guess that’s cool…
See and hear it in action
What I like
- Thocky!
- Cool little smart display
- Large battery
- Well made
What I’d change
- Add more customization options/settings for the smart display
Final thoughts
There is a lot to like about the EPOMAKER RT100 from the funky retro design vibes, to the thocky sound (at least with the keyboard I was sent with EPOMAKER’s Wisteria switches) and there’s that fun little display that you can program. With all these features, I think the RT100 is reasonably priced and I can’t wait to see what other fun mechanical keyboards that they will create in the future.
Price: $105.99 – $119.99 depending on the switch preference
Where to buy: EPOMAKER and Amazon
Source: The sample for this review was provided by EPOMAKER.

GMKtec G3 Pro Mini PC, Intel Core i3-10110U (Beats 4300U/N150) 16GB DDR4 (Dual Channel) 512GB PCIe M.2 SSD, Desktop Computer 4K Dual HDMI/USB3.2/WiFi 6/BT5.2/2.5GbE for Office, Business
(as of June 17, 2026 02:33 GMT -05:00 - More infoProduct prices and availability are accurate as of the date/time indicated and are subject to change. Any price and availability information displayed on [relevant Amazon Site(s), as applicable] at the time of purchase will apply to the purchase of this product.)
Gadgeteer Comment Policy - Please read before commenting
I was looking for the “Any” key to be able to respond to the retro “PRESS ANY KEY TO CONTINUE” dialog.
😉 😉
Wocka wocka!
One could still be fabricated and used with the usb-c port in lieu of that Smart Display… just sayin’
Great review, thank you Julie
That’s a cute cat!
Thanks John! He’s an American Bobtail and his name is Ozzy.
Great Review, I have one on order from Amazon. I am going with the green and silent key switch. Thank you for the video and detailed post.
Chris,
Let me know what you think of it after you get it 🙂
The keyboard came in today, I ordered it with the silent witches. I am very pleased with the overall typing feel. I can report the “silent switches” do their job very well. The volume knob also works great. I am using the keyboard in a wired mode so I could get the full benefits of the small monitor. I uploaded a picture, set the time and have the cpu percent working. I cannot get the date or temp set for some reason. Honestly I am more focused with the keyboard itself and would give it a solid thumbs up!
Chris, that’s good. There’s a button for the time in the EPOMAKER software on the same screen (I think) as the picture setup that sets the date and cpu. It might be the upload frame button (looking at the screenshots in my review) but I don’t remember. I know it’s on the sketchpad or upload file tab though.
Hi
You have to set your Windows date format to YYYY/MM/DD then sync it in the software.
I received one of these yesterday with the Wisteria Linear switches and it is nice to type on, I am a semi touch typist in that I dont look at the keyboard but I also do not use my fingers “correctly”.
I can’t get the CPU percentage to display anything other than 0 and my NumLock/CapsLock lights dont work, but other than that it is a nice keyboard.