REVIEW – Although our kids are grown and gone, we often have families with kids over to our house. I thought it would be cool to have a building brick set or two available for them play with while they are here. In this review, I’m looking at the JMBricklayer Chameleon set to see if it would be fun for kids to come over, put together, and play with it.
What is it?
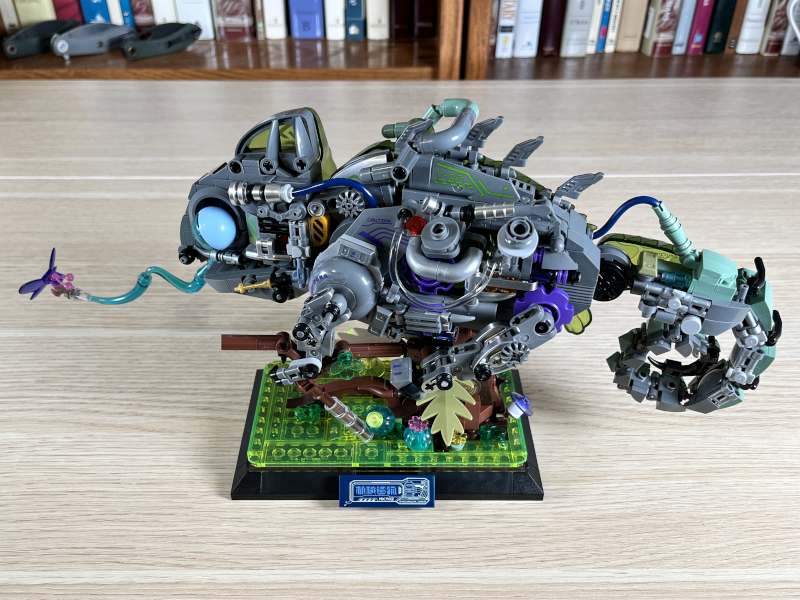
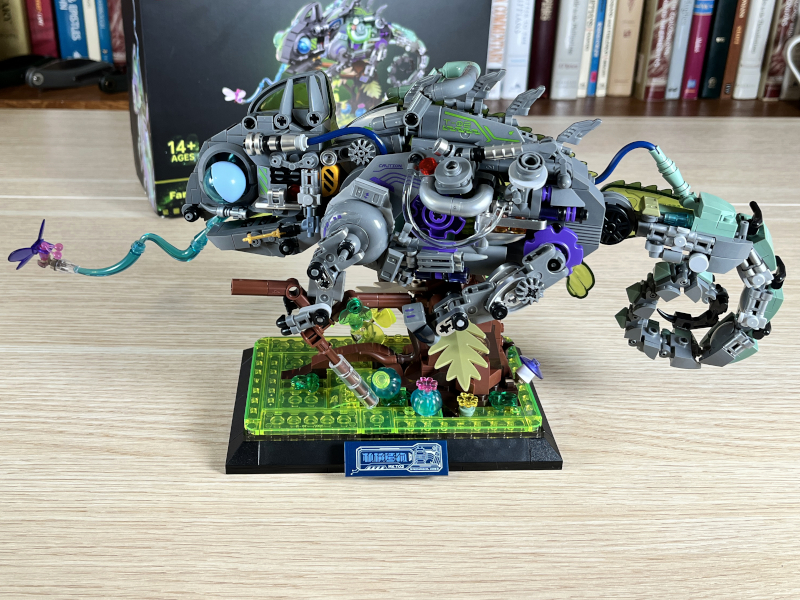
The JMBricklayer Chameleon is a LEGO-compatible building block set (model 70124) that features a bionic chameleon perched on a small tree. This set contains 827 pieces, mostly in shades of gray and green, along with a few stickers and one light brick. The vast majority of the pieces, with a few notable exceptions, are small, and many are similar to LEGO Technic pieces. JMBricklayer’s motto is “Joy Makes Brillance,” and their mission is to help builders “reap the rewards of their ideas.”
What’s in the box?
- 827 building bricks
- A small sheet of stickers
- A light brick
- A brick separator
- A 94-page manual
Design and features
When it comes to the design of LEGO alternatives, there are a handful of questions that always need to be answered:
Are they compatible with LEGO? Yes, this set is totally compatible with LEGO. I ran a handful of tests, and everything connected exactly as a LEGO brick would connect.
Are they of the same build quality? These are some of the best off-brand building bricks that I have seen. The smaller pieces, of which there are many, are nearly identical, and the larger pieces are good. I think any kid would be happy to add these pieces to his LEGO collection.
Do they fit tightly, or do they come apart easily? These pieces are just as tight as LEGO pieces. I rarely had any problem with pieces failing to stick together or popping off on their own. The precision on these pieces, unlike many of those on JMBricklayer’s lighthouse, are very consistent. The only exception to this is the molded hind leg piece, which was too loose for the ball joint (step 208).
Are they cheaper in cost than LEGO? Surprisingly, they are not. One of the biggest selling points of off-brand bricks is that they are cheaper than LEGOs. The Chameleon, however is about 10 to 15% more expensive than similar sets from LEGO. This 755-piece Exotic Tiger set is 6.6 cents/piece. This 630-piece Hedwig the Owl set is 6.3 cents/piece. The 827-piece Chameleon set is 7.2 cents/piece.
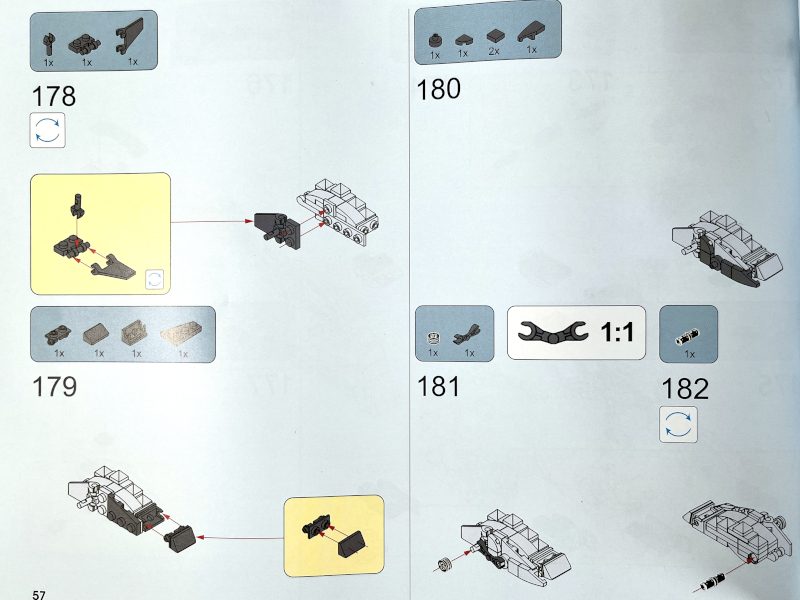
How do the instructions compare? The instructions are good, although not perfect. They are clear, easy-to-follow, and only have a few pieces per step. Previous steps are colored in white, making it easy to see where to add the new bricks. There are places to measure the axles, plenty of markers of where to rotate the set around, and clear indications where to add the stickers. There are, however, a few mistakes in the instructions. There is no explanation of what the starburst icon next to some bricks means. Orange and red clear pieces are nearly identical in color, though thankfully there are not many of either. I found two pictures with the wrong piece (steps 62 and 74), two steps with instructions that left me scratching my head (steps 91 and 129), and one step where JMBricklayer included the wrong piece (the one-by-one in step 238 should have had a stud on one side, not two sides). To be fair, these complaints are nitpicky. Overall, these instructions are good, and experienced builders will have no problems following them.
The manual begins with an explanation of the design motivation of the set. It’s intended to be a bionic chameleon in the far future, and the set certainly highlights the mechanical nature of this little guy. This introduction really helped me to appreciate what I was building, and I hope JMBricklayer does something similar with future sets. There’s also an explanation on how to use the brick separator, how to measure the length of axle pieces, and where to go for help.
Setup
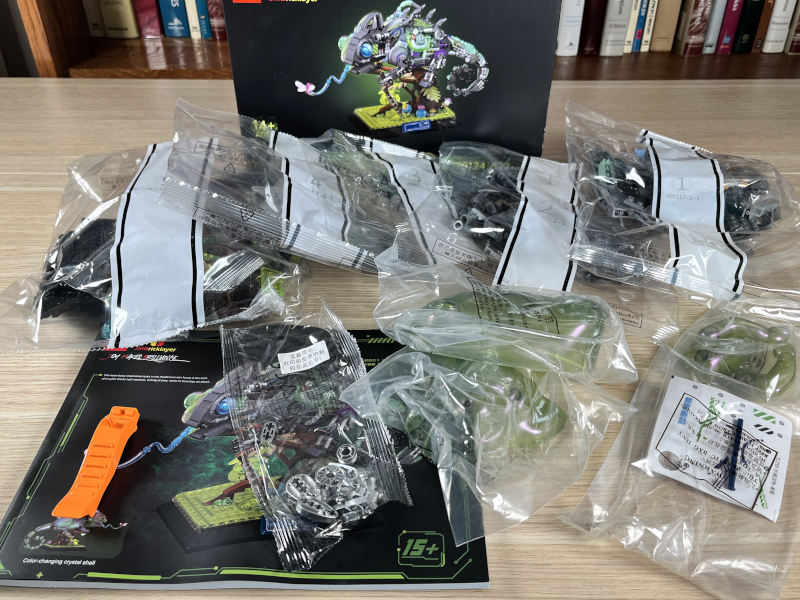
There are five major sections in the manual for building the chameleon, and there were five large bags numbered accordingly. This made it easier to find just the pieces necessary. There were also separate bags for the silver pieces, the light brick, and the large green molded pieces for the back.
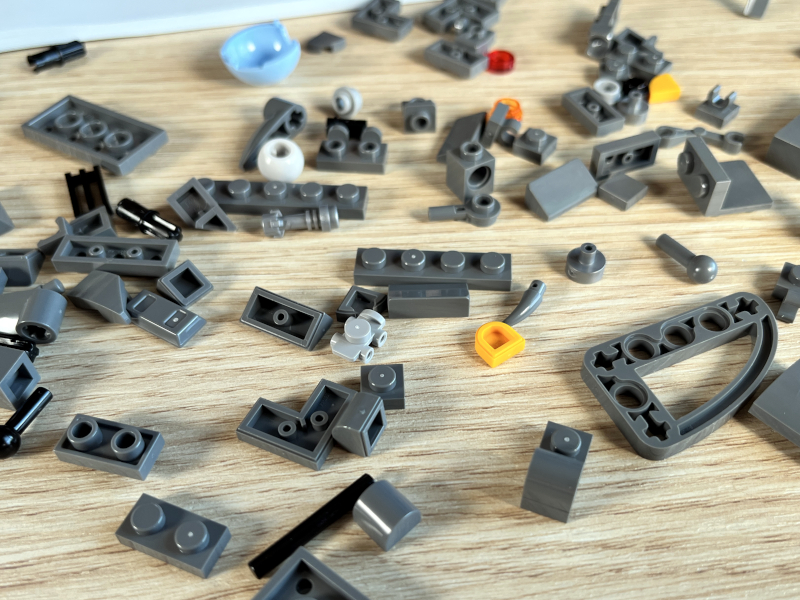
The first major section was the main part of the body. I immediately noticed that this set has a lot of very interesting little pieces. The other thing I noticed is that the designers are good at using SNOT techniques. This part of the body, for example, has studs on four different sides.
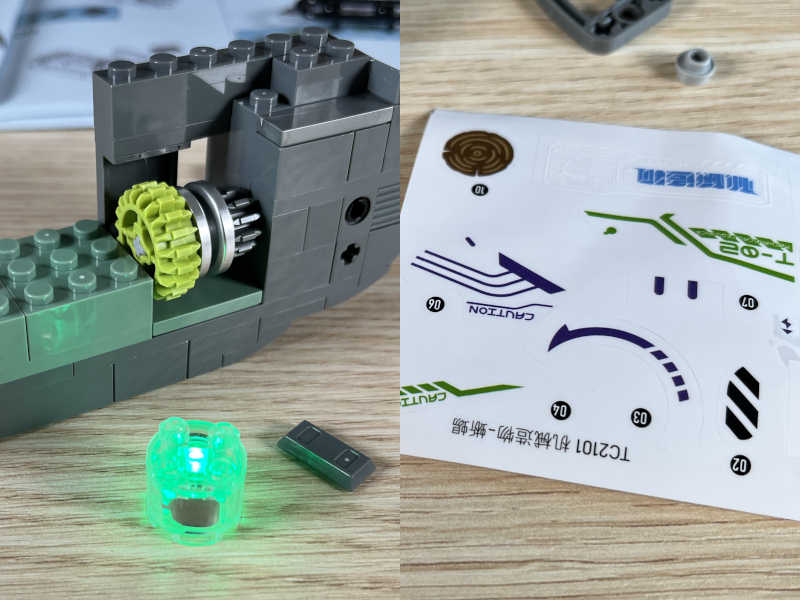
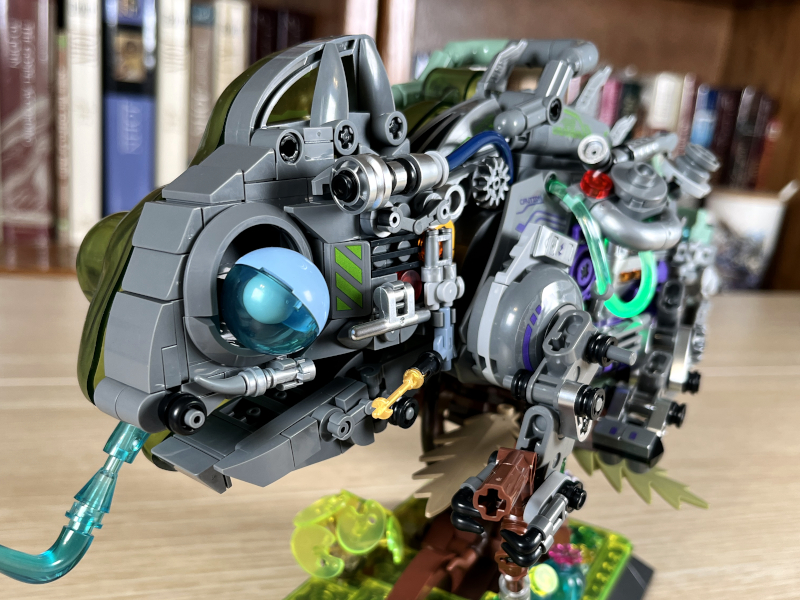
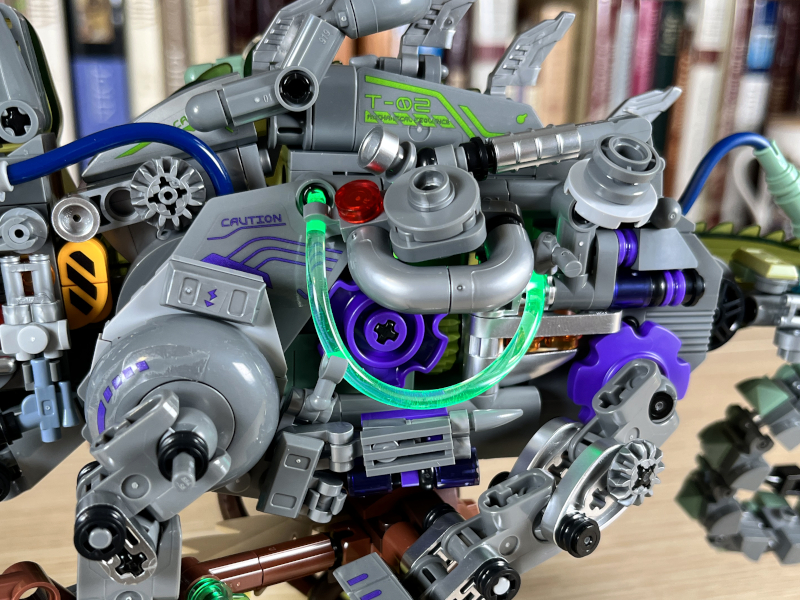
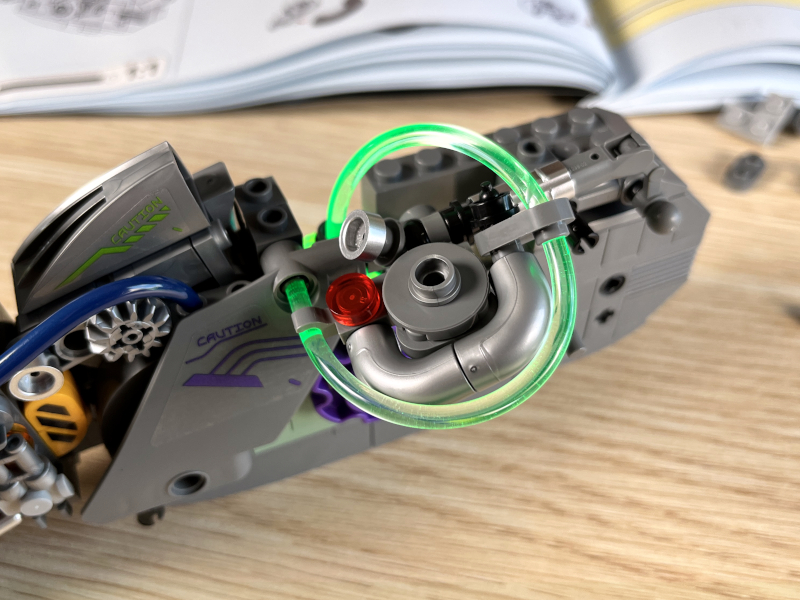
This set has one cylindrical light brick with a built-in, non-replaceable battery that is used to light up a “pipe” with a bright green color (see the picture above with the closeup of the bionic parts). It also has a handful of stickers that added extra character to a few bricks.
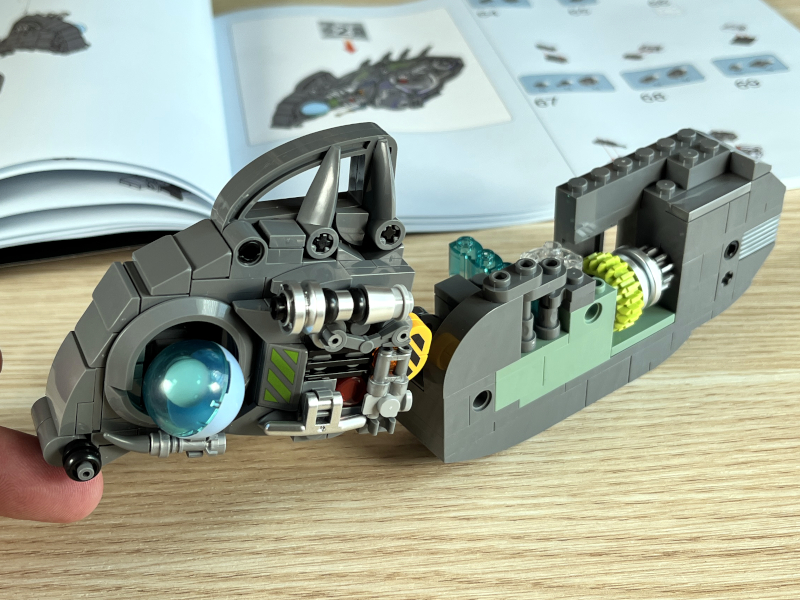
When finished with this section, I can already begin to see the outline of the body and head. It’s clear that this is going to be an intricately-designed set that pays a lot of attention to details.
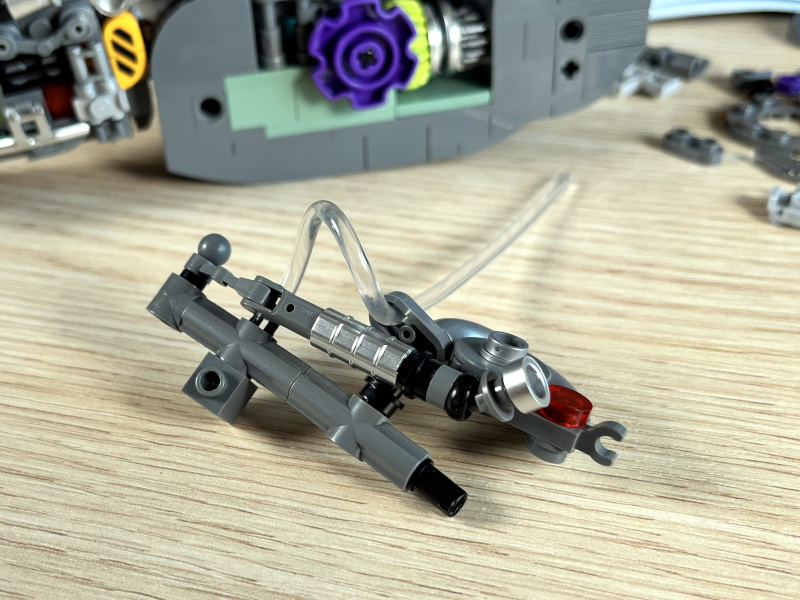
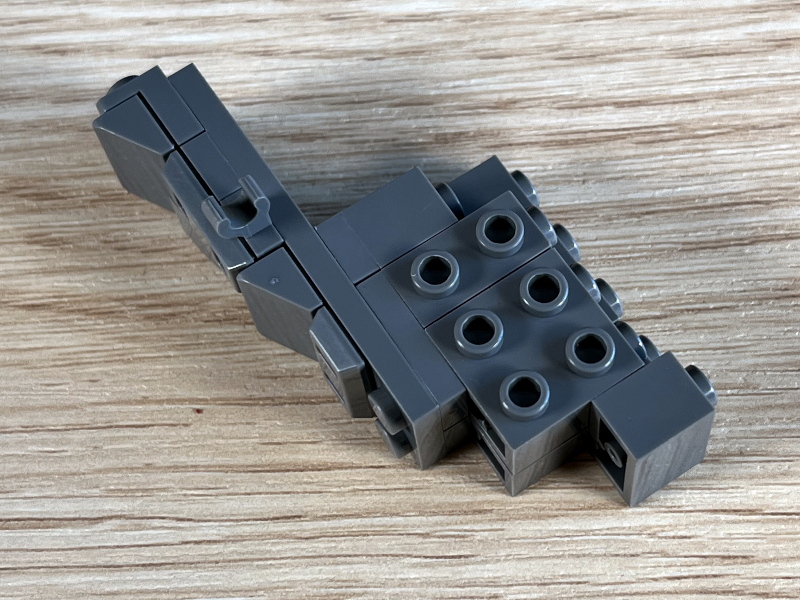
The second major section added various details added to the body. This is where I ran into a problem. I built this small assembly here, which looks like a small engine. This connects to the main body with two little pieces, and it connects the clear tube to the light brick. This section is very intricate, but it’s ridiculously unstable. Every time I connected it at one place, it pulled apart at another. After 30 minutes of unsuccessfully trying to get it to connect, I gave up and redesigned it in a simpler manner.
Here’s what it looked like when I had completed the redesign it. Even this wasn’t quite finished; as I added the surrounding pieces, I had to modify it couple more times to fit in. I am all for sets having a clever and complicated design, but if the result is unstable, then it’s a poor design. This assembly is so difficult that JMBricklayer calls it “the hardest part” and has special instructions online to try and give some help. JMBricklayer need to take steps 74 to 94 back to the drawing board and come up with a better design.
The box says that this set is for ages 14 and up. At first, I thought this number was a bit conservative; having dealt with this problem, I think it’s probably about right, as building this chameleon requires some patience. If you buy this set, don’t be surprised if you have to do some ad hoc designing of your own in order to finish this part of the chameleon. The good news is that my redesign works fine, and if you didn’t know that I had made changes here, you probably couldn’t tell. Although this problem was annoying, it’s not a deal-breaker in my mind. Hey! Redesigning things is part of what we do as builders! Be flexible.
At this point I am done with section two, and the bionic nature of body can really be seen clearly. The rotating eye is in place, and there is a set of spines along the top. It’s looking good.
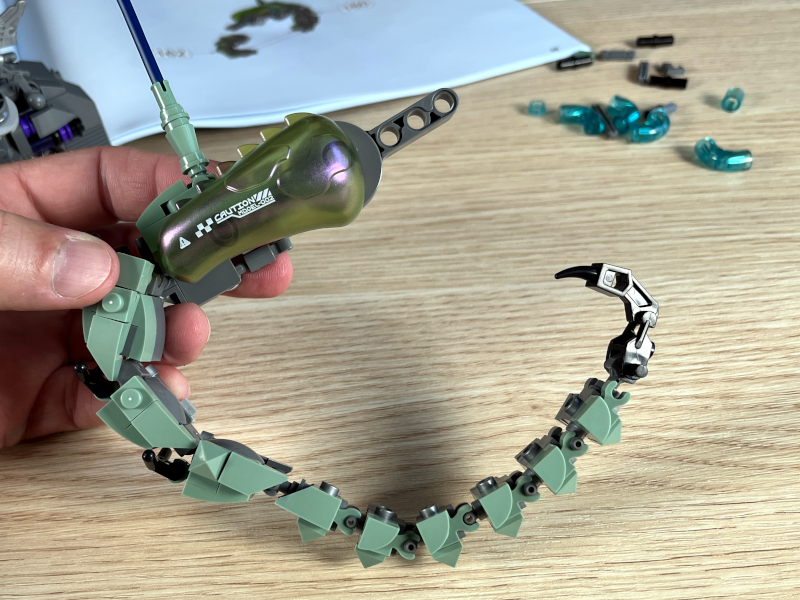
The third major section was the tail, and this was my favorite section to build. The tail is absolutely sick. I love the use of the short connecting pieces to create sections that can contract or extend. This idea could be copied for other creatures, like a scorpion or wyvern.
Once attached to the body and curled around, it looked it even better.
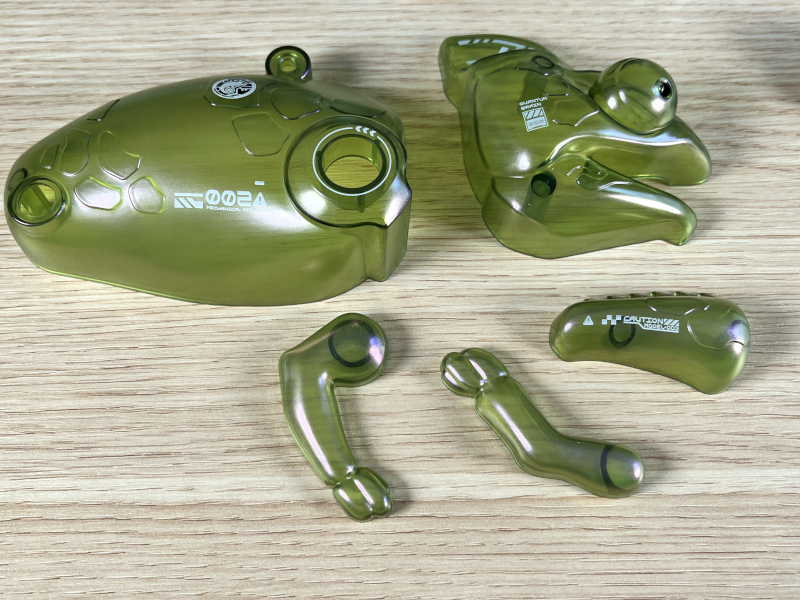
This section was the first time that I added some of these large, molded pieces. I’m not a fan of these at all. They scream, “We wanted to cut costs so we didn’t finish building the back of this set.” This seems like something LEGO would do, and I wish they hadn’t used them. Certainly, they are not reusable, like the rest of the pieces are.

Here’s the front of a finished section three.
Here’s the back, where the molded pieces can be seen.

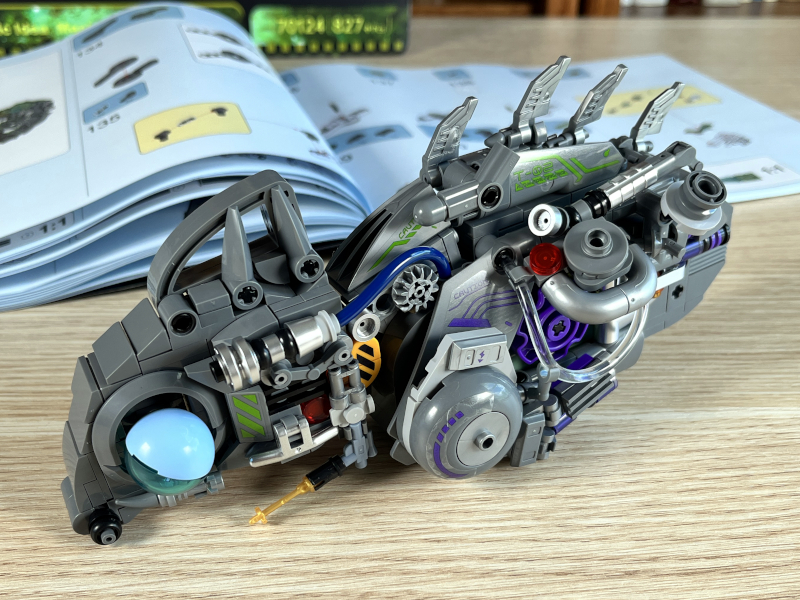
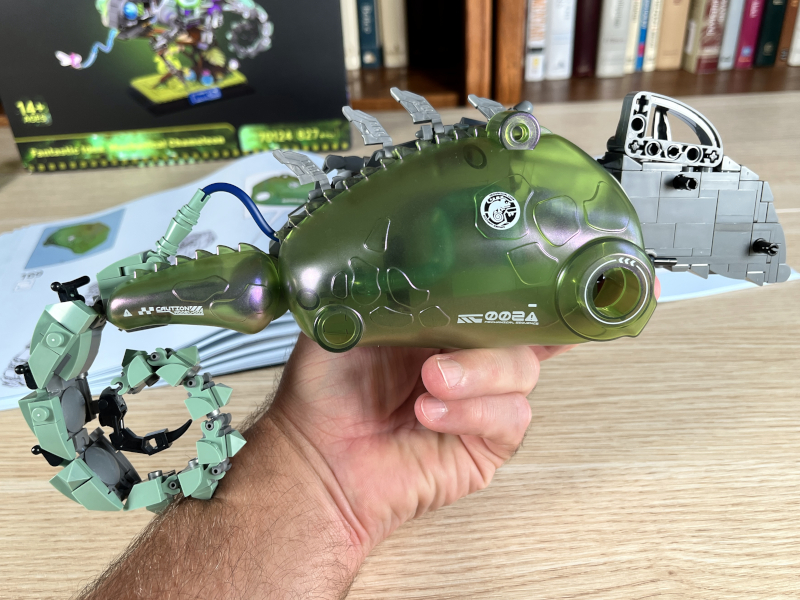
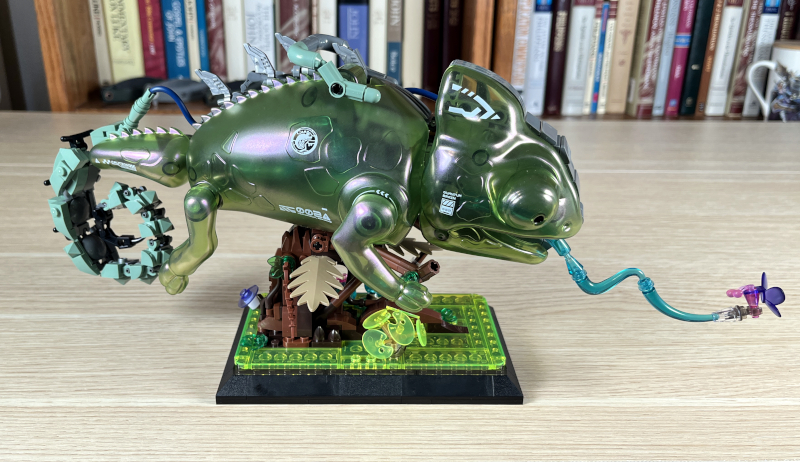
The fourth major section finished the body by adding the jaw, the tongue, and the legs. These were all done very well, and the chameleon itself is now finished.
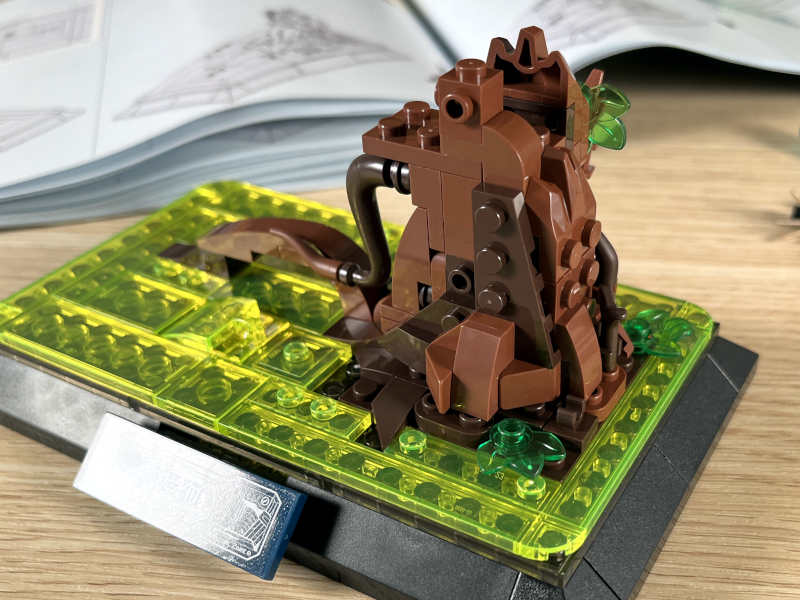
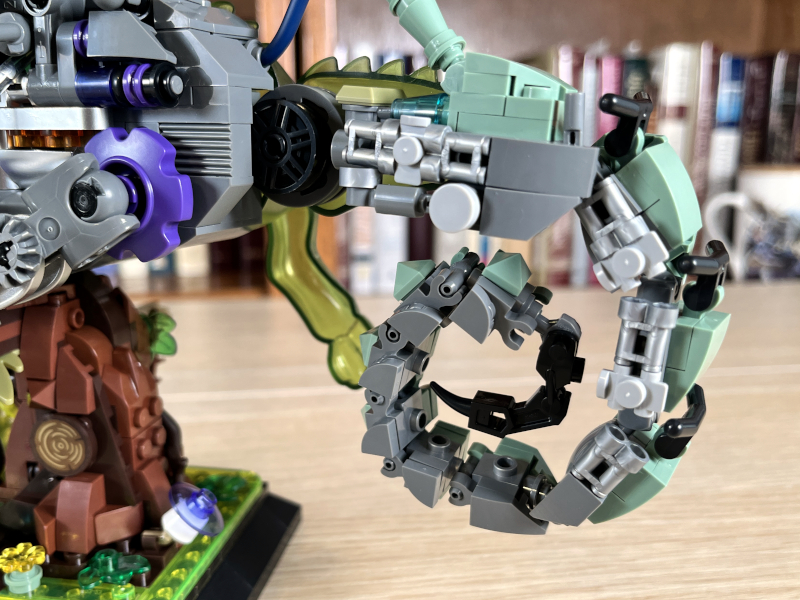
The fifth major section built the tree and perched the chameleon upon it. The base itself was super stable, and the tree trunk was another solid demonstration of SNOT, with studs being on five sides. This was well done.
The chameleon connected to the tree in only two places, and it’s surprisingly stable.
Here’s the finished back.
Performance
Overall, I like this set. The pieces are good. The design is very detailed and highlights the high-tech nature of this critter. The reuse for MOC (My Own Creation) value is very high, especially for those who tend to be technical, detail-oriented builders looking for a challenge. The one part of the body was too unstable and needs to be redesigned. The light is rather meh; it does light up one tube to a bright green color, but this doesn’t really add much effect. Despite these issues, it’s a great set.
This set is definitely not designed for younger kids. The difficult and intricate nature of the pieces will make it too challenging for these builders. Additionally, this is one of those sets that designed to be built and displayed but not played with.
Sadly, no mini figures are included with this set.
What I like
- Quality pieces
- A lot of very reusable pieces.
- Clever design with lots of mechanical-looking pieces
- Stable base and cool tail
What I’d change
- Lower the price
- Redesign steps 78-94 to attach in a sturdy manner
- Replace the large green molded pieces
Final thoughts
The JMBricklayer Chameleon is a futuristic rendition of a cyborg reptile. It has over 800 pieces that are mostly small. The design focuses on the minutiae, which gives it a realistic look. There’s a lot to like about this set. Younger kids coming to my house will not want to build this set due to its high level of difficulty, but the older ones will love the challenge! I can always put the pieces in a box, and kids of any age will have tons of fun inventing their own creations. The only thing that should make you pause is the price, which is surprisingly more than similar LEGO sets. If that’s not an issue, and if you’re looking for a challenge, this is a sweet set to build.
Price: $59.99
Where to buy: JMBricklayer’s online store and Amazon (Use the code VIPGAD15 to save 15% on either site. Expires 12/31/2023)
Source: The sample for this review was provided by JMBricklayer.
![[MINI SIZE. ULTRA PORTABLE CHARGER]: Roughly the size of an AirPods Pro case, this smallest power bank packs 10,000mAh of long lasting power into a tiny, nano footprint. Easily slide this ultra slim, credit card size charger into your skinny jeans, a...](https://m.media-amazon.com/images/I/41rATpm6dyL._SL160_.jpg)
Now retrieving an image set.
INIU Portable Charger, Ultra Mini 10000mAh 45W Fast Charging with Detachable Cable, Flight-Safe Travel USB C Power Bank External Phone Battery Pack for Xiaomi iPhone 17 16 Samsung S26 Google iPad etc
(as of July 13, 2026 18:57 GMT -05:00 - More infoProduct prices and availability are accurate as of the date/time indicated and are subject to change. Any price and availability information displayed on [relevant Amazon Site(s), as applicable] at the time of purchase will apply to the purchase of this product.)
Now retrieving an image set.