REVIEW – So you like puzzles do ya? Then prepare yourself for a challenge like no other! Not only is the ROKR Magic Cello a 3D Wooden Puzzle, but it’s also a fully functioning mechanical music box once you get it assembled! But make no mistake: it is quite the challenge. Did the Cello beat Bob, or did Bob defeat the Cello? Let’s find out. To the review!
What is it?
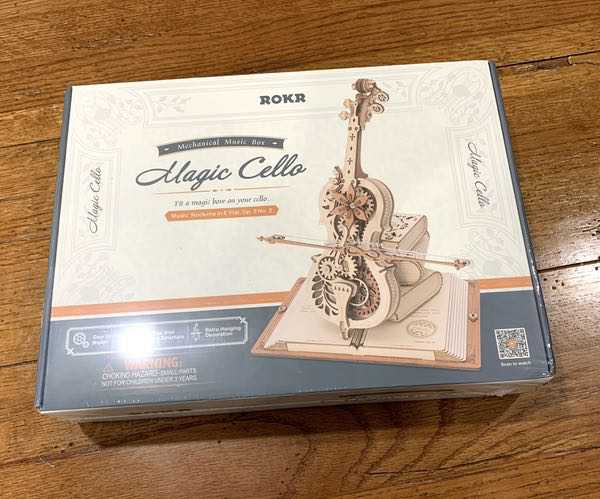
The ROKR Magic Cello is a 3D wooden mechanical puzzle that results in a functional music box in the form of a self-playing cello.
What’s in the box?
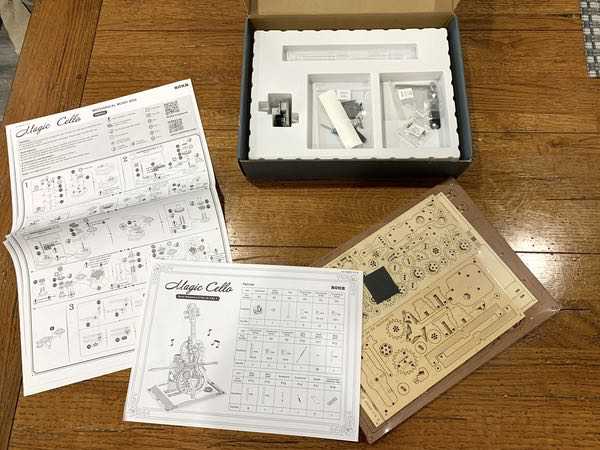
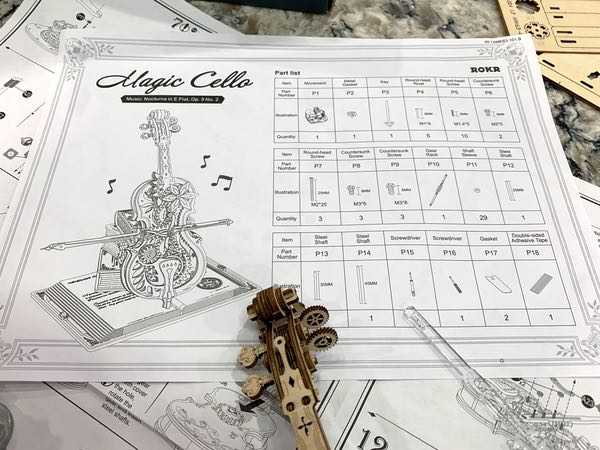
You’ll get all the things you need to build the ROKR Magic Cello puzzle in the form of a bunch of wooden sheets with the parts pre-cut into templates, assorted assembly parts (tiny screws, rods, gaskets, etc.), and the tools to put it all together. There are over 200 pieces in all.
Design and features
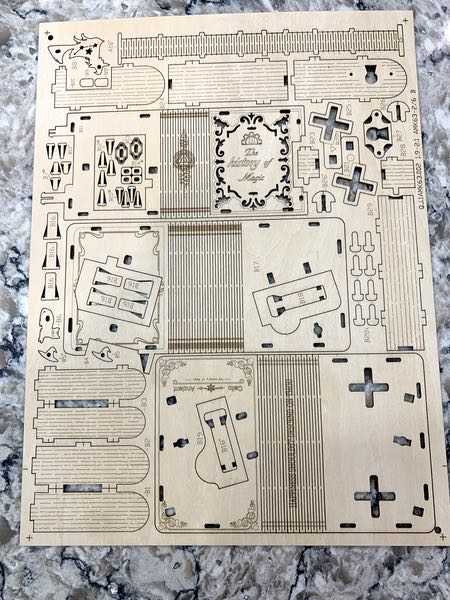
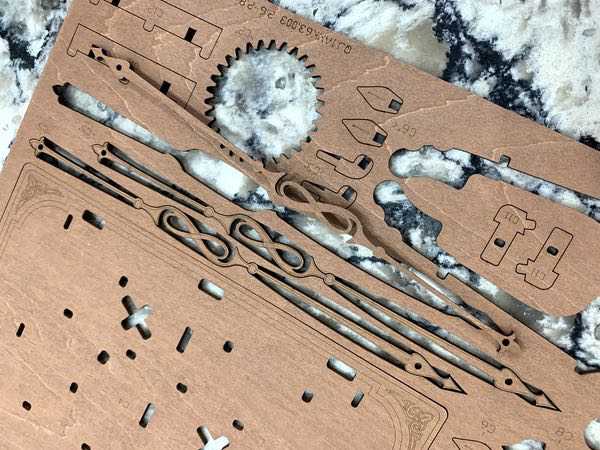
Let’s start by setting the stage for the adventure you are undertaking with the ROKR Magic Cello. Shown here are all the goodies that come in the package.
The star of the show is the wood that is the primary material in your build. You get a stack of thin sheets of wood in different colors & textures with the parts laser-cut so you can punch them out of the templates.
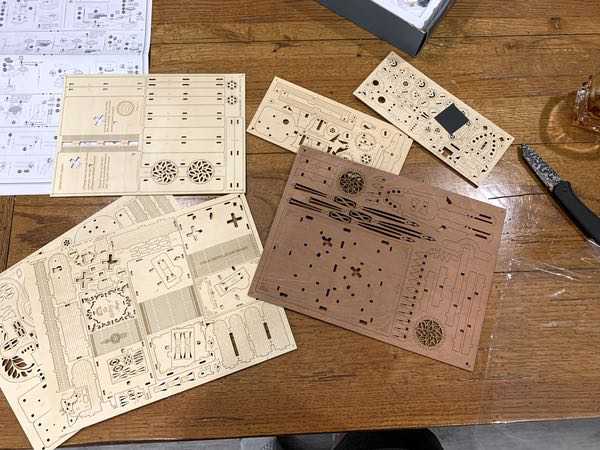
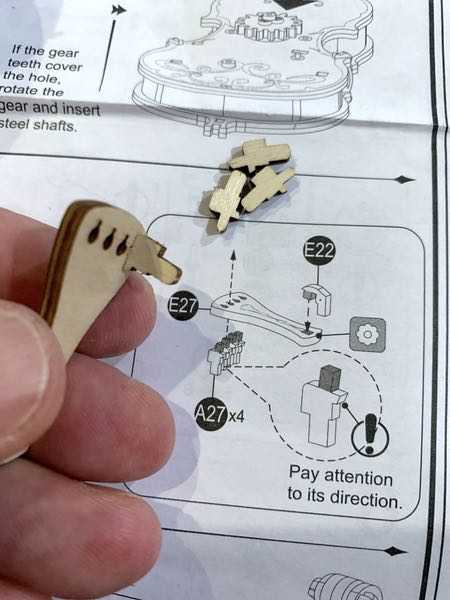
Each piece is numbered on the wooden sheet for reference to the instructions as shown below.
Next, you have a collection of connecting bits made from metal or plastic depending on the part. The inventory list is shown below…
The pieces themselves, with some exceptions, are VERY tiny. Shown here are the screws and post caps that you’ll be seeing quite a bit of (my hand for scale).
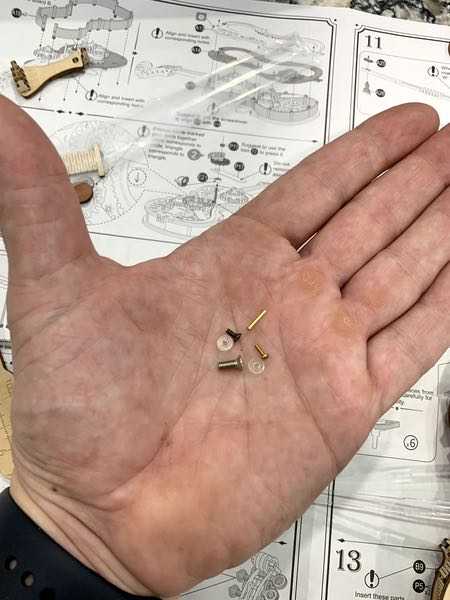
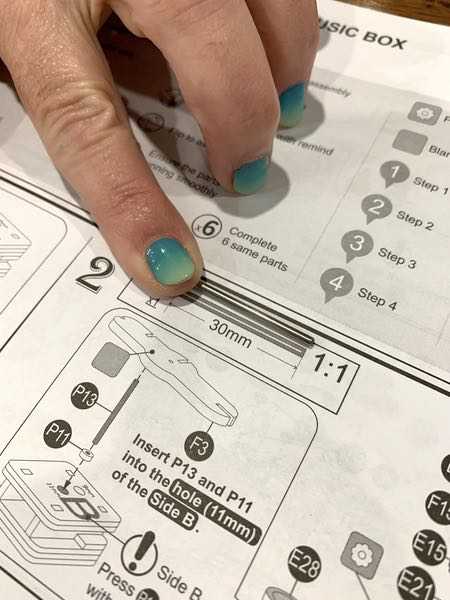
They do come polybagged, but it is important to note that the labels on the bags do NOT match up to any instructional reference. You do get little “actual size” printed references throughout the instructions as shown in the second picture below to match the bit to the job.
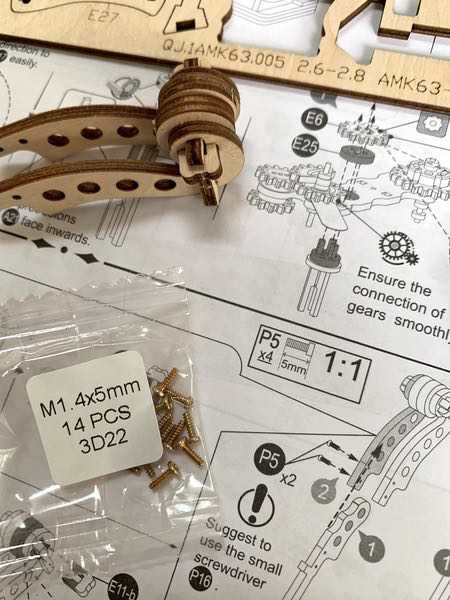
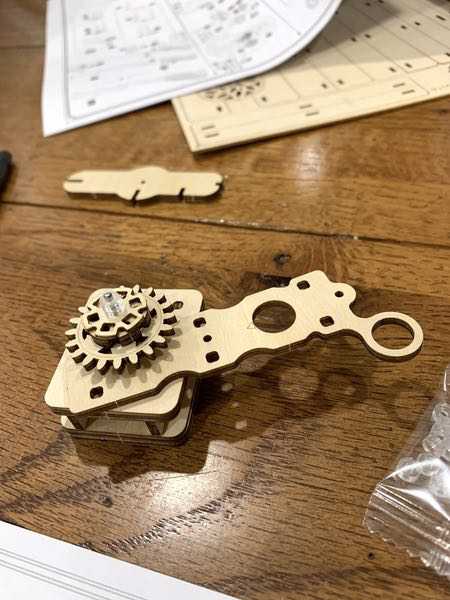
Your parts bin includes the mechanical heart of the music box and the box winder.
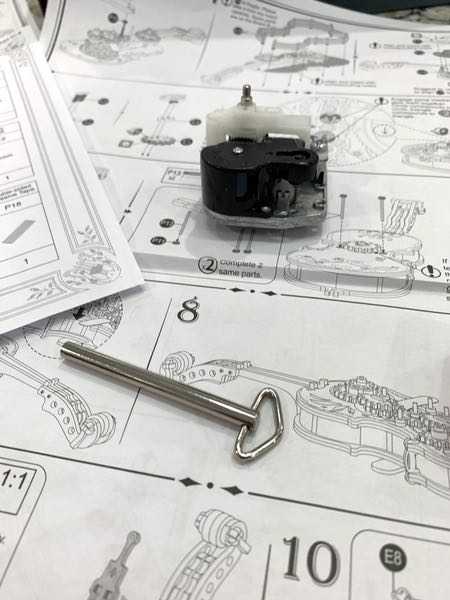
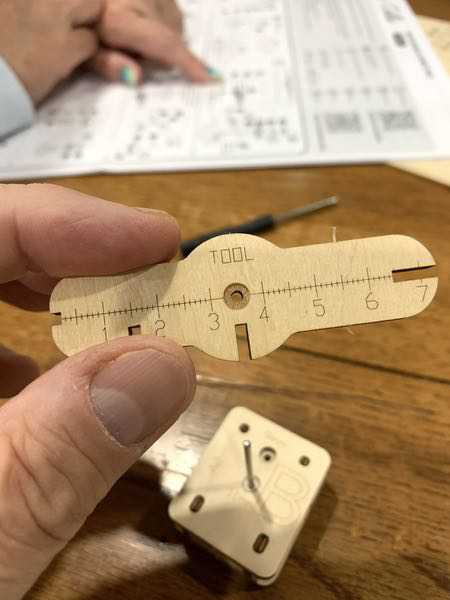
Finally, you have the tools included with the ROKR Magic Cello kit to do the assembly. One of them is a wooden tool that pops out of the template. You get two different-sized screwdrivers, and what I’ll call an “assembly block” that you build as your first project to get started.

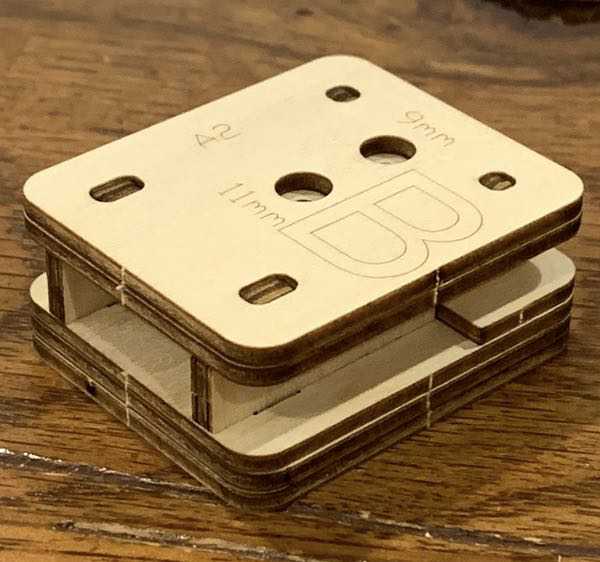
Here’s a closeup of that block. Do you see those little holes in the face? They are repeated on both sides. Several functions in the assembly require an anchor or backstop to force things together, a big one being these little plastic gaskets you shove onto the ends of rods to create a stopper.
Here’s an example of one such activity below. I placed one of those rings in the block, then used the wood tool to insert the rod into the ring. That wood tool serves multiple functions as a press, a guide, and a wedge depending on what parts you’re assembling.
Most of the activities involve inserting wooden bits into other wooden bits. There is some forcing and manipulation involved to get things where they need to go. This is often in a small space as you see here.
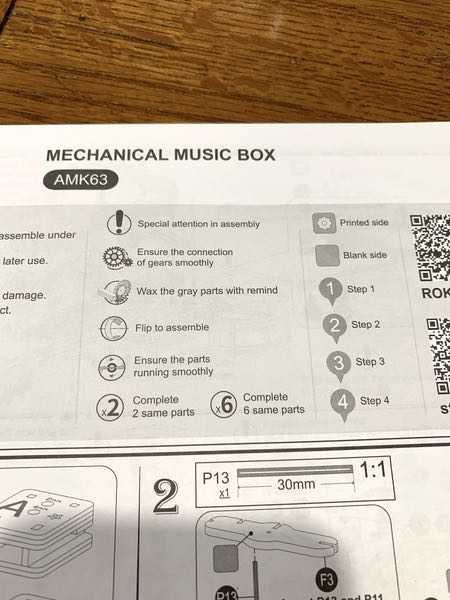
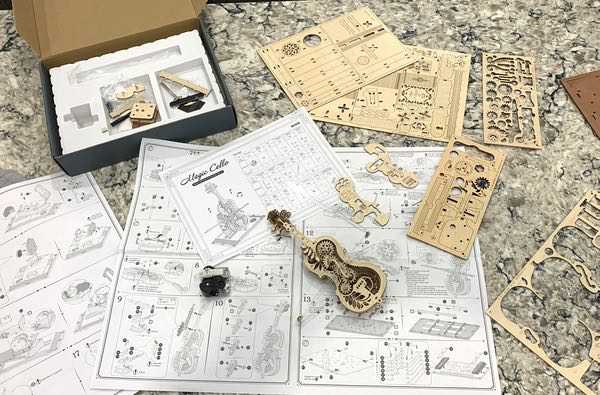
This all comes with a pretty substantive set of assembly instructions. Two 22″ by 17″ double-sided instruction sheets accompany the kit, breaking the build down into 18-ish “parts” which each may include multiple steps.
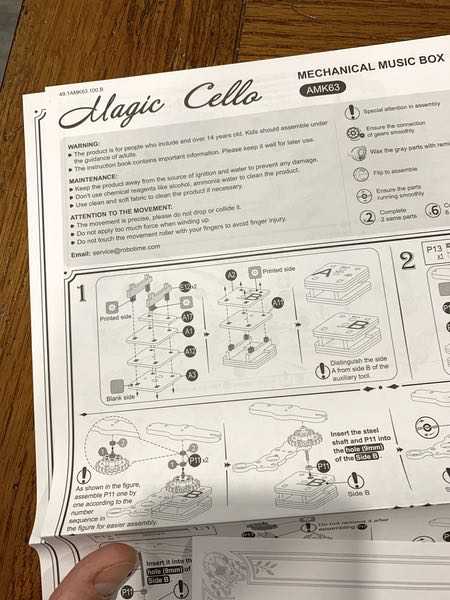
These steps come with a helpful reference guide, as the instructions use iconography to clarify specific steps that may need special attention.
That’s the basics of the ROKR Magic Cello kit you’re facing. The manufacturer claims that the average build time is 4.5 hours.
Performance
I am not going to lie: The ROKR Magic Cello defeated me. But it did so in a beautiful way.
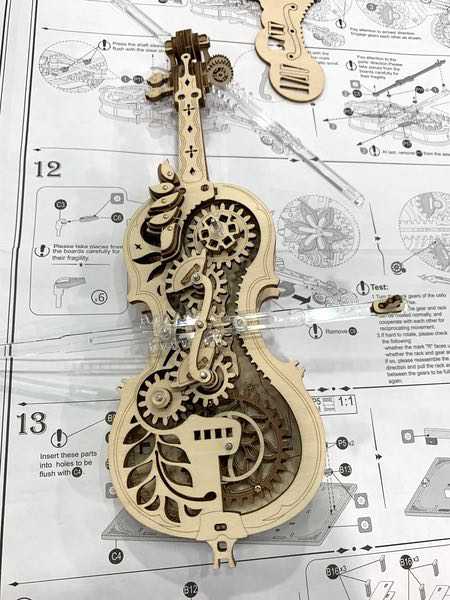
Let’s have a quick look at the package so can see what it SHOULD look like. I do highly recommend that you follow the link below to see the finished piece on their website. It truly is lovely with intricate details, different wood tones, and extraordinary complexity in the assembly.
You’ll start by assembling the smaller components. Here’s an example of one piece where I am using that assembly block as a base to insert a rod through the set of components.
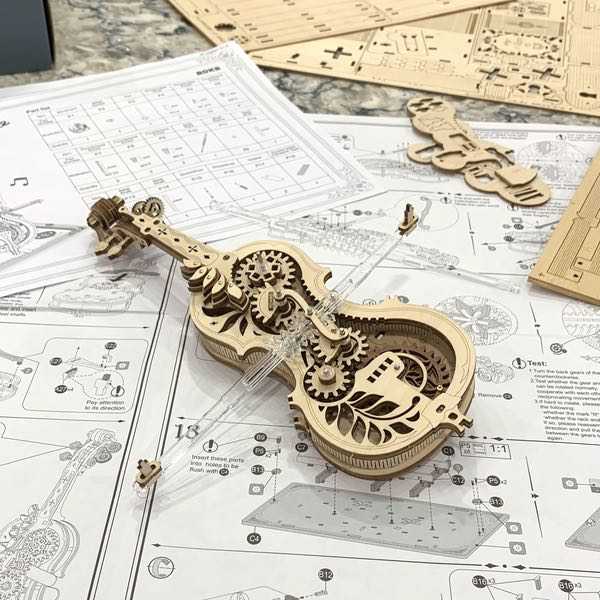
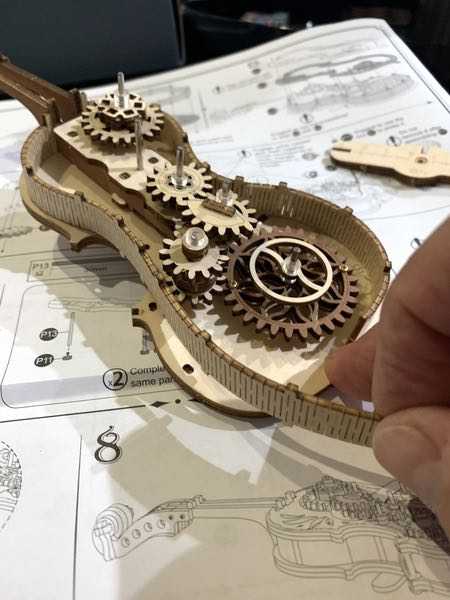
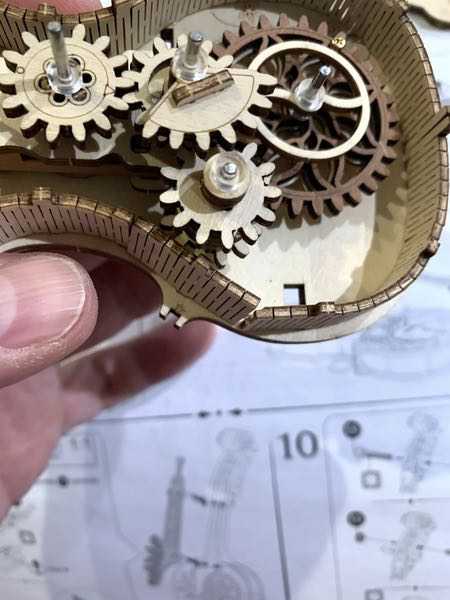
Here I have started taking some of the smaller elements and adding them to the body of the instrument. See all those little gears, spacers, and struts?
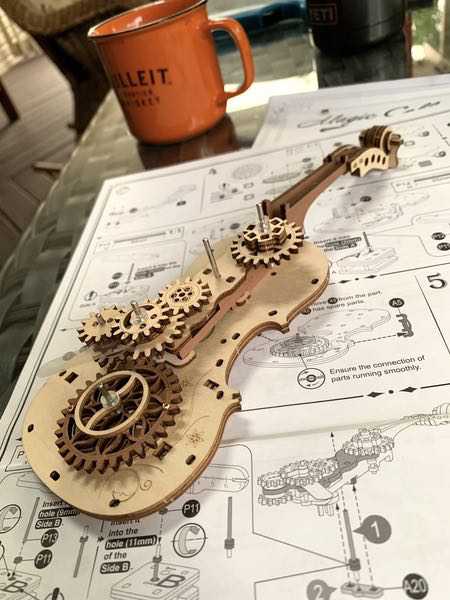
And here is my latest progress, after 8-10 hours worth of work. And I think I am about halfway through.
Why this is the case? Complexity and delicacy, my friends. You have a lot of parts, some complicated instructions, and some very fragile bits that require a lot of patience to come together properly.
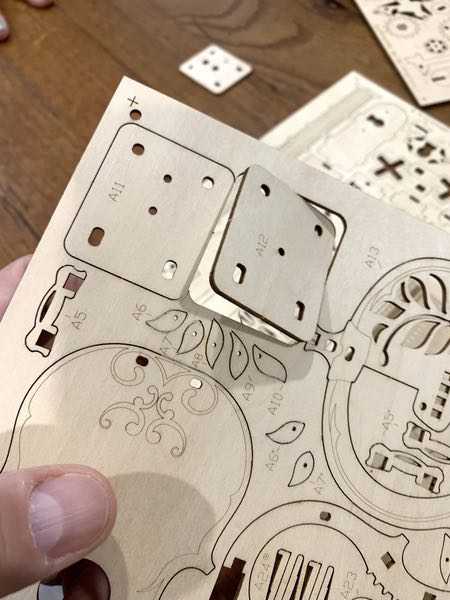
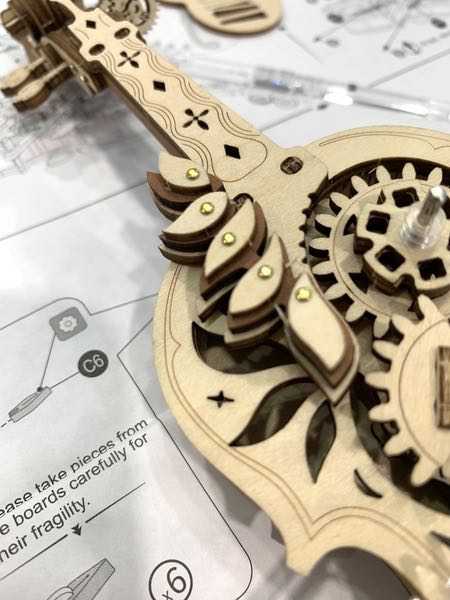
Some pieces are pretty easy to pop loose even if they are small, like the small disks and key-style posts shown below that will be part of the head of the cello (you can see them in the other pics).
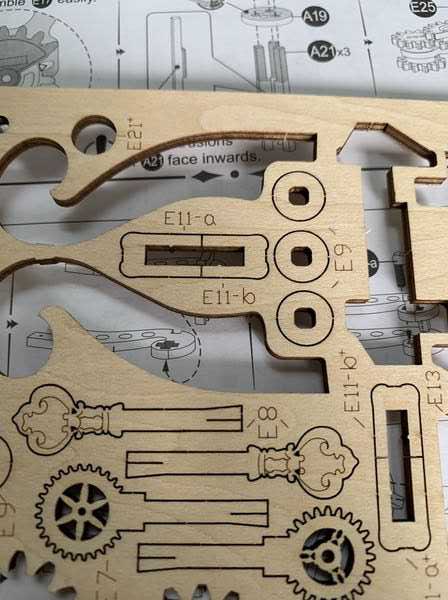
Other pieces, however, are very delicate and require careful removal to avoid breakage. The good news is that the kit usually includes several copies of the same part in the template. You still have to be very careful, however, as that delicate scrollwork will snap easily if you don’t go slow.
I had one case where I broke the replacement bits. This band is cut to be flexible so it becomes the sidewall of the instrument body. You kind of bend it and insert it into the tabs as shown below…
As I came around this part of the body, however, I broke the first band. And the second. I had already used the third band on the other side, so I had to just work with it.
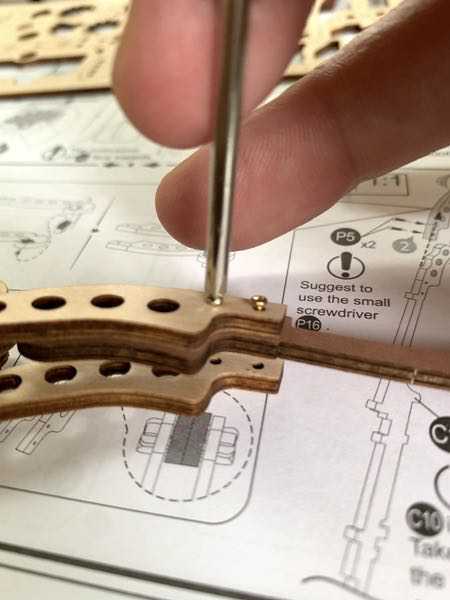
You also have some teeny-tiny delicate assembly, like these tiny screws connecting two wooden parts…
Or these beautiful highlights done in layers of light/dark/light wood, each of which is made from bits that are smaller than my pinky fingernail.
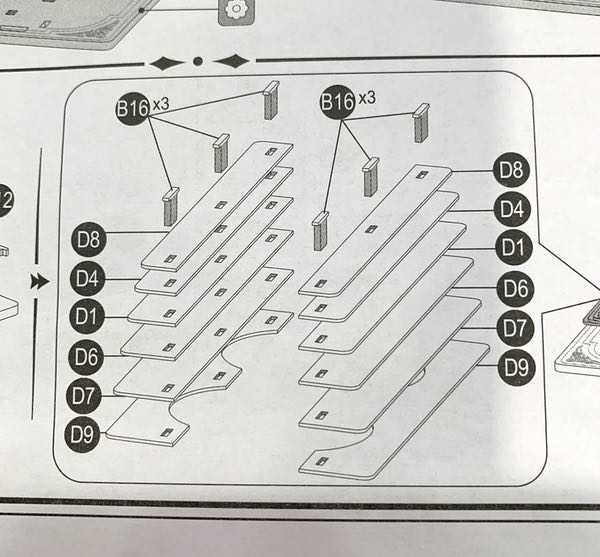
Then you’ll get layers of wood bits that need to be kind of coerced (forced) to fit together, like this stack shown in the instructions…
… or these bits where you have to pick your way through the built parts to find out where the whatzit gets inserted into the thingamajig without crushing some other part you already built!
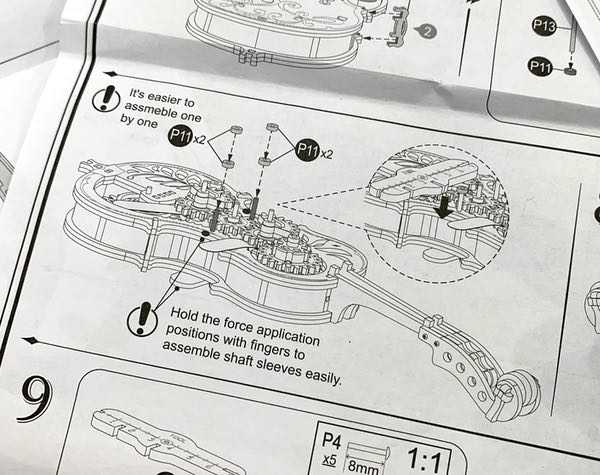
This is all accompanied by little cautions and warning callouts to make sure that gears align, that pieces move smoothly, and that you don’t use so much force that you break stuff.
This was my last known location in the build as of yesterday. I honestly don’t know how someone would build this in 4.5 hours, unless you have experience with similar models. I still have half the instructions and parts to complete!
It’s a lot.
Don’t get me wrong — the finished piece looks like it will be gorgeous — but it takes a special kind of mindset to get there. The complexity of the build takes patience to work through the instructions to begin with. Combine that with tiny parts and delicate components, and this project becomes quite a challenge. I would absolutely not recommend it for people with vision problems or fine motor skill challenges. Nor would this be good for beginners into this sort of modeling.
For me, the ROKR Magic Cello was just too much. I’ll still keep plugging away at it, but I feel in my case that this is a puzzle that is best attacked in small doses over time. Your mileage may vary based on your comfort with these sorts of puzzles.
What I like
- Beautiful, detailed components
- It’s a challenge if you’re up for complex puzzles
What I’d change
- Requires extraordinary patience
- Small delicate bits are subject to breaking and requires careful handling
- Instructions can be difficult to follow
Final thoughts
The ROKR Magic Cello will present a worthy challenge to experienced mechanical puzzle lovers. It’s got a level of detail & complexity that is not for the faint of heart. And despite the fact that I haven’t finished it, I do respect the level of detailed work that has gone into the design of this model. Shoot, I’d argue that the value is there with respect to the cost ($40) and the hours of time you’ll invest in this challenge. Just know that you’re going to spend a lot of time with this one and that patience and delicate delicate detail work will be essential to your success.
Price: $39.99
Where to buy: robotimeonline.com
Source: The sample of this product was provided by Robotime.

Google Review Tap Cards (3-Pack) by TapFive - Tap for Instant Reviews - All Phones Compatible - Reusable Smart Tap NFC & QR - Boost Business Reviews - Powered by TapFive (3 Card Pack)
(as of June 20, 2026 22:56 GMT -05:00 - More infoProduct prices and availability are accurate as of the date/time indicated and are subject to change. Any price and availability information displayed on [relevant Amazon Site(s), as applicable] at the time of purchase will apply to the purchase of this product.)
Gadgeteer Comment Policy - Please read before commenting
Great post and review! Thank you!
Wow! I love this puzzle kit, and thanks to your honest feedback, I now have the confidence to conquer it!
I destroyed part No B11. I have tried to email and attach a picture of the part, but I CAN NOT do it. would it be possible to talk to someone and describe what I need.
Unfortunately we do not have any affiliation with support for the manufacturer. It looks like they have both e-mail support and a form for replacement parts. I would guess that you could just tell them the piece number and you would be good to go!
Just got mine for Christmas gift so can’t comment on the build … HOWEVER… once did a multi thousand piece jigsaw puzzle of the sailing vessel Belem only to find out AT THE VERY END that a piece was missing, right in the center of the puzzle on the main sale Turns out the pieces are on a numbered grid and you can order them individually, EXCEPT, you have to send to Spain to do it. The puzzle lay dry docked until one day, three months later, a little box from Spain arrived with the replacement piece.
Belem is now framed and hangs on my office wall. One day I came across the dog chewed piece hiding in a corner.
DONT GIVE UP ! Even if you have to fabricate the piece.
Good luck
This is a great review! I am about to start my mechanical cello, but I’m worried that I may be missing parts. Do you still happen to have P17, the gaskets? The parts list says there should be two, but I don’t recognize the shape in my kit. I have something that looks like a nail file, but it doesn’t match the shape needed. I appreciate any help you can give me!
I was just looking at the instructions… I think that piece is a rectanguar one with a notched end? Your best bet may be to contact the manufacturer!
This is my first adventure into modeling like this and I love it. I’ve always loved mechanics, helping my dad repairing our bikes and stuff like that. After about 5 hours I’ve only broken 1 part (A5), the cello itself is finished and I’ve started on the base. I think I’ll be able to finish it in 8-10 hours in total. I’ve one extra challenge: my manual is in Chinese and I really don’t know any Chinese. Luckily Google Lens can translate for me. The detail in the build is amazing!
Good review! I also broke one of the A18 pieces but there was a spare so I learned my lesson. To answer the above question, the “gasket” isn’t a gasket at all- its a nearly transparent piece of incredibly thin plastic which is SUPPOSED to be stuck in between the gears at specific places and then removed later. They didn’t stay in place and I just ignored them.
Several hints:
1.Have a straight edge razor blade handy- good for shaving some wood off those pesky insert tabs to make life easier.
2. Use a needle nose pliers to hold the small inserted pieces like A27 while gently inserting them.
3. Use the wax they provide. It works,
4. Last step of #13- make sure the unfolded pages (boards)
sit squarely against the shoulder of the book’s spine (Part F1), before you read my next hint Otherwise you’ll have trouble with the next step.
5. Lastly, use GLUE! (sparingly) I used it instead of the 2-faced strips they supplied (Step 13 above), and also in a few other places where I didn’t trust the tab-to-notch joint. I use Duco cement with a toothpick applicator. Just dots- no globs.
6. I still can’t figure out what the note in step 2 means: “wax the grey parts with remind”!!!
I’m on step 14 1/2 so I hope it runs when everything is done!
How big is the finished cello?