REVIEW – I have had a robot vacuum in my house since 2018, when I reviewed the Deenkee I7 Robotic Vacuum Cleaner. Since then, robot vacuum cleaners have come a long way in being more efficient and offering other functions like mopping and vacuuming. In my ongoing effort to keep my house clean with as little effort on my part as possible, I will be reviewing the Roborock S7 Max Ultra vacuum.
What is it?
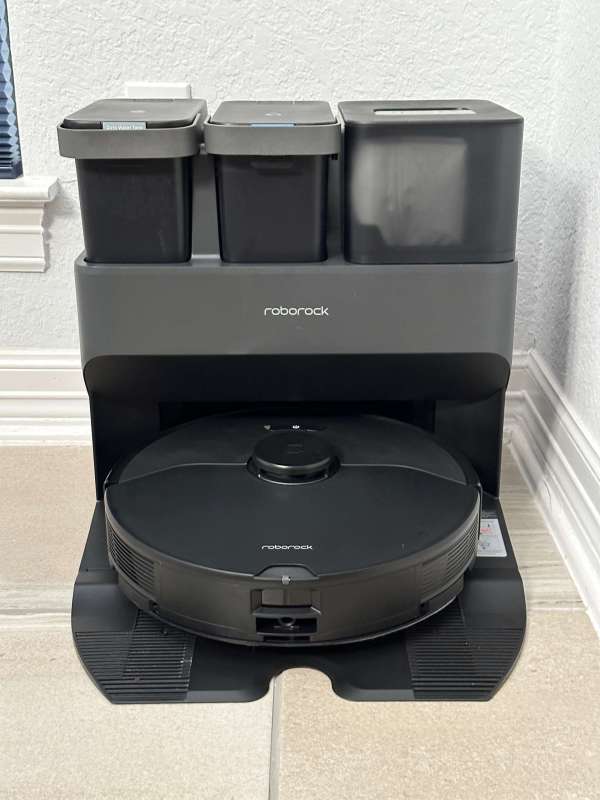
The Roborock S7 Max Ultra is a robotic vacuum and mopper with a very nice docking station. The S7 Max Ultra will vacuum and scrub mop your floors, then go to the docking station, empty the dustbin, clean the mop, and dry the mop.
What’s in the box?
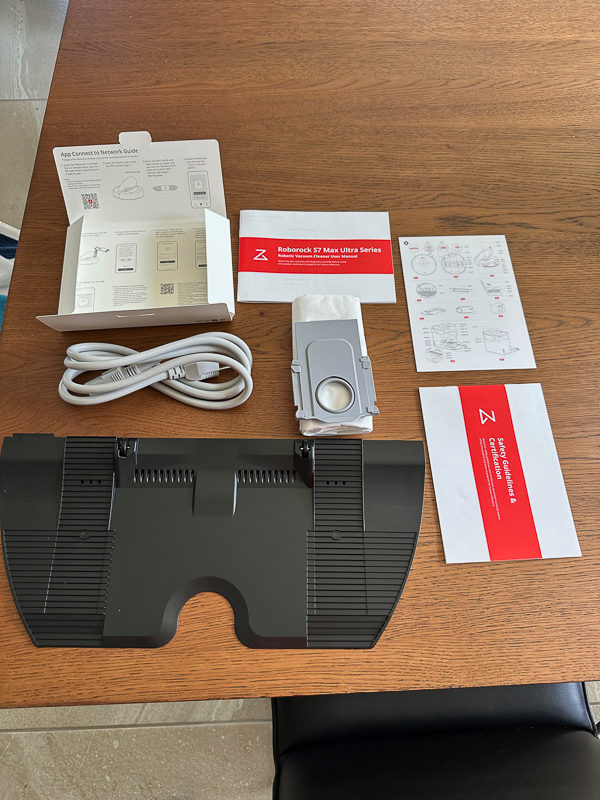
- Roborock S7 Max Ultra (1)
- RockDock™ Ultra (1)
- VibraWash Water Tank (1)
- VibraWash Mop Cloth (1)
- VibraWash Mop Cloth Mount (1)
- Power Cable (1)
- User Manual (1)
Hardware specs
- One Dock to Rule Them All
- Self-Drying&Self-Washing
- Self-Emptying&Self-Refilling
- Self-Cleaning
- 5500Pa Extreme Suction
- VibraRise® Mopping System
- Auto Mop Lifting
- Reactive Tech Obstacle Avoidance
- PreciSense® LiDAR Navigation
- Easy-to-use App features
- Custom Cleaning Routines
- Alexa&Google Assistant, and Siri Shortcuts Supported
- 30% Faster Charging
- Off-Peak Charging Supported
- Child Lock
Design and features
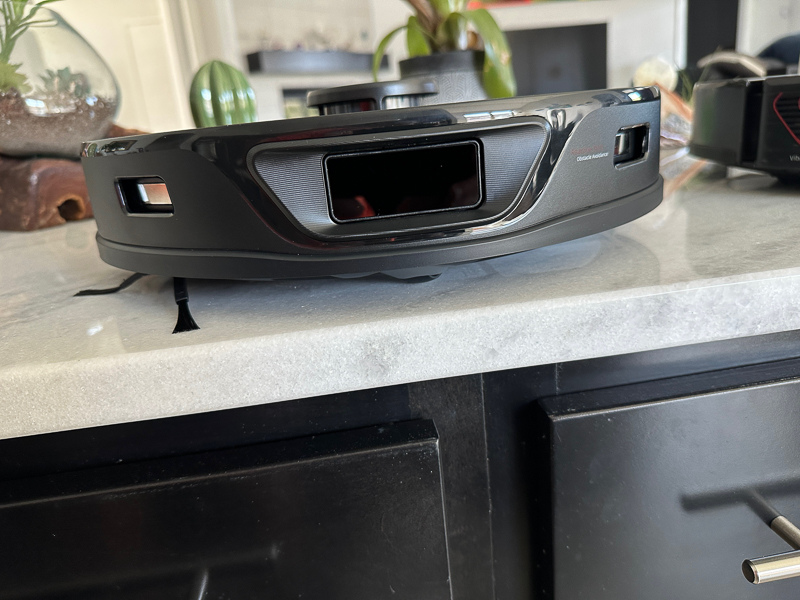
The top of the Roborock S7 Max Ultra vacuum is pretty basic. There is a flap that lifts up in the back where the Roborock logo is to expose the air filter and dust bin. At the very top and middle, you will find the vertical bumper, and underneath that is the LiDAR sensor.

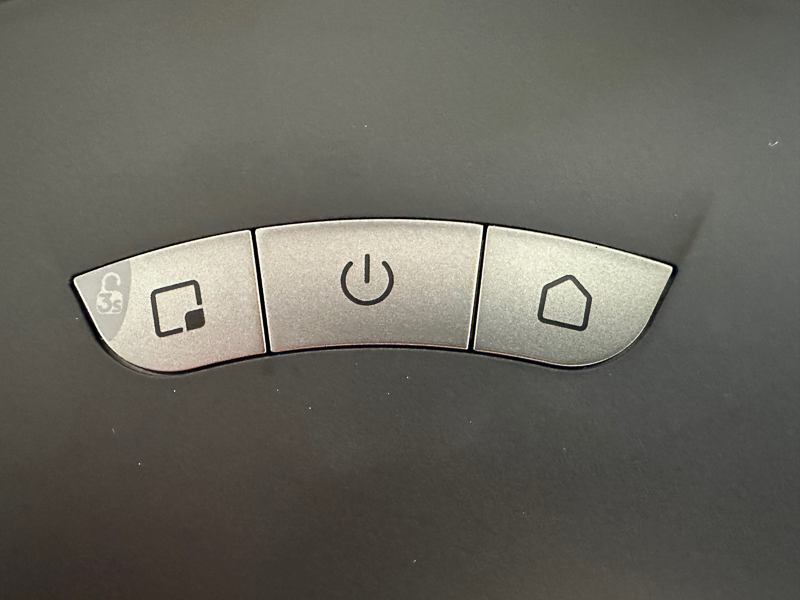
On the front top of the unit are three buttons. From left to right, they are:
Home button -Press quickly to return to the dock and start emptying the dust bin. Press and hold to wash the mop.
Power/Clean -Press and hold to turn the robot on and off. Press to start cleaning.
Spot Cleaner/Child Lock – Press quickly to start spot cleaning. Press and hold for 3 seconds to turn on/off the child lock.
The power button lights up white to indicate the power level is greater than or equal to 20%, red when power is below 20%, breathing to indicate it is charging, or flashing red for an error.
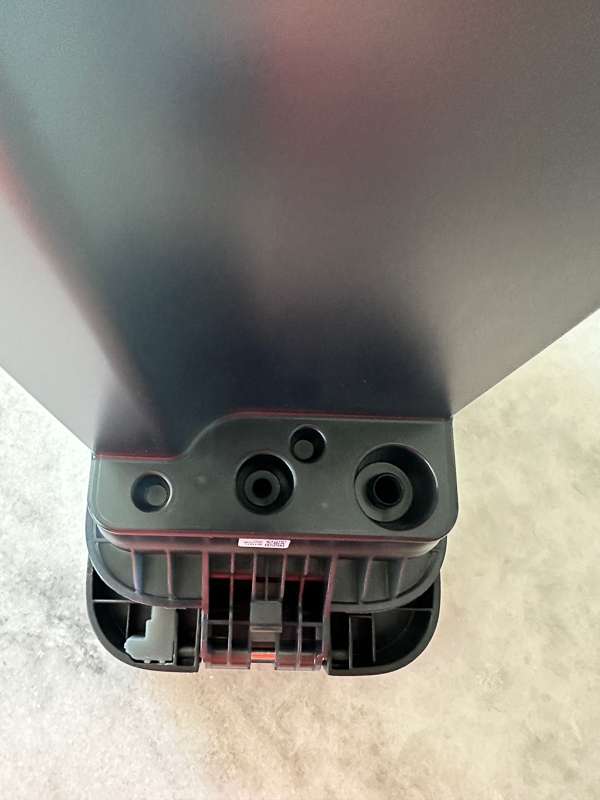
In front of the Roborock S7 Max Ultra is the docking sensor. The two metal rectangles on either side are the charging contacts.
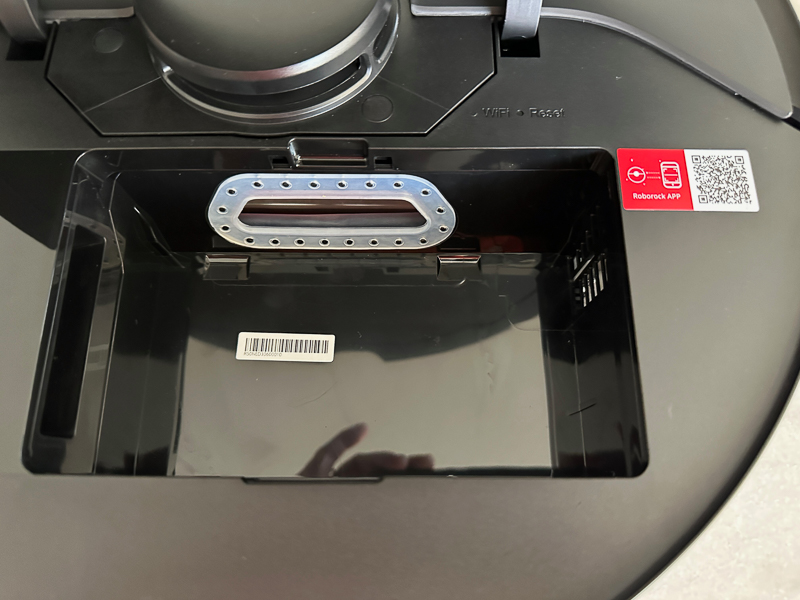
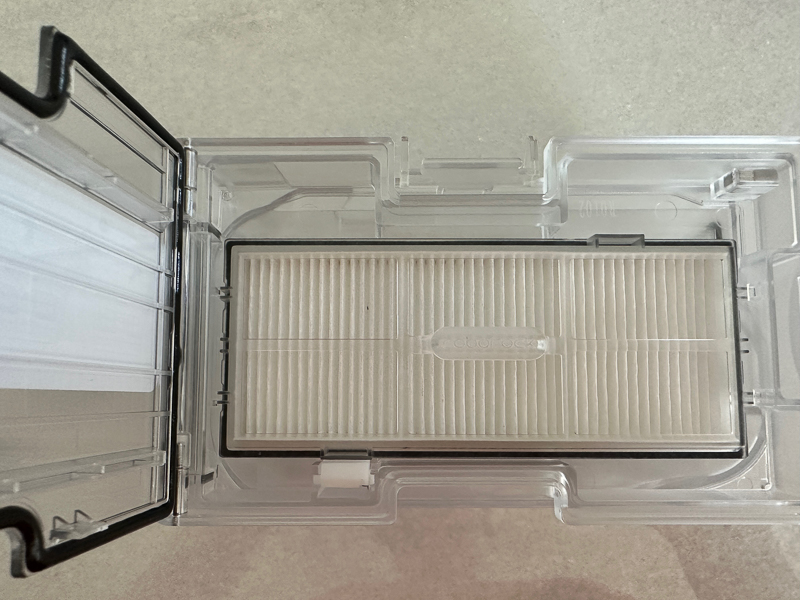
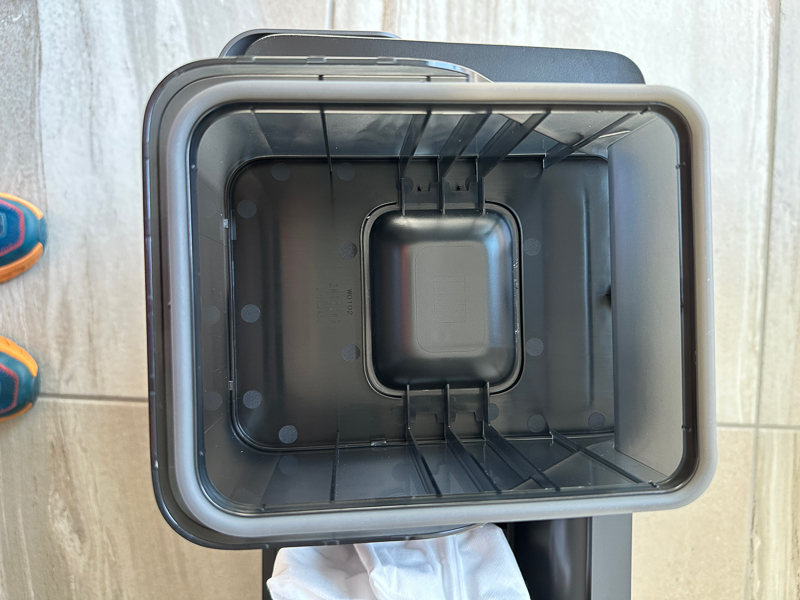
Lifting up the flap on the back and top of the unit exposes the dustbin.
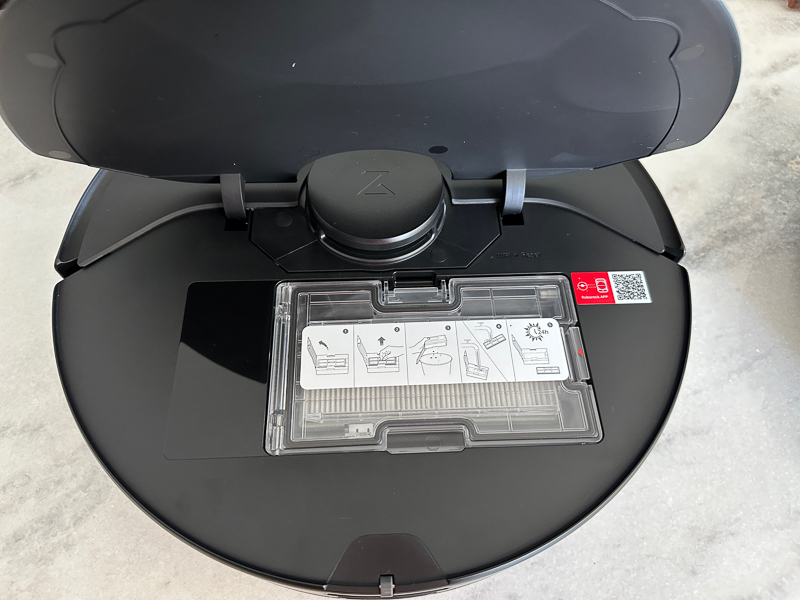
Popping it out exposes the cavity in which it sits, and you can see the hole where the dust comes in/out of the unit.
This is a closeup of the dustbin. It shows how to remove the filter and clean it. The filter is washable. I never wash them, but I take them to my air compressor and blow them off every week. I find that washing the filter will sometimes cause the dirt to imbed in the grooves, while blowing it off with compressed air often makes the filter look like new.
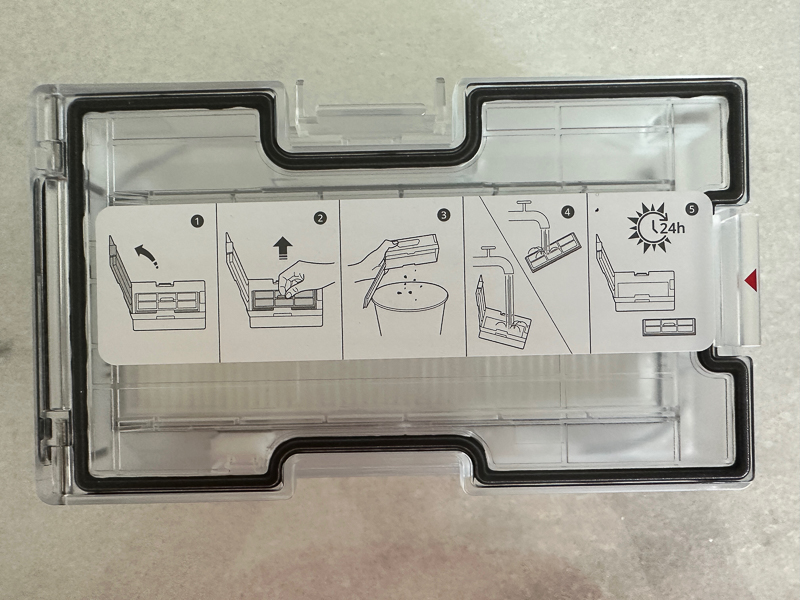
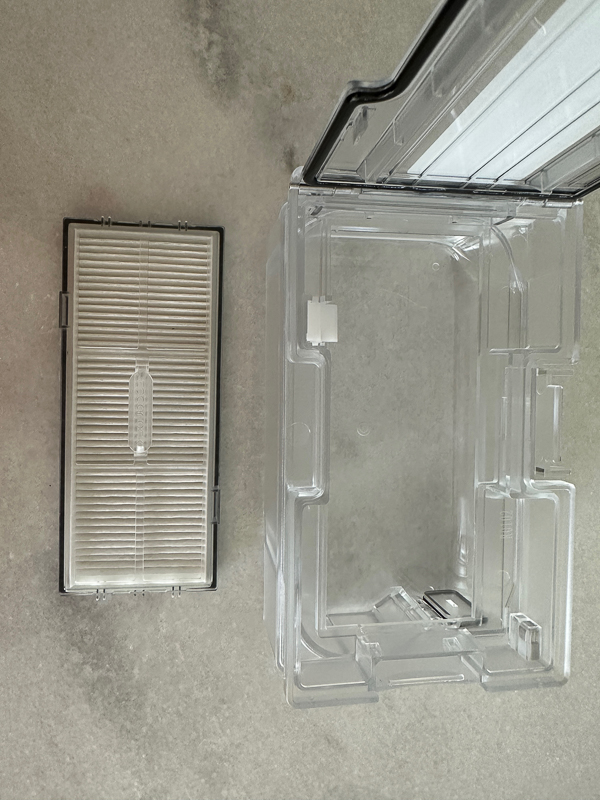
The next two pictures show the dustbin’s air filter, which was removed from the dustbin.
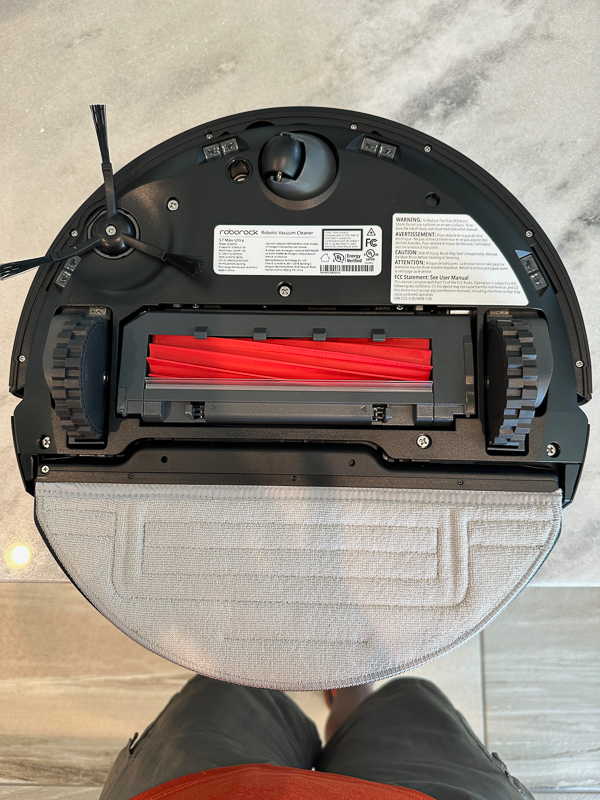
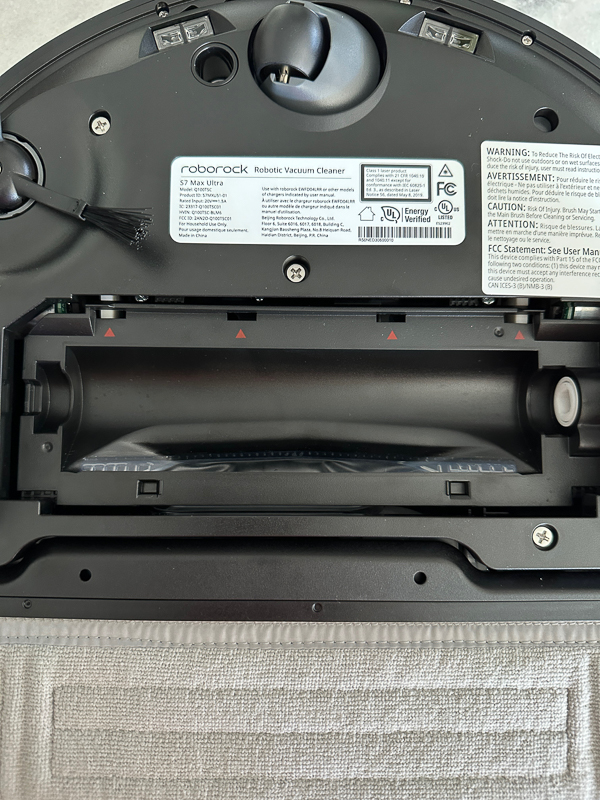
This is a picture of the bottom of the Roborock S7 Max Ultra. You can see there is a single side brush. I want to note that to change out the side brush, you need a Philips screwdriver. This connection is much more durable than the vacuums that you clip in the side brush. If you break that clip, you are ‘screwed’! You will see the clear cliff sensors to the left of the side brush and three more times around the edge. You have an omnidirectional wheel up front and the carpet sensor just to the left. Then you have the main brush and the mop.
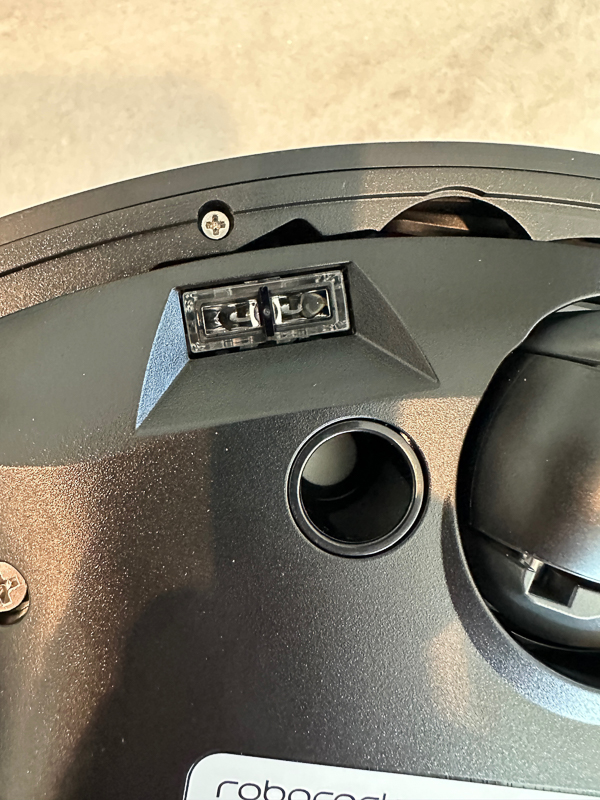
Here is a close-up picture of the cliff sensor. These need to be wiped off about once a week to make sure they work properly.
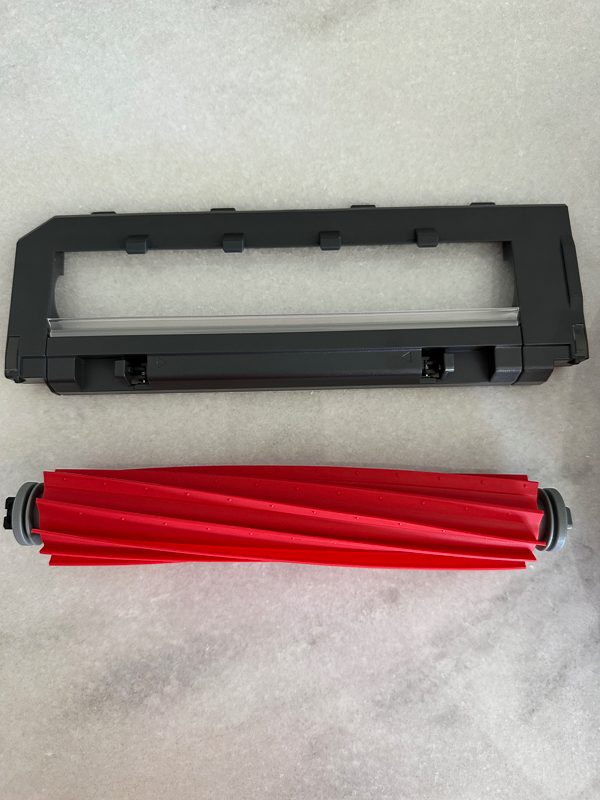
The next couple of pictures shows that the main brush can be removed to clean it out or replace it. My husband and I both have short hair and so does our dog. I have never had any issues with fur or hair getting tangled in the brush. The brush itself is all rubber which I find stays much cleaner than a bristle brush on other vacuums.
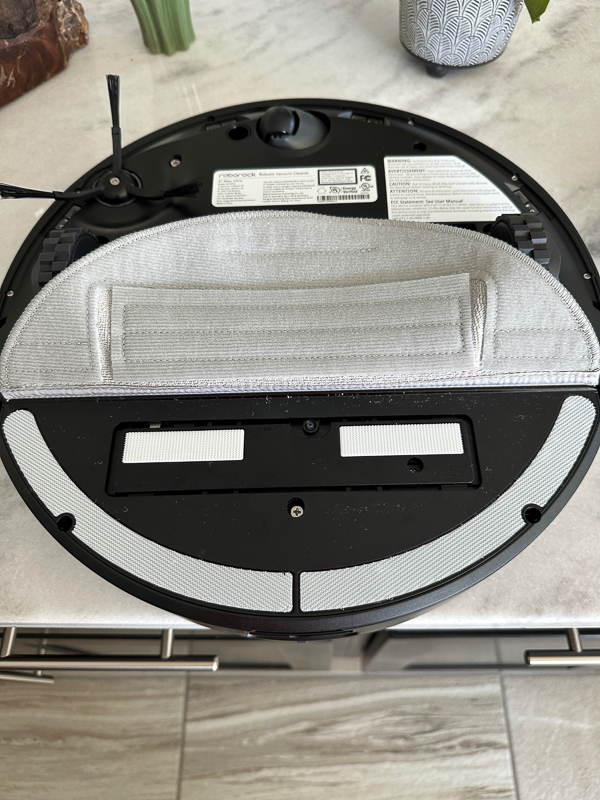
This next picture shows the mop area with the Roborock S7 Max Ultra’s mop pad lifted up from the velcro. The pad is built with a bit of extra reinforcement in the middle.
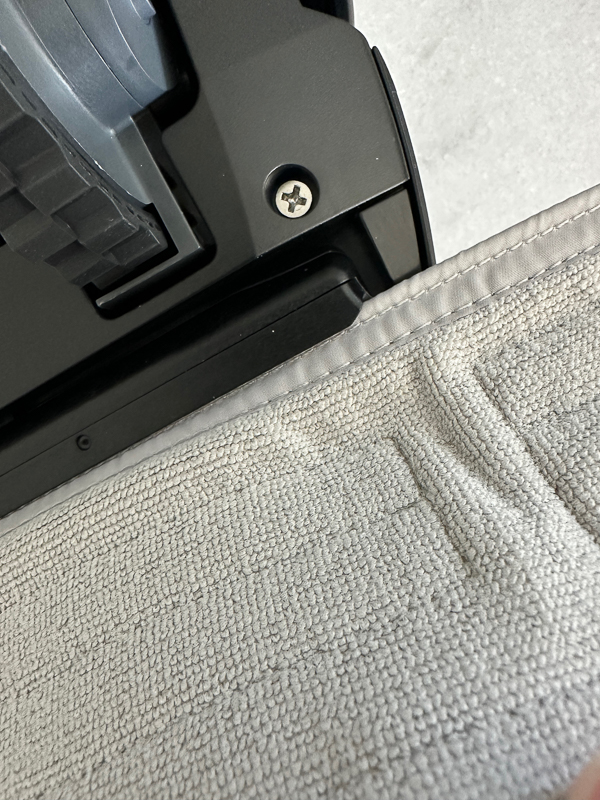
To change the mop pad, you lift it from the velcro and slide the hard edge out of the slot, as shown below.
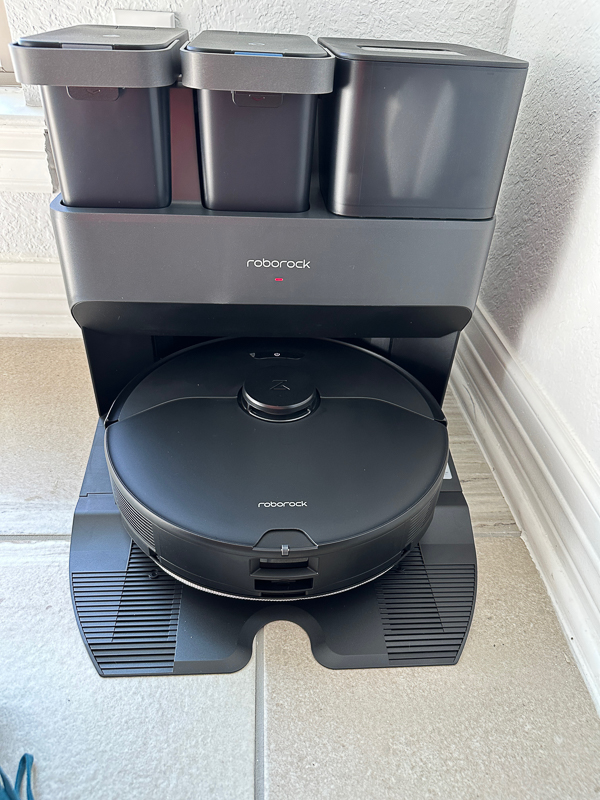
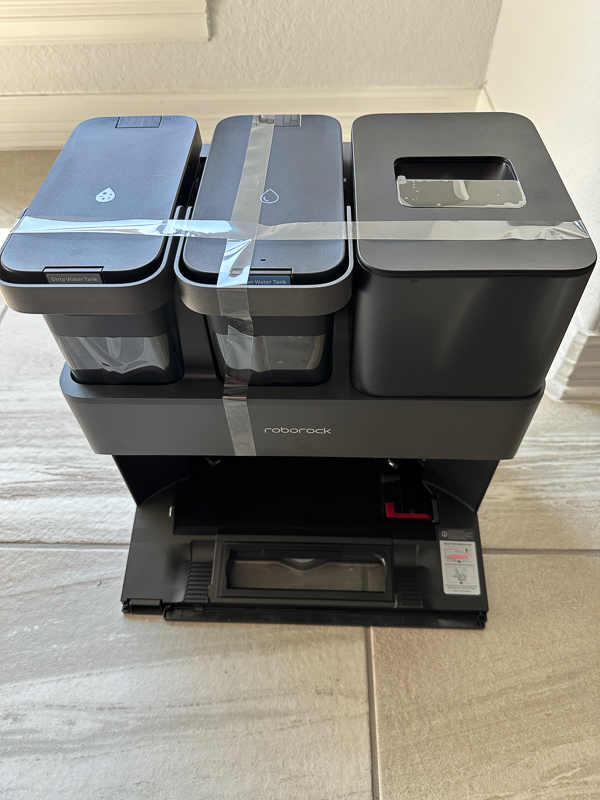
Now we get to check out the docking station. This is the docking station of my dreams. It came all taped up like the picture below because each canister can be removed for cleaning/filling. From left to right, you will find the dirty water tank, the clean water tank, and the dust bin area. What is missing is the front piece that goes on the bottom of the docking station to make it a ramp for the mop to go up.
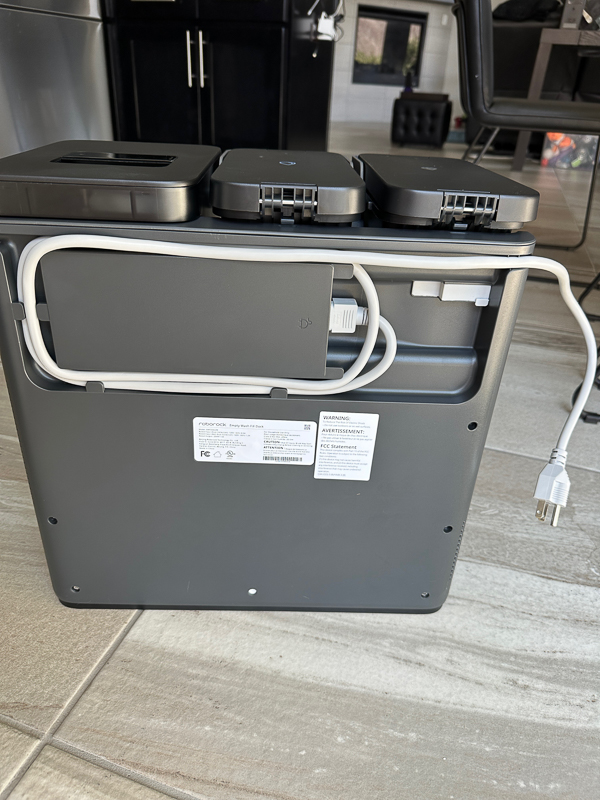
The back of the Roborock S7 Max Ultra’s docking station has a nice holder for the cord which I used.
The next couple of pictures shows the dirty water tank. Inside the tank, there is a float at the top that, when the water level reaches it, will cause the vacuum to send you a notification through the app.
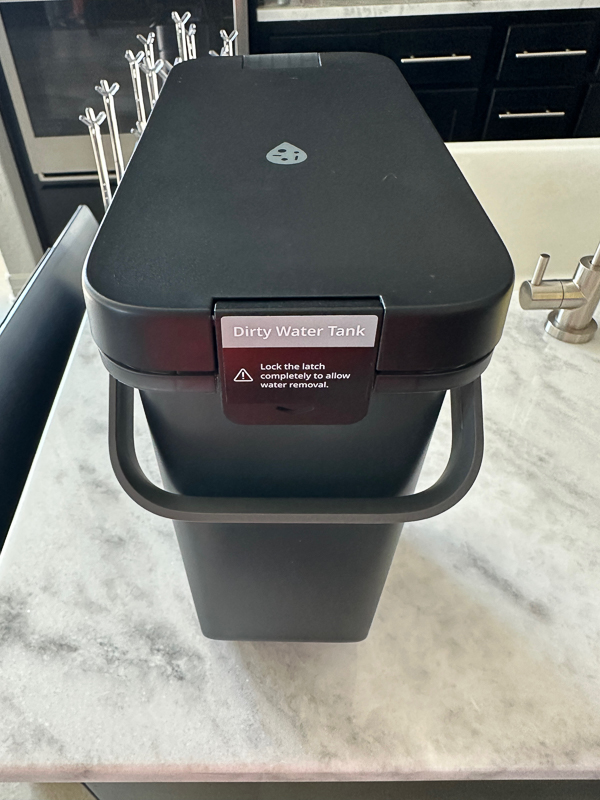
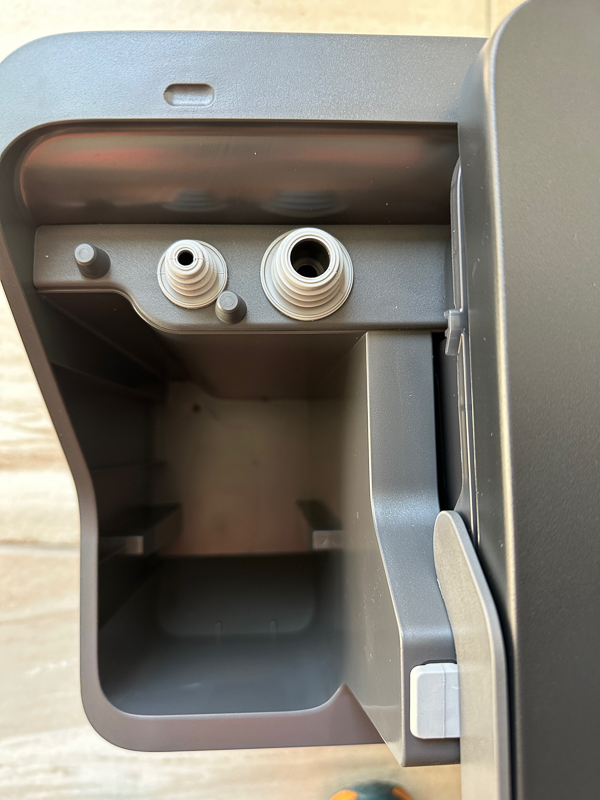
The dirty water tank has multiple ports under the lid that match the same ports on the docking station. There is no way to install the dirty water tank where the clean water tank should sit or vice versa.
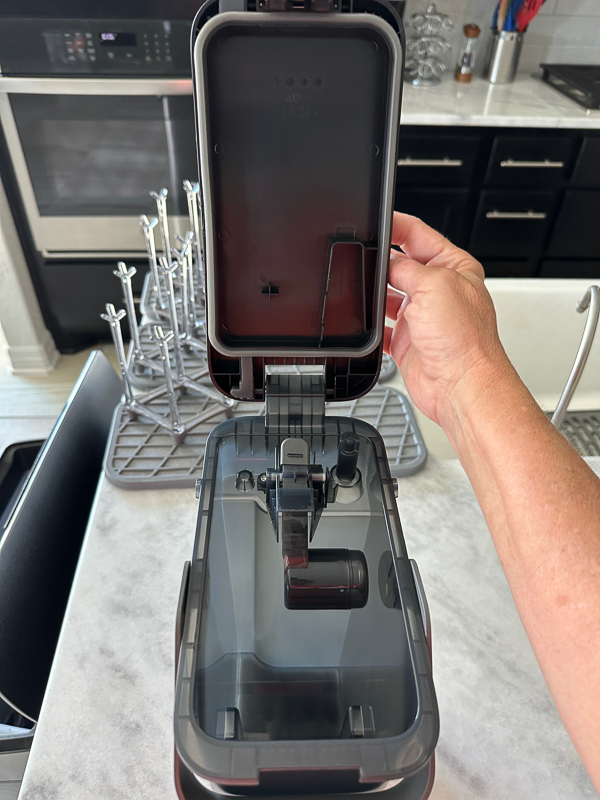
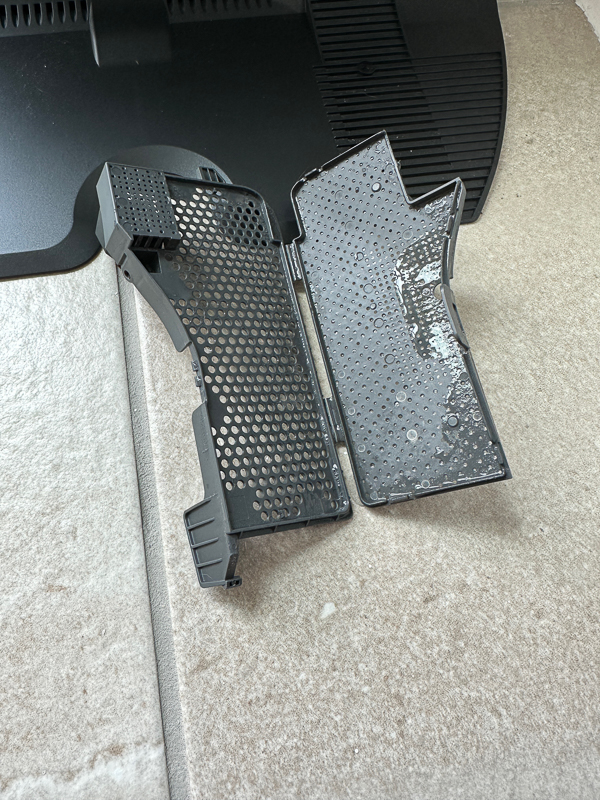
This next picture shows the inside of the clean water tank. It has a tube that runs all the way to the bottom to allow clean water to be sucked into the vacuum tank.
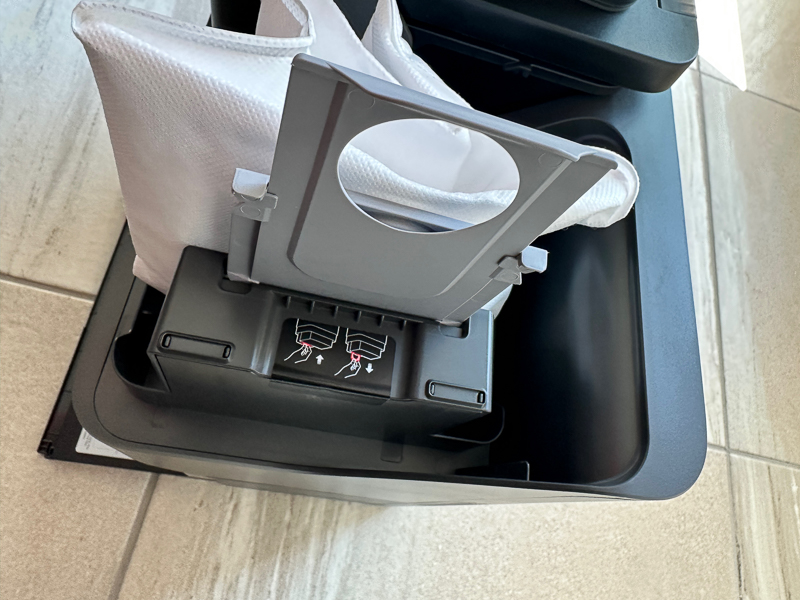
The third bin is the dust bin. Its cover has a rubber gasket that runs around the bottom edge. This lets a good seal form so the docking station can suck the dirt out of the vacuum and into the disposable bag. I pulled up the bag to show that when you remove it from the docking station, the dust bag gets sealed so that no dust gets out.
I took a picture of the bottom of the cover to see the rubber gasket.
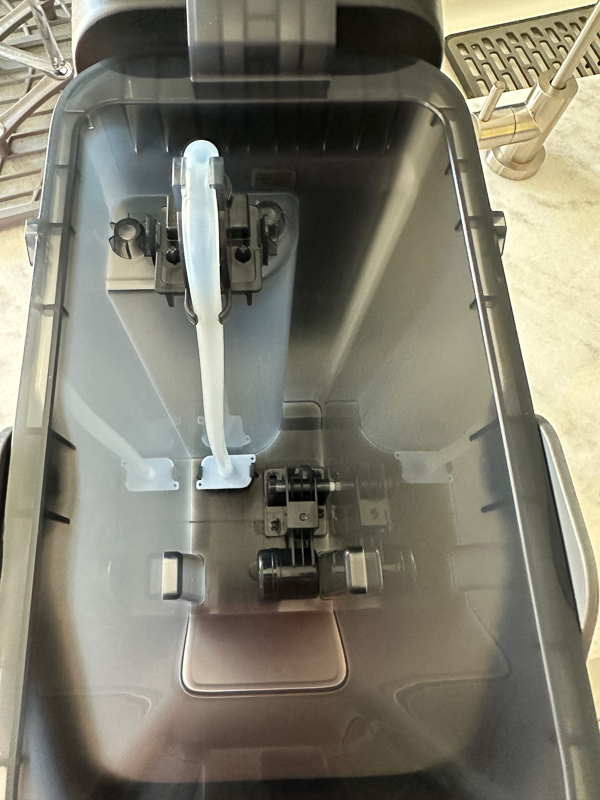
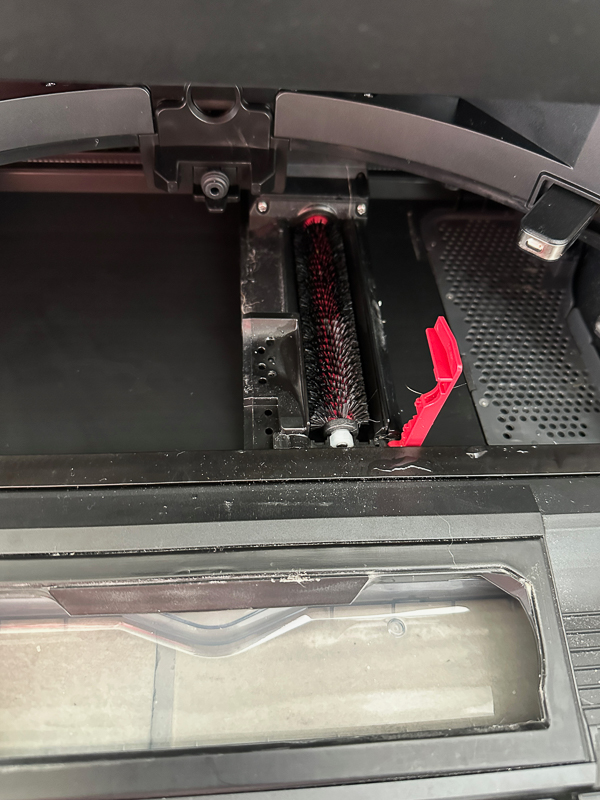
You will find the mop cleaning section at the docking station’s base. There is a high-speed brush that is locked into place by the red lever. You lift that, and you can remove the brush to clean it out.
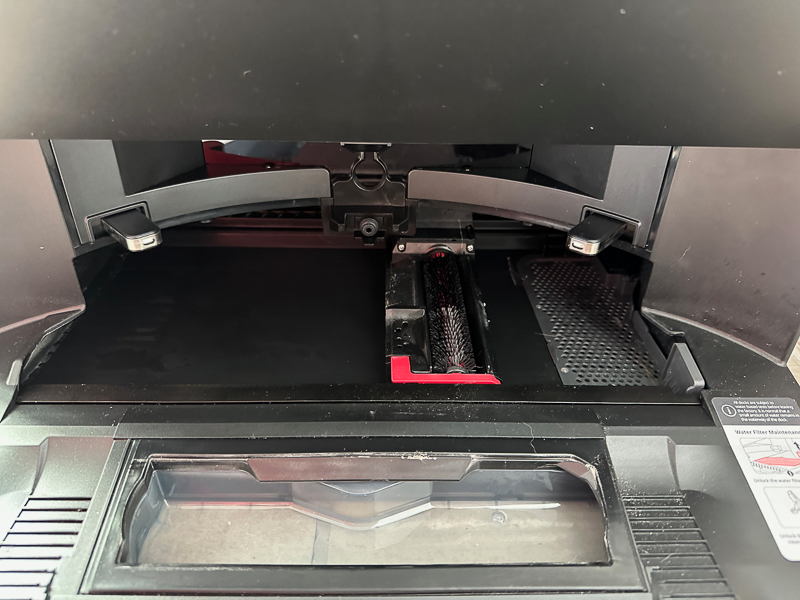

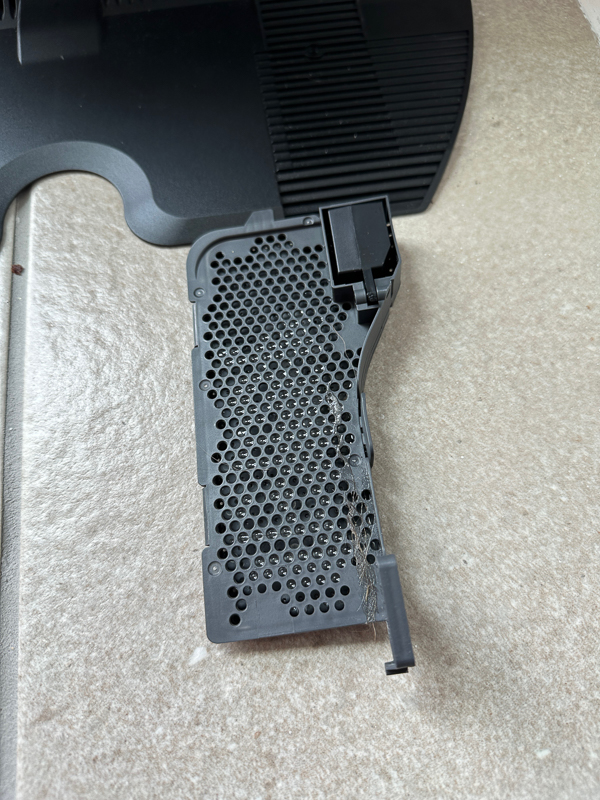
To the right of the high-speed brush is the water filter area for the docking station. As dirty water is washed from the mop, it moves to the right side of the docking station to be sucked up into the dirty water tank. The filter is plastic and has offset holes that it uses to capture larger particles and hair. At the end of the week when I clean it, I will find a small clump of dog hair neatly pushed to one side of the filter. You can open it up and run under hot water to clean it out. It goes back into the Roborock S7 Max Ultra’s docking station with a click. If you don’t put it back in properly, the app will let you know when the robot tries to run the next time.
Setup
The setup of the Roborock S7 Max Ultra’s docking station was pretty easy. I removed all of the shipping tape. I attached the ramp to the bottom section of the dock and stored a large part of the electric cord in the wrap at the back of the unit. I plugged it in and filled the clean water tank with water. There was already a dust bag installed in the unit. I then placed the robot into the docking station and moved it a bit until I heard the docking station say, ‘charging.’ As it charges, the docking station has an LED that breathes white below the Roborock logo. When it is completely charged, the light goes out.
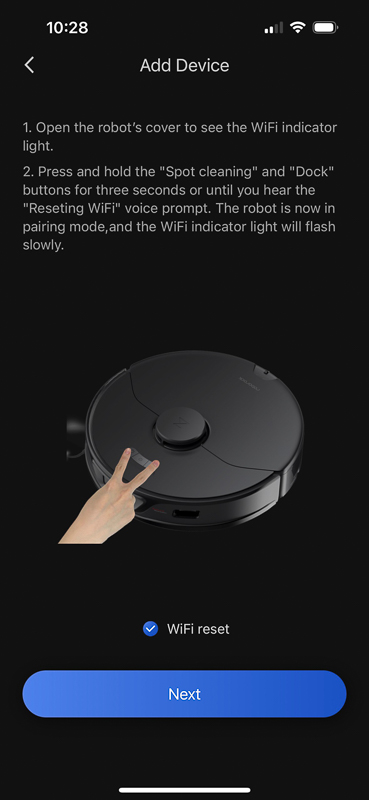
The next step was to set up the app. I am happy to report no account was required to set up the Roborock App. From the app’s home page, I clicked the plus sign and was presented with the following screen. I followed the instructions, and the vacuum was quickly added.

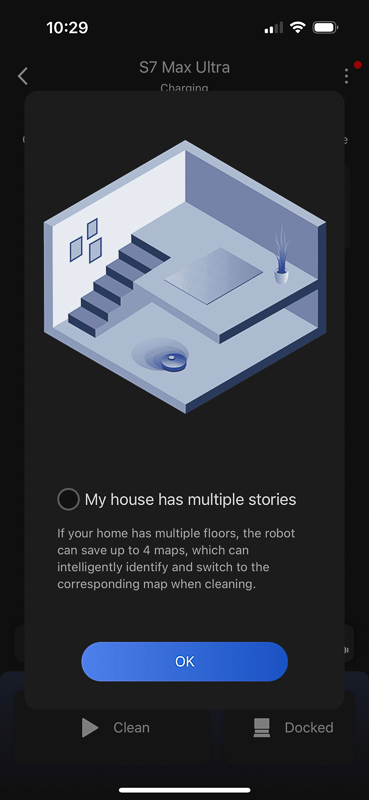
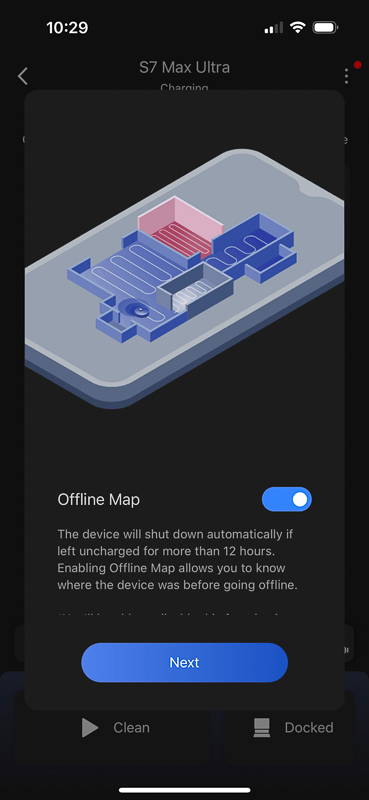
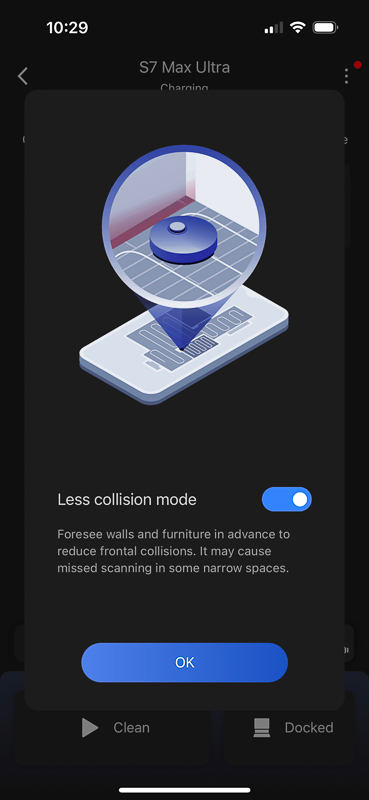
The next few screens took me through a few options. The first option is map saving. You definitely want to turn this on if you ever want to tell the robot to clean specific rooms, mop only, vacuum only, or do both. You also can create schedules with the map. The next option asks if you have multiple floors in your house. The vacuum can save a map for each floor. You will have to carry the robot up and down the stairs. My house only has a single floor. The next option is for offline maps. If the robot gets stuck somewhere while you are away for more than 12 hours, the robot will shut down. The offline map option lets you see where the robot is located when you get back home. This is a huge timesaver. I have a door to a closet that tends to close way too easily, and the robot got stuck in the closet. I did not notice the notification, and it was well over 12 hours when I realized the robot was not back in the docking station. Being able to see where it was last located quickly was awesome. The last option is the less collision mode. I turned this on and have yet to have the vacuum bump into anything. If you have tight spaces, you may want to leave this option off and see how it works for you.

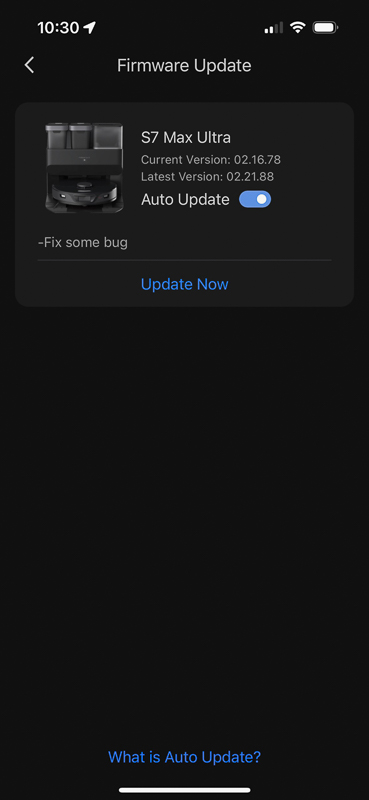
I did have a firmware update that the app picked up right away. Reading forums, Roborock appears to be updating its app at least several times a year. I think that is great as each update seemed to result in better performance.
Performance
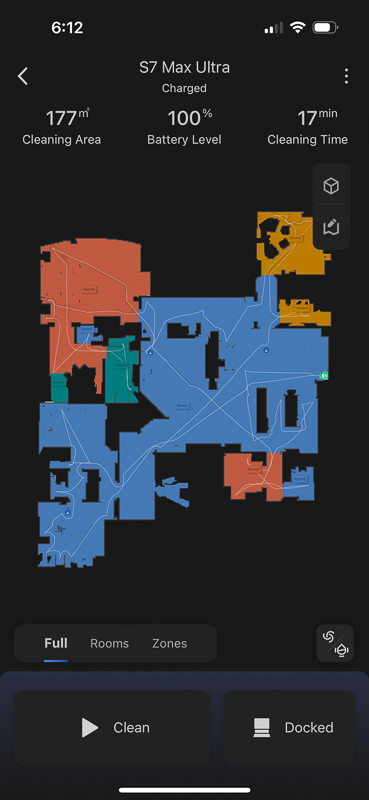
Once I set up the app, it asked if I wanted to do a quick map of my house. I have a pretty large home of almost 2800 square feet. There is one room I will never have vacuumed because of a baby gate we have blocking the door. It is the one room our dog Peanut is not allowed to enter. It is that weird sideways V-shaped room in blue on the bottom middle of the map. The robot looked through the door and could scan part of it but could not go in. During its quick scan, the robot does not actually vacuum. You can see the path it took, and it was very accurate. The black spaces in the middle of the rooms are larger furniture or islands in the kitchen.
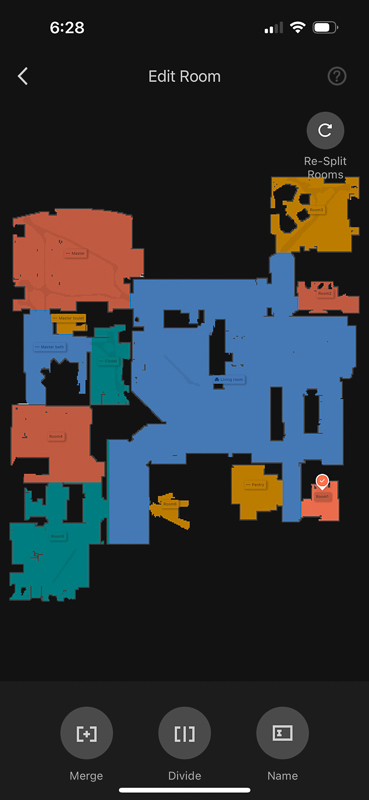
After the initial mapping was complete, I could edit the map and split out and label the rooms.
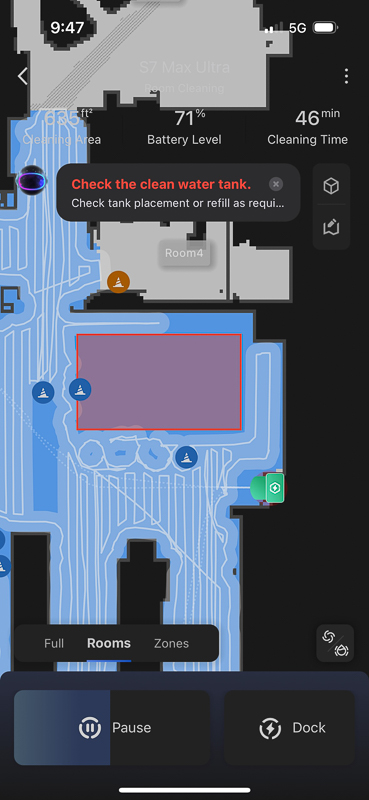
If you forget to fill the water tank, you will be reminded to check the placement or fill it up. It also gives you a notification if the dirty water tank is full. The nice thing is that the robot will continue to vacuum but will no longer mop any areas.
This is the final map of my home. I have marked off several no-go zones in red.
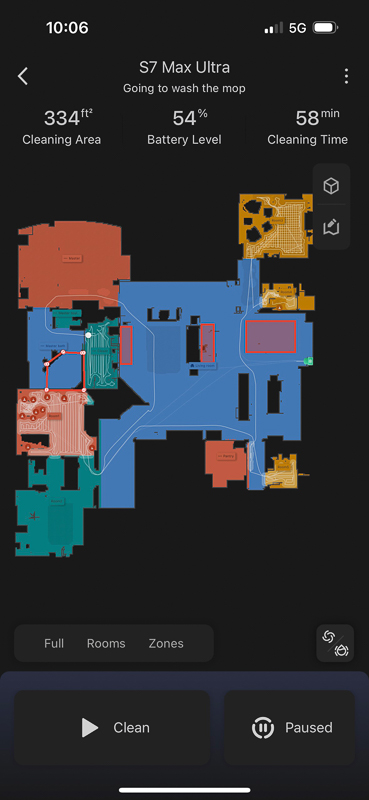
The Roborock S7 Max Ultra has done a great job of mapping and cleaning my home. I have a room I use as my gym with black floor mats. My other robot vacuums always thought the black mat was a ledge and would not go over it. The S7 Max Ultra has no issues with it and cleans my entire gym floor. I recommend you be there the first time the robot cleans your home. My dining room table and chairs are in the large no-go zone close to the middle right. The chair legs have metal rods that cross the floor and can be climbed by the robot, but I feel it really abuses it. I felt better telling it to skip the area. To find the exact location on the map of the table and chairs, I had to watch where the robot went and adjust my no-go zone accordingly. Also, being there for the first run lets you know about obstacles you were unaware of, like cords.
The Roborock S7 Max Ultra mop head actually scrubs your floors. You can change the intensity level for each cleaning session if you have more delicate floors. I have it vacuum and mop rooms with tile, rugs, and carpet. The carpet sensor knows exactly when it has reached the carpet and will lift the mop head so that the wet mop head is not rubbing over your rug or carpet. I got on my knees right after the robot passed from a tiled room into a carpeted room and could not feel any water on the carpet at all. The robot will return to the docking station at a set time period, or it can learn how dirty your floors are and return when it feels it needs to and clean the mop. The robot backs into the docking station, and the station shoots clean water into the base and uses the brush to scrub back and forth across the mop. So now I no longer have a robot running a dirty mop pad over large parts of my home. When the cleaning session is complete, the docking station turns on a warm air dryer to dry the mop head. When I get home from work, the docking station and mop head are completely dry. No more moldy mop heads!
I have it cleaning one set of rooms every Monday and Friday and a second set on Tuesday and Thursday. I make sure each evening after the cleaning is done that I check and empty the dirty water tank, fill the clean tank and make sure the dust bin is empty on the robot. The robot’s dustbin may get full or not fully empty the first time you use it. The robot learns and will adjust how often it empties the dust bin. The dirty water tank is very dirty, and I will rinse it out in addition to emptying it. I will swap out the mop head weekly and put the old one in the washing machine. I will also clean out the filter in the docking station and give the mopping cleaning area a good wipe-down. I will also check the docking station dust bag and blow out the air filter from the robot with my compressor. The app lets you know when it is time to replace the filter, main brush, side brush, and high-speed cleaning mop brush. I manually wipe down the edge sensors and wipe off the robot. In the app, you want to reset that you have cleaned the water filter and sensors, or it will remind you when to clean them. I find that cleaning them weekly keeps the robot working perfectly.
What I like
- Cleans the mop during and after room cleaning.
- The mop scrubs and will lift out of the way when going over carpet/rugs.
- Dries the mop
- It has clean and dirty water tanks.
- The app reminds you when it is time to replace used parts and clean the robot and docking station.
- The best mapping of my home to date!
- Recognizes furniture, carpet, rugs, edges, and obstacles.
- Great scheduling options.
- Easy editing of the map.
What I’d change
- It would be cool if it could directly connect to a water source and drain.
- Pretty darn expensive.
Final thoughts
The Roborock S7 Max Ultra is my new best friend! This is the best robot vacuum and docking station I have ever worked with. It has excellent mapping features, a great app, and pretty much takes care of itself during the week. I only have to empty and refill water bins. A big part of owning a vacuum with a docking station is keeping up with routine maintenance. If you don’t clean things on a regular basis, chances are, the robot will fail when it can’t sense something due to blocked sensors or dirty filters and brushes. I use the Roborock as my main floor-cleaning device. I will break out the manual vacuum for the one room that has the baby gate or spot clean an area quickly (yes, the Roborock can spot clean, but I find it quicker to do it myself). If you have the money and want the best, I highly recommend the Roborock S7 Max Ultra.
Price: $1299.99
Where to buy: Roborock and Amazon
Source: The sample of this product was provided by Roborock.

HP Essential Laptop Computer • 2026 Edition • AMD High Performance Processor • 128GB SSD + 1TB Cloud Storage • Thin & Portable • Fast Response • Windows11 with Microsoft 365
(as of July 2, 2026 13:41 GMT -05:00 - More infoProduct prices and availability are accurate as of the date/time indicated and are subject to change. Any price and availability information displayed on [relevant Amazon Site(s), as applicable] at the time of purchase will apply to the purchase of this product.)
Gadgeteer Comment Policy - Please read before commenting
I have one but have not found a way to manually remove, empty, and clean out the robot’s water tank. Can you help with that?
I have one but have not found a way to manually remove, empty, and clean out the robot’s water tank. Can you help with that?
I have never felt the need to clean the water tank on the robot. I clean the base station and clean out the dirty water tank. Nothing in the manual says you need to, or shows you how to clean the internal robot water tank.
Can you put in cleaner in the water tank?
Yes, they sell a cleaner that you can put in the water tank. You put a super small amount in there.