REVIEW – E-Bikes are now firmly established as a central part of urban transport. For instance, nearly every delivery bike in NYC is an e-bike. I wanted to explore being part of the newest segment of urban commuting and I have an ENGWE P26 electric bicycle to review. Read on to see what I think!
What is it?
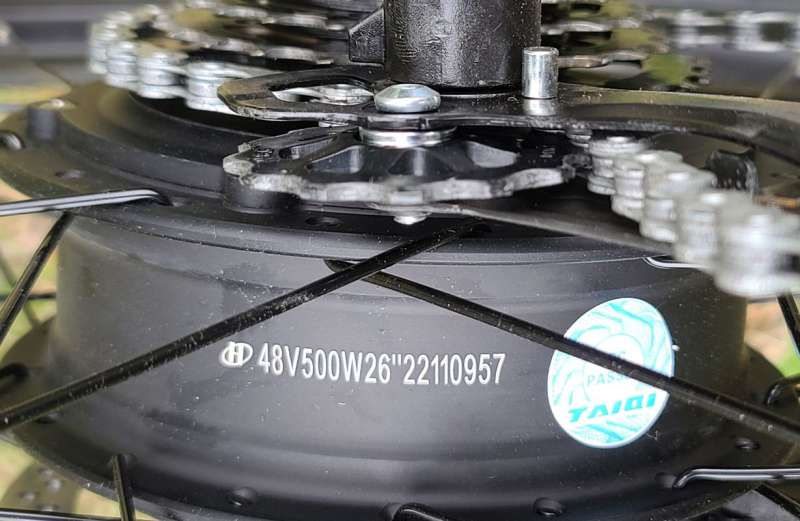
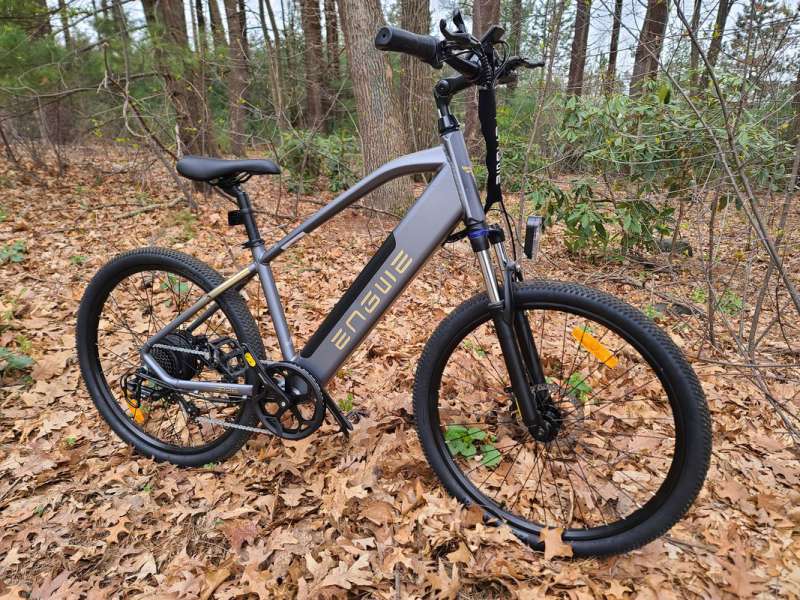
The ENGWE P26 electric bicycle is a full-size, fully welded frame bike with a built-in electric motor, battery, and throttle. The drive train is 7-gear and is assisted by a 500 Watt motor that has a peak output of 800 Watts. The motor is powered by a 48V 13Ah lithium-ion battery that is chargeable while attached but also removable for charging, swapping, or upgrading. The drive powers 26″ diameter wheels that are 1.95″ wide. The wheels are outfitted with cable-pull disc breaks. The wheels are attached to a solid rear fork and a shock-absorbing front fork. The front fork turns by riser handlebars with a bracket-mounted display, bracket-mounted thumb controller, and handlebar throttle.
What’s in the box?
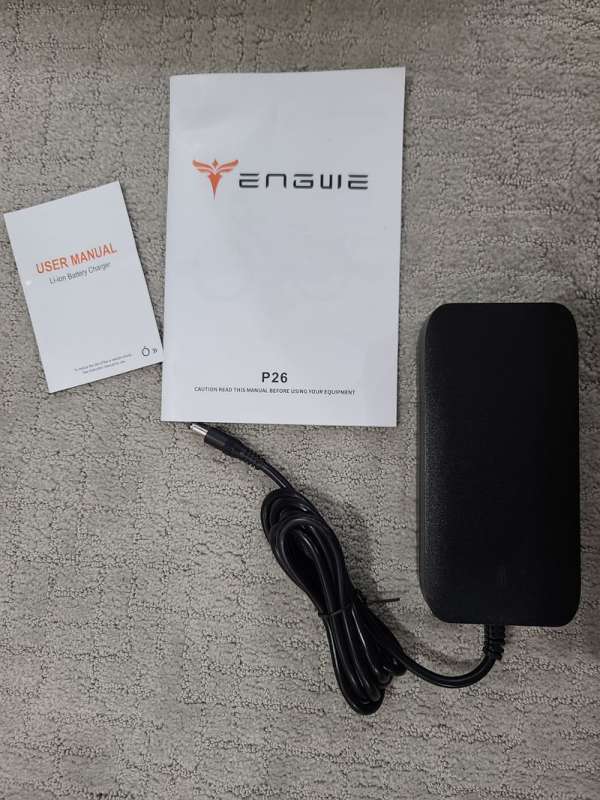
- Engwe P26 bicycle
- toolbox
- user manual
- display manual
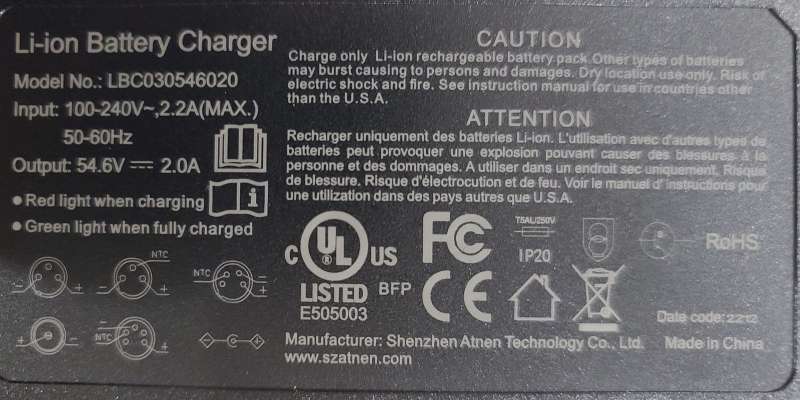
- charger
Hardware specs
- Material:6061 Lite Aluminum Alloy
- Size:26 x 1.95 inches
- Motor:800W(PEAK) high-speed brushless motor
- Torch: 45 N.m
- Throttle: Twist Throttle
- Battery: 48V 13Ah Lithium-Ion Battery
- Speed: 0-28MPH
- Mileage on Single Charge: 50+Miles
- Charging time: about 8H
- Maximum climbing degree: 7°
- Brake: Mechanical front & rear brake
- Transmission system: Shimano 7 Gears
- Bike weight: 53.35lbs (24.2KG)
- Maximum Load: 220lbs (100KG)
- Package size: 57.09in*9.84in*32.28in (145*25*82CM)
- Size (L*H*W): 24.8in*6.81in*44.09in (63*17.3*112CM)
- Suitable for: 5.08 feet – 6.89 feet (155-210CM)
Design and features
Unboxing
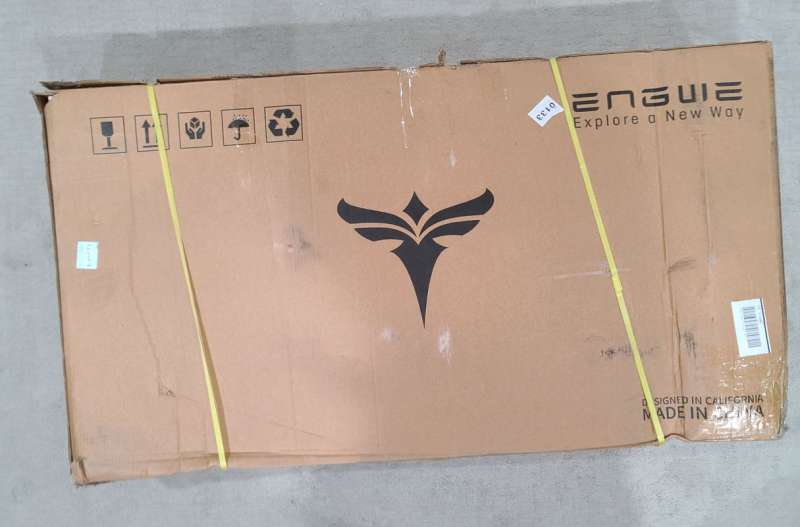
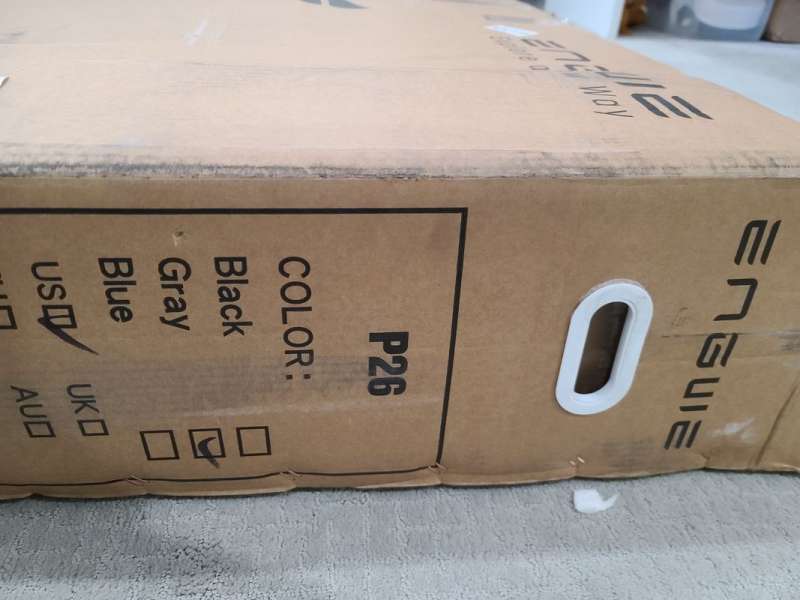
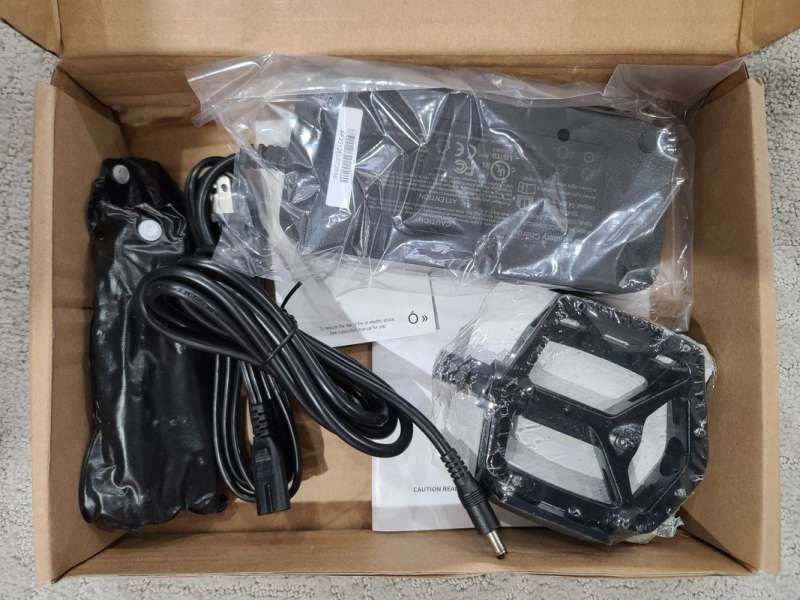
As you can see from the pictures above the bike comes in a substantial box. The box is supported by some straps which make it easier to move around and there are reinforced hand holds on each side too.
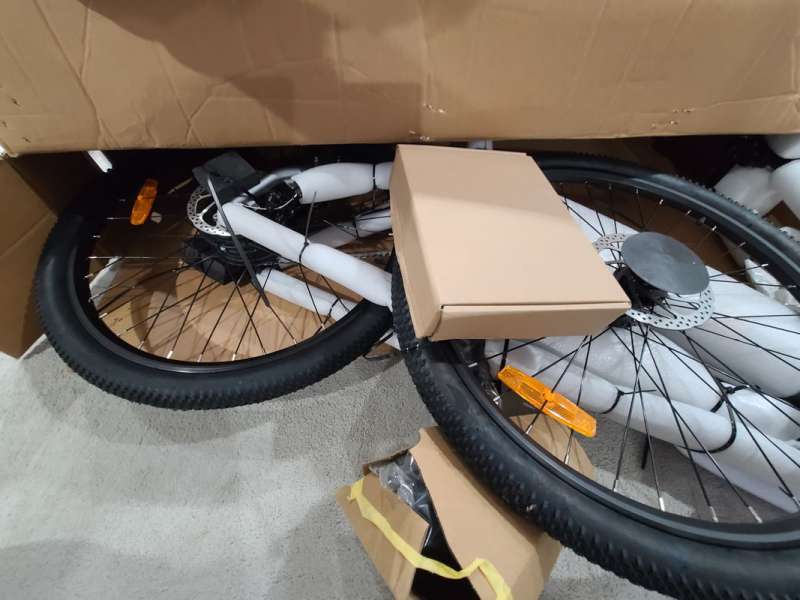
Most of the bike was protected by styrofoam sheets tie wrapped around the structure and more resilient styrofoam on the axle parts.
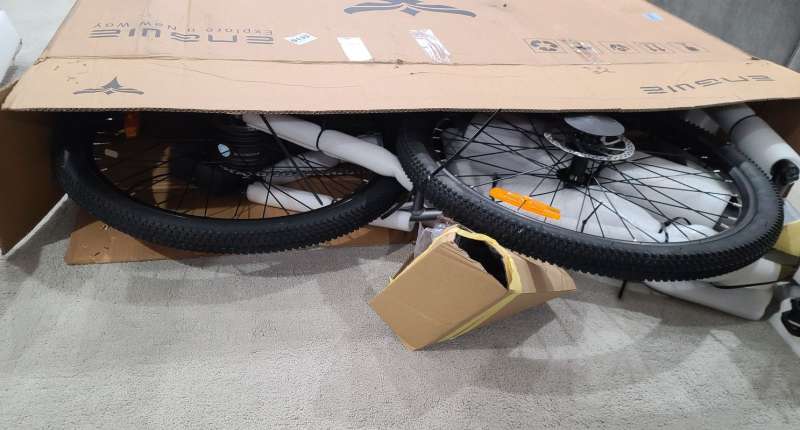
The front fork was protected by an axle bolt through the center and a large foam block. The ends of the front wheel, which was shipped disconnected from the fork, were covered by plastic bolt covers. A smaller box inside contains the instructions, pedals, charger, and tools.
Setup
Setting up the bike without having to replace any components only takes about a half hour or so. The steps include:
- removing the protective foam from each of the components
- rotating the stem to the front
- removing the step faceplate and installing the handlebar
- installing the front light
- installing the front wheel
- installing the pedals
The bike comes with all of the tools required to perform these steps and you may consider keeping the tools with you as you are riding to make sure they are at hand if needed.
While the instructions don’t require this, it is important to tighten the quill stem in the front fork so that you don’t rotate the handlebars while riding, or worse, pull the stem from the front forks. The instruction for setup is included here and there is a video here.
I didn’t notice until after assembling the bike that the box was partially crushed during transport.
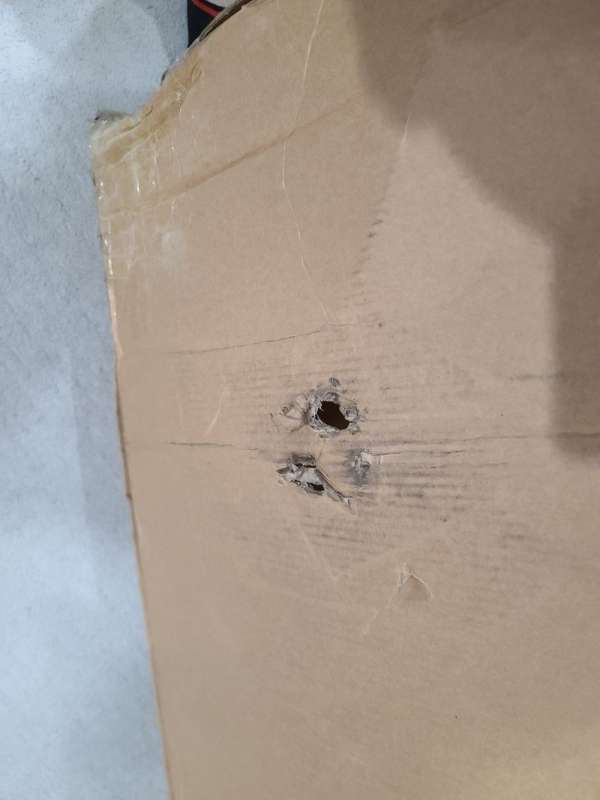
This resulted in a bent derailleur guard and derailleur hanger.

The derailleur hanger is a sacrificial aluminum part designed to yield when the derailer is pushed so that the frame is not damaged by the force applied to the derailleur.
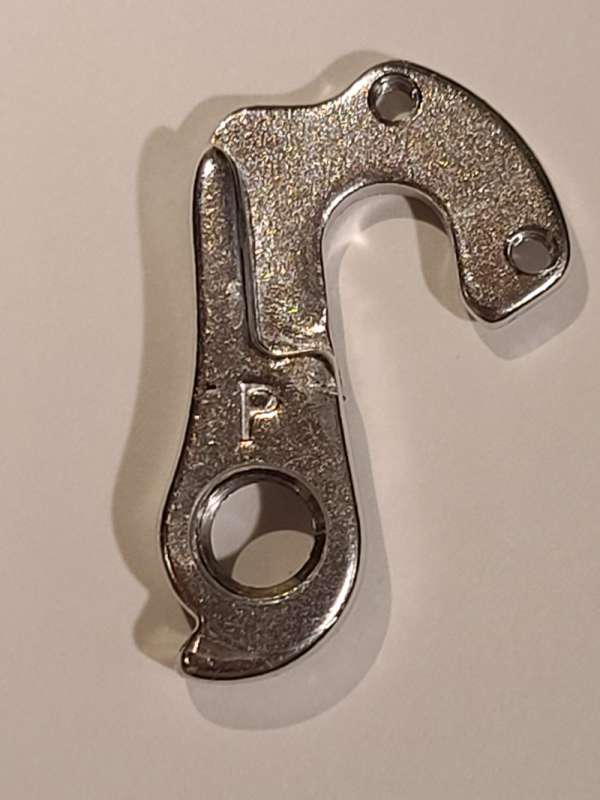
Replacing the derailleur hanger and the derailleur was not any more difficult than on any other 5- 7 speed bicycle, except that a socket could not be used to tighten and loosen the axel nuts as the motor power cord comes out through the center of the axel on the derailleur side.

The only other setup issue I noticed is that the bell was installed too close to the controls to access the far side button. Moving it over was easy.
Design
A fork-to-fork review of this bike:
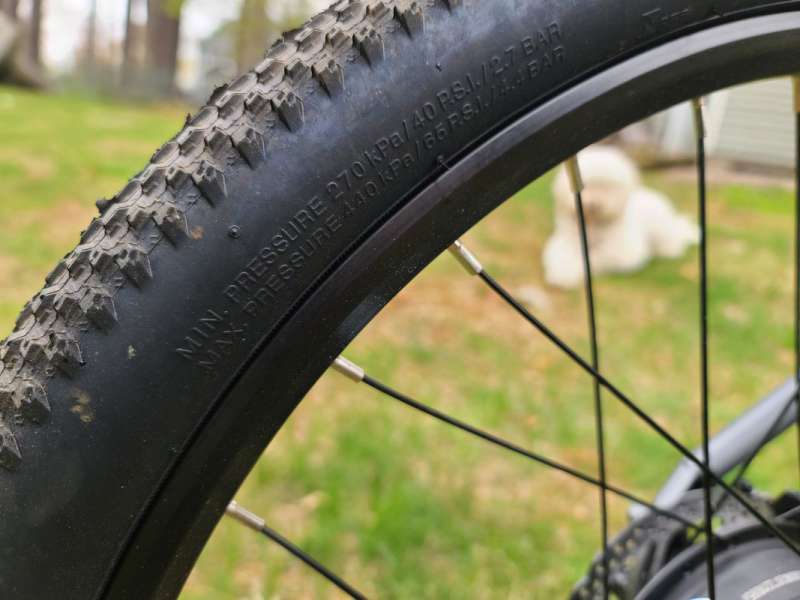
The wheels are 26″ by 1.95″.
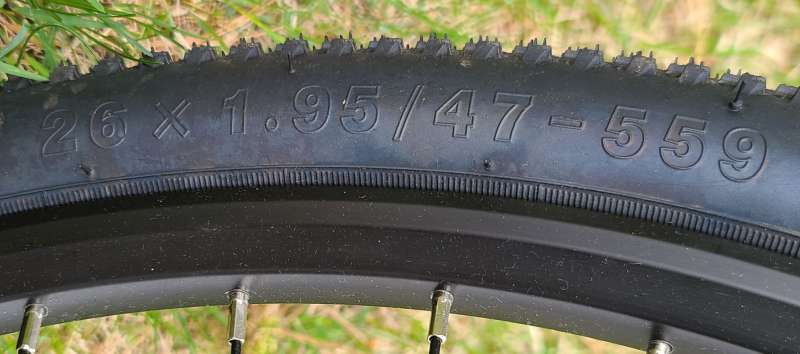
This is the perfect amount of tread in my mind to avoid being too thin on uneven asphalt and grooved pavement while at the same time not being so thick that pedaling is never above 3rd gear.
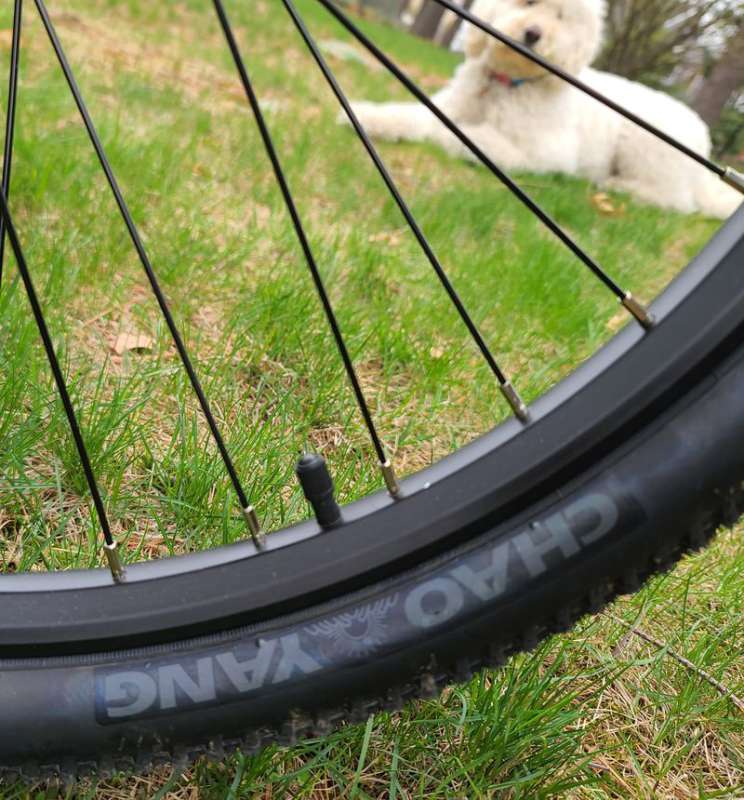
The tire tubes are fitted with a Schraeder valve so no adapter is required to fill them at a gas station.
The brakes are sturdy mechanical 160 mm disc breaks.

They are able to stop the bicycle quickly, even at full speed. In addition to the coaxial wire that actuates the mechanical breaks, the calipers are wired through to the inside of the bike frame with an electric sensor that automatically cuts power when brakes are applied. Hitting the brakes when the throttle is at max will still quickly stop the bike.
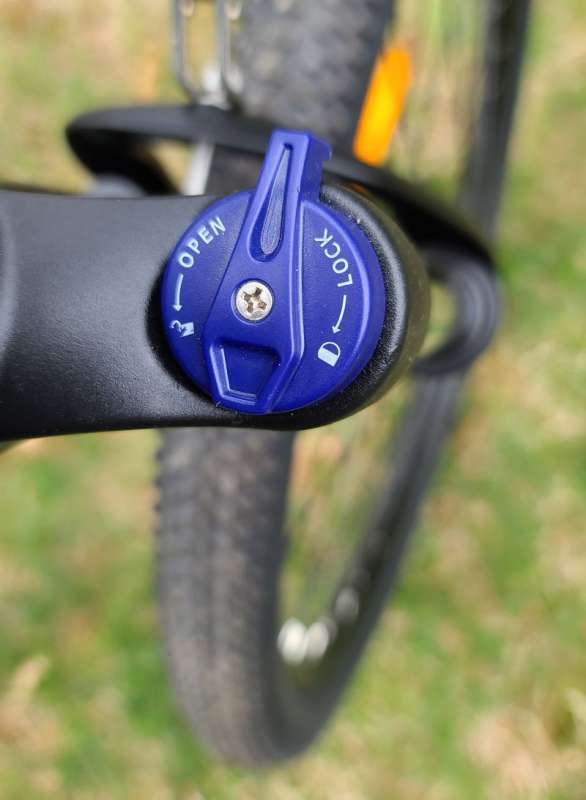
The front fork suspension is lockable to allow the rider to enjoy different handling conditions and to improve the efficiency of pedaling and of the motor.
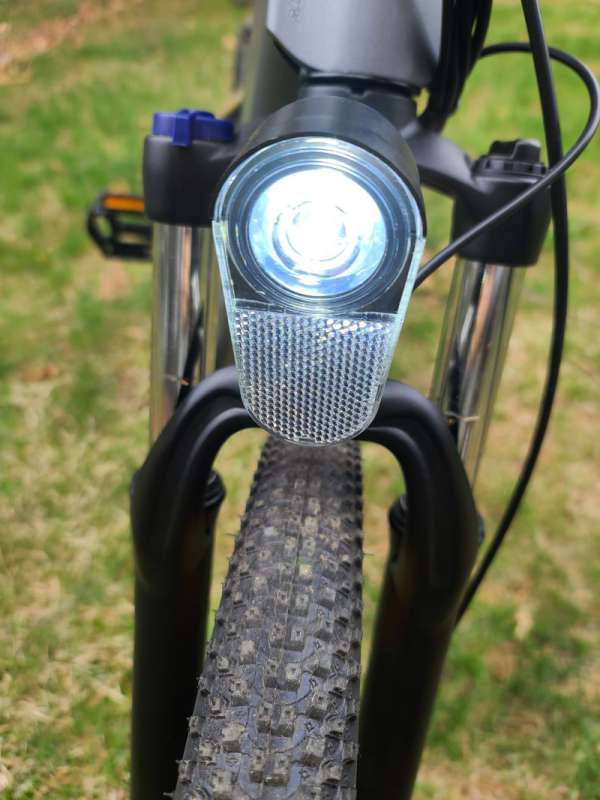
The front wheel is bolted securely to the front frame and does not include a quick-release system for carrier mounting. The LED powered headlight mounted on the front fork is very bright. It is only powered if the headlamp button is pressed.
The quill stem has an adjustable angle which is one of the reasons why this bike can be fit for anyone from 5.08 feet – 6.89 feet. The European version of this bike has fenders on both wheels and a rack on the rear wheel but the US version does not.

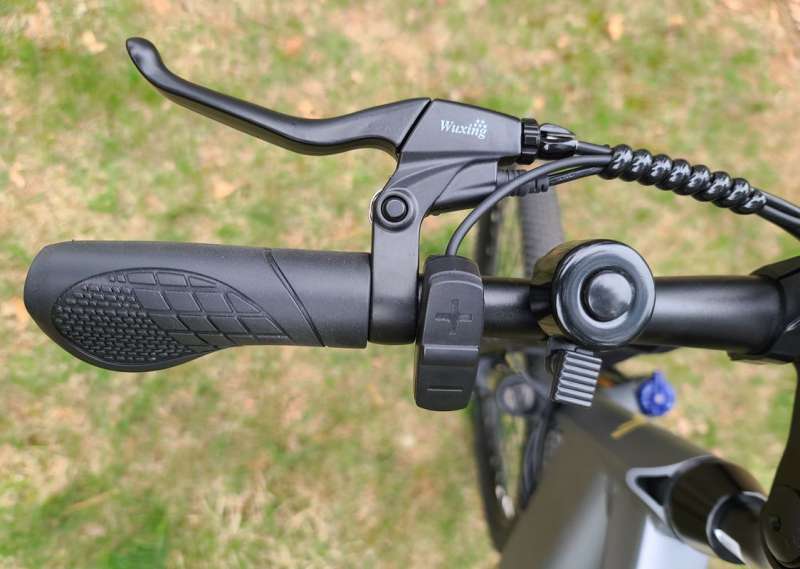
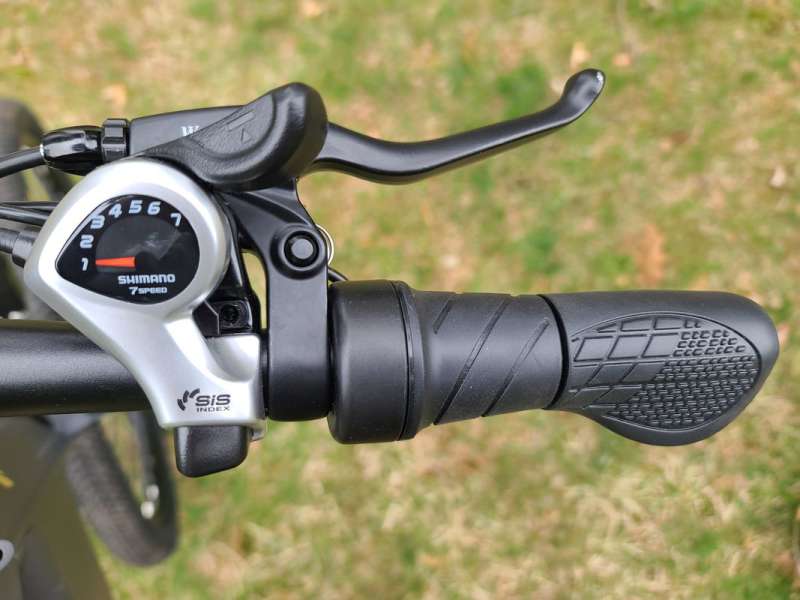
The handlebar has a right-handed throttle, a Shimano Tourney 7-speed gear system, and WUXING brake levers. They are each modular items that can be replaced or upgraded as required or desired. I think that the parts are fine enough, but enthusiasts may want to change the calipers and brakes out with hydraulic systems and more responsive shifter levers (or a left grip lever, if so desired). The grips that come with the bike are comfortable (not too hard, not too squishy).
The display is mounted in the center and has a reflective display finish. I think a matte anti-reflective display finish would be a better option.

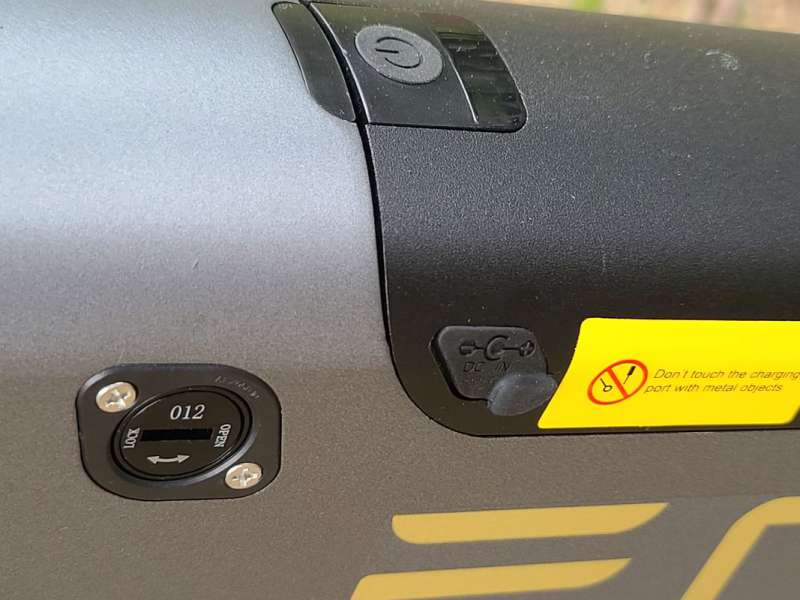
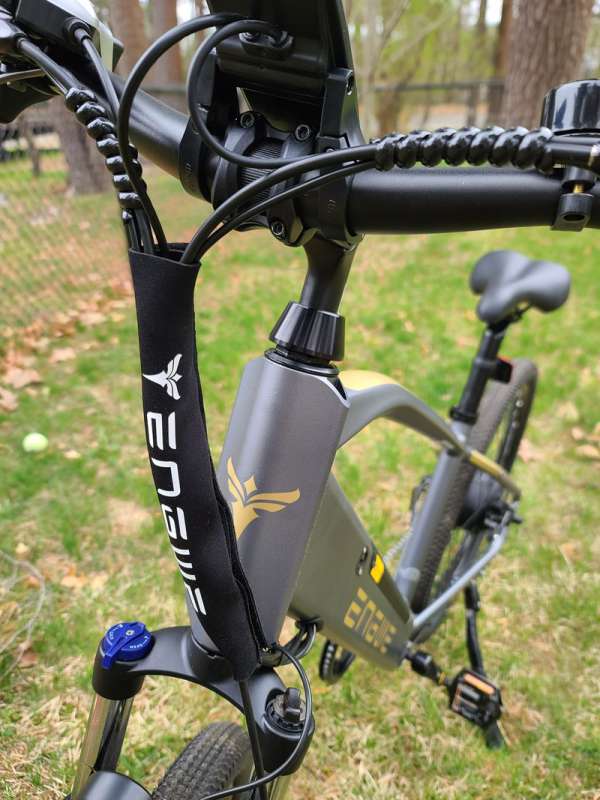
The bike frame is a unique design. The down tube is extra long and wide to accommodate the battery and electronics. The battery fits into the down tube and locks into place.
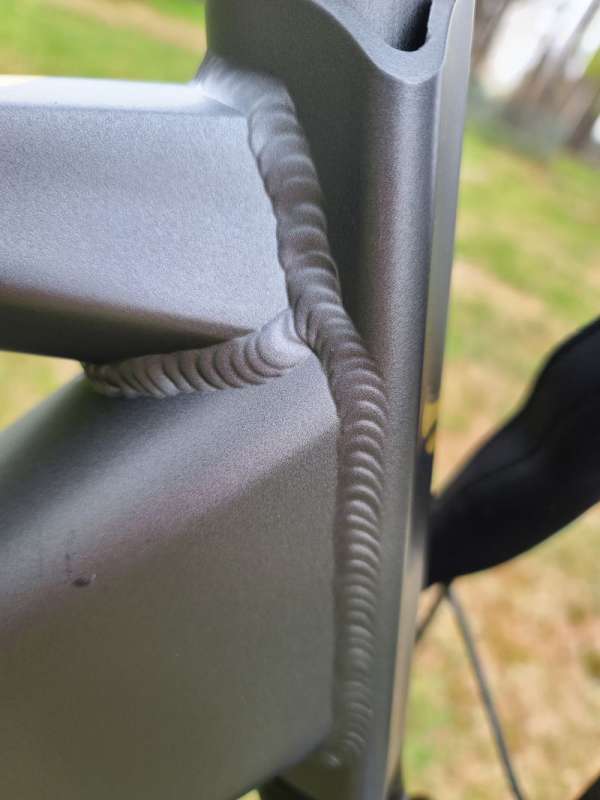
The top tube is bent to permit joining it to the head tube without making the seat tube extra tall. The welds are all neatly performed full penetration welds.
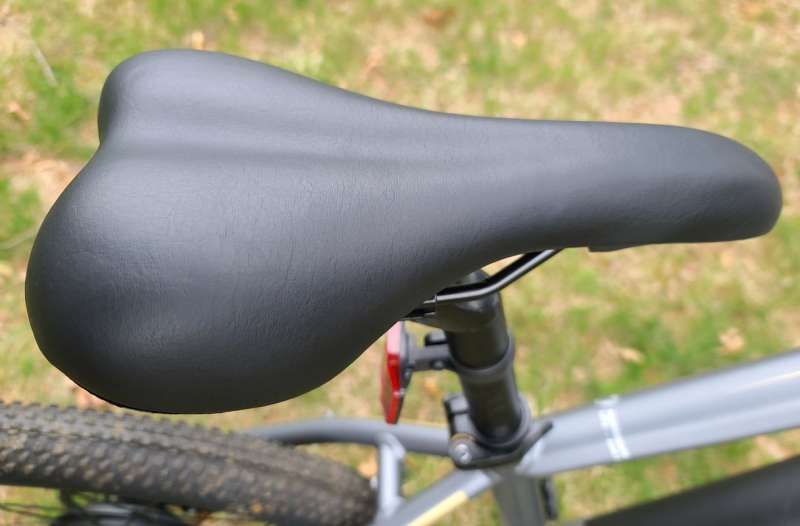
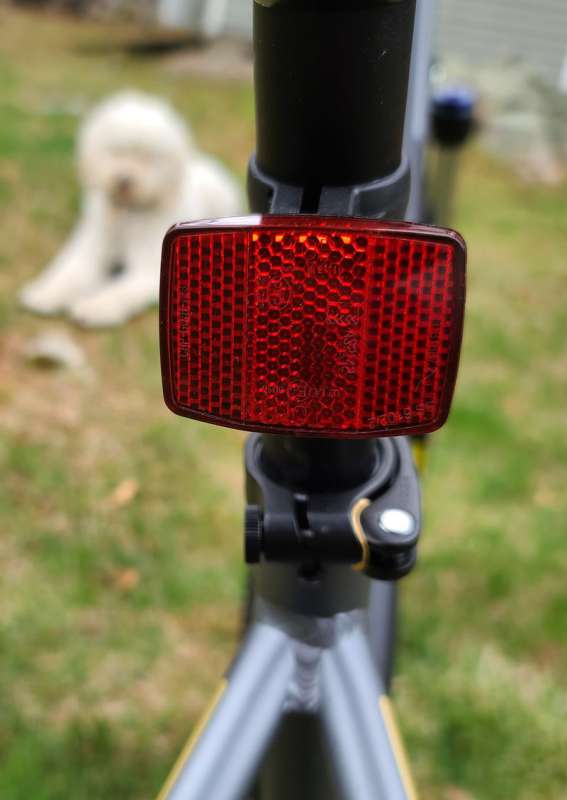
The seat post is adjustable with a quick-tightening cam bolt system. The seat is comfortably cushioned but depending on your riding schedule and terrain you may want to get a more cushioned seat. Again, because the components used are completely modular, changing the seat is an easy task. The seat post has a passive rear reflector. The European model has a brake lamp attached to the carrier and it is powered by the control system. It would be nice to add these to the system but it does not appear that the items are available from Engwe.
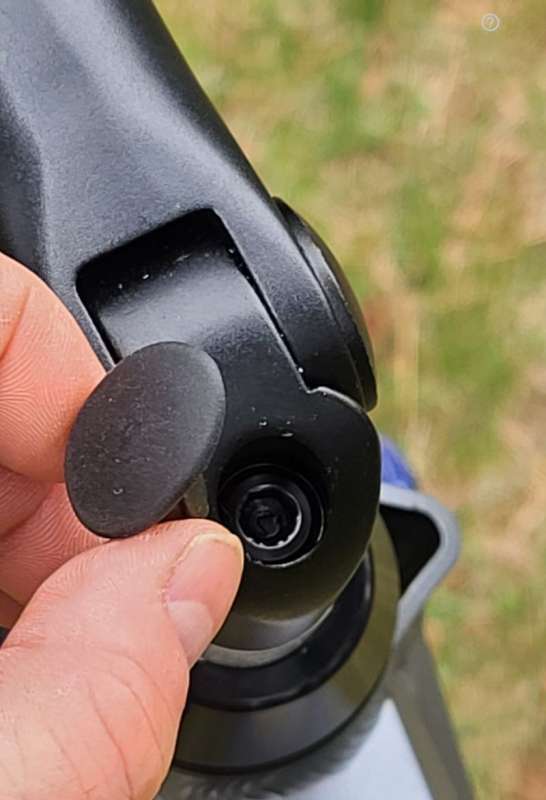
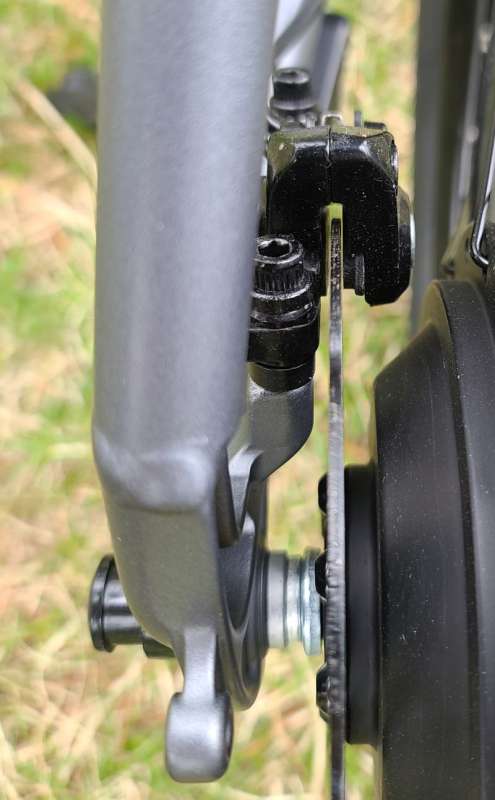
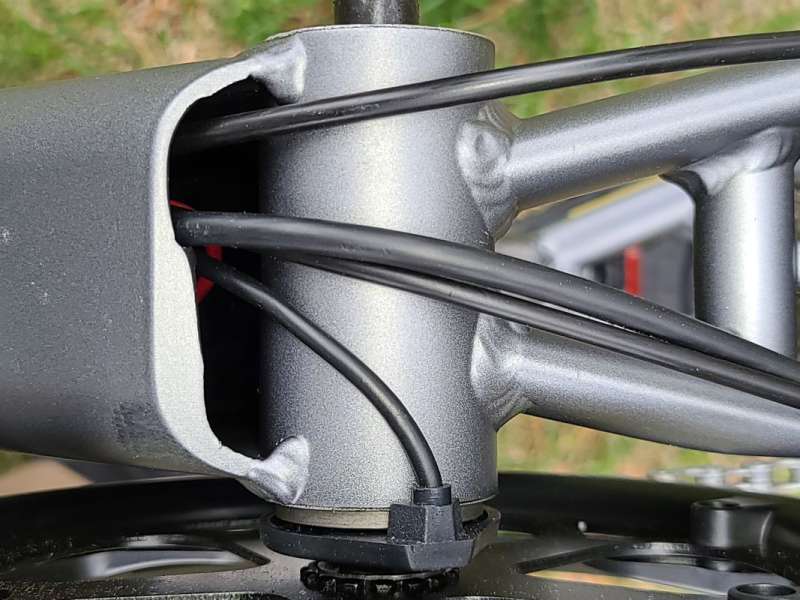
The crankshaft has a pedal sensor to measure torque so the motor assist is based on the throttle position pedaling speed and the rear wheel speed. This is located at the base of the picture below.
The single chainring is circular and has chain guards surrounding the chain to keep the rider’s pant legs clean. The cranks are screwed on and measured 6-5/8″. The petals are a platform design with shoe grips and reflectors. Again, thanks to a modular design, the petals may be swapped for a customized design, or pedals that have different features, such as toe cages or even clipless shoe designs.
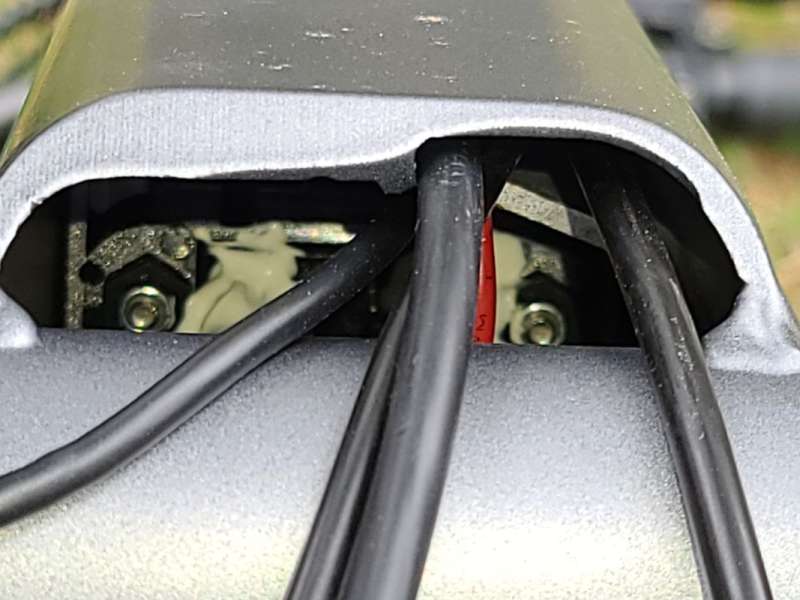
With all of the controls and instruments on the bike, there is quite a bit of wires. Engwe does a good job of keeping them organized. The handlebars feature a velcro closing fabric cable management bundle.
One thing that may be concerning is the water tightness of the frame at the crank. I would be happier if the wiring went through a proper watertight gland at the base of the frame. as it is the electrical connections are sealed with a plastic compound.
The rear fork is a rigid style and has a completely tubular welded design with mount holes for the carrier as well as the mounts used for the brakes and derailleur. It uses a tube-to-tube weld to allow precise alignment of the wheel mounts. The hub motor is mounted to the wheel spokes and is powered through the bolt extending through the derailleur mount side.
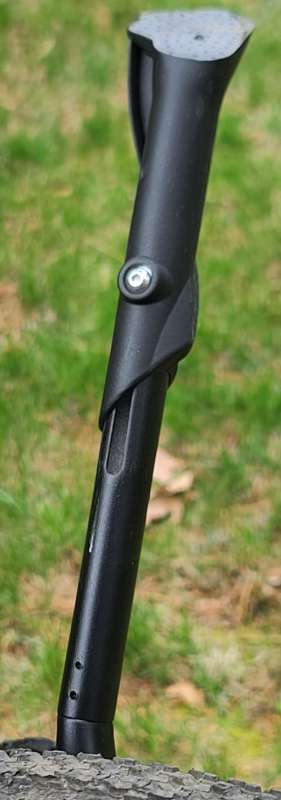
The bike comes with a kickstand on the chain stay. The kickstand length can be adjusted if the bike is stopped on an incline.
Operation
Besides the normal operation of the bike (balancing, pedaling, steering, braking, changing gears, etc.) The bike is controlled by the Tianjin Yolin YL80C.
The controller provides a variety of functions, including:
- Battery level indicator
- Motor power indicator
- Assist level adjustment and indication
- Speed indicator (including real-time speed, maximum speed and average speed)
- Distance indicator (including trip distance and ODO)
- Push assistance control and indication
- Headlight control and indication
- Error code indicator
- Custom parameter setting (e.g., wheel diameter, speed limit, battery level, assist level, power-on password, controller current limit, etc.)
There are five buttons on the operating unit of display YL80C, i.e., the on/off button, plus button, minus button, headlight button, and info button.
The controller will start to work by pressing and holding the power button. The controller will turn off after 10 minutes of not using the bike or by pressing and holding the power button while in a powered state.
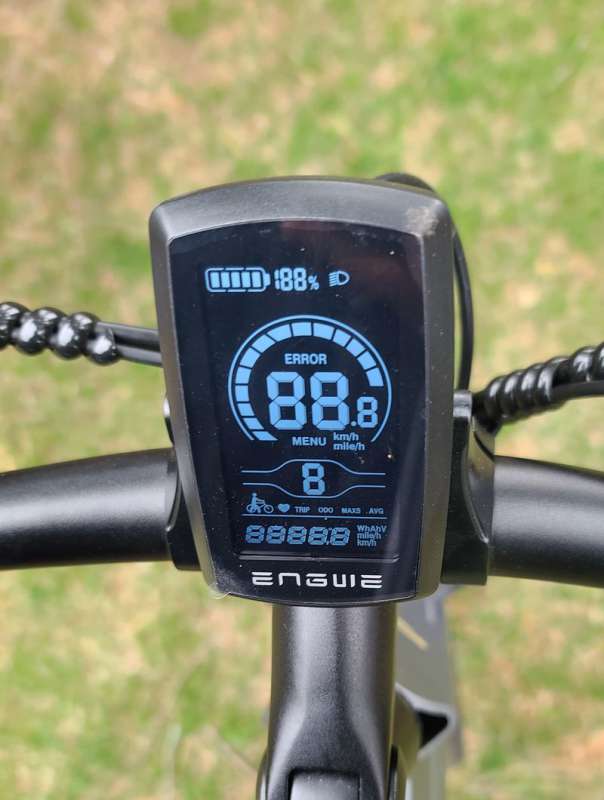
After the display is turned on, the display will show the real-time speed (km/h) and the trip distance (km) by default. The battery level indicator consists of five segments. When the battery is fully charged, all five segments are shown. In case of insufficient voltage, the outline of the battery indicator will flash, which means the battery has to be charged immediately. When operating the bike in normal operation the center of the display shows the speed and is surrounded by a bar graph that shows the percentage of full speed. Below the speed indicator, shown in between two curved graphics is the assist level indication. By pressing the info button, the information displayed will be switched between the trip distance (km), ODO(km), maximum speed (km/h), average speed (km/h), and riding power.
The electric push assistance mode is enabled by pressing and holding the minus button. Your e-bike will run at a constant speed of 6km/h and the display will show an icon of a person walking beside the bike. By releasing the minus button the bike will stop and return to the state it was in before push assistance was started.
By pressing the headlight button, the controller will turn on the headlights and the display backlight will turn dark. Pressing the headlight button in this mode will turn off the headlight and restore the brightness of the display,
Pressing the plus and minus buttons will change the amount of assistance that is provided for the bicycle.
There are a number of other settings available on the controller. The steps for general parameter setting are as follows:
- In the power-on state, when the display shows a speed of 0, Press and hold the plus and minus buttons at the same time for more than 2 seconds to enter the selection interface of general setting options.
- Press and hold the minus and info buttons at the same time for more than 2 seconds to enter the selection interface of general parameter setting options.
- Press the plus and minus buttons to switch the function, and press the info button to enter the parameter modification interface.
- Press the plus and minus buttons for parameter selection.
- Press the info button to save the parameter and enter the next selection interface of general parameter setting options.
- Press and hold the info button to save the parameter and exit the selection interface of general parameter setting options.
A description of what each settings screen means is included in the table below:
| Setting | Top Display | Bottom Display | option / valid input | Default |
| Trip Counter | tC | tC-n | not reset trip distance | tC-n |
| tC-y | reset trip distance | |||
| Backlight | bL | bL-1 | minimum luminance | bL-2 |
| bL-2 | standard luminance | |||
| bL-3 | maximum luminance | |||
| Units | Un | U-1 | Imperial units | U-2 |
| U-2 | metric units | |||
| Wheel Diameter | Ld | ## | 8 – 30 inches | 26 |
| 700C | 700 mm | |||
| Speed Limit | LS | ## | speed | 45 km/h |
| Voltage indication | VOl | 1-## | minimum voltage | 1-40 |
| 2-## | 2 segment voltage | 2-44.5 | ||
| 3-## | 3 segment voltage | 3-46.5 | ||
| 4-## | 4 segment voltage | 4-47.5 | ||
| 5-## | 5 segment voltage | 5-49 | ||
| Assistance Scale | SCA | 0-3 | levels 0-3 | 0-5 |
| 1-3 | levels 1-3 | |||
| 0-5 | levels 0-5 | |||
| 1-5 | levels 1-5 | |||
| 0-7 | levels 0-7 | |||
| 1-7 | levels 1-7 | |||
| 0-9 | levels 0-9 | |||
| 1-9 | levels 1-9 | |||
| Assistance Scale | SCA | n-## | for level n the percentage of assistance provided | 1-20 |
| 2-32 | ||||
| 3-45 | ||||
| 4-62 | ||||
| 5-99 | ||||
| Current Limit | Cur | ##.# | Current limit (A) | 18 |
| Assistance sensor | PAS | run-F | run forward direction | run-F |
| run-b | run backward direction | |||
| # | 2 = maximum sensitivity, 9 = minimum sensitivity | 2 | ||
| n-### | 5-9, 12, 24 magnetic disks per revolution | n-012 | ||
| Speed Sensor | SPS | sn-## | 1 to 5 magnets | 1 |
| Slow Start Parameter | SSP | 1-4 | 4 slowest – 1 quickest | 4 |
| Handlebar assist level | Hnd | HF-n | max speed not restricted by handlebar position | HF-n |
| HF-y | max speed limited to HL-## when the handlebar is turned | |||
| HL-## | max turned handelbar speed | |||
| System Setting | SYS | Dly-# | battery power delay 3s/6s/12s | 3 |
| PUS-y | button push assistance enabled | PUS-y | ||
| PUS-n | button push assistance disabled | |||
| Password state PW entry | P2 | #### | password (default is 1212) | |
| Password Enable | PSd | PSd-y | button push assistance enabled | PSd-n |
| PSd-n | button push assistance disabled | |||
| Password Entry | P1 | #### | password lockout | |
| Password change | P3 | #### | password entry | |
| default setting | dEF | dEF-y | restore default settings | dEF-n |
| Def-n | do not restore default settings |
Performance
The bike is an absolute joy to ride. In the unassisted mode, the shifting is responsive and the bike is easy to use on the road and also easy to use off the road. Crossing roots in the ground, branches, or uneven pavement on and off trails is a piece of cake. And just when you were tired of riding you can get an extra boost of power from the motor. As a person who doesn’t ride a motorcycle, it took me some practice to learn how to maintain a proper throttle position while riding rather than just starting and stopping pedaling. With knowledge of what percentage of assistance each setting provides, it is easier to understand what to expect from the bike motor. I may continue to play around with the number of assist settings and the assist provided until I am happier with the results. I haven’t emptied the battery yet which is to say that it lasts a long time and I’m sure that running out of power on my trips will not be an issue.
What I like
- Comfortable ride
- Easy to use controls
- Customizable
- Powerful motor
What I’d change
- Seal of the bike at the crank
- Make rack and brake lights available for purchase.
Final thoughts
There are a lot of e-bikes out there. I wanted a full-size bike since I didn’t think that I would have to consider portability. The ENGWE P26 electric bicycle is fantastic even without the motor assist. Throwing that into the mix makes this bike easy to ride and really fun. If you are considering a bike for a commute and portability is not a restriction, consider the Engwe P-26.
Price: $899.00 – $1099.99
Where to buy: Amazon and Engwe
Source: The sample of this product was provided by Engwe.

Google Review Tap Cards (3-Pack) by TapFive - Tap for Instant Reviews - All Phones Compatible - Reusable Smart Tap NFC & QR - Boost Business Reviews - Powered by TapFive (3 Card Pack)
(as of June 23, 2026 13:17 GMT -05:00 - More infoProduct prices and availability are accurate as of the date/time indicated and are subject to change. Any price and availability information displayed on [relevant Amazon Site(s), as applicable] at the time of purchase will apply to the purchase of this product.)