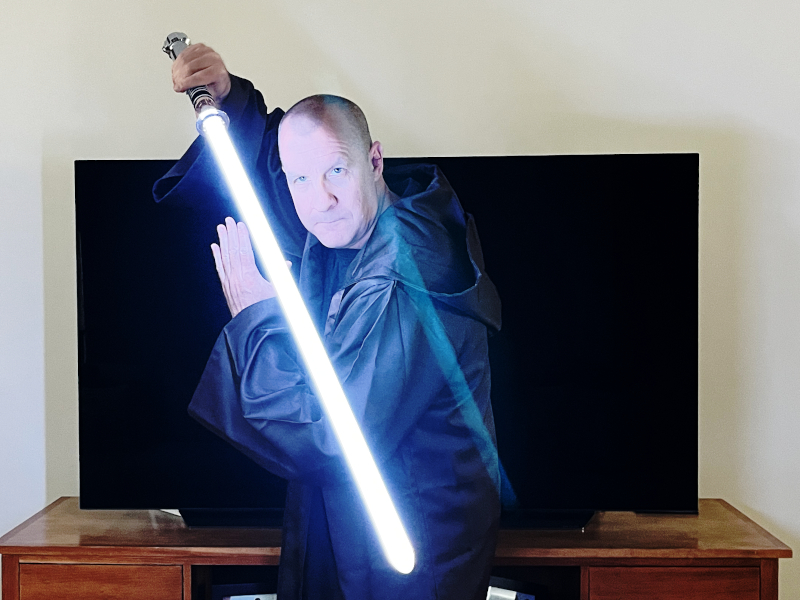
REVIEW – One of the most loved entertainment empires of the last fifty years is Star Wars. Ever since Ben first taught Luke the ways of the Force, we’ve been enthralled with this epic battle of good vs evil. The most iconic characters in Star Wars are the Jedis and the Sith, and the most distinctive weapons are their lightsabers. Every fan of the series has wanted to own their own saber, whether single- or doubled-bladed, whether blue or green or red in color. Damiensaber has recently released their newest saber, a replica of the first one that Luke Skywalker built for himself. This blade debuted in Return of the Jedi when Luke rescued his friends from Jabba the Hutt, and now you can have one for your very own!
What is it?
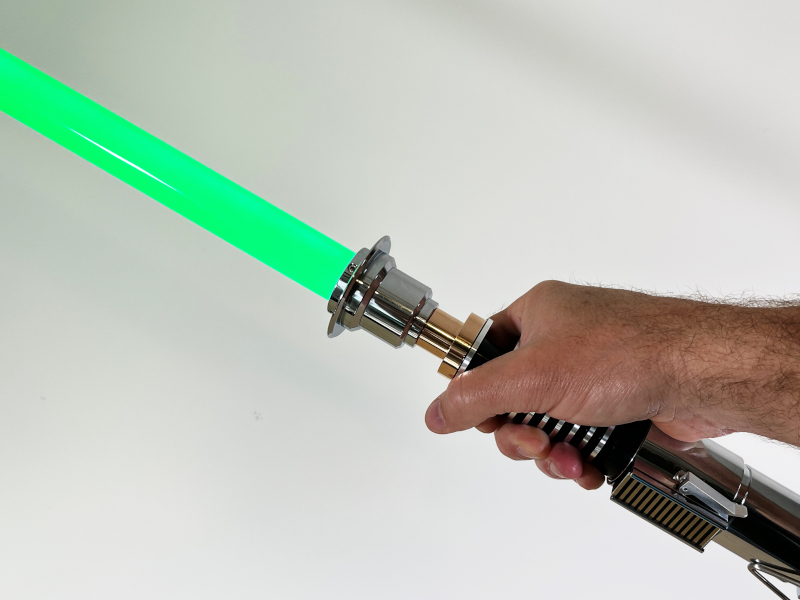
The Damiensaber Luke Skywalker (LSW) lightsaber is an entry-level, configurable lightsaber that features an aluminum alloy hilt, a polycarbonate blade with LED lighting, and a soundboard that controls everything. It comes with a variety of colors, sounds, and special effects, and more can be added via a micro SD card.
What’s in the box?
The following items were in the box:
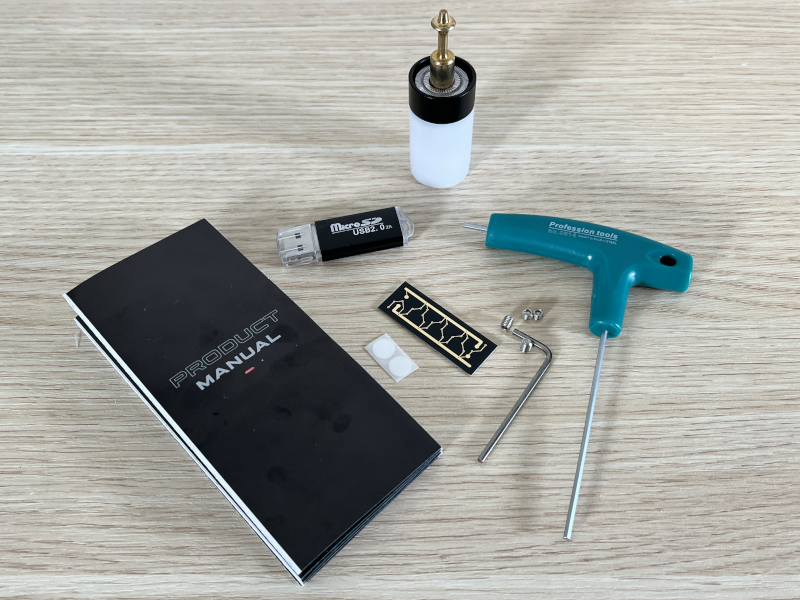
- The hilt, including the soundboard with micro SD card and battery
- The blade
- A plug (the mini looking blade)
- A USB-A to USB-C cable for charging
- Two hex wrenches
- Four spare hex screws
- A spare button
- Two small stickers (purpose unknown)
- A micro SD card to USB-A reader
- An acrylic stand for displaying the lightsaber
- A product manual
Specifications
- Hilt: Aluminum alloy
- Hilt length: 11 inches
- Hilt diameter: varies, but 2 inches at the widest
- Blade: Polycarbonate
- Blade length: 36.2 inches
- Blade diameter: 1 inch
- Battery: Rechargeable, replaceable lithium-ion
This lightsaber is also available in shorter sizes and with less capable, less expensive soundboards.
Design and features
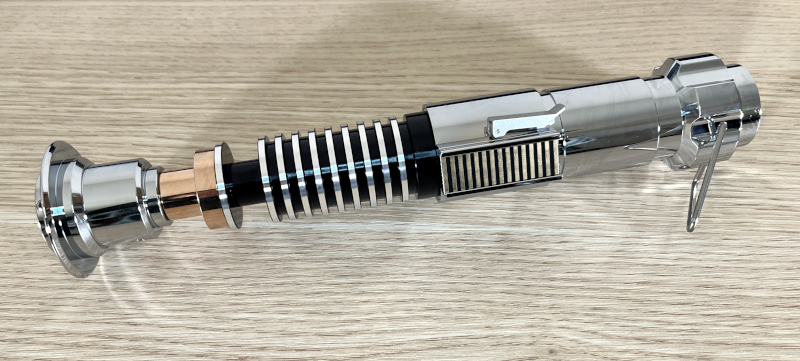
This Damiensaber Luke Skywalker lightsaber has a beautiful and solid hilt made of aluminum alloy; it’s hefty and feels like it could be the real thing. It’s also unbelievably unergonomic, which is Luke’s fault, not Damiensaber’s fault. I have no idea how he managed to wield this thing. It’s made of four distinct-looking sections, which can be unscrewed to provide access to the soundboard, the USB-C charging port, the battery, and the micro SD card.
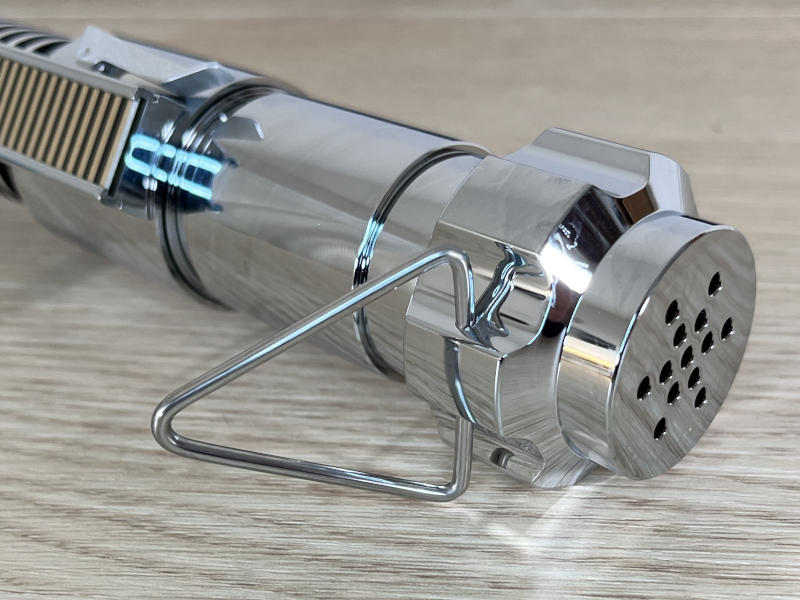
Inside the base of the hilt is a small speaker; despite its diminutive size, it produces a fair amount of sound. It has a variety of special effects, including turning the lightsaber on and off, swinging it around, and deflecting blasters.

The blade is over a yard long, though only 35 ¼ inches are visible once assembled. It can be set to a variety of colors, including the expected red, blue, and green, and is beautiful and bright, especially in dim light. I am impressed with the quality and design of this lightsaber. Any fan of Luke will be happy with it.
Installation and setup

The Damiensaber Luke Skywalker lightsaber arrived in a long, thin box. Custom foam inserts provide good protection, and the hilt was wrapped in cellophane to secure it from scratches. After carefully removing everything from the box, I read through the manual to see how to assemble and configure it. I can only describe this manual as horrible, because it is missing so much information. How do I charge the saber? How do I assemble it? Where do I find the SD card? What are blade effects, blade modes, and sound fonts? None of these questions are answered, and other information is wrong or omitted. It feels like the writer of this manual wanted to write as little as possible. If you’re already familiar with this type of lightsaber, this may not be a problem. If you’re new to this space, prepare to spend time figuring things out on your own. I hope Damiensaber decides to throw this manual away and write a new one from scratch, one that covers everything a new owner needs to know.
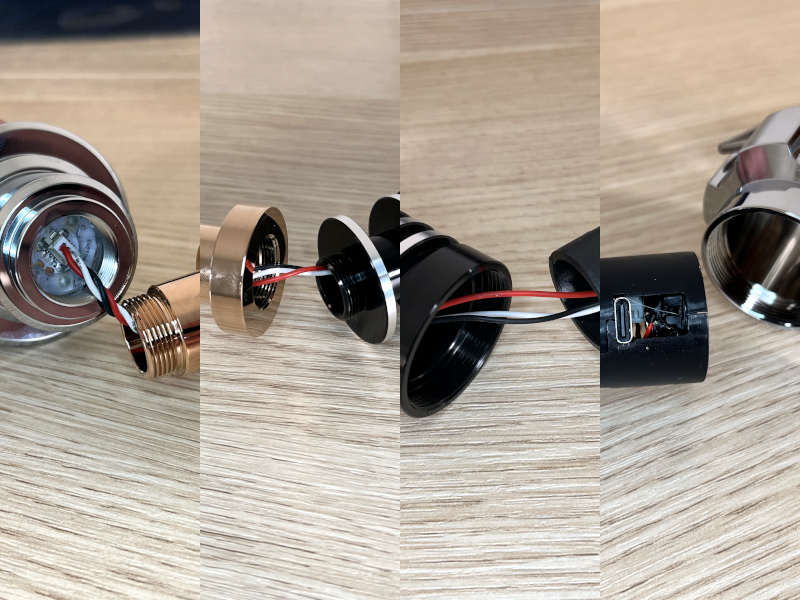
The good news for you, kind reader, is that I’ve done a lot of work for you, and I’ll walk through everything I’ve learned. The hilt arrived fully assembled. It has four sections, each of which can be disconnected from the next simply by unscrewing it.
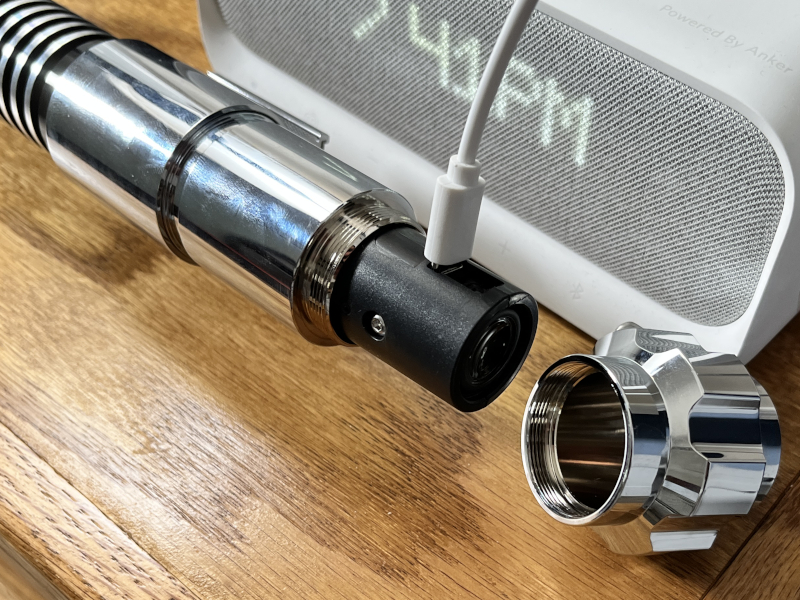
The first step for setup is to charge the saber. To expose the USB-C port for charging, carefully unscrew the bottom section, the one with the speaker. Plug in the USB-C side of the cable, and put the other into a charger. When you do this, the speaker will announce, “Charging!” Damiensaber’s website says it takes four hours to charge, and each charge will last for about two hours. When it’s low, the speaker will say, “Low battery; please recharge.” Once the battery is fully charged, reassemble the bottom section.
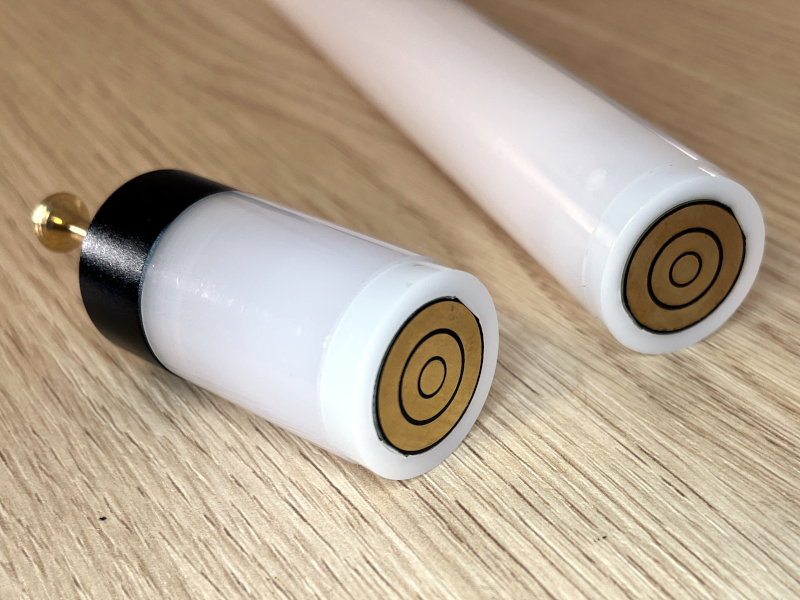
The second step is to add the blade. There are strips of LED lights inside the blade itself, and the base of the blade has connectors to the soundboard.
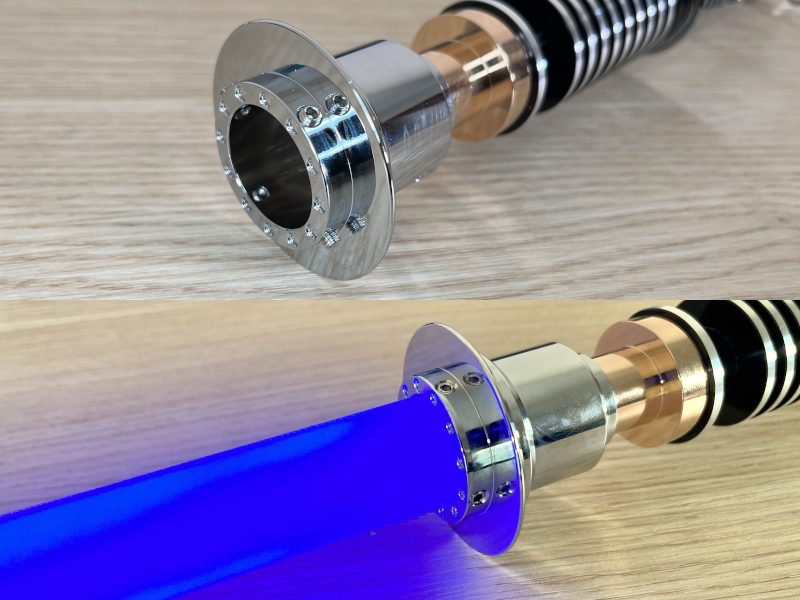
Loosen the four screws around the outside of the top section, insert the blade firmly, then tighten. The lightsaber should be ready to go.
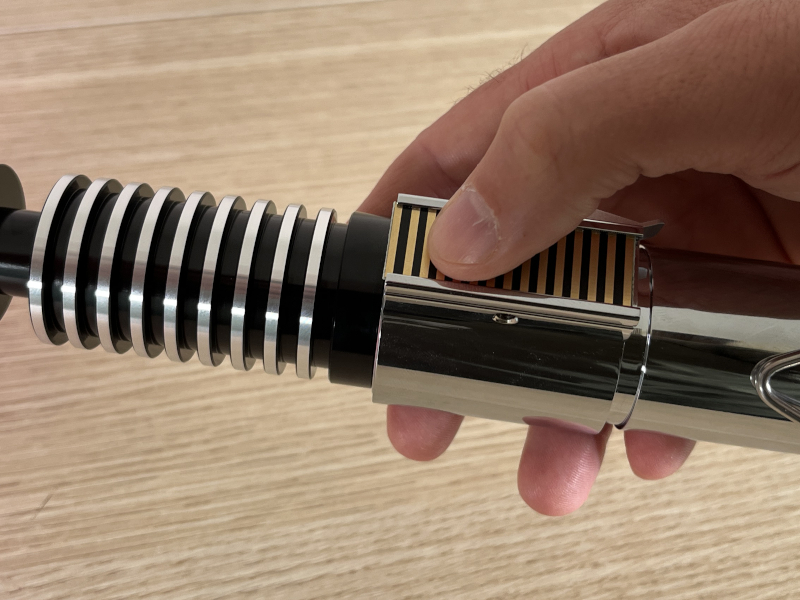
The third step is to turn on the Damiensaber Luke Skywalker lightsaber. To wake up the saber, press and hold the button for a couple of seconds. The speaker will beep and say, “Power on!” To activate the blade, press the button again. It should give the “power on” sound for a lightsaber and the blade should light up. You’re ready to fight!
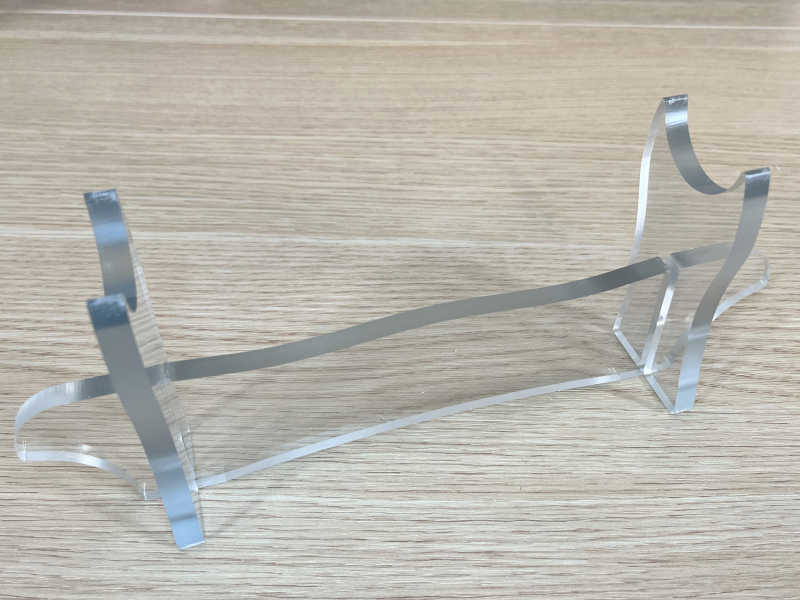
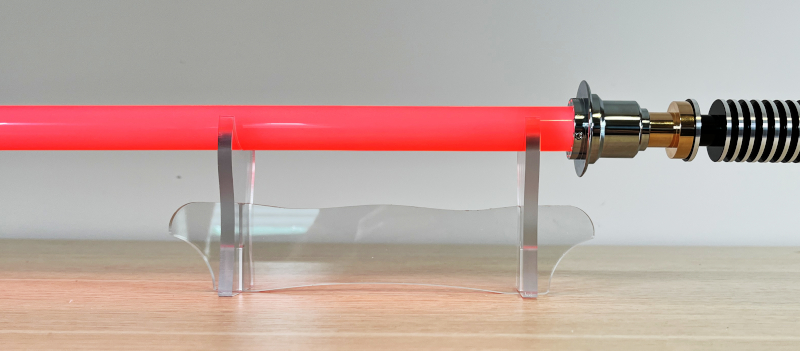
The fourth step, which is optional, is to assemble the stand. Simply slip the notched sections together as shown in the picture above. This stand provides a steady place to keep your lightsaber when you’re not on a mission for the Rebellion.
Performance
When our kids were young, they had these cheap, short, plastic lightsabers with telescoping blades. They thought they were so cool, but boy oh boy have lightsabers come a long way. This LSW lightsaber is your introduction to the world digital lightsabers, and it features a plethora of lights and sounds. It comes out-of-the-box with a variety of configurable options, and additional customizations can be added. I had never seen one of these types of lightsabers before, and I was blown away. It looked and sounded and felt so real.
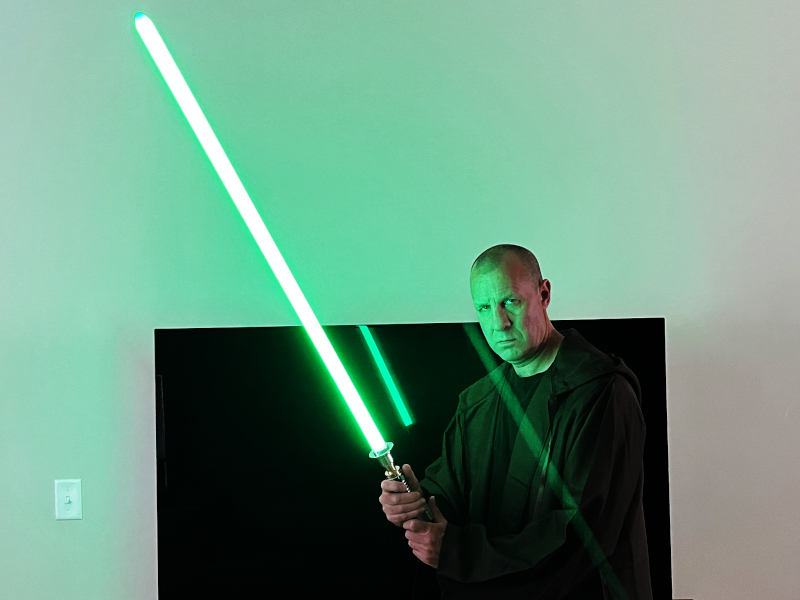
This saber has several default features. When turned on with a single press, it makes the familiar sound of a lightsaber powering up while the blade ignites from the hilt to the tip. The blades glows and gives off the distinctive humming sound that lightsabers make. If I swing it around, the sounds changes. A slow swing gives a slight whooshing sound, while a fast swing gives that characteristic undulation. It’s so realistic! When I press and hold the button, the lightsaber turns off with the expected powering down the sound and the blade de-ignites from tip to hilt. If that was all that this gadget did, it would be pretty cool, but it does a lot more.
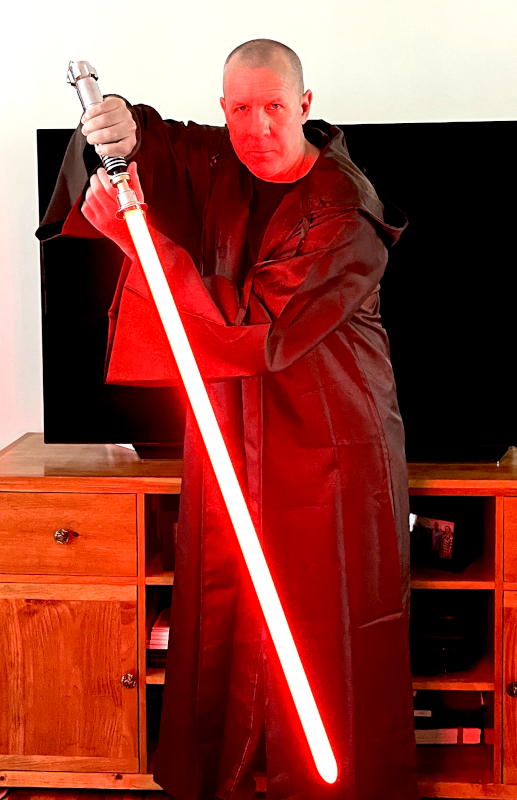
Who is this lightsaber for? If you’re wanting to cosplay as Luke, this would be the perfect addition to your outfit. If you’re going as Luke for Halloween this year, this weapon would absolutely make your costume. Perhaps you’ve been thinking about creating your own lightsaber duel video for YouTube? This saber, along with one from Darth Vader, would be perfect swords to wield. Finally, any fan of Star Wars would find this to be a fabulous souvenir all on its own. One note about dueling with this weapon: Damiensabers says that it is suitable for mock dueling, such as creating a video, but it’s not really intended for full contact. If you’re learning to swordfight, you’ll want to buy a practice weapon instead.
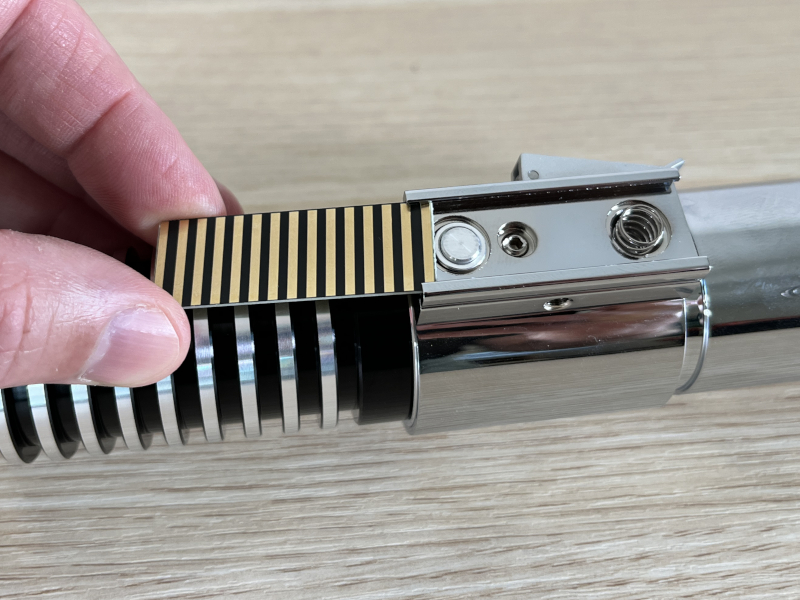
All interactions with the LSW lightsaber are done through its only button. Unfortunately, this button is the only bad part of the hardware. The actual button is hidden by this rectangular cover, which is held in place by the spring. As you can well imagine, this design completely fails to hold the cover in place, and it always slipping off, causing the spring and button to fall out as well. More than once I’ve gone searching for them in the grass. This part of the gadget is very annoying, and they need to take this one back to the drawing board and find a better way to secure it.
There are two special effects that are available while the saber is turned on. Tapping the button activates the blast defect, which happens whenever Luke blocks a blaster bolt. Pressing the button for one second activates the drag defect, which happens when Luke’s lightsaber is held against Vader’s; pressing the button again deactivates it.
Once I understood the basics, I began exploring the various ways to configure the lightsaber. The most important setting to change is what Damiensaber calls the sound font, a rather inadequate description. A sound font is really a theme that is based upon some character from Star Wars. It changes every aspect of the blade, all sounds and colors, to match that character. There are sound fonts for Luke, Leia, Vader, Kenobi, Sidious, Rey, Dooku, and others, though the name of sound fonts are couched in bland terms, such as the knight, the protector, the son, the master, the dark lord order, the princess, and the senate, no doubt to avoid licensing issues. To change the sound font, turn off the light saber and then press and hold the button until the speaker says the name of a character. Then turn the weapon on and use it to see how everything has changed. If you want to try a different sound font, turn it back off and hold the button again; in this way, you can cycle through all of the options. My favorites are the son (Luke’s green), the princess (Leia’s blue), and the chosen (Anakin’s red) as well as the bounty, a white blade with some unique sounds.
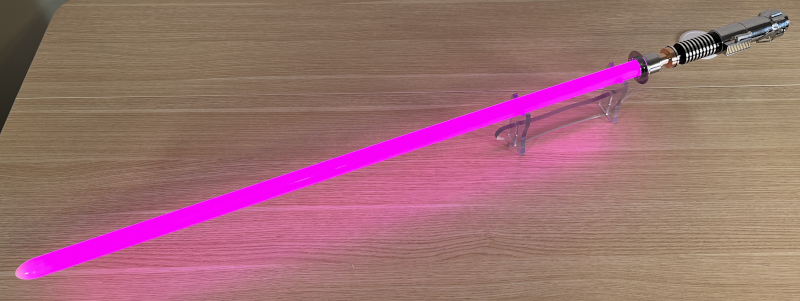
If these pre-defined themes are not enough choices, I can make four additional types of changes. First, when the lightsaber is on, pressing the button for two seconds enters the color change mode. The blade cycles through all the colors, and tapping the button sets the blade to the current color.
Second, when the lightsaber is off, pressing the button for one second changes the volume. There are three options that can be cycled through: low, high, and off. I keep it on high.

Third, when the lightsaber is off, pressing the button for two seconds changes the blade effect, and the speaker will give the name of the effect. The manual doesn’t explain what blade effects are, but they appear to be special effects that alter how the blade looks when it’s on. The manual says that there are five effects, but there are actually seven: steady, pulse, rainbow, candy, unstable, cracked, and fire. Steady is the default mode; unstable and cracked are psychedelic; and rainbow and candy are just silly.
Fourth, when the lightsaber is off, pressing the button for three seconds changes the blade mode, and the speaker will give the name of the mode. The manual doesn’t explain what blade modes are either, but they appear to be special effects when using or igniting the blade. There are ten modes: standard, blaster, ghost, broken ignition, stack ignition, photon ignition, warp ignition, phaser ignition, scavenger ignition, and hunter ignition. Ghost turns off the blade unless I am actively swinging it; broken flickers sections of the blade randomly, as if the blade were broken and having trouble staying on. All of the ignition modes alter the way the blade is ignited. As far as I can tell, blade effects and blade modes are mutually exclusive.
Using one simple button for all the configuration settings is a real weakness of this gadget. It’s difficult to hold it for exactly the right amount of time, and I often wound up changing the wrong setting. And once I changed the wrong thing, it’s a pain to set everything back, as I have to cycle back through all the options; there’s no undo button. I would like to see LGT create one or more additional input mechanisms to make configuration easier.
The LSW lightsaber also has motion controls that allow me to control the blade by moving and tilting it. The manual defines five motion controls, but most of them don’t actually work or don’t work reliably. Here are the two that do work well: Quickly twisting the hilt will turn the blade on or off, and quickly stabbing the blade forward will turn it on. When the blade is off, pointing the tip down and quickly twisting the hilt will change the sound font, but it often changes the sound or sets a blade mode or effect as well, ruining the sound font settings. This highlights the problem of only having one button.
The brains of the Damiensaber Luke Skywalker lightsaber are its sound card, which is the Xenopixel version 2. It controls the blade colors and the speaker sounds, and it reads the pre-installed styles and controls from the micro SD card. The Xenopixel 2 is considered a budget card; more expensive options (e.g., the Profile) are available that include more options and customizations. If you want to learn a lot more about sound cards and the companies that make and sell them, including LGT and Damiensaber, read this Reddit post.
One of the features that set the Xenopixel 2 apart from lower end cards is the ability for users to modify the files on the micro SD card to make their own customizations. The manual gives some instructions on how to find the card, but they skip some steps. Here’s how to find it:
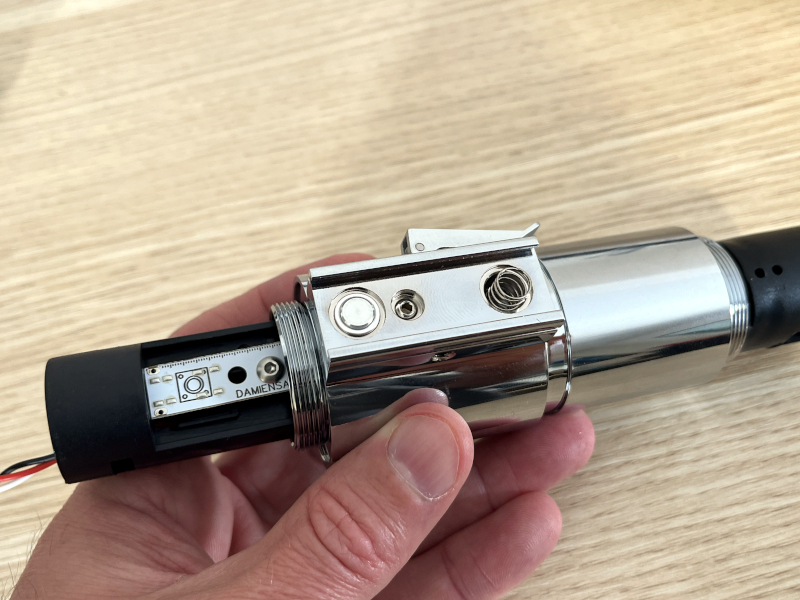
Step one, remove the cover over the button, unscrew the hex screw, remove the button and spring, and slide this entire piece of the hilt off the one below it.
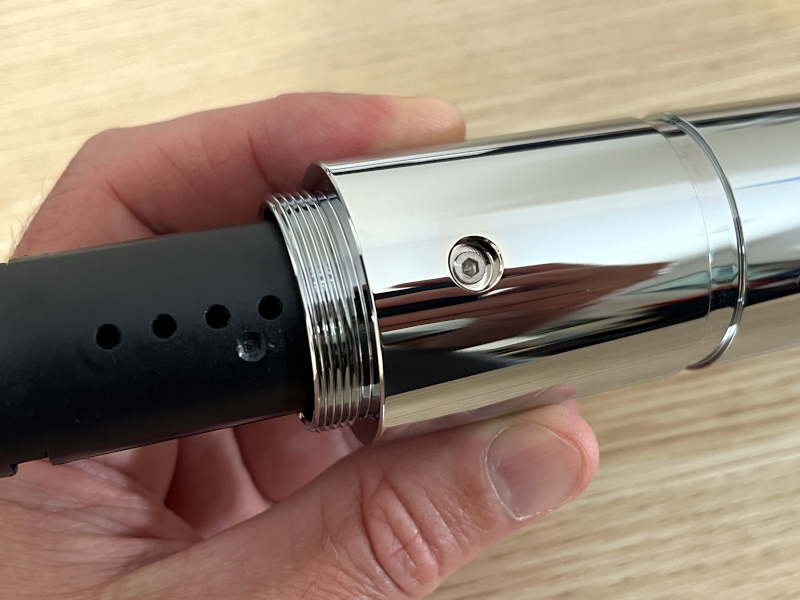
Step two, turn the remaining piece of the hilt over, unscrew the hex screw, and slide this metal piece off of the hilt off the plastic tube below it. This tube is the soundboard kit and contains the Xenopixel 2, the battery, the speaker, and so on.
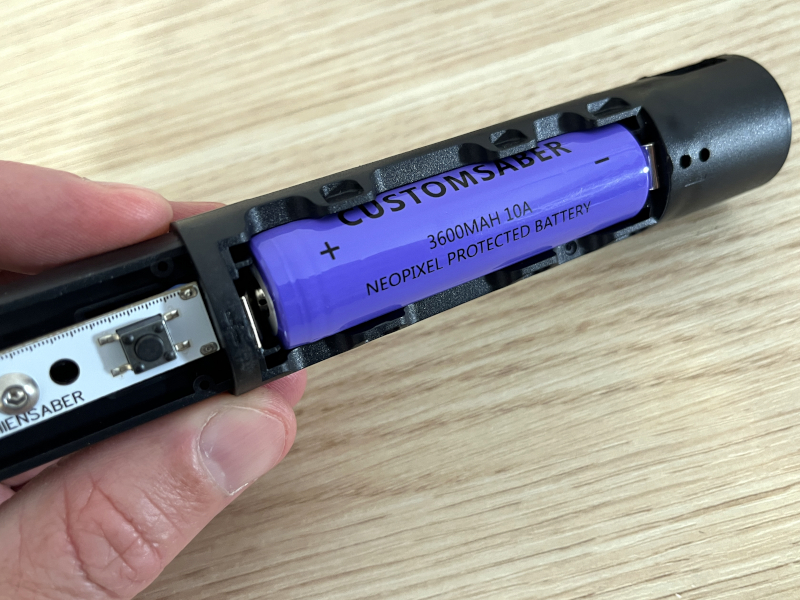
Step three, carefully remove the battery, noting which side is positive.
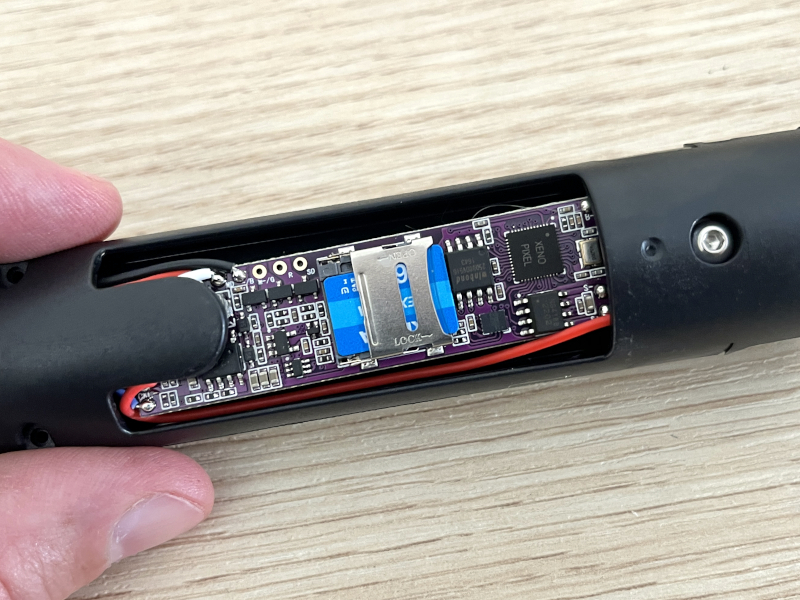
Step four, turn the tube over to see the micro SD card reader and carefully remove the card from it, preferably while wearing an anti-static wristband. Although Damiensaber sells a wide variety of replacement parts on their website, I couldn’t find any soundboard kits with the Xenopixel 2. Be careful to not break this one!
The manual also describes how to change the files, but the instructions are terse. They do offer more information on their website. I chose not to make any changes to my saber for two reasons. One, I’m content with the sound font options that come pre-installed; they really are pretty amazing. Two, I don’t trust Damiensaber’s instructions, as the rest of their documentation has been very poor, and I didn’t want to risk breaking something while going through another trial-and-error process.
The LSW lightsaber comes with a plug that you can insert into the hilt in place of the blade. This is for those times when you just want to display the hilt, maybe as part of a cosplay costume.
What I like
- Hefty, well-constructed hilt
- Amazing sound and color
- A wide variety of customization options
- A believable lightsaber!
- Solid stand
What I’d change
- Write a good manual
- Redesign the cover for the button
- Add an additional mechanism for configuring options
Final thoughts
Are you a Star Wars fan? If so, then you need a good lightsaber. The Luke Skywalker lightsaber from Damiensaber is a nice blade to start you on your path to the Force. This lightsaber features the Xenopixel 2 sound board, a solid aluminum alloy hilt, and customizable sounds and colors. It’s a beautiful, realistic-looking lightsaber, a great addition to your favorite Star Wars outfit, especially if you’re Luke Skywalker.
This gadget is not without its problems, however. The manual is terrible and omits a lot of important information; be prepared to figure things out by trial-and-error. The cover for the lightsaber button was poorly designed and doesn’t stay in place; you’ll have to jury-rig some way to keep it from slipping off. So long as you’re willing to overcome these problems, however, this would be a good first lightsaber.
Price: $269 or $259
Where to buy: Damiensaber’s online store
Source: The sample for this review was provided by Damiensaber.


Gadgeteer Comment Policy - Please read before commenting
The colors are rich! This will do until the market makes one w/o the “blade.”
how much do you need to pay for these please
Here at The Gadgeteer, the price of the gadgets and a link for purchasing are always found at the end of the article (but before any comments).
Excellent tutorial! Just got my light saber yesterday & it stopped working. Your breakdown of the light saber kept me from returning it.
Thanks,
Luis.
Glad to help.
Hey James, thanks for saving me from the Dark Side! Just got this exact Saber and couldn’t get it to work, and was about to go Sith on it! Then send it back with extreme prejudice! Couldn’t decipher the Chinese puzzle of the damn thing. I’m a life long model and prop maker but this one had me stumped. In desperation I searched for info on it and contacted Damien Sabers. They’ve responded; I need to get back to them. But then I stumbled on your site, which is a virtual “Rosetta Stone” for this saber! Now I know at least how to partly operate it since last night. Watching your site, I’m sure I’ll master it now pretty quickly. The ROTJ Luke saber has always been my favorite, and I’m so jazzed to finally have a “real” one! But mine has a different set up: the exact same hilt, but mine is base lit, no LEDs in the blade, and no connection between the two components. You can see the LEDs down in the emitter. Also no apparent provision for a USB drive. Yeah, not only were the instructions useless, they were the wrong ones for this saber! They were for one of the simple, less interesting “training” sabers. And the wrong blade plug. Should be the emitter as when the saber is off. Wanna put a tiny flag on that stupid spike that says “Remove Before Fight”! Otherwise I’m pretty happy with this thing now that I know how to work it! Working on the clamp card problem, and how to add the two buttons and triangle lights opposite the clamp tab, which was flopping around loose, so I super glued it in the clamped down position to avoid trouble wielding it. (Just the screw part; I can still flip the tab up if I want, to make it appear functional.) I think this saber should’ve been put out with a brushed metal finish. The polished chrome surface is beautiful, but immediately gets all finger printed, and the brushed finish is more accurate to the screen prop anyway. Oh, and it wasn’t the kids who thought those old plastic ones were cool; you really mean US! WE had those back then! And now we’re getting these great next generation of sabers, what we REALLY wanted back then! Now I mainly want the two Kenobi sabers, from Phantom Menace and New Hope, and the original AniLuke from New Hope, before they started tweaking it. I like the bubble strip, the T grips with no screws or rivets, and the whole simple but elegant look of that first saber. These are my favorite sabers of all the ones we’ve seen in the movies and tv shows. So anyway, thanks again for saving the day, and now I’m gonna watch your site a few more times and PRACTICE til I master this thing! Have a better one!