REVIEW – Do you own a 3D printer? Would you like to make it faster? One way to do this is to run Klipper. Klipper is a standalone software that essentially allows you to 3D print at faster speeds, among other things. Creality recently released the Sonic Pad, a 3D printing pad based on Klipper. I was lucky enough to get my hands on one to review. I have only been 3D printing for about 9 months. And honestly, I know virtually nothing about software or firmware. So I was intrigued by the Sonic Pad as a plug-n-play Klipper solution. Was it easy to set up and use? And how big of an improvement is Klipper? Let’s find out.
What is it?
The Creality Sonic Pad is a 7-inch color tablet based on Klipper. It connects to your 3D printer with a USB cable. And essentially takes over control of your printer, making it faster and easier to use.
What’s in the box?
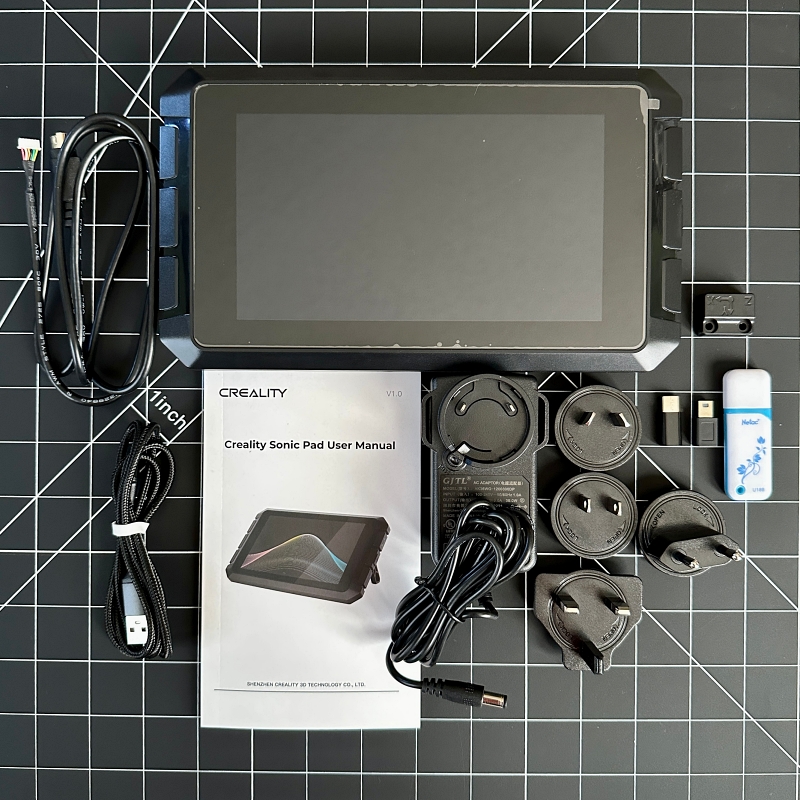
- Creality Sonic Pad
- 12V power adaptor (including adaptors)
- G – sensor data cable
- G – sensor
- USB cable
- USB drive
- MicroUSB to MiniUSB connector
- MicroUSB to Type – C connector
- User manual
Hardware specs
- CPU: T800
- RAM: 2GB
- ROM: 8GB
- USB 2.0 interface: 4
- Screen resolution & size: 1024×600 & 7-inches
- Wi-Fi protocol: IEEE 802.11b/g/n
- LAN interface: 100M
- G-sensor interface: PS/2
- Power interface: DC 2.5
- Input voltage: 12V
Design and features
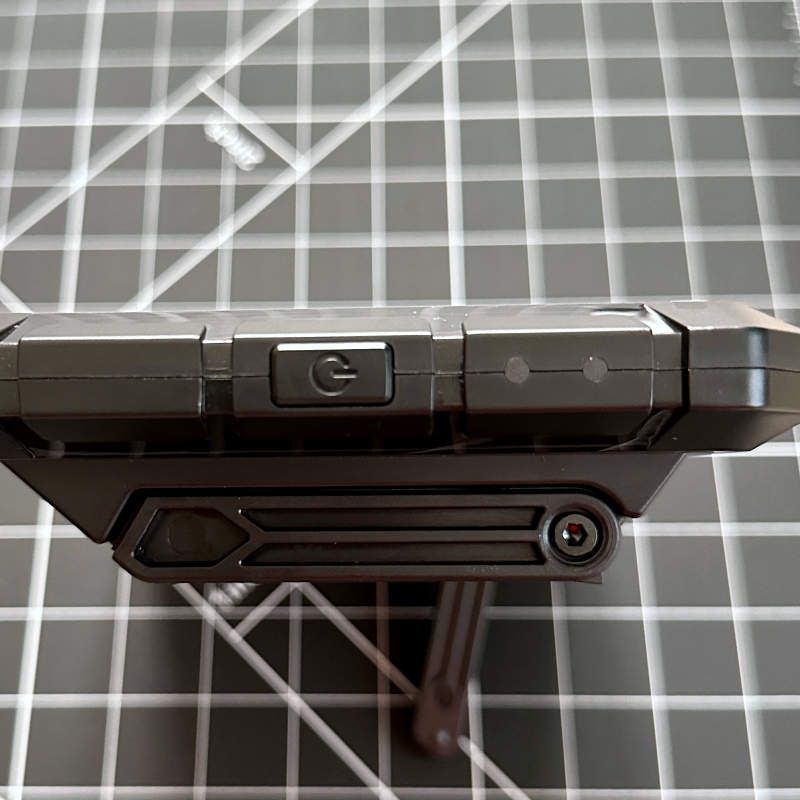
The Creality Sonic Pad has a 7-inch color touch screen with a resolution of 1024 x 600. The body is made of hard plastic. It is lightweight but has a premium feel. The right side of the unit has two status LEDs and a power button.
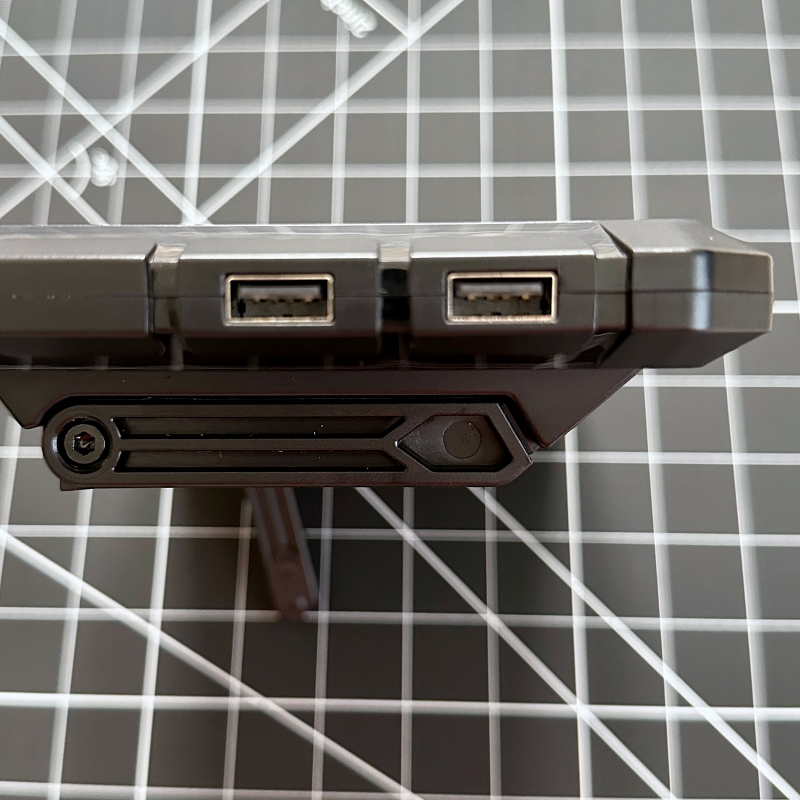
On the left side, there are two USB ports.
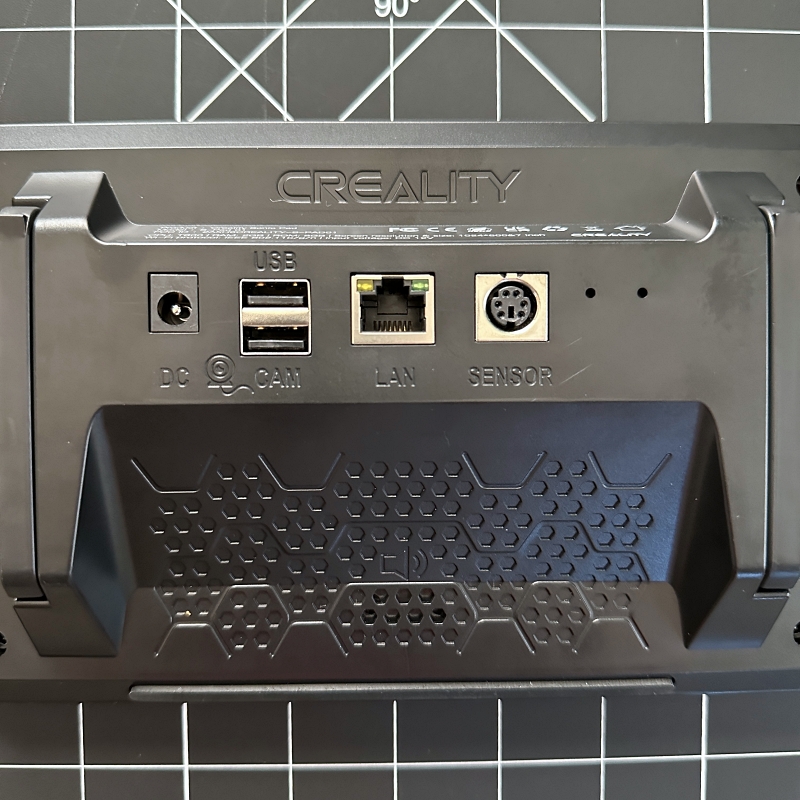
Around the back are two more USB ports (one labeled camera), an Ethernet port, and a PS/2 port for attaching the accelerometer.
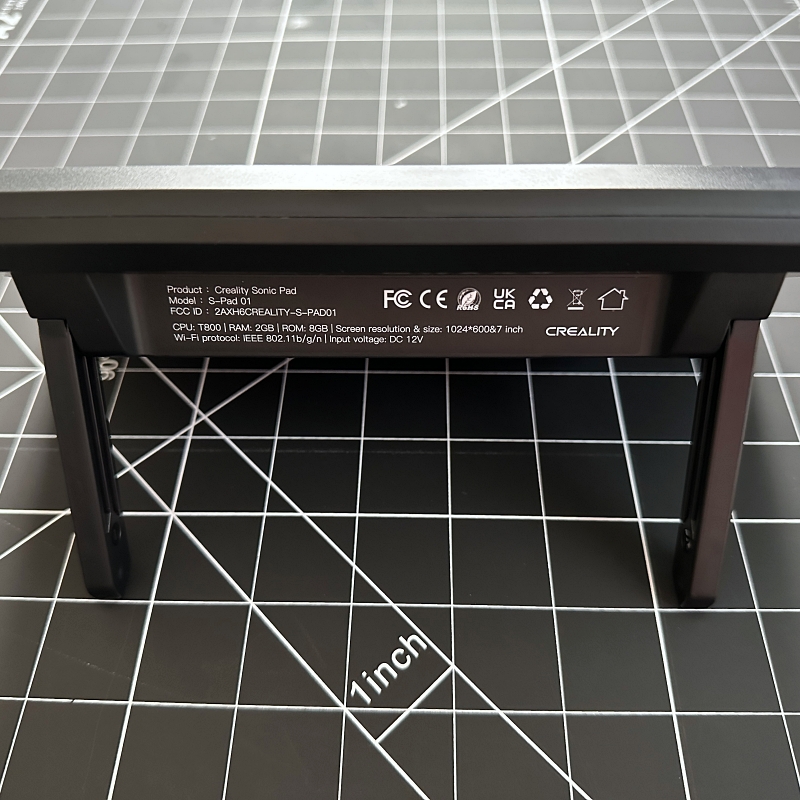
There are also two kickstand feet and mounting holes. The bottom of the feet are rubberized to keep them from sliding around.
Setup
The Sonic Pad is pretty much plug-and-play. Setting it up was easy and took me about 15 minutes. After powering up the Sonic Pad, you will be prompted to select your language, and region and connect to your network.
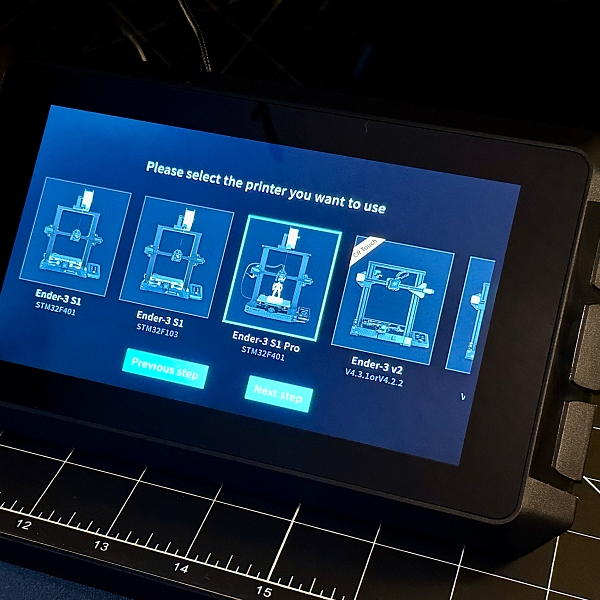
The next step is to select your printer. Currently, the Sonic Pad only supports the Ender-3 S1, Ender-3 S1 Pro, and the Ender-3 v2. Creality says they are committed to adding support for more printers soon. I set up the pad with the Ender-3 S1 Pro I reviewed a few months ago.
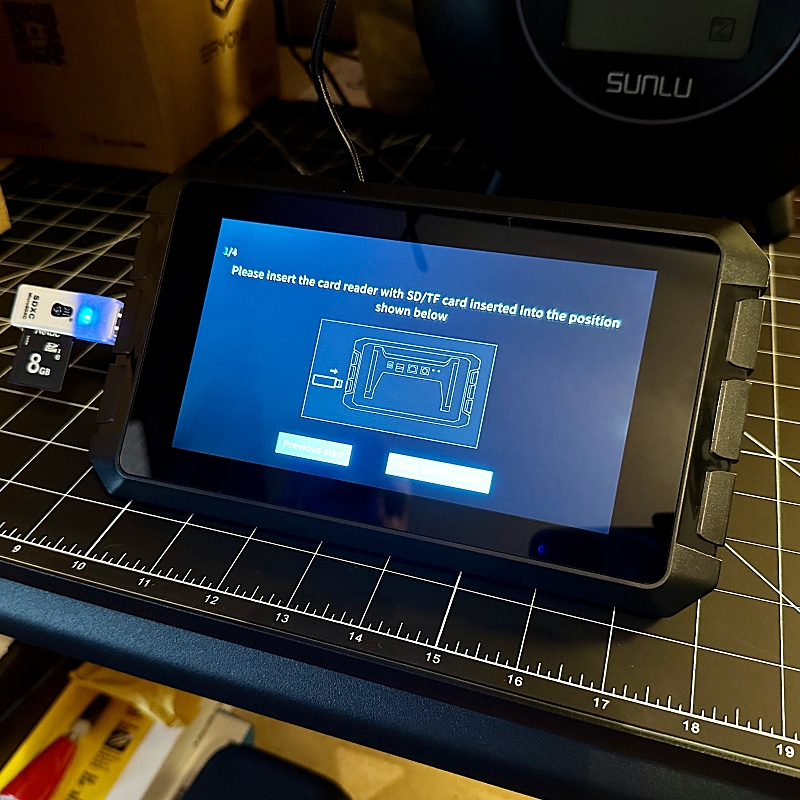
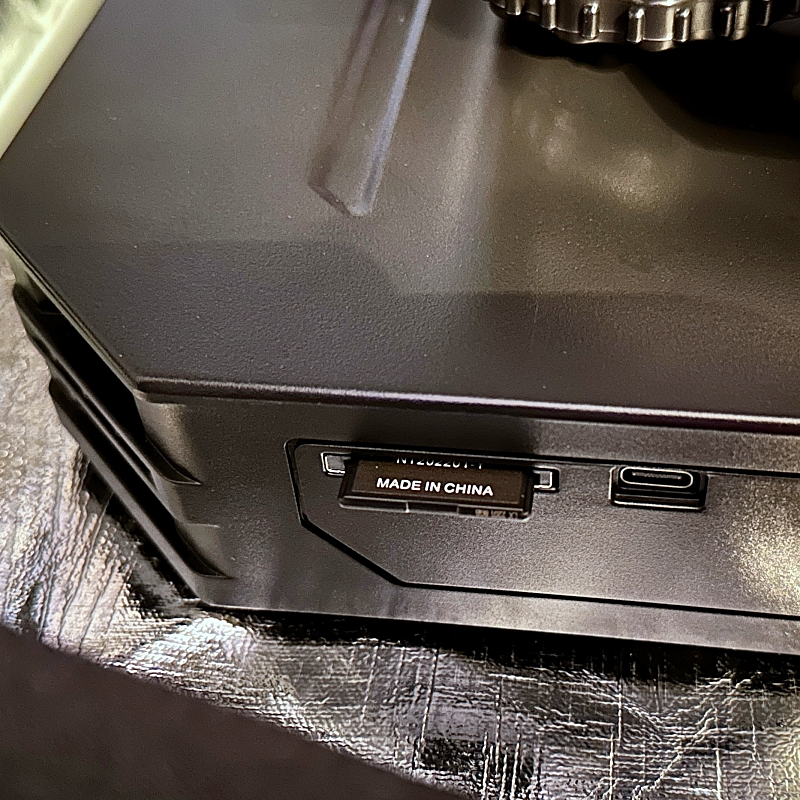
After flashing the firmware to my SD card, I inserted it into the printer and turned it on. The S1 Pro doe not have a USB port, so I had to use an SD card reader to flash the firmware.
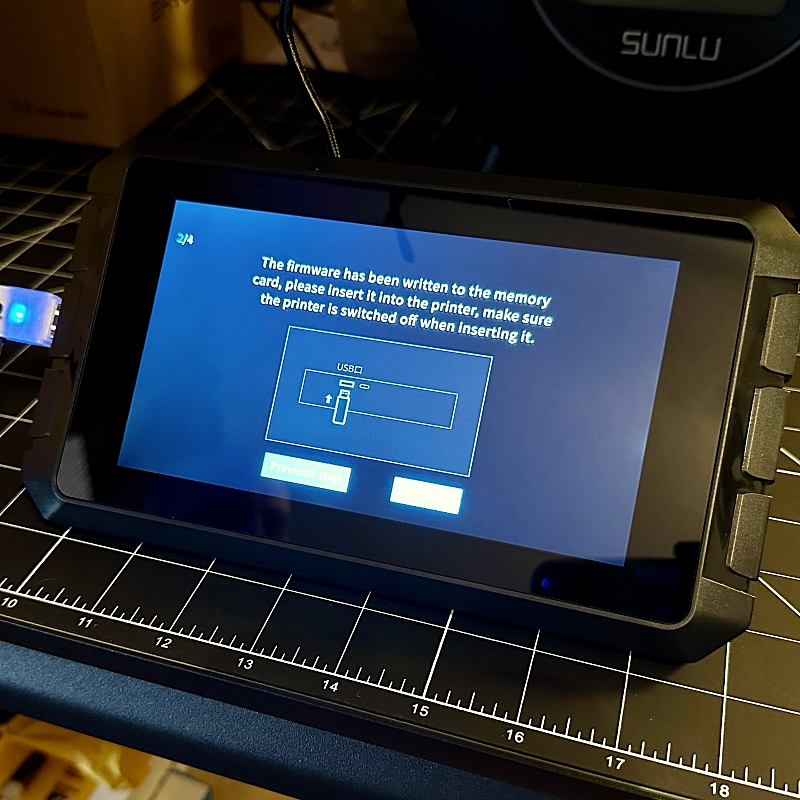
Next, turn the printer off, remove the SD card and reinsert it back into the pad. Connect the Sonic Pad to the printer using included USB cable and proper adaptor, and turn the printer on.
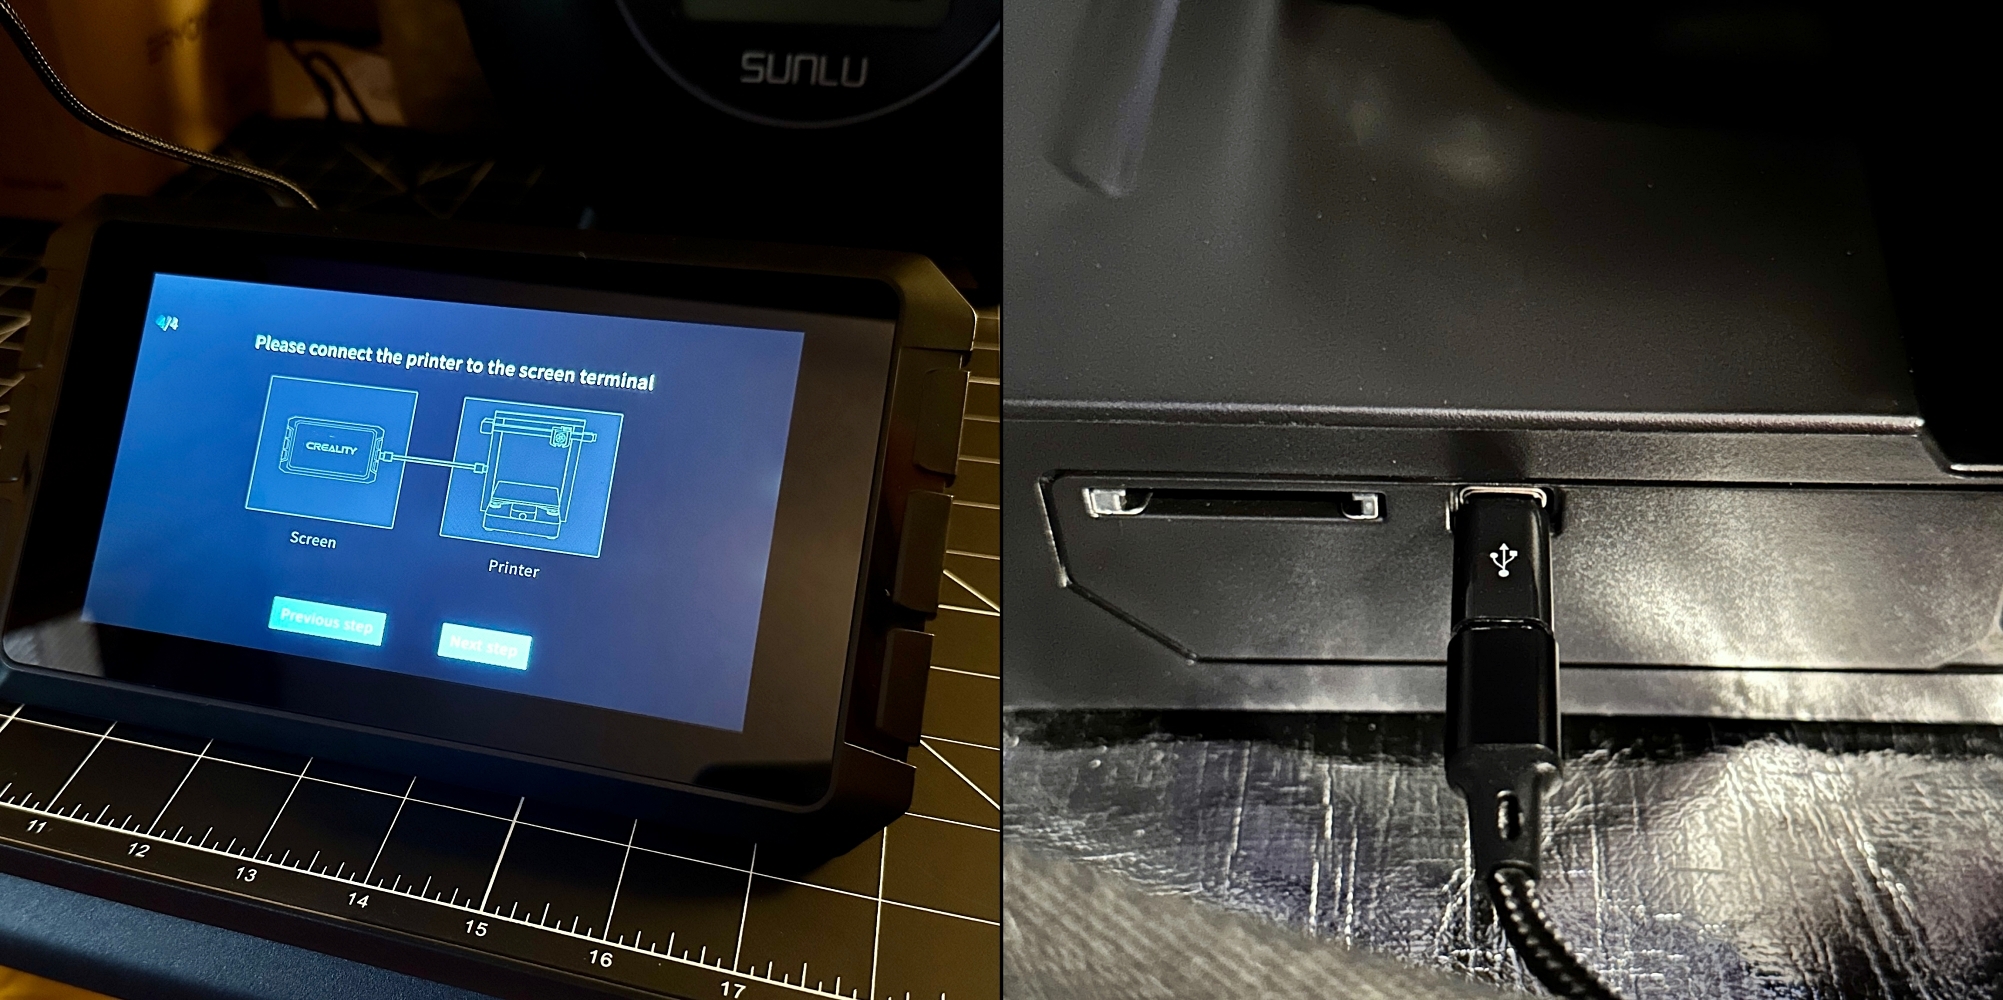
The Klipper firmware will then be flashed to the printer, replacing the stock firmware.
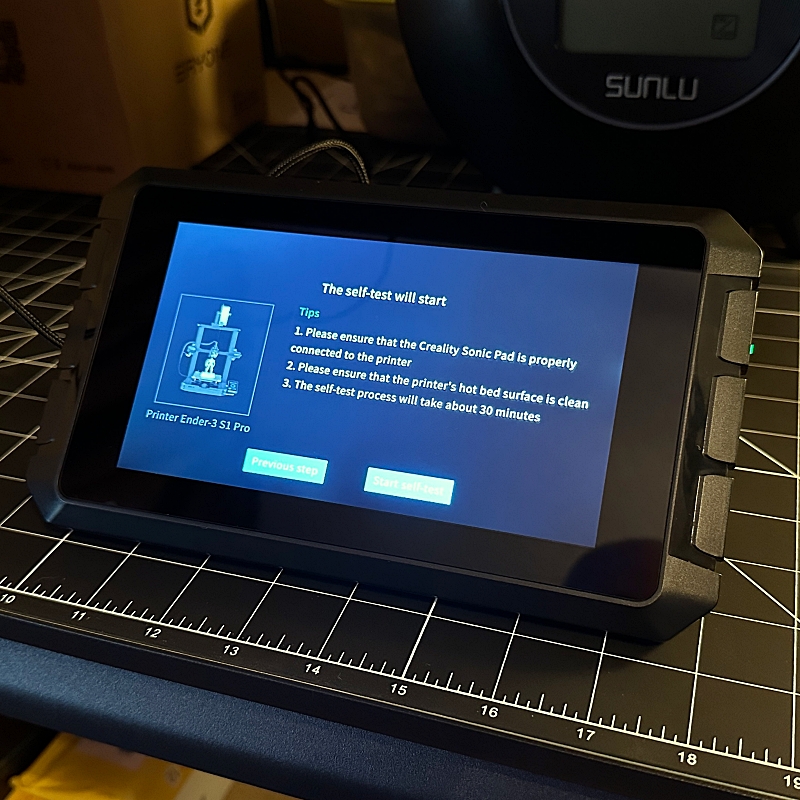
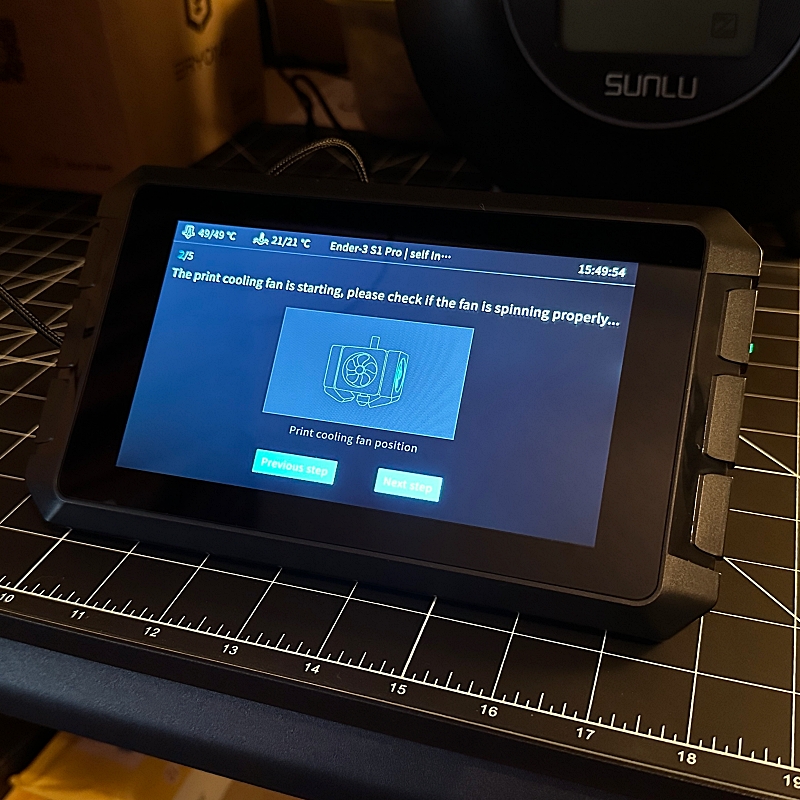
Next, you will be prompted to run a few self-tests for the hot end and cooling fans.
You will then be guided to level your printer. The first step is leveling all four corners manually. You can skip this if you have done it already.

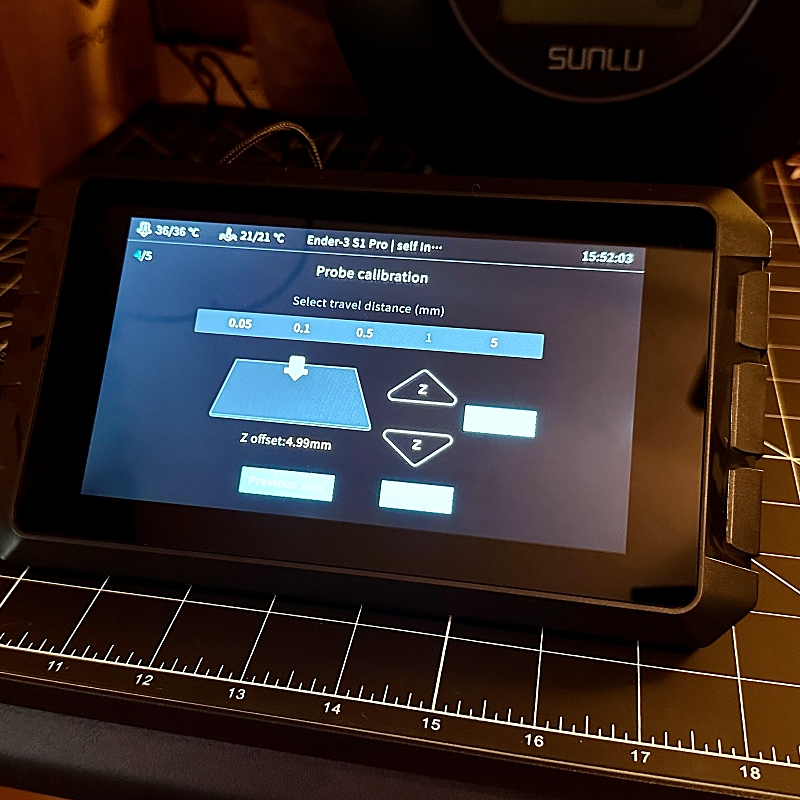
Next, you will set the Z height using a piece of paper.
The final step is a 25-point automatic leveling of the bed. During this process, a mesh is created, showing how level your bed is.
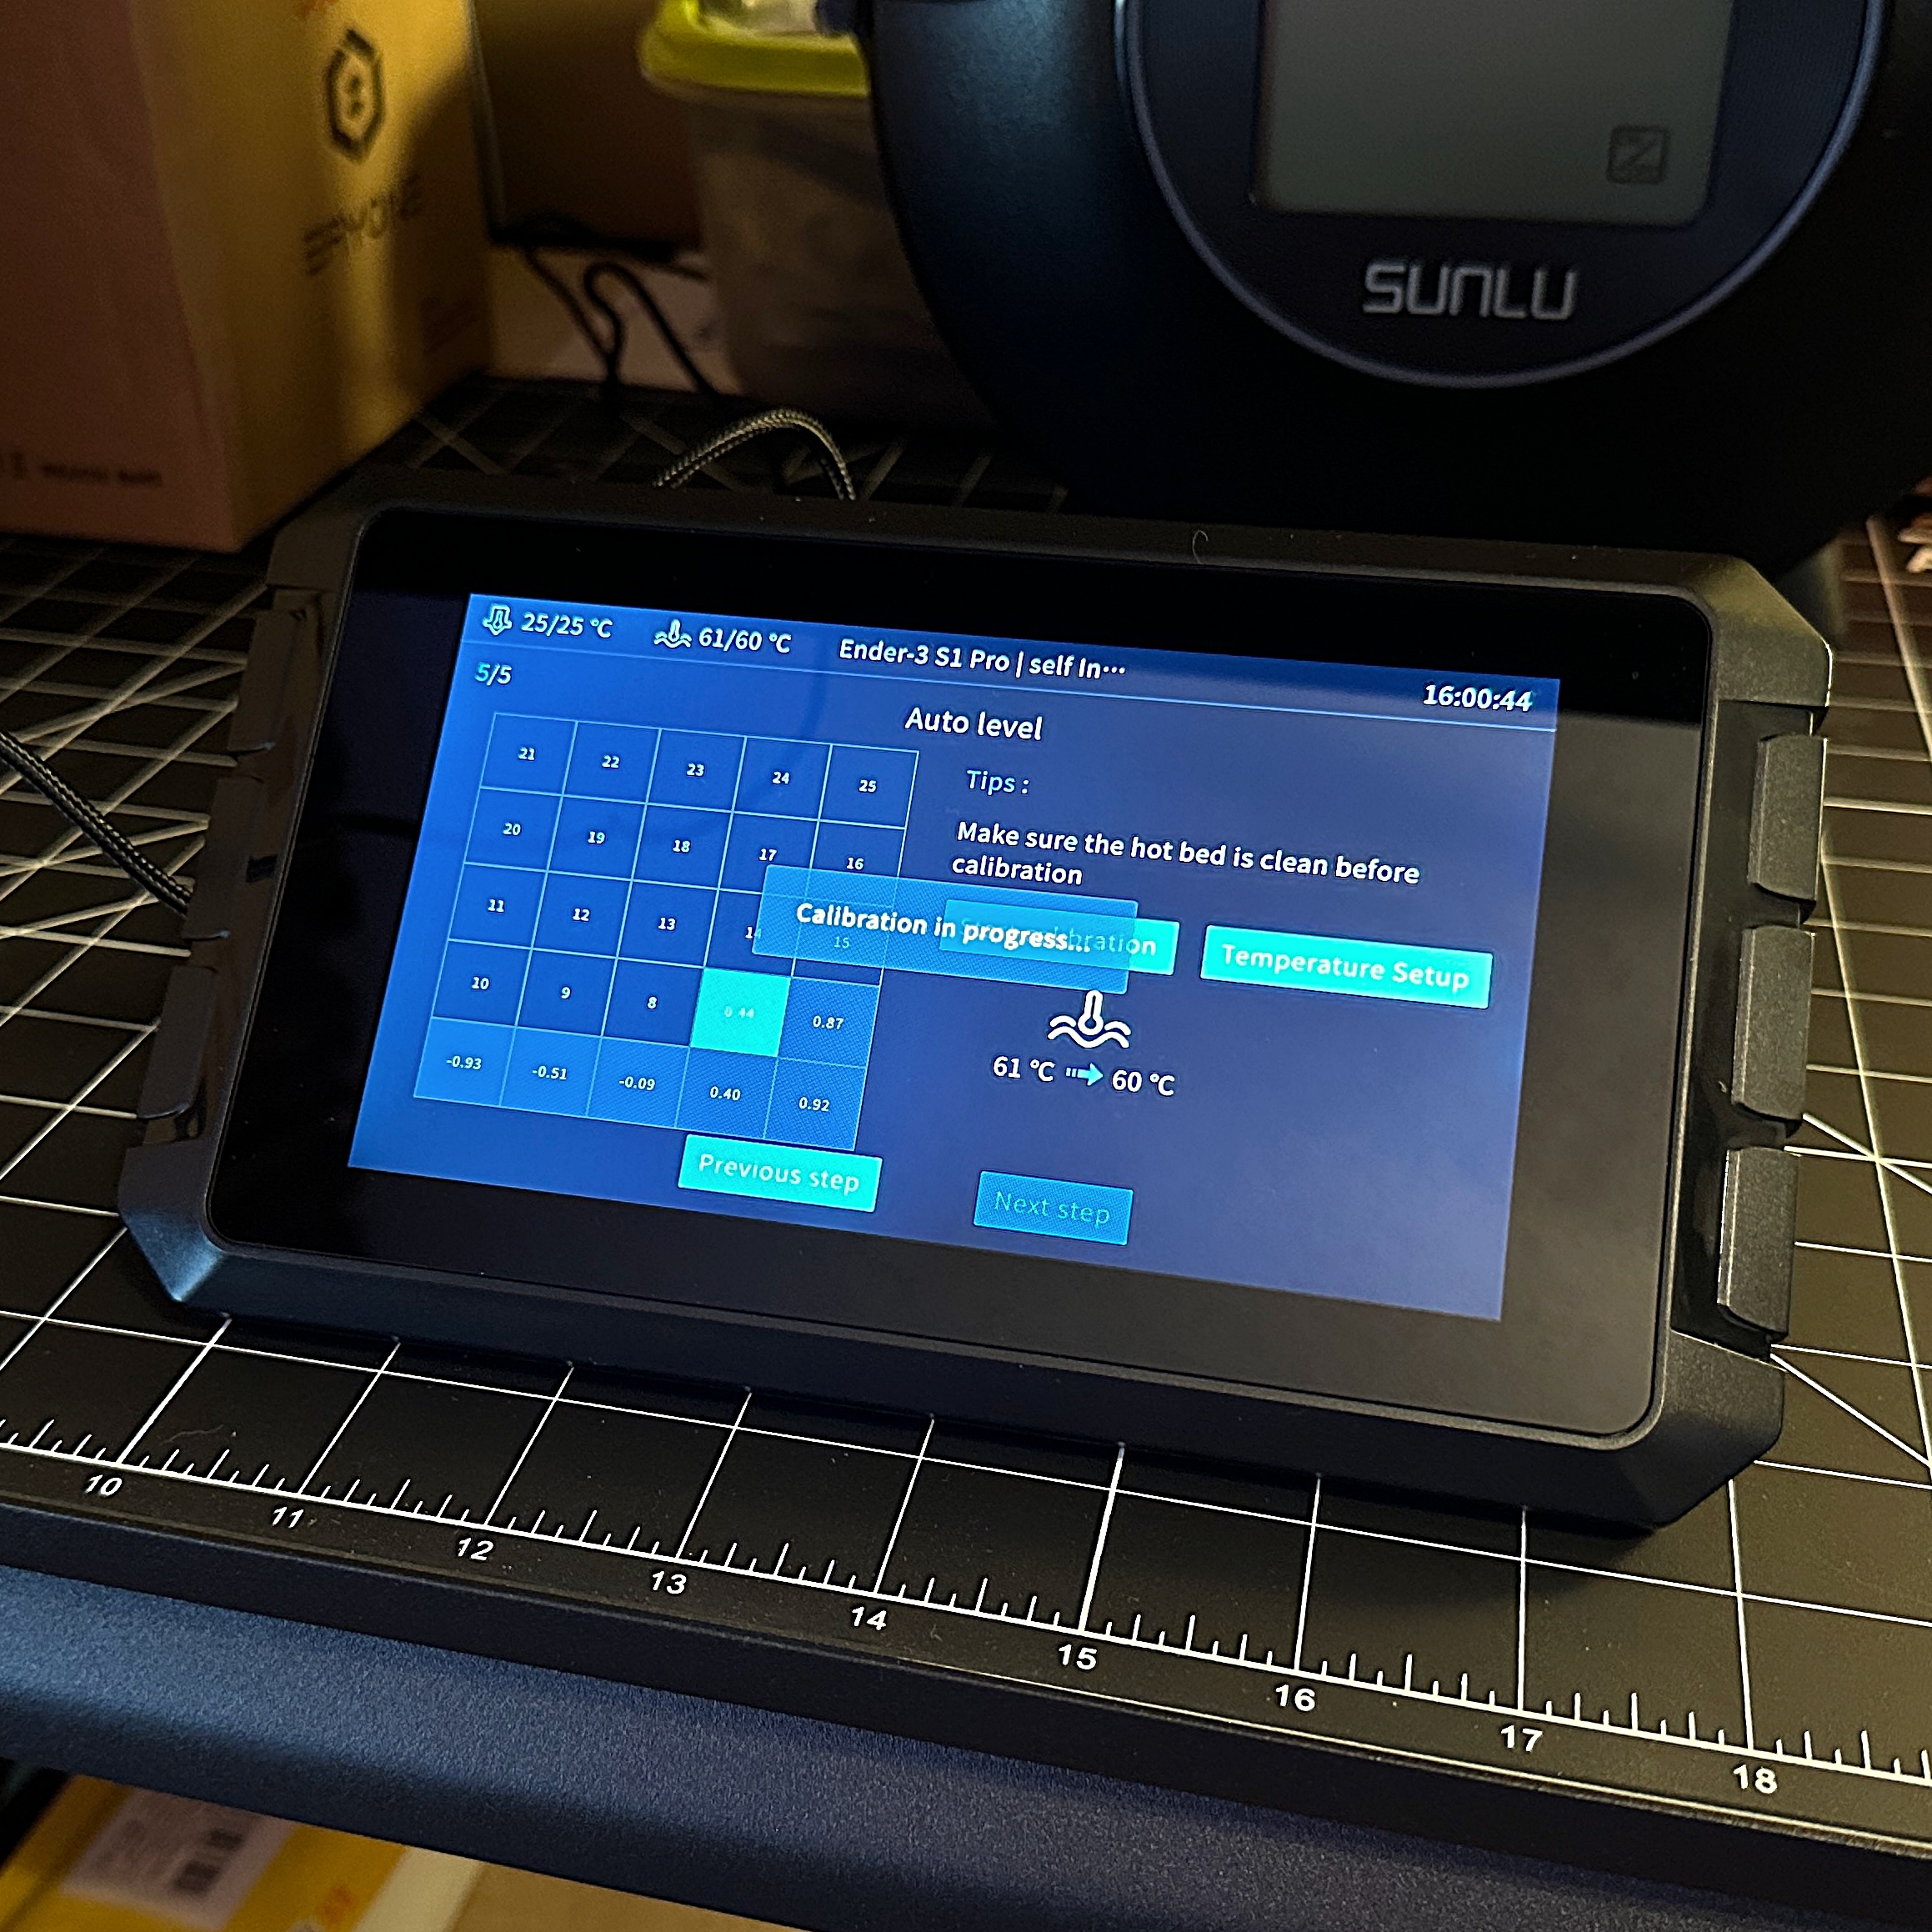
As you can see from the picture below, mine is pretty uneven, something I will have to tinker with later. After confirmation that your printer is correctly set up, you will be taken to the home screen.

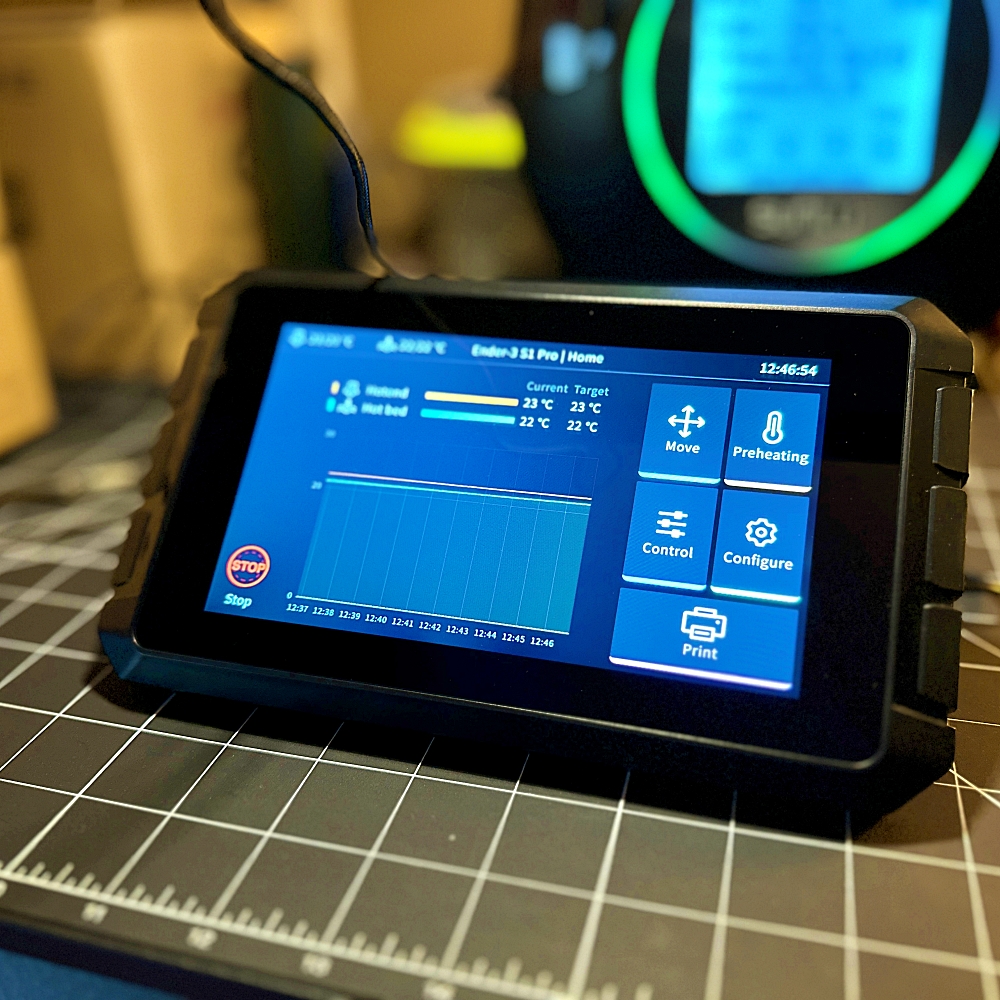
Sonic Pad screen overview
The Sonic Pad has a 64-bit CPU, 2GB of RAM, and 8GB of onboard storage. The pad can be used exactly the same way as your printer’s stock LCD screen. The display is bright and sharp. It is very responsive to touch commands and feels very quick. I also found it much more intuitive than the S1 Pros stock screen. You can get to most of the settings with just a couple of taps. The home screen displays the current temperature of both the hot end and bed. On the right side of the screen are icons for Move, Preheating, Control, and Print. The Configure icon lets you adjust leveling, Z-offset, and network settings. This is also where you can set up a camera. More on that later. The Other Settings icon lets you change the pad’s tone settings, upgrade the firmware, or reset the unit. Tapping Advanced Settings opens up another set of sub-menus. Below is a quick video of the different sub-menus and settings available.
Now that everything is set up, you can type the Sonic Pads IP address into any browser on your local network to view The Klipper web interface.
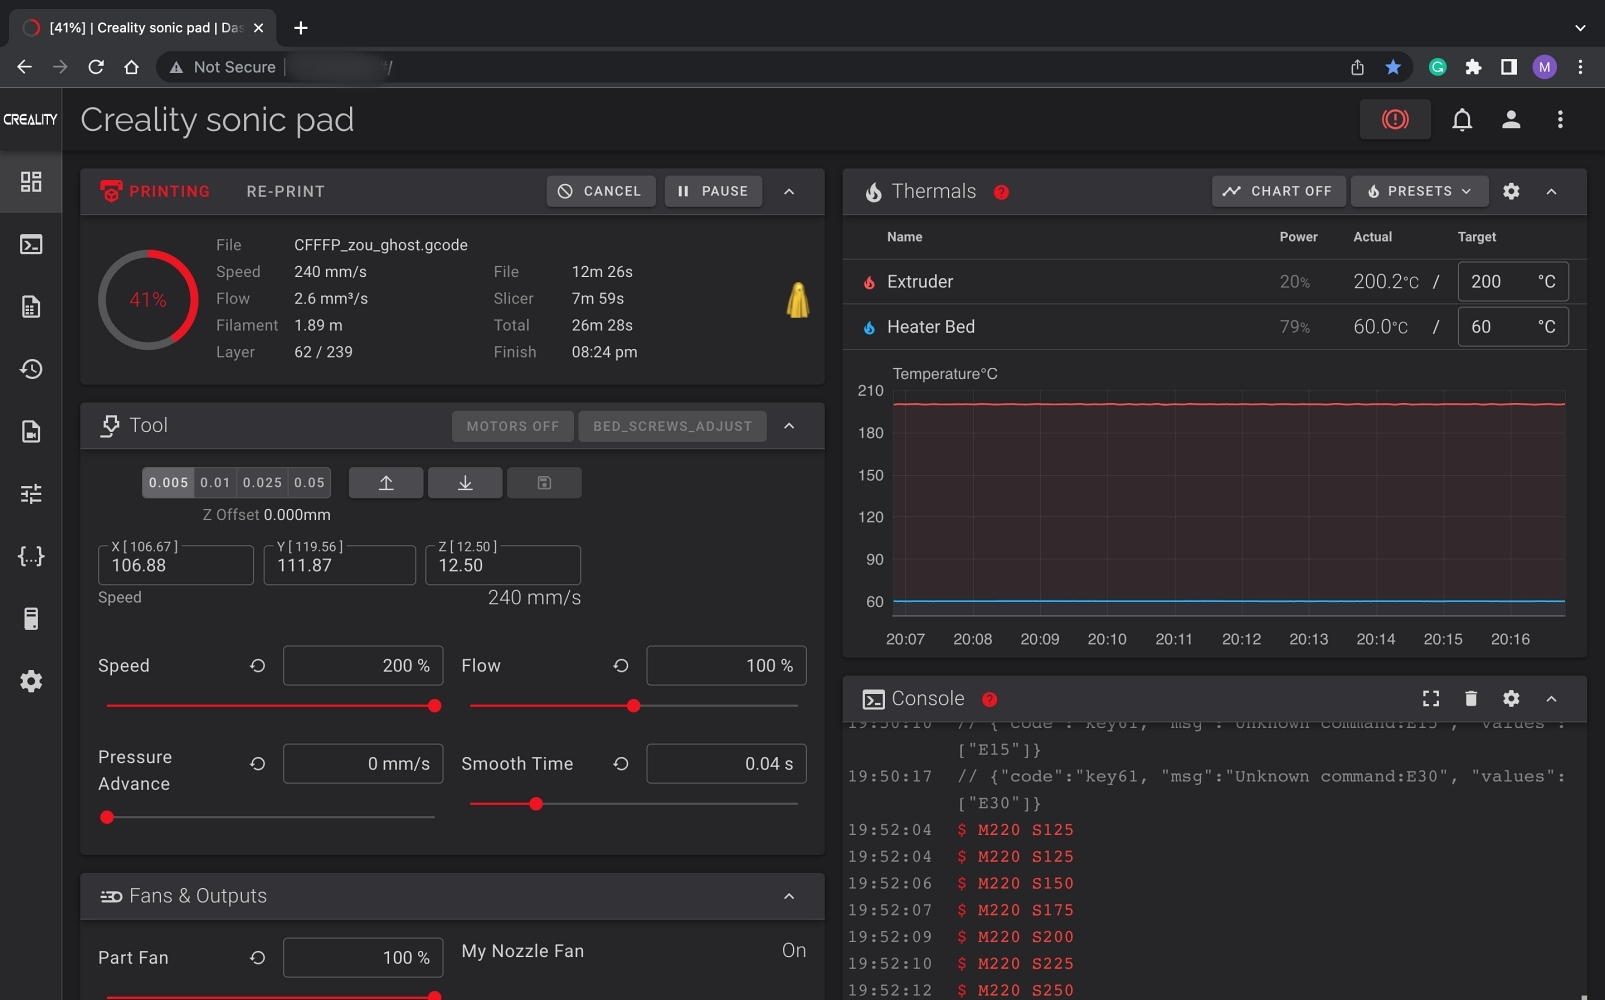
From here, you can remotely control your printer. And you can monitor a current print if you have a webcam setup, even from your phone.
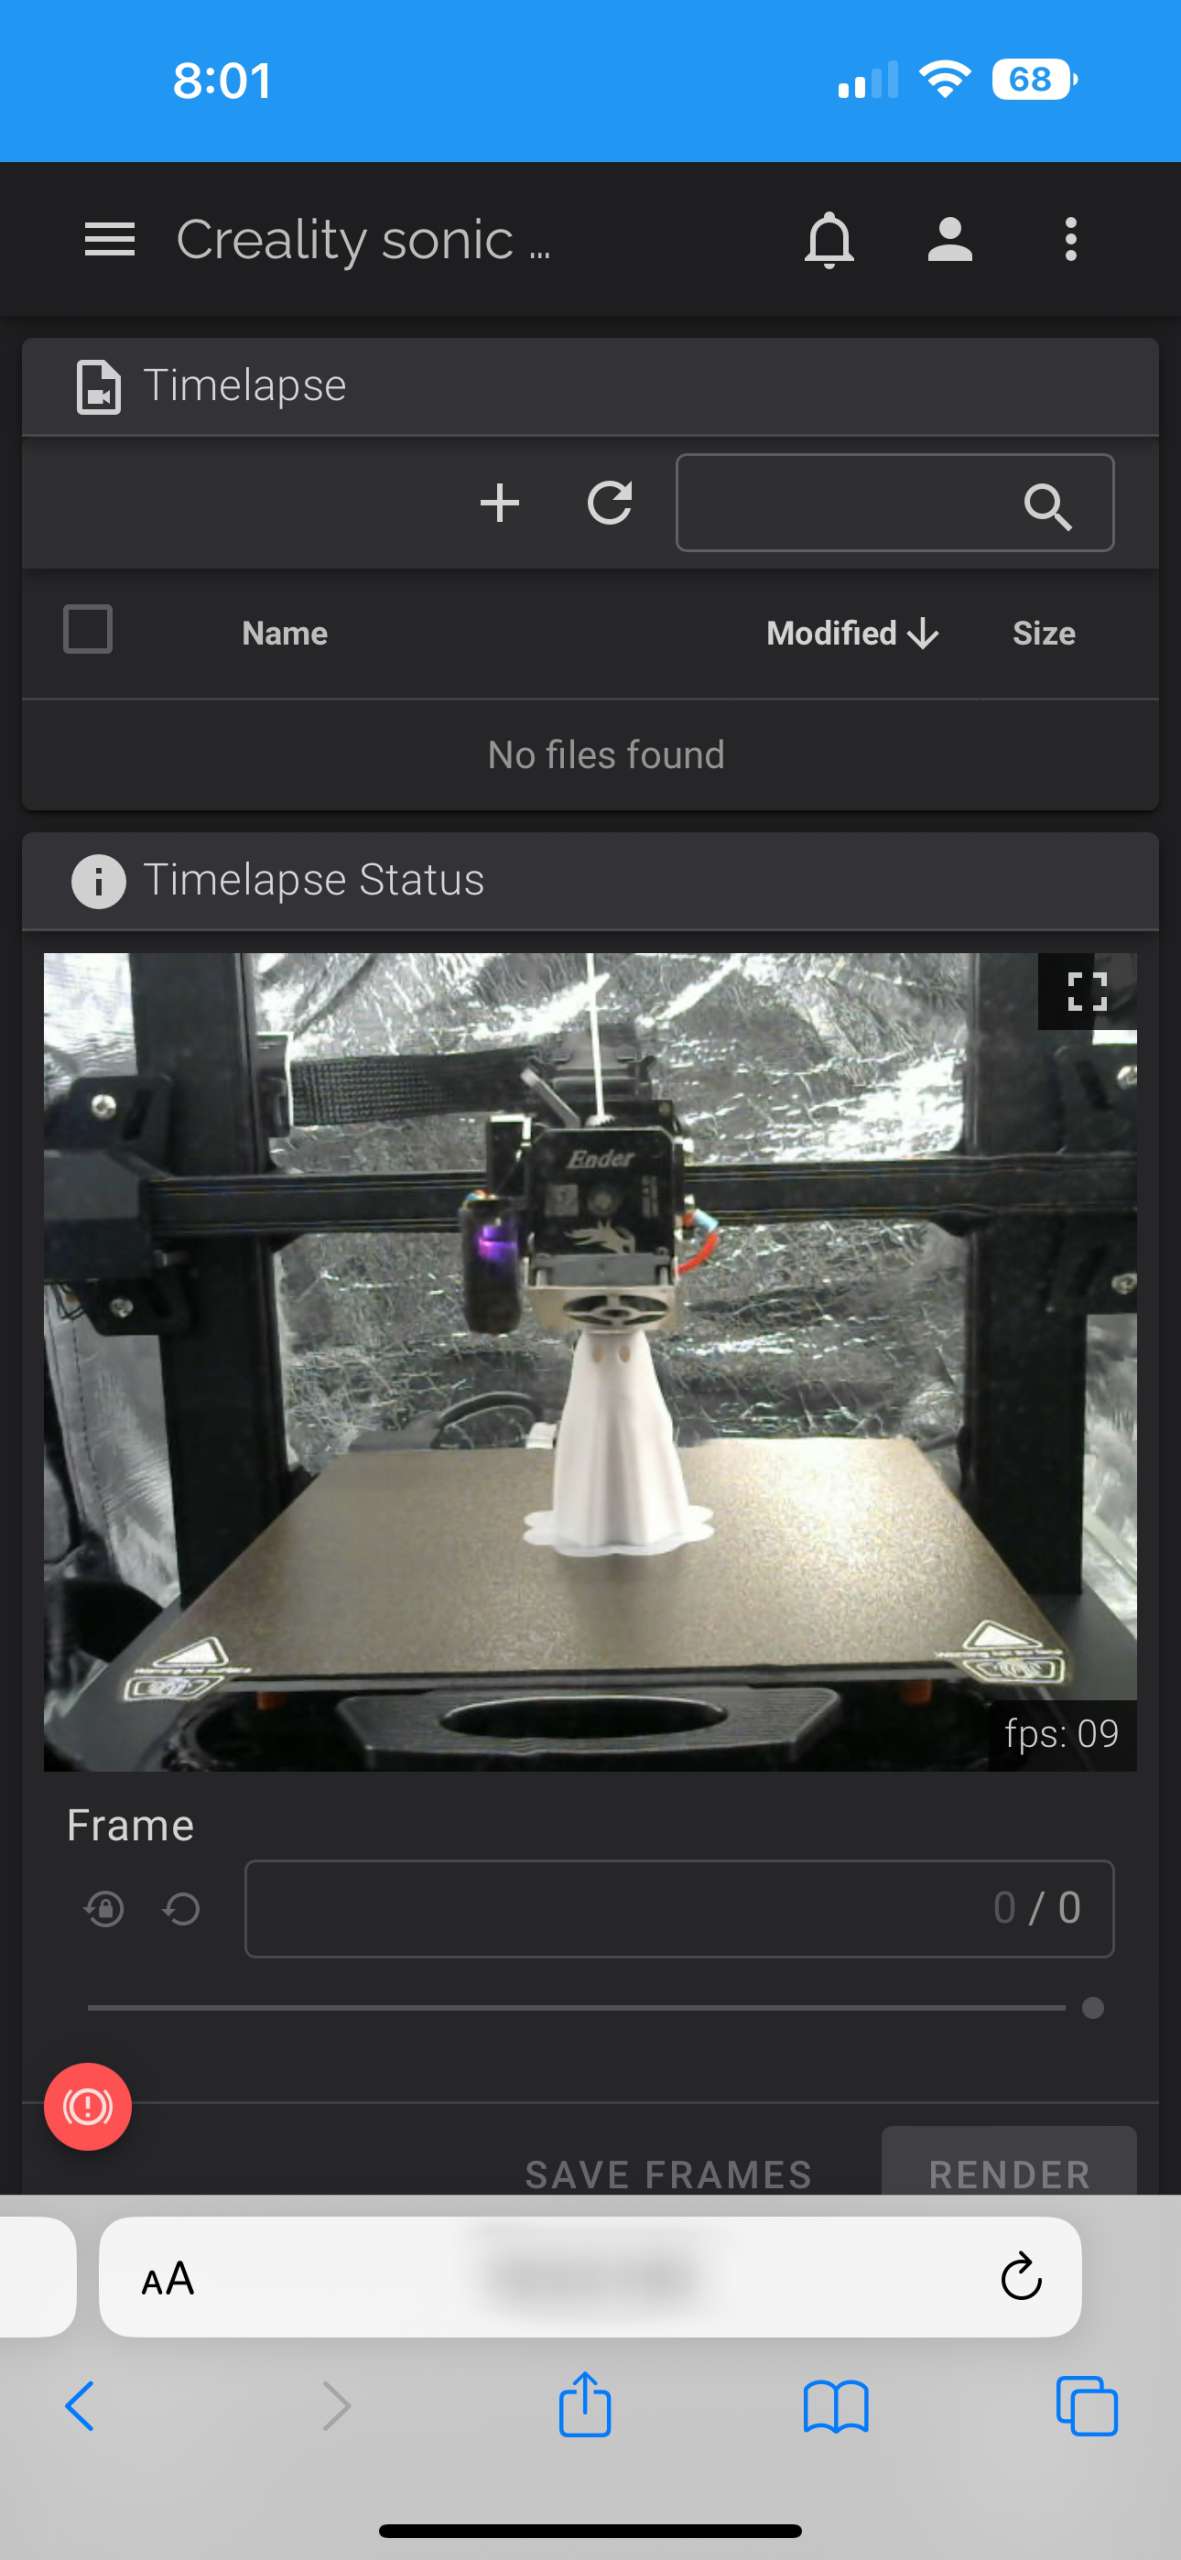
You can add a webcam to the Sonic Pad very easily. With a webcam, you can view a live feed of your print job and record time-lapse videos of your prints.

To add a webcam turn the pad off and plug it into the USB camera port around the back. Turn the Sonic Pad back on, tap Configure>Camera, then tap the webcam icon. Check the box to confirm the camera is attached and if supported, you will see a live feed from your webcam. Tap on the settings menu to select to have the camera automatically connect after startup and enable time-lapse photography.

I hooked up an old Logitech webcam I had and could view it from the Sonic Pad and the Klipper web UI without issue. I have not gotten around to doing any Timelapse videos yet. Maybe in a future update.
Slicing
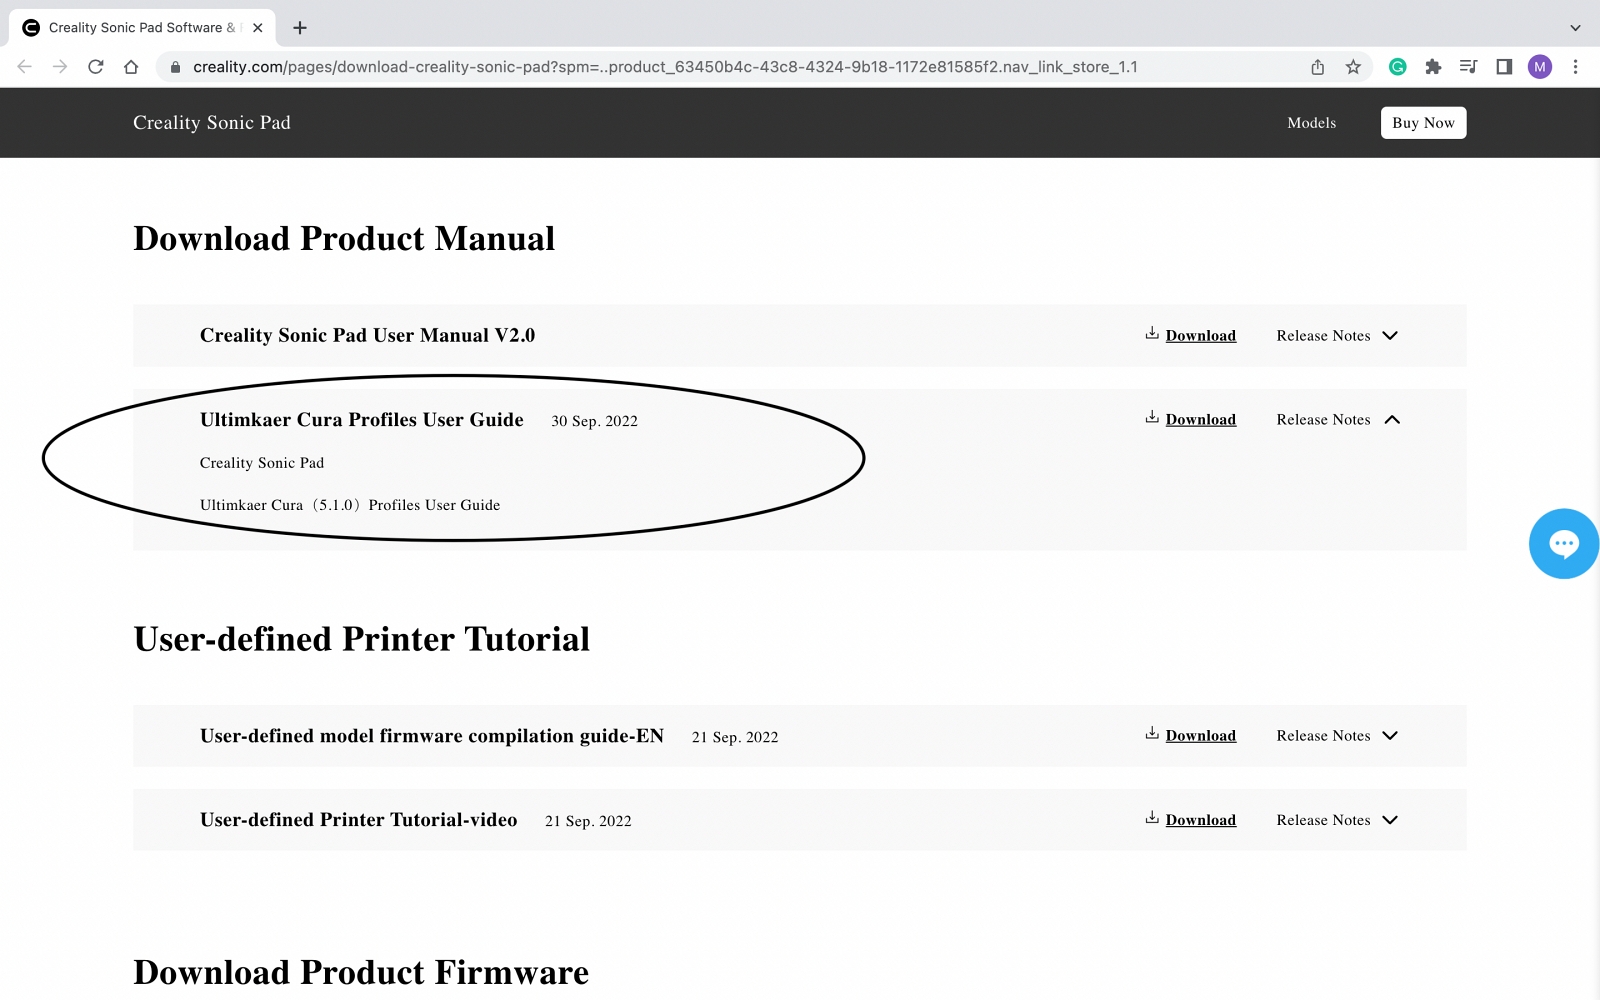
For slicing, you can use a version of Creality Print that is included on the USB. But, I prefer to use Cura because that is what I am most familiar with. If using Cura, you can go to Creality’s website and download a file that includes a PDF with instructions on how to set up the Sonic Pad in Cura 5.1 and 6 preset Cura profiles. There are Normal and Fast profiles for PLA, PETG, and ABS. Once you have Cura set up, you can import these profiles.
I also downloaded the Moonraker Connection plug-in from Cura’s marketplace.
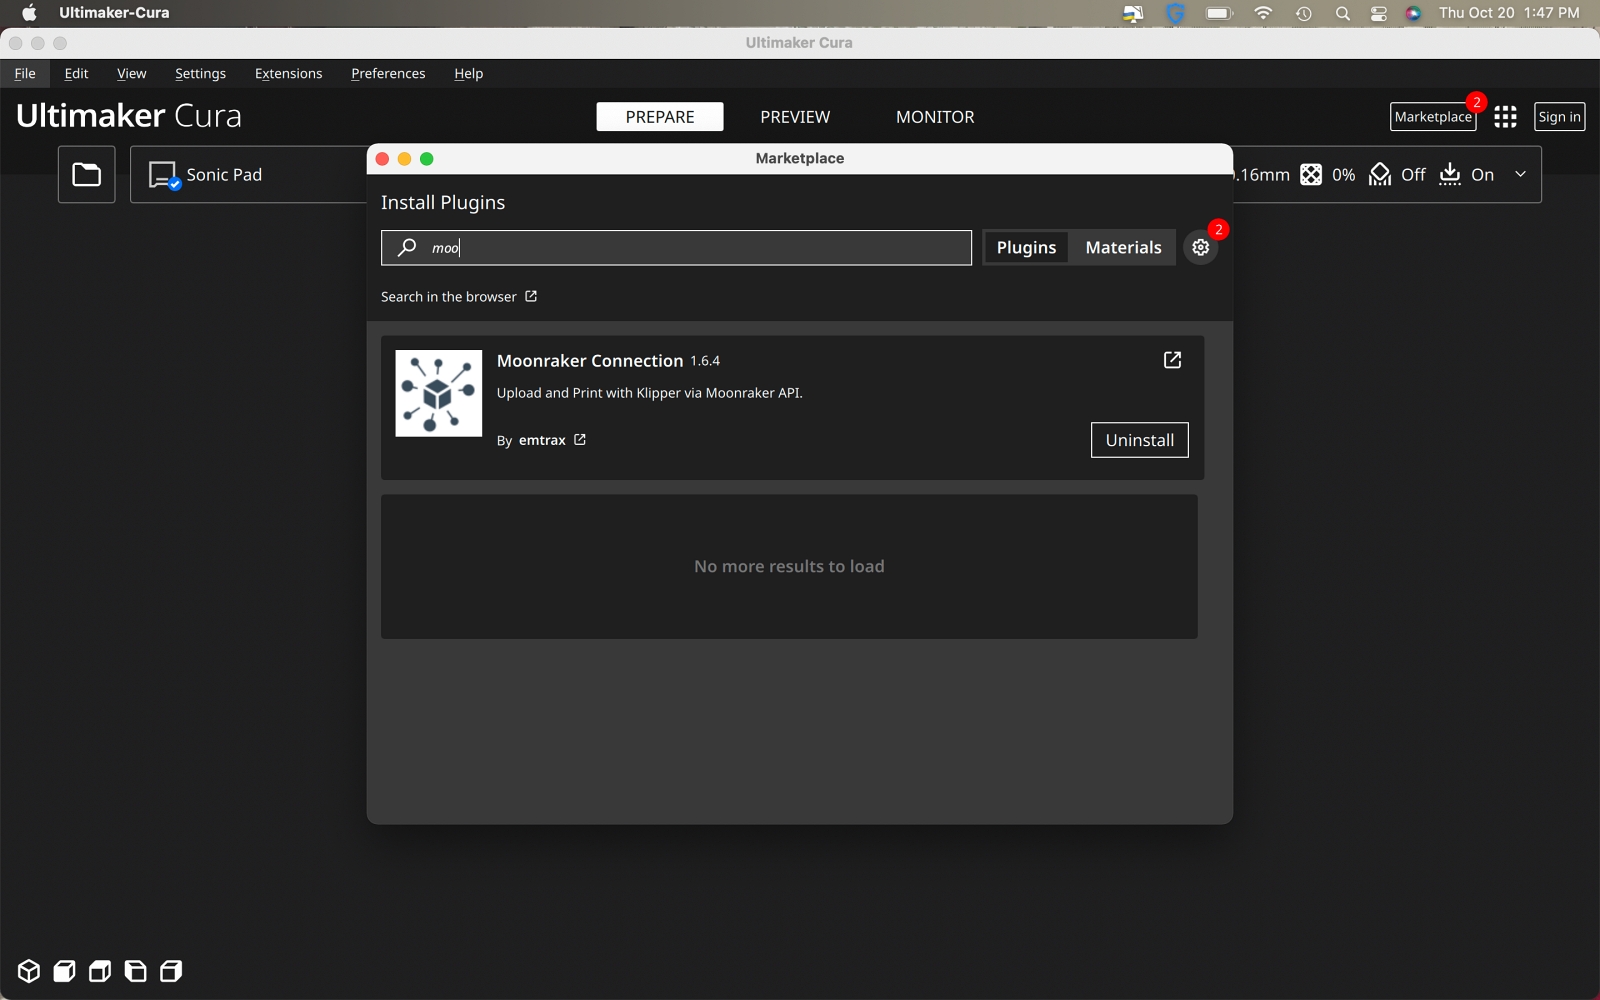
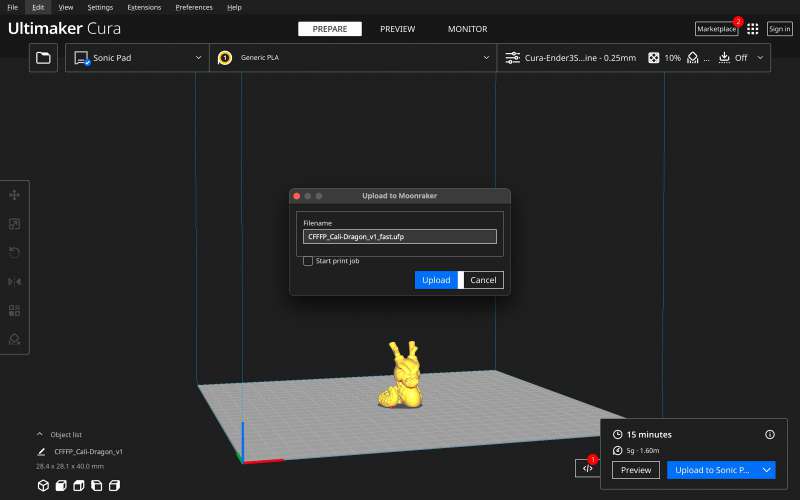
This allows you to send prints directly from Cura to the Sonic Pads’ internal memory after slicing. You will also be given the option to start the print job immediately. Or you can do it later from the web interface or the Sonic Pad.
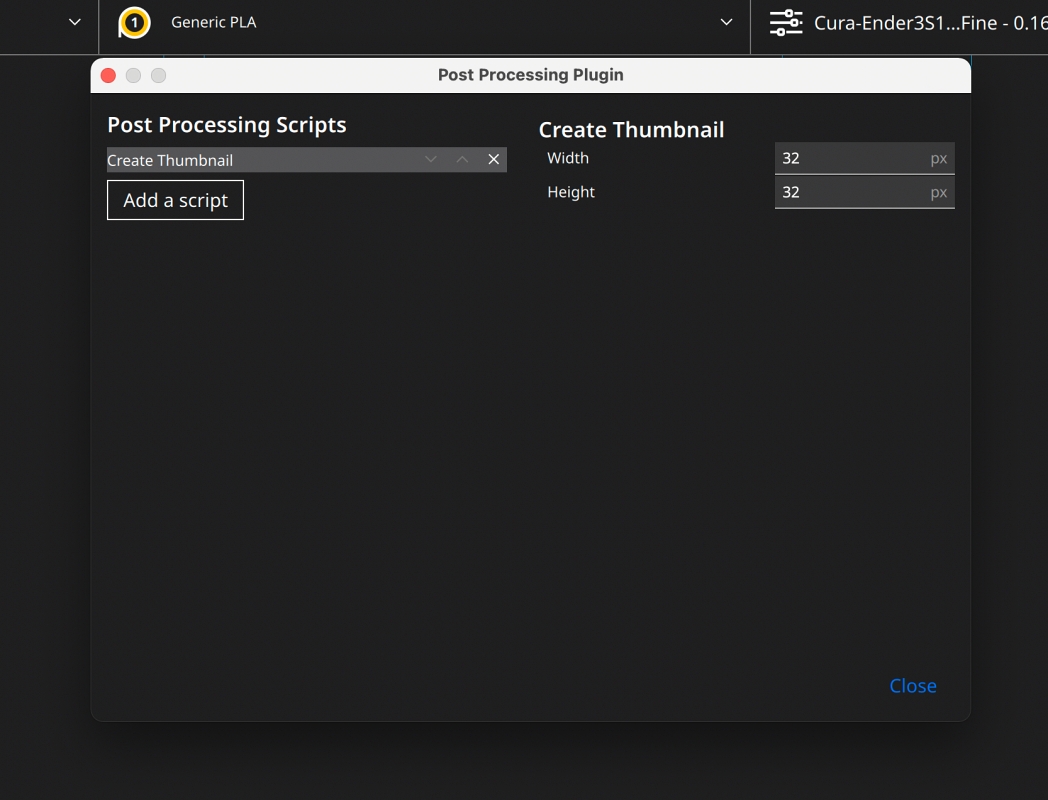
You can also enable thumbnails to view a rendering of the sliced file. This makes it easier to ensure you select the correct print file. Thumbnails can be activated in Cura under Extensions>Post Processing.
If you prefer to use a slicer other than Cura, you can find instructions on how to set them up in the user manual.
Before printing, especially at higher speeds, you need to run a resonance test. The test uses an accelerometer to measure the printer’s resonance frequencies. The best explanation I have seen is that it is like active noise cancellation for your 3D printer. The benefit is a reduction in ghosting or ringing you might notice when increasing print speeds and acceleration.
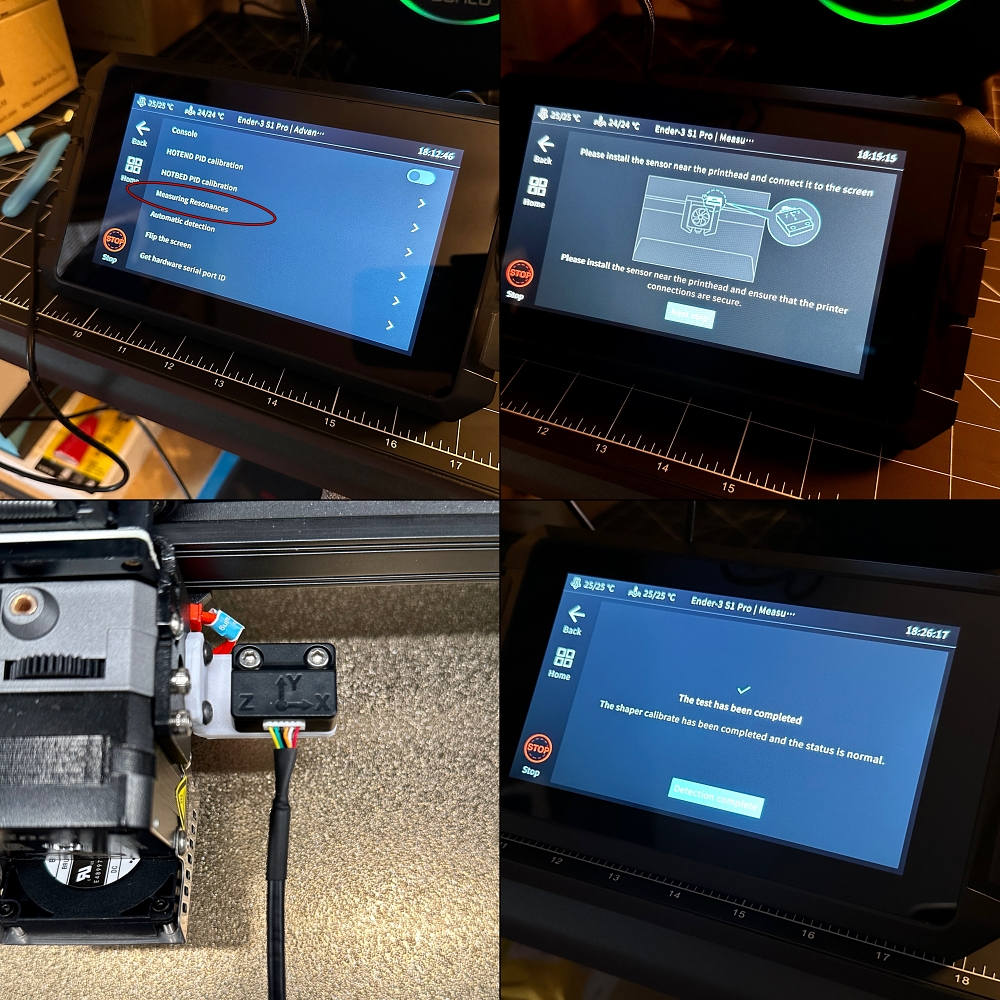
Creality includes 3D models of mounting brackets for attaching the sensor to the printhead. There is also a cable that connects the sensor to the PS/2 port. The test does not take long. When finished, Klipper will save the values and restart.
Performance
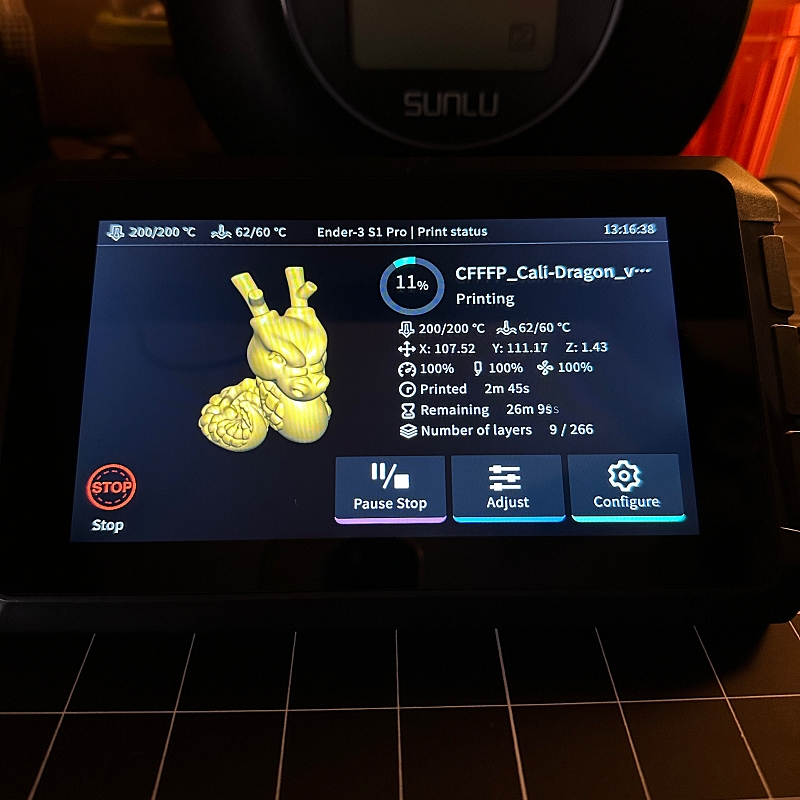
Printing with the Sonic Pad yielded fantastic results. Even using the Normal PLA profile, my models printed at twice the speed. Printing is easy, select the file you want to print from the local print menu and hit start. While printing, the progress screen will display all pertinent information about the current print job.
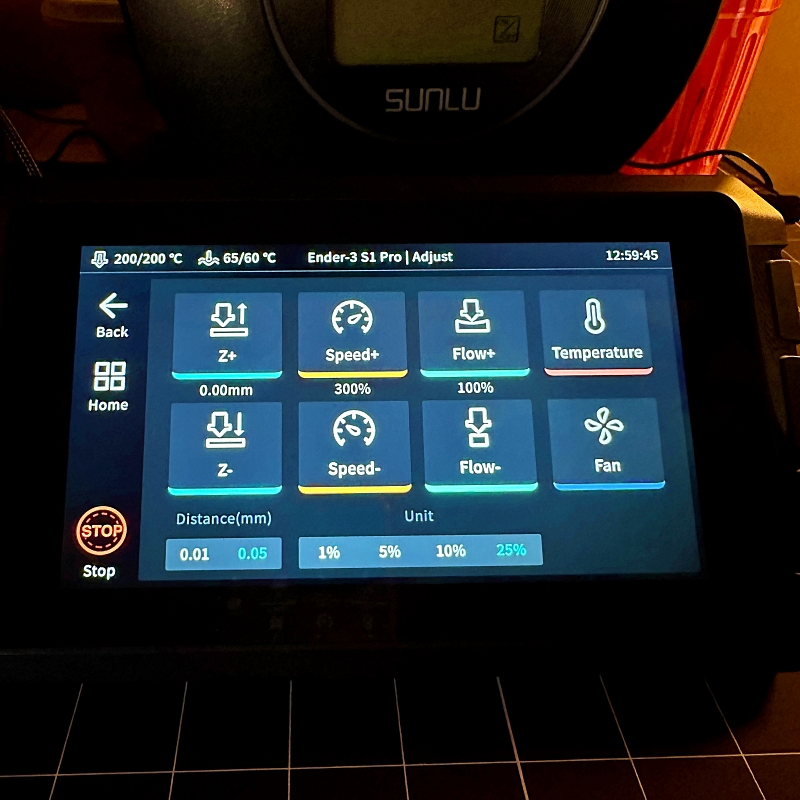
You can also make adjustments on the fly by tapping the Adjust icon. From there, you can change speed %, temperature, change Z height, flow, and fan speed.
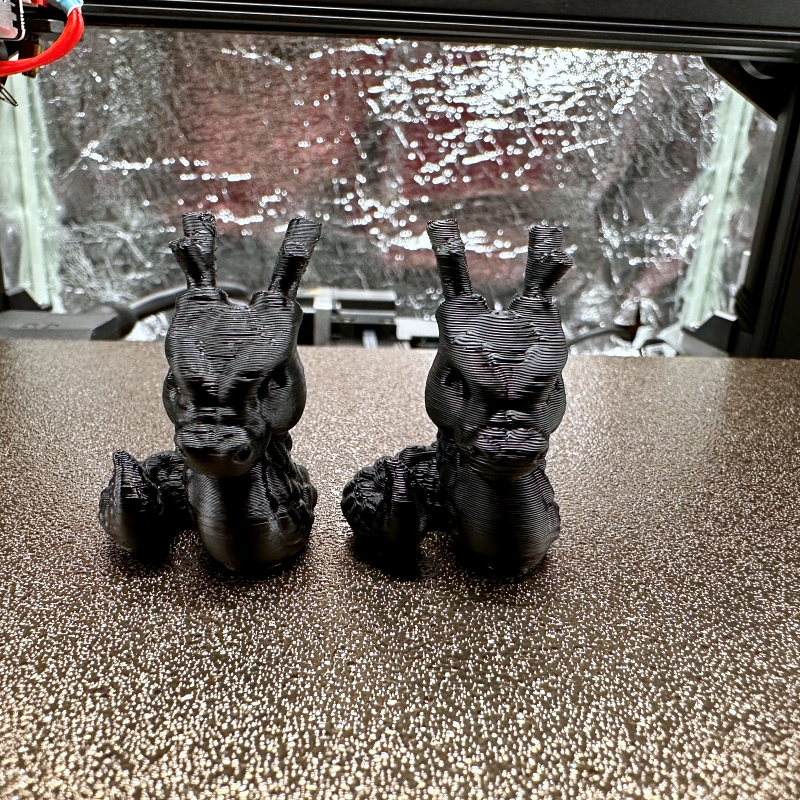
I printed two Cali Dragon models, one using the Normal PLA profile, which prints at 120mm/s, and the other using the Fast PLA profile (160mm/s). They printed up at 39 and 24 minutes, respectively. Both models turned out great, and the difference between them is negligible. In fact, I had to mark the bottom of the first model so I could remember which was which.
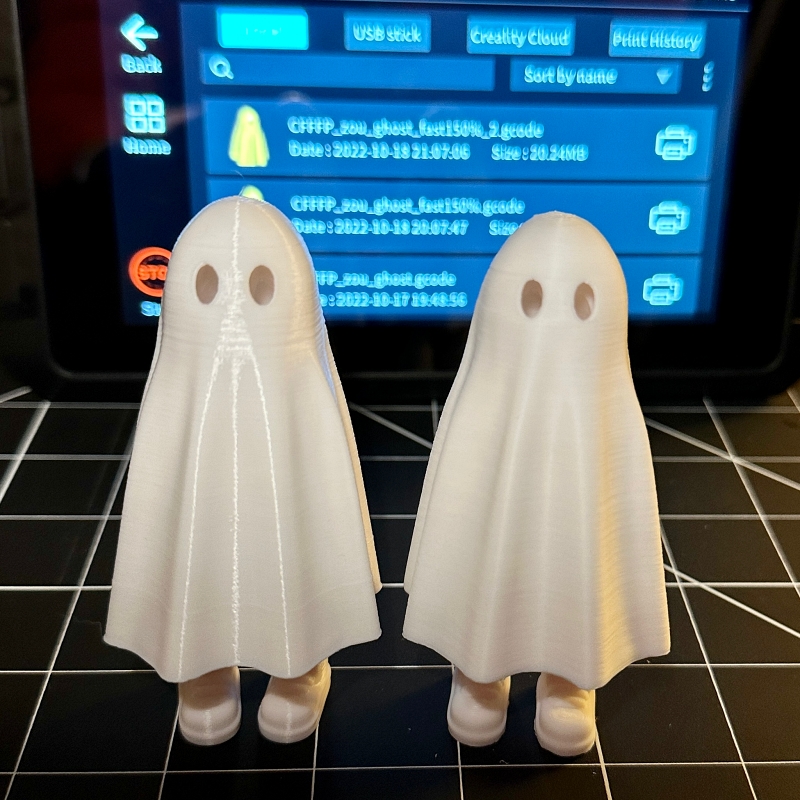
To further test the Sonic Pad’s capability, I printed a cute ghost with legs model from ZOU3D before installing the Sonic Pad. It was printed at 60mm/s using white PLA and finished in approximately 4 hours. I then printed the same file using the Fast PLA profile (160mm/s). It printed in 2 hours and 40 minutes. Again the results were very similar, even at more than twice the print speed.
With Klipper, models print much faster with much the same quality as those at lower speeds. And I know once I learn more about it, I’ll be able to tweak settings to make it even better. That is exciting.
Overall I think the Creality Sonic Pad is a worthy upgrade to my Creality Ender-3 S1 Pro 3D printer. The list of upgrades is impressive. And they start even before producing a single print. It has a larger screen, a cleaner user interface, control of all settings, easy bed leveling, webcam support, a web UI, the ability to send sliced files directly from Cura, and much more. And the out-of-the-box print performance is great.
The only issue I have with the Sonic Pad is its lack of support for other printers. But, as I mentioned earlier, Creality is working to fix that. Also, since receiving the Sonic Pad, there have been two OTA updates. This shows me that Creality is committed to making this the best device possible.
What I like
- Setup is plug-n-play
- Easy to use
- 7-inch touch screen
- Control over more settings
- Web UI
- Ability to connect a webcam
- Klipper produces faster, quality prints
What I’d change
- Needs to be compatible with more 3D printers
Final thoughts
The Creality Sonic Pad checked every box when it came to my expectations. It was simple to set up, easy to use, loaded with features, and printed at much faster speeds than my stock S1 Pro. And it did all this right out of the box. No tweaking or software knowledge needed. If you are looking for a plug-and-play way to add Klipper to your 3D printer, Sonic Pad is the way.
Update 11/11/22
As promised Creality has added to the list of the Sonic Pads supported printers. They have added 7 new printers to the list, the Ender-3 Pro, Ender-5 Plus, Ender-3 Max, Ender-3 S1 Plus, CR-10 Smart, CR-10S Pro V2 and CR-10 V3. I’m sure this list will continue to grow, and hopefully we will see more support for non Creality printers.
Price: $159.00
Where to buy: Creality and Amazon
Source: The sample for this review was provided by Creality.

Samsung 14" Galaxy Chromebook Go Laptop PC Computer, Intel Celeron N4500 Processor, 4GB RAM, 64GB Storage, ChromeOS, XE340XDA-KA2US, Student Laptop, Silver
(as of June 13, 2026 18:47 GMT -05:00 - More infoProduct prices and availability are accurate as of the date/time indicated and are subject to change. Any price and availability information displayed on [relevant Amazon Site(s), as applicable] at the time of purchase will apply to the purchase of this product.)
Gadgeteer Comment Policy - Please read before commenting
Michael, I have purchased mine already and waiting for it to arrive. I will be hooking it up to the Voxelab S2 you reviewed before. I was told but Creality that it with work with my printer. Have you tried it on that one and if so any words of advice.
Hey Carl,
I have not tried it with my S2 as of yet. I’m still fine tuning it with my S1 Pro and want to learn more about Klipper before doing anything else. Please let me know how it works with the S2, definitely curious to see how easy it is to setup and use with a non Creality printer. Good luck! Thanks for reading and commenting.
Maybe they should give these out for free who bought the Ender 5 Plus that is useless.
I am wondering if it still supports the laser module for my Ender S1 Plus? The laser module is pretty much plug and play with the S1 Plus with the stock firmware. Guess I’ll find out. The pad came yesterday and the laser module will be here in a few weeks.
In the last week or so, they have an upgrade for the SonicPad that now does support the laser module on the S1 printers.
Klipper is niet alleen snelheid, het verbeterd de bochten en hoeken.
is it possible to view the web interface outside of my local network to monitor prints when away from home?
VPN server on your LAN
Dopn’t you still have to do a lot of other calibrations like E-steps and flow rate?
This is a useless piece of kit. It only recognises USB 2. You cannot use the printer SD card to print. If you have a touch screen UI on your printer this is a waste of money. It is not worth the effort to get so called improvements and faster printing. Better to invest in another company. Creality support is appalling