
REVIEW – Six months ago, I was bitten by the 3D printing bug when I reviewed my first 3D printer, the Voxelab Aquila S2. Since then, I have fallen in love with 3D printing. There is a lot to learn. And it can be frustrating at times. But it is one of the most satisfying things I have ever done. So, when I was approached by Creality to review one of their newest 3D printers, I jumped at the opportunity. Let’s take a closer look at the Creality Ender-3 S1 Pro.
What is it?
The Creality Ender-3 S1 Pro 3D printer is an upgraded version of the Creality Ender-3 S1 3D printer. This 3D printer features an all-metal dual gear direct drive extruder, auto bed-leveling, a 4.3-inch touch-screen, and more.
What’s in the box?
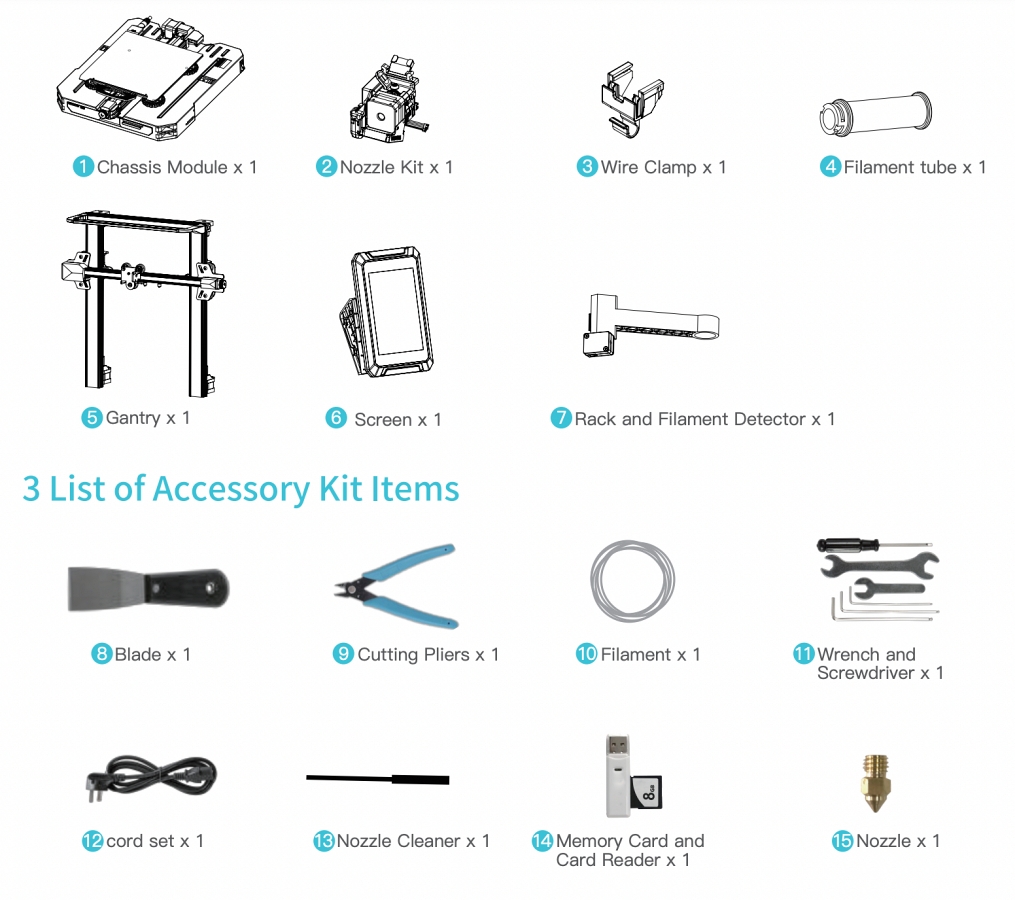
- Chassis module
- Nozzle kit
- Wire clip
- Filament tube
- Gantry
- 4.3-inch touch screen
- Rack & filament runout sensor
- Metal spatula
- Cutting pliers
- Filament sample
- Wrenches & screwdriver
- Power cord
- Nozzle cleaning needle
- Memory card & reader
- Extra nozzle
- Assembly bolts z-axis limit switch
Hardware specs
- Molding Technology: FDM
- Build Volume: 220 x 220 x 270 mm
- Machine Dimension: 490 x 455 x 625 mm
- Nozzle Temperature: Up to 300°C
- Heat Bed Temperature: Up to 110°C
- Leveling Mode: CR Touch Automatic Leveling
- Display: 4.3-inch color touch screen
- Motherboard: 32-bit silent motherboard
- Gross Weight: 10.7 kg
- Printing Speed: Maximum 150 mm/s
- Printing Precision: +0.1 mm
- Layer Height: 0.05-0.4mm
- Filament Diameter: 1.75 mm
- Resume Printing: Yes
- Filament Sensor: Yes
- Rated Voltage: 100-120V, 220-240V, 50/60 Hz
- Rated Power: 350W/24V
- Nozzle Quantity: 1
- Data Transmission Method: Type-C USB/ SD card
- 3D File Format: .stl/.obj / .gcode (after slicing)
- Nozzle Diameter: 0.4 mm
- Extrusion Force: 80N
- Extruder: “Sprite” full-metal dual-gear direct extruder with 1:3.5 gearing
- Slicing Software: reality Slicer/Cura/Repetier-Host/Simplify3D
- Build Surface: Spring steel PEI magnetic build plate
- Supported Filament: PLA, ABS, WOOD, TPU, PETG, PA
Design and features
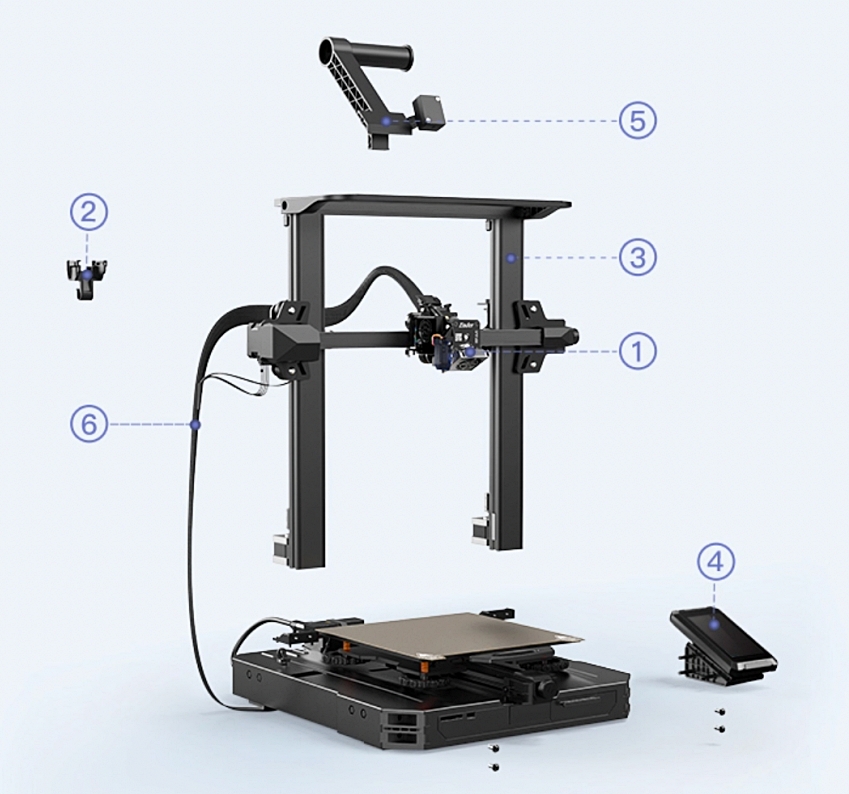
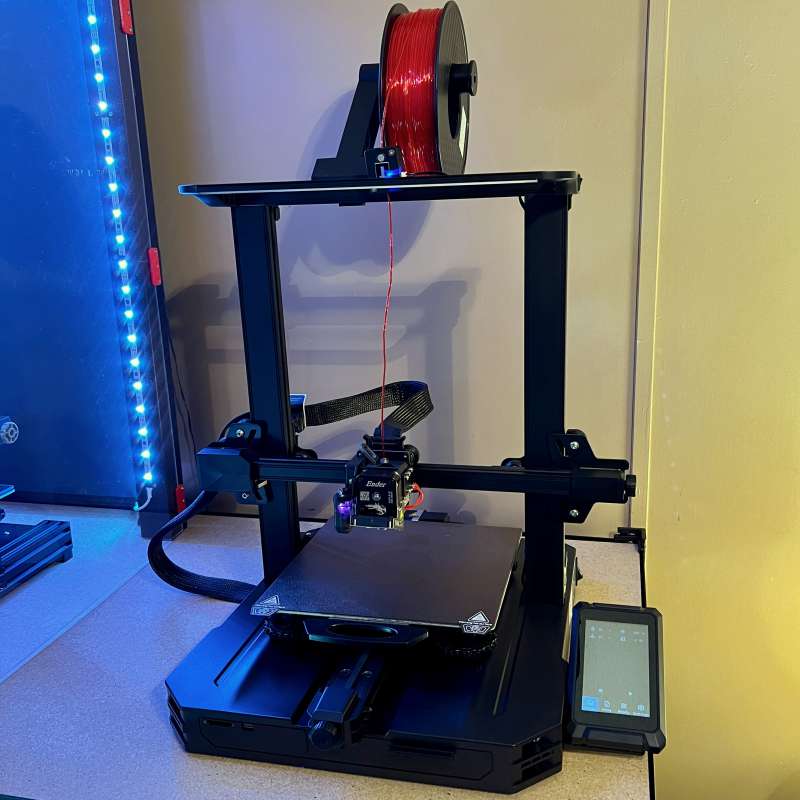
The Creality Ender-3 S1 Pro 3D printer arrived in a good-sized box, and each part was securely packed in foam. Assembly was a breeze. The printer is 96% assembled in the box and literally goes together in 6-steps illustrated below.
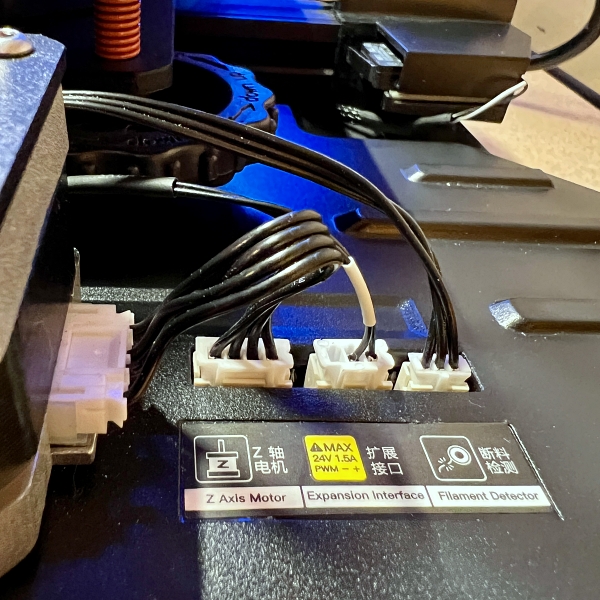
The wiring management is also excellent. Everything is labeled, and the plugs only fit together one way. So it is nearly impossible to mess up.
I had the Creality Ender-3 S1 Pro 3D printer fully assembled and ready to go in under 20 minutes.
Overall the build quality of the printer is impressive. All of the parts are solidly built, and everything feels robust.
The chassis is fully covered by injection molded plastic giving it a premium look and feel. But it still has a rigid metal frame underneath.
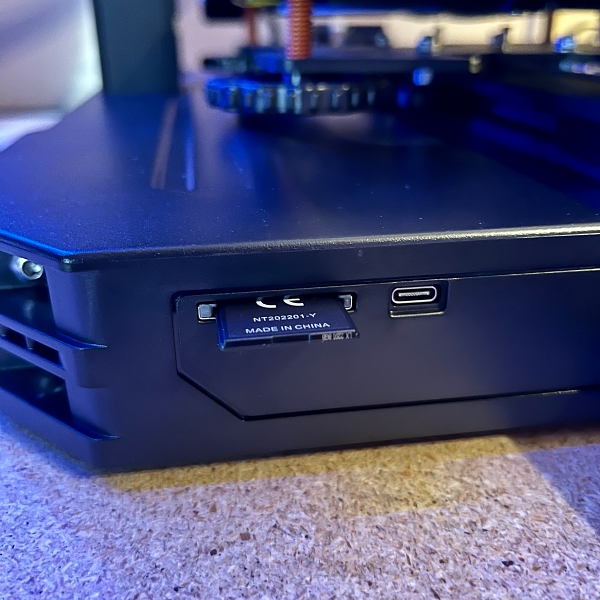
A full-size USB card slot and a Type-C port are located on the front of the printer.
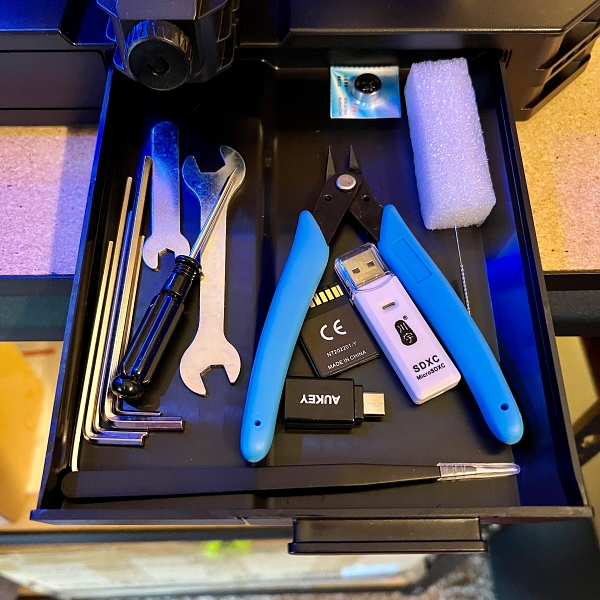
Just to the right of the ports is a 6 x 71/2 – inch drawer. I like this addition because it gives me plenty of space to store my accessories. Things like the cutting pliers, Allen wrenches, and tweezers fit nicely inside. It also helps keep the printer workspace free from clutter.
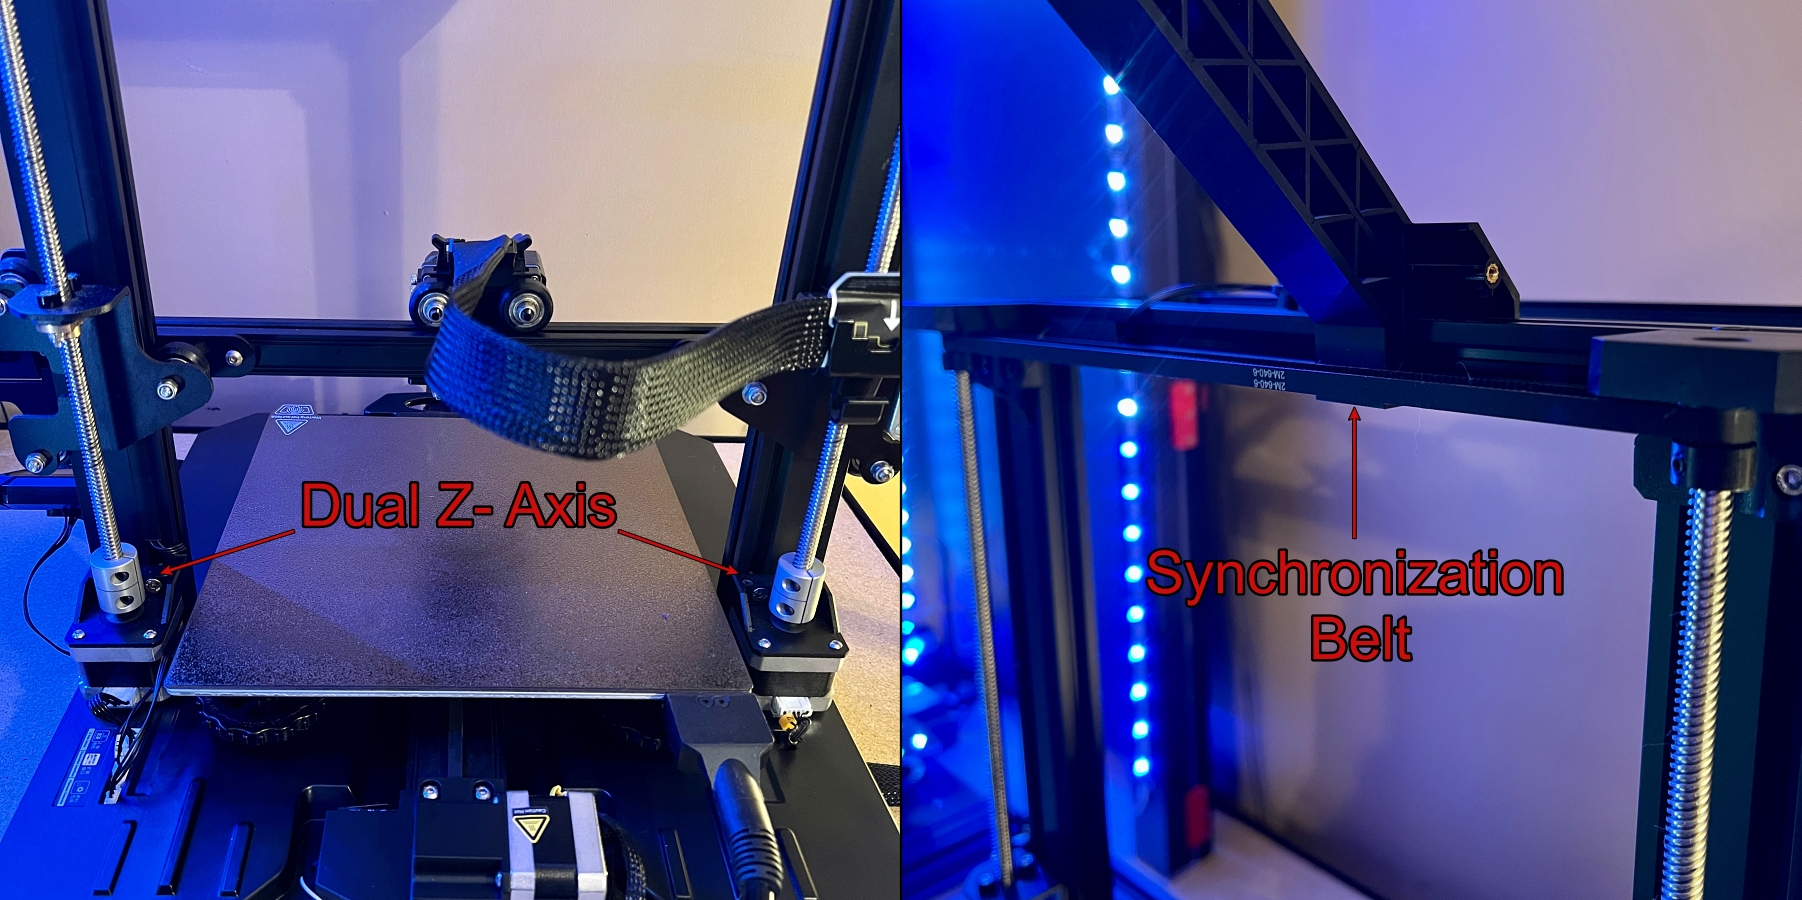
The Creality Ender-3 S1 Pro 3D printer has dual Z-axis screws and motors. The two separate motors are synchronized by a belt at the top of the gantry. This allows the Z-axis to move more smoothly, resulting in more precise prints.
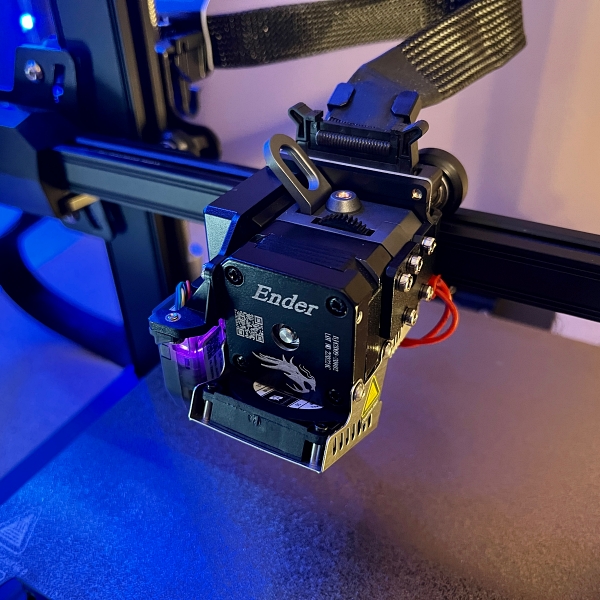
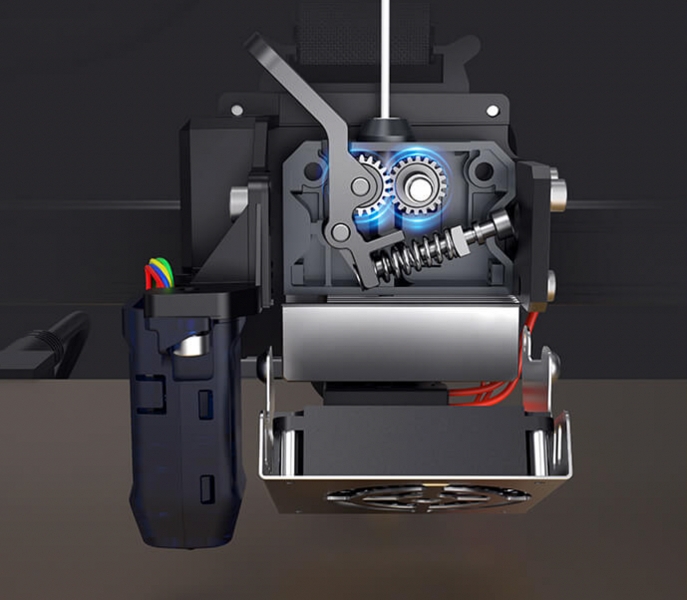
The Creality Ender-3 S1 Pro 3D printer comes equipped with several upgrades over the Ender-3 S1. Chief among these is a full-metal dual-gear direct extruder. The Sprite dual-gear direct extruder ensures smooth feeding and less clogging when using different filaments. It works particularly well with softer filaments like TPU, for example.
The full-metal hot end allows the nozzle to reach a temperature of 300º C. The higher temp lets you print denser filaments such as ABS, nylon, and carbon fiber.
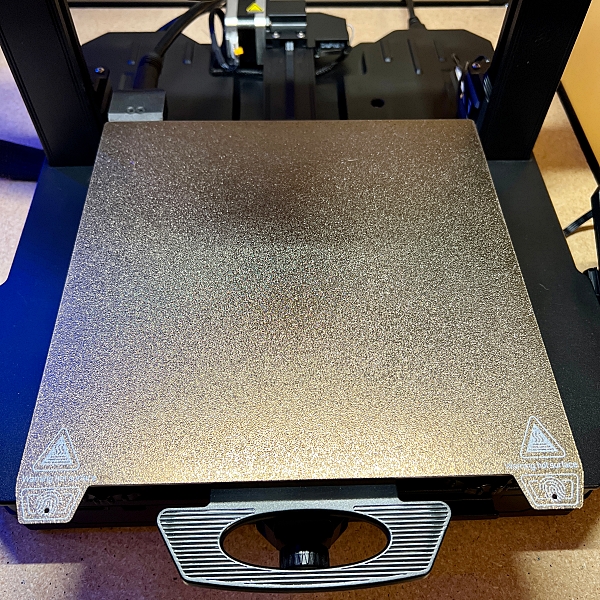
The Creality Ender-3 S1 Pro 3D printer comes with an upgraded PEI spring steel magnetic build plate. The PEI coating on the steel sheet gives better layer adhesion, especially on the all-important first print layer. It is also flexible, allowing for easier print removal.
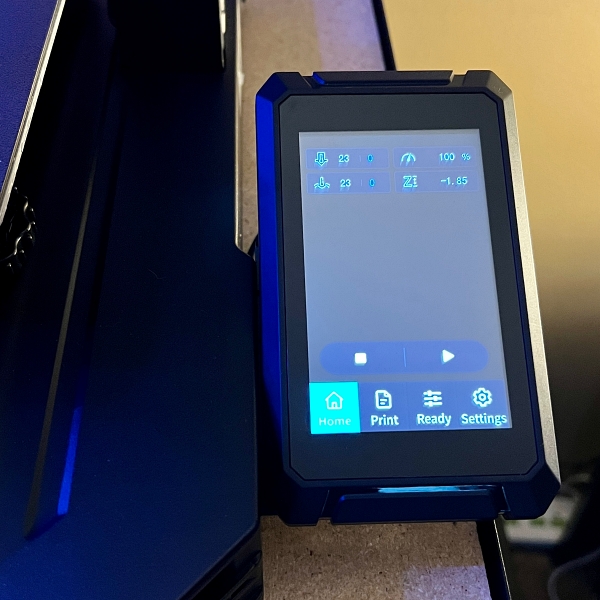
The 4.3-inch display has been upgraded with a touch screen. The touch screen makes it easy to quickly navigate the various menu options. And since almost everything we use these days has a touch screen, this is a welcomed addition. The display itself is bright and easy to navigate. The screen has an auto-dimming feature that dims the screen when it is inactive for more than 5 minutes. I did find that some of the menu options are buried in sub-menus, making them a little hard to find. So it is a good idea to familiarize yourself with the touch screen before printing.
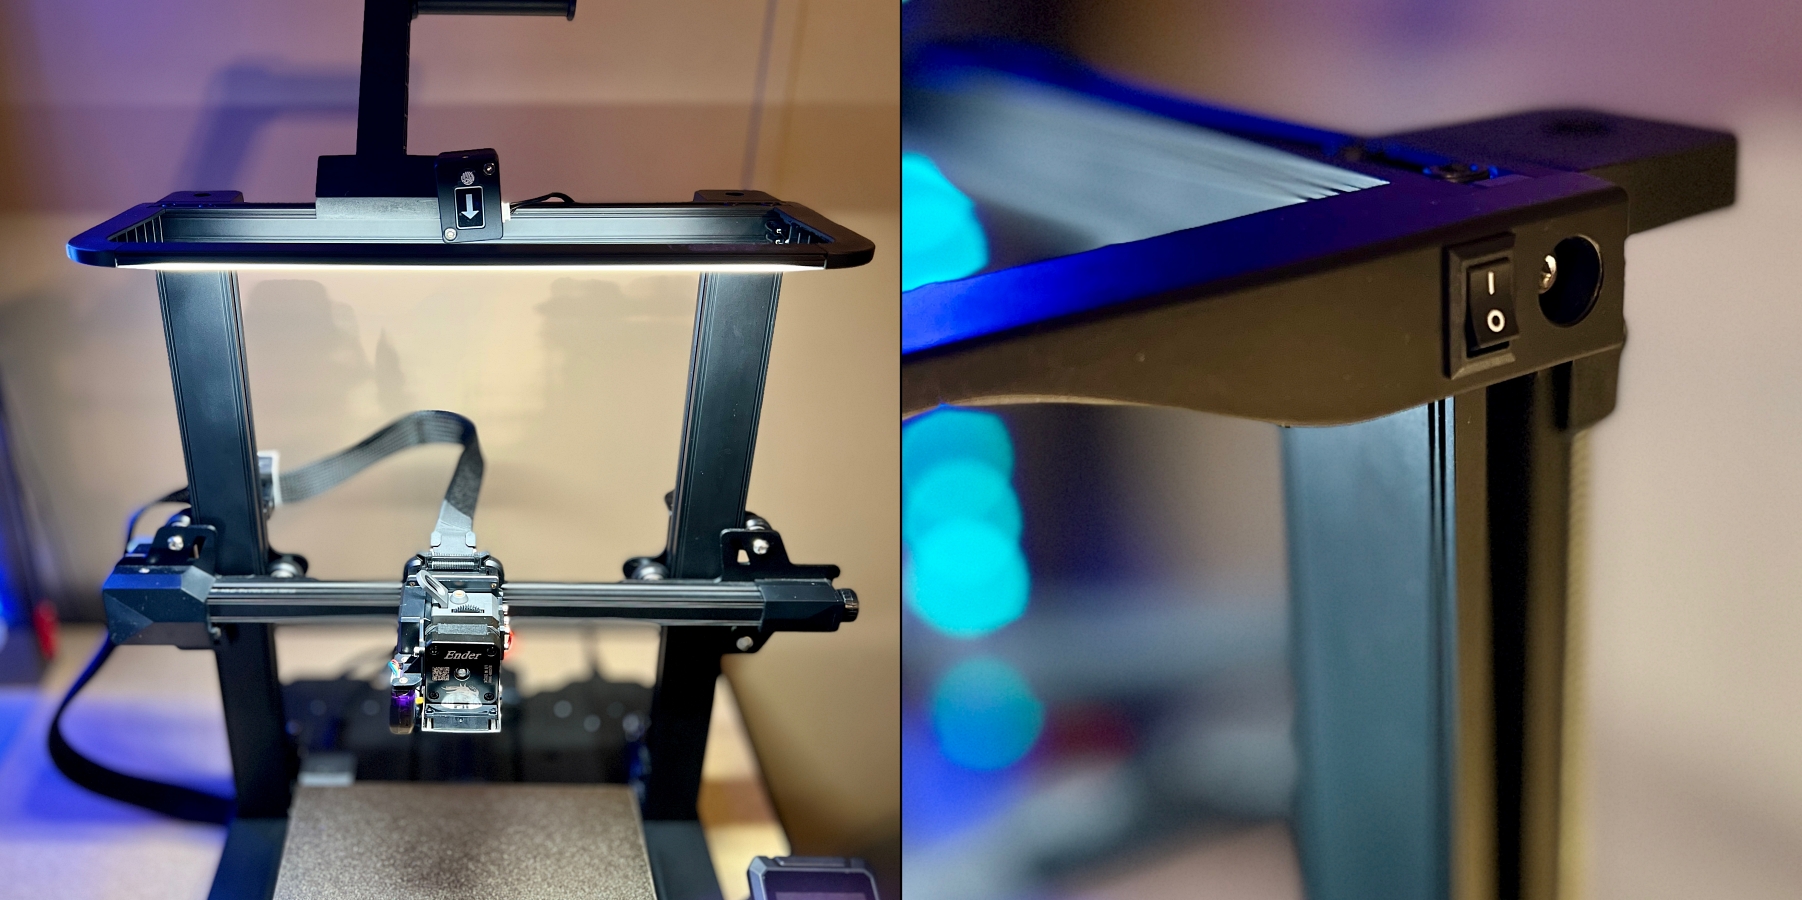
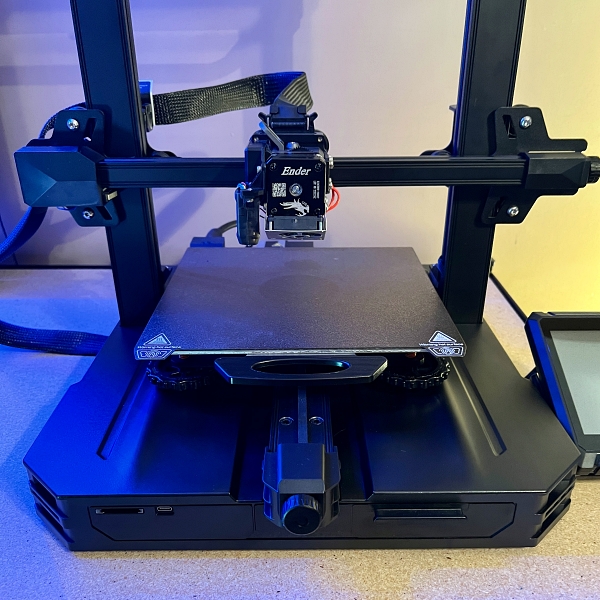
The Creality Ender-3 S1 Pro 3D printer also comes equipped with a built-in LED light bar. The light does a great job of illuminating the print bed and surrounding workspace. A conveniently located power switch on the side makes it easy to turn on and off.
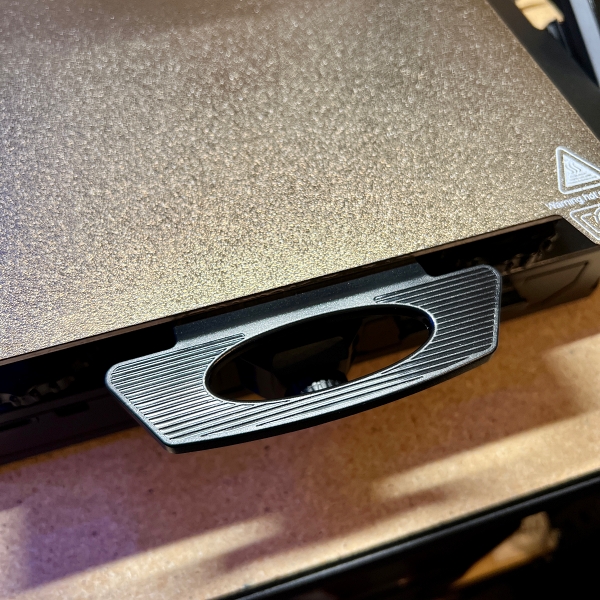
Another small add-on is the pull handle on the front of the print platform. I like that it allows you to move the bed without fear of burning your fingers while the bed is hot.
Performance
The Creality Ender-3 S1 Pro 3D printer boots up quickly and is relativity quiet. Before printing anything, you need to level the print bed. The S1 Pro has auto bed-leveling to make this all-important process easier and faster.
The Creality Ender-3 S1 Pro comes equipped with a CR Touch. The Touch is Crealitys auto bed-leveling sensor. It uses a metal probe to measure 16-points across the print surface and compensate for any anomalies (low or high spots) as the printhead moves across the bed surface. Running the auto-level is easy. From the start screen select Settings-> Auto-Level-> Start. It takes about 2 minutes for it to complete. Once completed, return to the previous screen and run auxiliary leveling. This will allow you to adjust the Z-axis compensation for the center and four corners of the print bed. Tapping each number on the screen will move the printhead to the corresponding spot on the print bed. From there, you can adjust the Z offset until you can slide a piece of A4 paper under the nozzle and feel a slight resistance. Repeat this process for all 5 spots on the print bed. This stores the Z offset into the printer.
This was my first time using any kind of auto bed-leveling. I spent hours manually leveling the Aquila S2 before getting it level. The auto-leveling on the S1 Pro makes the process a whole lot easier.
Time to do some printing. I preheated the nozzle and bed using the Preheat PLA function from the menu. This automatically heats the nozzle to 200º C and the bed to 60º C, which are the optimal heat settings for most brands of PLA. There are separate settings that allow you to individually heat the nozzle and bed to different temperatures for different filaments. Once the nozzle was preheated, I loaded the white PLA filament that came with the printer.
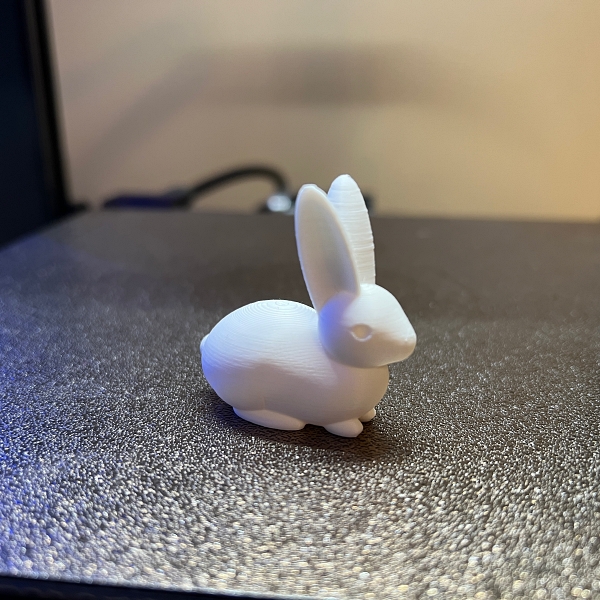
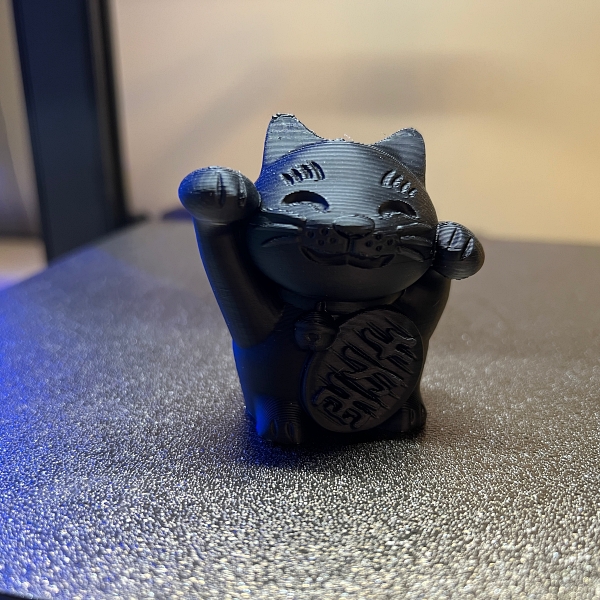
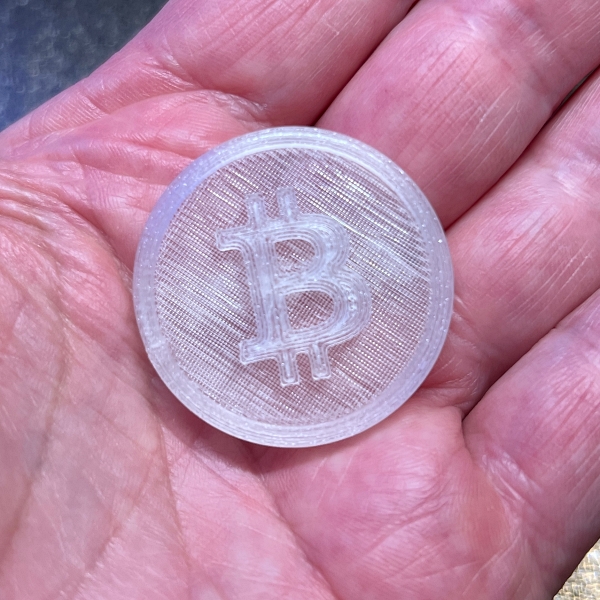
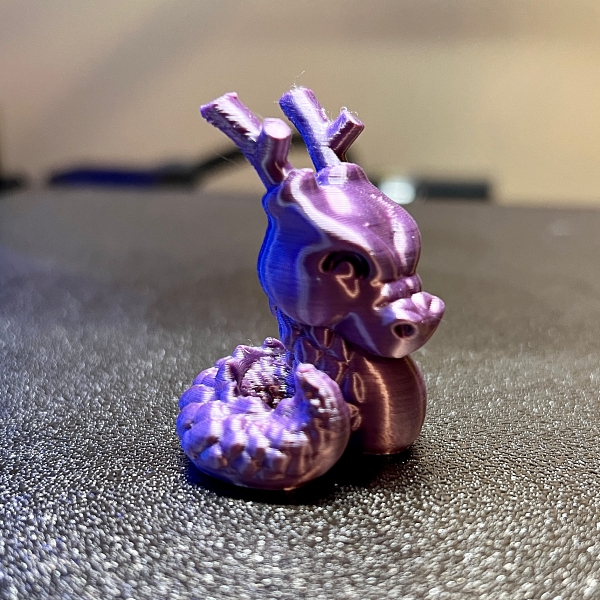
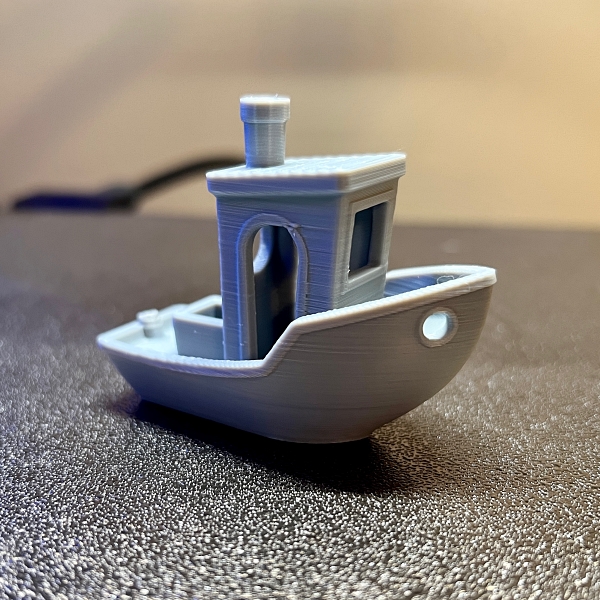
For test purposes, I wanted to print models from the SD card, and a few I sliced myself. I also wanted to print using a variety of filaments to see how the S1 Pro handled each one.

I then sliced a couple of models of my own that I downloaded.
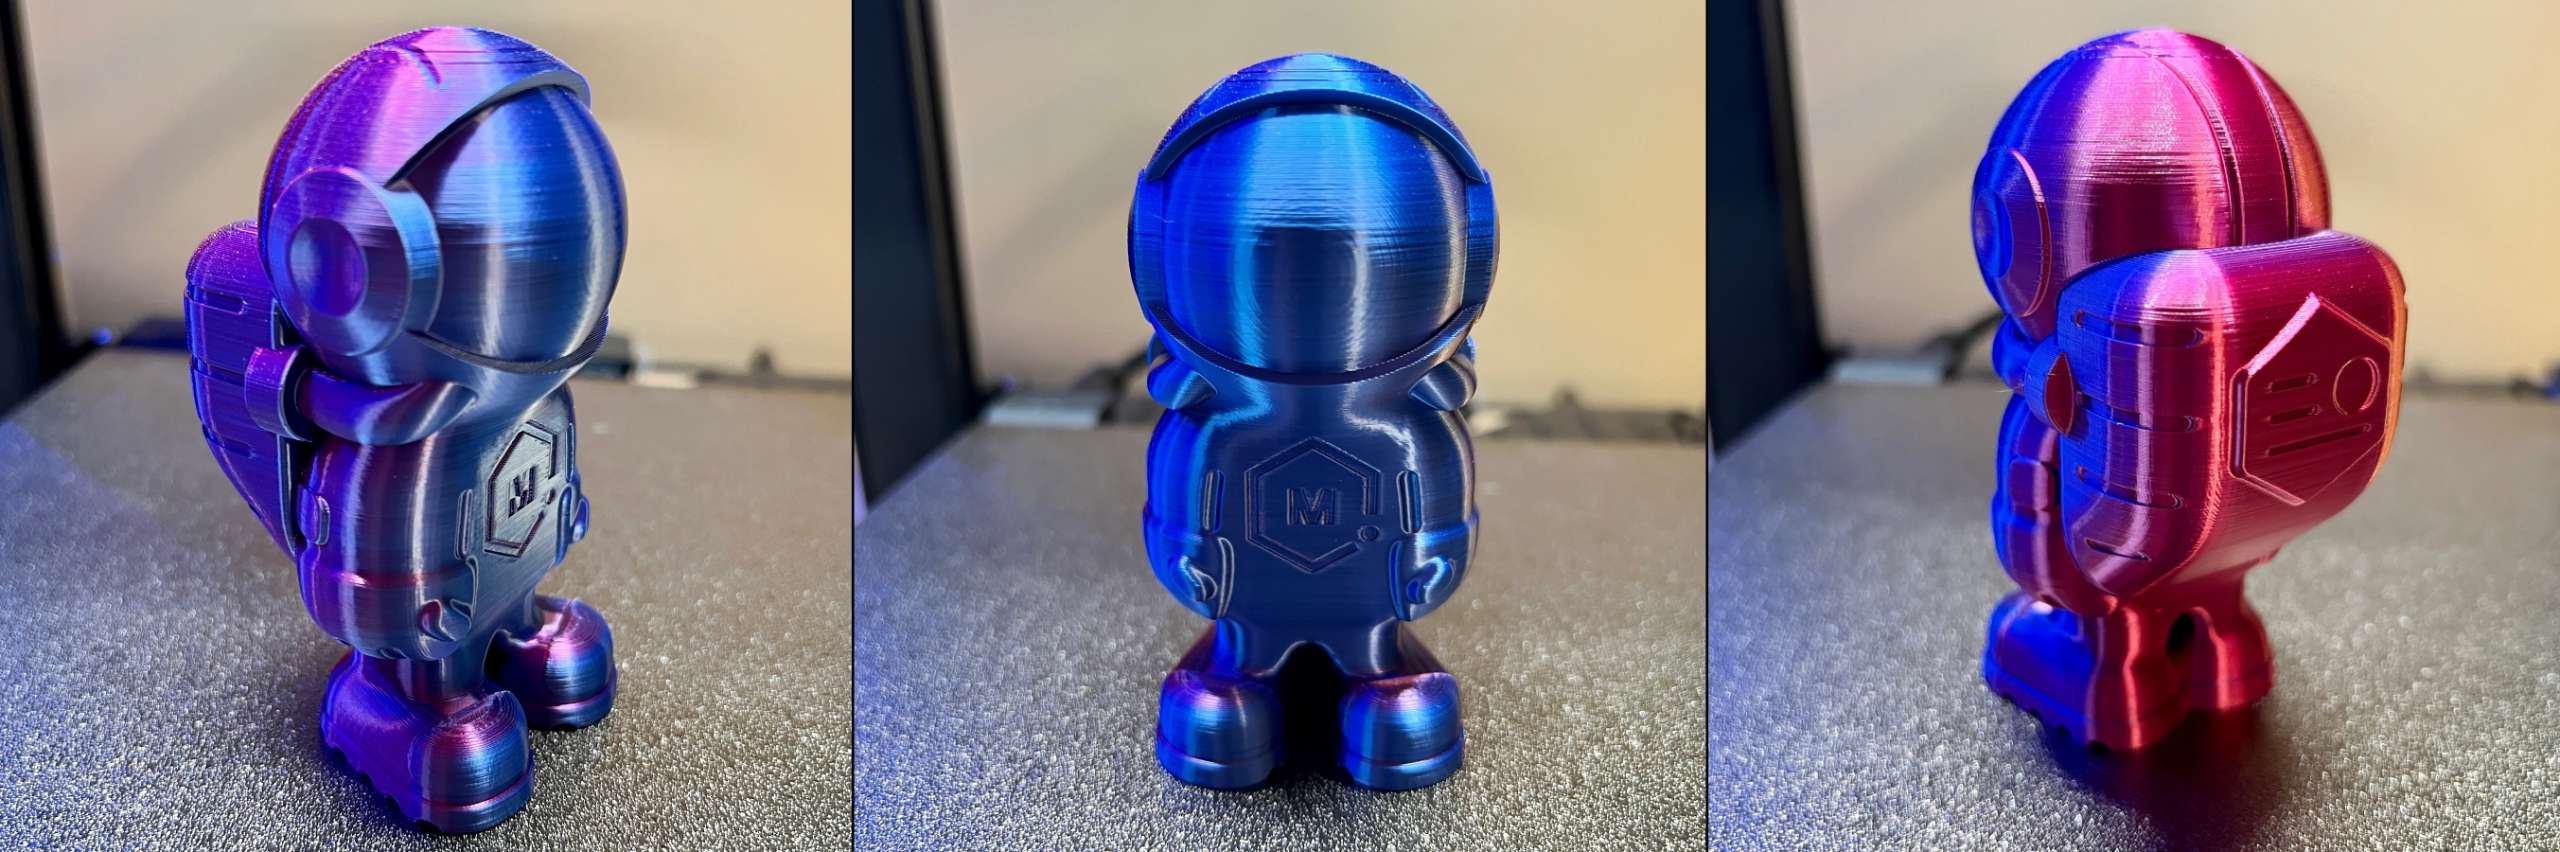
The Astronaut was printed using MatterHackers Blue Raspberry Quantum PLA. It is an awesome-looking PLA that combines two colors per filament, displaying a different color front to back, and blends those colors on the sides.
Then I ran into an issue. I had several prints that failed because of the extruder clogging. I tried different filaments, settings, and models, but the clogging persisted. I contacted Creality, and they were kind enough to ship me a new extruder. The extruder was easy to swap out, and I was ready to begin printing again in no time. And since the swap, I have not experienced any further clogging.
I also wanted to test the Sprite dual-gear extruder to see how it handled TPU. TPU is a very soft, pliable filament. I printed a trash can to use on my workstation for discarding my filament scraps.
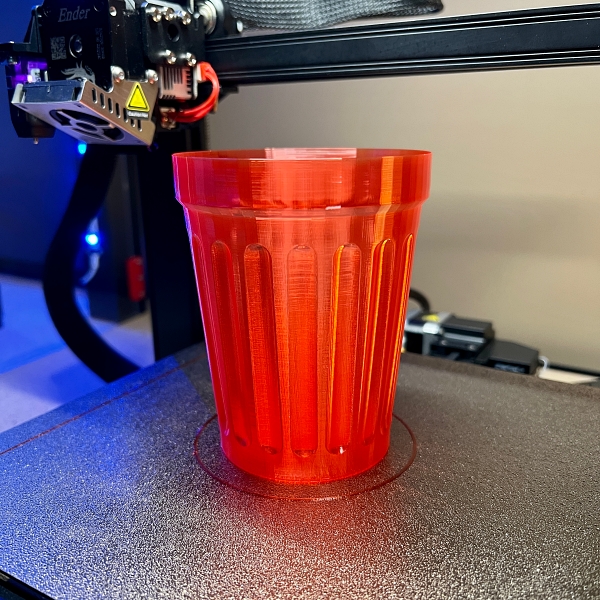
The print turned out amazing, and the Sprite extruder handled the TPU filament like a champ. You can see from the video just how pliable (squishy) TPU really is.
Overall, I was thoroughly impressed by how well the Creality Ender-3 S1 Pro 3D printer printed with just out-of-the-box settings. As you can see, all of my test prints turned out excellent. I don’t think I could have asked for better results.
What I like
- Easy to assemble (96% preassembled in the box)
- Quiet operation
- Sprite extruder
- PEI coated spring steel build plate
- Auto leveling with CR Touch
- Dual Z-axis
- 4.3-inch touch screen
- LED light kit
- Large drawer for tool storage
- Full-sized USB card
What I’d change
The ability to print using a WiFi connection
Final thoughts
In conclusion, the Creality Ender-3 S1 Pro 3D printer is an extremely capable 3D printer. It has every feature you could want and produces high-quality prints. And all of those features make it very easy and fun to use. With upgrades like the Sprite all-metal dual gear direct extruder, auto bed-leveling, and 4.3-inch touch-screen, the S1 Pro is a definite step up from the S1. But is it worth the extra $80? In short, the answer is yes. In fact, IMO it is one of the best sub $500 printers on the market.
Price: $479.00
Where to buy: Creality store and Amazon
Source: The sample for this review was provided by Creality.
L39 Ultra Slim UV Protective Filter for Leica Q3 43 Q2 Camera with Moisture-Proof Case & Removal Tool 19 Layers Mulit-Coated UV Ultraviolet Filter 99.3% Light Transmission Water Oil Scratch Resistant
(as of June 23, 2026 18:03 GMT -05:00 - More infoProduct prices and availability are accurate as of the date/time indicated and are subject to change. Any price and availability information displayed on [relevant Amazon Site(s), as applicable] at the time of purchase will apply to the purchase of this product.)
Gadgeteer Comment Policy - Please read before commenting
Creality has been very consistent on providing solid quality 3d printers at a very good price. I’ve been happy with every one I’ve had (don’t ask how many printers I’ve owned, can’t have evidence for spouse to find. j/k). Highly recommend them. The only drawback I’ve found is Creality printers are not 100% plug and play. But this goes for almost all reasonably priced printers. You need to have basic ability to follow directions, and take time assembling the printer CORRECTLY. The performance difference between slapping the printer together, and very carefully checking alignments, bracing, etc will be great. A poorly assembled and aligned printer will frustrate you to no end, and sour your printing experience. Take a few extra hours assembling, go slow, take your time and you will save hours of frustration later.
Loved mine until the 2nd month when it kept giving me an AB error. The cord going to the print bed burnt from the inside out. Very disappointed. Been waiting a week now because no one is emailing me back because of the Chinese new year