REVIEW – Ever see those “deconstructed” phone frames on social media feeds, and think “oh wow I had one of those!” Recently, Alex Birch and Andy Chen got a chance to create some phone art of their own thanks to the Xreart Deconstructed tech artwork series. Alex got an Original iPhone, and Andy got the iPhone 4S.
What is it?
Xreart sells a series of kits where you can show off the inner workings of older phones and game consoles in a nice frame. They include all the tools you need.

What’s in the box?
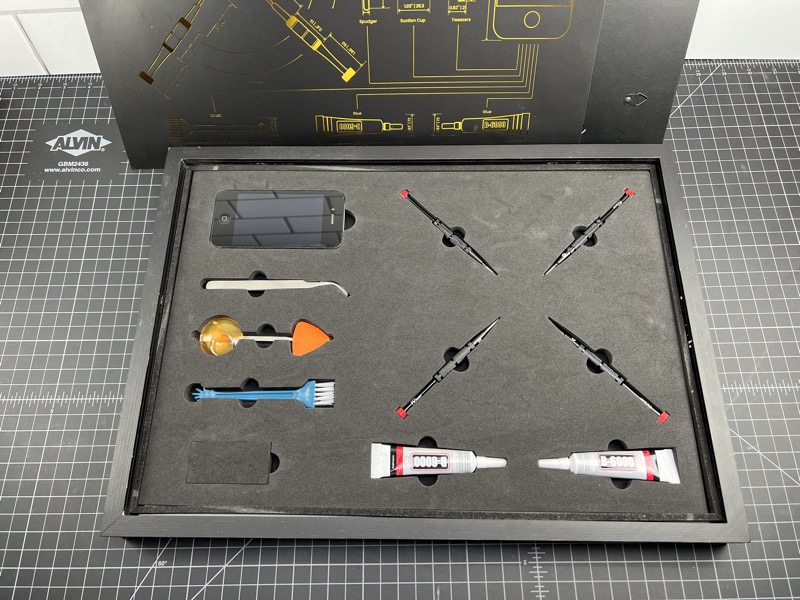
ANDY: I received the Xreart Framed iPhone Kit with the iPhone 4S. All kits come with the same tools:
- Screwdrivers
- Tweezers
- Suction cup
- Metal spudger tool
- “Guitar pick” tool
- Brush
- Adhesives
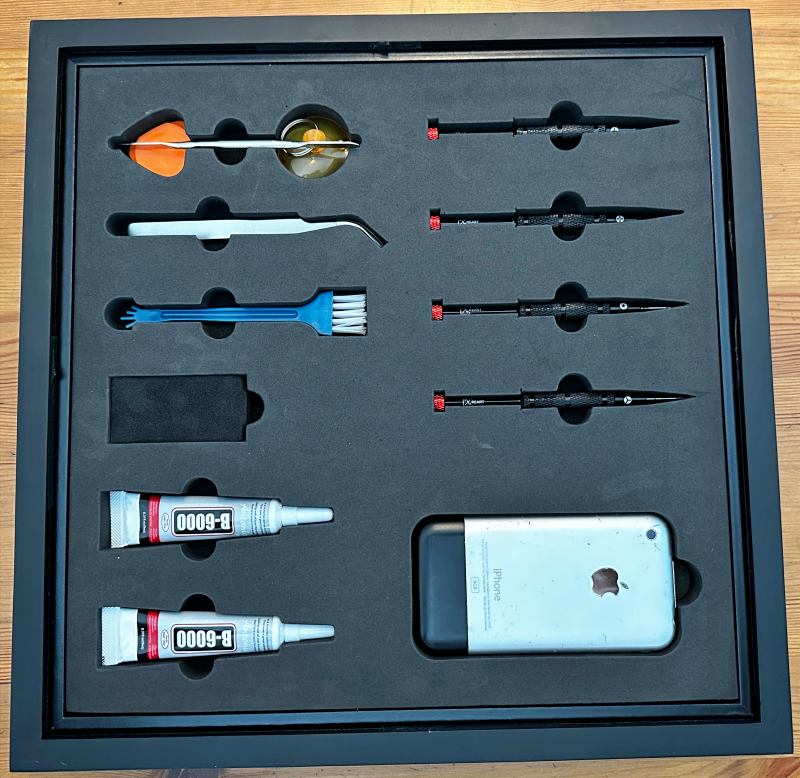
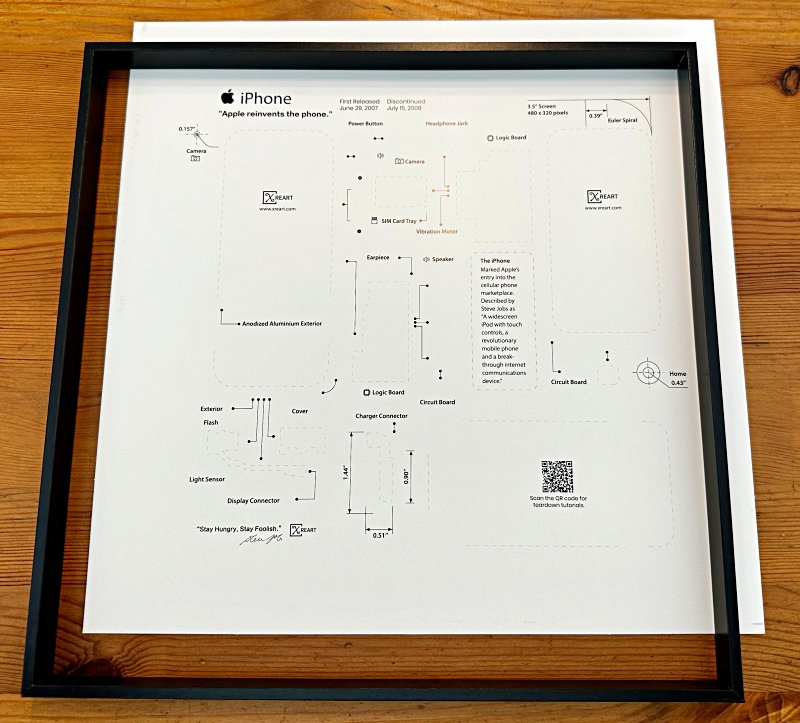
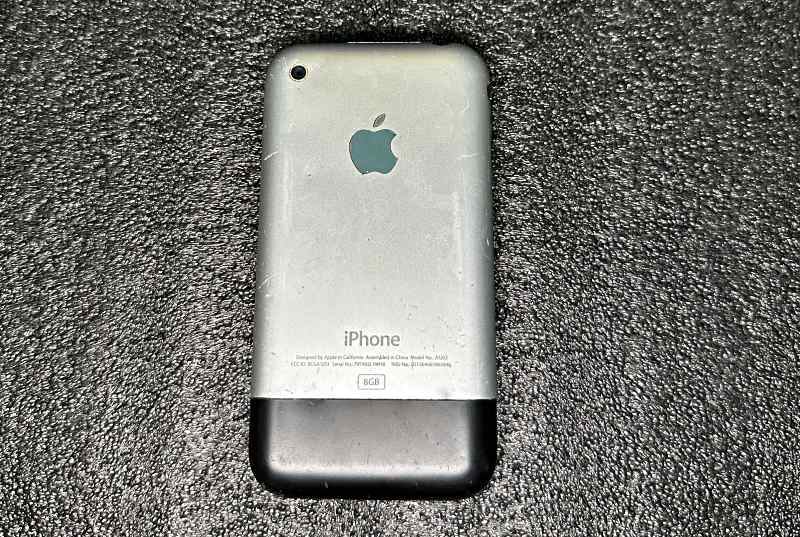
ALEX: I was sent the iPhone 2G (1st Generation) which I was excited about as it has some sentimental meaning for me. The same tools and supplies were included, but a different layout in the EVA foam due to the smaller frame size.
Hardware specs
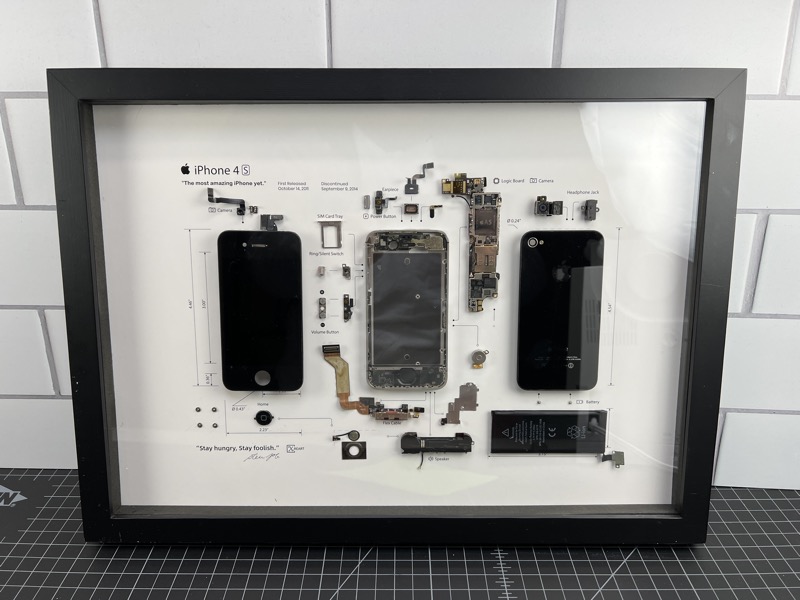
ANDY: The iPhone 4S kit frame size measures 44.4*32.6*3.2cm (17.48*12.83*1.26 inches).
ALEX: The iPhone 2G kit was a little smaller at 33*33*3.4cm (13*13*1.3 inches).
Design and features
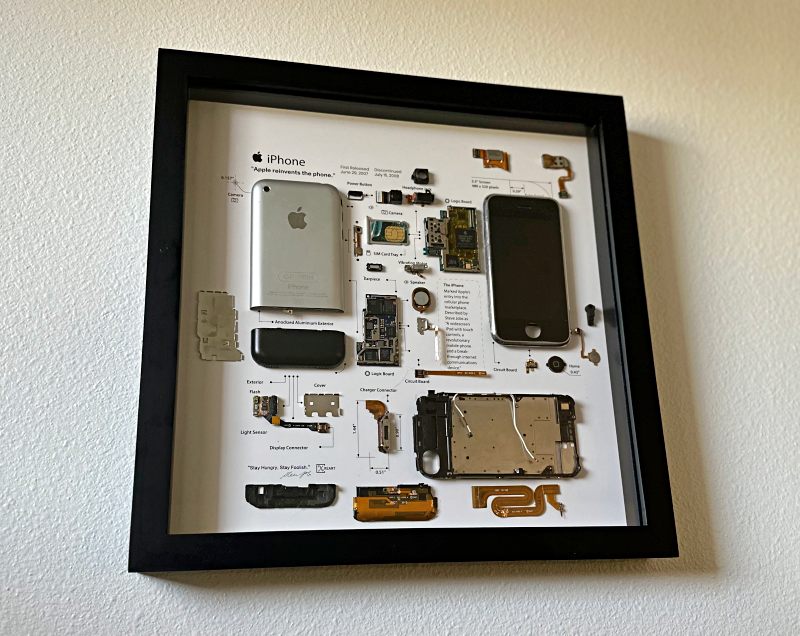
ANDY: The box also doubles as the display frame. A printed sheet with the outline of the parts is also included. The premise is simple: Take the phone apart and glue the bits on the background.
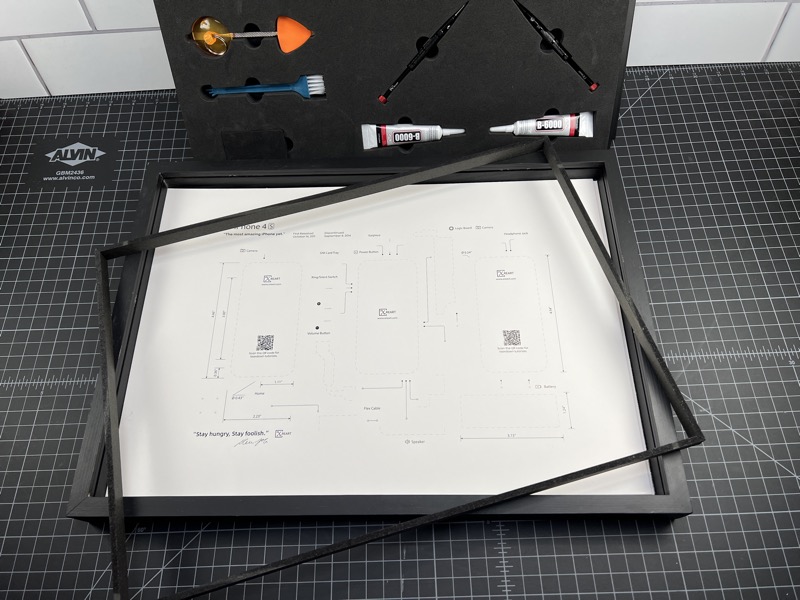
ALEX: I’ll add that the Xreart Framed iPhone Kit arrived well packaged. Everything you need is tucked inside the frame set inside an open-cell foam tray and cover which doubled as a work mat. The printed layout looked a little different for the 2G iPhone.
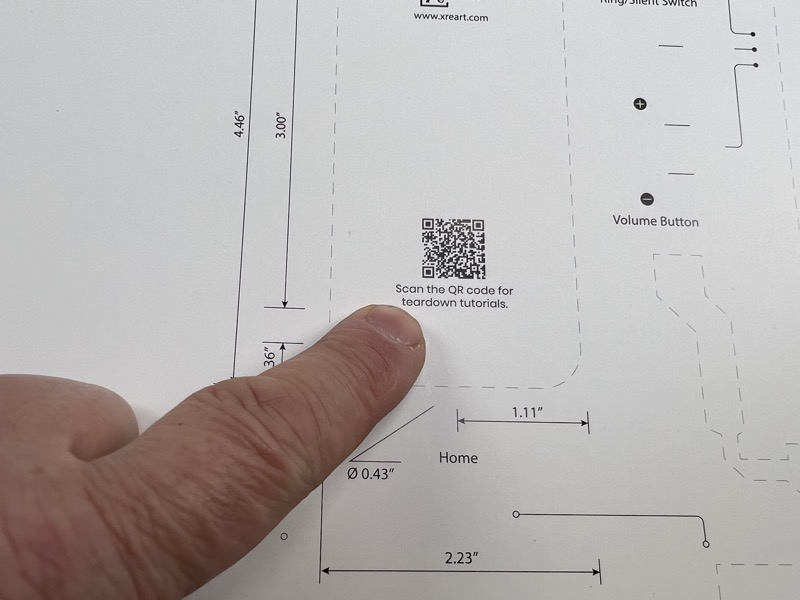
ANDY: But how do you take a phone apart? There’s a little clue on the display board: A QR code to a video link.
ANDY: That link sent me to a page with many different phone models. The bad news for me and the iPhone 4s is the video wasn’t very descriptive. It only got as far as removing the back cover, and not much else. The rest I had to figure out.
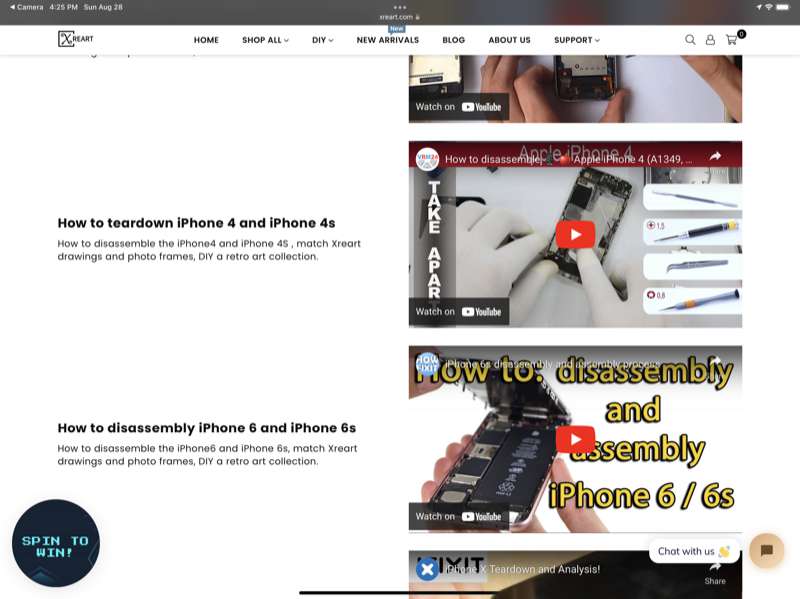
ALEX: The QR in my Xreart Framed iPhone Kit went to the same page above and while the 2G video did get me a little farther, it did not tackle removing all the small items that had printed locations on the card. Like Andy, I decided it would be more fun to sleuth it out than to head over to iFixit.
ANDY: The first thing I noticed about the iPhone 4S in my Xreart Framed iPhone Kit was how SMALL it was compared to my more recent iPhone 13 Pro.
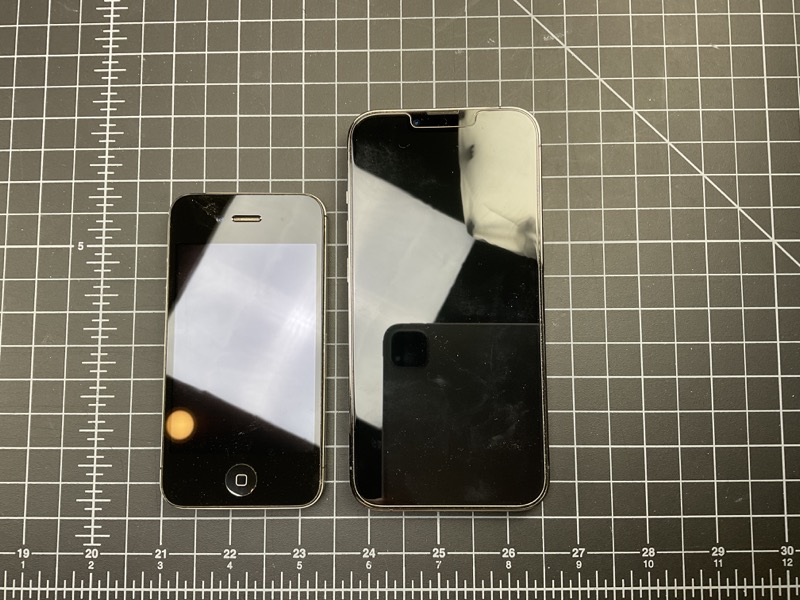
ALEX: Couldn’t agree more. I almost thought it was a reduced scale replica for a moment, so I went digging for my own 2G in my device collection to confirm. I will say that while the phone looked pretty good and had some expected scratches and dings, there was a small bent spot near the 8GB logo from where it had been opened to remove the battery.
ANDY: Following the video, I was able to separate the two halves of the iPhone 4S and discovered there was no battery. The folks at Xreart told us that they include a “dummy battery” instead, which makes sense. Shipping lithium batteries pose a hazard, but I did not find a dummy battery in my kit.
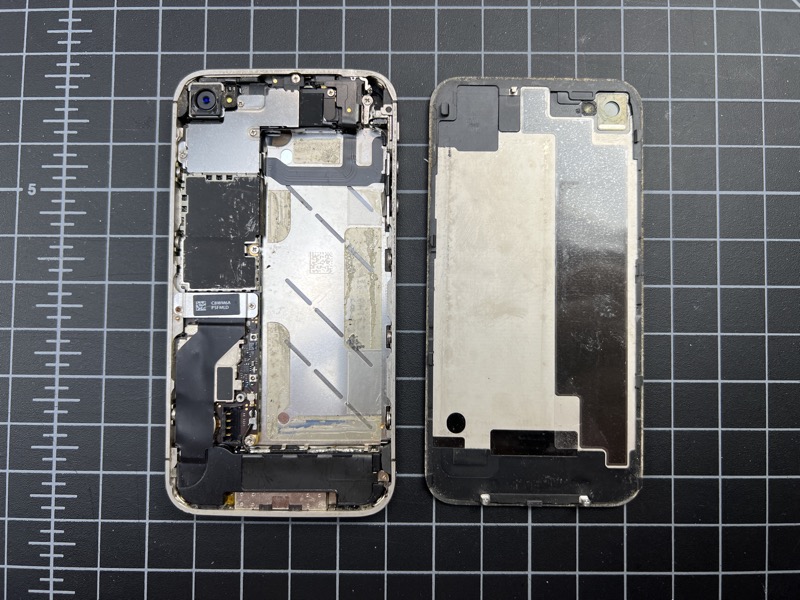
ALEX: Same here. No dummy battery in the Xreart Framed iPhone Kit, but as you can see from the big cavity below it’s large enough that it wouldn’t have fit on the card even if it had been included. Quick note that if you get inspired to try one of these kits, go slow and don’t force anything. There are always small catches, latches and adhesives and some of the parts themselves can be really sharp, not to mention the tools.
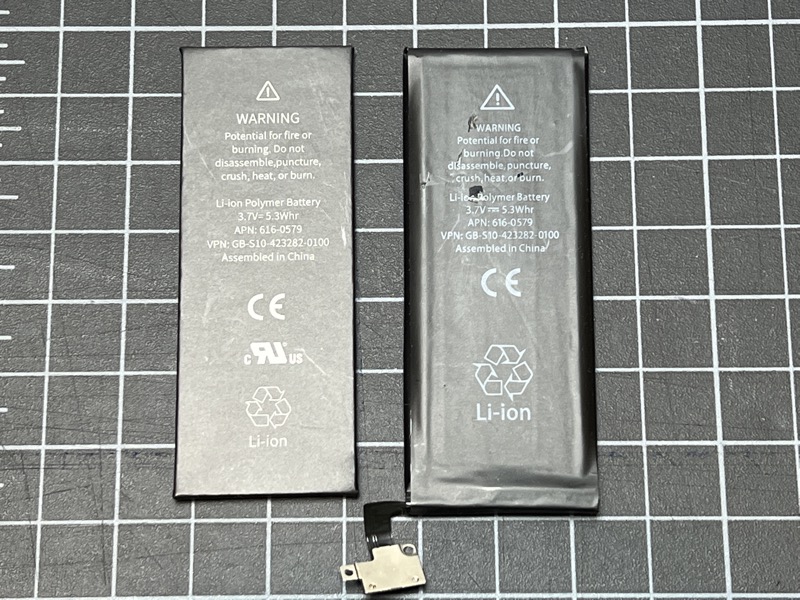
ANDY: I finally received the dummy battery separately. Here’s what it looks like (left) next to a “real” battery of my own (right). It’s not bad. Even the part number is correct.
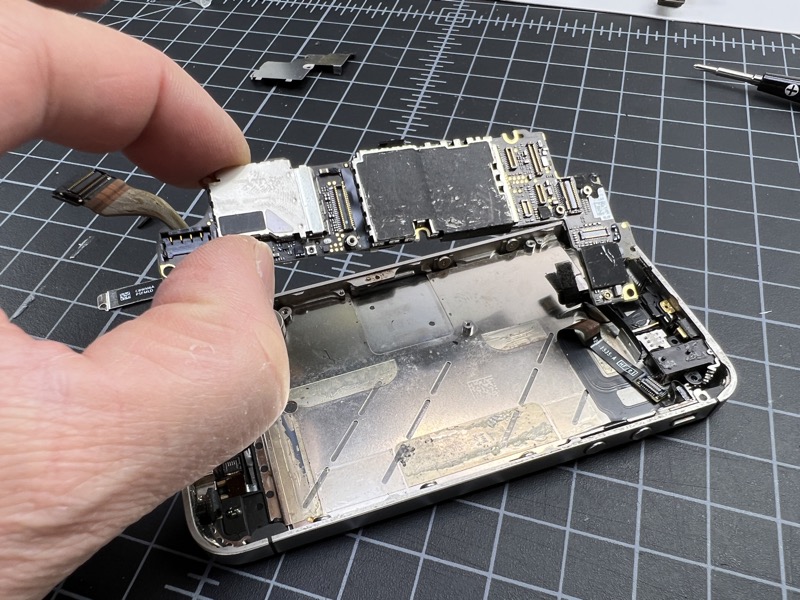
ANDY: Although I could have poked around the web for disassembly instructions, I decided to have a go on my own. Here’s the main motherboard of the iPhone 4S.
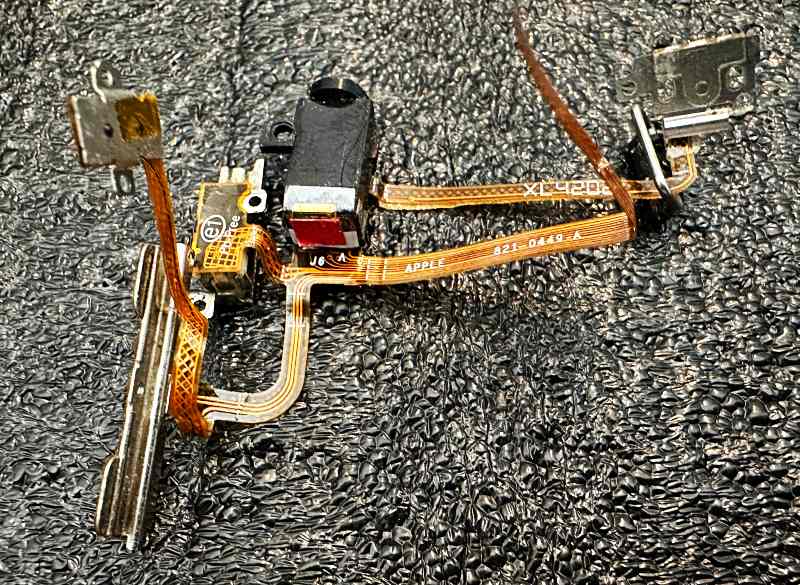
ALEX: One thing not mentioned anywhere that I saw is that there are a lot of cool ribbon cables and tiny connectors that actually need to be snipped off in order to fit the core components into the layout. The below interconnected jumble of headphone jack, power button, volume buttons and vibration motor is a good example of that.
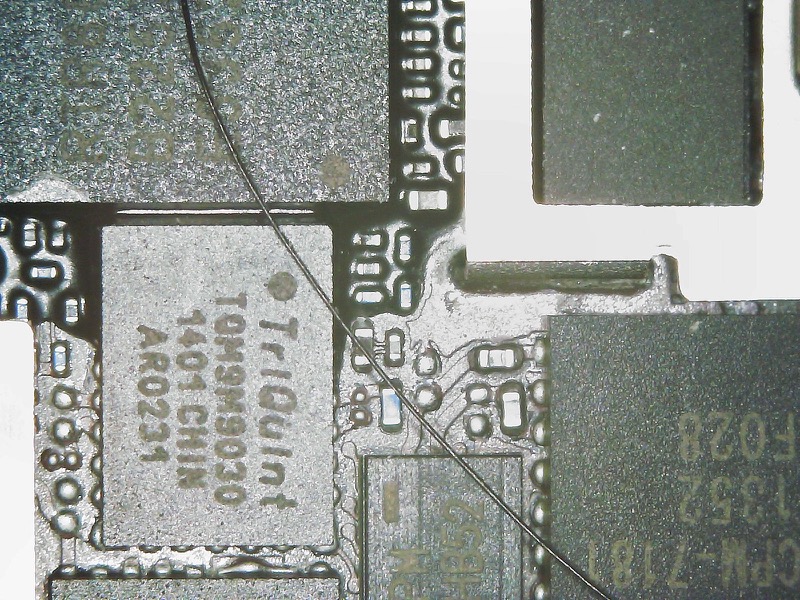
ANDY: Here’s a closeup of the motherboard. Some of the components are almost the size of a human hair (pictured).
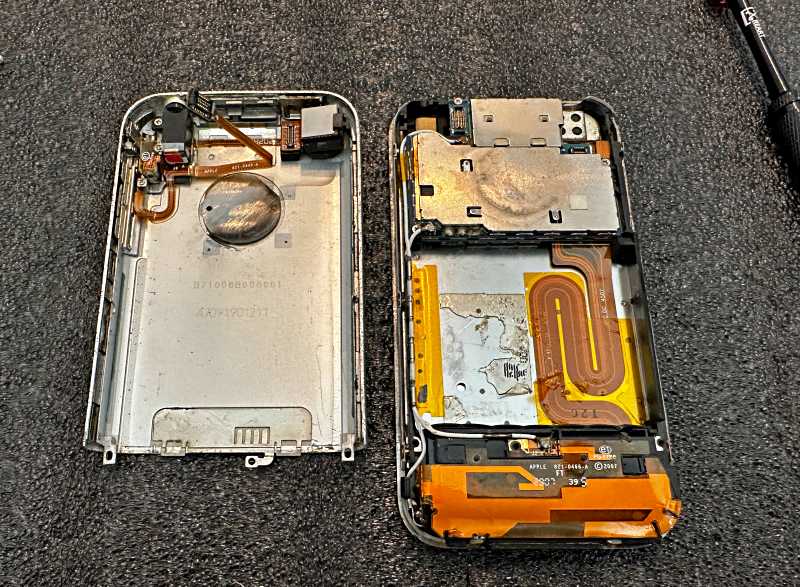
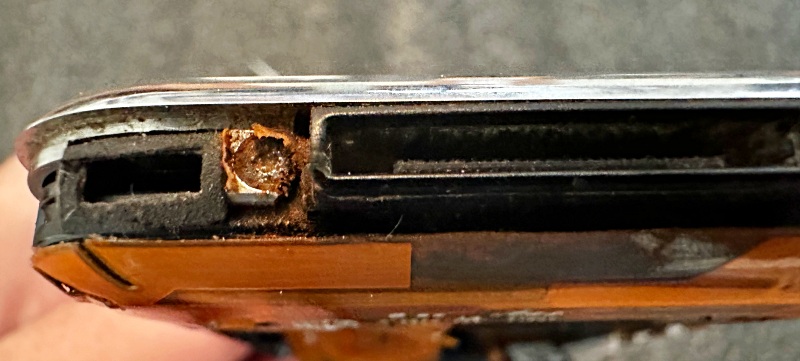
ALEX: The only real issue I ran into with the Xreart Framed iPhone Kit was that the phone I received clearly had some water damage at some point. The 2 bottom screws were completely rusted and stripped instantly. I had to bend the polished frame back and forth until the screw bosses snapped off.
ANDY: I noticed the bits in my iPhone 4S were slightly different than the printed layout would suggest. I suspect there may have been different hardware versions. But it was close enough.
ALEX: Similarly, I found a couple of things labeled where I couldn’t find the part, but also a lot of parts that I preferred to include around the margins since there was enough real estate. Depending on how meticulous you are, there can be a good bit of cleaning to remove adhesive residues. Tweezers are your best friend too as there are some beautiful parts to be found peeling back black tapes and foams. When it’s time to glue, it definitely helps to do all the gluing at once, then let it dry a while before framing.
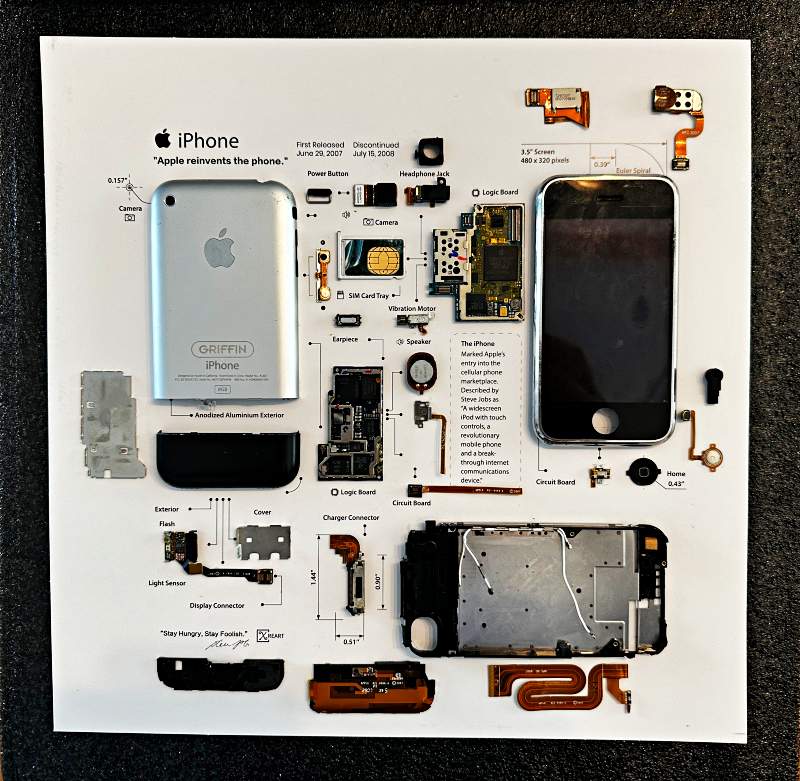
ALEX: Here’s how my project finished up. You can see above and below that I ended up taking apart my own 2G as well to use a few cleaner items including the engraved back of my personal phone from my time at Griffin Technology. I remember camping out with co-workers to get these on launch day and this kit is the perfect way to capture that era that really changed the trajectory of mobile phones.
What I like
- ANDY: All the tools you need are included. Makes a neat display.
- ALEX: Super fun project that can be done in an afternoon or spaced out over time.
- They’ve also added some DIY versions where you can bring your own device.
What I’d change
- ANDY: The missing dummy battery was a bit of a mystery. The glue doesn’t dry instantly so be patient!
- ALEX: I’d really like to see more devices supported for the DIY kits. I’m thinking older iPods, Zune, Game Gear…
Final thoughts
ANDY: The Xreart Framed iPhone Kits make a great gift for the DIY gadget person in your life. It was fun to deconstruct and nice to show off.
ALEX: Also a great gift for yourself, if you are the gadget-person in your life.
Price: $169 (iPhone 4S), $349 (iPhone 2G) | $139 for the Tool Kit versions where you supply your own device.
Where to buy: Xreart (iPhone 4S) | Xreart (iPhone 2G) | Xreart Tool Kits (Frame, layout, tools)
Source: The samples of this product were provided by Xreart.

Samsung 14" Galaxy Chromebook Go Laptop PC Computer, Intel Celeron N4500 Processor, 4GB RAM, 64GB Storage, ChromeOS, XE340XDA-KA2US, Student Laptop, Silver
(as of June 20, 2026 13:14 GMT -05:00 - More infoProduct prices and availability are accurate as of the date/time indicated and are subject to change. Any price and availability information displayed on [relevant Amazon Site(s), as applicable] at the time of purchase will apply to the purchase of this product.)
Gadgeteer Comment Policy - Please read before commenting
I have to replace iPhone 4 display, Battery, Back panel and Home button.