REVIEW – I was bitten by the mechanical keyboard bug many years ago. I always hated the cheap membrane keyboards that come with PCs. The typing experience was squishy and unsatisfying. If you like mechanical keyboards, you know what I’m talking about. I have several now in my lineup and switch them out every so often. One may have a different switch or offer something else my current one does not. Because of this, I’ve been longing to build one from scratch. The Whatgeek Dukharo VN96WAP barebones DIY mechanical keyboard kit is an affordable way to do that while still getting some quality components and going wireless if you so choose.
What is it?
The Whatgeek Dukharo VN96WAP barebones DIY mechanical keyboard kit is a 96% layout keyboard kit that comes assembled but without switches or keycaps.
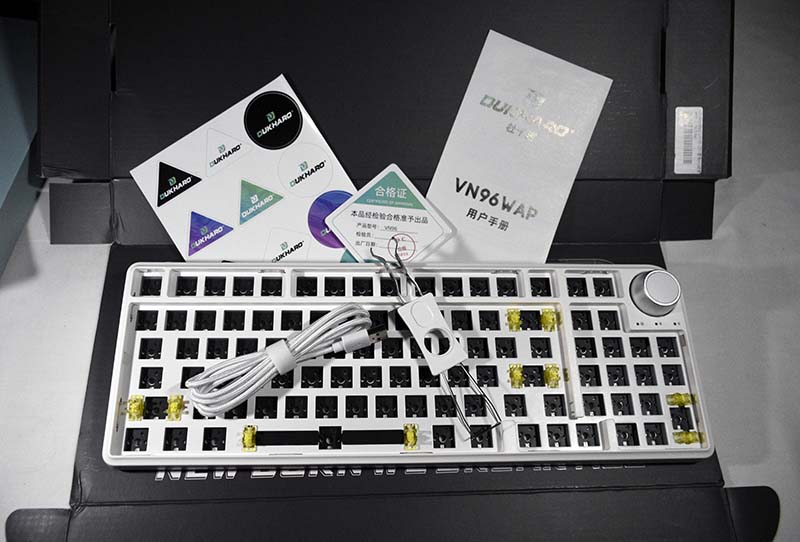
What’s in the box?
- 96% layout pre-assembled barebones keyboard
- USB C to USB A
- 2.4 GHz wireless dongle
- Keycap/switch puller
Hardware specs
- Mounted: Gasket
- Layout: 96%
- Keys Number: 96
- Backlight: RGB
- LED: South facing
- Batteries: 6000mAh
- Connectivity: USB-C, Bluetooth 5.0, 2.4 GHz
- Switch Sockets: Hot-swappable Support 3pin/5pin Switch
- Anti-ghosting: Full Key Anti-ghosting
- Dampening: Sound-absorbing Foam, Silicone Pad
- System Support: Windows/macOS/IOS/Android
- Product Weight: 0.9kg / 2 lbs.
- Product Size (L x W x H): 38.3 x 13.8 x 3cm / 5.43 x 5.59 x 15.08 inches
Design and features
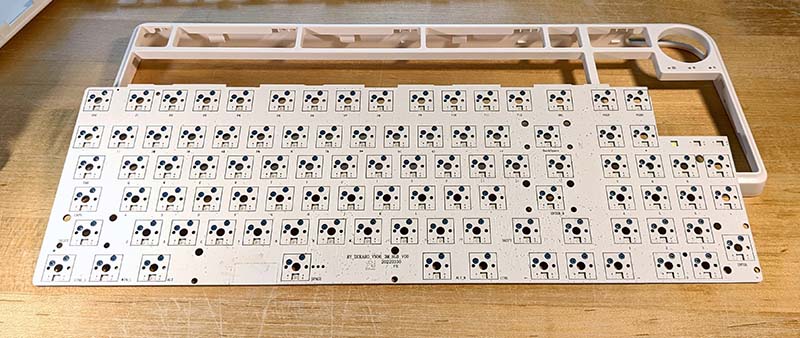
The Whatgeek Dukharo VN96WAP barebones DIY mechanical keyboard kit I received is white, a gray one is also available, and has a plastic frame with a matte finish. That’s not surprising considering the kit is only $95. If you’re looking for a milled aluminum case with brass weights, expect to pay a lot more. I don’t know what kind of plastic is used but I will say it’s not flimsy. It doesn’t feel like it’s going to break when you take it apart, which is good considering it’s not held together by screws. It snaps together. To remove the top cover, it must be pried off. I would suggest using something like a guitar pick or plastic spudger to work around the seam to release it. Sure, you CAN break it if you use excessive force. Just take your time and use a sensible amount, and it comes right off.
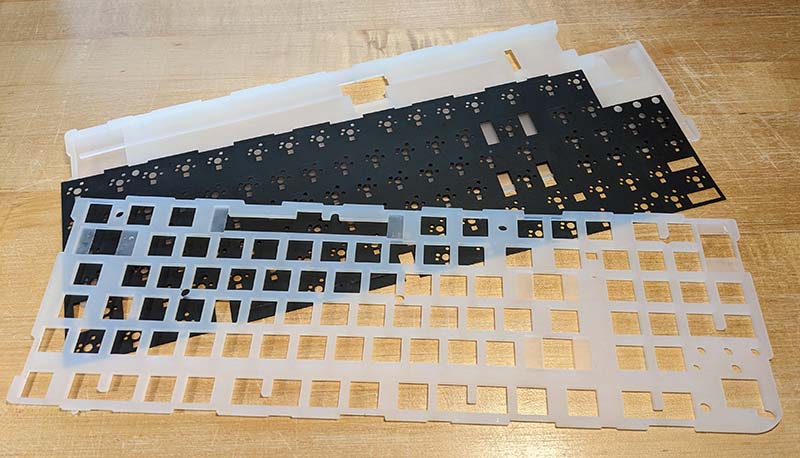
Once the upper cover is removed, you’ll see the steel plate.
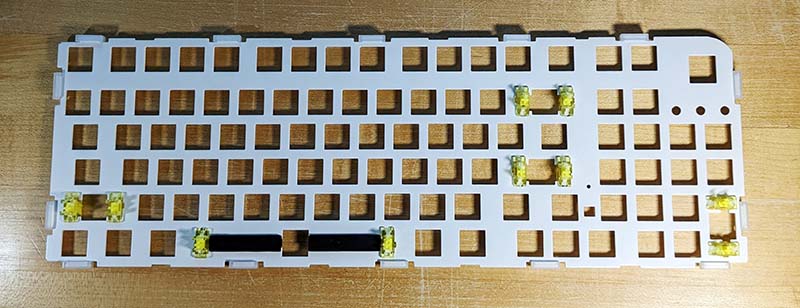
Unlike some other budget mechanical keyboards, the Whatgeek Dukharo VN96WAP’s plate is thick enough that it flexes well without bending. It also has silicone gasket pads around the perimeter to add comfort to the typing experience.
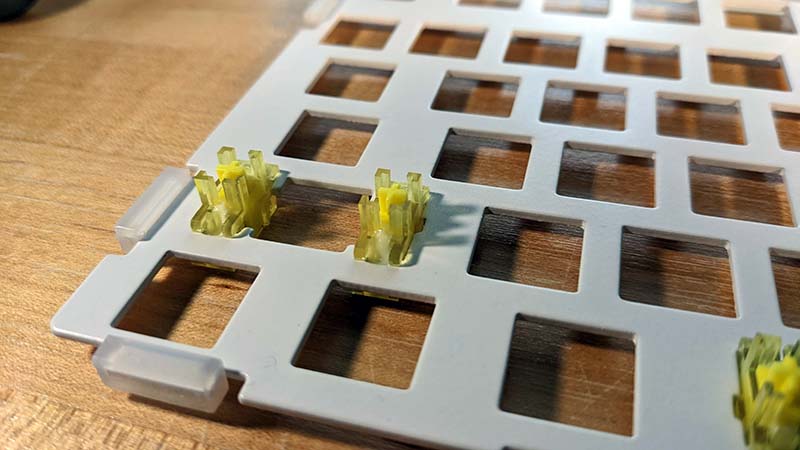
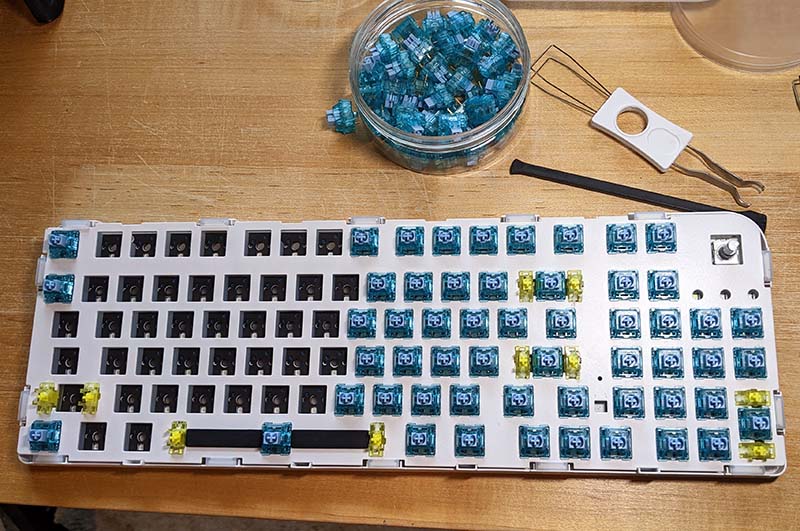
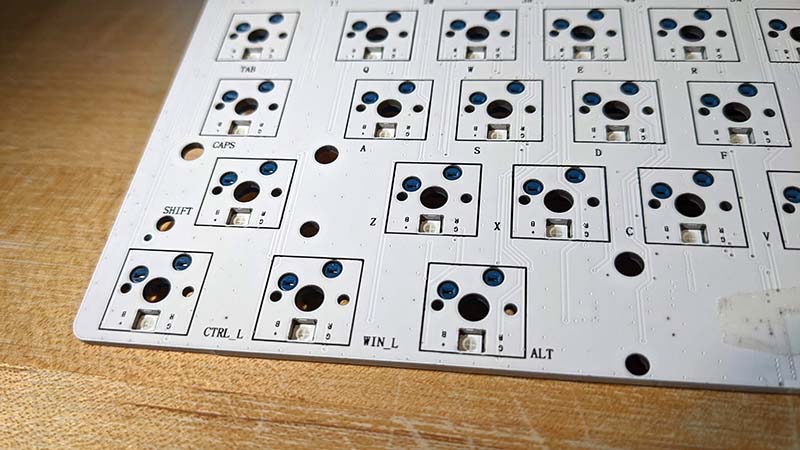
The stabilizers are not screw-mounted to the PCB but snap into the plate. I was a little disappointed to see that initially, but they are gold-plated and pre-lubed. And they are very stable. I haven’t noticed any wobble or rattling.
Do you like sound dampening in your keyboard? The Whatgeek Dukharo VN96WAP barebones DIY mechanical keyboard kit has you covered with three separate layers.
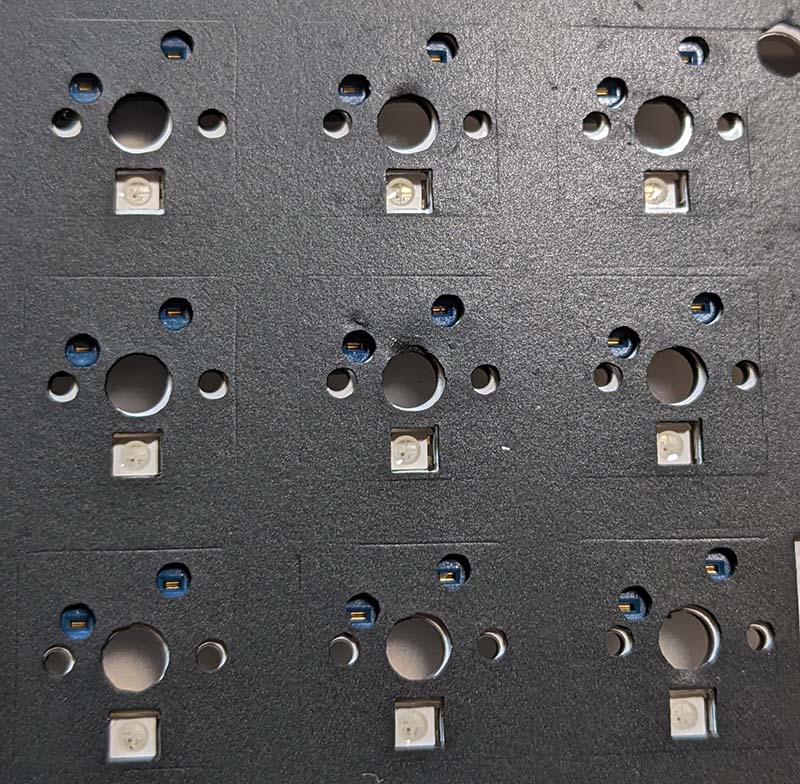
Under the plate, there’s the first layer of silicone padding. Next, there’s a PORON foam switch pad covering the PCB. This pad is sandwiched between the switches and the PCB. Be aware, if you take the kit completely apart, you’ll need to carefully line this pad up with all the holes in the PCB, or installing the switches will be an issue. How do I know? Well, I was a little off and my switches wouldn’t seat. Let me be clear, this was my fault, not the manufacturer’s. If you look at the center socket pictured below, you’ll see where the switch pin was pressing into the PORON pad.
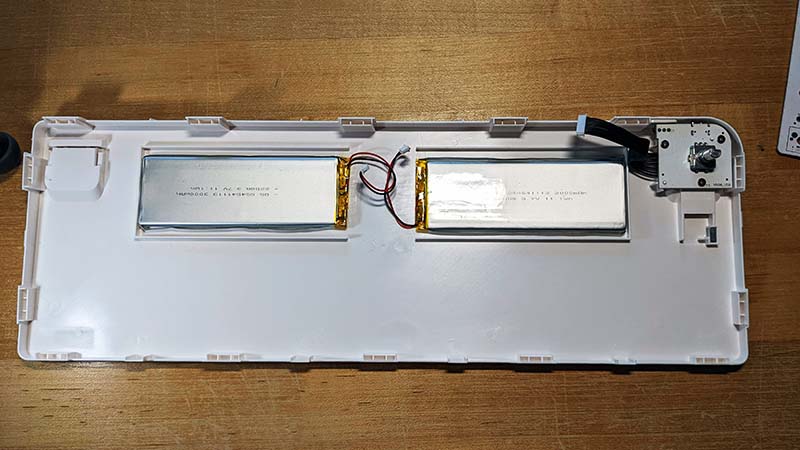
Finally, under the PCB is thick, and I do mean a thick, silicone pad. This is where most of the weight of the kit comes from. It separates the PCB from the two 3000mAh batteries. Sure, you can remove it if you want, but if you want that nice, thocky sound, then leave it alone.
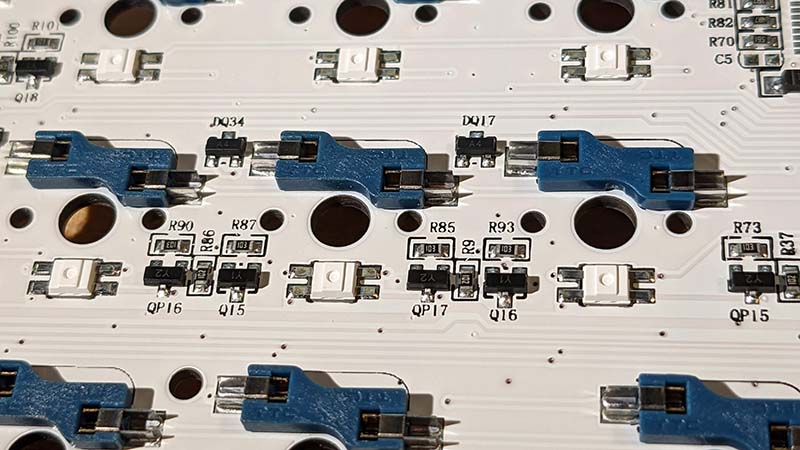
Another factor that sets this kit apart from other budget kits is the PCB.
I was pleased to see its thickness and sturdiness of it. I’ve seen some that were so thin you’d wonder how they didn’t break during use. Something else I liked was the soldering job. Chef’s kiss to whomever or however it’s performed because it looks flawless to me.
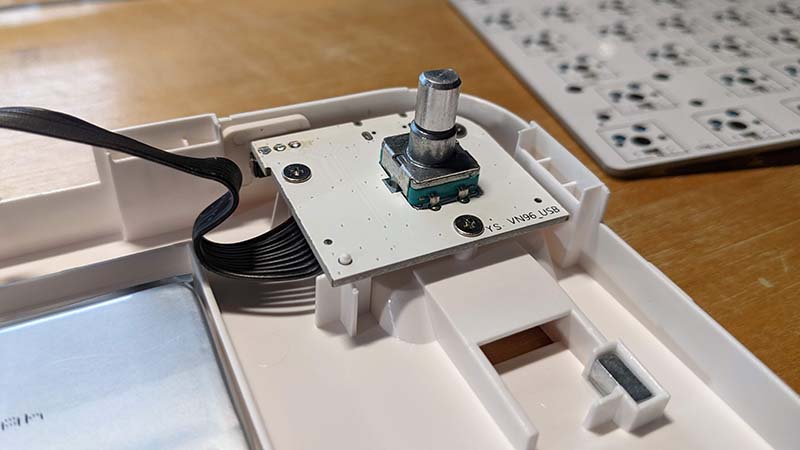
The Whatgeek Dukharo VN96WAP barebones DIY mechanical keyboard kit includes a CNC aluminum alloy knob and who doesn’t like knobs? It’s the volume and mute button for your media. One feature I’m a little confused by is the magnetic insert on the top of the knob. I’m not sure what purpose that serves. So, if anyone else knows, please enlighten me. All is not unicorns and rainbows though. There’s a lot of wiggle in the knob, which concerns me. It makes me think the potentiometer may not be the best. I mean it works, but I’d prefer the knob just spins and clicks up and down, not feel like a joystick. This may just be my review sample.
The kit is USB C thankfully. I’m glad to see USB Micro and Mini disappear. The fewer cables to keep up with the better. The included cable isn’t much to talk about, but it is braided, so it’s better than the majority of cables included in other budget-friendly kits. There’s also a switch next to the USB C port but there’s no legend to tell you what it’s for. The included manual will tell you but the one I received is in Chinese. I contacted Whatgeek support, and they quickly responded by sending what they have as an English manual. It’s the picture on their website, which wasn’t initially in their download with the Dukharo driver software but is now. After some trial and error, I figured out that you move the switch to the right, and then use the function and number keys to switch between 2.4 GHz and Bluetooth. Since this kit is relatively new, I’m hoping a full manual in other languages will become available.
The Whatgeek Dukharo VN96WAP barebones DIY mechanical keyboard kit has all the RGB LEDs you could want with numerous modes to cycle through. They’re south-facing so that makes the kit more compatible with Cherry profile keycap sets.
Using key combos you can switch through the modes, brightness, speed, and colors. This is also in the manual and found on the Whatgeek website.
Setup
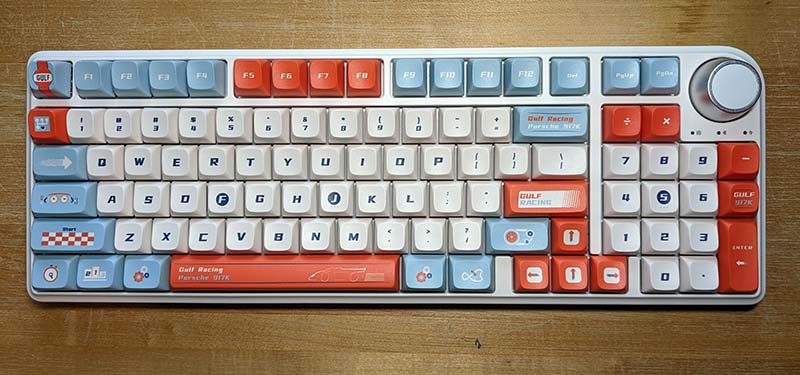
To use the kit, you will need to add your own switches and keycaps. Here are a couple of shots of my completed builds. I first went with the Gulf 917K set from Whatgeek, because it looks like the Ford GT Le Mans Livery. I also like the keycap profile.
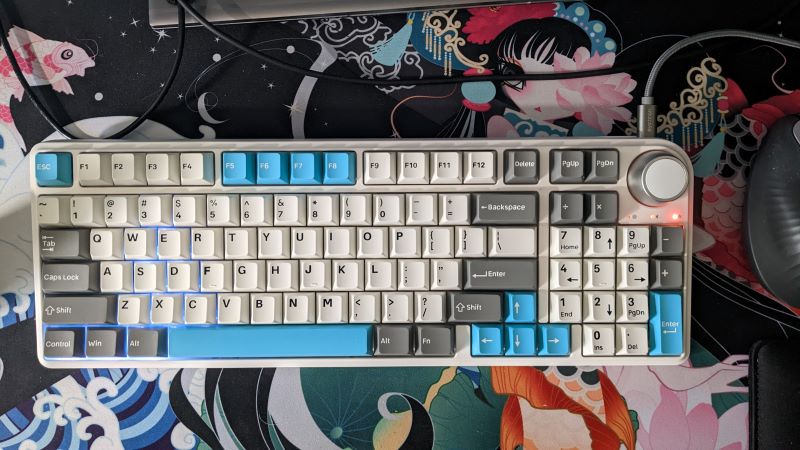
I settled on another set I had because it seemed to match the case better.
Using the Whatgeek Dukharo VN96WAP barebones DIY mechanical keyboard kit is straightforward if using USB. Just plug it in and it’s recognized. At least it was on my Windows machine. I can’t say if it would be the same on Apple products. There are a couple of key combos that allow you to switch between Windows and Mac so I can’t imagine there would be a problem.
Connecting to the keyboard wirelessly was another issue. After figuring out the wireless mode switch issue, I had to figure out how to switch between 2.4GHz and Bluetooth. I did find the instructions after a quick internet search, but those steps should be added to the manual. The next big problem was finding out you have to put the keyboard into 2.4GHz mode before connecting the USB dongle. It must be done in that order every time, otherwise, the keyboard isn’t recognized by the PC.
Bluetooth works well. You can connect to three separate devices, again through some key combos. The caveat is to enter pairing mode, you have to long-press the key combo. Again, that’s not currently in the manual I received. On the bright side, when pairing it to my Pixel, I saw two options, Bluetooth 3.0 and 5.0, opening up compatibility to various devices.
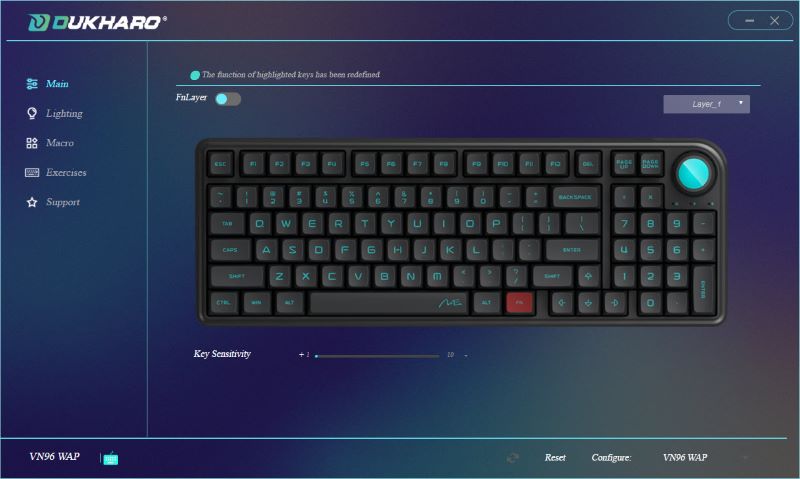
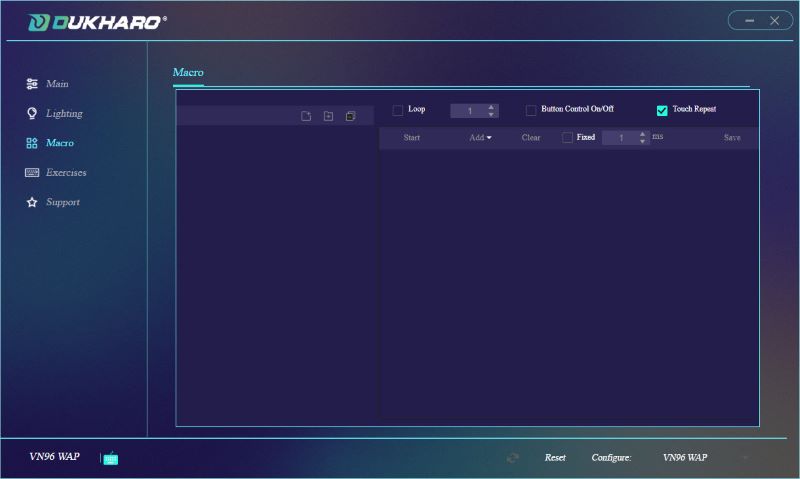
To get more granular control of the Whatgeek Dukharo VN96WAP barebones DIY mechanical keyboard kit you’ll want to install the Dukharo Driver software available on Whatgeek’s website. Initially, there was a problem accessing the download. Clicking the link would give an access error, but after contacting Whatgeek’s support, that was quickly remedied.
The software is a little clunky if I’m honest, but it works. You can set up different layers to work with different applications if you choose.
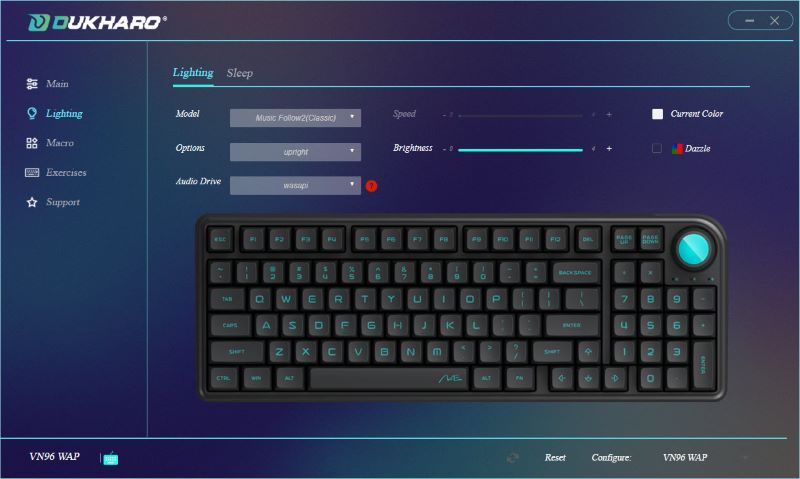
You can customize the lighting effects and create your own macros.
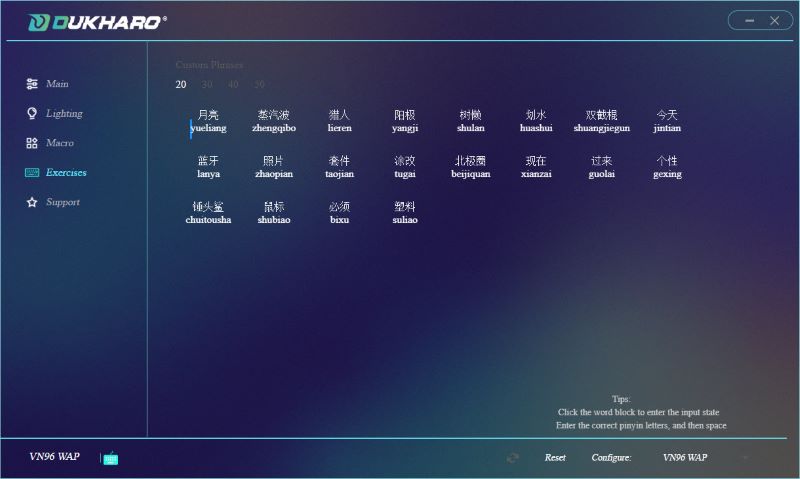
An option to change key binds, however, is absent or if it is there, I can’t find it. Being that this is a 96% layout, there are a few keys missing. Currently, the setup has the Delete, Page Up, and Page Down keys next to the knob. I really want to change Page Up and Down to Home and End but can’t figure out how to do it. I’ll be reaching out to support again to see if that’s even possible. Next, there’s a section in there for Exercises. I’m not sure how to use those because again they’re Chinese.
The last section is Support. There you can find the App and Firmware versions and check for newer versions.
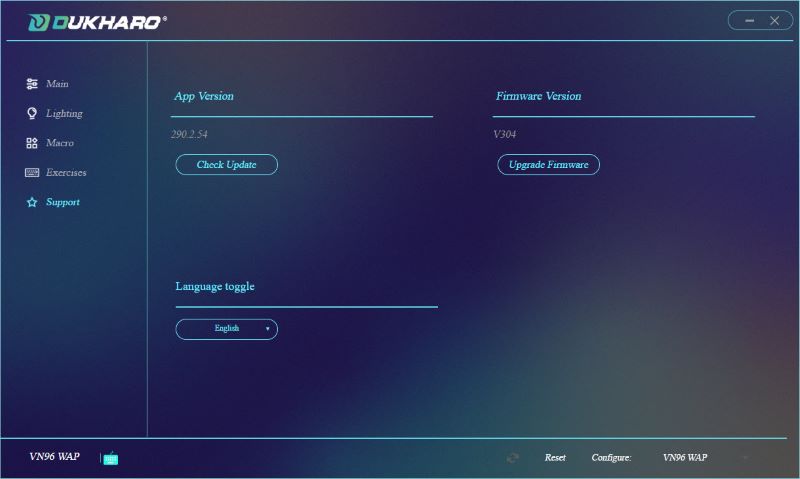
There’s also a Language toggle but I can’t tell if it does anything. When I switched to English, the app stopped responding and I had to close it and reopen it. I have updated the firmware of the keyboard through the app. It worked flawlessly. As far as I can tell, I’m using the latest version of the app. It hasn’t found any newer versions yet. I did find some older versions of it online, so that gives me hope. I’m hoping that means they’re still developing and improving it. It would be nice to have the option of using QMK and/or Via apps to customize the keyboard but I don’t think that’s going to be offered.
Performance
After adding some tactile switches and keycaps, I have to say I really like the Whatgeek Dukharo VN96WAP barebones DIY mechanical keyboard kit. Granted there were some hiccups getting to this point, but it works great via Bluetooth, 2.4 GHz wireless, and USB. It’s very sturdy with a good weight to it. With all the dampening installed, there’s a nice-sounding thockiness (is that even a word?). It’s a comfortable layout with a Numpad if that’s important to you. The knob works fine even with the slop of the potentiometer, knob fit, or whatever is causing the issue.
Other than the few quirks I’ve mentioned, the Whatgeek Dukharo VN96WAP barebones DIY mechanical keyboard kit performs great.
Hear it in action
What I like
- Build quality
- Accessibility, no screws to remove
- It thocks, thanks to all the dampening
- Customizability
- Good price
- Response of Whatgeeks’ support
What I’d change
- The manual
- Knob slop
- The Dukharo software
Final thoughts
Whatgeek offers quality and customizability at a good price with this kit. Their support group is very responsive. If you want to dip your toes into making your own keyboard the way you want it, then the Whatgeek Dukharo VN96WAP barebones DIY mechanical keyboard kit is a good starting point. It’s readily available on their website, with no pre-orders or drops to join, and you can get switches and keycaps there too. I give it two thumbs up.
Price: $94.99
Where to buy: whatgeek.com ( Save 10% with code: JULIE10 )
Source: The sample of this product was provided by whatgeek.com.
L39 Ultra Slim UV Protective Filter for Leica Q3 43 Q2 Camera with Moisture-Proof Case & Removal Tool 19 Layers Mulit-Coated UV Ultraviolet Filter 99.3% Light Transmission Water Oil Scratch Resistant
(as of June 20, 2026 03:47 GMT -05:00 - More infoProduct prices and availability are accurate as of the date/time indicated and are subject to change. Any price and availability information displayed on [relevant Amazon Site(s), as applicable] at the time of purchase will apply to the purchase of this product.)
Gadgeteer Comment Policy - Please read before commenting
Nice review, I’ve just placed an order for one.
Just FYI the knob is actually an encoder not a potentiometer (variable resistor).
AHhhh. Thank you for the comment! It’s always good to learn new things
hello! Any Idea why the driver software can’t find the keyboard, even in wired mode? Thank you!