REVIEW – As a band mom, I’m called upon to do a lot of things, but probably the most important one is to help fundraise for the marching band. Pre-pandemic some of the band moms tossed around the idea of making buttons to sell, but none of us had any button making experience. I thought trying out the Mophorn Button Maker would be a perfect opportunity to experiment with this craft and see if it’s something we can use as a fundraiser for next year.
What is it?
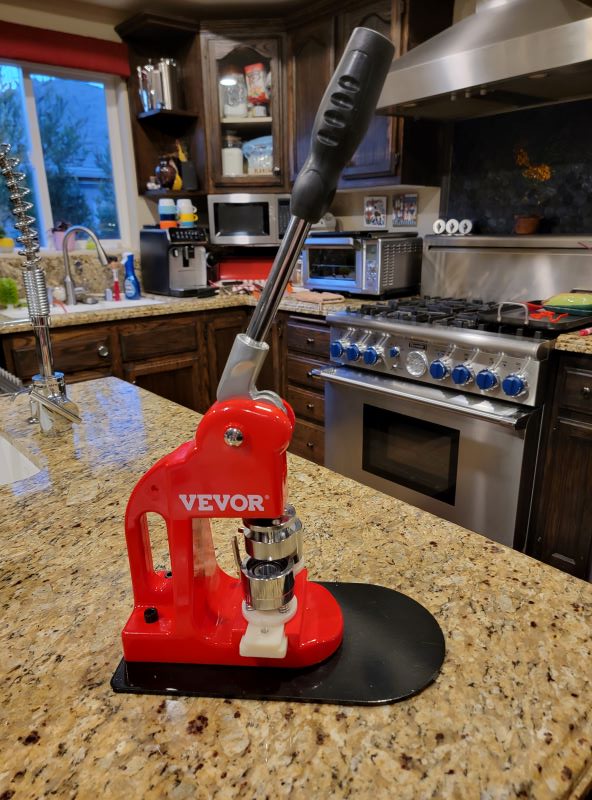
The Mophorn Button Maker is a button maker with supplies to make 500 buttons that are 25mm (about an inch) in diameter.
What’s the box?
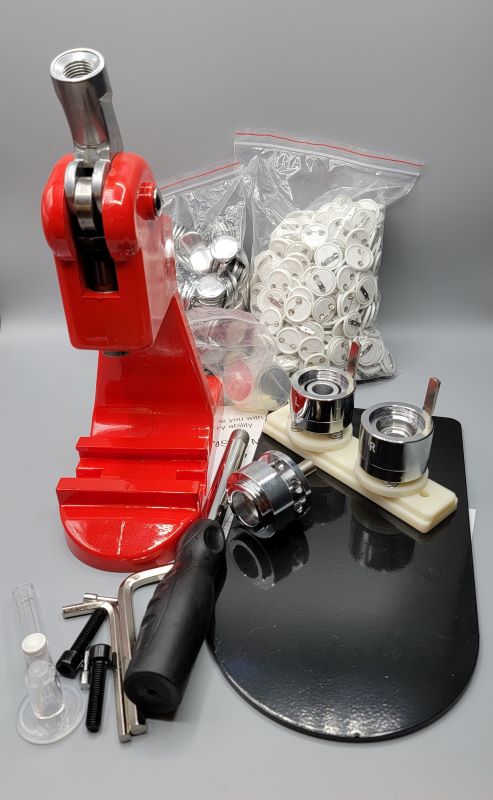
- The Mophorn Button Maker in a few parts
- Some Allen wrenches help put it together
- Some instructions
- Pin button parts (blanks, plastic circles, and pin backs)
- A circle cutter with several spare blades
Setup
So easy. The box comes well packed but the machine is made of cast iron and stainless steel and could survive a drop from a very tall building. Basically, all you need to do is screw the press onto the base with a couple of supplied bolts and screw in the handle. Then you slide on the molds that actually hold the parts of the button while you’re making them. I looked at the instructions but I didn’t need to – there’s pretty much only one way this thing goes together.
Features
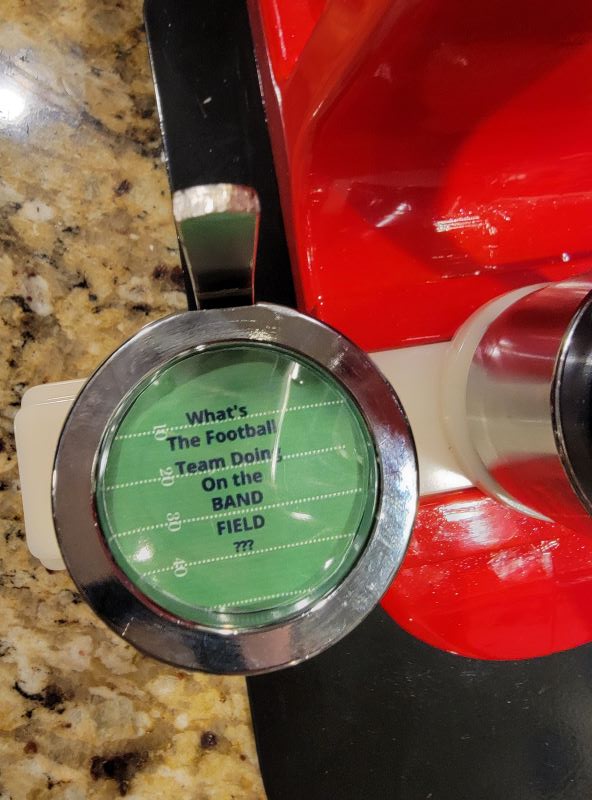
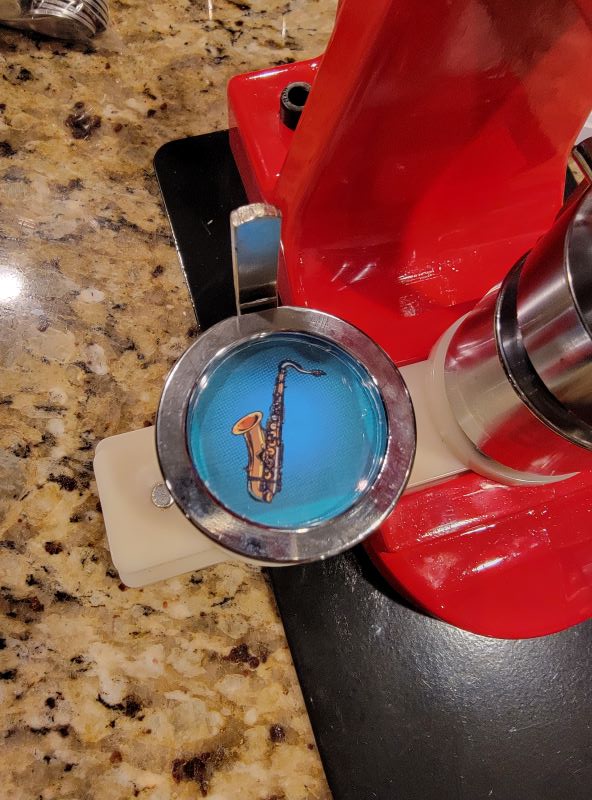
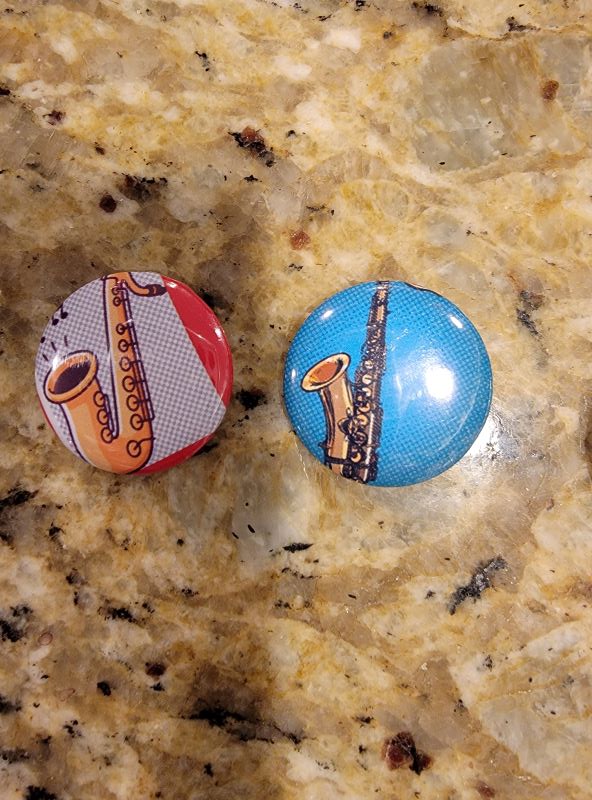
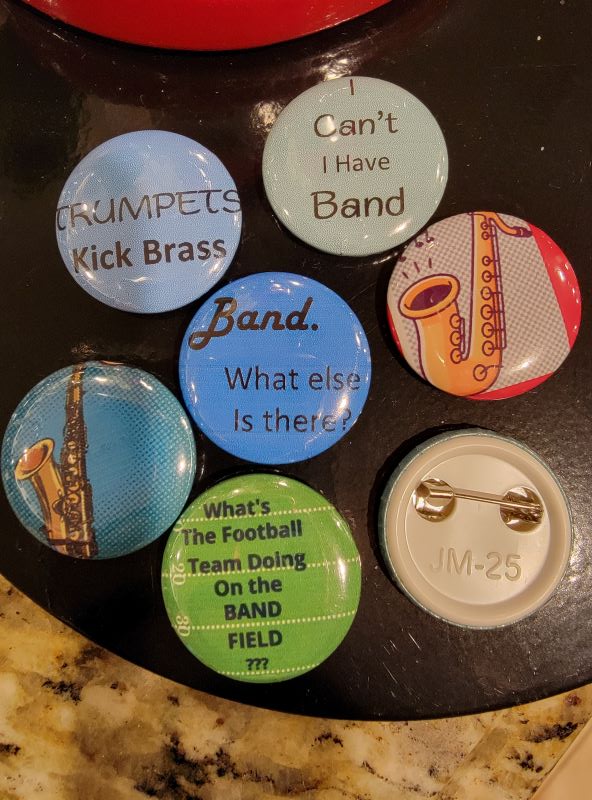
It turns out that the hardest part about making buttons is designing them. The learning curve is not that high. The instructions gave clear measurements on how big your design could be, how big the overlap (to wrap around the button) needed to be, and how big to cut your design. This button machine makes buttons that are a little under an inch wide, so you don’t have a lot of area to work with. I tried to make one with print that says “What’s the football team doing on the band field?” and I designed it in MS Word and then printed it out on some photo paper so the design was bright and sharp. It looked cute, but the print is hard to read because it’s so small. I also made a couple of designs of just musical instruments, and those looked better. I made a few more with fewer words and those looked big enough to read. My advice is to carefully pick the size button maker that you think you’ll need because most are not interchangeable. If I wanted to make buttons that are an inch and a half in diameter, I would need to buy a whole new machine.
Also, I used MS Word just because it was easy for me, but I imagine you could make some great designs in other applications such as Canva or Photoshop. I would also do a web search for button templates because I found some sites with some great tips and downloads to help you get started with whatever size machine you’re using.
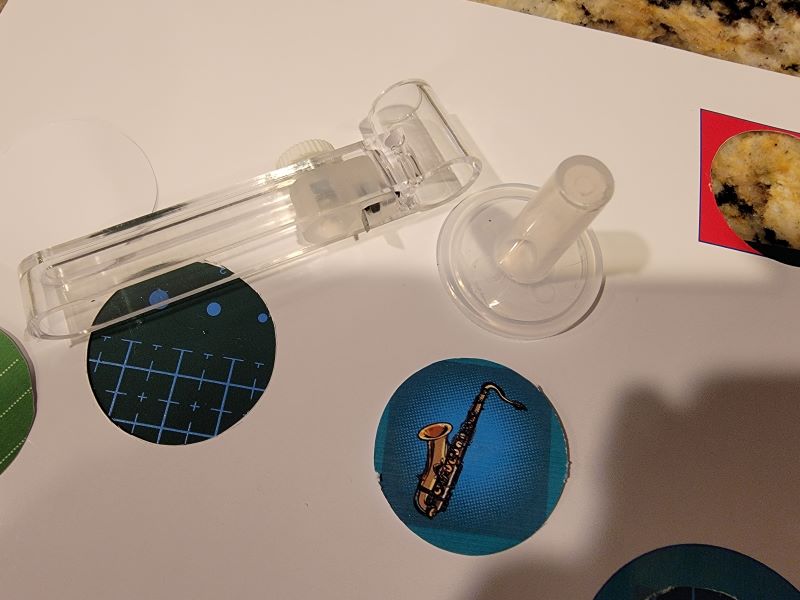
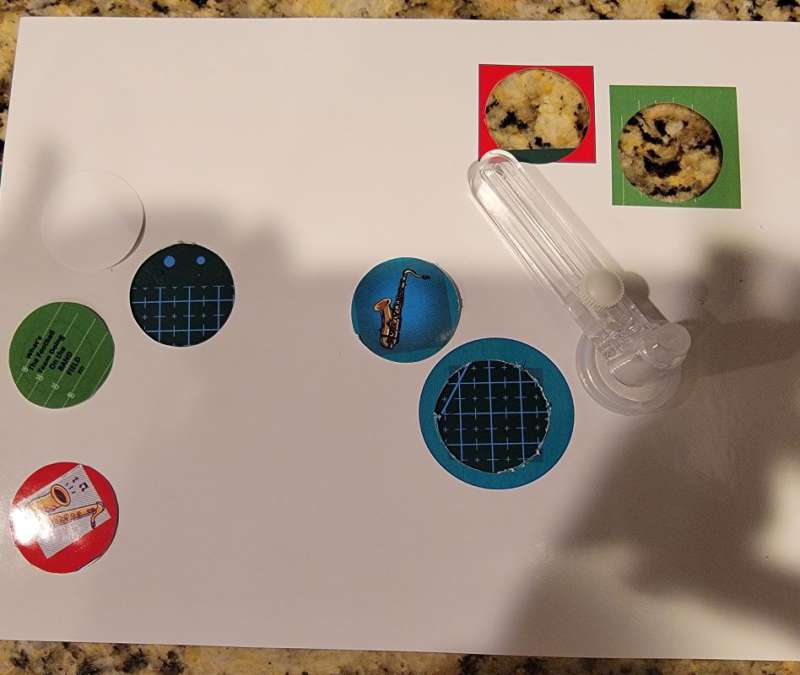
After you print your design, you need to cut it out. I used the circle cutter that they included and my own cutting board. If you don’t have a cutting board, I’d recommend using a layer of cardboard or something to protect your work surface because the circle cutter is quite sharp. It’s adjustable, so I just adjusted it down based on the template in the instructions. I only made a few buttons so my circle cutter stayed very sharp, but they include a few extra blades so I imagine you could go a long time working with it before you have to buy a new one.
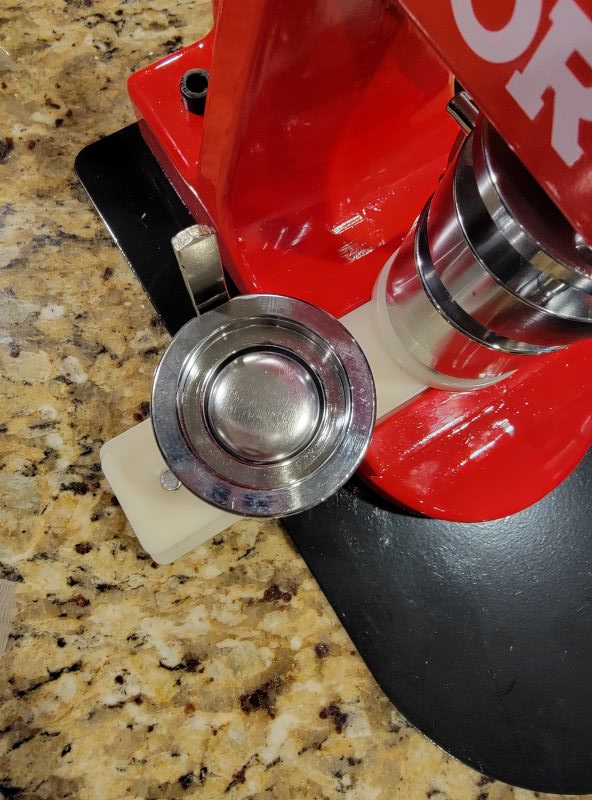
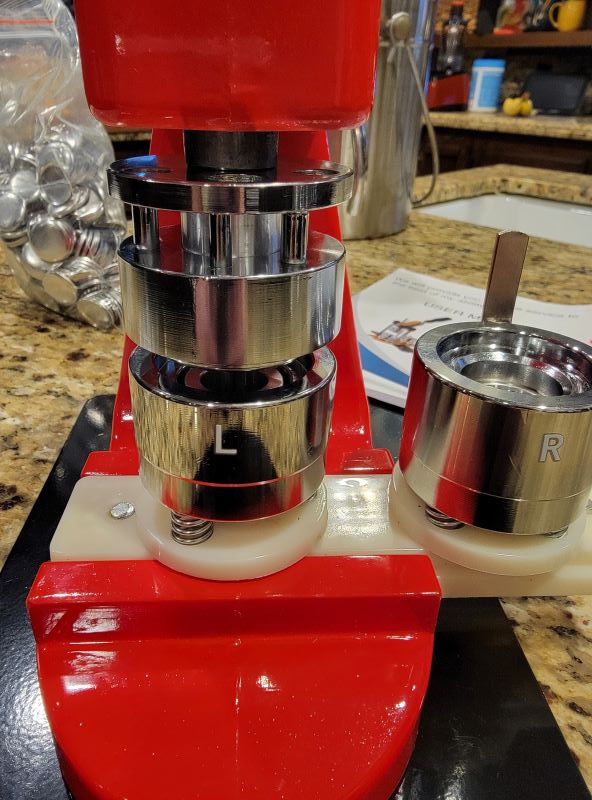
Once you have your image cut out, you put the shiny metal circle part on the left die, your cut-out image on top and the plastic clear circle that covers it on top. Next, you press down on the button maker and it crimps it together and lifts it up into the top chamber. It doesn’t take a lot of force – the Mophorn Button Maker does all the work. Then you slide the mold to the left and put the back of the pin in the right die, press it down again, and presto! You have a button!
It is a super easy process and If I wind up becoming the button maker for the marching band, I plan on making some more sophisticated designs and cutting them out on my Cricut. I found cutting them manually a bit tedious and easy to screw up because you have to make sure the circle cutter is centered on the design. The Cricut would also let me turn out the designs very quickly. The button-making literature said that the Mophorn Button Maker could make 200-300 buttons per hour, which is perhaps true if you already have them all cut out and ready to go into the machine. I can’t imagine how long it would take to cut out that many manually.

I really like the way they included so many supplies with the machine. If we decide to make buttons as a fundraiser, we might want to buy materials to also make bottle openers, key chains, and magnets with the machine, but we’ll be set to make pin back buttons for a long time.
What I liked
- The fact that they thought of everything and included it in the package
- The clear instructions for the design
- The ease of use.
What I’d change
- I can’t think of anything. It’s a great machine!
Final thought
Overall I was pleased with the way my buttons turned out and how easy the Mophorn Button Maker is to use. The instructions were great and the finished product looks professional!
Price: $89.99
Where to buy: Amazon
Source: The sample for this review was provided by Mophorn

KAMRUI Pinova P2 Mini PC 16GB RAM 512GB SSD, AMD Ryzen 4300U(Beats 10110U/3500U/N95,Up to 3.7GHz,4C/8T)Mini Computers,Triple 4K Display/HDMI+DP+Type-C/WiFi/BT for Home/Business Mini Desktop Computers
(as of June 24, 2026 14:17 GMT -05:00 - More infoProduct prices and availability are accurate as of the date/time indicated and are subject to change. Any price and availability information displayed on [relevant Amazon Site(s), as applicable] at the time of purchase will apply to the purchase of this product.)
Gadgeteer Comment Policy - Please read before commenting
just wanted to know if you can make other things instead of buttons maybe other surfaces?
Well it can make anything buttony…like you can get plain backed supplies and glue magnets on (you might be able to buy backs already made with magnets too. You can make bottle openers too with the right supplies. Are those what you were thinking about?
Would you be able to post the instructions for assembly ? I was just gifted one and – it doesn’t work; I think it’s mis-assembled….
I don’t think I still have them, but there’s just the handle, and then the mold just slides on there. if you follow the link to Amazon they have a video of the assembly on there.
There is something gravely wrong – I thought the instructions might help. It doesn’t press down nearly hard enough to get the plastic cover on the button, or to join the button to the backing. And yes I am strong and press REALLY hard and my partner can’t make it do it either… Oh well…
If you’re doing buttons just as a hobby it’s fine. But if you’re using it to try and make bunches to sell don’t do it. They’re really bad quality. Most of the machines are hit or miss cause of poor quality control. Sometimes they don’t get all the pressure they need because of the plastic backings and over time eventually the buttons just come apart.