REVIEW – I’ve been getting into making stuff lately and have had some serious fun with the Artillery Sidewinder 3D printer. I’ve been wanting to add to my options and am joyously happy I gave Creality’s CR-Laser Falcon engraver a try. This thing is glorious fun, but it’s no toy. Read on, Gadgeteer friends!
What is it?
The Creality CR-Laser Falcon engraver is a five-watt, solid-state laser controlled by a motorized X-Y gantry capable of burning and/or cutting computer-generated text and images into/through wood, leather, and other surfaces.
Hardware Specs
- Dimensions: 568 x 632 x 198mm (22.4 x 24.9 x 7.8 inches)
- Weight: 3.3kg (7.25lbs)
- Operating System: MacOS, Windows
- Voltage Input: 110-220 volts, 47-63Hz
- Power supply voltage output: 24 VDC, 3.0A
- Safety Certifications: IEC60825, FDA, CE, ROHS, FCC, UKCA, UL
- Safety Class: FDA –Class 1
- Laser engraving software: LaserGRBK, LightBurn
- Laser source: Semiconductor type
- Laser power: 5-Watts
- Supported materials: cardboard, wood, bamboo, rubber, leather, leather, fabric, acrylic, plastic, and more
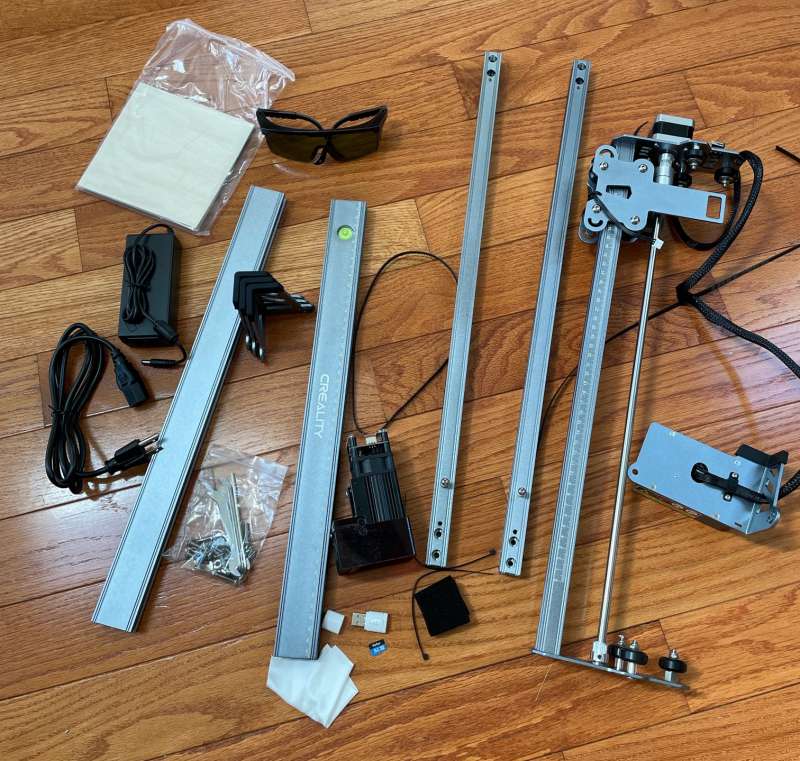
What’s in the Box?
- Laser computer control assembly
- Five-watt solid-state laser module
- X-Y Gantry (assembly required)
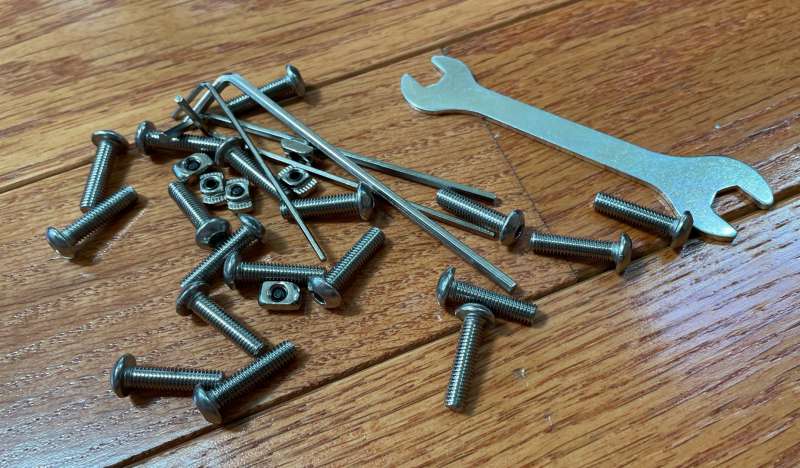
- Assembly screws and hardware
- Gantry support legs
- Power supply
- Power cord
- Linden plywood sample material (2)
- Wrench
- T-nuts with grub screws for securing the X-axis belts
- Allen wrench sent
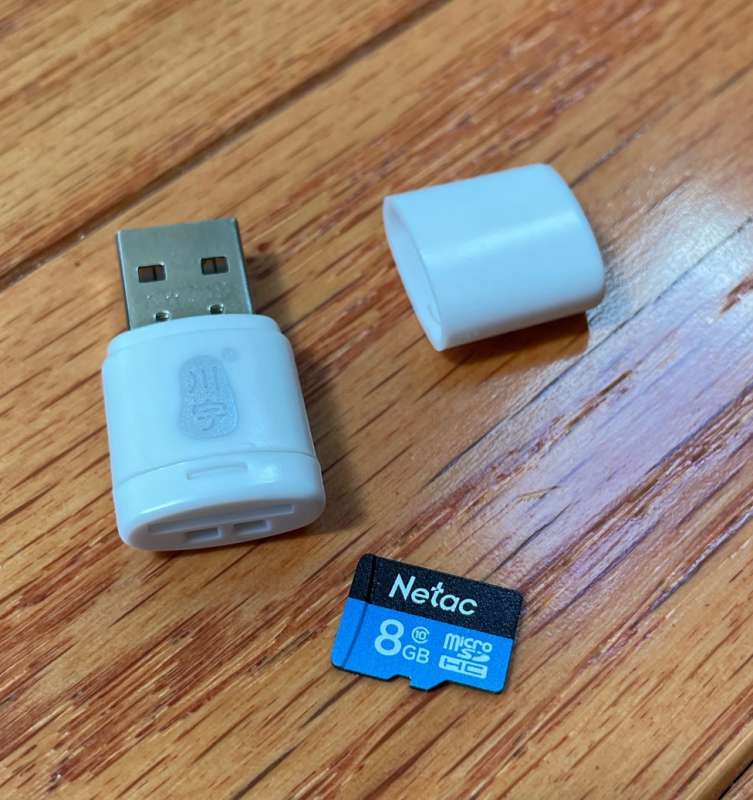
- 8GB TF card and USB card reader
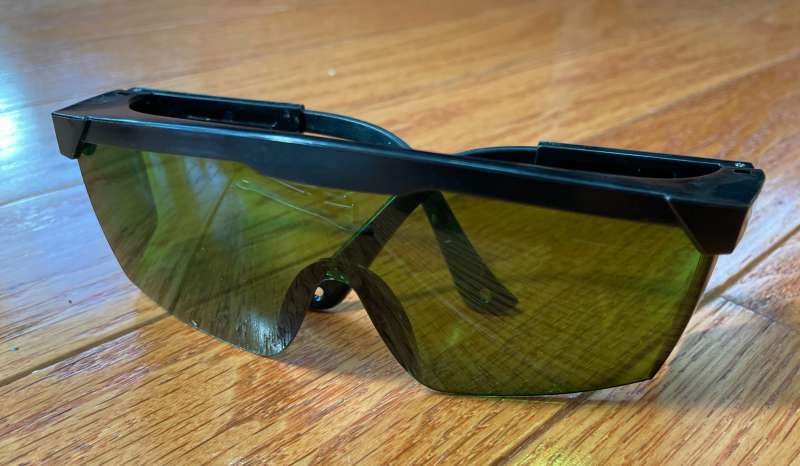
- Safety goggles
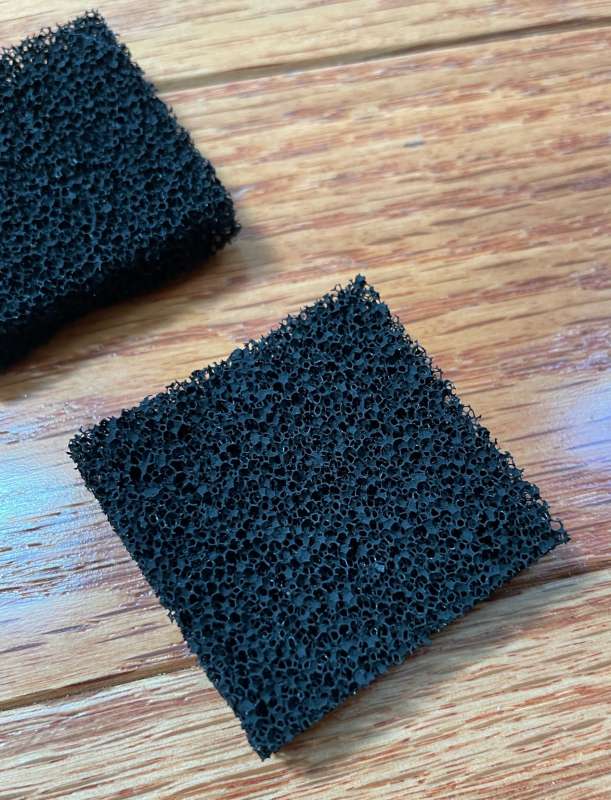
- Spare activated carbon smoke filters (2)
- Dustless cloth
- Owners manual
Design and Features
My wife is mega-talented when it comes to sewing, upholstery, pillows, jewelry, and all manner of crafty projects. Me? Not so much. I’m more of the technical, “fix-it” type, but I do love to make useful stuff. I’m not talented enough to sew, draw, or build furniture like my better half, but given enough time, I can usually figure out how things work and enjoy tinkering.
I’ve been looking forward to getting my hands on a laser engraver when the opportunity arose to see the Creality CR-Laser Falcon, I was eager to see what it could do.
The Laser Falcon arrived in very well padded, foamy comfort.
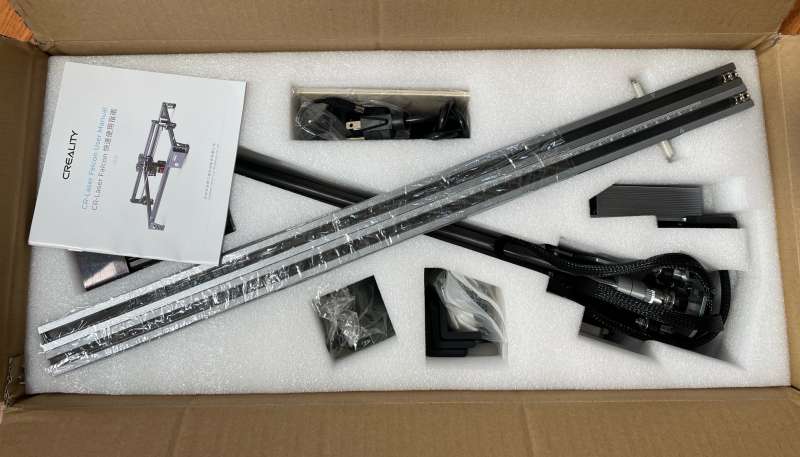
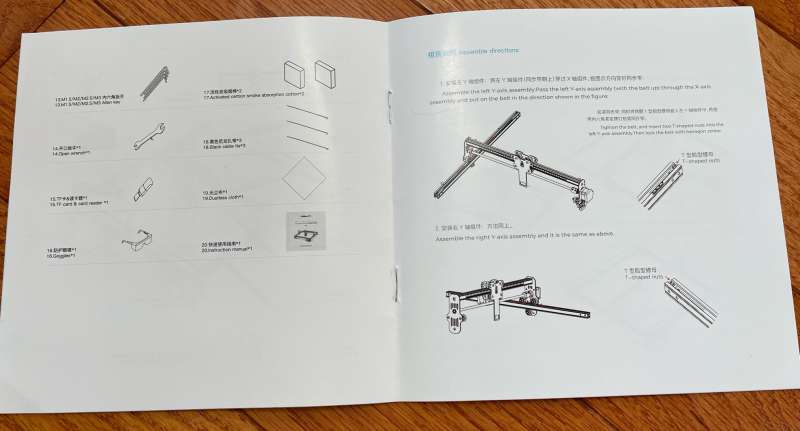
All of the pieces-parts need to be assembled before the fun begins which took about 30 minutes. I was very pleased to find all of the parts and tools were included.
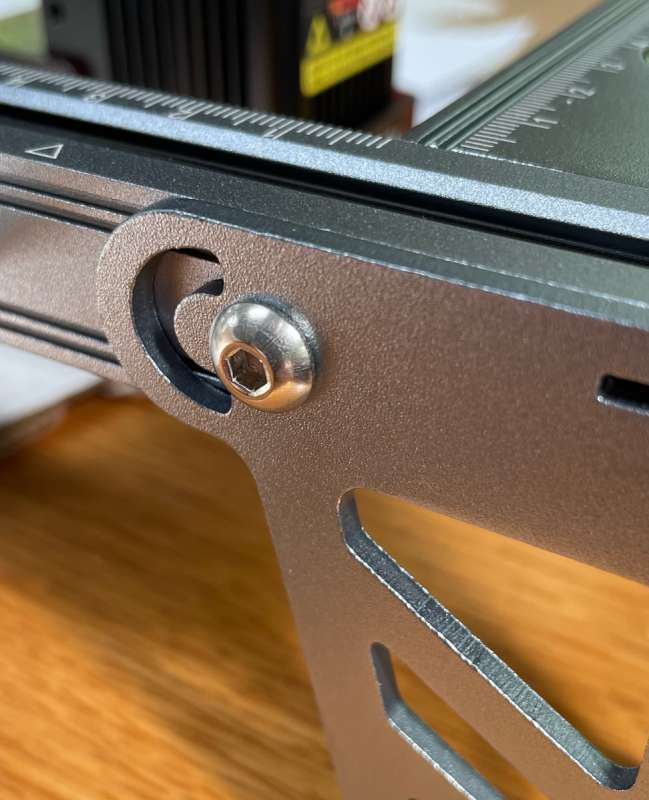
The fit of the bolts is commendable. With the bolts properly torqued, there was no flexing or bowing of the frame.
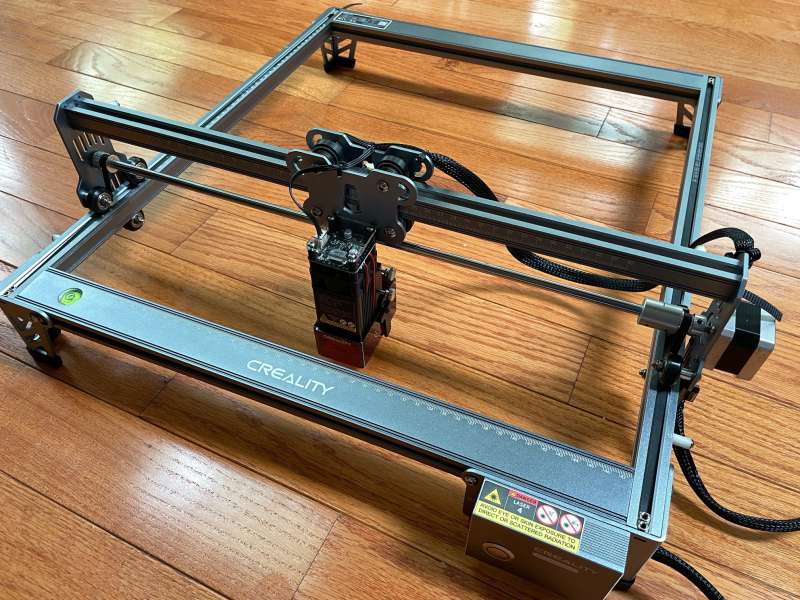
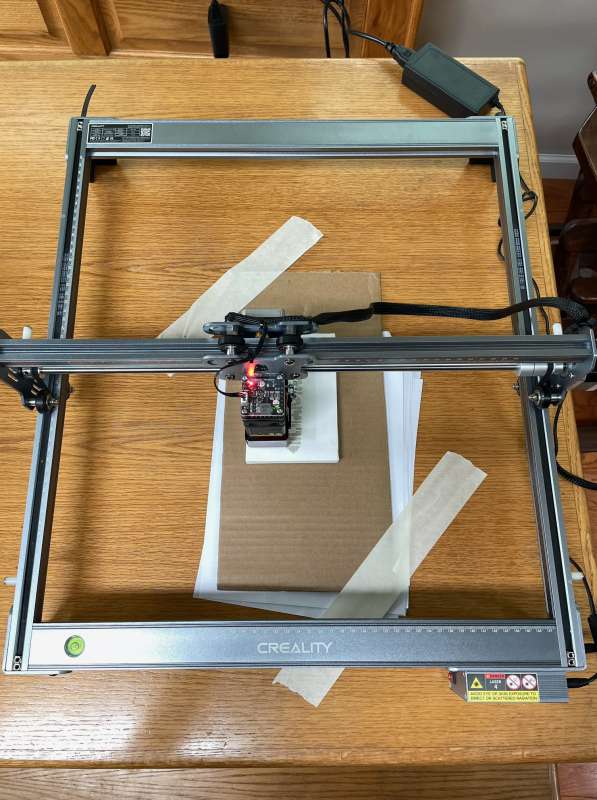
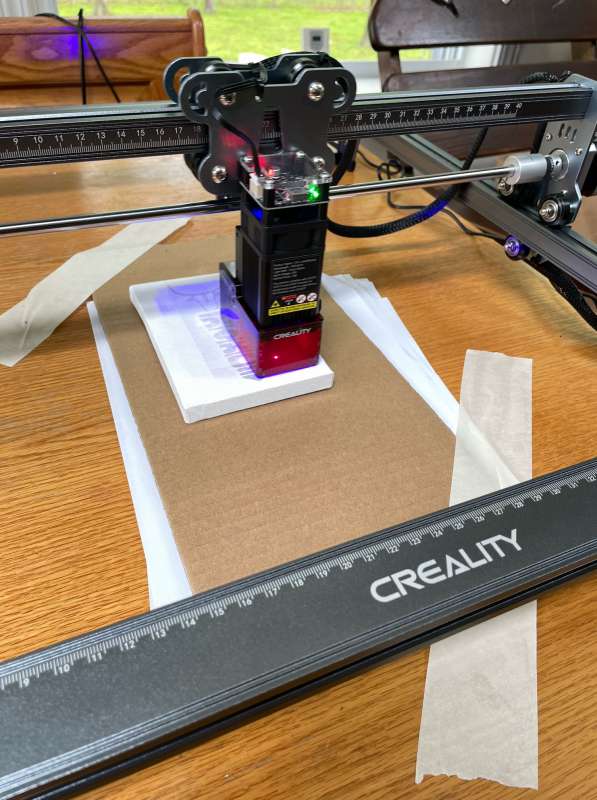
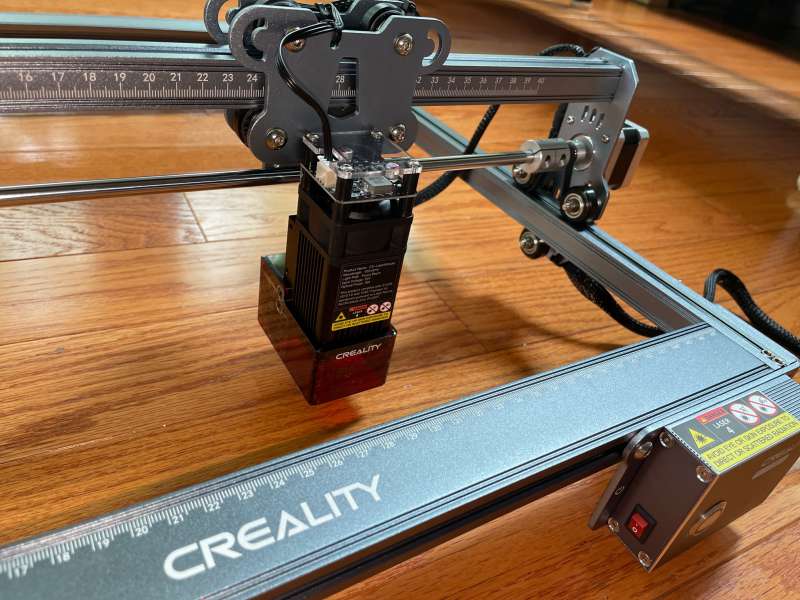
The fully assembled Creality-CR Laser Falcon Engraver. Tadaaa!
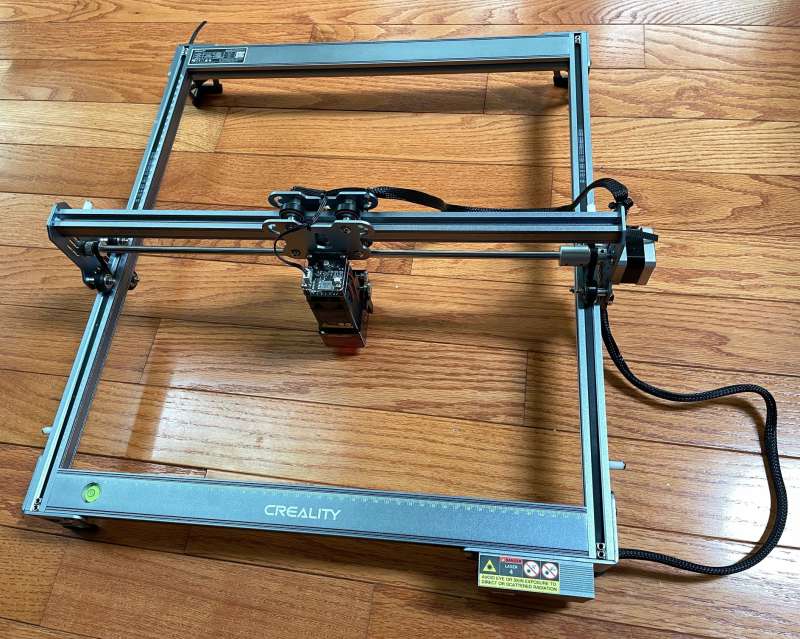
System mechanics, stepper motors, and couplings were all exemplary. I carefully checked the fit and function and found everything was solidly constructed. Very nice!
The manual wasn’t clear about the routing of the laser/Y-Axis cable, but popping a few of the bolts off to correct my error was nothing to fret about.
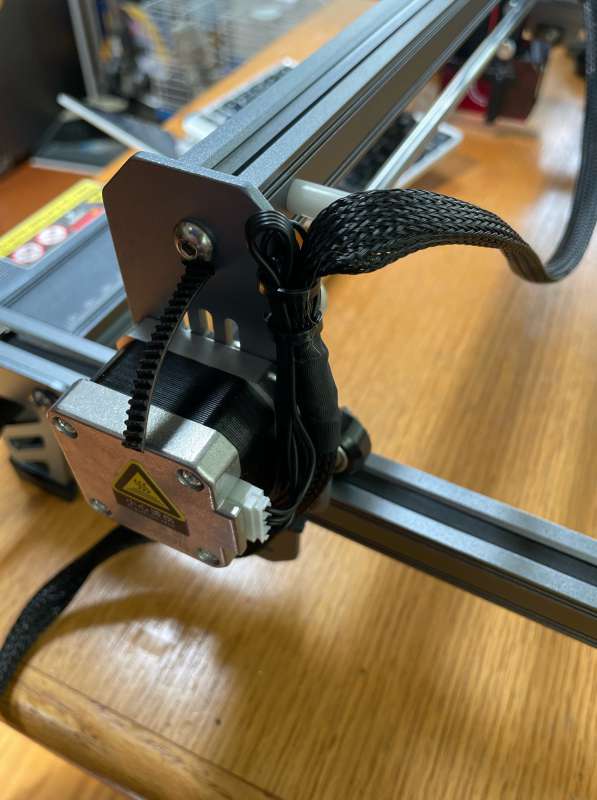
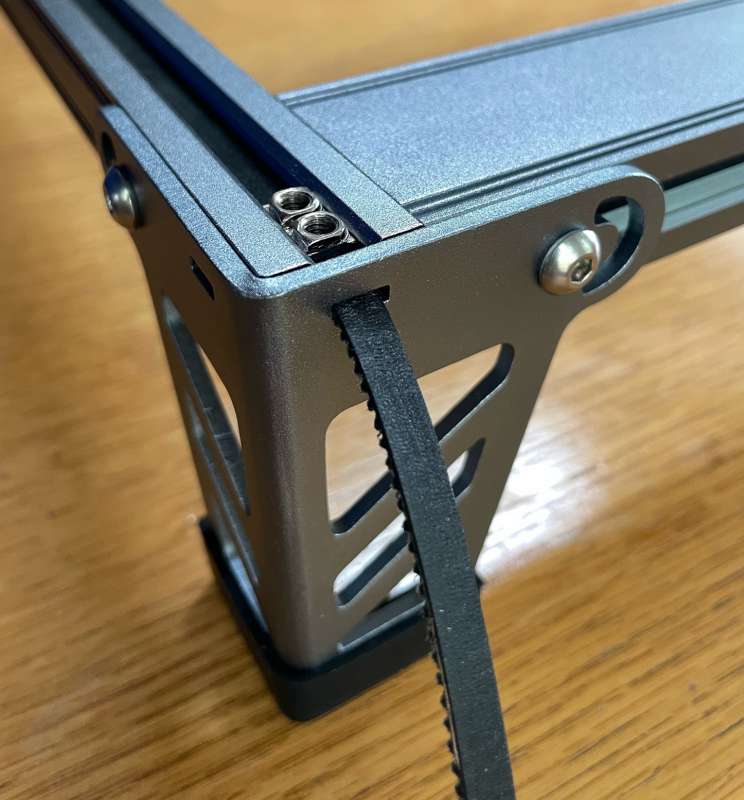
The X-Axis belts are routed through the Y-Axis gantry support…
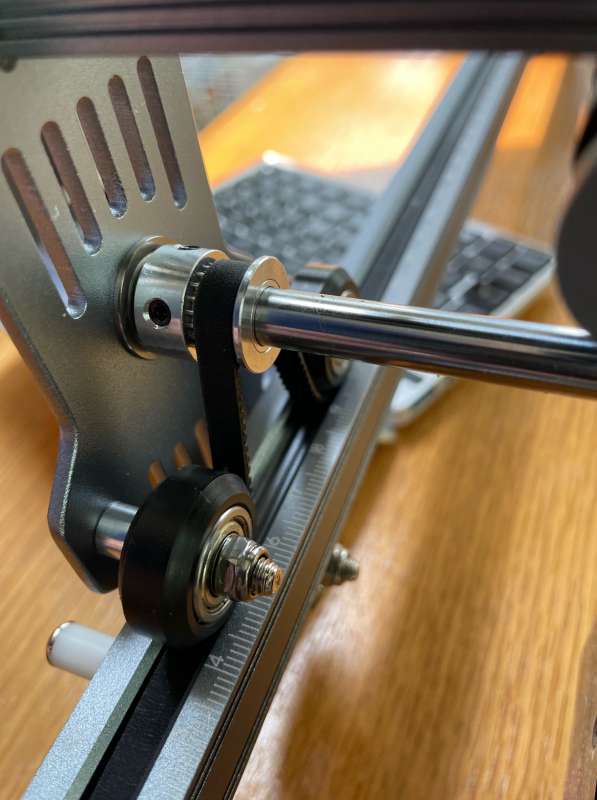
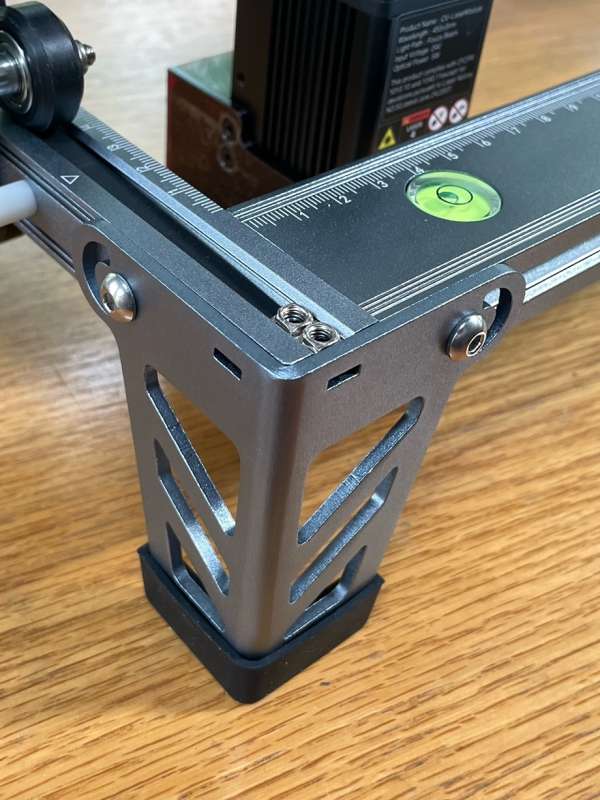
… then secured inside the rails using the included T-Nuts. The legs have rubbery covers that protect tabletops from scuffs.
The excess belt extends through the support legs
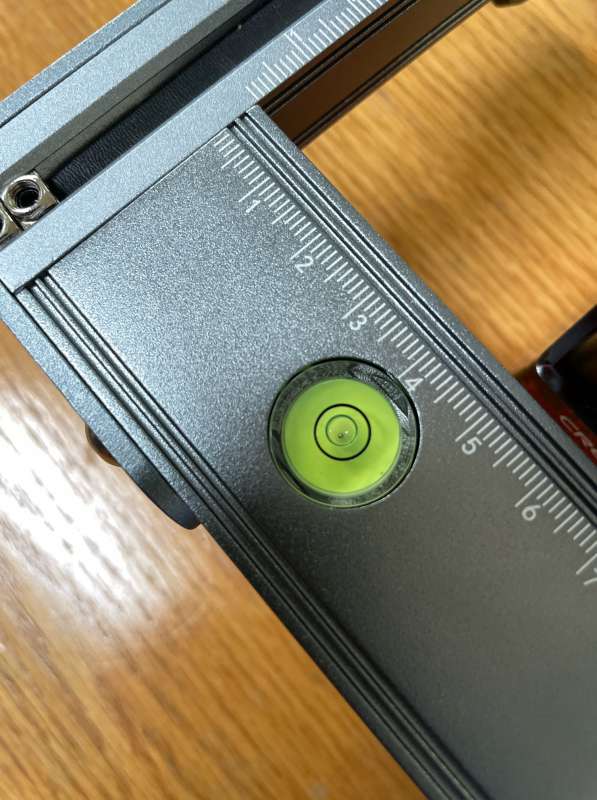
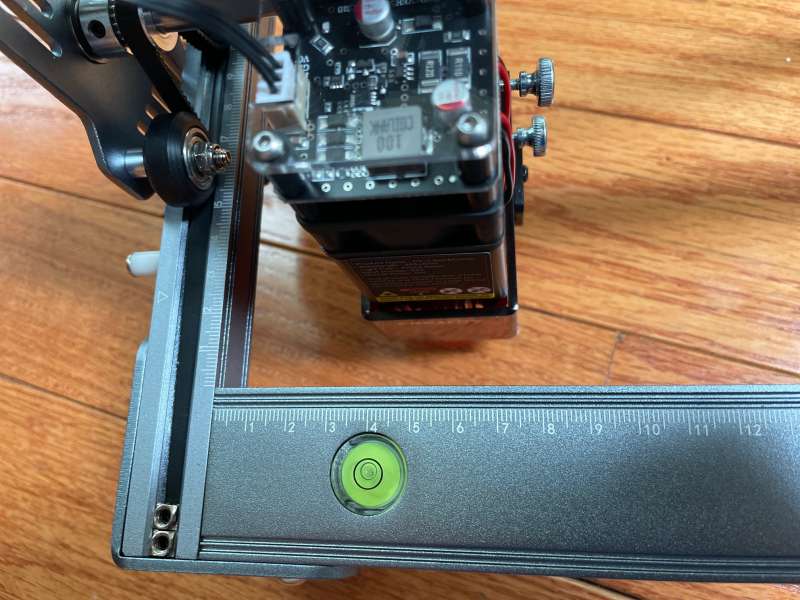
Creality included a convenient bubble level to ensure the gantry will operate parallel to the surface on which it rests.
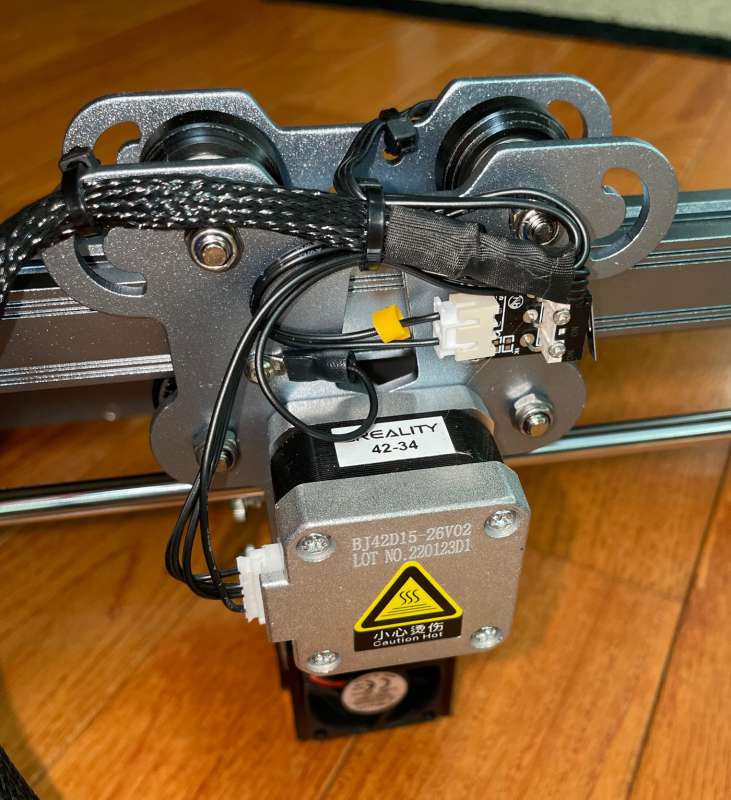
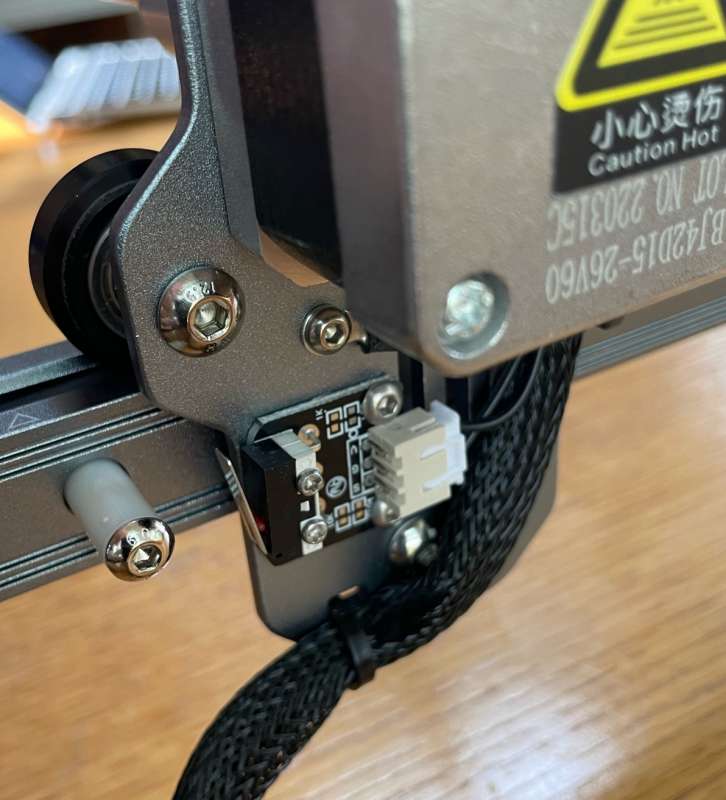
The X and Y-Axis travel switches were preassembled and required no adjustment.
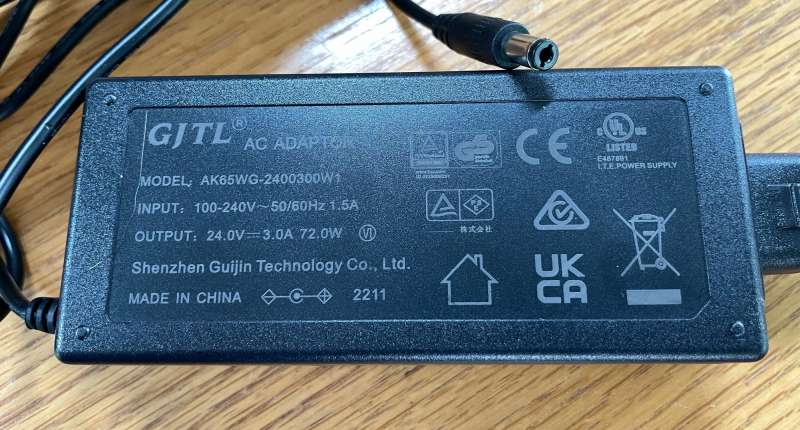
The power supply looks similar to laptop computer power bricks. Output is 24 volts, 3 amps.
Input power is a barrel-type connector. On the same side is the SD card socket for loading .gcode files and a USB-C connection direct control. (More about .gcode files later.)
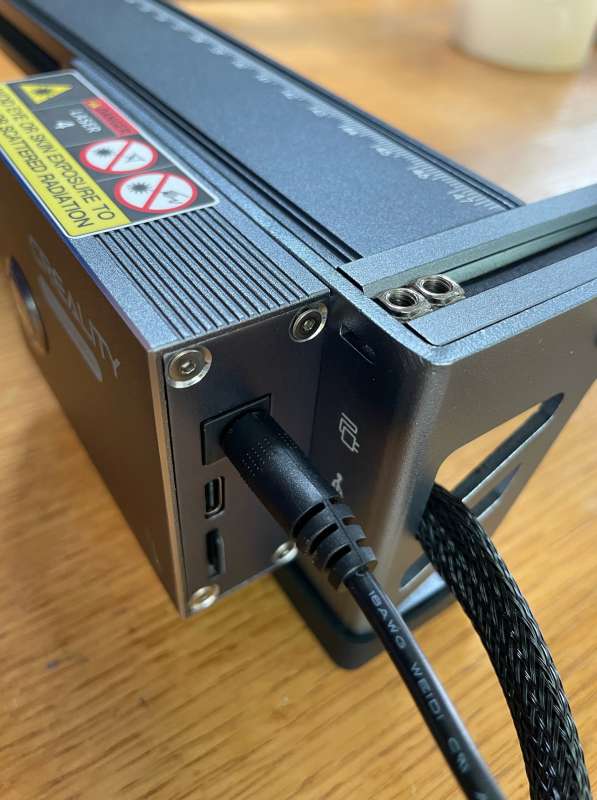
The opposite side of the control is the power switch.
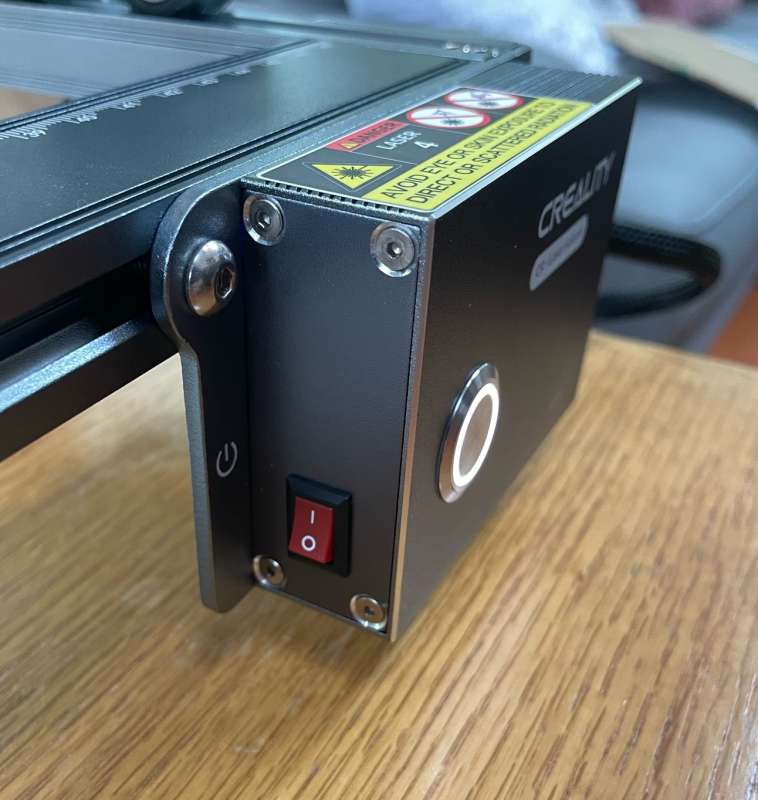
A lone button sends the gantry in motion once everything is ready.
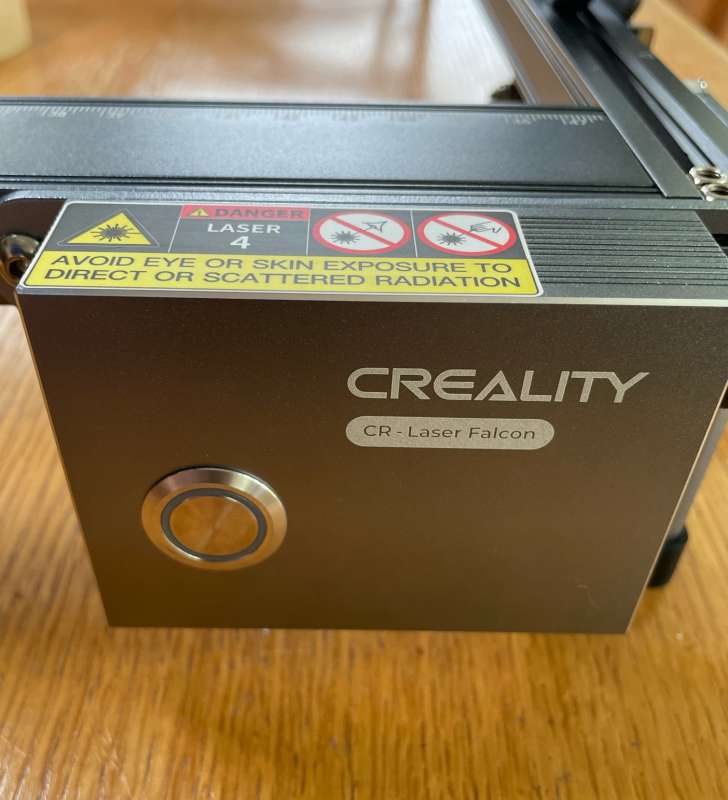
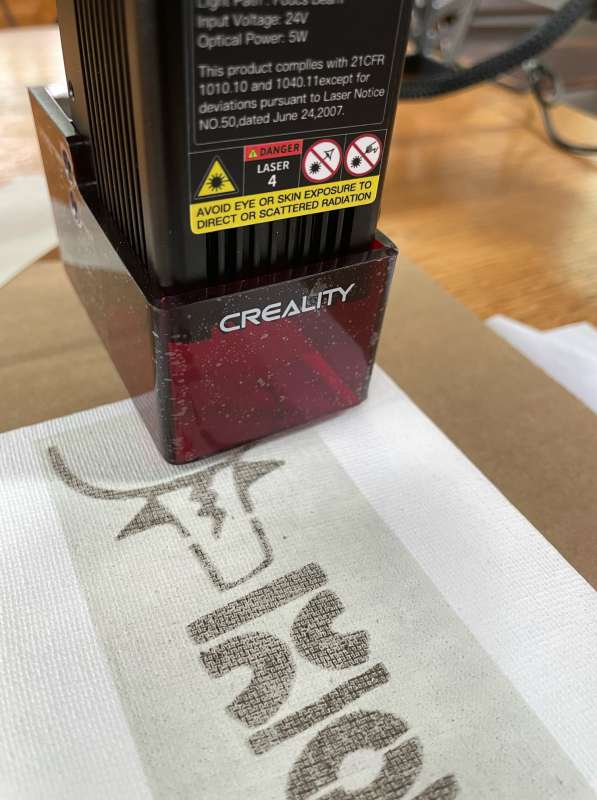
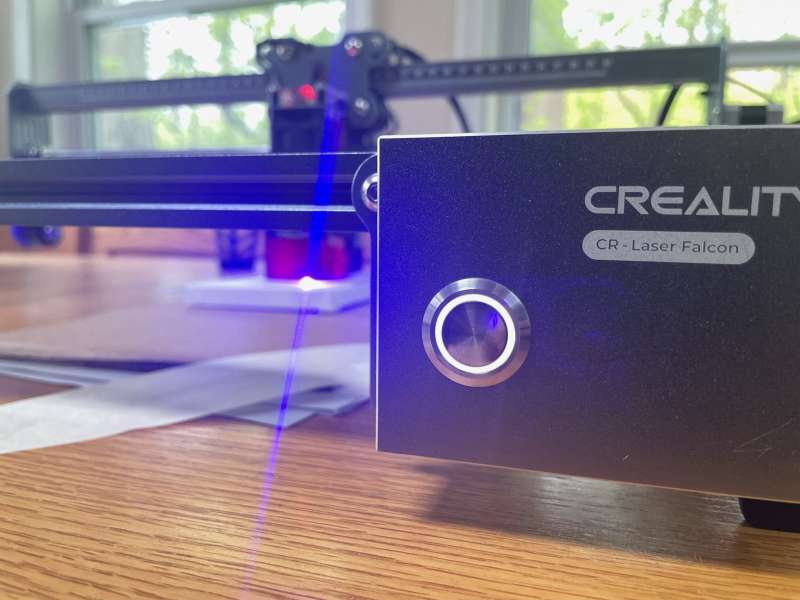
The laser is rated at a respect-worthy five watts and attaches to the gantry using thumbscrews.
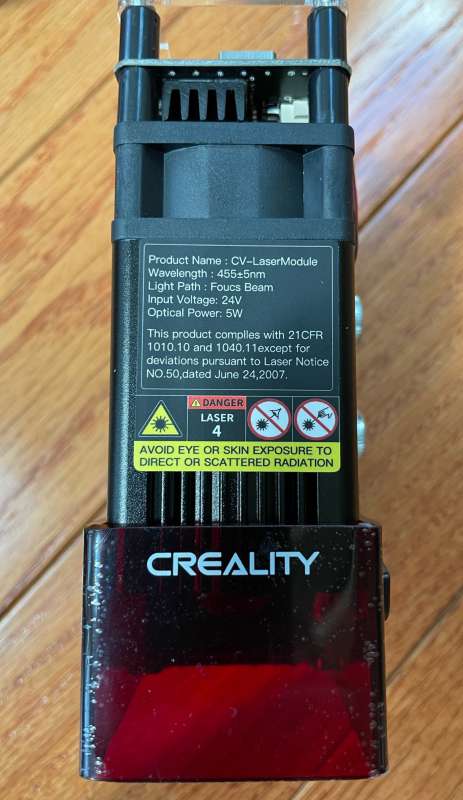
To prepare the laser’s focus, a lever flips downward and contacts the material surface. A magnet retains the lever when not being used.

Software for generating project files is located in separate folders on the included SD card. Gcode files can then be loaded onto the card and installed in the engraver. A single press of the button homes the gantries and moves the laser at a low output level (nothing will be burned or cut, but the beam dot will be bright enough to see where the image will go), and sends the gantry circling the outer perimeters of the design to allow positioning of the material.
Here’s where abundant caution is warranted….
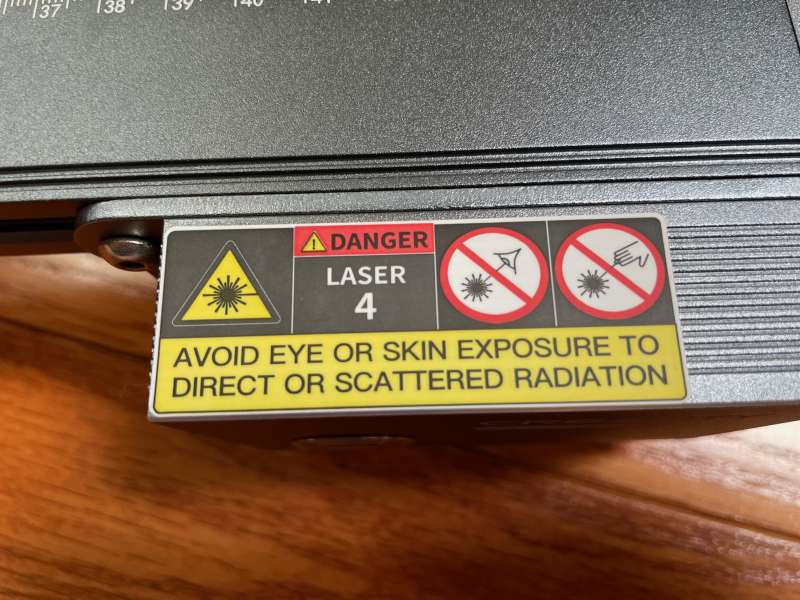
Never expose a living creature to the laser beam. It can burn flesh, cut holes, and, can cause permanent blindness. Never operate the laser separately from the gantry, be sure to follow all of the manual’s safety warnings, and do not look at the beam under the safety shield because even reflections can cause blindness. More safety warnings can be found here. This laser is NOT a toy and should be treated with the utmost respect. When in doubt, use the included safety goggles.
A second press of the button will send the gantry in motion and begin burning or cutting. Depending on the material, laser power, and speed, the laser can burn the contents of the .gcode into the surface of the material, or cut completely through.
Next caution: Creality includes a reference for burning and cutting on the included SD card, but the information is only a “ballpark” estimate. Thickness, color, density, and other factors can increase or decrease the speed at which the laser will burn. Extreme care is needed because with some materials, the laser can cut through material like a hot knife through butter. Always make sure there is a solid backstop surface between the material and the workplace. If the parameters aren’t correct, you might find that you’ve inadvertently burned your .gcode through the material and into your dining room table. It’s always better to err on the side of caution, rather than hearing your own (or your partner’s) shrieks of horror and having to spend days sanding and refinishing your antique table.
In my case, my first attempt at cutting a small “it is what it is” plaque blasted through the wood and into the cardboard I had used as a protective layer. I have no doubt that had I used less backstop material, a slightly slower speed, or made an additional pass, the Laser Falcon would have penetrated the cardboard and into my oak table… and I would have needed to explain my error to my very patient wife. Ironic? Yes, it certainly would have been. To be clear, had it happened, it would have been my fault, chalked up as inexperience.

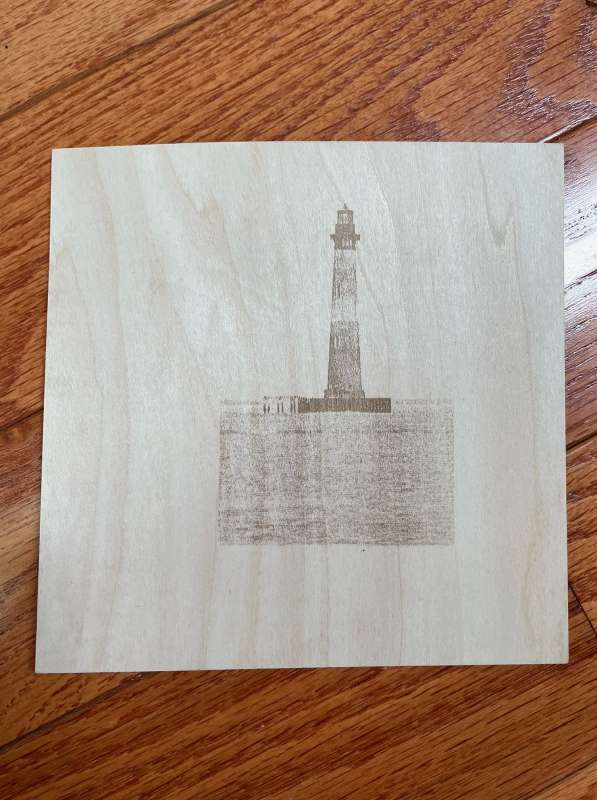
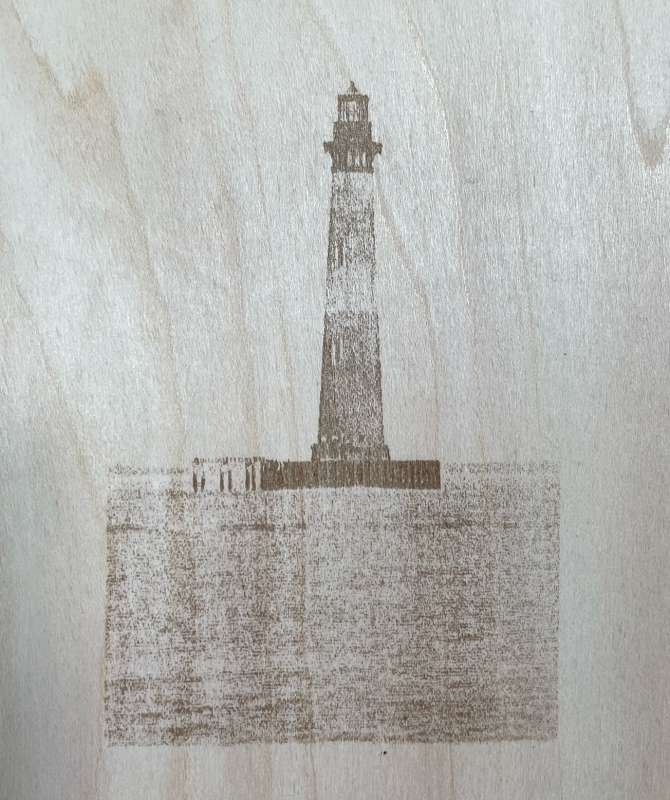
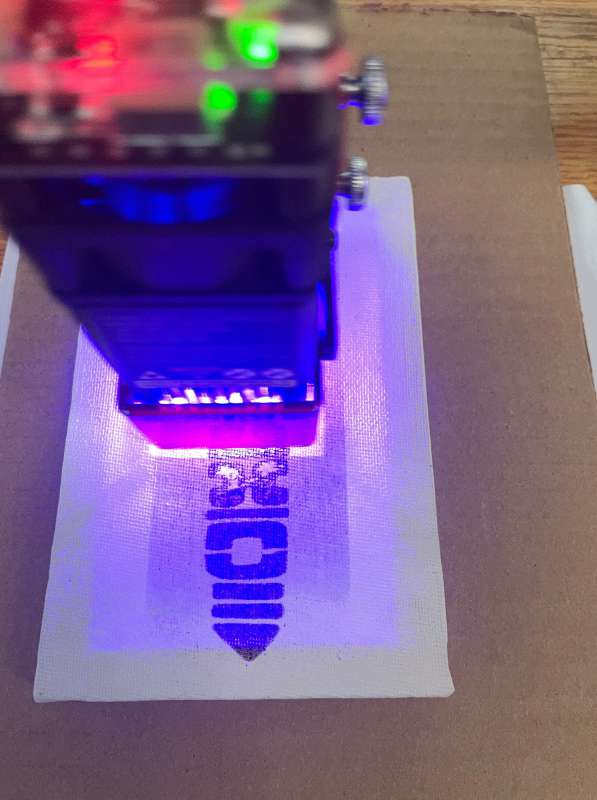
My first image was the Morris Island Lighthouse near Folly Beach, South Carolina (the aforementioned plaque was my third test, but I felt it was important to talk about safety first) I was very pleased with the results, particularly for my first try.
My second test was my mother-in-law being silly (I love you, Mom!). I was equally happy with the results, except for the alignment.
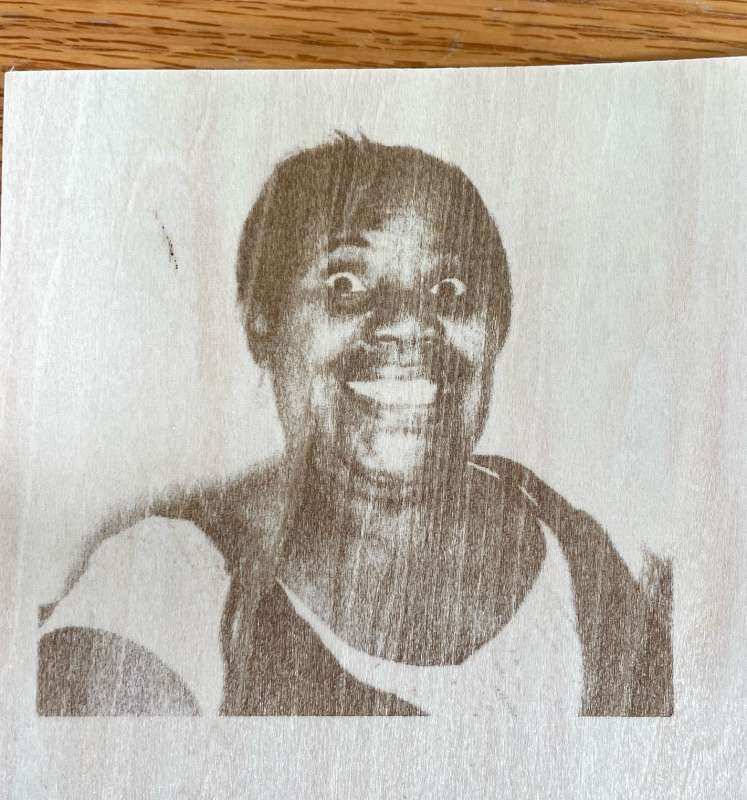
Despite my best efforts, my first images were skewed. It would have been great to have a graduated (and laser proof!) surface to assist, but still, I was able to find a few solutions online. There are millimeter markings on the gantry, but I found “eyeballing” the material isn’t good enough.
The best solution was to place some waste material (cardboard for my test) under the laser and secure it in place with tape. Next, I created a simple .gcode file using only an outline of the material, loaded it into the SD card, inserted it into the engraver, and burned the waste material. Then, I created a second .gcode file with the content inside the outline, loaded the SD card, reset the laser height, and burned it again. I used this technique for my previously mentioned “it is what it is” plaque and (aside from almost burning my tabletop 😛 ) the results were exhilarating! Now we’re talking!
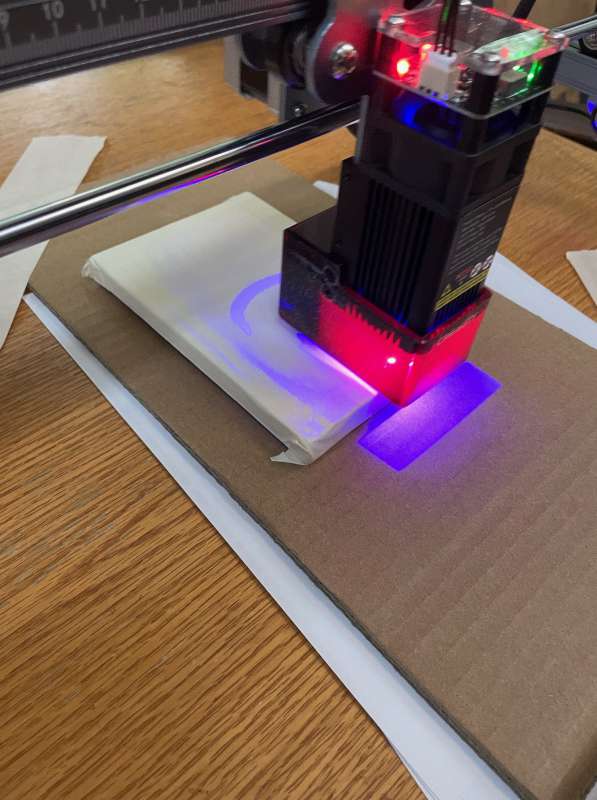
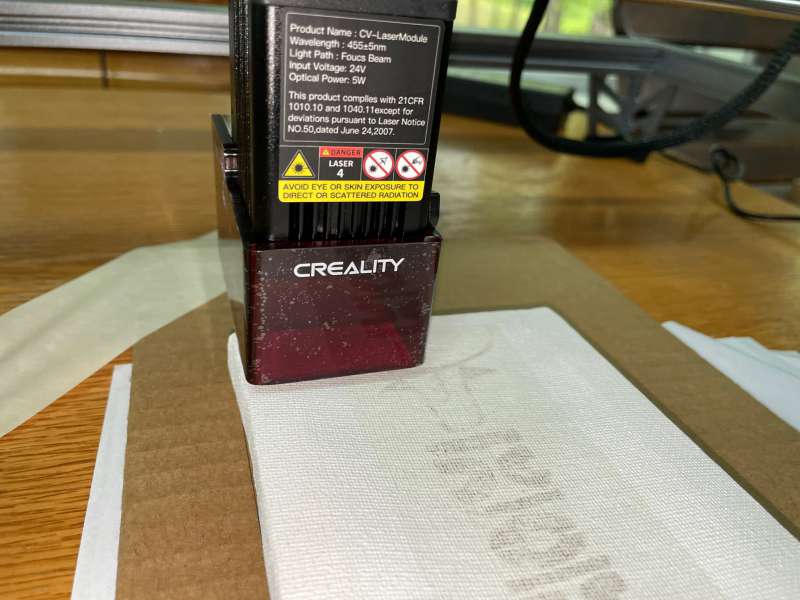
It took a few passes to make the image as dark as I wanted it.

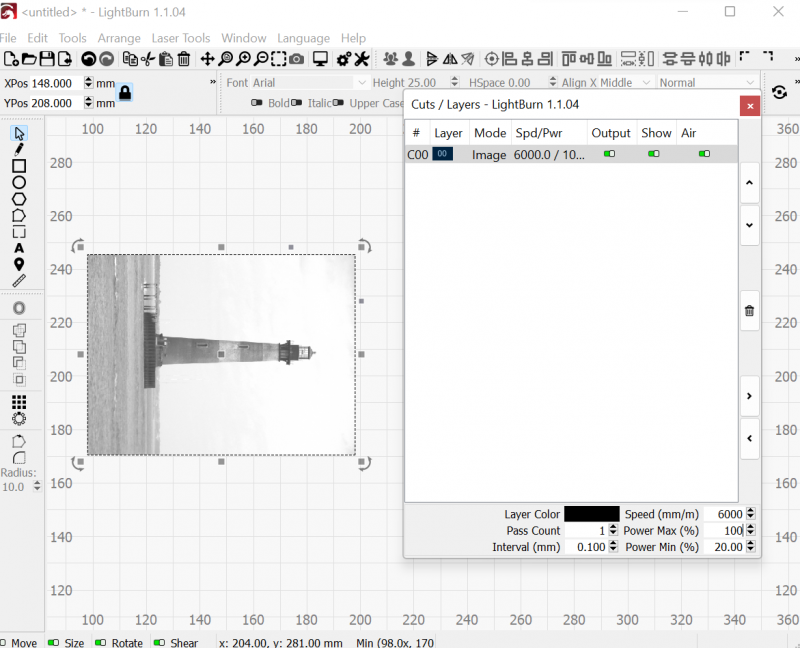
At this point, you may be asking, “what’s a .gcode file?” Simply put, it’s code that tells the Laser Falcon where and how fast to move as well as when and how much power to deliver to the laser. To generate the code, Creality recommends LightBurn and LaserGRBL, both included on the SD Card. To make things easier, an SD card to USB-A reader is included. Also included are the manuals, an excellent assembly video, and two sample files for cutting into the included Linden Plywood.
After reading a few online reviews, I decided to go with the LightBurn software. A 30-day trial version is great for starting and can be purchased for $60.
Photos and other images can be imported or created from scratch
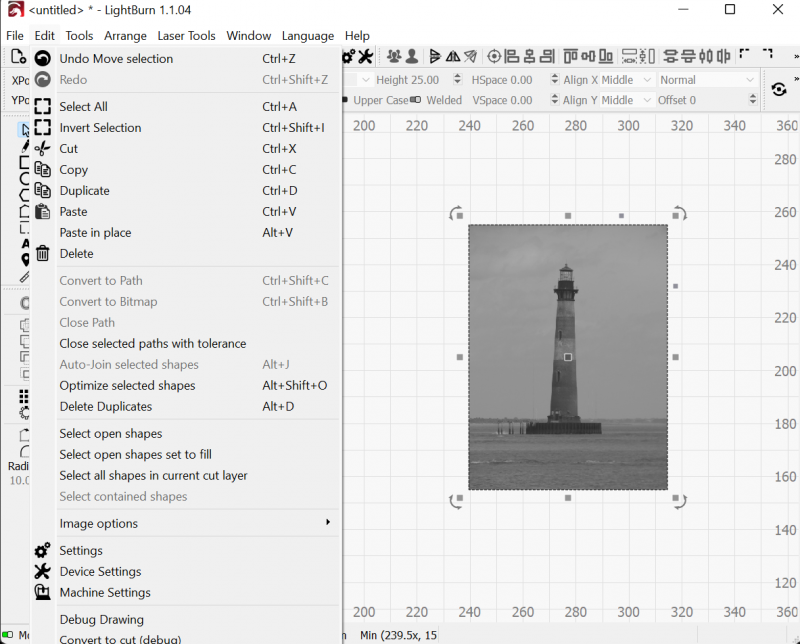
The interface takes some practice, but I think many will find the interface familiar and intuitive.
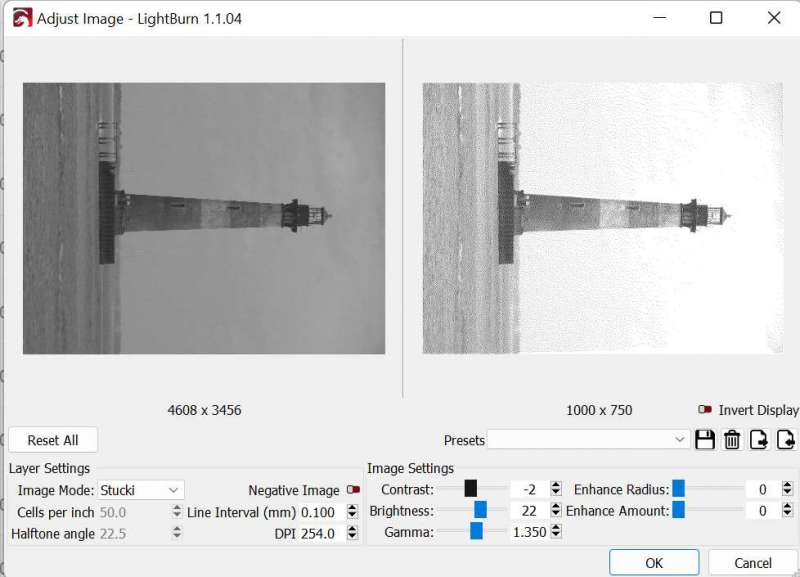
The printer is capable of burning images in several different styles. Some experimentation is needed to obtain a suitable image. Once completed, it’s saved as .gcode to the SD card for use on the Laser Falcon. To keep my brain straight, I elected to load only one .gcode file on the SD card at a time because I didn’t want to risk scorching my table again ;-).
It’s worth mentioning that while in operation, there is some smoke, but most of it is absorbed by the active carbon filters. Creality includes a few spares.
Thank you, Creality! I love this!
What I Like
- Easy assembly
- Tools are included
- Output is great
- Five-watt power is plenty for me
- Huge print area!
What I Would Change
- A graduated material surface would be a nice touch
- A laser-proof mat would have been welcomed to prevent me from… me 😀
- A full version of the LightBurn software would be great!
Final Thoughts
The Creality CR-Laser Falcon Engraving Machine assembles quickly, and is plenty powerful and super-fun to use! From the box to work, I was lasering away in less than an hour. More time and practice will be needed for proficiency in customized designs, but I’m looking forward to making many useful and whimsical engravings over the coming weeks! I was delighted with the build quality, and results! The Creality CR-Laser Falcon Engraver is a blast (literally)!
Price: $349.00
Where to buy: Creality store and Amazon
Source: The sample for this review was supplied by Creality.

Ruilogod 32" 2-in-1 Light Mulit Collapsible Disc Reflector 80cm Silver Gold
(as of June 26, 2026 14:20 GMT -05:00 - More infoProduct prices and availability are accurate as of the date/time indicated and are subject to change. Any price and availability information displayed on [relevant Amazon Site(s), as applicable] at the time of purchase will apply to the purchase of this product.)
Gadgeteer Comment Policy - Please read before commenting
i started out with a sacrificial wasteboard…still use them from time to time
recently i switched to a 12×12 stone tile ( i added a non slip pad to it)
once everything is squared up it seems to be a superior work surface
originally i started from a corner for each project
now i use the center of whatever i’m burning for the zero point
as a consequence the grid i had used is less important
OMG THANK YOU SO MUCH FOR POSTING THIS
The directions said NOTHING bout the belt and the Y axis thing!!!! I almost returned it!!!
Do you think this would work on Pewter?
Yay thanks so much for making this detailed walk through I was wondering if you had any updates on different materials and the working speed for cutting them I was very interested in cutting paper and sim card….. anyway hoping you were tinkering is bringing much joy thanks again