REVIEW – As my collection of portable batteries and power packs grows, the need for cheap (or free) electricity to keep them topped off increases as well. To avoid forking over my paycheck to Seattle City Light each month I’ve been looking for an effective solar panel kit to address this need. I may have found the perfect solution in the FlexSolar 120W Foldable Solar Panel Kit. This affordable, versatile kit includes not only high-efficiency solar panels that are easy to tote around but a Solar Charge Controller as well, which allows me to charge just about every device I have, up to and including my car battery. There are a few caveats that come with the low $199 price tag but overall, this kit delivers a ton of functionality along with lots of free power.
What is it?
The FlexSolar 120W Foldable Solar Panel Kit is a portable, four-panel monocrystalline solar panel set with an integrated junction box as well as a separate Solar Charge Controller designed for temporary off-grid charging needs such as camping, hunting, or RVing.
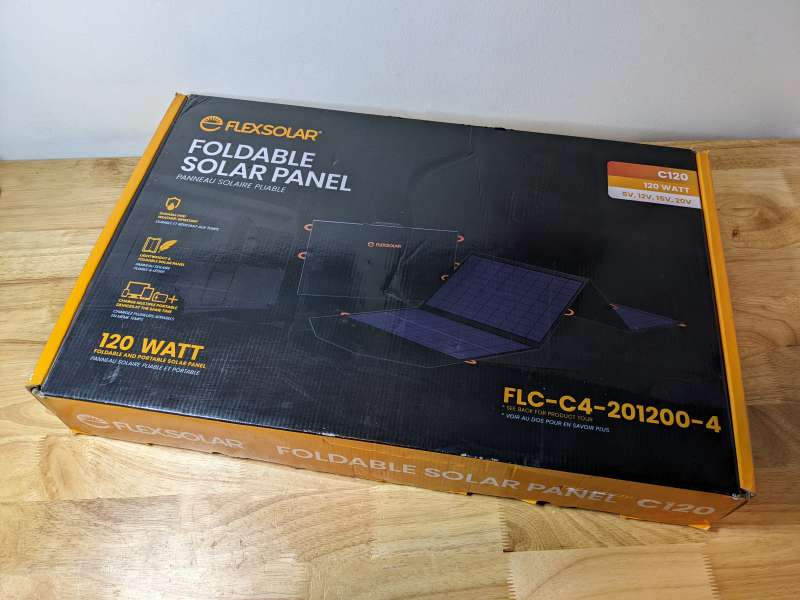
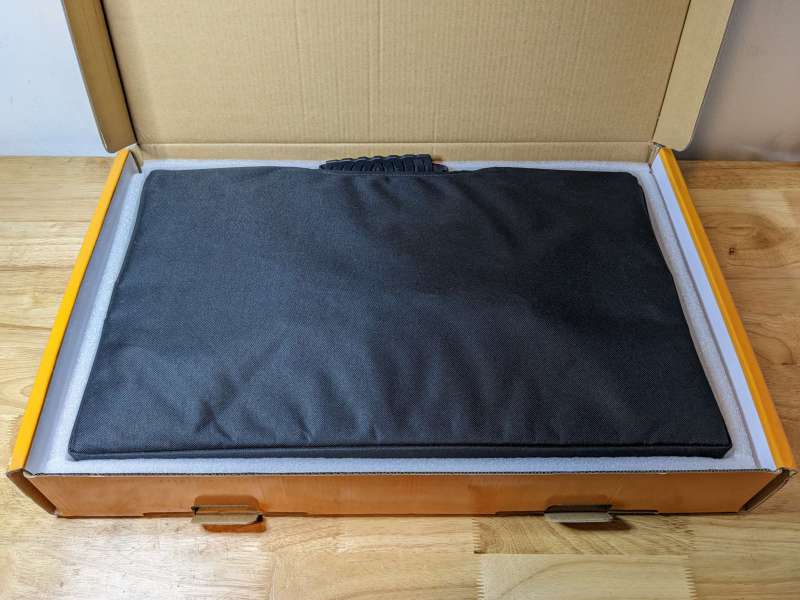
The FlexSolar Kit shipped in its display box which had me concerned at first because solar panels can be fragile if not handled correctly. Luckily, the kit was packed well in foam and there was no damage on arrival. The box details all the features of the solar panel kit as well as its technical specifications.
What’s in the box?
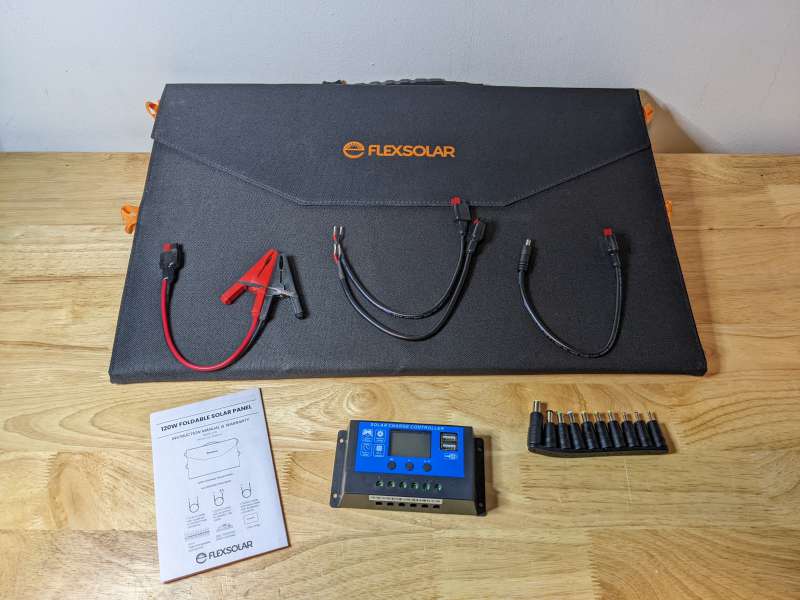
- 120 W Foldable Solar Panel
- 20 A (12 V/24 V) PWM Solar Charge Controller
- Carrying Case
- User Manual
- 2 x 1 ft. (0.3 m) cables with Anderson to Wire
- 1 ft. (0.3 m) cable with Anderson to Alligator Clip
- 1 ft. (0.3 m) cable with Anderson to DC5521 Male Connector
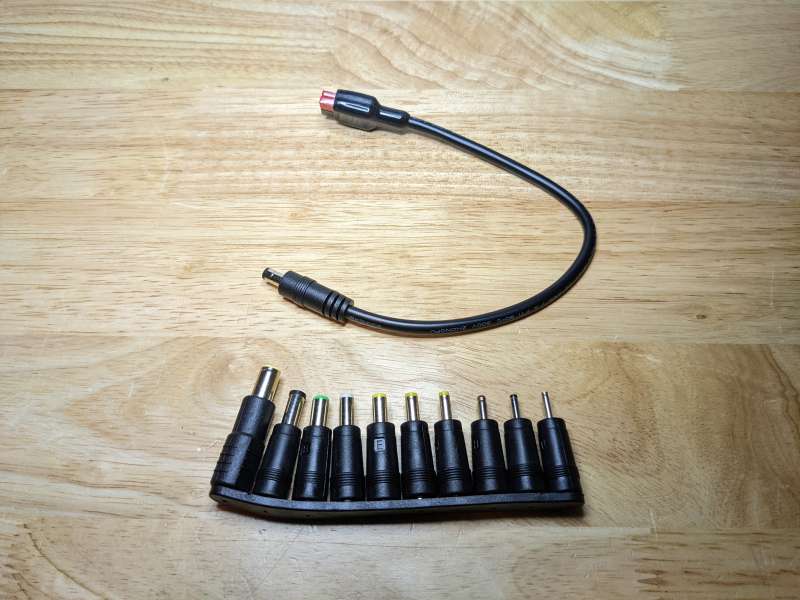
- 10-in-1 Interchangeable Connectors
- 7.9 x 5.6 mm
- 6.0 x 4.3 mm
- 6.3 x 3.0 mm
- 5.5 x 2.5 mm
- 5.5 x 1.7 mm
- 4.8 x 1.7 mm
- 4.0 x 1.7 mm
- 3.5 x 1.35 mm
- 3.0 x 1.1 mm
- 2.5 x 0.7 mm
Hardware specs
- Solar Cell Type: Monocrystalline
- Dimensions: (L x W x D)
- Unfolded: 65.1 x 22.2 x 0.2 in (1653 x 564 x 564 x 5 mm)
- Folded: 22.2 x 14.1 x 1.6 in (564 x 359 x 41 mm)
- Product Weight: 10.8 lbs (4.9 kg) with junction box and accessories
- IP Rating: IP65 – protection against accidental contact and ingress of dust along with water jets from any direction
- Output ports: USB 2.0, USB 3.0, USB-C (PD 60 W), Anderson (10 ft. hardwired cable)
- Charge Controller: 12V/20A PWM
- Open Circuit Voltage (Voc): 23.7 V
- Short Circuit Current (Isc): 6.36 A
- Maximum Power (Pmax) 120W
- Maximum Power Voltage (Vmp): 19.8 V
- Maximum Power Current (Imp): 6.06 A
- Cell Efficiency: 22%
- Power Tolerance: ± 10%
- Operating Temperature (F/C): -4°F to 149°F (-20°C to 65°C)
- Temperature Coefficient (Pmax): -0.45 %/K
- Temperature Coefficient (Voc): -0.32 %/K
- Temperature Coefficient (Isc): +0.02 %/K
- NOCT (Air 20°C, Sun 0.8kW/m², Wind 1m/s): 45±2°C
- Standard Test Conditions: 1000 W/m2, 25°C, AM1.5
Design and features
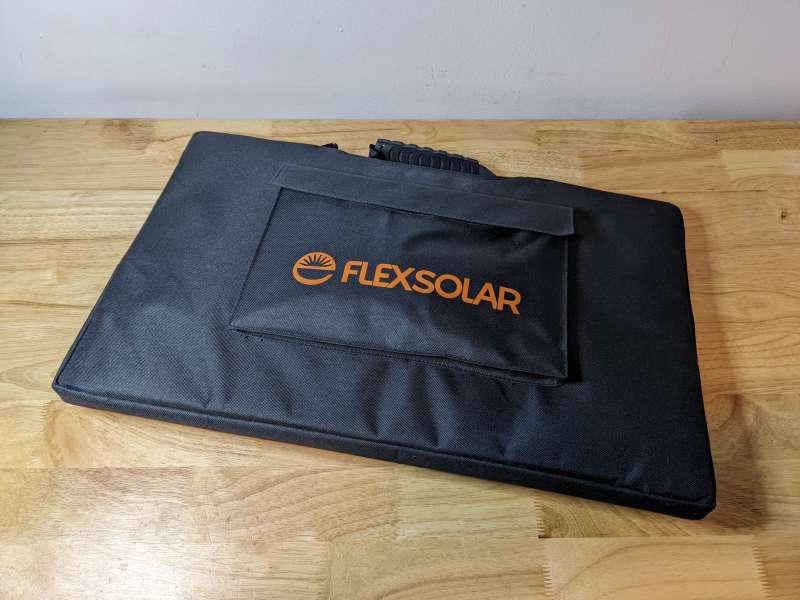
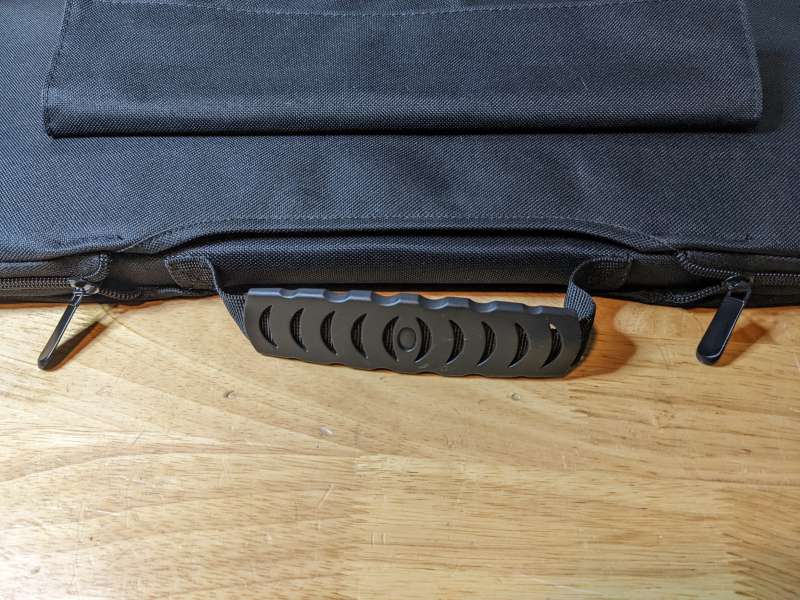
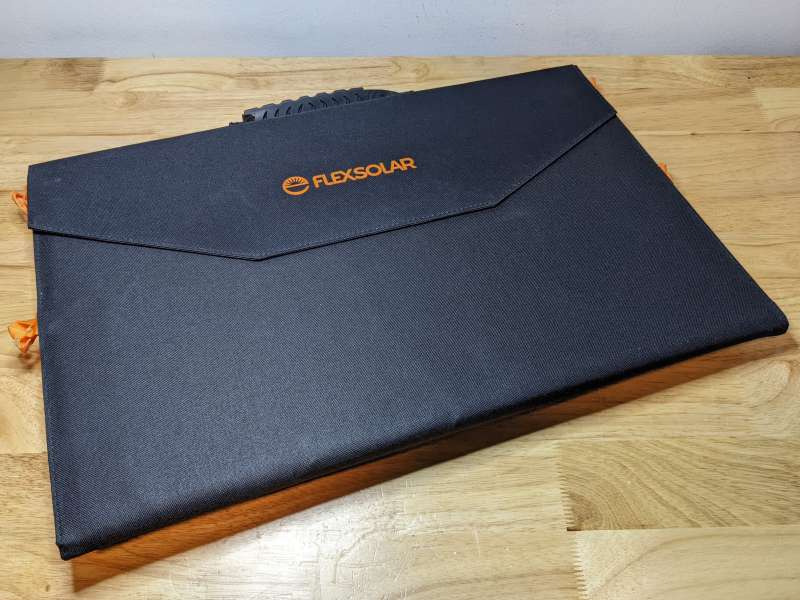
The design of the FlexSolar 120W Kit is similar to most portable solar panels with a few exceptions. One unique aspect of the FlexSolar is its included carrying case. The case is a simple fabric bag with two zippers that follow along the edges of the panels. The heavy rubber carrying handle is attached directly to the folded panels.
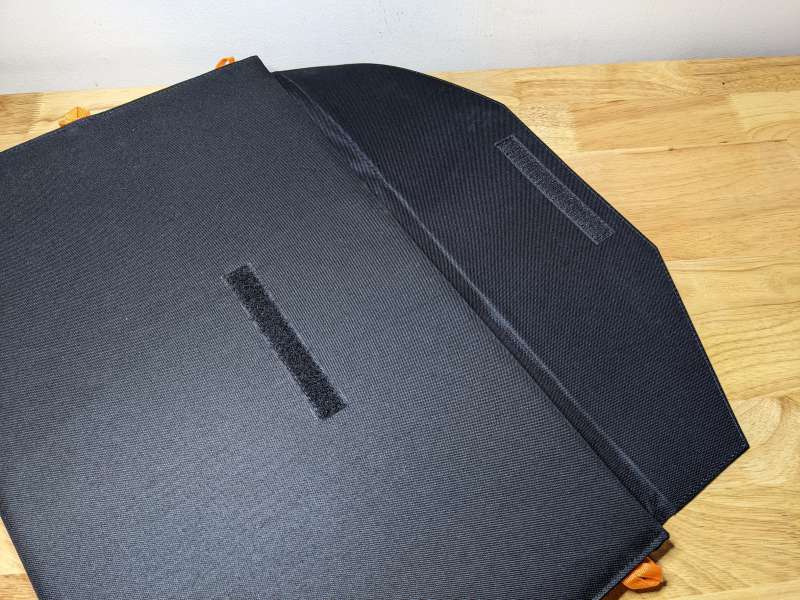
What makes the case a bonus, besides the fact that it adds an extra layer of protection for the panels, is the Velcro pouch on the front, great for keeping the FlexSolar accessories handy and secure.
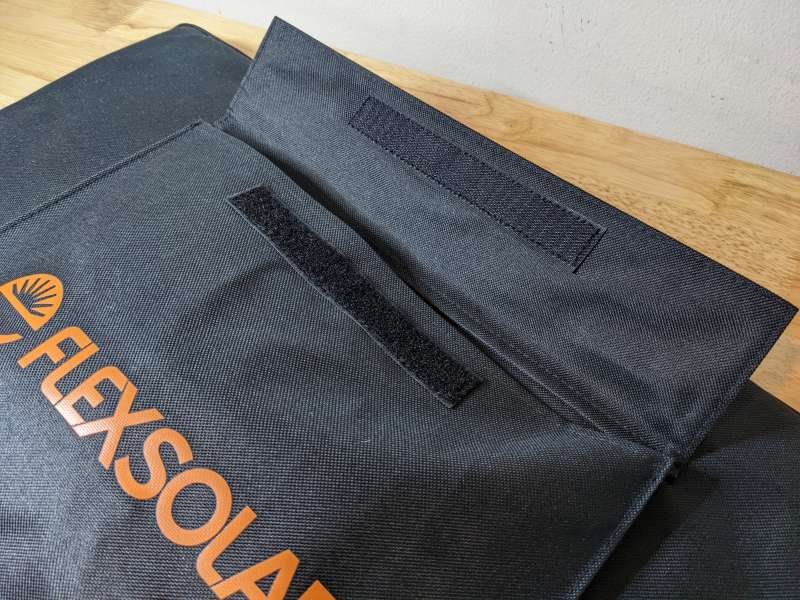
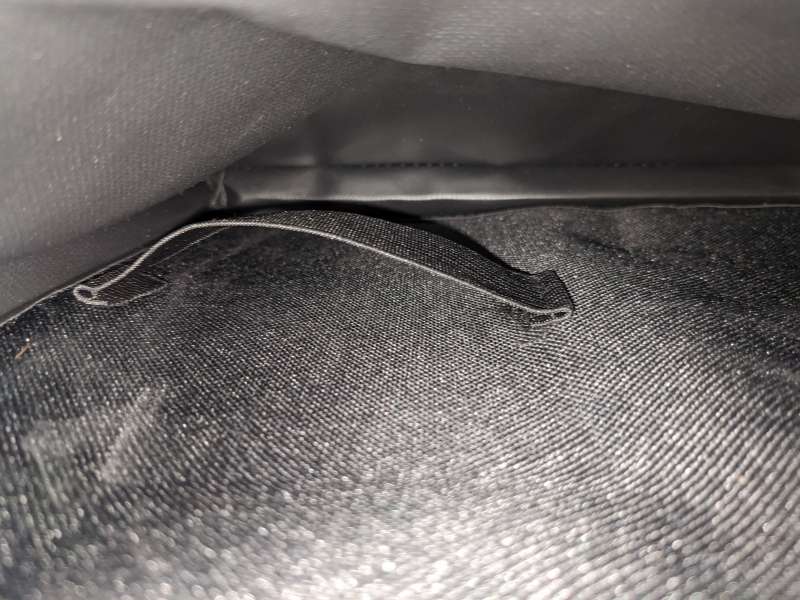
Inside of the pouch is a small elastic band that fits perfectly around the Solar Charge Controller, a nice design touch.
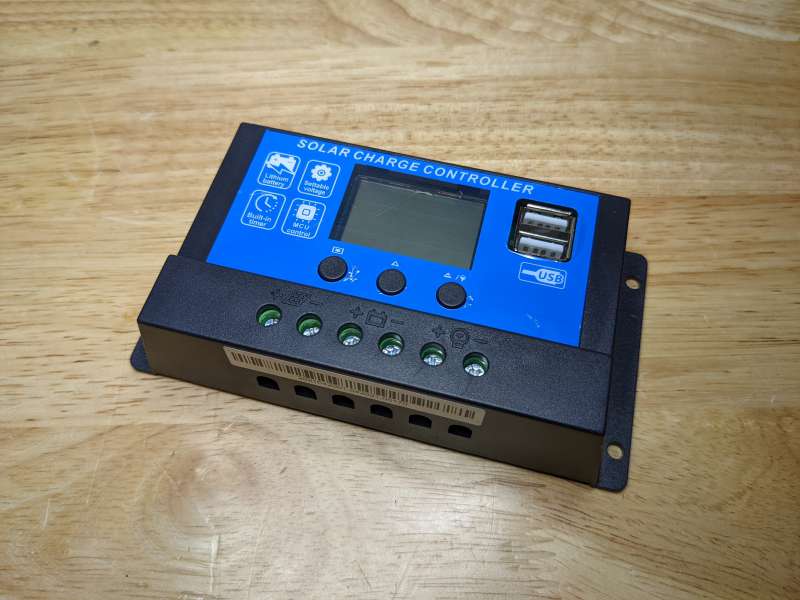
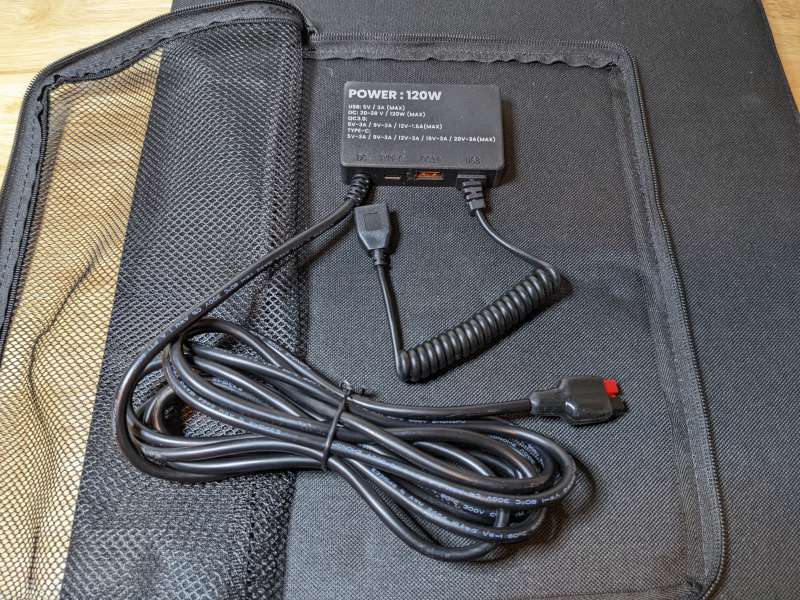
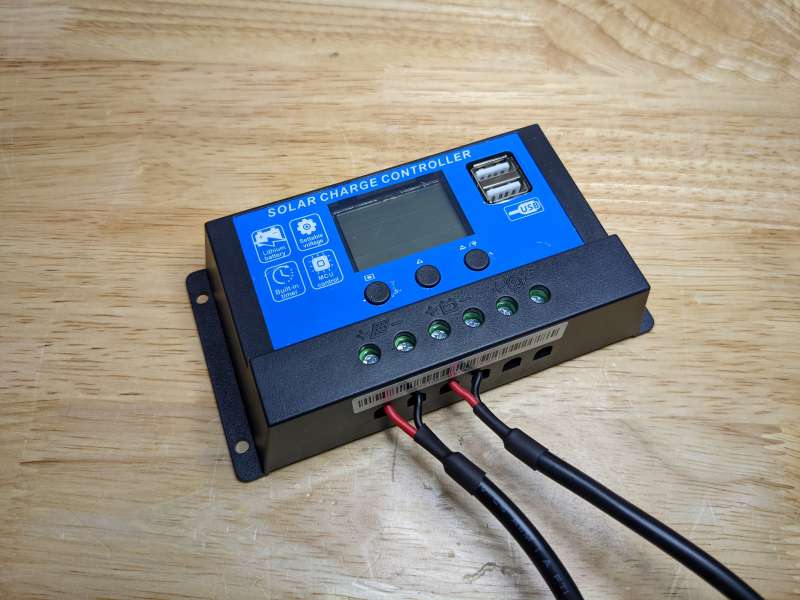
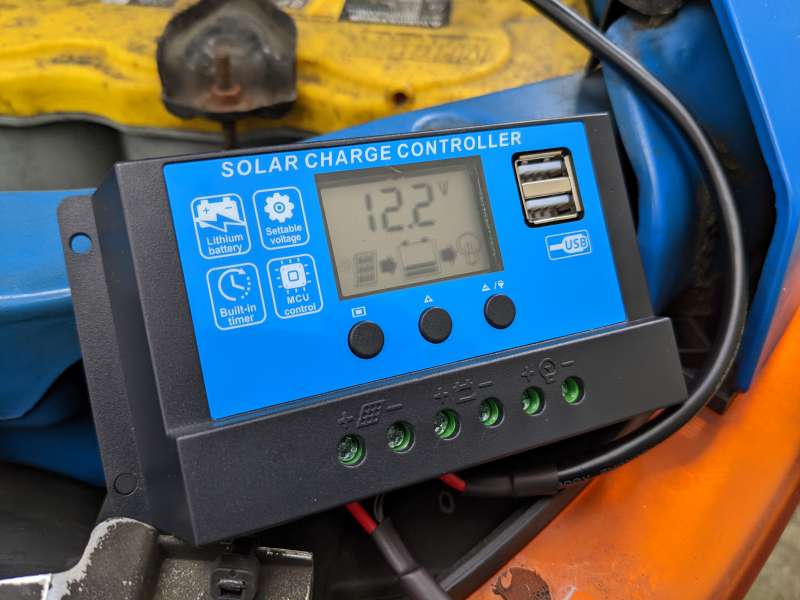
The Solar Charge Controller that ships with the FlexSolar Kit is pretty basic but definitely increases the usability of the kit. The controller works by protecting attached devices from over-charging, over-voltage, and short circuits as well as adding the ability to charge different types of batteries such as lead-acid batteries used in cars or RVs. The controller has three buttons for navigating its menus and an LCD screen. There are also two USB ports on the unit for direct charging devices like tablets or phones.
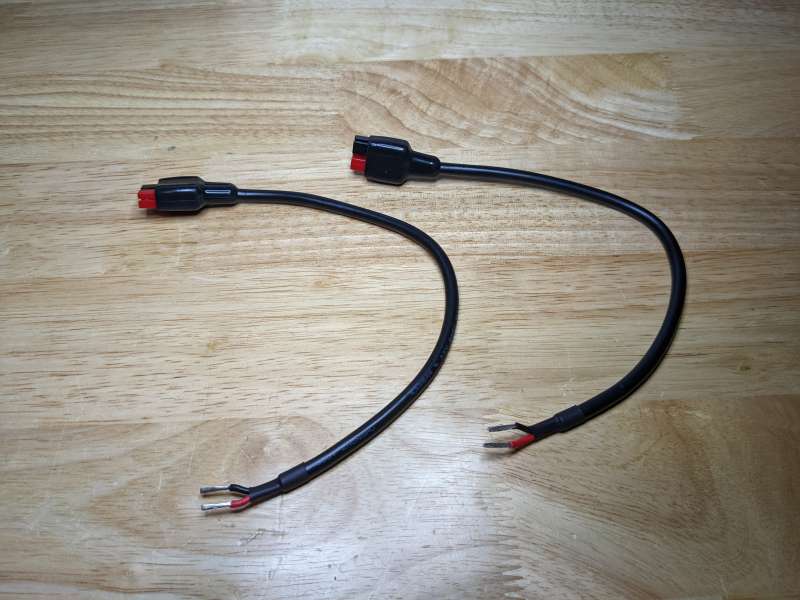
Along with the Solar Charge Controller the FlexSolar ships with four cables with Anderson connectors. The interchangeable Anderson power connectors are typically used for conveying high-power electric current.
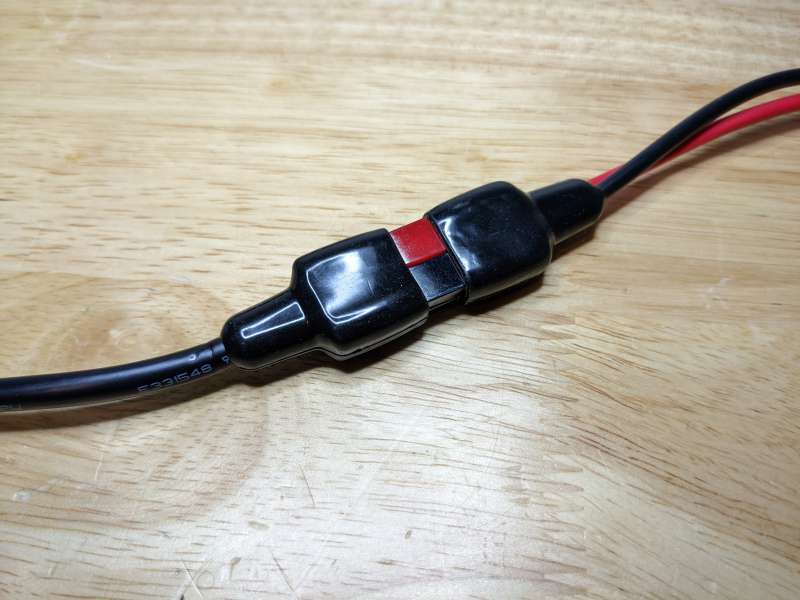
Two of the included cables are Anderson to bare wire, the bare wire ends are inserted into the terminals of the Solar Charge Controller and the Anderson ends can be linked to any other Anderson connectors.
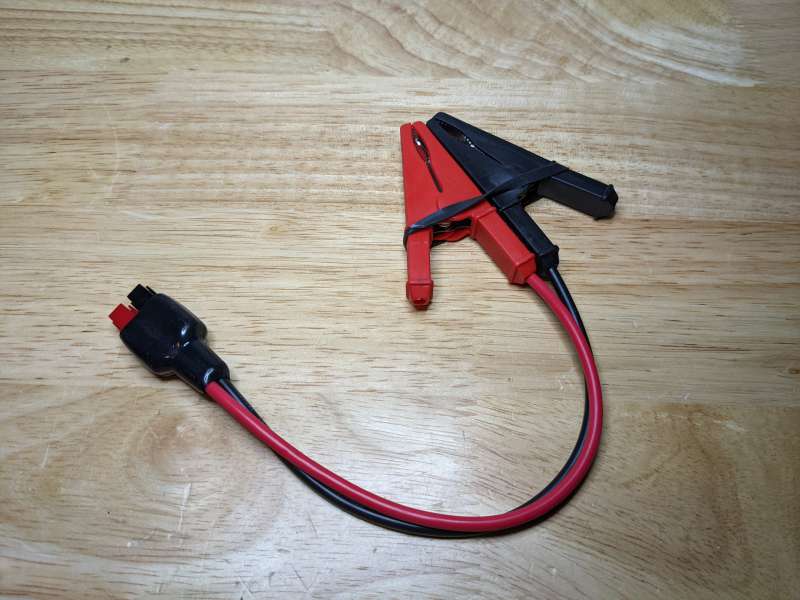
The Anderson to Alligator Clip cable is used for attaching the charge controller to batteries.
The Anderson to DC5521 cable is for utilizing any of the 10 adaptor plugs and connecting the Anderson cable from the solar panel junction box to most any power station.
Once removed from the carrying case in the folded configuration the FlexSolar panels are protected on one side by heavy fabric.
The front flap secures the panels closed with Velcro.
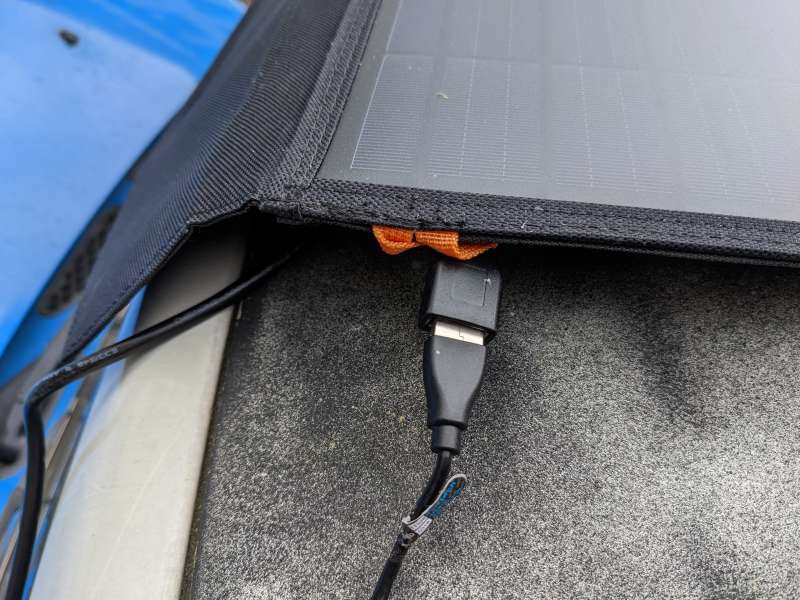
On the back of the panels inside of an integrated zippered mesh bag is the attached junction box.
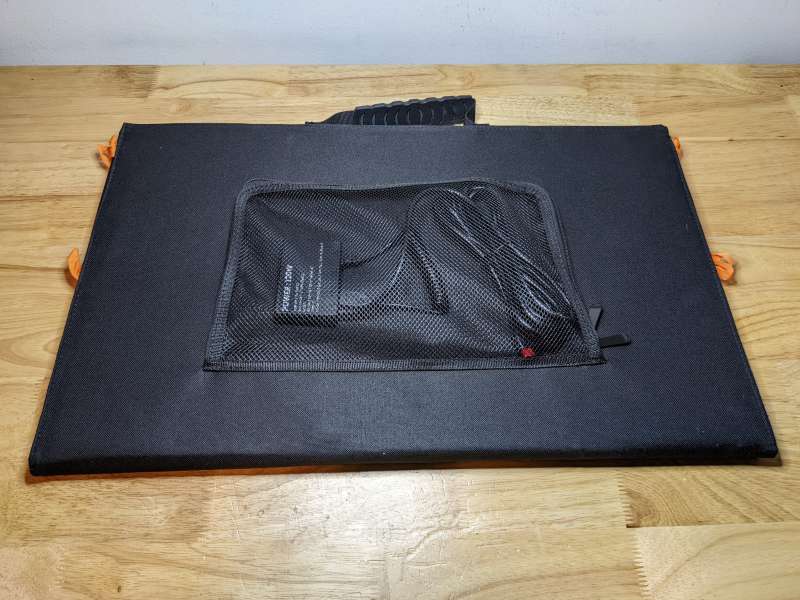
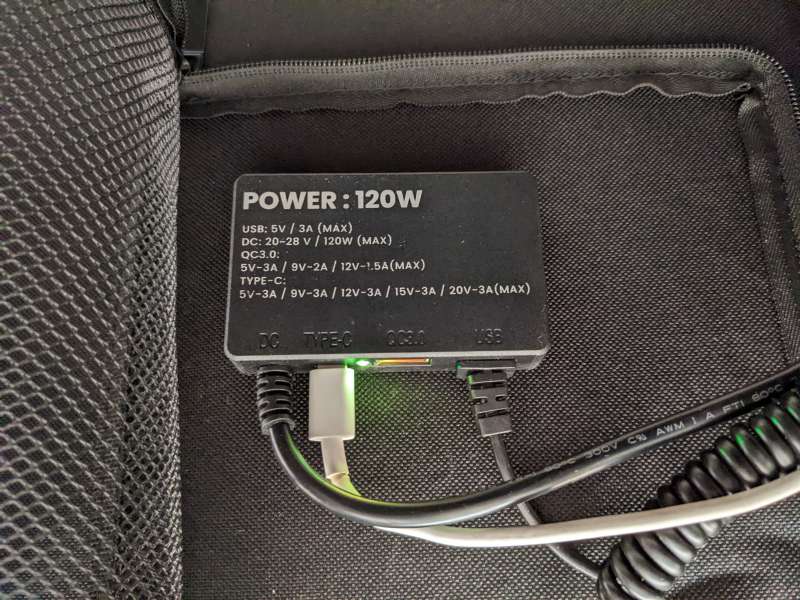
The junction box has a hardwired 10-foot cable with an Anderson plug on the end for connecting to power stations using the 10-in-1 adaptors. It also has three charging ports; a USB 2.0 port connected to the end of a coiled cable, a USB 3.0 port, and a USB-C port which allows the FlexSolar to charge some devices at 60 watts. The 60W PD USB-C port also enables you to charge a power station from both it and the hardwired Anderson cable simultaneously as long as your unit has the option to accept charges from both. With an optional cable, you can also use the junction box to chain two 120W panels in parallel.
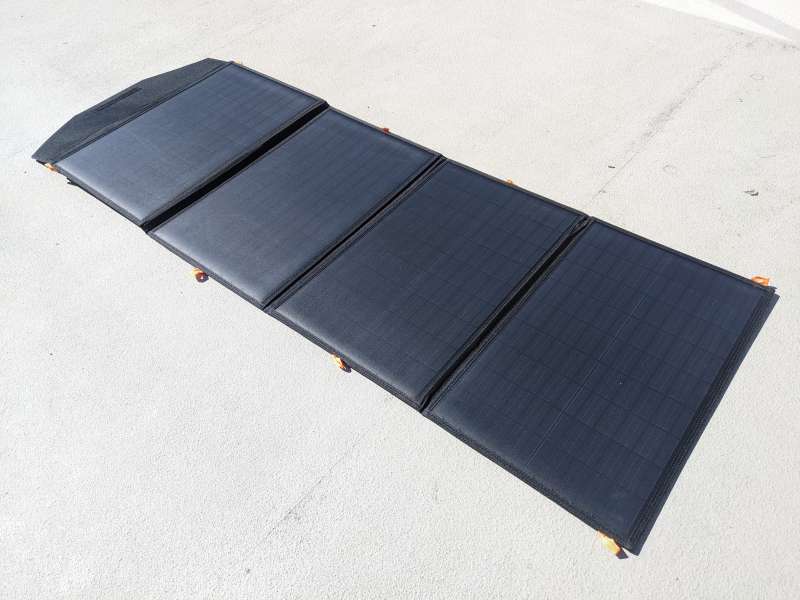
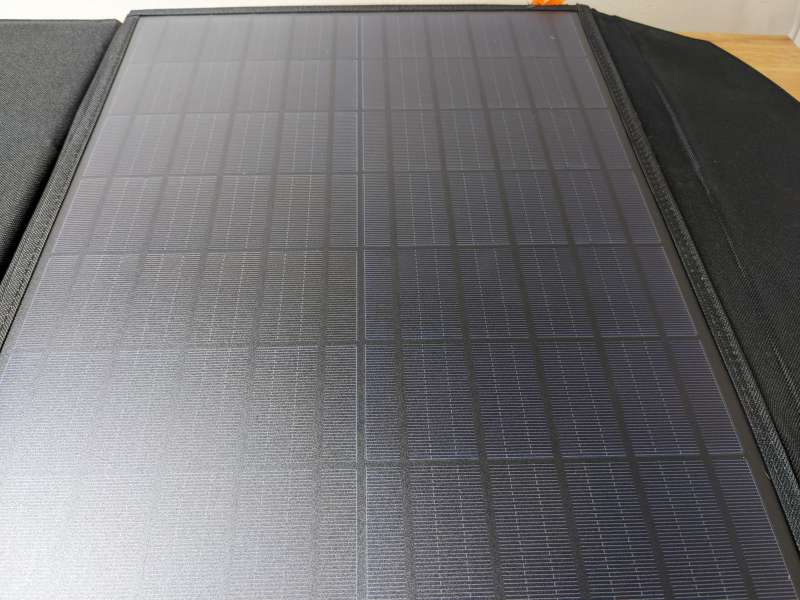
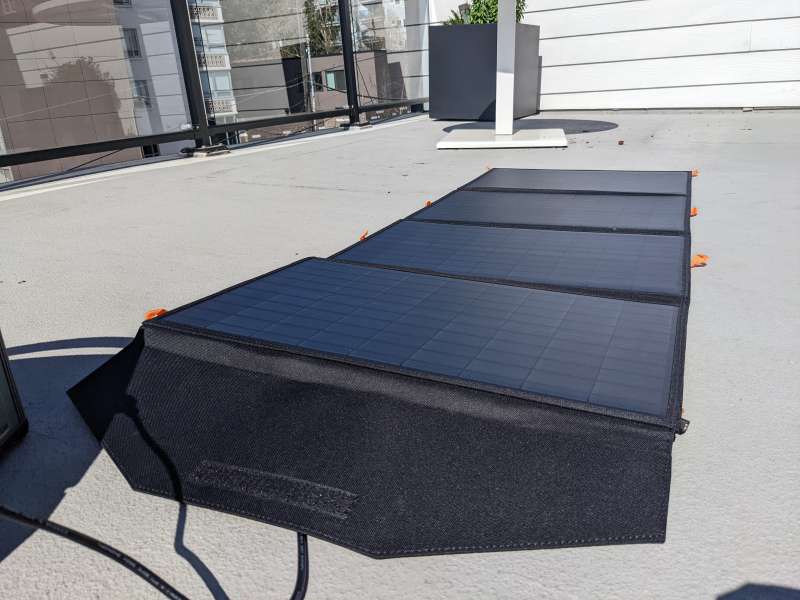
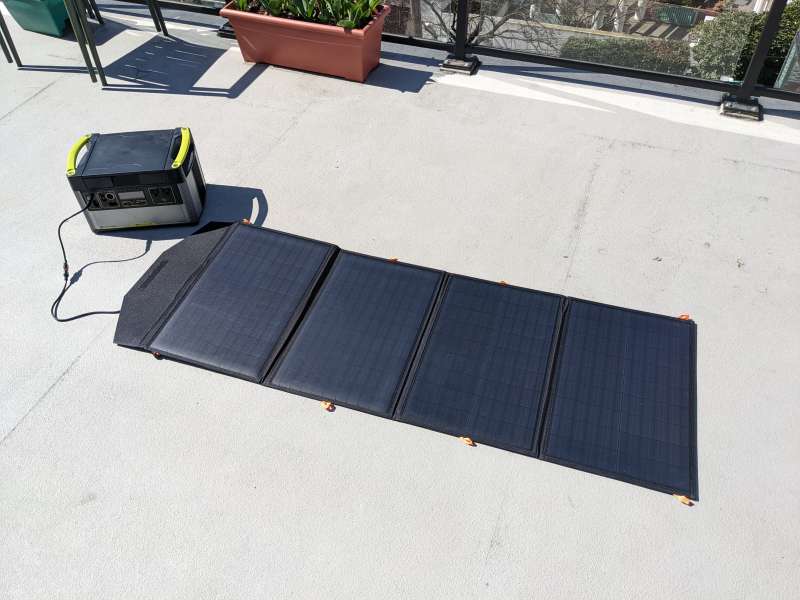
Unfolded, the panels reach about five and a half feet in length. The FlexSolar panels have a monocrystalline inlay, which is more efficient than older types of solar cell inlays and supposedly returns a stated 24% efficiency.
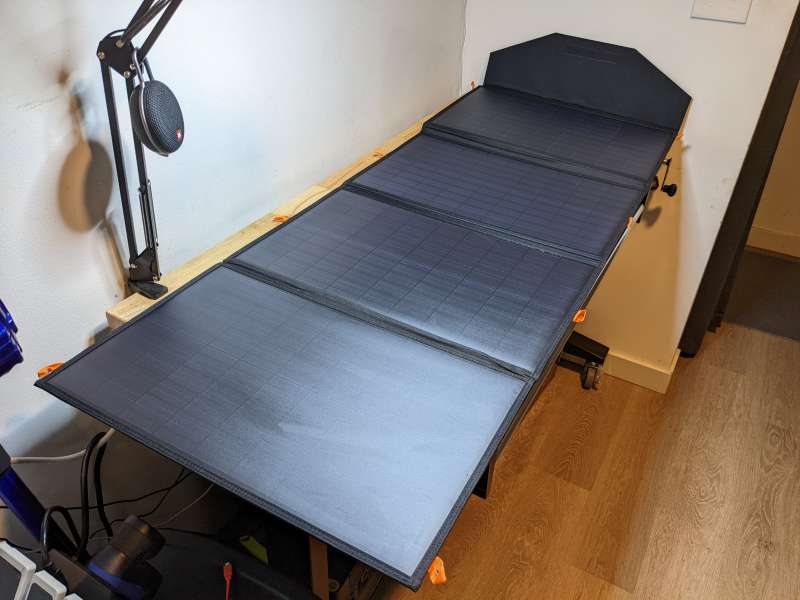
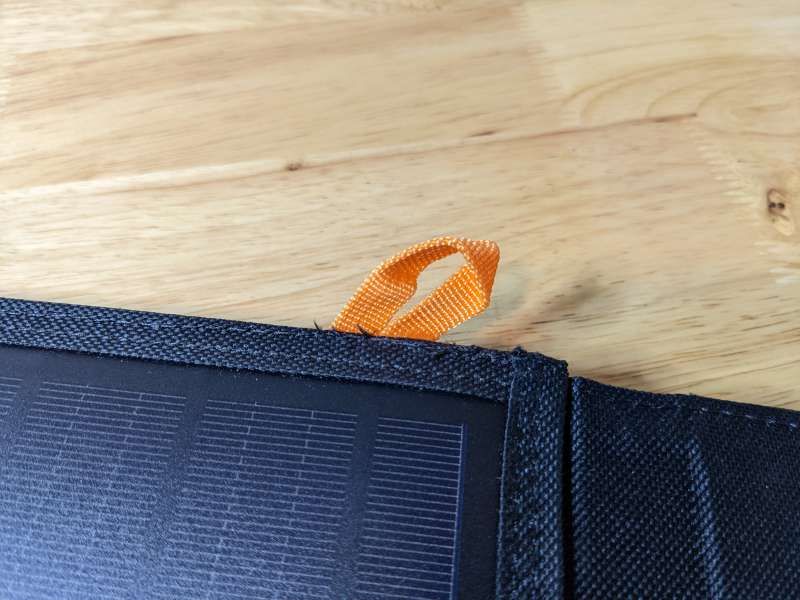
The panels have tiny fabric loops along the edges which allow you to hang them on the side of a tent or car. These are portable panels which may be why they don’t have grommets which are typically found in panels of this size. Grommets would allow you to screw down the panels to prevent theft or shifting around. For a portable kit, security isn’t as much of a concern since you’d be setting up and removing it frequently. I plan on using the FlexSolar kit for car camping and most likely will have it laid out across the windshield or roof of my car so not having grommets isn’t a deal-breaker for me, especially at the great price.
The panels are well protected inside of the sealed hard plastic sleeves and dirt is easily wiped off with soapy water. One concern I do have is that the panels and junction box are only rated IP65 which means they are not fully waterproof, just resistant to direct water jets and dust. I would be afraid of the junction box getting wet and being damaged during use.
Setup
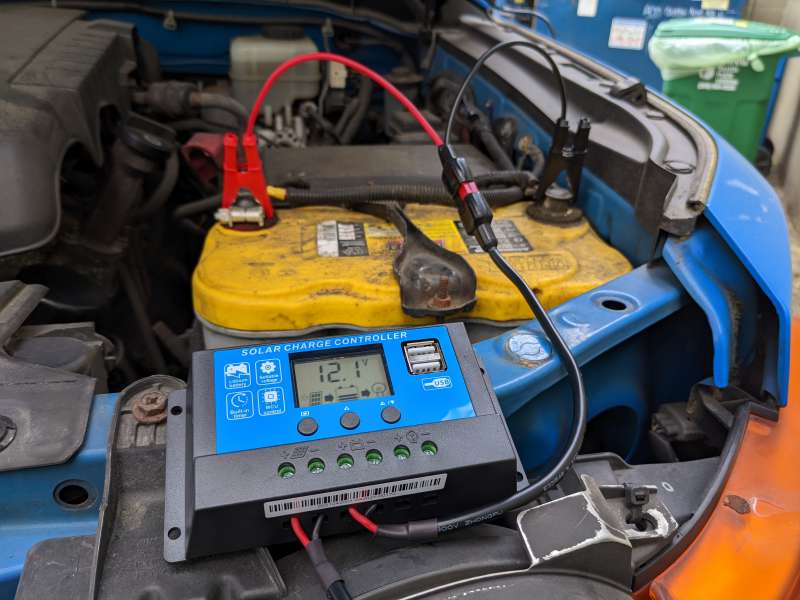
Setting up the FlexSolar kit depends on how you’re planning to use it. For charging batteries like for RVs or cars, the Solar Charge Controller needs to be wired correctly before use. Simply loosen the screws on the unit with a Phillips screwdriver and insert the ends of the bare wire cables into the corresponding positive or negative terminals. Tightening the screws will secure the cables in place. There are small icons over the terminals indicating power input from the solar panels, power output to a battery, and power output load terminals.
The hardwired Anderson cable from the solar panels connects to the cable from the solar panel input. For use with a car battery, the Anderson to Alligator Clip cable connects to the battery port and the Alligator Clips connect to the battery terminals. The Solar Charge Controller must be connected to the battery BEFORE being connected to the solar panels, doing so otherwise will damage the controller. Power from the battery will activate the controller and allow you to run through the menus and configure it for the type of battery being used.
When not using the Solar Charge Controller you simply connect whatever devices you want to charge, including a power station, to the junction box and lay the panels out in the sun. The LED on the junction box will light red when generating power from the sun and green when any device is plugged into the USB-C port.
The FlexSolar panels are designed to be laid flat 90 degrees to the sun so they do not come with any foldable stands or mounts. This may just be a marketing ploy to justify not including mounts though, which normally would come in handy when the sun is at different angles.
Performance
While I had the bright idea of testing a solar panel kit in a city known mainly for its cloudy skies and rain, I was lucky enough to get a few partly sunny days on the roof of my building to test out the FlexSolar kit.

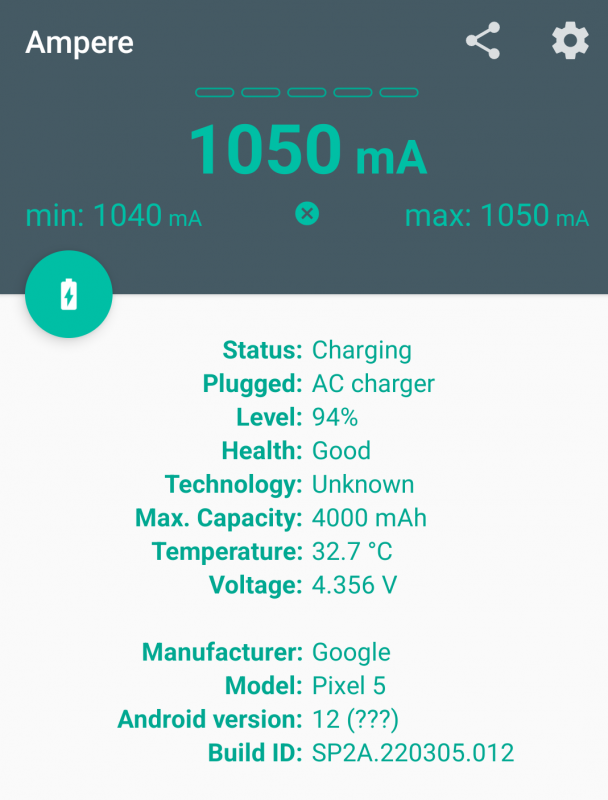
Once I laid out the panels, which was very easy to do, I immediately started charging my phone from the junction box first using the USB 2.0 port. I was able to measure power output from the panels at about 5V and the panels were able to charge my Pixel 5 rapidly even though it was only partly sunny out.
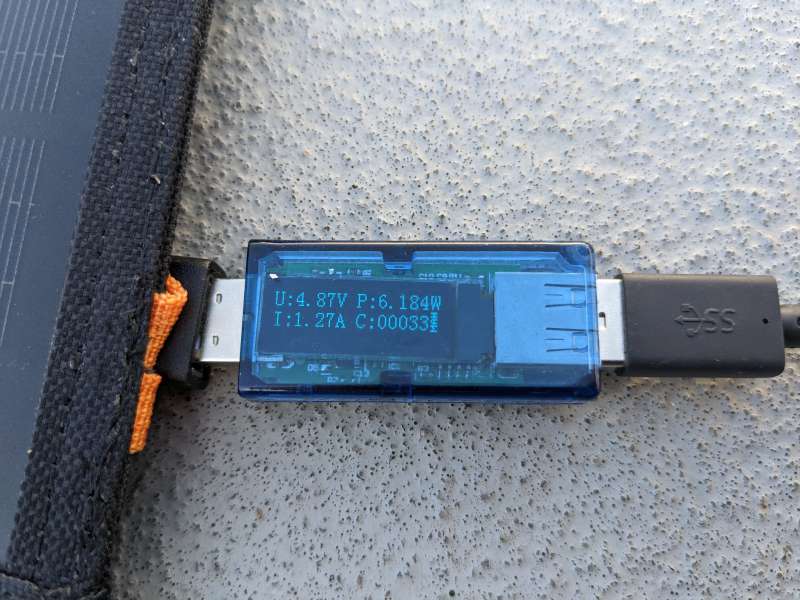
I also tried charging my phone from the USB 3.0 port and the USB-C port. All three ports on the junction box consistently provided about 5 V of power. This really impressed me since each of these ports can be used simultaneously to charge different devices without losing any voltage.

Using the Ampere app, I was also able to confirm the voltage to my phone at between 4 and 5V and an average of about 1045mA.
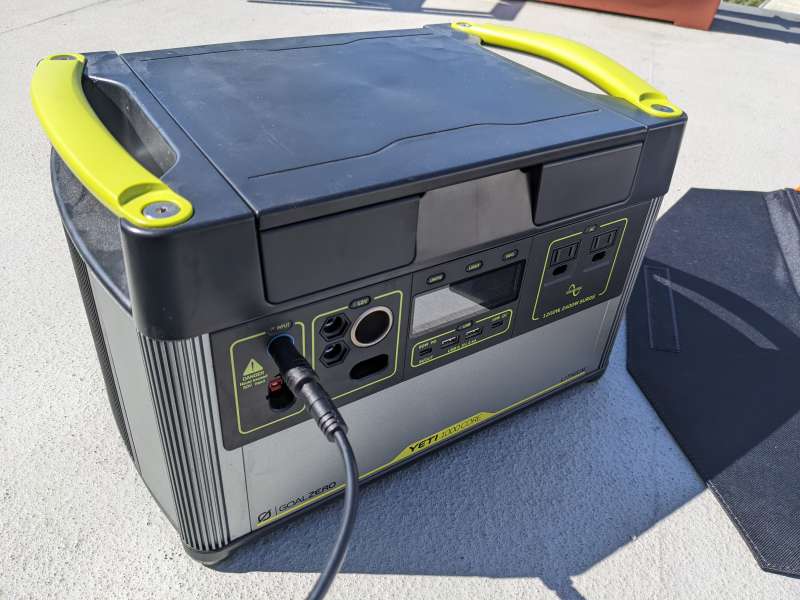
I then connected the junction box directly to my Goal Zero Yeti 1000 Core Portable Power Station, which I reviewed in September 2021, using the hardwired Anderson cable and the 8-millimeter connector.
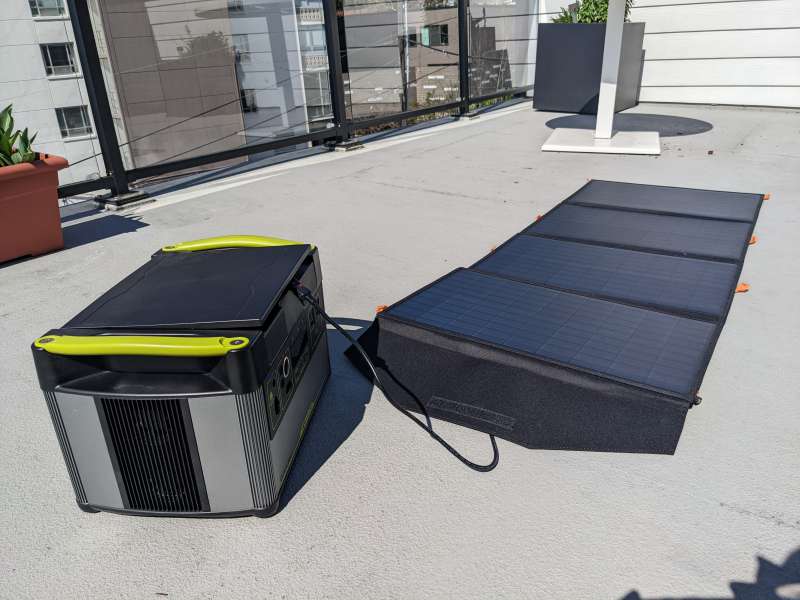
The FlexSolar panels were able to steadily pump out about 70 to 74 watts of power to the Yeti, much lower than the 120 watts it’s capable of in ideal conditions, but still impressive for the day.
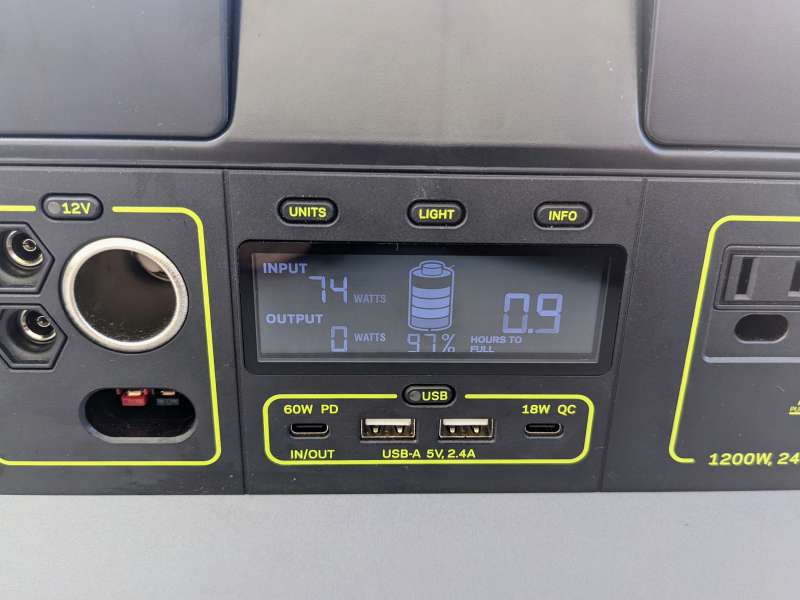
If I wanted to, I could have also connected a 60W USB-C to USB-C cable from the junction box to the 60W PD port on the Yeti to pick up some additional charging power.
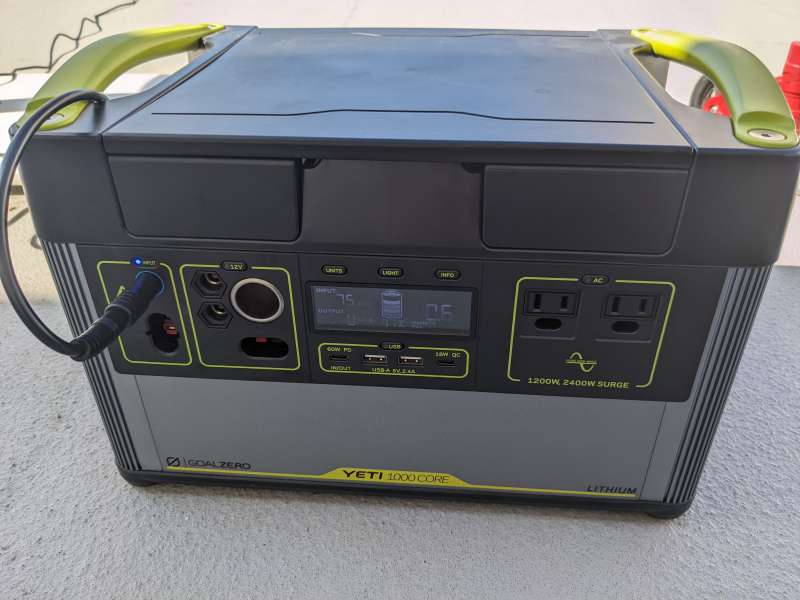
One issue I did have was with the 8mm adaptor plug. While I did find the inclusion of the various connector tips useful, the length of the plug caused it to be a little unstable and it fell out a few times with barely a nudge. Again, not a huge problem but I made sure to secure the input with some tape to keep it from falling out.
I also tested out the FlexSolar and its Solar Charge Controller using my FJ Cruiser’s car battery with some great results.

I put the solar panels on the top of my FJ for convenience which is typically the type of setup you might use in an emergency if you’re out in the woods and your car battery dies.
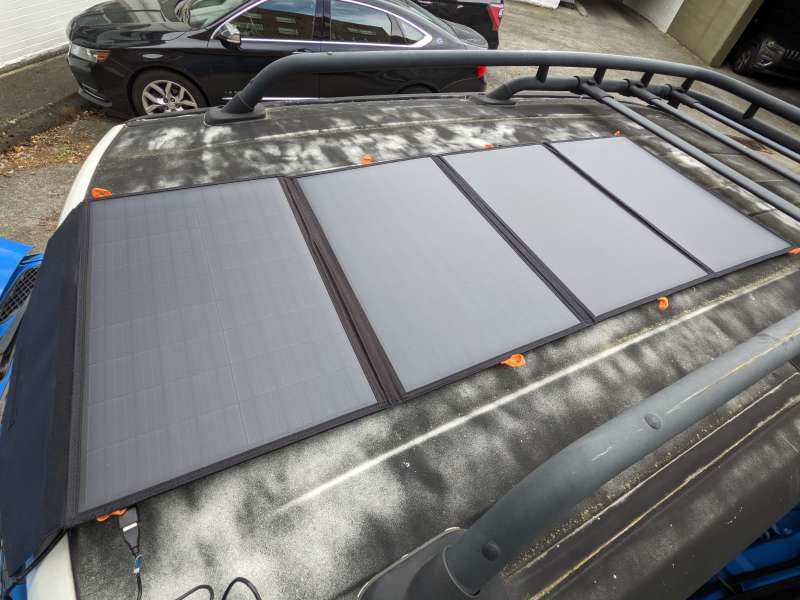
Once again making sure to connect the controller to the battery before connecting it to the panels, I was able to get about 12V of power delivered to my car battery. Over time the panels would be able to completely recharge the battery even if I was using it at the same time to power other devices. A typical RV setup would have an inverter coming off of the battery powering my devices and then the controller and the panels refilling the battery as it depletes. The controller USB ports can be used as well in this configuration.
If I was even more power-hungry, I could utilize the USB ports on the solar panel junction box to power even more devices at the same time.
Being able to charge my car battery with solar power is a game-changer for me and secured the FlexSolar a spot in my FJ’s emergency kit.
Overall, I was really impressed with the price, portability, and performance of the FlexSolar 120W Kit. Not only does it add to the usefulness of my Goal Zero Yeti 1000 it can power all of my power banks at once for as long as the sun continues to shine.
What I like
- Easy to set up and break down
- Included charge controller adds expanded functionality out of the box
- Multiple ports allow charging simultaneously from panels and charge controller
What needs to be improved
- Panels and junction box are only IP65 rated, not fully waterproof
- No included or integrated stands for panels
Final thoughts
The FlexSolar 120W Foldable Solar Panel Kit is an affordable, versatile alternative to most similarly powered solar panels. The panels themselves are sturdy, portable, and easy to set up although it would be nice if they were more water-resistant. The included charge controller adds a lot of value to the kit by allowing you to set it up in multiple configurations depending on the situation. Additionally, the 10-in-1 connector set, charging cables, and multiple ports will work with just about any power station, electronic device, or power bank. The best feature of the FlexSolar is that all of this versatility comes at the bargain price of $199. Whether kept in your vehicle as an emergency battery charger or as part of a basic RV setup, the FlexSolar 120W Foldable Solar Panel Kit is a great buy.
Price: $199.99
Where to buy: FlexSolar or Amazon
Source: The sample of this product was provided by FlexSolar

ESR for MagSafe Wallet, 5 Card Holder with RFID Blocking, MagSafe Sticker Included, Slim Magnetic Wallet for iPhone 17e/17/16/15/14/13/12 Series and Selected Samsung Devices, Not for 13/12 Mini, Black
(as of May 15, 2026 04:45 GMT -05:00 - More infoProduct prices and availability are accurate as of the date/time indicated and are subject to change. Any price and availability information displayed on [relevant Amazon Site(s), as applicable] at the time of purchase will apply to the purchase of this product.)
Gadgeteer Comment Policy - Please read before commenting
Hola Joe
Resido en Puerto Rico. En 2017 el huracán María nos ocasionó mucho daño y estuve sin luz por mas de un mes.
Por si volvía a ocurrir otro desastre, este año compré un SunBeatGo(portable power station) con los FlexSolar fordable panels.
El huracan Fiona, nos azotó el domingo 18 y estoy sin luz desde entonces.
Necesito instalar mis paneles y no sabía como hacerlo.
Tu explicación me ha sido de gran utilidad para llevar a cabo el proyecto.
Muchas gracias.
Me alegro mucho de que te haya ayudado el artículo. ¡Por favor, mantente a salvo!