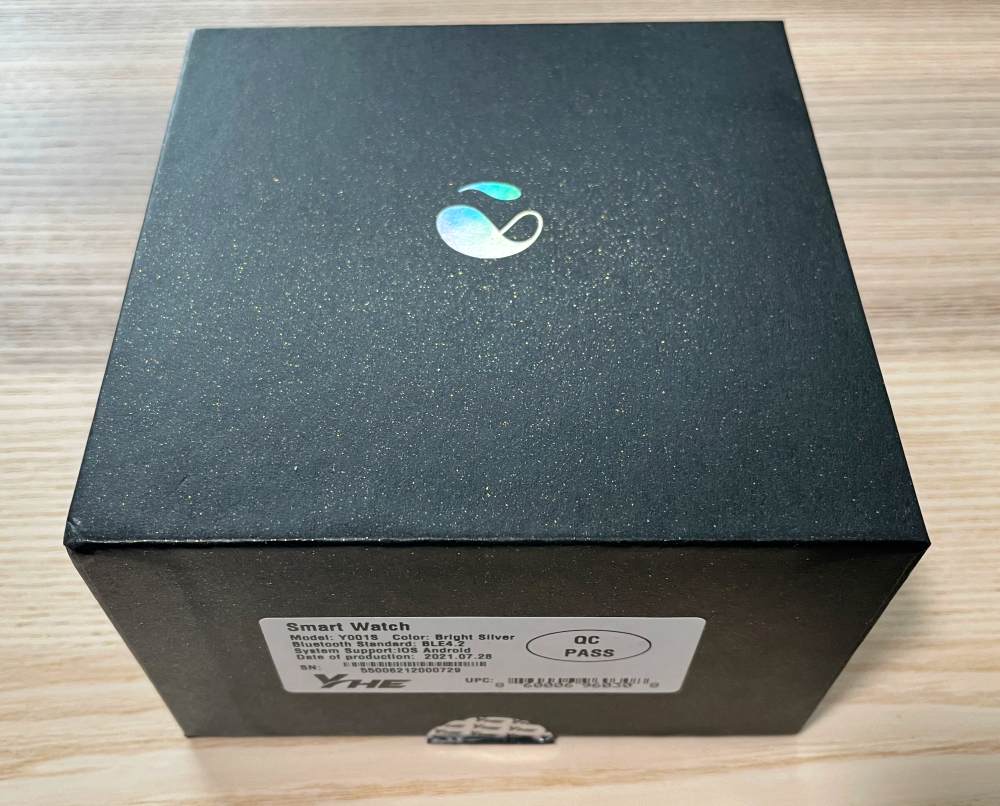
REVIEW – According to the CDC, nearly half of adults in the United States (108 million) have hypertension or high blood pressure as of 2018. That’s defined as readings greater than 130/80 or on medication. If untreated this can lead to increased chances of heart disease or stroke and by itself is a primary or contributing cause of death for hundreds of thousands of Americans each year. I am one of the 37 million adults in the US whose high blood pressure is greater than 140/90 if not controlled. I recently restarted medication and have been taking daily readings for the last few months. It only takes a few minutes and has become part of my morning routine. It does get trickier when I need to travel though. As it would happen, YHE Technology offered up their new BP Doctor Pro Smartwatch for review and it looked like just the ticket for those of us more on the go.
What is it?
The BP Doctor Pro is a smartwatch with a lot of the expected features like activity tracking, heart rate, Sp02 and even sleep tracking, but also a built-in inflatable cuff for taking your blood pressure.
What’s in the box?
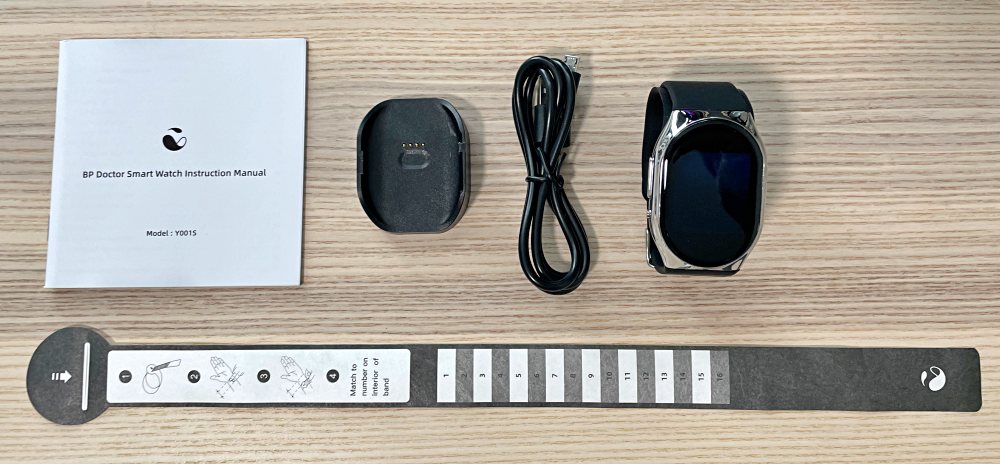
- BP Doctor Pro Smartwatch
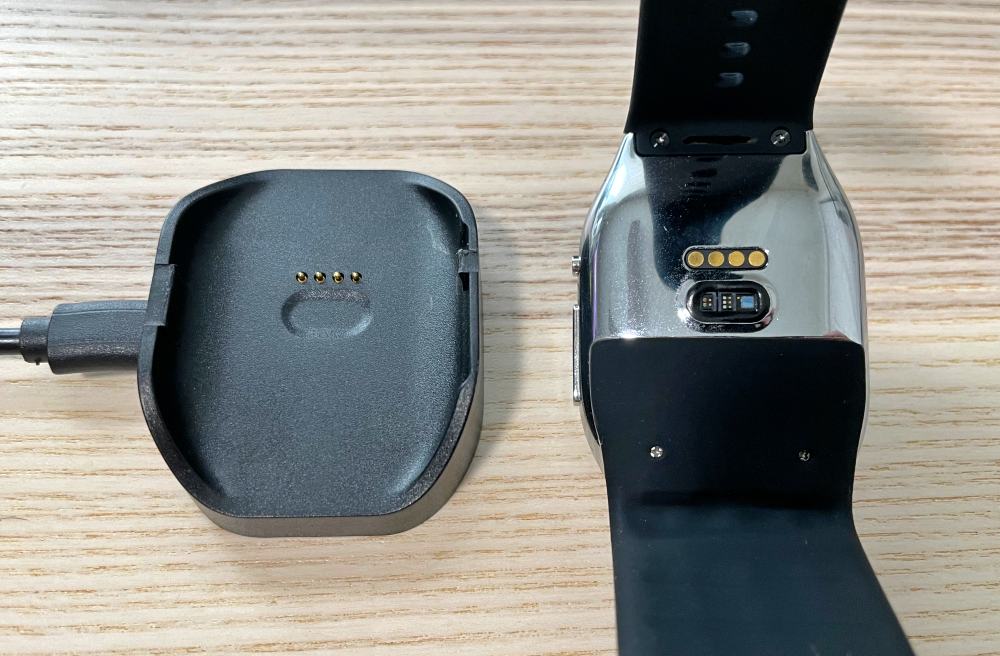
- Charging cradle
- USB cable
- Instruction Manual
- Wrist sizing template
Hardware specs
CPU: 208MHz MTK processor | 256mb memory
Sensors: PPG Heart rate sensor | Triaxial accelerometer | Gyroscope | Pressure sensor
Bluetooth: BLE 4.2
Display: AMOLED 1.4″ glass touchscreen | 320 x 360 resolution
Body: Medical grade 316L stainless steel
Battery: 170mAh LiPo
Battery Life: 2-3 days with heavy use and monitoring | 4-6 days with light use, low brightness and test on demand
Design and features
The BP Doctor Pro looks the part of a smartwatch. It has an elongated stainless steel body with a touchscreen display.
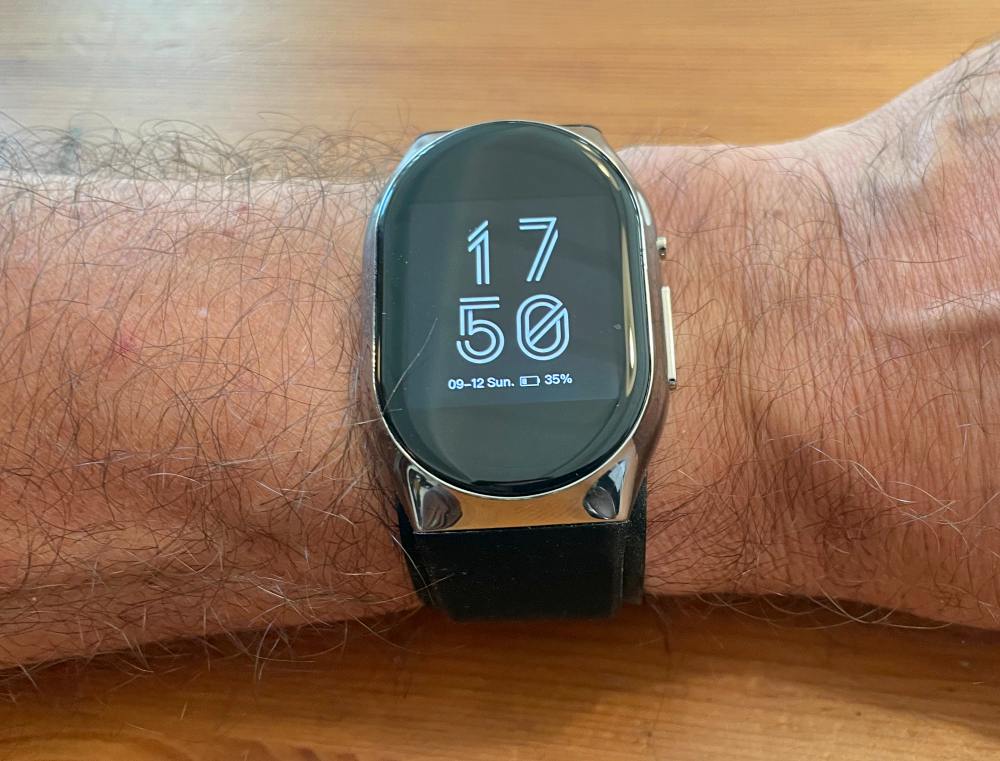
There’s a pair of buttons on the right side; a small power button, and a larger multifunction button.
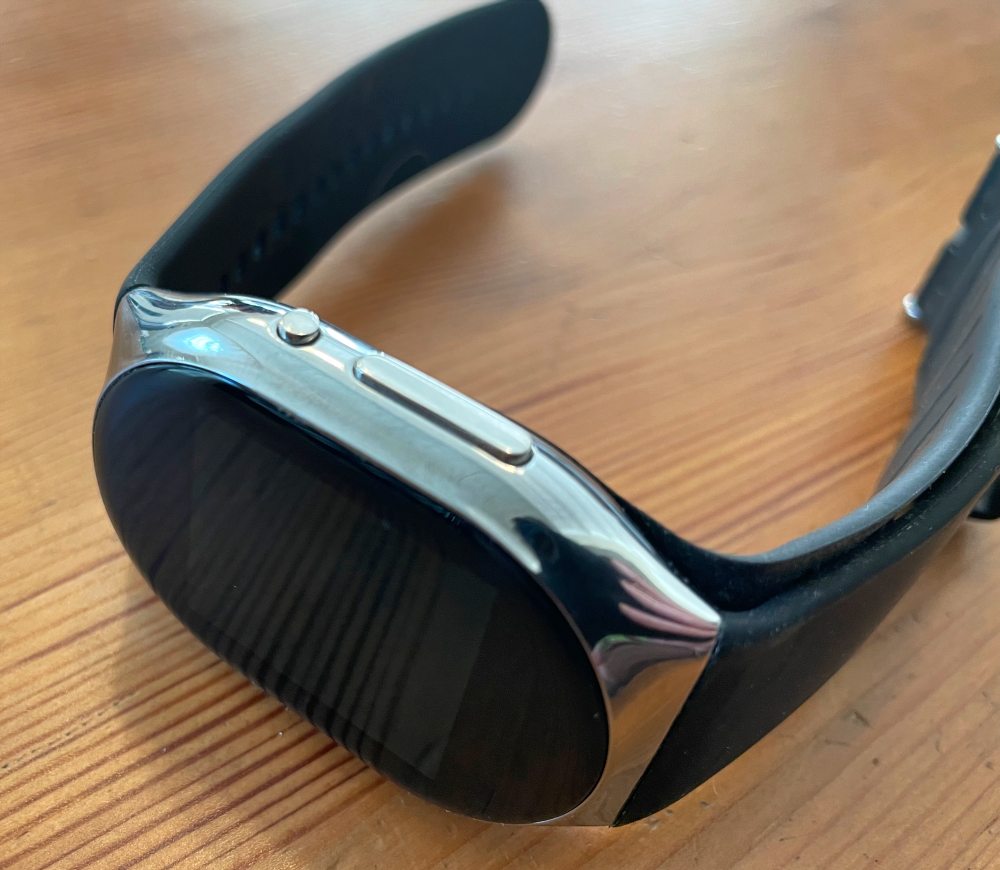
The underside has the wrist facing sensors that are required for the magic to work along with the charging contacts.
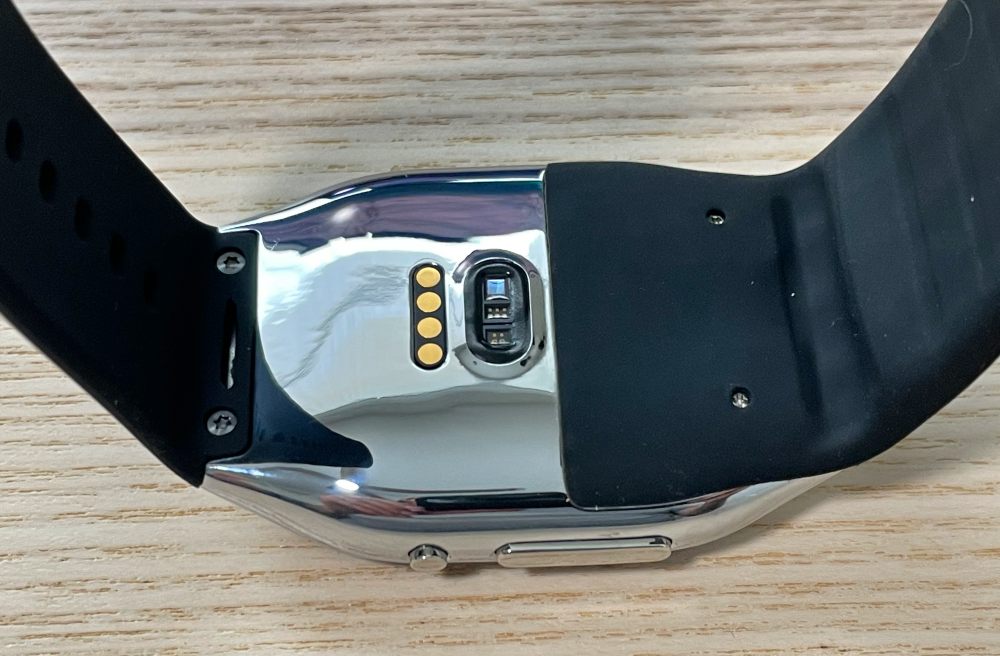
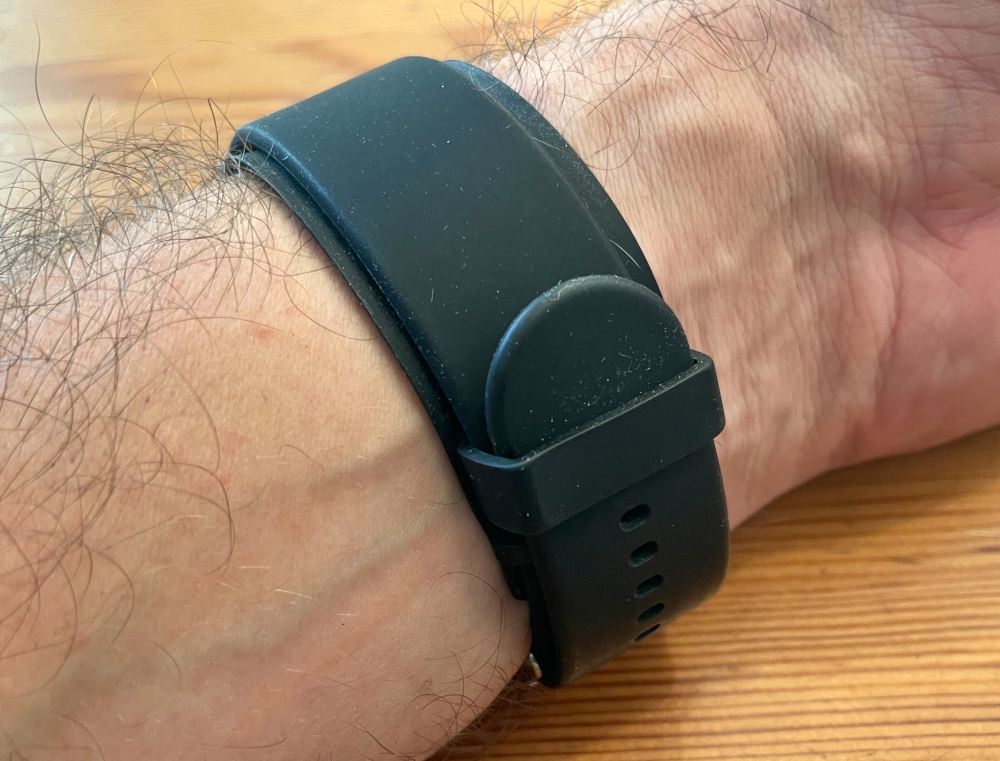
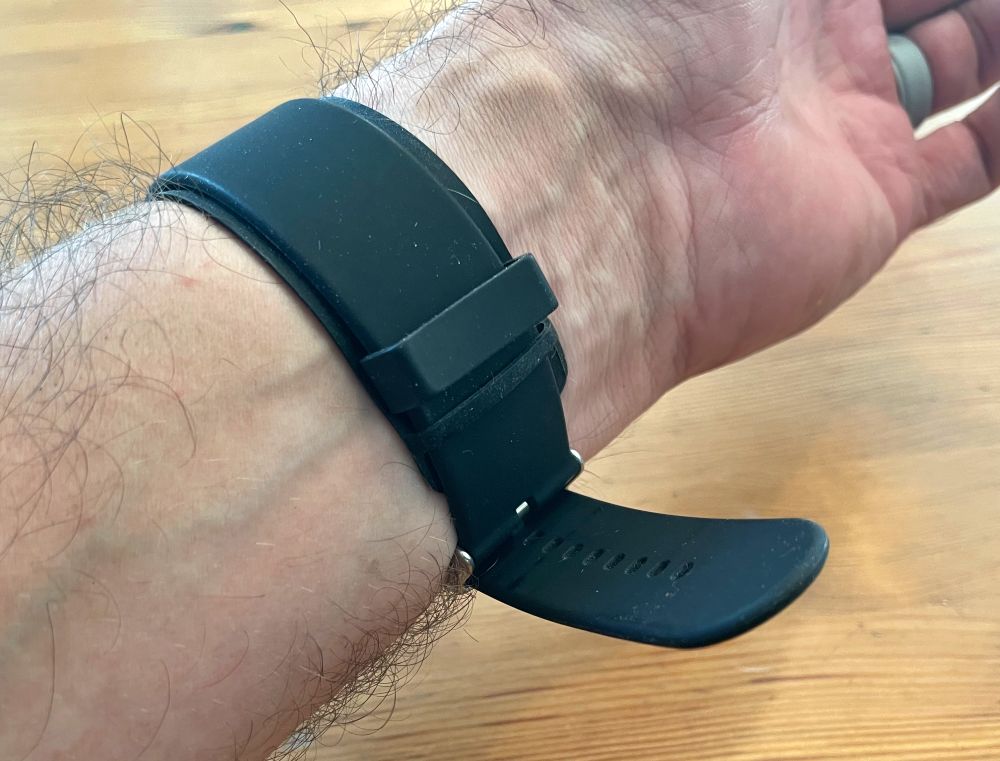
The strap is silicone and has a traditional buckle and tang, but it’s on the down-side of the strap instead. This is to protect the flat, inflatable bladder that lines the underside of the down strap.
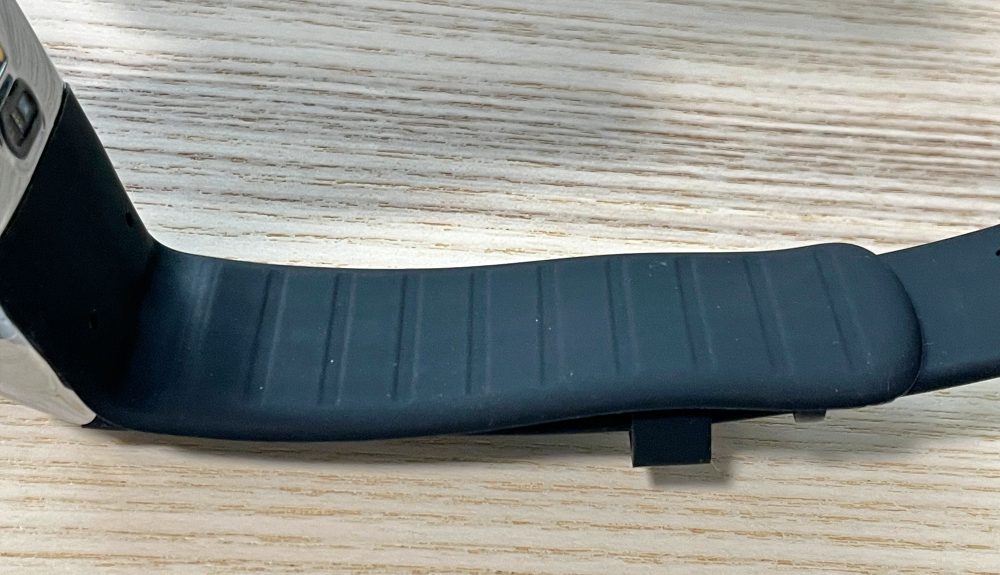
YHE did a really good job of making this thin to the point that it’s not really noticeable while wearing until you take a measurement.
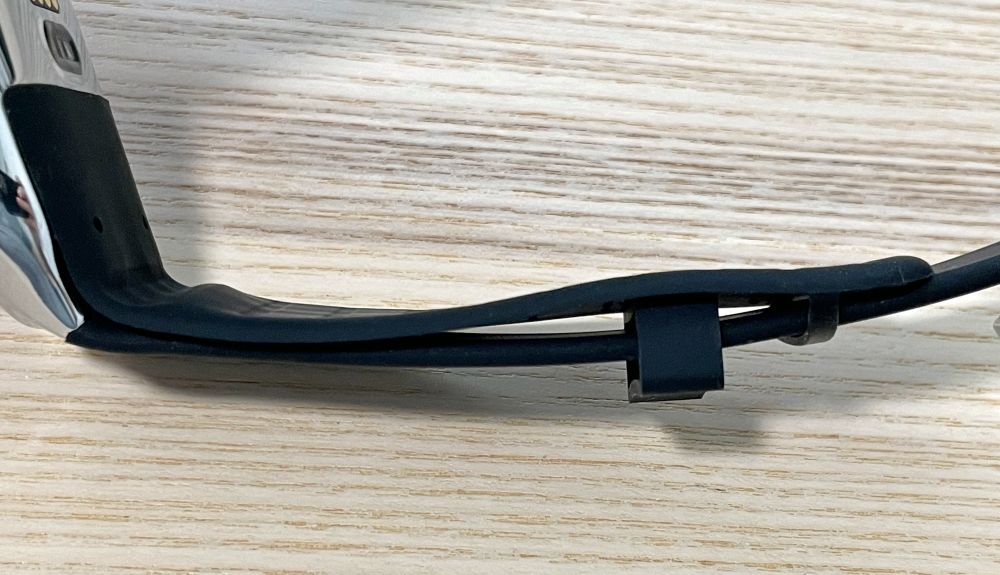
Here’s an exaggerated view of the bladder working. Without pressure against a wrist, I’ve stopped the reading to keep it from inflating too far.
Setup
Connect the cable to the charging module and to a power source. Then insert the button side of the watch into the charger facing the side with the protrusions and then push the other side until you feel it pop into place. There are no moving parts on the charger so it’s a tight fit that begins to loosen up over time. There’s also no release lever, so when it’s time to remove the watch you’ll want to push down on the non-button side to leverage the charger off. I recommend removing the cable first so you don’t accidentally bend or damage the connector.
Turn on the watch with the small button if you haven’t yet. A 3 second press will do that for you.
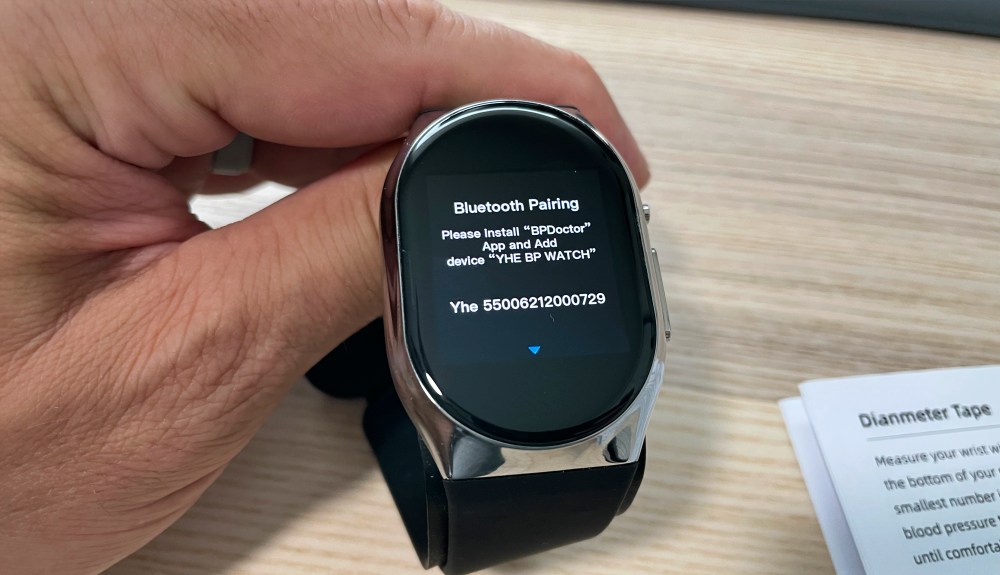
The next step is to pair the watch to your phone. Use your phone to scan the QR code, download the app, launch and fill out the account registration. Go through the extra steps to fill out your profile with an email address so you don’t lose any data should you need to reset the watch and re-pair later.
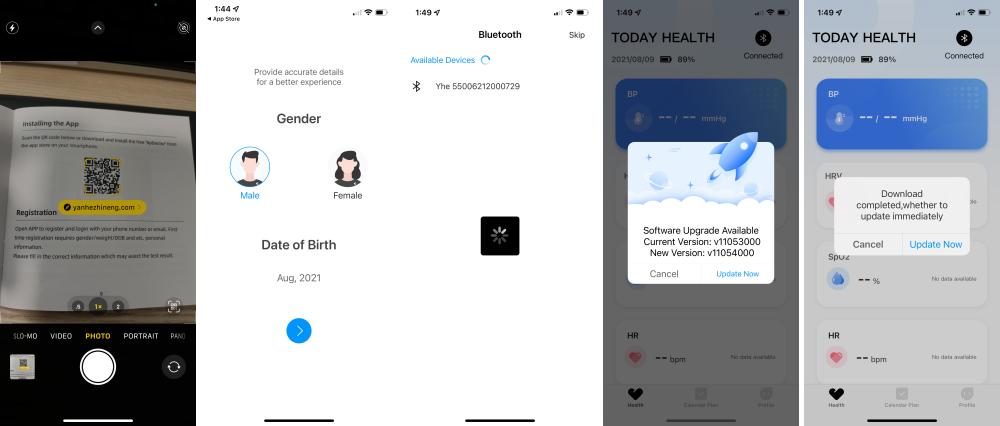
The App will show the nearby watch. Click pair, and then you’ll probably also see the available software update, so go ahead and do that. This one can take a few minutes so you might want to reconnect to the charger for the process.
The last step is to wear it properly and that’s directly related to performance, so let’s jump right in.
Performance
First, you’ll want to use the included sizing template to find the hole you should use when taking blood pressure readings. This is likely a hole or two tighter than the size you’ll want to wear for regular smartwatch use. You can see that it indicated an 8 for my wrist size.
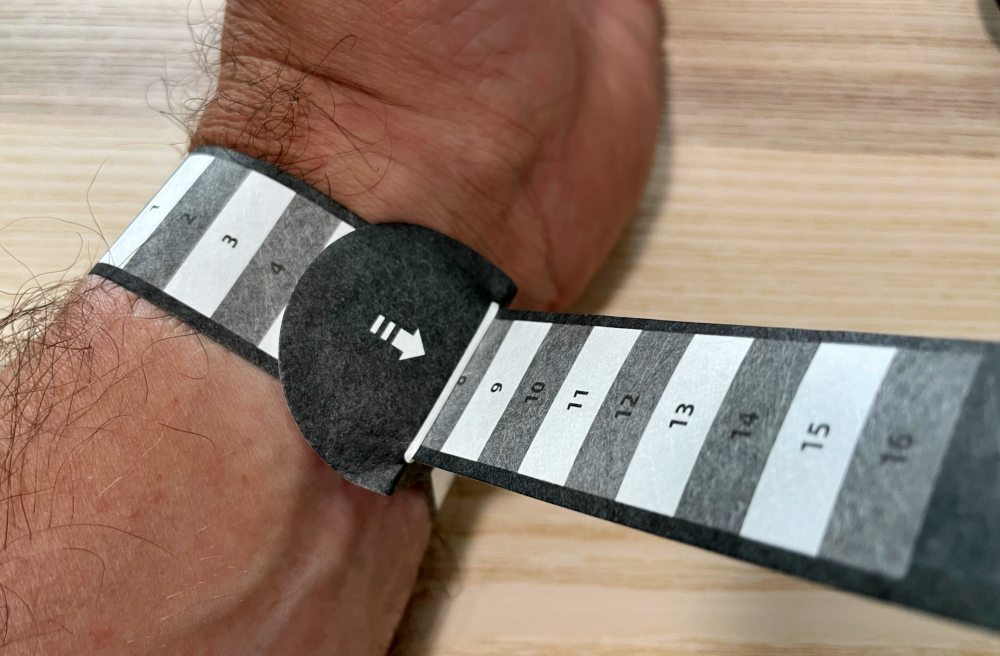
For reference, I consider myself to have a pretty wide wrist. I’ve worn the larger Apple Watch since launch and with most Fitbit models I’ve had to swap out for the larger of the included band sizes.
The watch body is nearly the same width as my wrist which works well for me but might not for anyone with a smaller wrist. The biggest change however is that the buckle is flipped from how we’ve all be trained to put on a watch. The buckle goes on the body side of your wrist which isn’t harder to do, but continues to just feel weird. This is a necessary change to keep the tang or prong of the buckle away from the inflatable bladder that runs underneath the strap. I’d actually prefer that they provide the option to flip the display 180º so the strap would feel normal and the two buttons would be away from my wrist motion. That’s the way I wear my Apple watch.
Regardless, there are a few things to keep in mind as you tighten the band.
- You must wear the watch on your left wrist (heart side)
- You need to position the watch about two finger widths behind your wrist joint/palm
- You should wear the watch snug for general use so the wrist side sensor will work well
- When taking a blood pressure reading you will need to tighten the band to the number measured when sizing
It would definitely help to have small numbers on the underside of the strap for finding the same position quickly each time, because you will be adjusting this every time you want to take a blood pressure reading. Hole one is closest to the watch on the far side of your wrist making it tricky to count. The strap needs to be very snug to allow the inflatable cuff to work properly. It’s tight enough that you’ll absolutely want to loosen a hole or two after for casual wear.
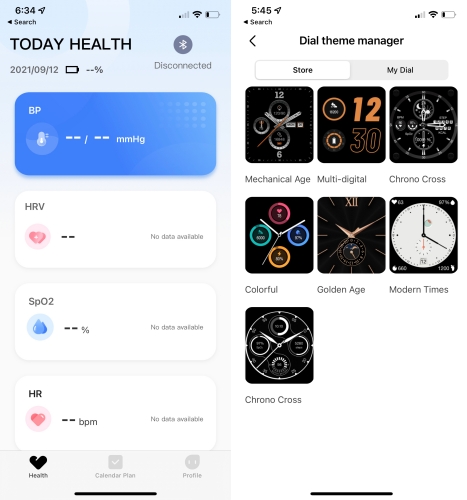
Okay, so all of that is just for how to wear the BP Doctor Pro Smartwatch. The App shows the history of your readings along with more analysis per metric. There would be considerably more data here normally, but the App continually would disconnect from my phone and not re-pair without wiping data. Using the App you can adjust the different watch faces. Some need downloading and installation which is painfully slow. You’ll quickly find that only a couple of them are easy to read and if you have the brightness on the watch turned up, you can easily see how little of the watch’s face is the actual display which is unfortunate.
The BP Doctor has a touch screen. From the clock face, you can…
- Swipe down to see settings – Brightness, Bluetooth, vibration, settings, battery, alarms, sleep
- Swipe up to see messages
- Swipe left to see Stats – (distance, calories, steps)
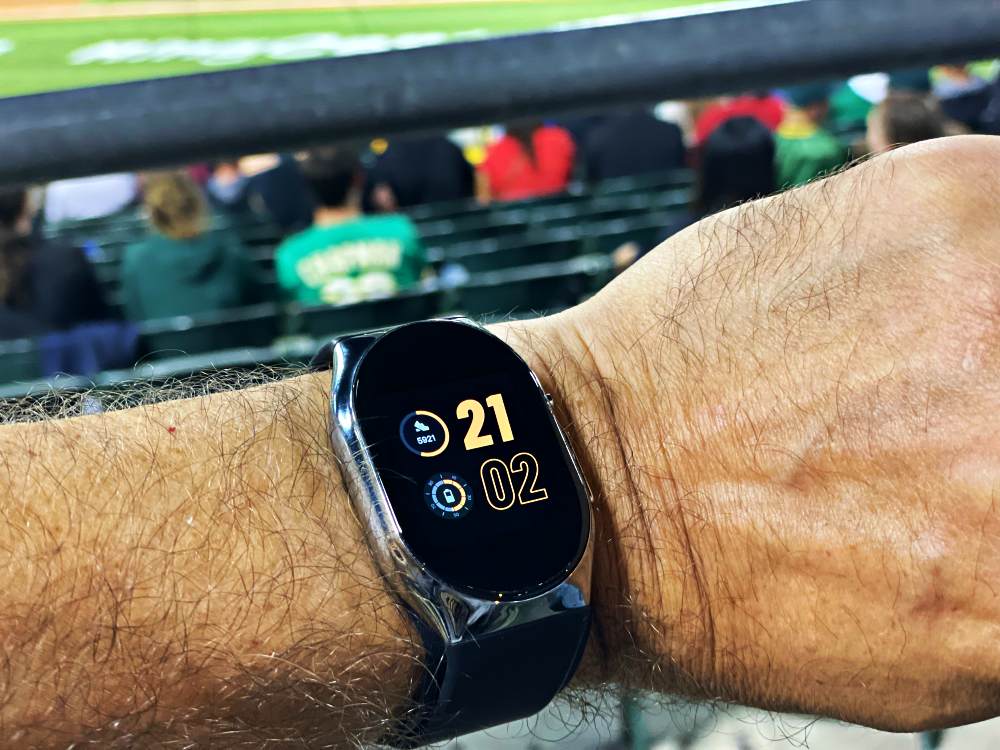
- Swipe right continually to see measurements – Blood Pressure, Heart Rate, and Sp02
Either button on the side will wake the watch and a second press of the larger button brings up the apps where you can swipe up/down to see them all (BP, Sp02, HR, Workout, Alarm, Calorie, Sleep, Weather, Settings, HRV. You may find it helpful to go into settings and turn on “Raise to Wake” allowing the watch to automatically turn on the display with a wrist raise including the time of day you want that function to be active. Very helpful for not having your watch light up the room if you move your arm while sleeping.
As for general wear, the watch is comfortable enough. The addition of the pressure cuff is not noticeable unless it’s really hot outside.
It’s a big surface area and even though there are some relief channels it can get very sweaty and caused some itching on a couple of occasions. Another issue I ran into is that the strap would not stay tucked during the day. It’s a combination of strap rigidity, not tucking far enough through the keeper for my wrist size and having the strap end pointing the wrong direction where it would catch as my wrist passed my pant leg. The result is it looking like this a lot of the time.
Okay so let’s move right along to the big pink elephant in the room. If you want an activity monitor or a smartwatch you’re going to buy one from Apple, Fitbit, Garmin or Wear OS by Google. That leaves the blood pressure monitoring as the sole reason to look at this watch. It’s definitely why I was interested.
We’ve all had our blood pressure taken. You strap a velcro cuff to your bicep at heart level, you sit in an upright position with your arms relaxed at your side and your feet flat on the floor. The measurement starts and approximately 30 seconds later you have your reading. It works, it’s reliable and it’s repeatedly accurate. It’s normal for everyone’s blood pressure to raise and lower through the day, but in a single session, the numbers should not fluctuate all that much.
To take a reading with the BP Doctor Pro smartwatch like so….

you need to follow these steps…
- Tighten your watch band to the measured value
- Sit upright with your feet flat on the floor
- Raise your arm to heart level (preferably resting on a steady object)
- Press and hold the large button on the side, or navigate to the BP screen on the watch and press ‘Start’
- Should you need to stop the measurement for any reason, press the large button or press ‘Stop’ on the screen
It’s a very similar process at first glance, but in the testing period I found it to be very tedious and infinitely finicky. Here are some points…
- Your arm has to be at heart height. Lower and your pressure numbers will be elevated. Higher and your numbers will be depressed.
- Your arm needs to be very, very still. If you rest your arm on your chest, the motion of your breathing will throw off the result or cause a read failure.
- Do not talk as that can affect numbers or result in a read failure
- If your watch band is too loose you reading will be higher or result in an error
- If your watch band is too tight your reading will be lower or result in an error
- If your watch band isn’t two fingers behind your wrist your numbers may be off
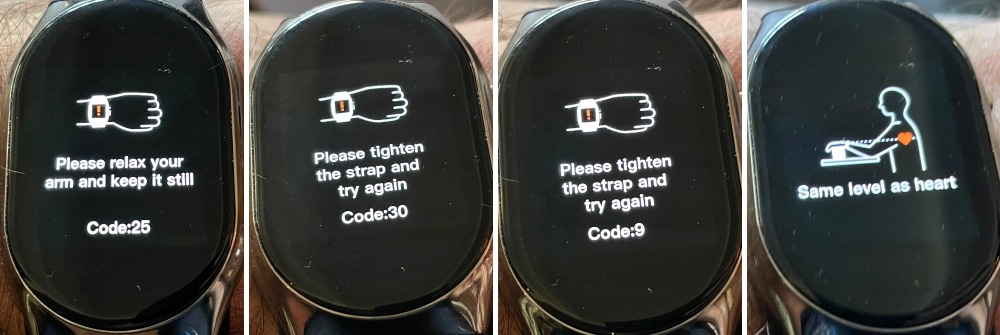
I had numerous sessions where I would get 5 or 6 errors in a row, cycling between Code 25: ‘Please relax your arm and keep it still’, Code 30: ‘Please tighten strap and try again’, Code 9: ‘Please tighten strap and try again’ (yeah, same error, different code) and an uncoded ‘Same level as heart’.
The watch strap literally could not be any tighter on my wrist, I wasn’t moving my arm, and I wasn’t talking. I’ll stop there and we can look at the numbers. For comparison, I used the Omron monitor I purchased back in 2008 when I first went on medication. It has the typical velcro cuff we’re all familiar with and can run on batteries or wall power as needed. I’ve been using it for my daily measurements and also as a baseline device when testing the BP Doctor smartwatch. Here’s a snapshot of readings from both devices taken within a minute or two of each other each day. All readings with the BP Doctor were taken as instructed with my arm at heart level, no motion, etc.
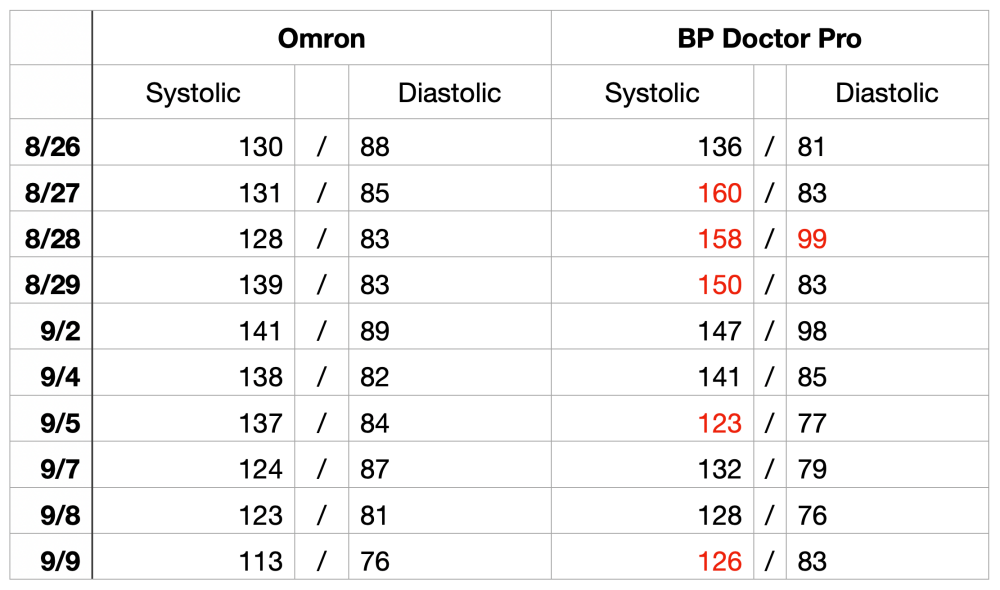
Starting with the readings from the Omron, you can see clearly that my blood pressure numbers vary. I’ve highlighted a few readings from the BP Doctor where it was more than 10 points higher or lower (one being 29 points higher). The fact that it isn’t biased one way or the other gives me serious cause for concern. If it was always ~ 5 points higher, I would make adjustments and feel comfortable that I could trust the readings. But given the results over the time period, and knowing that I was doing my absolute best to wear the watch the exact same way and keep all the variables as consistent as possible, I have a hard time trusting the data.
I also repeatedly had issues with the watch not reconnecting to my phone, but that wasn’t high on my worry list given the numbers.
What I like
- The function of the inflatable cuff
- Heft of the watch (80g) and general fit
What I’d change
- Increase accuracy and decrease variables when taking a reading
- Figure out how to allow for accuracy at the strap tightness you want to use
- Add the ability to flip the screen 180 so the strap functions normally
- Add magnets or a spring to the charging dock to make entry/exit easier
- Larger display that uses the full face of the watch
- A non-mirror finish on the watch body
Final thoughts
There’s a lot of promise here, but sadly the BP Doctor Pro Smartwatch does not rise to meet it. There are so many variables in position, tension, motion, noise that I am unable to trust the blood pressure readings, which is the whole point, especially when compared to the reliability of a standard arm cuff monitor. I believe that YHE will be able to get there eventually, but they have a ways to go.
Price: $399.00
Where to buy: YHE Technology (save $100 using code: YHEWELCOME expires 12/31/21) and Amazon (save $50 with coupon)
Source: The sample of this product was provided by YHE Technology

Apple Watch Series 11 [GPS 42mm] Smartwatch with Rose Gold Aluminum Case with Light Blush Sport Band - S/M. Sleep Score, Fitness Tracker, Health Monitoring, Always-On Display, Water Resistant
(as of June 21, 2026 05:55 GMT -05:00 - More infoProduct prices and availability are accurate as of the date/time indicated and are subject to change. Any price and availability information displayed on [relevant Amazon Site(s), as applicable] at the time of purchase will apply to the purchase of this product.)
Gadgeteer Comment Policy - Please read before commenting
Don’t deal with this company.
They claim to have a belief in integrity and claim that the first-gen BP Doctor was a success. Both claims are false and misleading. I obtained two first-gen BP Doctor watches. They both fell over in a few days. Months of trying their support page before they fianally responded. Their “solution” didn’t work and they refused to give me a refund.
hi, Steven
I’m so sorry for your experience with our first-gen watches. Please kindly contact us via [email protected] for further helps.
I confirm everything. The smartwatch is too expensive for performance that is below average. the app is minimal. there is no possibility to carry out an electrocardiogram. for a device that has medical claims it seems to me the minimum. The fact that the vibration is not perceived is serious, making notifications and alarms useless. The support service has always replied to my emails but without the possibility of solving the reported problems. Put in the drawer.