REVIEW – One of the bedrooms in our house needs to serve two purposes: For most of the year it’s my office, but when the kids come back for the holidays it’s a bedroom. Half of the room has my desk with my computers, and the other half needs a bed. I haven’t bought that bed just yet, but I plan to get something like a captain’s bed or a mini loft. Because the bed will be up against the wall, I won’t have room for a traditional end table with a lamp, so I’ve been looking for ideas for a light source that could be used when reading in bed. That’s when I found the Polygon light tiles.
What is it?
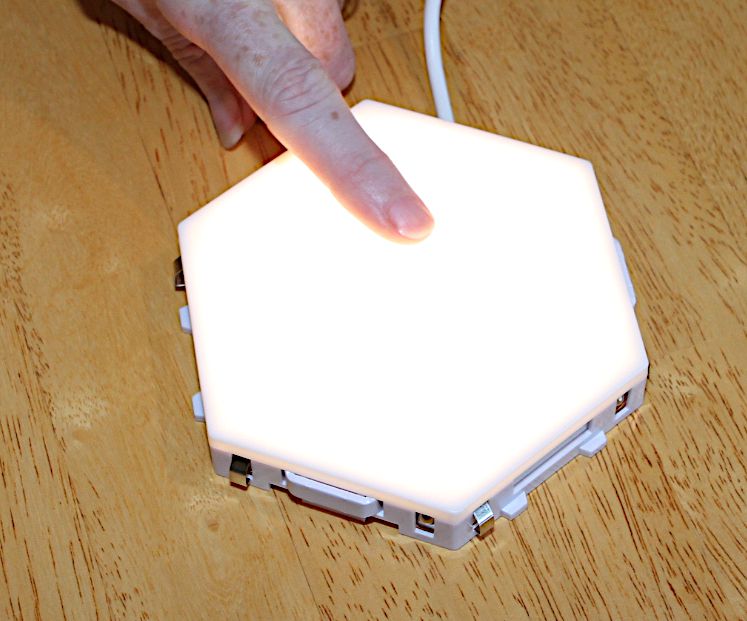
Polygon light tiles are a set of modular, hexagon-shaped tiles that are designed to be creatively grouped together and attached to a wall. When touched, they light up; the more tiles that are touched, the brighter the light. Polygon is an American company based in New York City that focuses on “creating unique, design-focused products.”
What’s in the box?
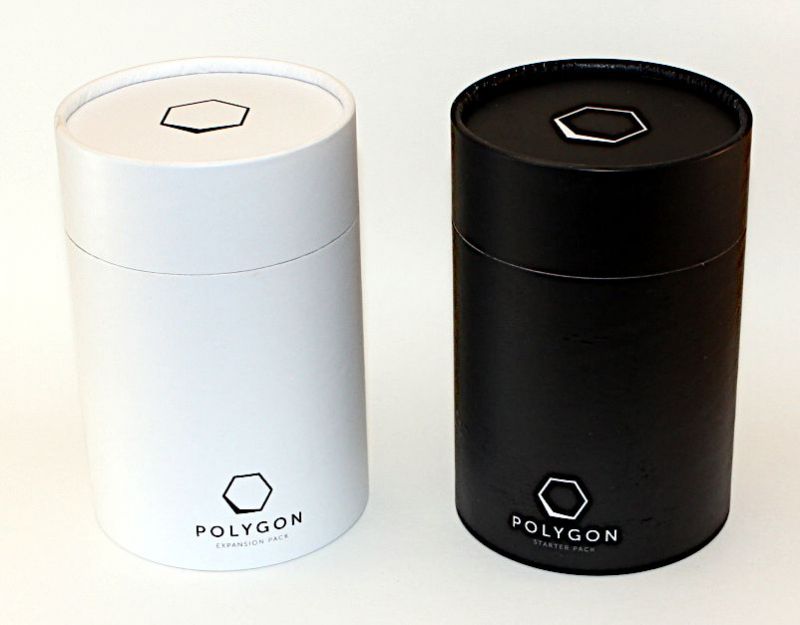
Polygon was gracious enough to send me both their Starter Pack and an Expansion Pack, and they arrived in a pair of cylindrical-shaped boxes. The Starter Pack contains:
- 5 Polygon tiles
- 1 Power supply
- 1 Set of sticky pads
- 1 Instruction manual
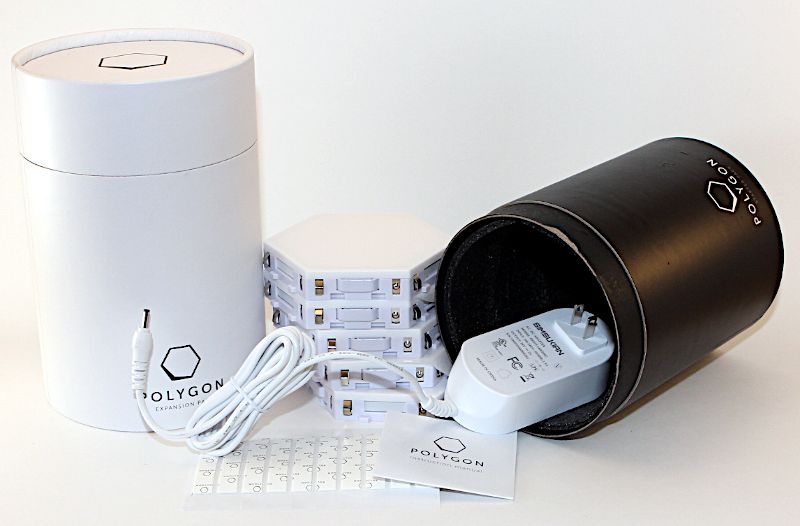
The Expansion Pack contains:
- 10 Polygon tiles
- 1 Set of sticky pads
- 1 Instruction manual
Together, these gave me 15 tiles to work with.
Hardware specs
- Illumination: 80 lumens per tile
- Light color: Warm white
- Light type: 24 LEDs per tile
- Dimensions: 4.5 x 4 x 0.75 inches
- Wall attachment: Sticky pads or nails
- Power supply: 48W (1 power supply can power up to 65 tiles)
Design and features
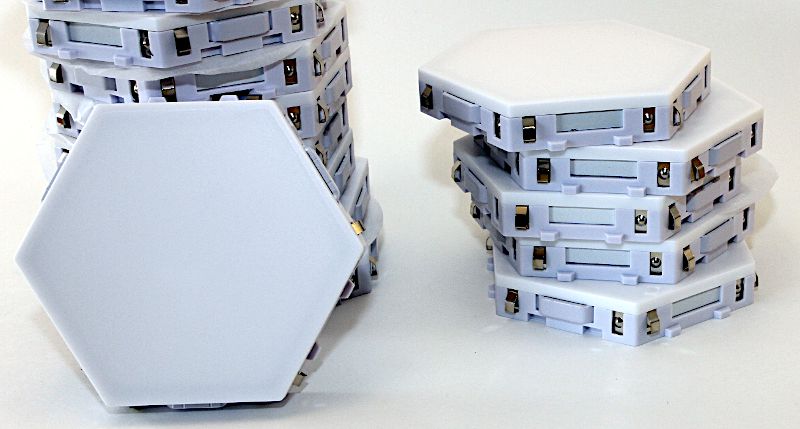
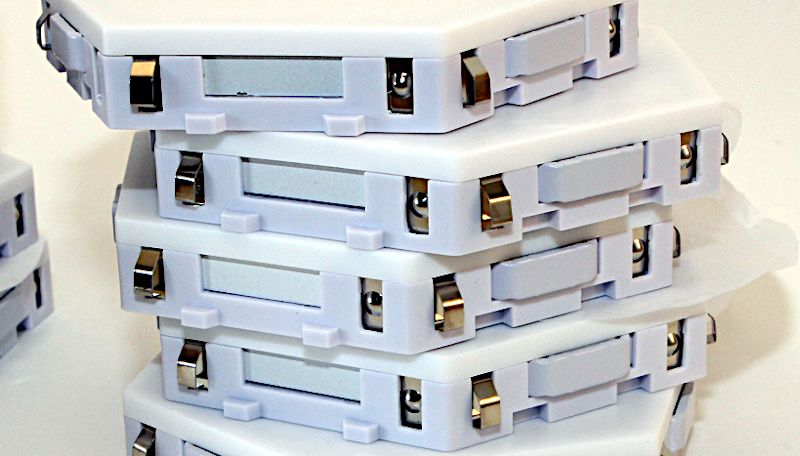
Each tile is in the shape of a polygon. The top half is white plastic, and the bottom half is a very light grey plastic. When the tile is lit, the entire top turns white; there’s not a bezel around the edges. Each of the six sides has a magnet that holds it together with the next tile as well as a pair of metal pieces that conduct the electricity. They are a non-traditional source of lighting whose design is simple and practical.
Installation and setup
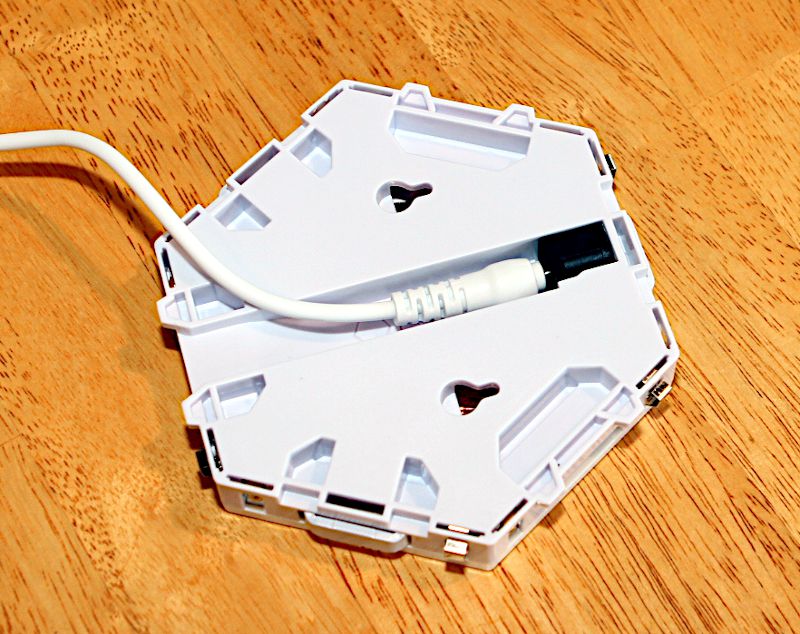
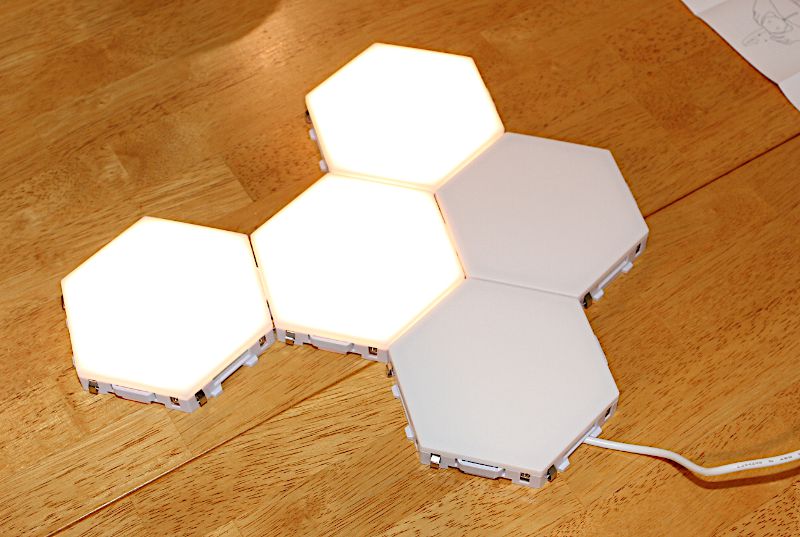
There are three steps for installing the Polygon lights. First, pick any tile and plug it in to the power supply. Touch the top of the tile, and it will light up.
Second, place the tile on a flat surface, like a kitchen table, and begin connecting the other tiles. The magnets will hold the tiles next to each; if you happen to place two tiles together such that their magnets are repelling, simply rotate one of tiles. Right about now is when your creativity should begin to kick in. You realize that you can connect the tiles together in any way you want to make any shape you can imagine. The only requirement is that they all have to be touching. As you connect the tiles, use a sweeping motion with your hand to touch the tops of several tiles, and you will see them all light up. Sweep again, and they turn off. It’s really quite cool to see the tiles work together.
Third, mount them on the wall. Polygon provides two mechanisms for mounting the tiles on the wall. One, there are pair of nail holes in the back of each tile that you could use with small nails or brads. Two, they have included a set of sticky pads (fancy double-sided tape) with each pack. I have read that these pads are really sticky and tend to pull paint off the wall if you attempt to take them down, so you might want to use command strips instead, especially if you think you might move the lights around. Whatever you prefer, mount the powered tile first, using a level to keep it straight (unless, of course, you have a very creative design that isn’t supposed to be level), and make sure that the tile is rotated to allow the power supply cord to hang down. Keep in mind the length of the cord—it’s about six feet long—to ensure that it can reach a power outlet. Then one at a time connect the rest of the tiles. Polygon recommends that 70% of the tiles be mounted to the wall. When they are all mounted, plug in the power, and you’re done!

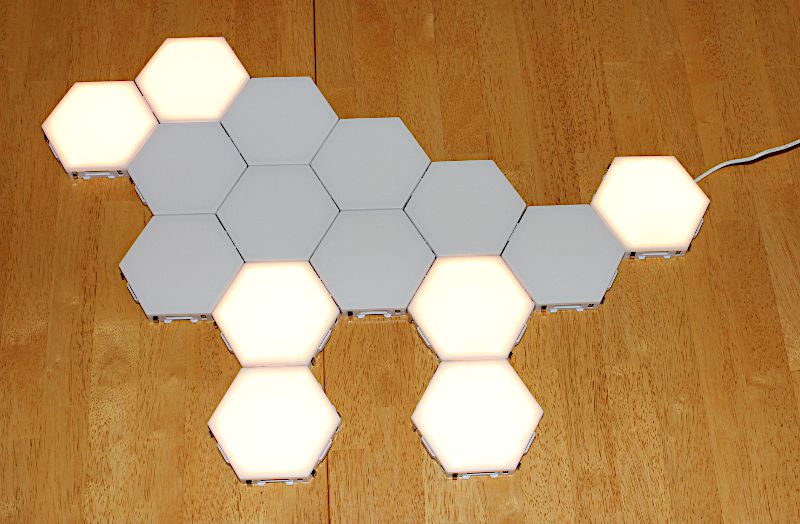
Here’s a picture of what we finally settled on. I’m a Tolkien fan and am planning to decorate my office with a Middle Earth theme, so a sword seemed like a reasonable use of the tiles.
If you want to read the manual for yourself, you can find it in this PDF.
Performance
The lights are a warm white color, and they add a nice glow to the room. The surface is not a button; rather it has a capacitive sensor that responds to touch. In my testing, I found that it responded best when touched with several fingers or a palm; if I touched a tile with a single finger, sometimes it turned the tile on but sometimes not.
The lights are perfect for reading. I think they would be a natural fit to hang near the bed that I will add to my office, and they could also be used near a chair, a couch, or any place that you need some extra light at night. Since each tile lights up individually–it’s not all or nothing–you essentially have a light that you can make as bright or as dim as you want. At this point, you might be tempted to react by asking, “You mean, they are just lights?” Yes, absolutely! That’s exactly the point! On their About page, Polygon says that they “believe in products that are creative, beautiful, and functional.” They are not just about a creative arrangement of tiles, they are intended to be a functional source of light for your room.
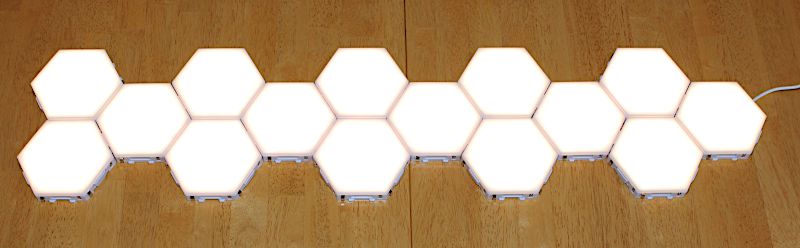
Speaking of being creative, you can arrange the tiles together any way you want. You can make simple lines or geometric shapes, though I think the neatest designs are those incorporate other elements on the wall, like this rain cloud or this hot air balloon. How cool is that! What creative ideas do you have? If you had 15 tiles, how would you arrange them? I’d love to hear your ideas in the comments below.
When putting the tiles next to each other, you don’t hook them together with clips or tape or anything. The magnets on each side attract the tiles together and keep them from moving around; the magnets are not, however, strong enough to hold them together on the wall. In other words, you can’t mount one tile with a pair of nails and then expect the magnets to hold the remaining tiles in place. I believe that Polygon’s recommendation to mount 70% of the tiles is spot on.
If there’s anything about the Polygon lights that would be a cause for concern, it would be the price. Five tiles with the power supply cost $112. That’s over $20 per tile. Ouch! If you bought the two packs that Polygon sent me for testing, that will set you back $248. That’s not cheap! If you just need some light, it would be cheaper to buy a couple of lamps. Polygon lights, however, are more than just lights: They are a blend of creativity, functionality, and interactivity, which is exactly what the Polygon’s founder, James Vanderpant, is looking to encourage.
While I think the lights are very cool as they are, if there was one thing I could add, it would be color. LEDs are capable of a wide range of colors, and it would be nice to have some way to change the color, thus setting a different ambiance in the room.
Extra Features
These lights don’t have any extra features, but Polygon also sells cork tiles and plant tiles, which can be interspersed among the light tiles for extra creativity and variation.
What I like
- Magnetic locking system
- Capacitive touch interface
- Creative options
What I’d change
- Lower the price some or add a feature like different colors
Final thoughts
Polygon lights are a modular lighting system that is both minimalistic and functional. The hexagon-shaped tiles be can hung on the wall in any shape or pattern, limited only by your creativity (and your budget). They provide varying amounts of warm white light, depending upon how many tiles you touch. I think they will be a wonderful light for my kids to read at night, once I am able to find the perfect bed for my office. If you’re looking to add a creative light source to your room and have a little extra money, then I recommend splurging for these lights.
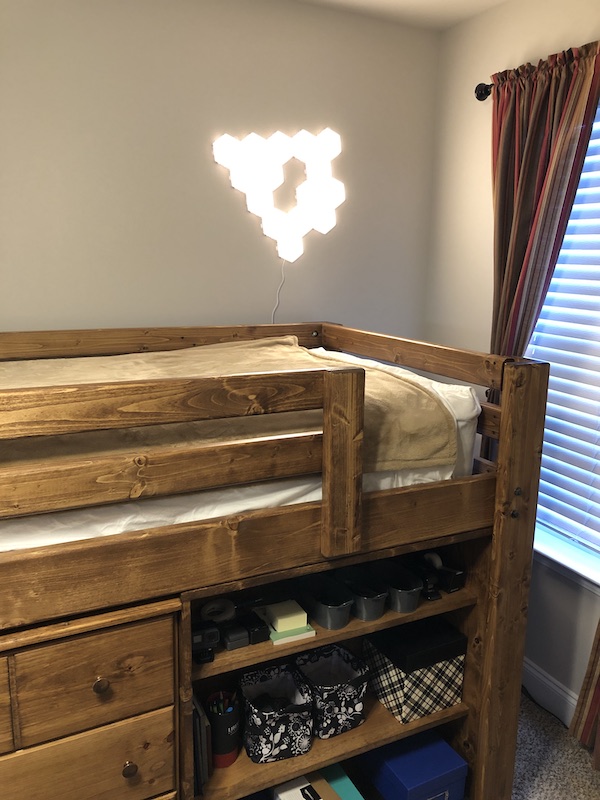
UPDATE (6 Feb 2020) – I finally got that bed for my office. I hired a local company to build a custom mini loft for me, and once they had finished I put up the Polygon lights again. The sword in the picture above was temporary; I had taken it down while looking for a bed. Somewhere along the way I changed my mind about decorating with Tolkien, so I put up a more abstract, arrowhead-looking shape instead. I used command strips to do it, using one strip for every tile, hiding each tab under the next strip. This should make it easier to take the whole thing down, if I ever change my mind about where it goes. Overall, I really like the way it looks, and it certainly provides plenty of light for the room. I’m happy.
Price: $112 (Starter Pack), $136 (Expansion Pack)
Where to buy: Polygon’s online store
Source: The sample for this review was provided by Polygon.

Now retrieving an image set.
2-Pack LED Video Light Kit, NiceVeedi Studio Light, 2800-6500K Dimmable Photography Lighting Kit with Tripod Stand&Phone Holder, 73" Stream Light for Video Recording, Game Streaming, YouTube
(as of July 14, 2026 14:09 GMT -05:00 - More infoProduct prices and availability are accurate as of the date/time indicated and are subject to change. Any price and availability information displayed on [relevant Amazon Site(s), as applicable] at the time of purchase will apply to the purchase of this product.)
Gadgeteer Comment Policy - Please read before commenting
Plenty of other cheaper options inspired by these on Amazon.
True. But cheaper doesn’t necessarily mean better; in fact, sometimes cheaper doesn’t even mean good. Caveat emptor.