
REVIEW – I’ve always wanted to get into 3D printing, but my other hobbies usually took my money and time. When the Kywoo Tycoon 3D printer review offer came along, I was fortunate to be selected to review it.
What is it?
The Kywoo Tycoon is a 3D printer that features automatic hands-free leveling and a color touch screen. The Kywoo Tycoon Kickstarter campaign is already fully funded.
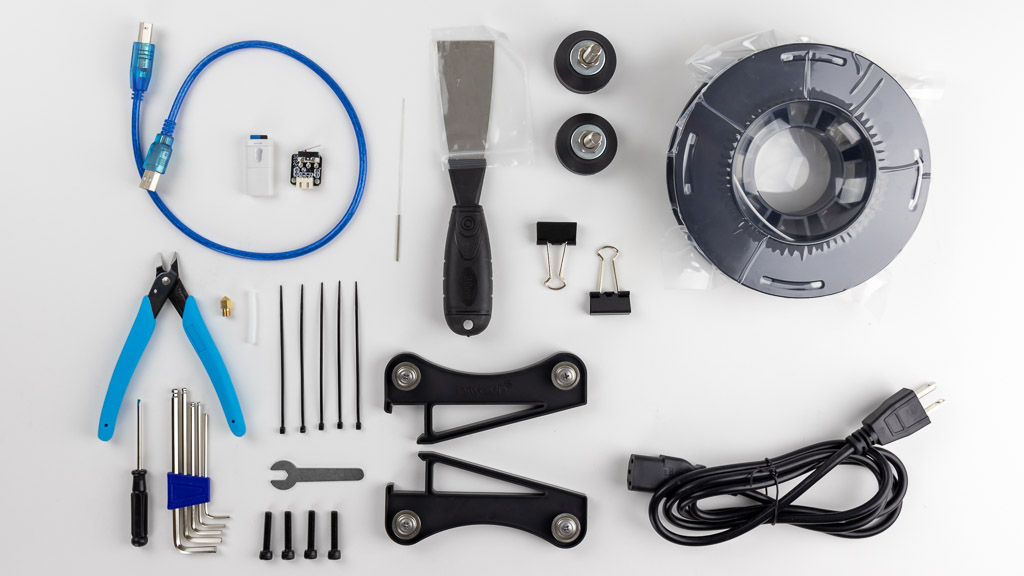
What’s in the box?
- Kywoo Tycoon 3D printer
- Power cord
- Filament spool
- Instruction manual
- USB cable
- Micro-SD card and reader
- Spare nozzle and other parts
- Spare stop switch
- Screwdriver
- Nozzle wrench
- Spade
- Allen wrench set
- Diagonal cutting plier
- Nozzle cleaner
Hardware specs
- 240x240x240mm print area
- 3.5″ HD color touch screen
- Dual Z-axis and linear X-axis
- Direct extruder
- Heated bed
- Exchangeable 245 x 260mm tempered glass hotbed
- Filament rack
- 32-bit motherboard
- WiFi File Transfer
- SD card slot (review sample has only a Micro-SD card slot, but the production version will have a full-size SD card slot also)
Design and features
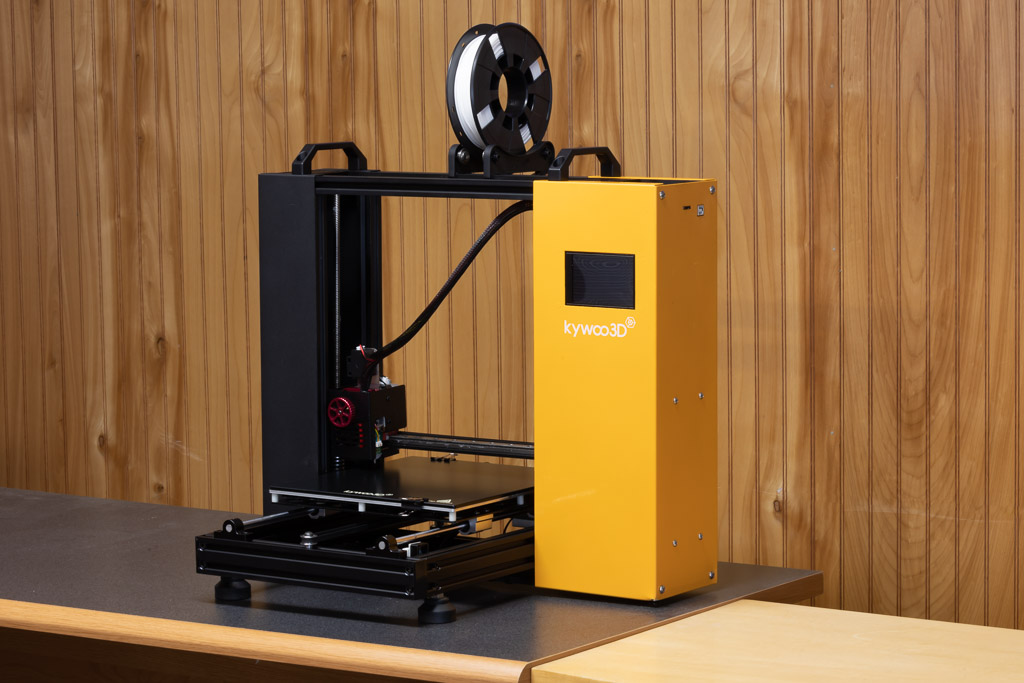
The Kywoo Tycoon 3D printer is a compact 3D printer that claims “surprising precision and stability found only in industrial-grade 3D printers” – and they are correct. The Tycoon’s dual gantry vertical structure has two rails on each side instead of single rails, making the Tycoon extremely stable. The dual-Z axis motors enable the Tycoon to perform auto-leveling, which not only saves you a lot of manual tinkering but is more accurate than just eye-balling it. These features improve accuracy by 30% vs. traditional pulley systems.
A wide range of filament materials, including PLA, PETG, TPU, TPE, and ABS, are supported to give you complete flexibility. The setup is straightforward. Install four screws, two bed feet, and connect three wire connectors, and you’re ready to print.
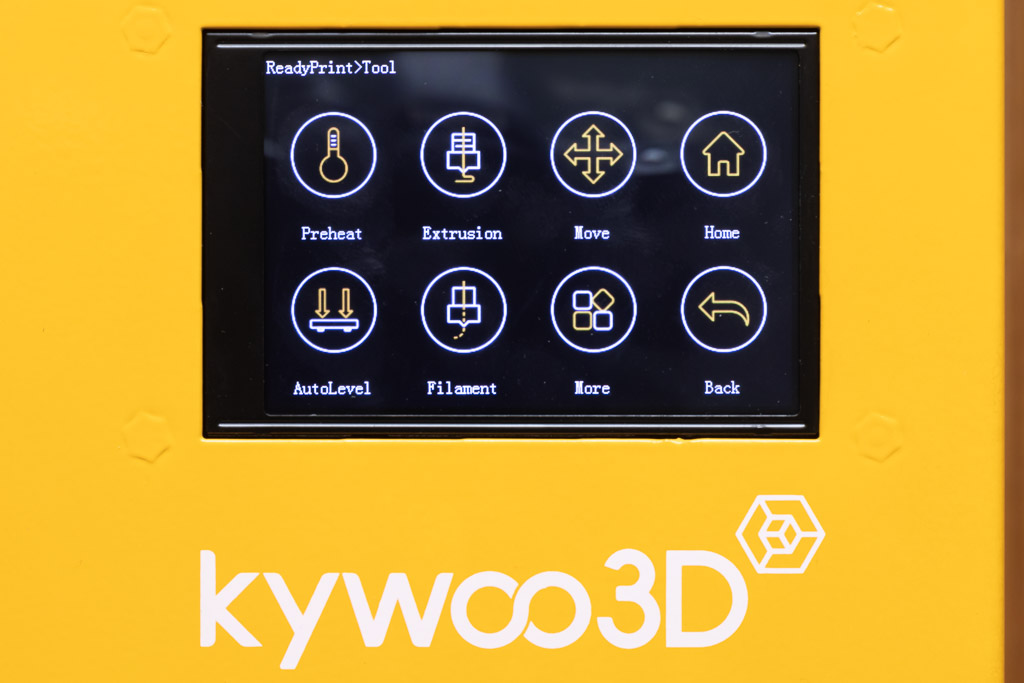
The HD color touch screen is so much easier to use than a knob or button-based interface. Nine supported languages ensure full accessibility. I found the screen extremely easy to read, responsive, and quite a pleasure to work on.
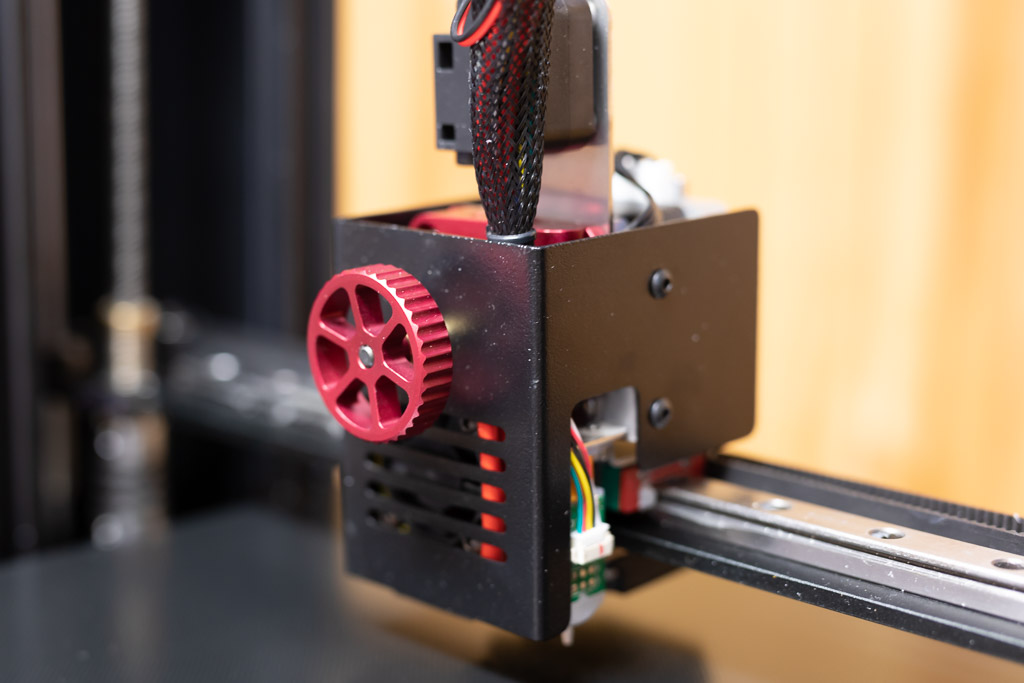
 The direct drive, all-metal integrated filament extruder, combines extrusion and heat dissipation, reducing resistance, vibration, and wear of filaments, significantly increasing performance and reducing size. It also features a filament run-out switch that ensures you can continue printing if the filament runs out. When replacing the filament nozzle, there’s no need to remove the entire extruder module. Simply unscrew the nozzle and screw in the new one.
The printer’s core features a 32-bit motherboard (equipped with Marlin 2.0) and a Meanwell power supply for high-quality power and a longer lifespan. The controller board also has a built-in ‘resume printing’ mode that helps recover lost work if there is a power outage.
The hot bed includes a 245x260mm tempered glass hotbed for the 240x240x240mm print area (that’s 9.5×9.5×9.5″). You can use alternative hot beds made of whatever material you prefer. For my first experience, I found the glass hotbed rather nice; however, I did use a glue stick to help with adhesion, as my son suggested.
The Kywoo Tycoon was my first experience with 3D printing, and as such, I learned a few things. I only had a little knowledge of some of 3D printing aspects, so I had to learn as I went.
If you’re not familiar with 3D printing, it’s not like printing a paper document. 3D printing must become somewhat of a hobby for you. Variations in printers, software, filaments, and 3D models require you to adjust settings to get the perfect print.
The steps for 3D printing are as follows:
1. Create a 3D model, or download one from the internet.
2. Load the 3D model into slicing software, set the properties of your printer and filament.
3. Slice the 3D model and export it as a .gcode file.
4. Load the .gcode file onto the printer and print.
I received the Kywoo Tycoon the day before the Kickstarter campaign started. Many Kickstarter review units are pre-production versions, which means that some things will be changed, fixed, or improved in the final production versions. It’s like beta software, but it’s hardware.
I had a couple of issues with the z-axis couplers and the y-axis motor when I first turned on the unit. Kywoo was quick to tell me that they identified and fixed the problem for future machines. I was able to adjust these items and run a test print. I had some issues with the first layer adhesion but found that stick glue helps. I’ve seen many ugly 3D prints on YouTube, so when my first XYZ test print came out nearly perfect, I was more than happy!

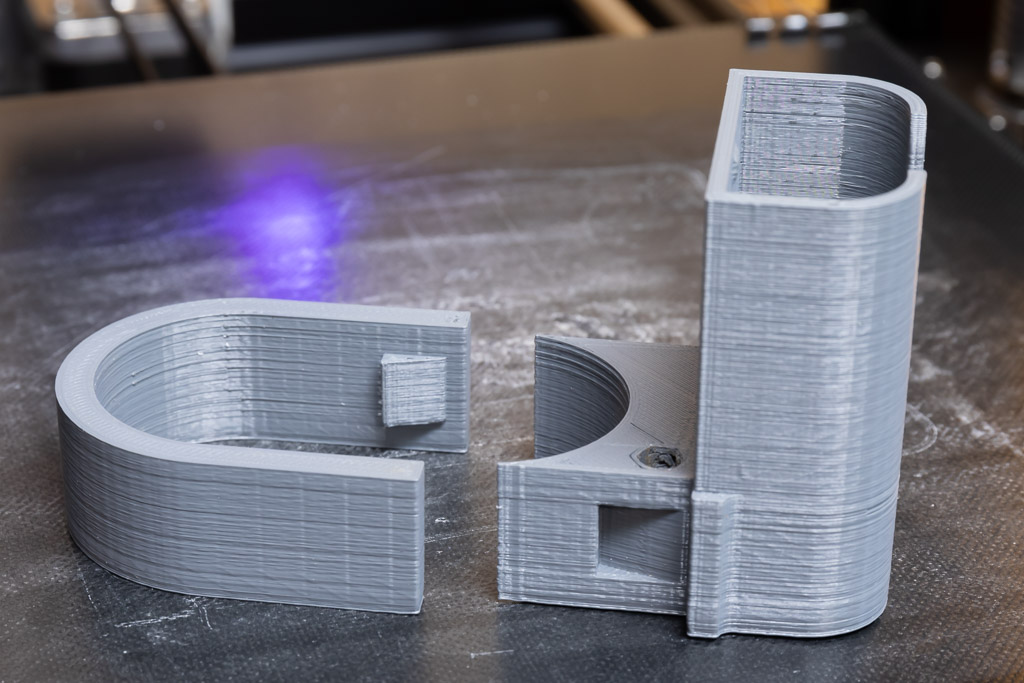
Next, I decided I didn’t want to rely on just printing a sample that came on the SD card, so I set out to design something that I could use in the real world. I found TinkerCad, an extremely easy online CAD design website, and designed a bracket to attach things to my tripod. I first designed a nodal rail bracket, then a battery bracket. I exported these designs as a .stl file. My son later told me that snap-to-fit connections are difficult to design and 3D print and that to accomplish that on a first attempt was fabulous.
Designing was easy; it was the slicing that turns out to be the most difficult. This was partially due to the manual not having some of the information about the printer settings. Kywoo has said that the final manual will have more information. I’m hoping that it also includes more details on some of the software’s menus, as I don’t know what some of them do. It may be more evident to someone that has more 3D printing experience.
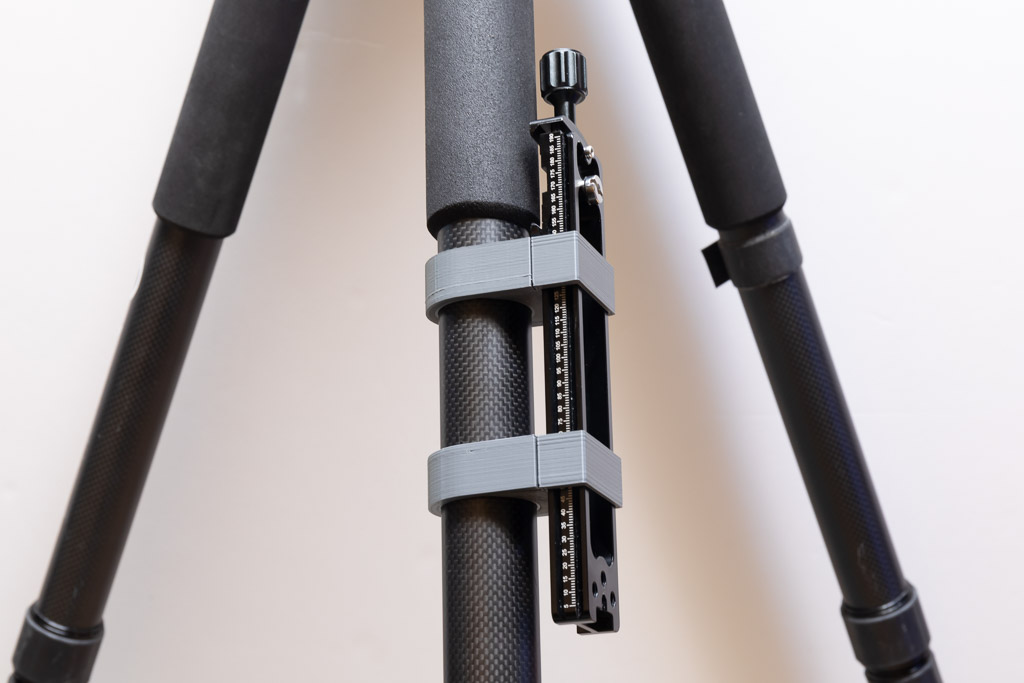
I was able to get the information about the settings to use from a YouTube reviewer, and using Ultimaker Cura I was able to slice the design and export it as a .gcode file for the printer. I was thrilled that my first print of this bracket worked wonderfully. The prints look better in person, I think the camera adds a little contrast, making them appear a little rougher than they are.

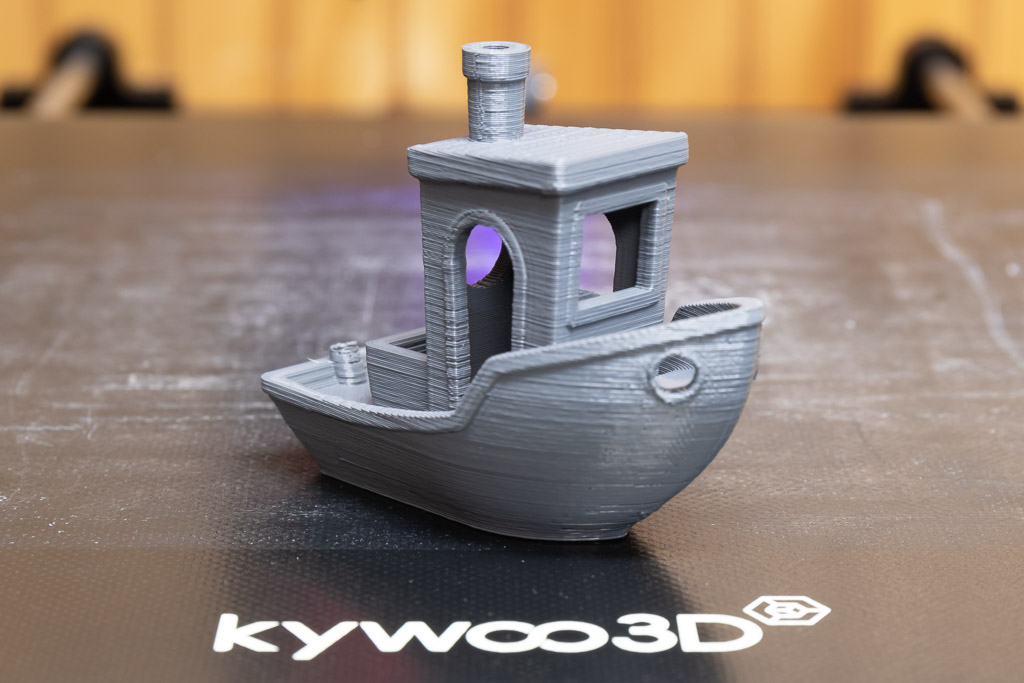
It then occurred to me that I should probably print the well-known 3DBenchy, a 3D benchmark test for 3D printers. 3DBenchy offers a large array of challenging geometrical features for 3D printers. I haven’t printed one of these before, but after seeing some other people’s prints, I can say that it printed almost perfectly.
What I like
- Extremely stable structure
- Auto leveling bed
- Touch Screen
- Print quality
What I’d change
- Manual needs to be a lot better
- Needs a quick start guide
- Glass bed clamps could be better
Final thoughts
My first experience with 3D printing was wonderful, thanks to the Kywoo Tycoon 3D printer’s quality. The prints’ quality far exceeded my expectations, and I’m going to buy another Kywoo Tycoon 3D printer; I like it that much. Kywoo also has a Tycoon Max version of this printer that features a larger 300x300x240mm print bed. Be sure to check out the Kywoo Tycoon Kickstarter page where they have full details as well as other review videos!
Price: $279 to $369
Where to buy: Kywoo
Source: The sample of this product was provided by https://www.kywoo3d.com?sca_ref=487095.mrbU1MeX3e.

HATCHBOX 1.75mm Black PLA 3D Printer Filament, 1 KG Spool, Dimensional Accuracy +/- 0.03 mm, 3D Printing Filament
(as of June 29, 2026 16:59 GMT -05:00 - More infoProduct prices and availability are accurate as of the date/time indicated and are subject to change. Any price and availability information displayed on [relevant Amazon Site(s), as applicable] at the time of purchase will apply to the purchase of this product.)
Gadgeteer Comment Policy - Please read before commenting
I got one thru the Kickstarter. Construction is pretty good. It puts out good parts. It has a kind of tinkerer/DIY feel to it. It came with a few loose set screws so the first prints were a little jagged. They don’t give you instructions for fine tuning, so obscure settings like Z Offset are kind of a trial and error. But for $279, it is an awfully good FDM printer. I got the magnetic plate and flexible magnetic plate, which make it much easier and less janky to use.
I tested the Tycoon v2 and v2 max had a few issues with the machine profiles i fixed them on here https://youtu.be/aKLSbEOMzIk
I have the Tycoon printer it works great. One of the best printers i have used. I make allot of prototypes at work and believe me this is as good as my $5000.00 printer.
Thanks Kywoo for an affordable printer that works like a pro.