
REVIEW – For several years, I was intrigued by everything that I read about 3D printing. In early 2019, I decided to purchase my very first 3D printer. When it arrived, it sat in the box for over a month as I walked by it several times daily and stared at it from a position of intimidation. Eventually, one day I opened the box and set it up. I was both excited and scared. While it did take another couple of weeks for me to try printing, it was such a great experience, that I was hooked. Since then I have tested and used a couple more printers and have become somewhat of a mid-level expert on 3D printing. I now create my own designs and I am pretty good at solving most of the inherent issues that 3D printers present. Now I am interested in the various designs of 3D printers and I am also looking for larger volume printers that will allow me to print larger designs. Enter the Creality CR-10 V2 3D Printer.
What is it?
The Creality CR-10 V2 is a Fused Deposition Modeling (FDM) 3D printer. It is also called Filament Freeform Fabrication, and it is a 3D printing process that uses a continuous thermoplastic material like PLA, ABS, etc. The 3D printer works by extruding the molten thermoplastic material through a tiny nozzle that moves around precisely under computer control. It prints one layer, waits for it to dry, and then prints the next layer on top. Eventually, it mirrors/replicates the 3D design that was input as software into a solid form.
What’s in the box
 1 x Gantry Frame
1 x Base Frame
4 x Pull Rod
1 x Test Roll of Filament
1 x Toolbox (Hex Keys, Wrench, Screwdriver, Spade, Diagonal Pliers)
1 x Spool and Nut
4 x M5x25 Bolt & Lock
1 x Pack of Cable Ties
1 x PTFE Tube
1 x Spool Holder
1 x Nozzle Cleaner
! x SD Card & Card Reader
2 x Spare Nozzles
1 x Limit Switch for Z-Axis
1 x Spare Limit Switch
4 x Live Bolts
3 x Thumb Screws
2 x Spare Blue Clip
1 x Pack of Miscellaneous Accessories
! x User Manual
Design and features
Specifications
Molding Tech: FDM
Printing Size: 300*300*400mm
N.W.: 11.5KG
Printing speed: ≤180mm/s,normal 30-60mm/s
Precision: ±0.1mm
Layer thickness: 0.1-0.4mm
Nozzle Diameter: Standard 0.4mm
Nozzle Number: 1
Hotbed temperature: ≤100℃
Working Mode: online or SD slot offline printing
File format: STL\OBJ\AMF
Slicing software: Cura\Repetier-Host\Simplify 3D
Operation system: MAC\Linux\WindowsXP\Vista\7\8\10
Power supply: AC Input 115V/230V Output:24V
Power rating: 350W
Auto-leveling: Optional
Filaments: PLA/ABS/PETG/TPU
Filament diameter: 1.75mm
Features
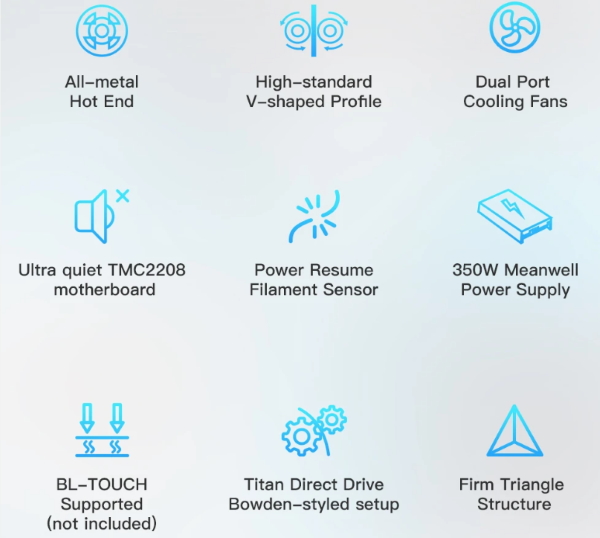
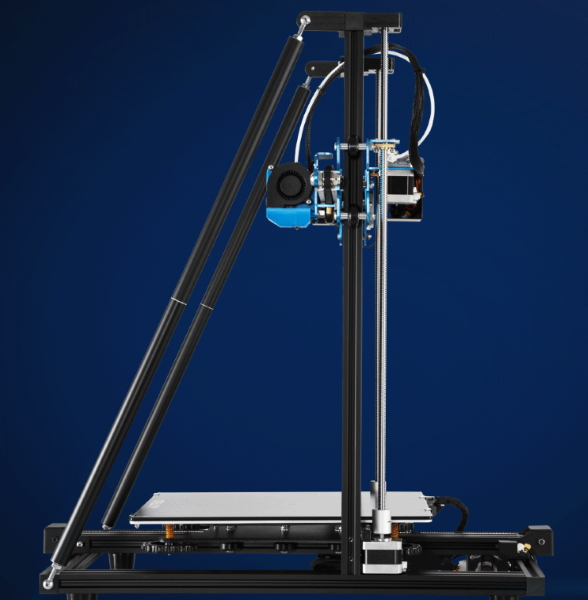
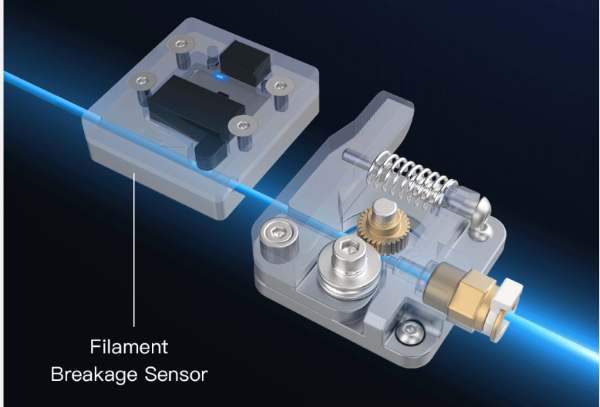
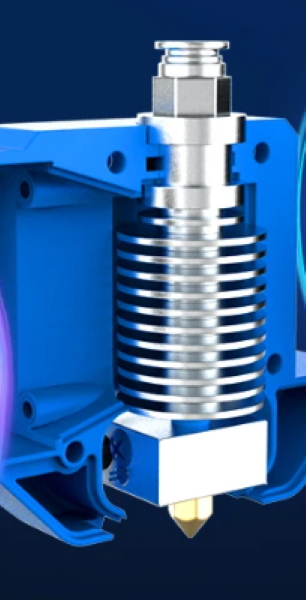
The Creality CR-10 V2 is an all-metal frame design with additional frame supports and a heated bed, a Bowden extruder, a filament sensor, a Carborundum glass platform, and an all-metal Hot End.
Rigid Frame with supports and Carborundum glass platform
Bowden Extruder and Filament Sensor
All-metal Hot End
Putting it together
The 3D printer arrived in a large brown box, and all of the parts were neatly and carefully packed.
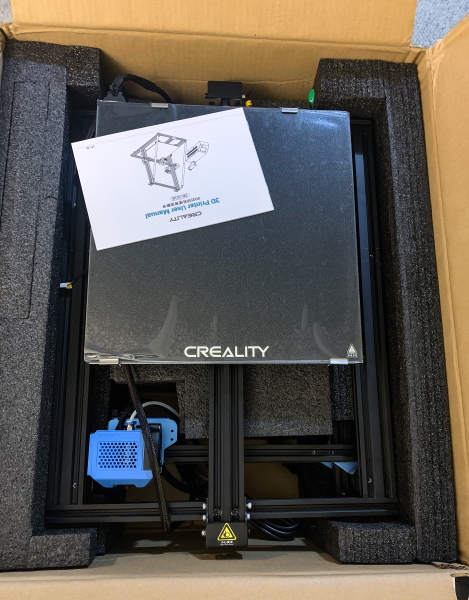
After taking all of the parts out of the box, I laid them out on a table and I was ready to start assembly.
The assembly took about 30 minutes. The following is a slideshow of the various stages of assembly:
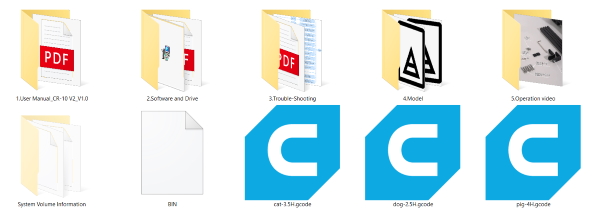
The included SD Card contained all of the necessary software including the manual, and a few test models for printing.
Performance
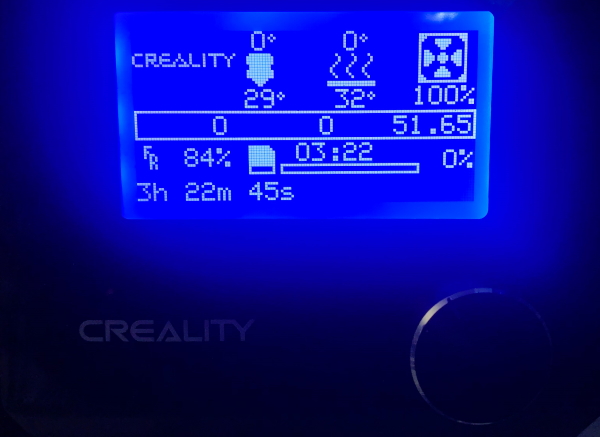
Once the printer is assembled and all of the cables are properly connected, you only need to turn it on, level the heated bed, tweak other settings such as the bed temp and nozzle temp, etc, as desired and you are ready to go. There are many videos on YouTube to explain how to level the bed so I will not go into that in this review. Since I have experience with 3D printers and with Creality printers, I have already created my methodology on how I like to level the bed. This printer does not have Automatic Bed Leveling built-in, so it is important to learn the manual method and to take your time when leveling. Once I finished that step, I accessed the settings using the knob dial and set my desired temperature for the PLA filament and heated bed. It is important to note that the test files that I used had the recommended temperature already saved as a part of the gcode file. The gcode file is the output file format from the slicing software. For those that do not know, 3D models are usually designed in CAD software and then imported into a Slicing software to be edited and compiled for your specific printer and output in the file format that is required for printing. While in the slicing software, you are able to adjust numerous values including setting temperatures, the density of printed wall and layers, selecting printing supports for the model if desired, choosing print quality, etc. Creality includes the Creality Slicer software on the SD Card, but I normally use either Cura or Simplify3D. Just FYI, I use Tinkercad or Fusion360 to create my original designs or to modify existing designs. There are also several websites that offer free already designed 3D objects in STL file format which is easily imported into the Slicing software. Thingiverse is one of the most popular websites.
The following is a short video of the printer working to print a design. It does so layer by layer.
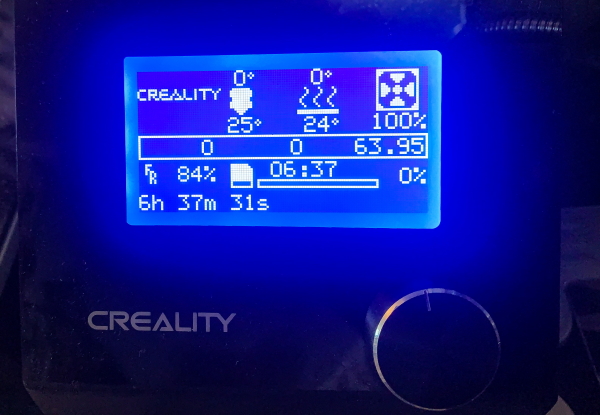
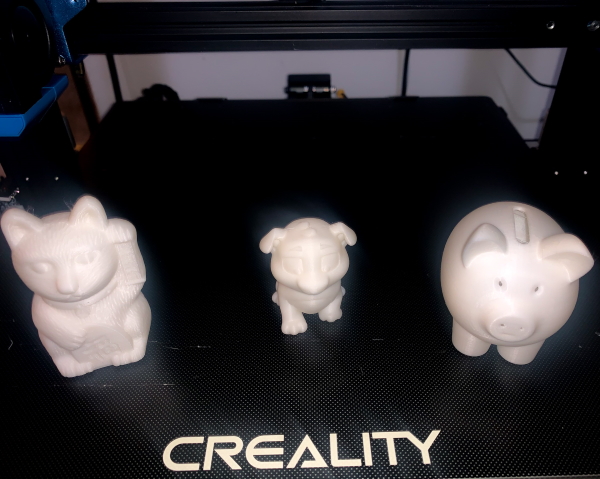
The first test model that I tried was the miniature pig piggy bank. It took 6 hours and 37 minutes to print. It is important to note that the time to print is controlled by the design and settings. These models were set to print slowly and in detail.
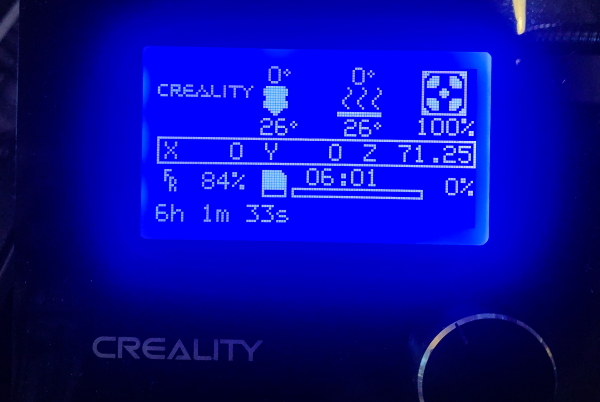
The second test print was the test cat model. It took 6 hours and 1 minute to print.
The last of the 3 test models was the test dog. As shown below, it took 3 hours and 33 minutes to print.
Here are the 3 consecutive test models that were printed. They were almost flawless. and any very slight imperfections can be fixed by tweaking the settings.
What I like
- The build quality
- The ease of assembly
- The ease of use (A basic understanding of 3D printers and printing is required)
- The almost 100% silent operation
- The quality of the prints it can produce
- The separate power supply (This has Pros and Cons)
- The number of upgrades available both hardware and software including printable upgrades
- The availability of replacement parts should they be needed
What I’d change
- The interface on the power supply should be a touch screen
- The separate power supply requires more space for the printer to occupy
- While I prefer to level the bed manually, I know many folks would prefer Auto Bed Leveling to be a standard feature
Final thoughts
Since I already own a Creality 3D printer, I had already established some requirements and expectations for this model in order to be impressed. This Creality CR-10 V2 is well built with a large print volume and includes several key design features, like the silent and isolated motherboard and power supply, the reliable Bowden extruder, and the easy to navigate controls. The ease of assembly, all-metal frame, and heated bed are also desired features. While I am not a fan of the turn knob control panel, ultimately this is a really nice printer that produces really nice and detailed prints. And, that is the ultimate goal. I am very much looking forward to getting my hands on their newest model/design. Overall, I give this C-10 V2 a well done and two thumbs up!!
Price: $499
Where to buy: The Creality website and Amazon
Source: The sample for this review was provided by Creality.

ESR for MagSafe Wallet, 5 Card Holder with RFID Blocking, MagSafe Sticker Included, Slim Magnetic Wallet for iPhone 17e/17/16/15/14/13/12 Series and Selected Samsung Devices, Not for 13/12 Mini, Black

Gadgeteer Comment Policy - Please read before commenting
Great. The quality seems very nice right out of the printer.