REVIEW – Not long after having reviewed the original Aeropress Coffee Maker, I was provided the opportunity to review a pre-release sample of AeroPress Go Travel Coffee Press, a product billed as being more lightweight, compact and portable than its predecessor. Having been very impressed with the original Aeropress, the idea of Aeropress Go immediately appealed to me. Let’s check it out. Gadget on!
What is it?
AeroPress Go is a press-style coffee maker that works by utilizing a plunger mechanism, similar to a large syringe, to force water ahead of a pocket of air through coffee grounds, producing low-acidity coffee that can be used to make several types of coffee drinks. AeroPress Go is just as easy to set up, use, and clean as the original, yet is even more compact, lighter weight, and portable.
Packaging
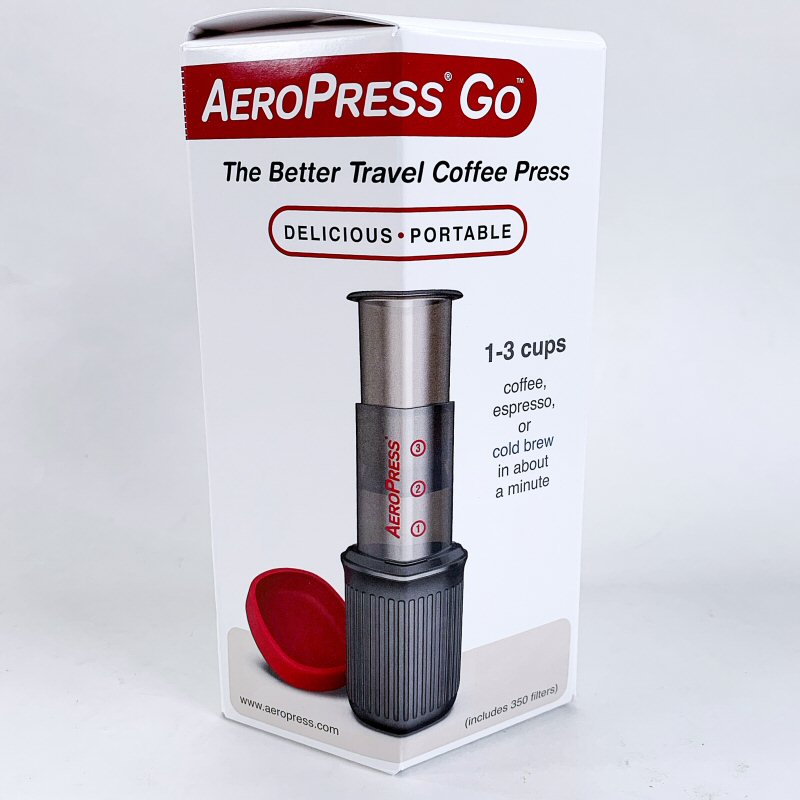
AeroPress Go’s box is shown above. I like that it’s compact and made of recyclable cardboard.
What’s in the box?
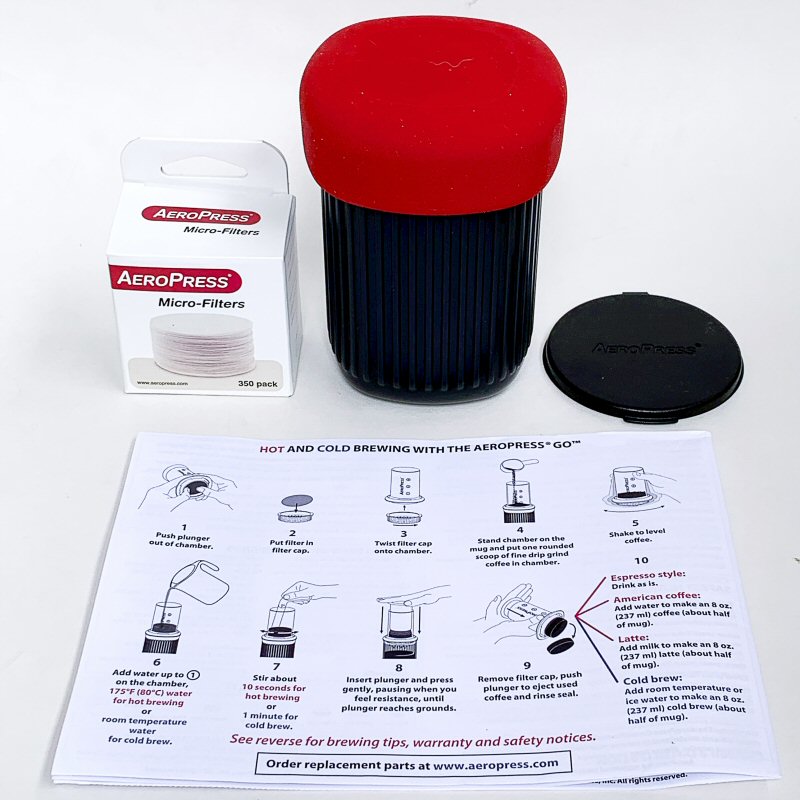
The items that I initially removed from the Aeropress Go’s box are shown above. From top left to right, they are:
- Box of 350 micro-gilters
- Aeropress Go (with all parts inside the drinking mug/carrying case)
- Filter holder
- Instruction booklet

Aeropress Go’s English instructions are shown above. This is actually one page of a sheet that includes instructions in multiple languages.
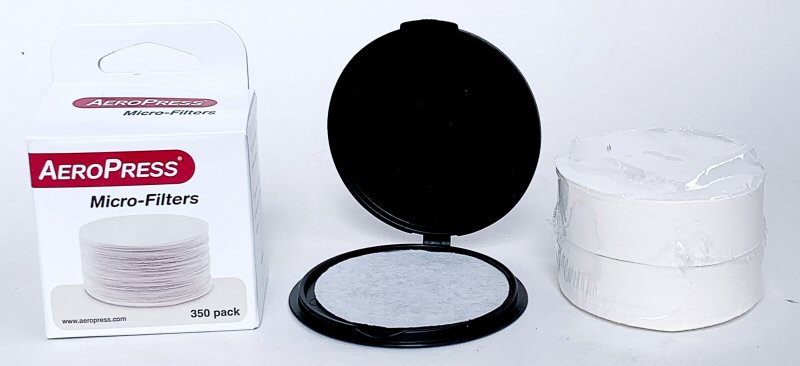
AeroPress Go includes a box of 350 micro-filters as well as a thin Filter Holder case in which you can place and protect about 20 filters for storage or transport.
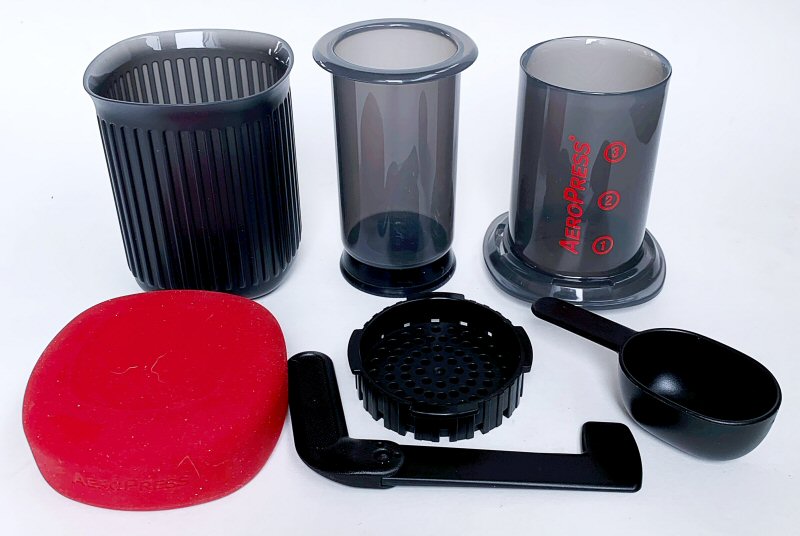
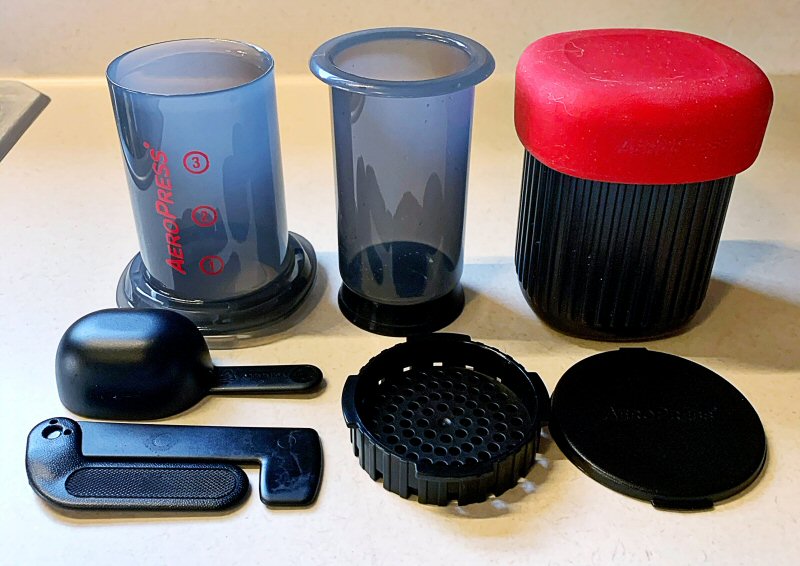
The main AeroPress Go parts are shown in the photo above, and are listed in the order as shown in the photo above starting at the top left and moving to the right. Note that all of the items in the photo immediately above fit inside the carrying case/drinking mug.
- Drinking mug/carrying case
- Plunger
- Chamber
- Carrying case cap
- Folding stirrer
- Filter cap
- Scoop
Hardware specs
- Chamber & plunger = Polypropylene (BPA free)
- Plunger seal = silicone
- Location of manufacture = USA
Setup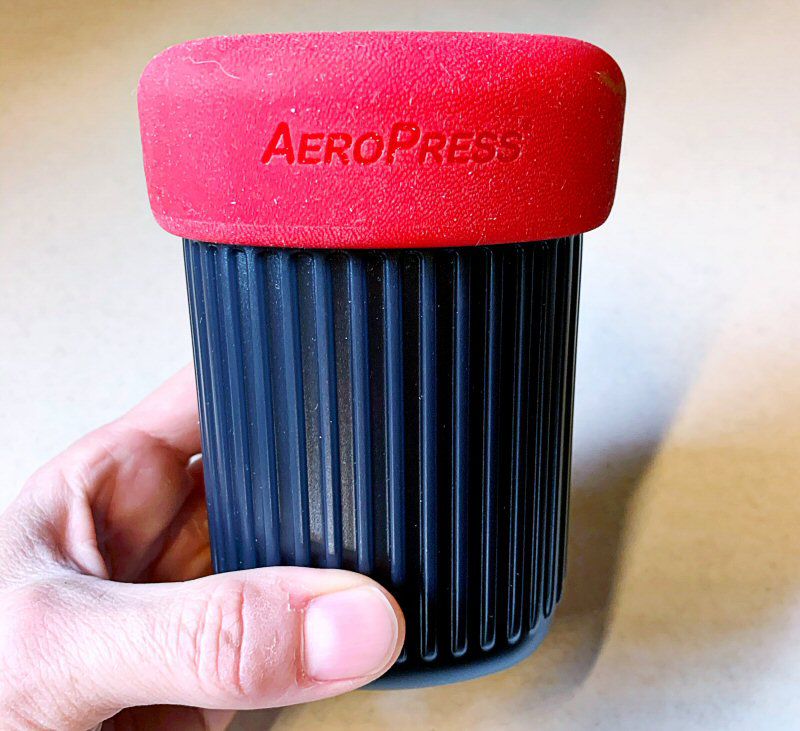
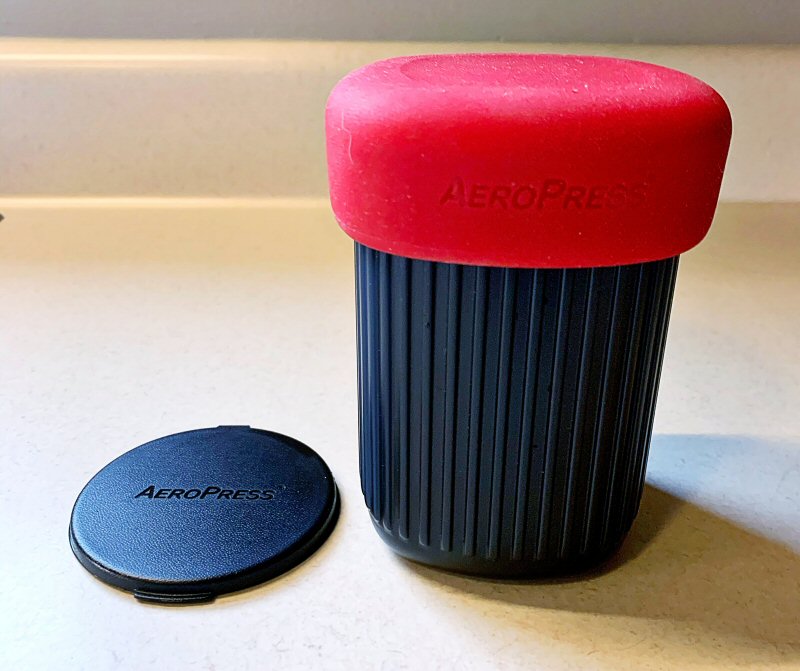
One of the features that I really like about Aeropress Go is that (almost) all of its parts fit into the carrying case/mug with its soft, flexible cap that provides a decent seal. Though I have to say that I thought the whole thing would be a bit smaller based on the photos I saw online. It also did not escape my attention that this resembles a miniature trash can. 😉

The items above are the parts you will need to brew a cup of coffee with Aeropress Go, but first I’ll describe the initial setup.

AeroPress Go requires only a few setup steps and very little setup time. First, twist the filter cap about a quarter turn counter-clockwise to remove it from the end of the chamber, then place a single micro-filter into the filter cap, as shown above.
Then, simply place the filter cap (with micro-filter now placed inside) back onto the end end of the chamber, align the tabs and cutouts, and give it about a quarter-turn clockwise to lock it in place.

With the micro-filter in the filter cap and the filter cap locked onto the end of the chamber, you are ready to move on to the actual brewing steps.
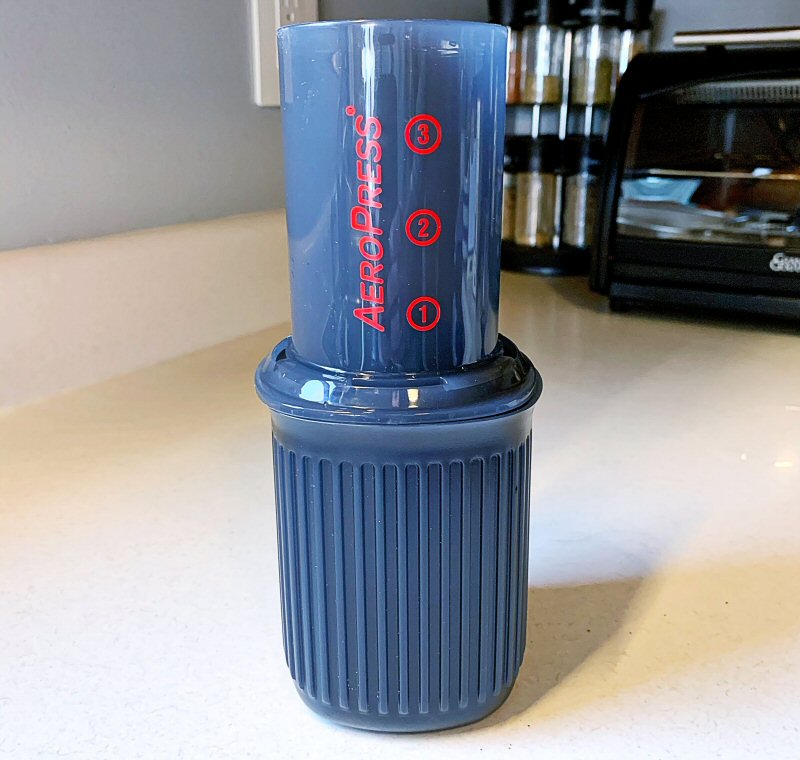
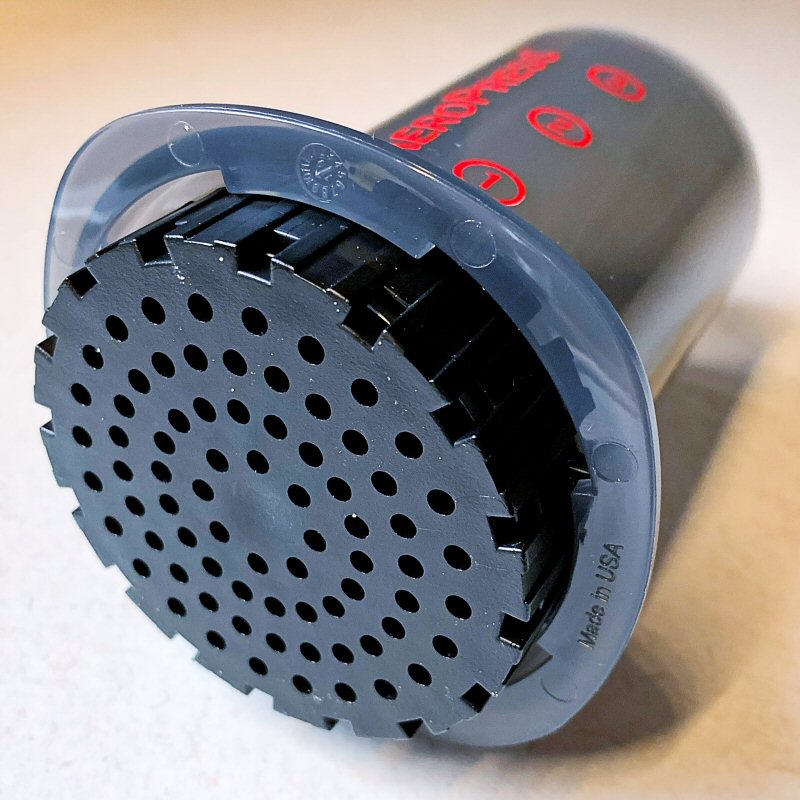
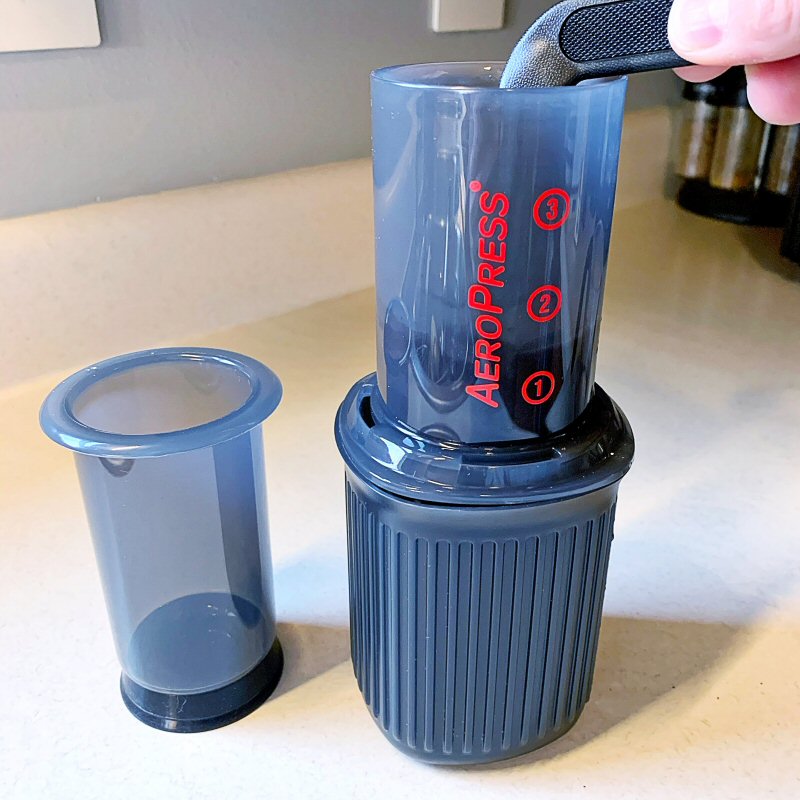
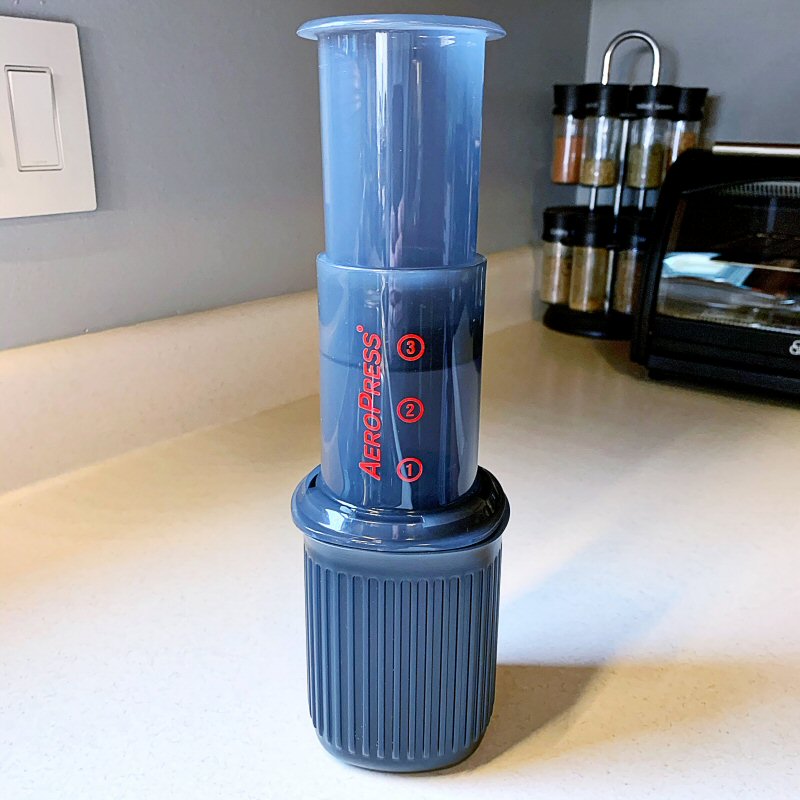
The chamber is placed atop the carrying case, which now becomes a handy mug from which you can enjoy your brewed beverage.
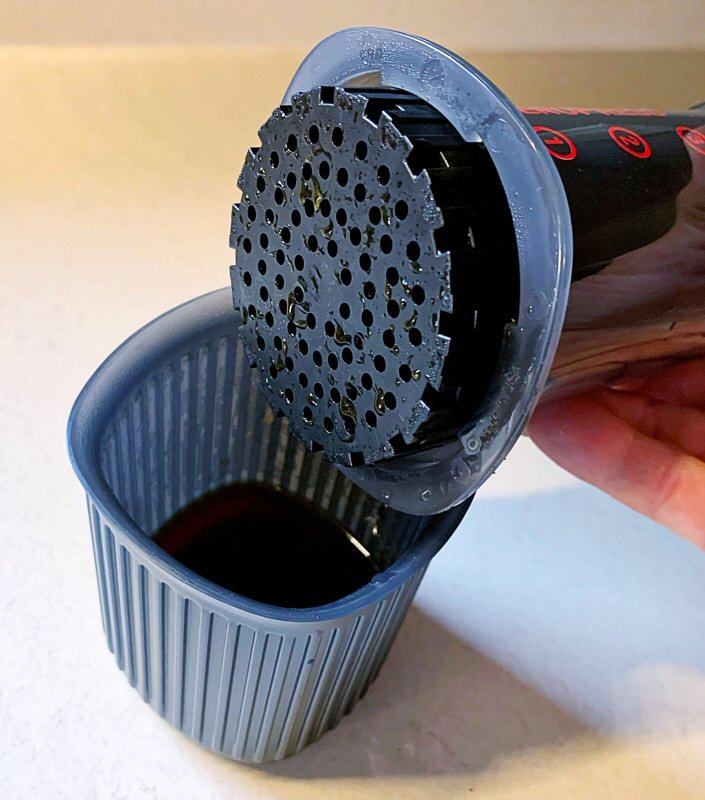
As seen in the image above, the flange feature located at the base of the chamber fits perfectly with the lip at the opening of the mug.
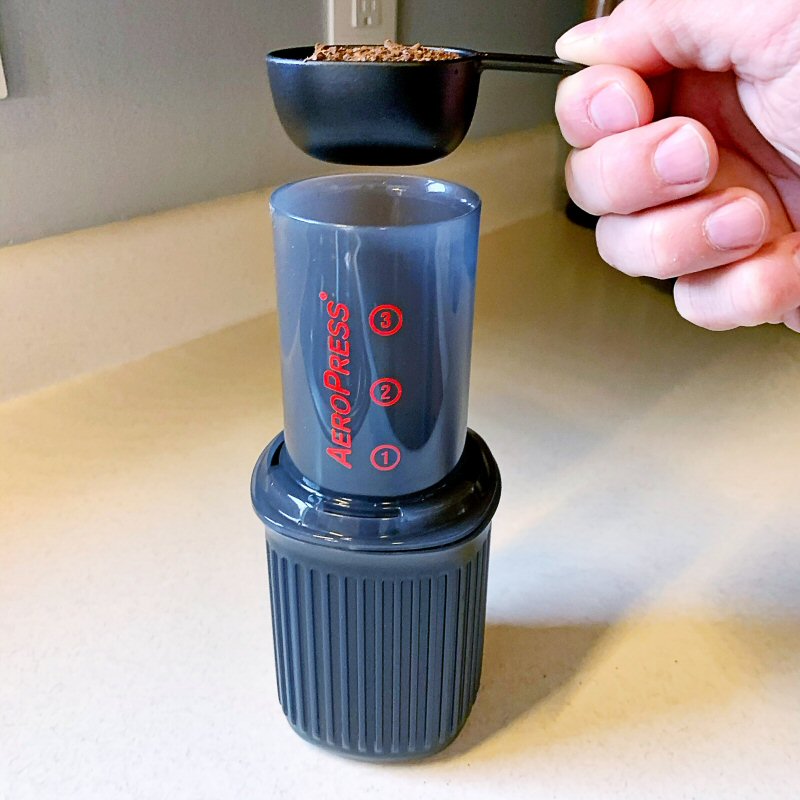
For a single 8-ounce cup of coffee, place a heaped scoopful of finely-ground coffee into the chamber, then give the chamber a slight shake to level out the grounds.
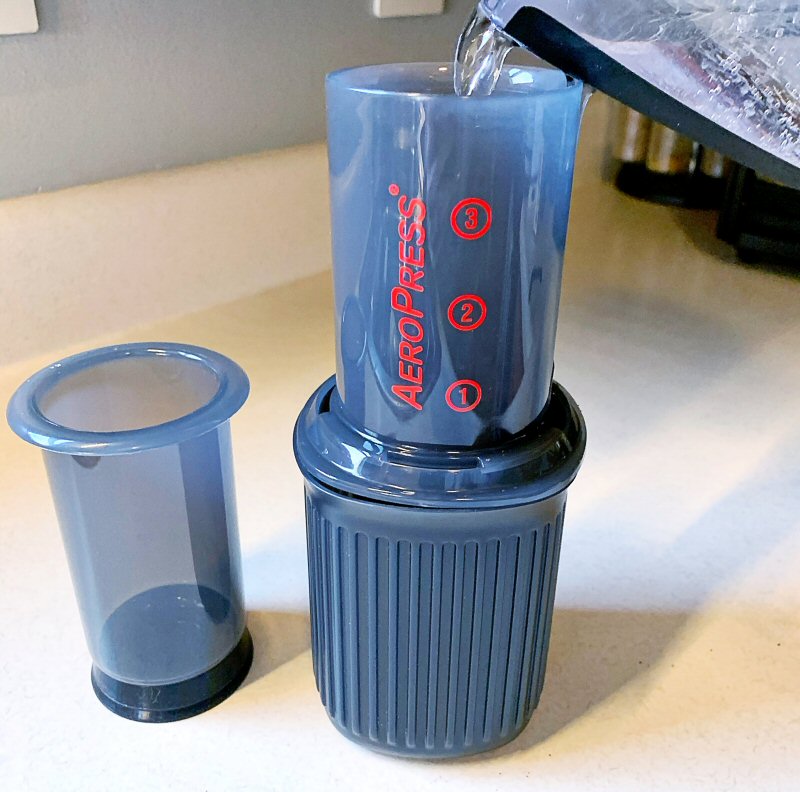
Next, water heated to 175 degrees F is poured into the top of the chamber. According to AeroPress, a panel of experts has determined that 175 deg F is the optimum temperature for your AeroPress hot coffee brewing experience. For cold brew coffee, simple add room-temperature tap water instead. To prepare 1 cup of coffee, the instructions advised filling the chamber with water to the marked “1” level.
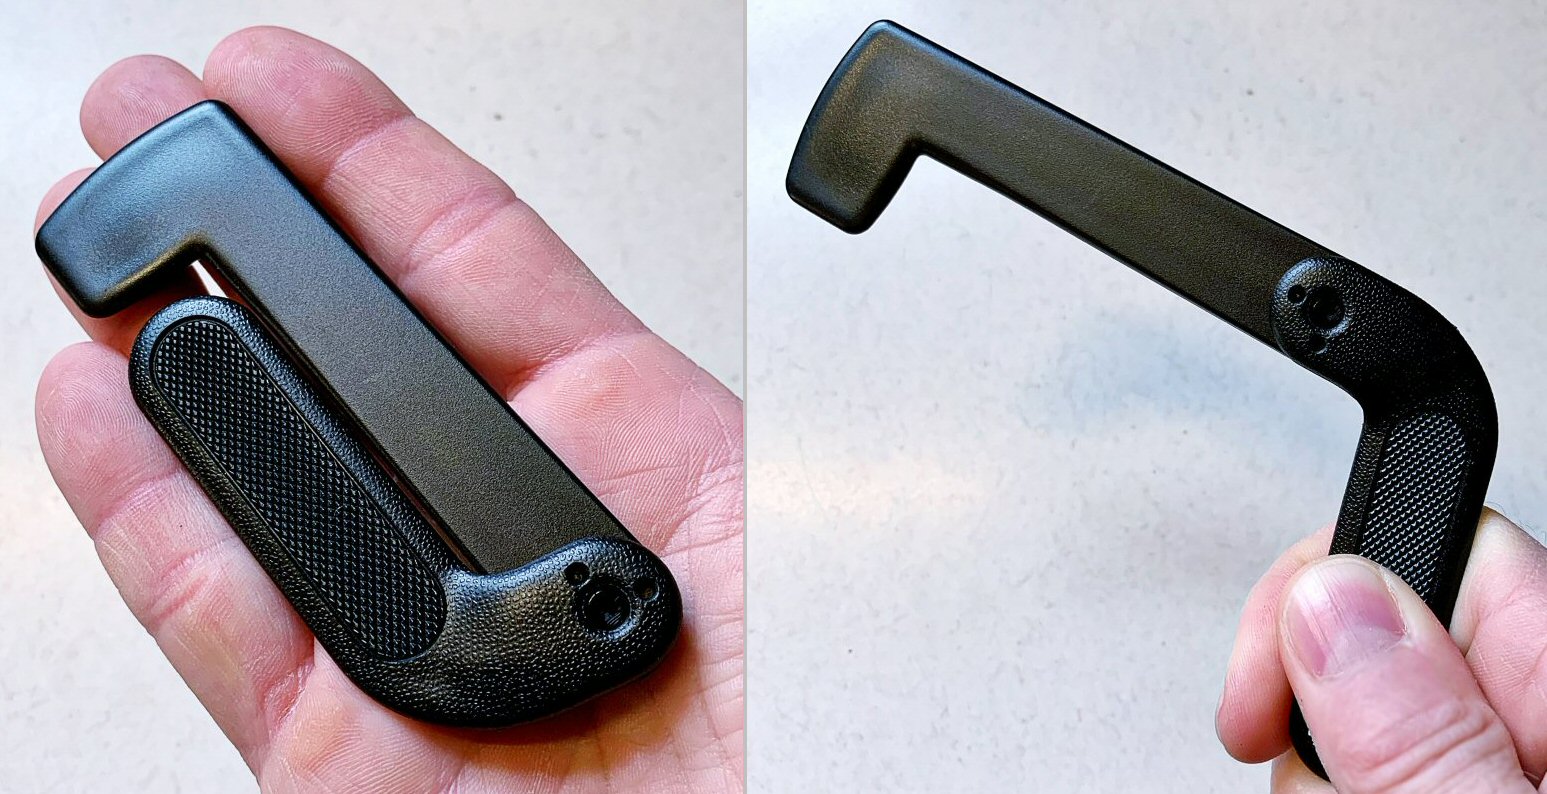
One of the clever features of Aeropress Go is the folding stirrer, which folds open for stirring, and folds back down (and snaps in place securely) to help it fit inside the carrying case/mug for storage or transport.
The folding stirrer is used to stir the coffee and hot water for about 10 seconds for hot brew coffee. For cold brew coffee, stir about 1 minute.
Having stirred for the specified time, the plunger is placed in the chamber and all is ready for my favorite part.
Next, the magic: pressing slowly but firmly downward on the plunger. The chamber and plunger essentially act as a giant syringe, with the air trapped in the chamber being used to force the hot water through the coffee grounds, brewing the coffee. While pressing, at a couple of points I encountered a slight resistance, so per the instructions, I paused briefly, then resumed pushing downward carefully but firmly. There is something oddly satisfying and fun about pressing the plunger and hearing the brewed coffee drip down into the mug.
Once I had advanced the plunger down to the level where it reached the top of the coffee grounds in the chamber and the plunger ceased to advance, I gave it a bit more of a gentle push, then lifted the chamber from the mug to reveal several ounces of concentrated, espresso-style coffee, which was quite tasty on its own. Very smooth, yet very strong and bold. Aeropress claims that the coffee brewed with this device produces coffee with very low acidity, and based on the taste, I believe that claim.
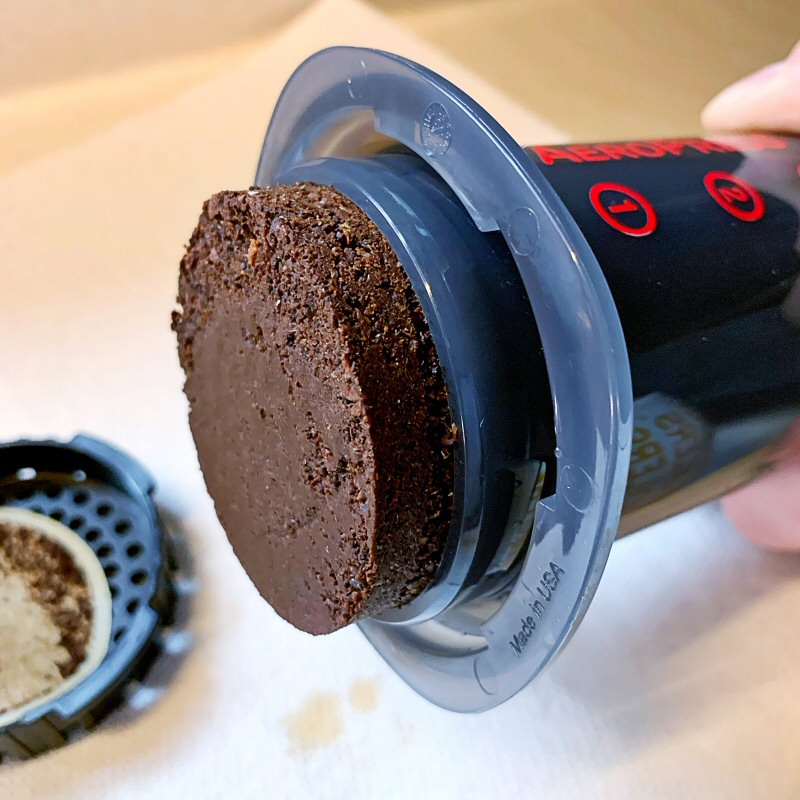
Giving the filter cap a counter-clockwise quarter twist to remove it from the end of the chamber reveals the coffee grounds, now compressed at the bottom of the chamber, with the compressed grounds essentially forming a coffee “puck.” Giving the plunger a little push further into the chamber shoves the puck of grounds off the end of the plunger and they fall off easily. If done carefully, you can aim for the trash can and have little to no required clean-up. Very efficient.
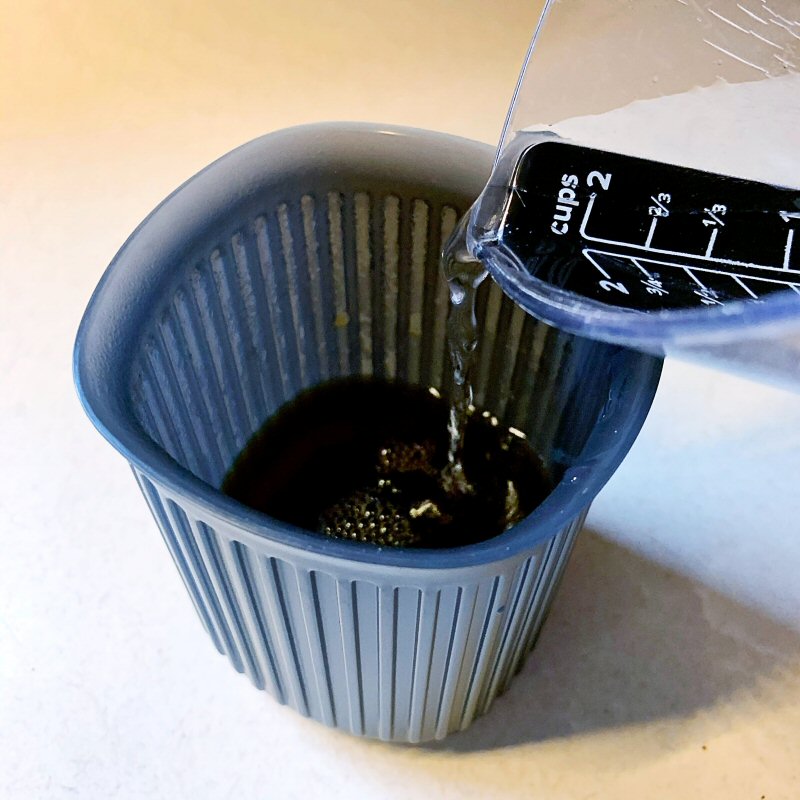
While the initially-brewed coffee is more of a concentrated espresso, which is fully drinkable on its own, I’m not much of an espresso drinker myself, so I followed the suggestion in the instructions, adding a bit more hot water.
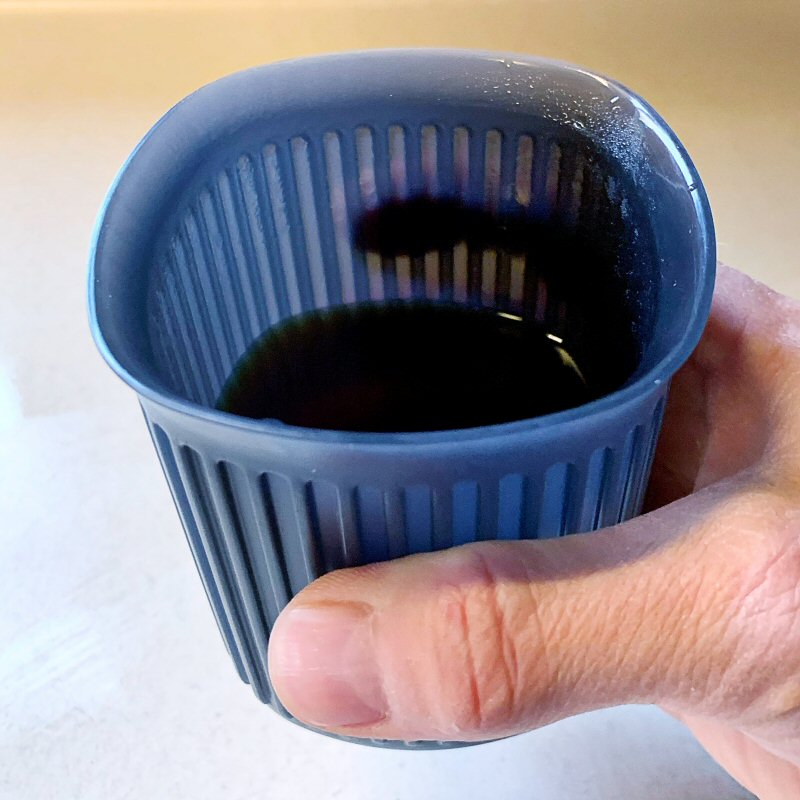
Boom! A great-tasting cup of coffee! And I do mean great-tasting! Full-bodied, rich, smooth, with almost no acidic bitterness. And the steps above, including microwaving the water for 1.5 to 2 minutes to heat it to temperature, only took about 5 minutes.

AeroPress Go is quite simple to clean, since all of its parts easily disassemble from each other and are both hand and machine-washable.
Aeropress Go essentially packs down to the items you see in the photo above, which makes it quite compact for travel, and I could see it being great for camping or outdoor adventures, though I didn’t have an opportunity to use it in that capacity (perhaps this could be a future update to this review). I did experiment with placing the filter case inside the carrying case/mug, but the red cap didn’t seem to fit quite as snug when I tried this.
Simplicity and durability are two of AeroPress Go’s great features: there just aren’t that many parts to fumble around with, the parts fit together easily, and all components are very stout and well made. Since I’ve been using AeroPress Go, I’ve found that I actually like it even better than the original AeroPress, which I was very impressed with. Aeropress Go’s smaller size and more compact design make it even better, at least for my usage.
Comparison to the original
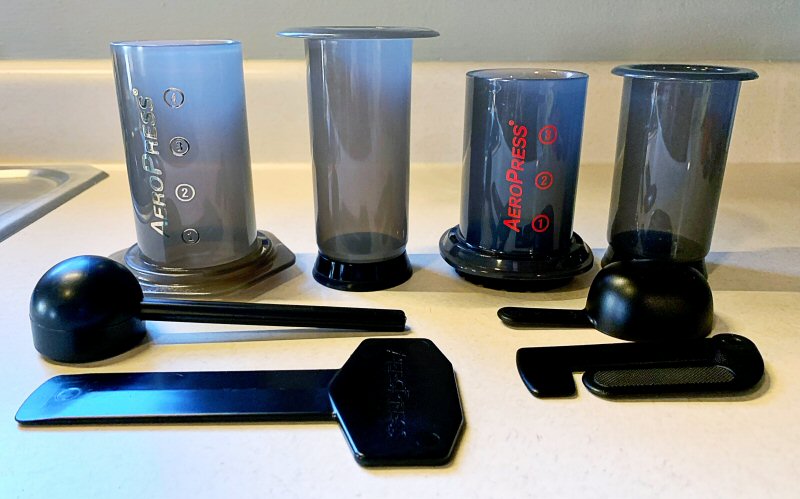
For anyone curious about how Aeropress Go compares to the original Aeropress, the above phone shows the main components of the original Aeropress on the left, and the comparable components of Aeropress Go on the right. The Aeropress folks have made the Aeropress Go’s chamber and plunger slightly shorter and wider and made the scoop and stirrer shorter and narrower. These changes all contribute to Aeropress Go being more compact and portable than the original, which I already felt was quite compact already. EDIT November 22, 2019: The Aeropress folks pointed out that the dimensions of the original Aeropress and the Aeropress Go are actually more similar than I thought. The inner diameter of the chamber, the outer diameter of the plunger, and the filter caps of both versions are the same. The main differences are that the Aeropress Go has a shorter height of both the chamber and the plunger and slightly narrower flange near the base of the chamber, all of which make Aeropress Go just a bit more compact and portable than the original version.
What I like
- Simple, easy, and quick to set up and use
- Brewed coffee has great flavor—very low bitterness
- Versatility in types of coffee that can be brewed
- Very easy cleanup
- Small, compact, lightweight, and very portable
What I’d change
- Maybe allow just a bit more space inside the carrying case/mug to fit the filter case, so that all of the items can fit inside
Final thoughts
Like the original AeroPress, AeroPress Go is a very cleverly simple (and fun) device to 0perate and produces a remarkably good-tasting cup of hot or cold brewed coffee in just minutes. It is simple to set up, quick and easy to clean and is very affordable. AeroPress Go is actually even more well-suited for me than the original, because of its smaller size and better portability.
Price: $31.95
Where to buy: Amazon
Source: The sample of this product was provided by AeroPress.

Google Review Tap Cards (3-Pack) by TapFive - Tap for Instant Reviews - All Phones Compatible - Reusable Smart Tap NFC & QR - Boost Business Reviews - Powered by TapFive (3 Card Pack)
(as of June 18, 2026 19:23 GMT -05:00 - More infoProduct prices and availability are accurate as of the date/time indicated and are subject to change. Any price and availability information displayed on [relevant Amazon Site(s), as applicable] at the time of purchase will apply to the purchase of this product.)
Gadgeteer Comment Policy - Please read before commenting
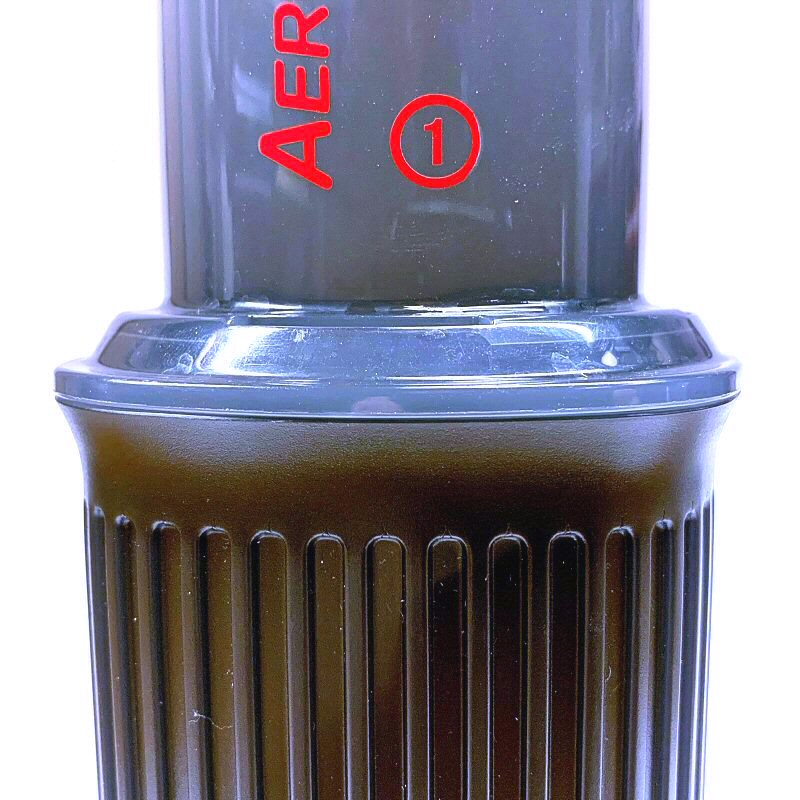
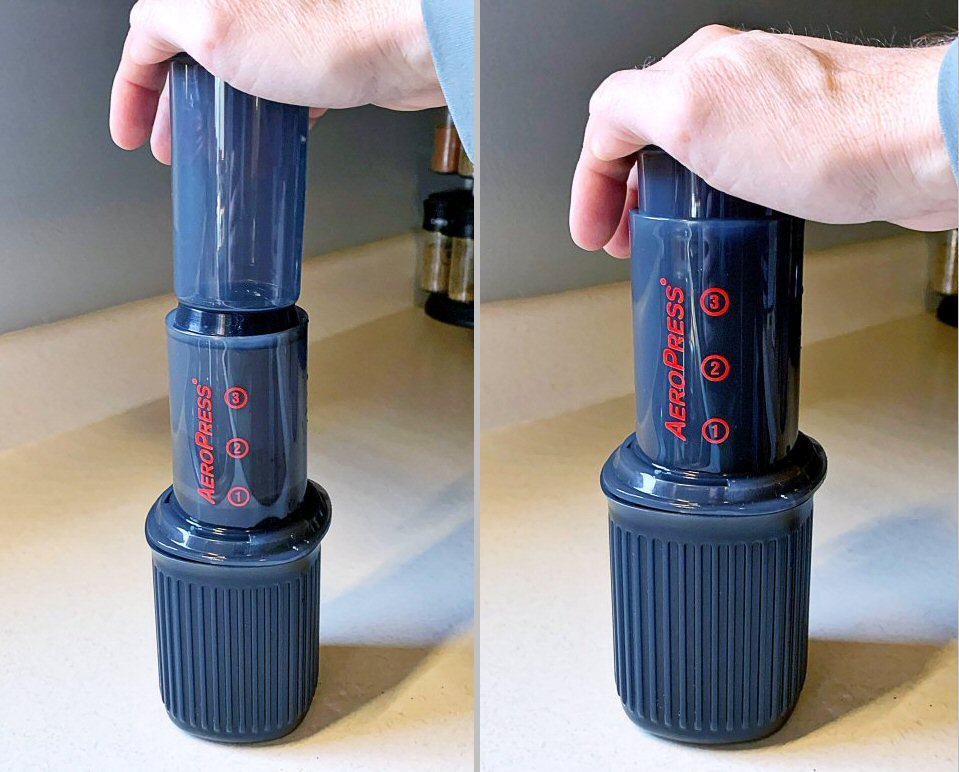
Interesting – when used with its own cup, does the filter end fit snugly enough into it to prevent the side-squirting I sometimes get plunging my original into a coffee mug or measuring cup?
Yes it does. I added an image above to illustrate this.
Nice! I may replace my original for that feature alone.
Yea helpful article. I own and love the Aeropress Original. The one question that I had about the Go was that I have heard the complaint that even the Original is fairly small in terms of how much it can brew, so to make it smaller does seem a bit counter intuitive. Have you found capacity to be an issue?
The chamber does have slightly less capacity, but for my own brewing, I’ve not found this to be an issue. However, this may depend on how you tend to brew your coffee.