As a product reviewer, the pictures that I take of the products that I’m reviewing are almost as important as the words I write about those products. The old adage “a picture is worth a thousand words” is still true and I want my pictures to be as good as they can be. I’ve been using a Canon 70D DSLR and a Canon Speedlite flash for years but now I’m actually switching over to using my Pixel 2 XL as my main camera and the SHOTBOX is going to make that transition much easier. Let’s take a look.
What is it?
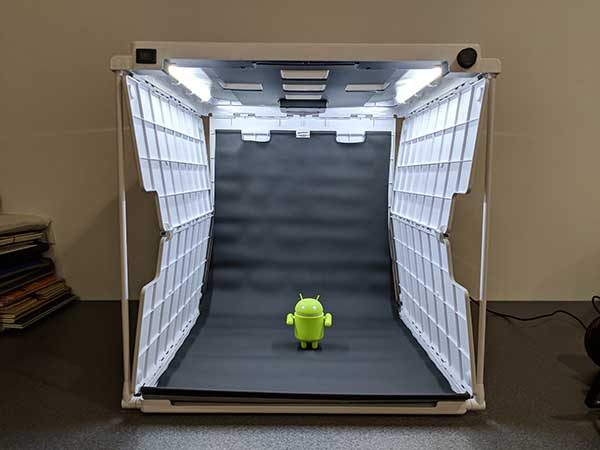
SHOTBOX is a portable and collapsible photography light box that has been designed to be used with your smartphone.
What’s in the box?
I was sent the SHOTBOX Deluxe Bundle with the SideShot, Backdrops and Deluxe Tote, a PANELS Complete set,
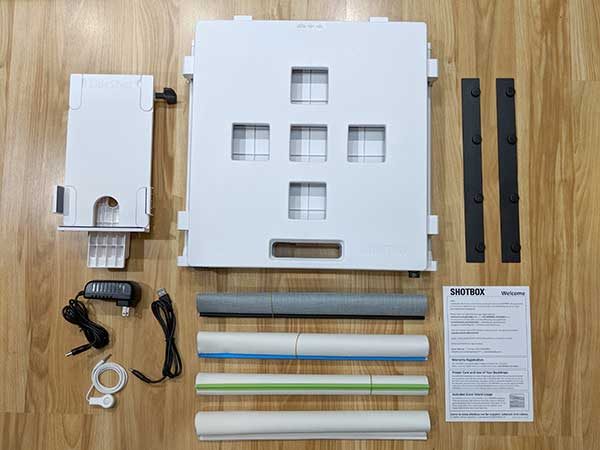
SHOTBOX light box
SideShot smartphone holder
4 backdrops
2 glare strips
Smartphone shutter release cable
USB to power cable
AC power adapter
Instructions
Also included is black/white reversible floor panel.
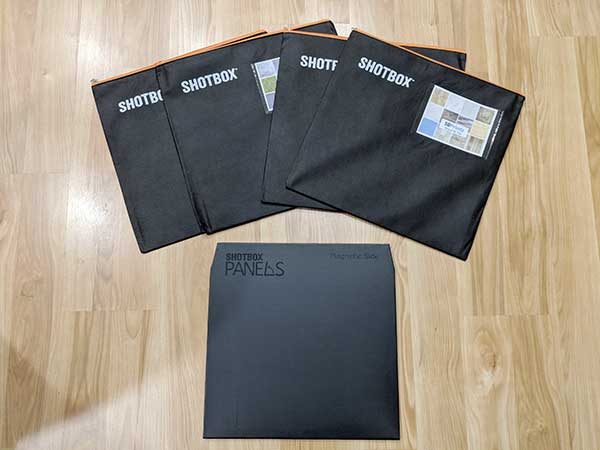
The PANELS Complete set includes:
Magnetic base unit
12 Hematite magnets
4 panel sets that are separated into zippered storage sleeves
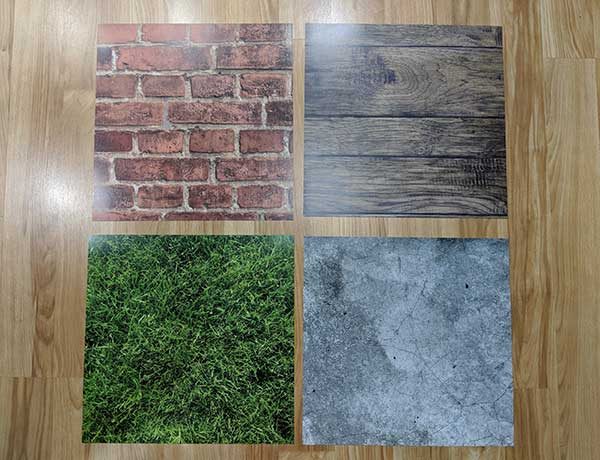
The panels include a variety of different textures and colors like you see above. They really help you get different looks for your product shots.
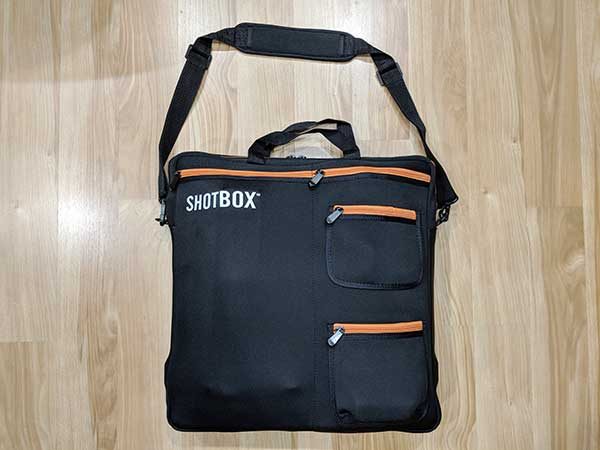
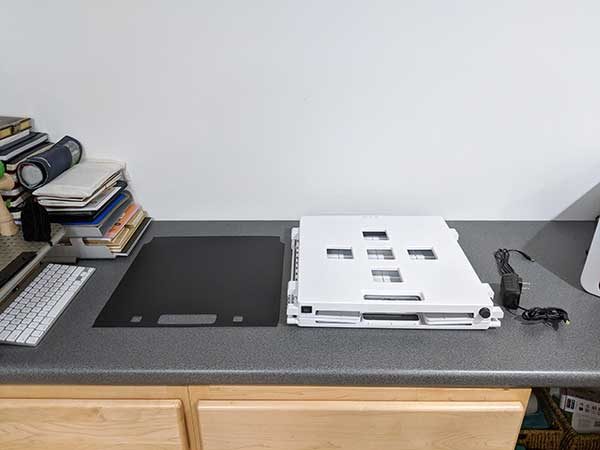
The deluxe carry tote is an awesome neoprene bag that has zippered pockets for everything that you see above except for the PANELS sets.
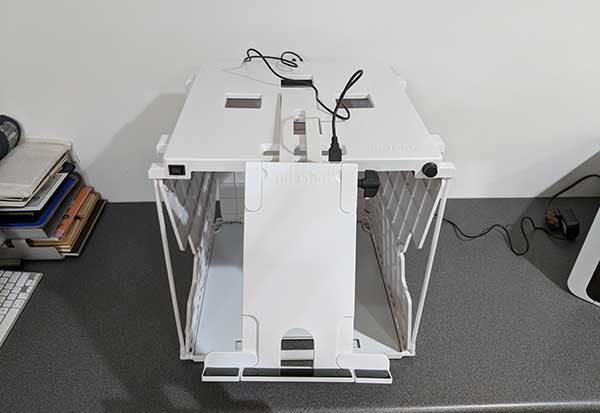
Setting up the SHOTBOX
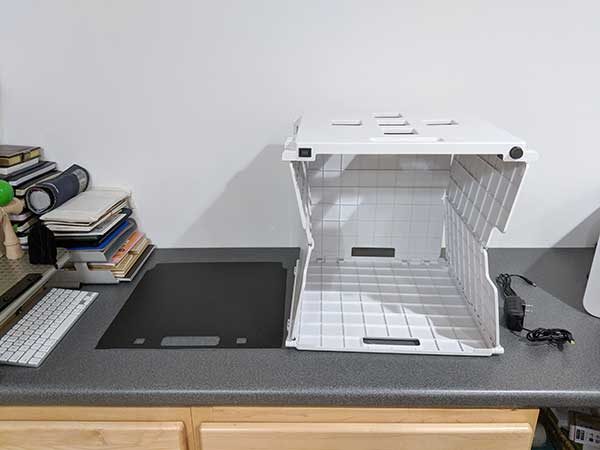
The heavy duty plastic SHOTBOX is easy to setup because all you really have to do is lift up on the top and reach inside to position the back panel into the slots on the bottom.
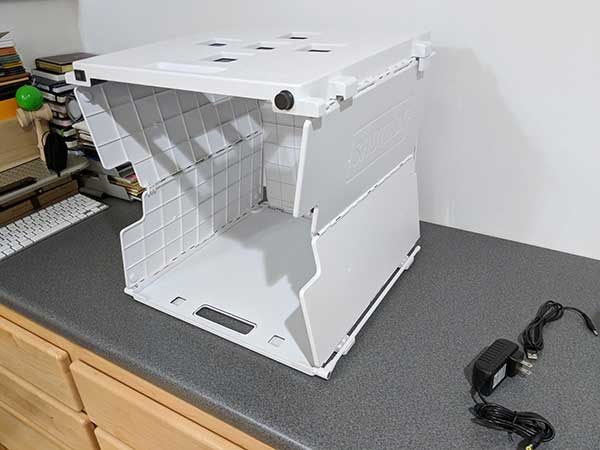
The next step is to lift the support legs on each side to secure the box.
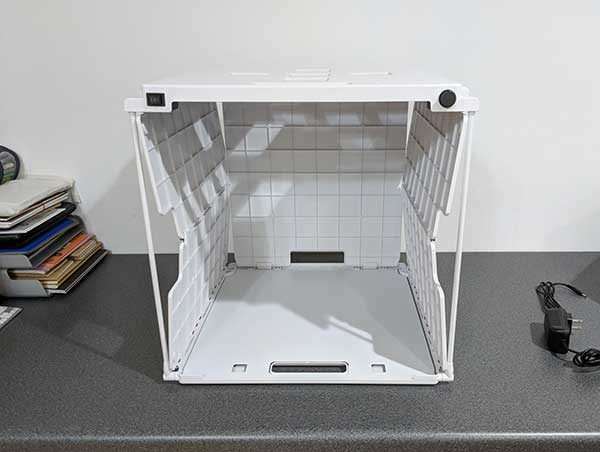
You can then slide in the reversible floor panel that has a white and a black side. In the image above, I have the white side up.
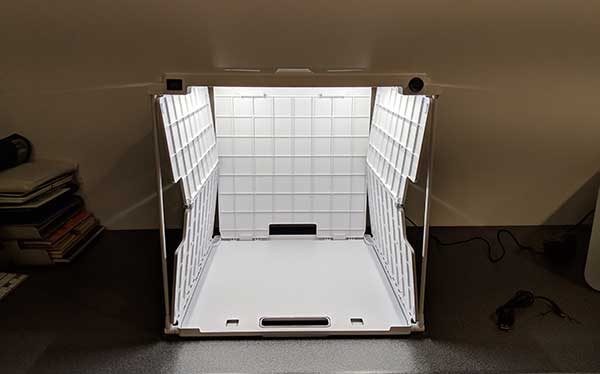
All that’s left to use the basic functionality is to attach the included AC adapter and flip the switch on the right to either have the left LED light strip on, the right LED light strip on, or both on.
Then the knob on the right will let you control the brightness. This knob also doubles as the power switch.
The LED lights strips are very bright and have a 50,000 hour lifespan which equals about 22+ years of use using the box for 6 hours a day.
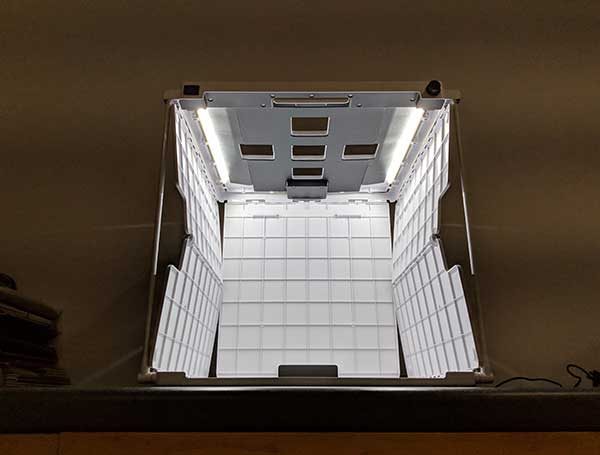
At this point, you can start using the SHOTBOX to take product shots by placing the product inside the 14.25 wide x 15 tall x 15 inch deep box and shoot pictures either straight into the box from the front or from the top through one of the openings.
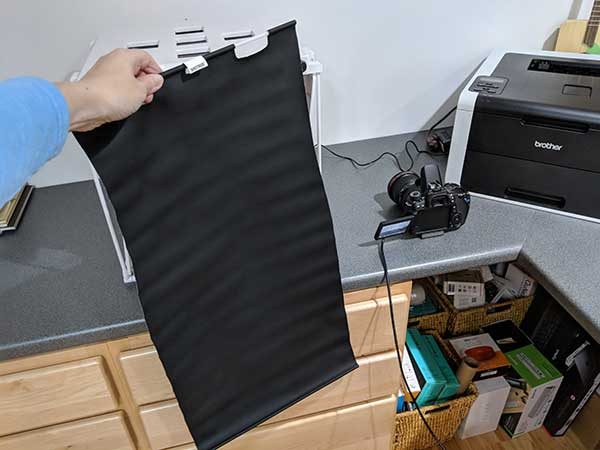
But to make the background look seamless, you will want to use one of the included backdrops.
The backdrop hooks to the back wall of the SHOTBOX to cover the back and the bottom like you see above.
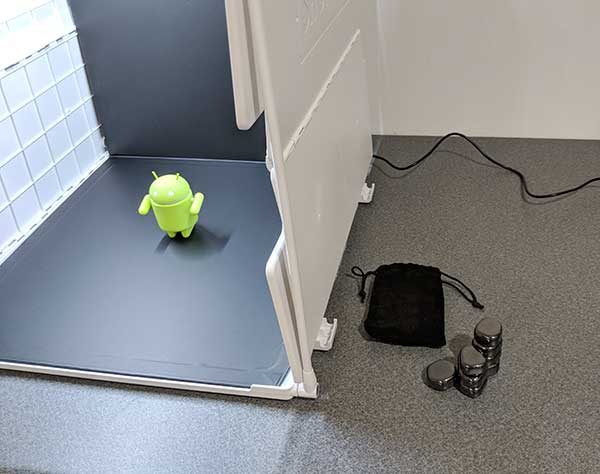
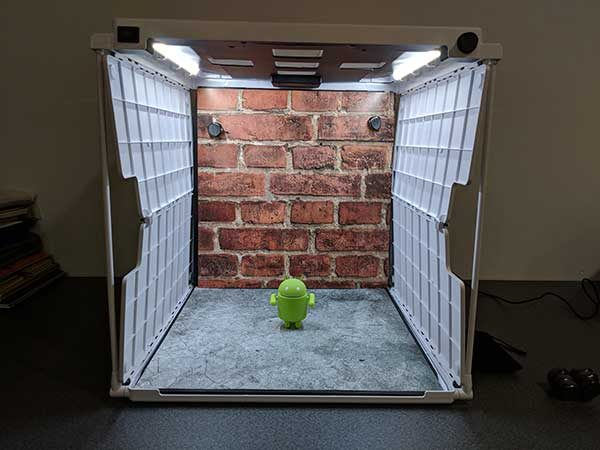
If you want to create an even nicer background, you can buy the optional PANELS set which comes with a folding magnetic panel that slides into the SHOTBOX. Then using the included magnets, you can use a panel on the back and a panel on the bottom to create the look you want.
In the example above, I used a concrete panel for the floor and a brick panel for the back wall.

Here’s the resulting image. Very cool right?
Your options are almost limitless using all the different panels.
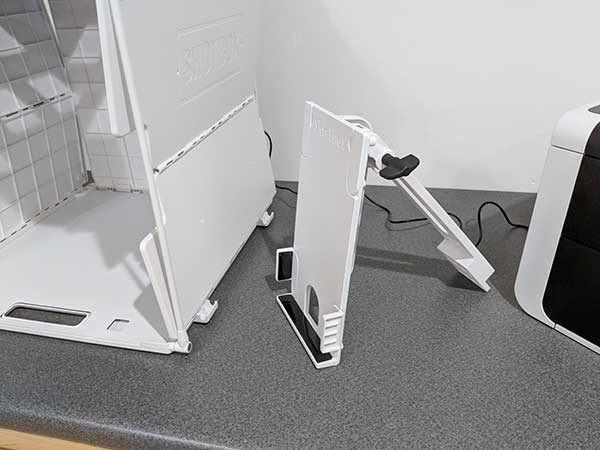
But wait, there’s more! You can also use the SideShot which is designed to hold your smartphone.
The SideShot has a support arm that fits into one of the openings on top of the SHOTBOX and then you can use the side knob on the SideShot to adjust the angle.
The included USB cable connects from the SideShot to the back of the SHOTBOX to provide power to the SideShot. Why does the holder need power you ask?
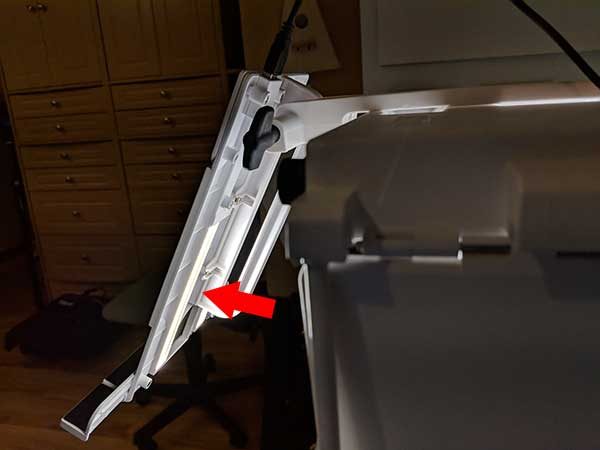
Because it lights up too! The SideShot has two LED strips of its own that shine into the SHOTBOX to provide more light on the product that you’re photographing.
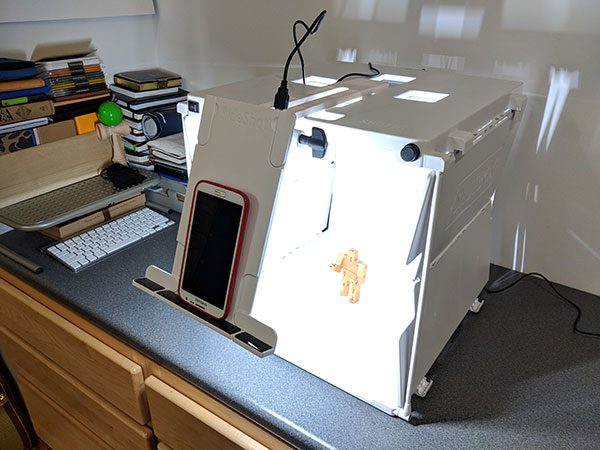
When the SideShot is in position you can then place your smartphone upside down or sideways on the SideShot ledge so that the main camera points through the opening that looks into the SHOTBOX.
Here are some product shots that I’ve taken with the SHOTBOX and my Pixel 2 XL.
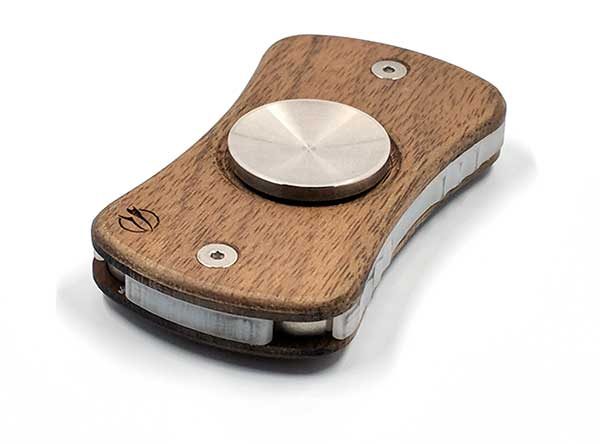


The first shot above of the fidget spinner was touched up in Photoshop to adjust the white balance and crop. The other two shots were straight out of the camera, so you can see that there can be some shadows that may or may not need to be cleaned up. But there is a way to minimize or even prevent shadows and glare, which is important if you use the SHOTBOX to take pictures of documents.

The SHOTBOX does a great job if you need to take pictures of documents. To do this, you just place the document on the bottom of the box and then use your smartphone or camera to shoot straight down from one of the openings on the top of the box.
You may run into glare issues from the side LED strips like you see in the image above.
To fix that, you can use the included glare strips which are magnet strips that you place over the LED light strips inside the SHOTBOX. These strips will cause the resulting image to be darker, but you can fix that with some post processing in Photoshop or even in your camera app.
What I like
- Well made
- Lots of features and add-ons
- Easy to adjust LED light strips
What needs to be improved
- None
Final thoughts
I won’t beat around the bush, I love the SHOTBOX. It’s allowed me to simplify my photography setup so that I no longer need a DSLR. The SHOTBOX is easy to use, folds down and can be stored when I don’t want to leave it set up on a desk, and just plain works great. I have tried another small light box, but the SHOTBOX is the one to get if you’re serious about document scanning and small object photography.
Updates 01/16/18
by Larry Geisz
So, after reading Julie’s review on the SHOTBOX I figured it was time for me to up my picture taking game leading me to buy a SHOTBOX. I went to Amazon and purchased the SHOTBOX bundle (this came with everything Julie reviewed except the Panels and Smartphone Shutter Release Cable) for $164. After seeing how Julie had hers set up I figured I would share how I set mine up.
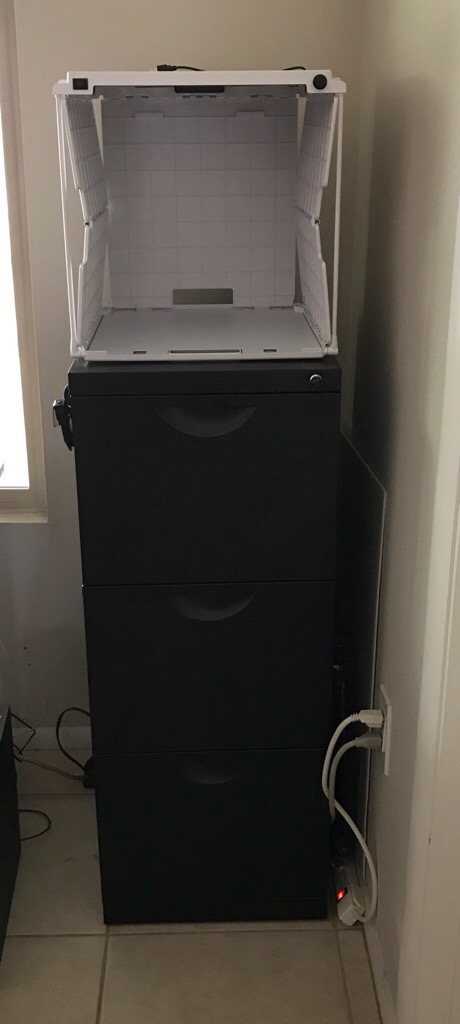
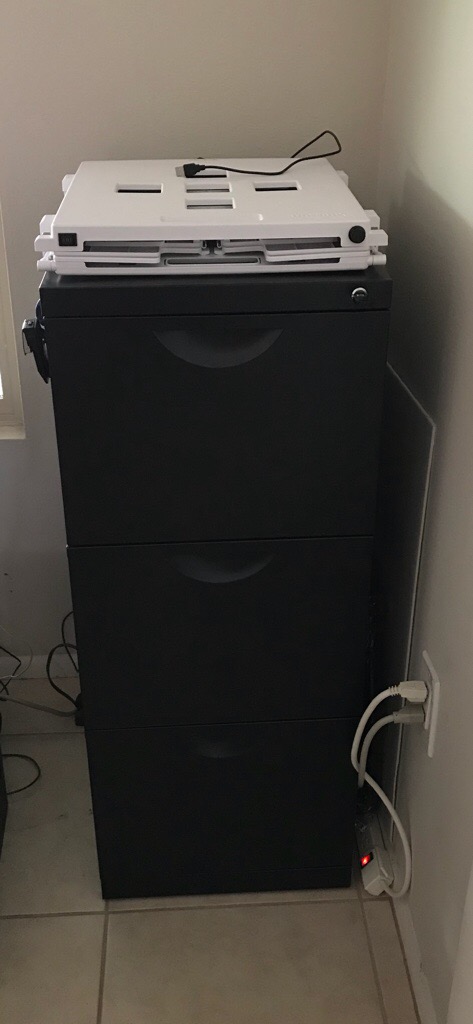
Previously when I would take pictures for my reviews I used a the top short two drawer file cabinet and a pair of “true light” fluorescent bulbs for my base. I set everything up on a large white storyboard and usually used a green felt mat for some color. Although this worked okay for me with my new SHOTBOX I wanted to make picture taking a little easier. With that in mind, I looked for a way to raise the base height of my 22 1/2” to about 36” or more. My solution is another file cabinet from IKEA. Although I thought 36’ would be a good height my current 41” base height is even better. I can shoot images almost straight on with no or very little bending. The only issue I will have is when I want to do overhead shots. For this, I have a 3 step stool that will allow me to see straight down into the floor of the SHOTBOX. I could also just place my SHOTBOX on the ground to take overhead shots as it is made to be portable. I have attached two pictures showing how my set up looks. Please enjoy.
Update 10/17/18
I have been using this photography studio box several times a week for almost a year now and I just love this thing. It helps me keep my product review shots looking great with little effort. I also enjoy switching between all the different colored backdrops and the panels. Next to my camera (the Huawei P20), the SHOTBOX is the most important tool in my toolbox that I hope makes my reviews standout by providing great photos of the products I write about.
Update 7/12/20
After almost 3 years, the Shotbox continues to be one of my most used gadgets when it comes to taking product shots for my reviews. The only thing that would make it better would be to add some more backdrops for even more variety. Otherwise, it works great and helps my pics stand out.
Update 10/7/21
Another year has gone by since I originally posted this review and I continue to use the Shotbox almost daily. I like everything about this product. I guess the only thing that could make it even better would be a bigger one for larger products!
Price: $109.00 for just the SHOTBOX, $290.50 for everything reviewed here
Where to buy: Amazon
Source: The sample for this review was provided by SHOTBOX.

Now retrieving an image set.
2-Pack LED Video Light Kit, NiceVeedi Studio Light, 2800-6500K Dimmable Photography Lighting Kit with Tripod Stand&Phone Holder, 73" Stream Light for Video Recording, Game Streaming, YouTube
(as of July 14, 2026 14:09 GMT -05:00 - More infoProduct prices and availability are accurate as of the date/time indicated and are subject to change. Any price and availability information displayed on [relevant Amazon Site(s), as applicable] at the time of purchase will apply to the purchase of this product.)
Gadgeteer Comment Policy - Please read before commenting
Did you receive compensation, of any kind, for your post about the Shotbox?
As listed in the review, they provided the sample. But they did not pay me to write the review. I continue to use this product several times a week for small product photos for other reviews.
I take photographs of printed photos. Will this work well for this?
You might have an issue with the built-in lights glaring on photos if they are glossy photographs.
A fun little tidbit of information. They’ve stiffed a lot of their overseas funders on Kickstarter. If you go to their 2.0 version on there people have been waiting for 2 1/2 years without no refunds or Shotbox. T
I have the shot box and have used an iphone 7 and 11 with it. I take lots of pictures of jewelry. I have a problem that when using the provided white backgrounds, pictures come out with a light blue background, not white. Do you have a fix for this?
Pat, that’s a white balance issue and is a big reason why I stopped using white backgrounds on my images. I always had to fix the levels for each image in photoshop. Do you use photoshop to post process the images? If so, just go into the levels, click on the white eye dropper and then click on the image where the color should be white.
Amazon no longer stocks this little gem, but Michael’s craft store has a Memory Keepers version that is almost identical. I had a Flashery lightbox ans hated it from the word go. Love this and all the backgrounds. Playtime!
Do you need a shot box if you have a very good photographic programme on your computer? I am thinking of buying one for my son who is a ‘professional amateur’, very good photographer, he photographs scenery, wildlife and sports (roller derby) among other things.
Daphne, A Shotbox makes taking product shots easier. It’s not a mandatory photography accessory. It’s just a tool to make taking some shots faster/quicker and well lit.