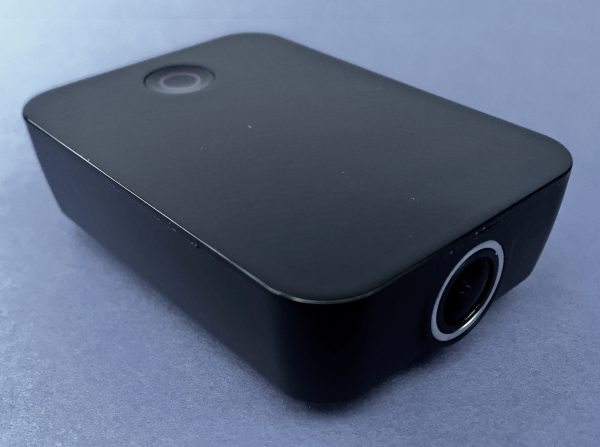
If you have been following any of the Tour de France as it rounds its way through Europe, you have seen a segment or two captured by a handlebar, helmet or seat mounted GoPro. These shots often capture the essence of the race: clearly depicting the speed, endurance, congestion and competitive nature of the event. But not everyone can afford to mount a GoPro to their bike, and if there are other things mounted to the handlebar, then perhaps the GoPro may not fit. MiniWing has just completed an Indigogo campaign to launch the Camile R100, a sports camera and GPS enabled bicycle computer all-in-one. Read on to see what I think!
The Camile combines a 140° HD camera, a GPS computer and a high contrast display in a form factor designed to be mounted to a handlebar. The fact that this device combines so many diverse technologies makes it an example of a convergent device. Another example of a convergent device is a smartphone. The picture below illustrates that 36 years ago before smartphones were invented, if you wanted to listen to music or radio, watch TV, record/playback video or type you would need a bunch of different devices.

These days you can do all of this and more with a smartphone. The smartphone may not offer the quality or full-feature set of comparable standalone devices, and this is the most typical drawback of a convergent device. The Camile definitely has some drawbacks too and I’ll explain why below.
Unboxing
The Camile is made in China and I wouldn’t be surprised if it were manufactured by Foxconn, the manufacturers of the iPhone. My suspicion in based on the fact that the box and packaging for the Camile is almost identical to the iPhone 5.
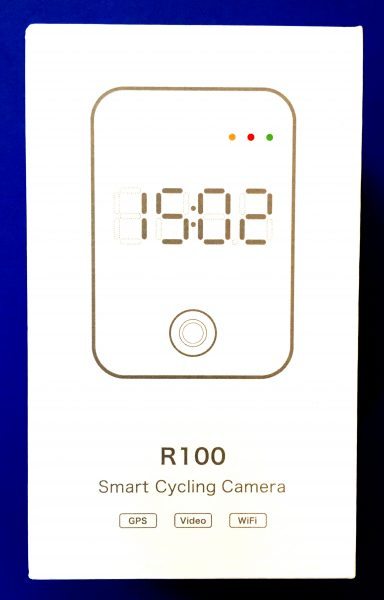
The unit comes in a thick, white cardboard box. Opening the box reveals the unit, with a plastic cover screen protector in a plastic bed liner, resting above the handlebar mount and microUSB packaged below. The rendering of the unit on the box cover, as seen above, is very similar to the design of the iPhone 5 box.
The plastic cover screen protector is also informative. These are, sadly, perhaps the best set of instructions for the unit outside of the app. The website has a button to download a manual, but it links you to the top of the page on which the button is located. 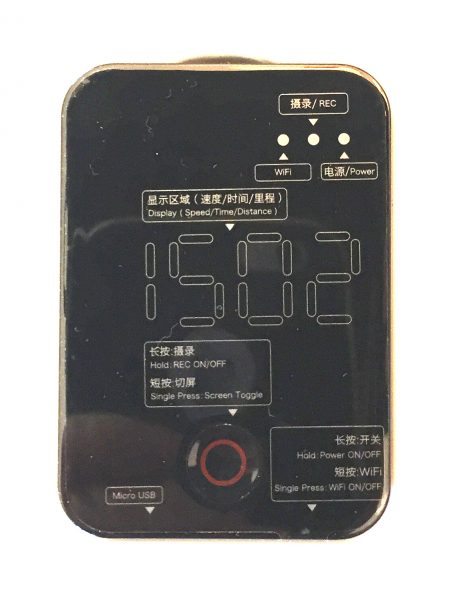
Hardware
The R100 is just short of 1 3/4 in wide and 2 1/2 in long and is about 3/4 in thick. It weighs 55 grams when not attached to the bicycle mount. The overall appearance of the unit is minimalist in design and is fairly reminiscent of the iPhone with only a single round button towards the bottom of the unit. The display is a backlit green LED type display that should be visible in all sorts of lighting conditions. The picture below does not do it justice because the frequency of the bicycle screen refresh and the camera shutter were out of phase. The issue is that the surface of the unit (perhaps in keeping with the iPhone design) is highly reflective, so that when the sun is high is the sky the display is blinding and unreadable. Installing a matte anti-glare screen protector should help and also help keep the soft plastic screen from getting scratched.
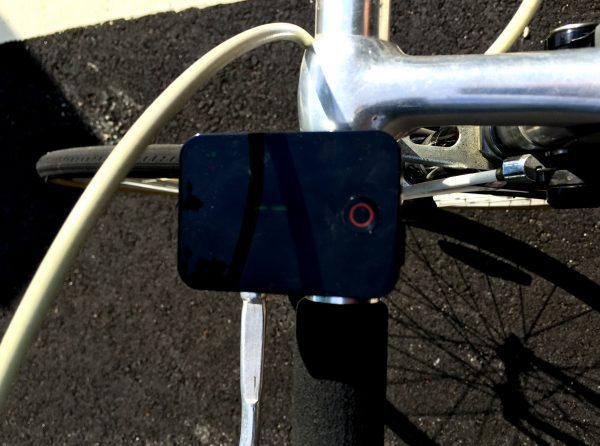
Pushing the big round button cycles (no pun intended) through time, distance, and speed. Considering that this is a GPS, it would be fantastic to include the elevation and interpolated grade (in degrees) as information on the display as well. I think only a firmware upgrade is required to get this to be included and would increase the usefulness of the device tremendously.
The GPS inside of the unit has some issues. I have turned the unit on and have obtained a fix on a GPS coordinate almost instantly. I have also spent 3 minutes waiting for a signal. Plus the app records the GPS coordinates incorrectly – it mixes up the coordinates north and south of the equator and west and east of the prime meridian. After syncing a couple of sample trips to Strava, downloading the GPX, changing the minus sign from the longitude to the latitude and pumping the corrected GPX path into GPS Visualizer I can finally view the GPS paths. As you can judge from the pics below, the GPS is awful. (I was only on the road)
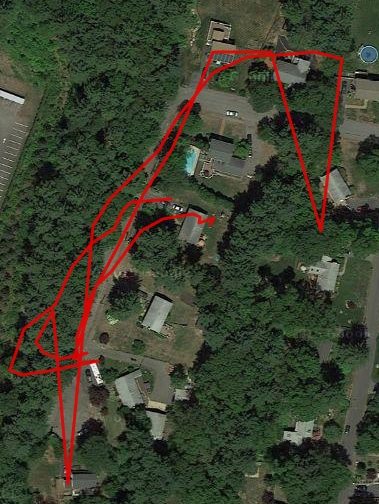
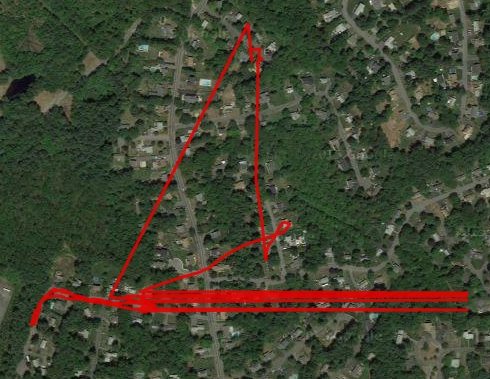
Any path that is oddly straight in the image above is attributable to noise. For comparison sake this is a path of a morning run I took with the iPhone at the same resolution as above:
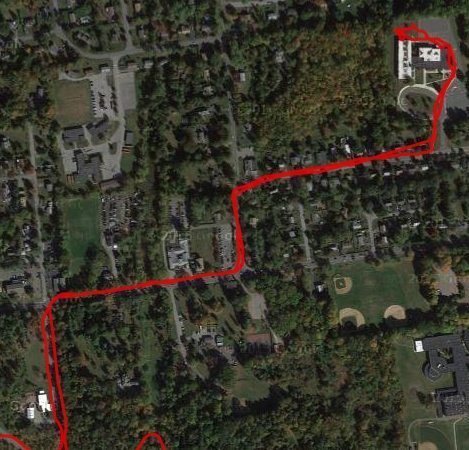
Based on the fidelity of the GPS, the functionality of the unit as a speed and distance recorder is questionable.
The front of the unit includes the camera. I intentionally put some fingerprints on this so you can appreciate the curvature of the glass.
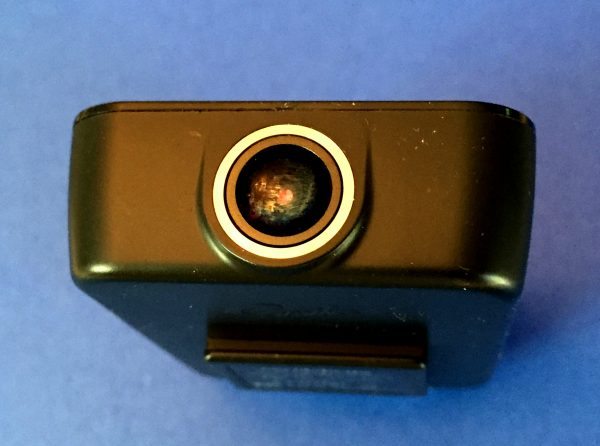
The camera takes pictures with a resolution of 1920×1080. The lens has a fixed focal length of 3 mm and a max aperture of f/1.6. Even when I was taking pictures at night the aperture was set to f/2.8. I shot some street lamps so maybe the metering caught one of them; I’m unsure what the metering pattern is. In the low light conditions, the ISO equivalent speed was 1600. The EXIF information includes the location but it incorrectly formats the longitude as east or positive instead of west or negative (I need to reformat the EXIF info to indicate the picture was taken in Massachusetts, not Kazakhstan.) The camera can be set to take pictures repeatedly from 5 to 300 seconds.
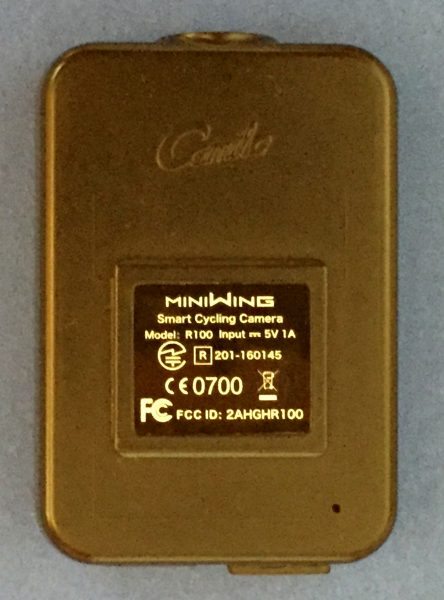
The video can record at 1080p at 30 frames a second, 720p at 60 frames a second, 720p at 30 frames a second, or VGA resolution . The unit records sound, but on my unsuspended handlebars, there was nothing but road noise, freewheel clicks and and derailleur clanks. The reason is probably that the microphone is at the bottom of the unit. You can see it as the black dot towards the rear (image bottom) of the unit.
The website claims there is image stabilization applied to the video. As can be seen from the same video I took below the image is still a little jumpy (Even though YouTube sometimes exaggerates shakiness, the video below looks very much like the one I shot.) Granted this was recorded on an unsuspended road bike on not the best road. Still, I’m only going about 20 MPH. Also, the videos are recorded in 2 minute Quicktime segments. This is how the camera achieves looping video; i.e., if the memory is full the oldest video gets deleted and is replaced by the next two-minute segment. So if you want to create a longer than 2-minute movie you will need to download and join the video files. I imaging there’s a dropped frame between files but I haven’t tested this to make sure.
Using the smartphone app, you can set up the device to automatically begin shooting at a preset time on either the current or following day. This feather is available for either the photo or video shooting mode.
The rear of the unit includes a micro USB connection and the power/Wi-Fi button. The USB is used to transfer images and to charge the unit. The manufacturer promises 3 hours of continuous shooting but I only got 2 without using Wi-Fi. I din’t have a great GPS signal; it could be that there are higher GPS loads if a signal isn’t fixed, but only 2/3 of a promised capacity is a little off. I know that performance specs need to be cutting edge, but if you advertise 3 hours of operation, the unit should be at least capable of 3 3/4 hours by design. Also, the unit becomes quite hot during operation.
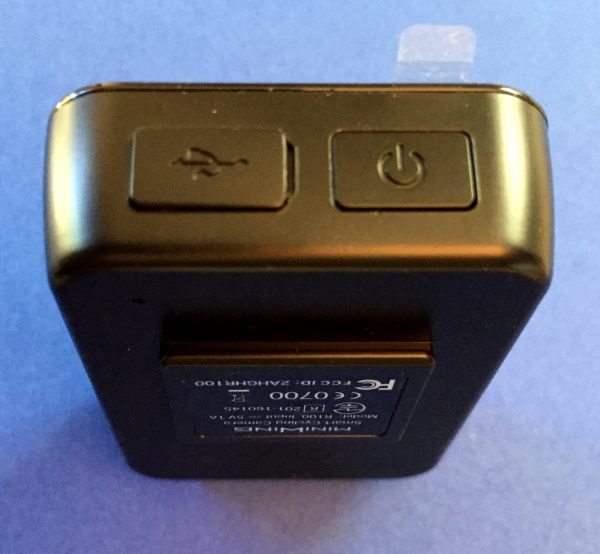
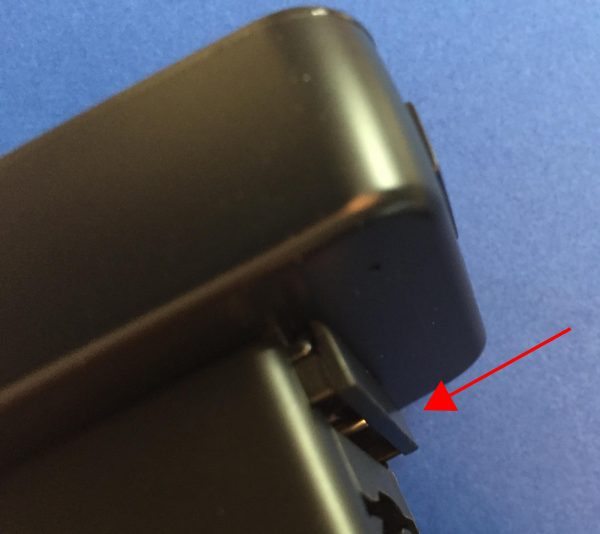
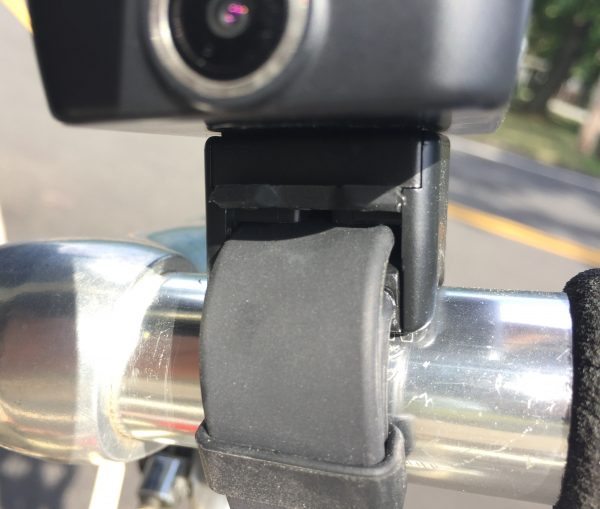
The unit attaches to the handlebar with a custom mount. The mount secures a square spring-tensioned holder using a rubber strap. I’ve pushed the device forward towards the release position so yo can see the spring extended in the picture below. I’ve included a red arrow to point to the extended spring.
The holder doesn’t swivel, so the bar to which the mount is secured must be perpendicular to the road. If you have a riser or upright this probably won’t work. If you favor aerobars then the view of the camera will probably be obscured. If you have an aluminum or carbon fiber base bar with an aerodynamic top the contour of the plastic holder may not fit securely. Then again, if you have carbon fiber base bar you probably have a GoPro Hero4 streaming to your Vertu. Also, this is probably not the best device for a recumbent.
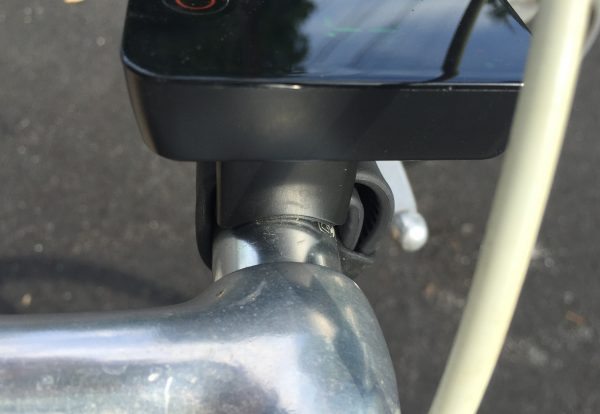
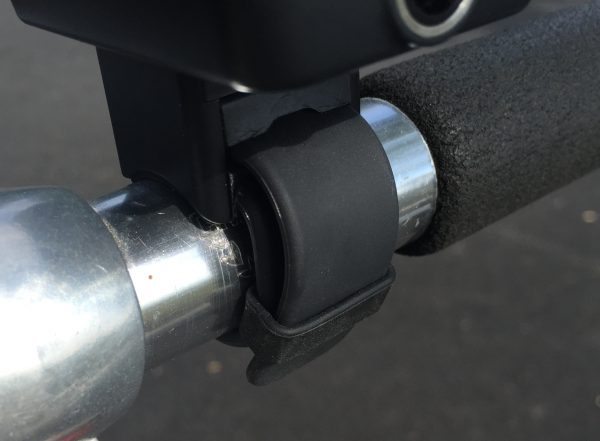
The rubber strap is held in place by a hinged clamp that is sort of like a belt clip. The next two images are of the hinge open and closed. Make sure this is closed before hitting the road or trail!
Software
The companion software app contains 4 main screens. The first screen is called moments and is some sort of social media driven collection of pictures. There are only 3 trips on the app, and no intelligible way to add your own. Honestly, I wish I could delete this function. The next tab is called routes and requires the smartphone to be connected to the R100 by Wi-Fi. After making a connection you can sync your trips to the smartphone.
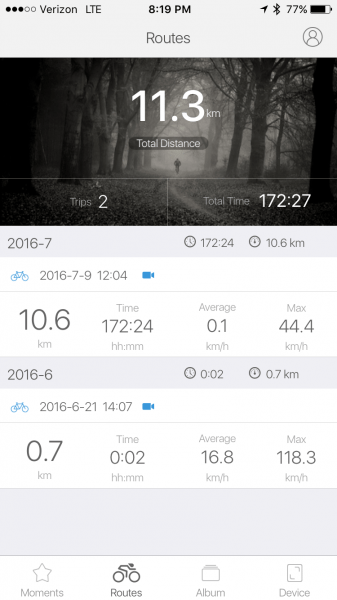
Once you are on this screen you can click each individual trip to see the route. Unfortunately, because of the bug in latitude and longitude, all my trips occur in the Indian Ocean. Once you’re viewing a trip, you can share to Strava (which is how I was able to finally utilize the data) or smart edit. When I clicked the smart edit button all I got was this screen:
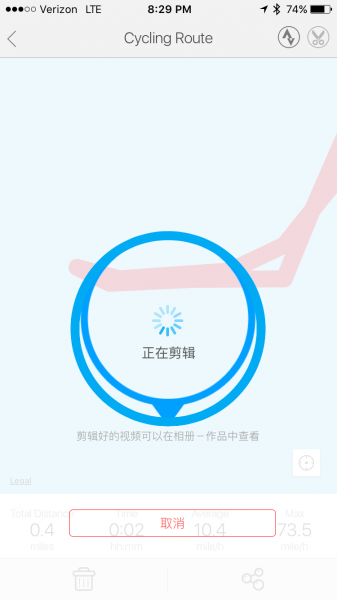
According to Volgan Shpitz Translate photo app, the screen says:
Clips are
Good video clips in albums – view works
cancellation
I guess some things are lost in translation!
The album tab lists the camera and video shots saved locally to the phone, photos and videos stored on the camera, and edits, which I was unable to test.
The last tab is device, which allows a live video feed to be obtained by Wi-Fi and also allows the device set up.
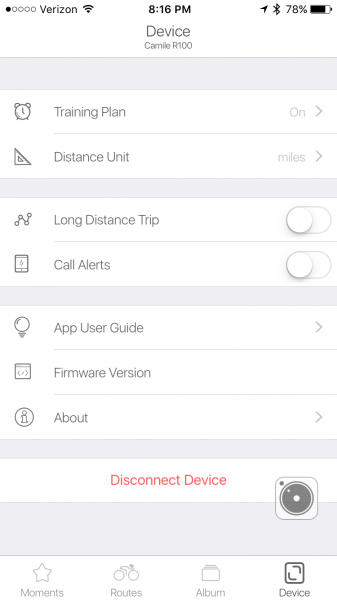
The training plan allows reminders to be set up to spend between 30 and 120 minutes training per day or between 10 and 40 miles riding per day. When switching to the metric units the training plan only permits 10 to 40 km. The device pane also allows the device to be set up for long trips, which ties several smaller trips into one larger trip. The call alert feature displays “CALL” on the screen when a phone call comes into your phone and the phone is connected to the device with Wi-Fi. The little camera button (which can be repositioned on the screen) only works with Wi-Fi. Since I’m using an iPhone, I constantly need to go to settings to connect with Wi-Fi. I’m not sure if this supports NFC connections if I were using an android. The camera button allows the video and photo settings described in the hardware section above as well as permitting the user to change the default Wi-Fi password (12345678) and checking the phone’s memory.
Summary
As I alluded to earlier, as a convergence device, the Camile R100 combines the abilities of several other technologies into a singe form factor. However, the end result is a device that is inaccurate in its GPS interpretation, buggy in the presentation of GPS results and fails to perform as advertised when it comes to battery life. The Camile is available for $169 but does not perform as well as speed and cadence sensors from Wahoo, a smartphone bicycle mount, and a generic action camera which together can be obtained for less money and achieve better results combined.
Source: The sample for this review was provided by MiniWing. Please visit their site for more information and Amazon to check prices / order.
Gerber Gear Suspension 12-in-1 EDC Multi-Plier Multitool with Pocket Knife, Needle Nose Pliers, Wire Cutters and More, Gifts for Men, Camping and Survival, Grey
(as of February 6, 2026 17:16 GMT -06:00 - More infoProduct prices and availability are accurate as of the date/time indicated and are subject to change. Any price and availability information displayed on [relevant Amazon Site(s), as applicable] at the time of purchase will apply to the purchase of this product.)Gerber Gear Diesel Multitool Needle Nose Pliers Set, 12-in-1 EDC Multi-Tool Knife, Survival Gear and Equipment, Black
(as of February 6, 2026 17:16 GMT -06:00 - More infoProduct prices and availability are accurate as of the date/time indicated and are subject to change. Any price and availability information displayed on [relevant Amazon Site(s), as applicable] at the time of purchase will apply to the purchase of this product.)Product Information
| Price: | $169.99 |
| Manufacturer: | MiniWing |
| Retailer: | Amazon |
| Requirements: |
|
| Pros: |
|
| Cons: |
|


