Have you ever wanted to build a guitar or a ukulele but felt it was completely beyond your capabilities, time and budget? Me too. That’s why I was very curious to try the Wolfelele kit when I saw it because it didn’t require tools I didn’t own, a huge investment in time and best of all, not a lot of wood working skills. They sent me a kit and I built it. Let me show you step by step how it went.
Note: Images can be clicked to view a larger size.

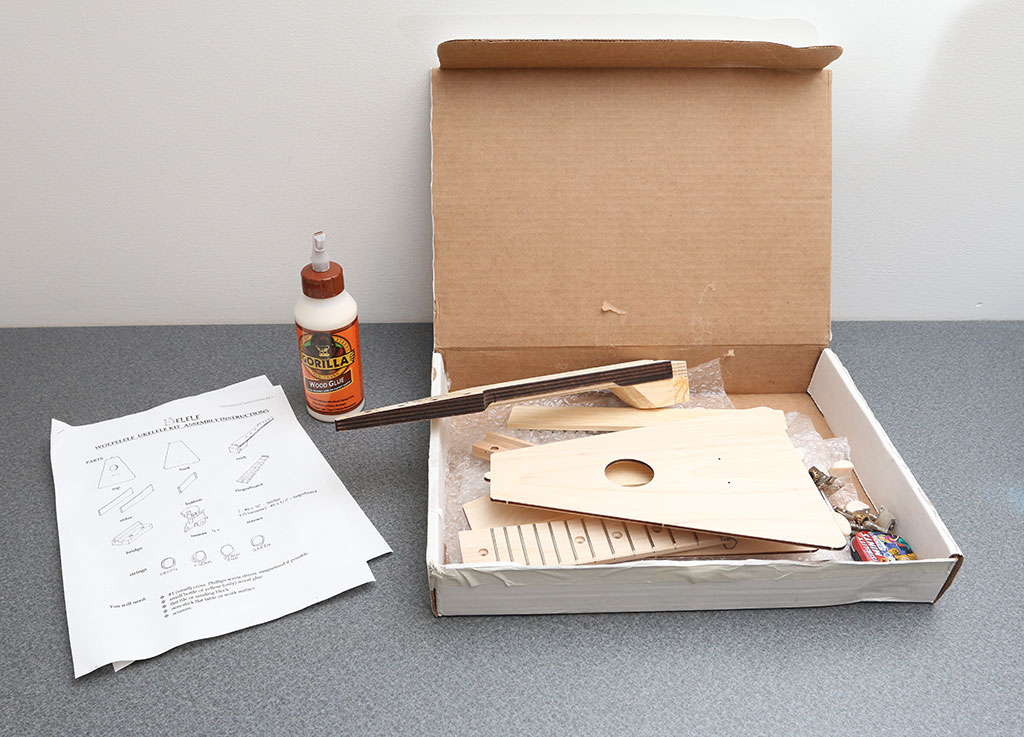
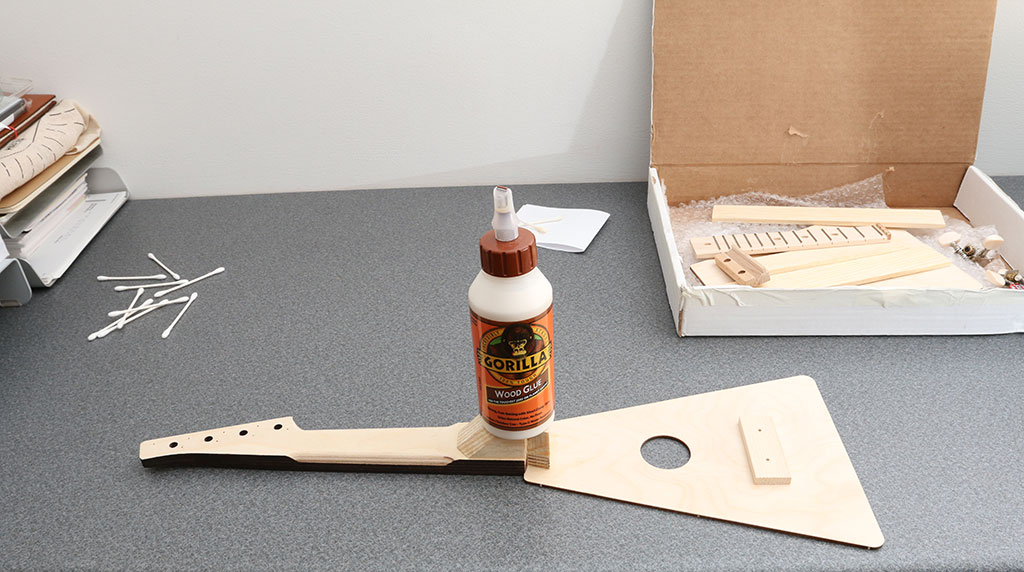
What’s in the box?
Soprano ukulele neck
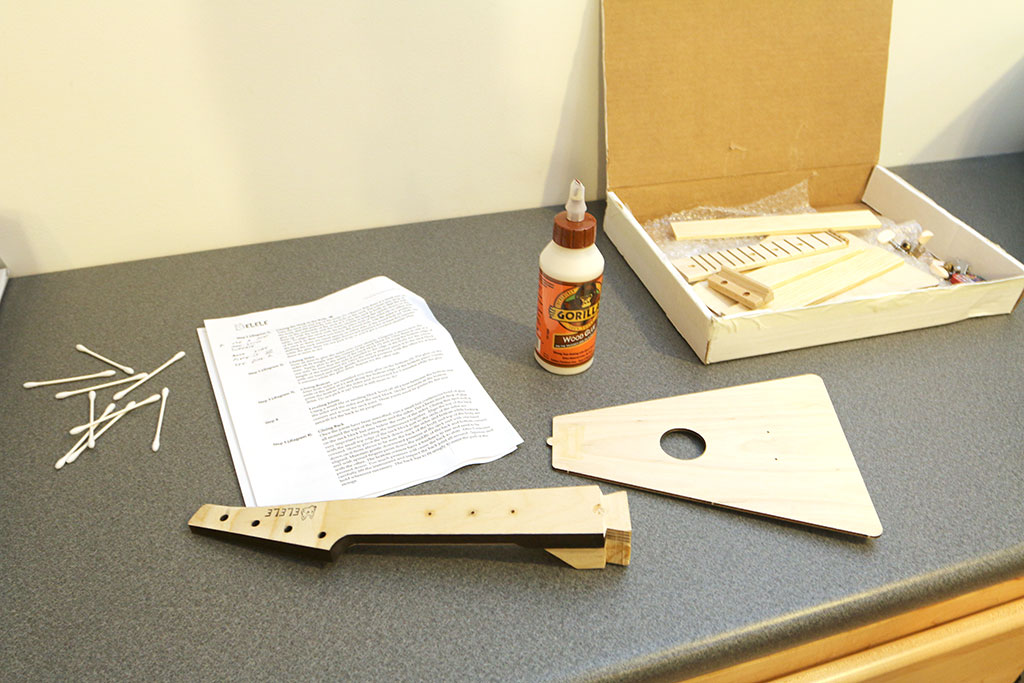
Top and back of instrument
Sides
Fretboard
Bridge
Tuning gears
Strings
Screws
Instructions
I’ve seen ukulele kits before, but they required special tools like clamps and skills to shape the curved sides. The Wolfelele kits are designed to me much easier because they have a triangle shape with straight sides.
The kit includes almost everything you need including step by step instructions, nine steps to be exact. The only things you need before you can begin is wood glue, a file or sandpaper, scissors and a Phillips screwdriver.
I’ll admit that I’ve had this kit for quite a long time. I kept dragging my feet to try it because I was afraid it would be too difficult or I’d screw it up. Now that I’m finished, I can say that it was really easy to build even though the instructions are not exactly the best I’ve ever tried…
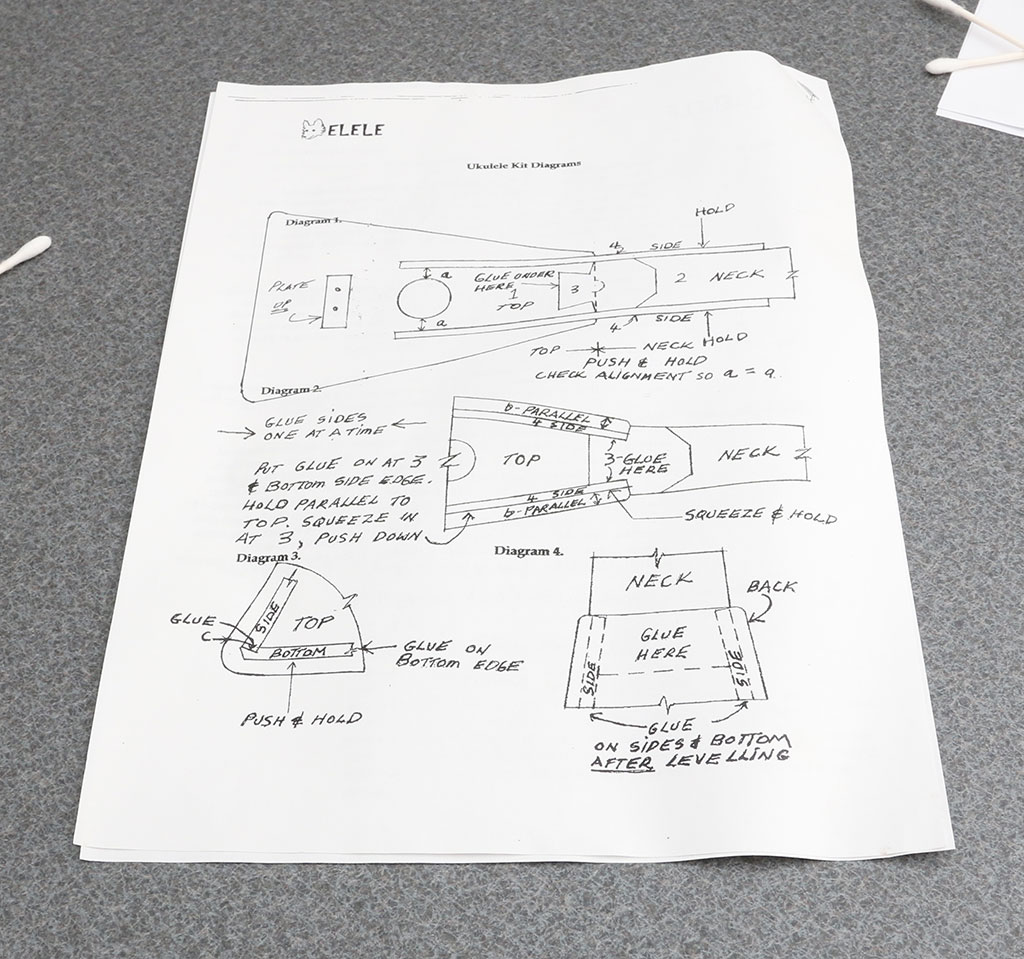
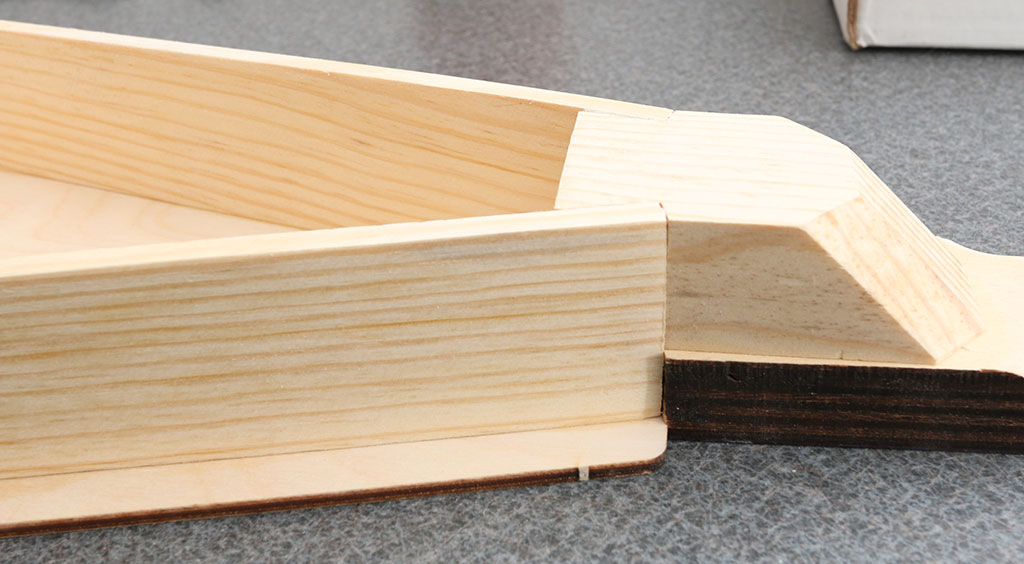
Step one involves gluing the neck to the top. This isn’t difficult because the neck has a small notch where a matching nub on the top fits.

However, the instructions confused me and I actually glued the top with the inside edge facing out when I first started. Luckily my brain kicked in about a half hour after I’d set the two pieces to the side to dry. I was able to break the glue bond and glue it back correctly.
The instructions didn’t tell me how long to let the glue dry before moving on to the next step, so I waited about four hours.
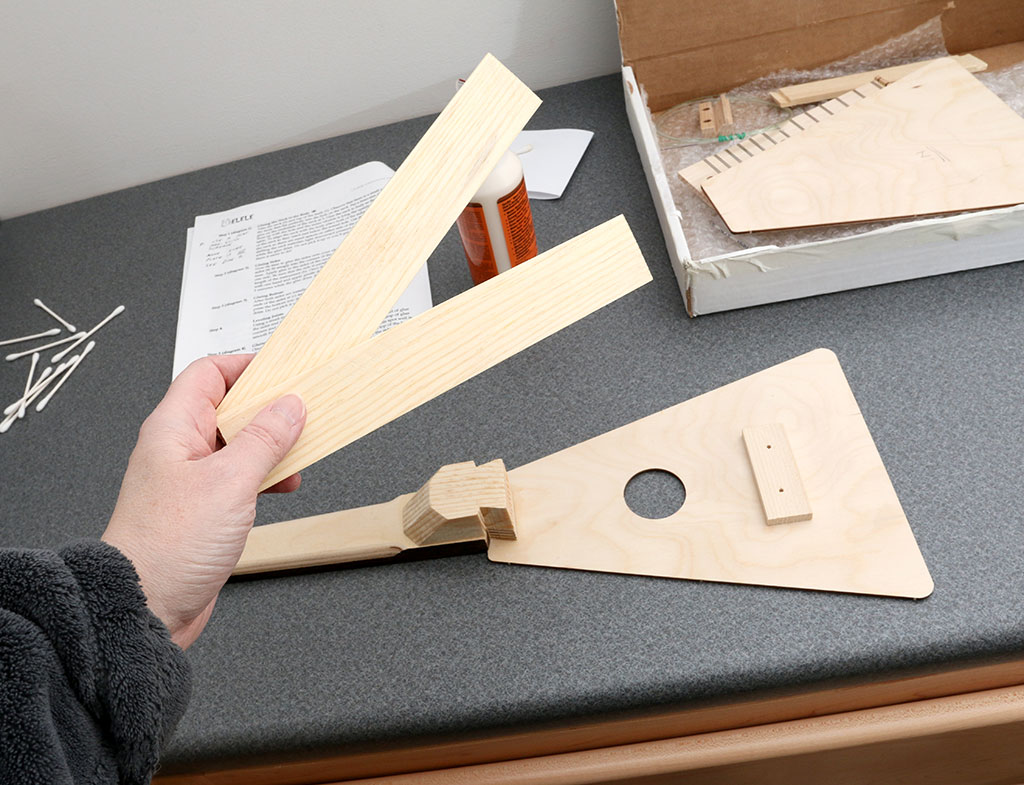
Step two instructed me to glue on the two sides.
This was as easy as step one (minus my goof up) and only required making sure that the sides were lined up correctly on each side.
I used the bottom piece which had notches to help me keep everything lined up perfectly.
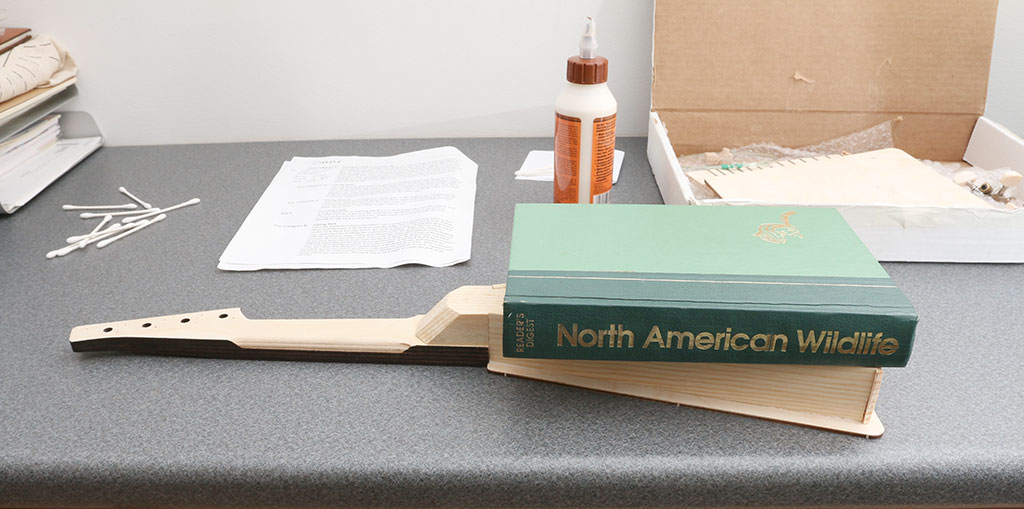
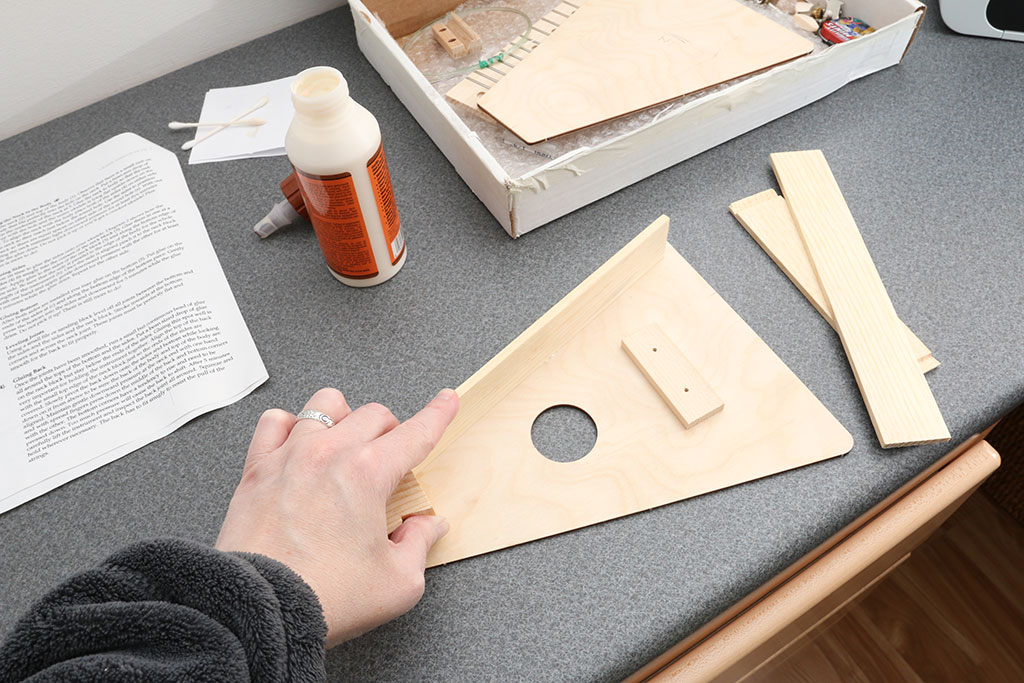
Step three. I used a book to apply weight to the sides for an hour and then glued the bottom piece and let the whole assembly dry over night.
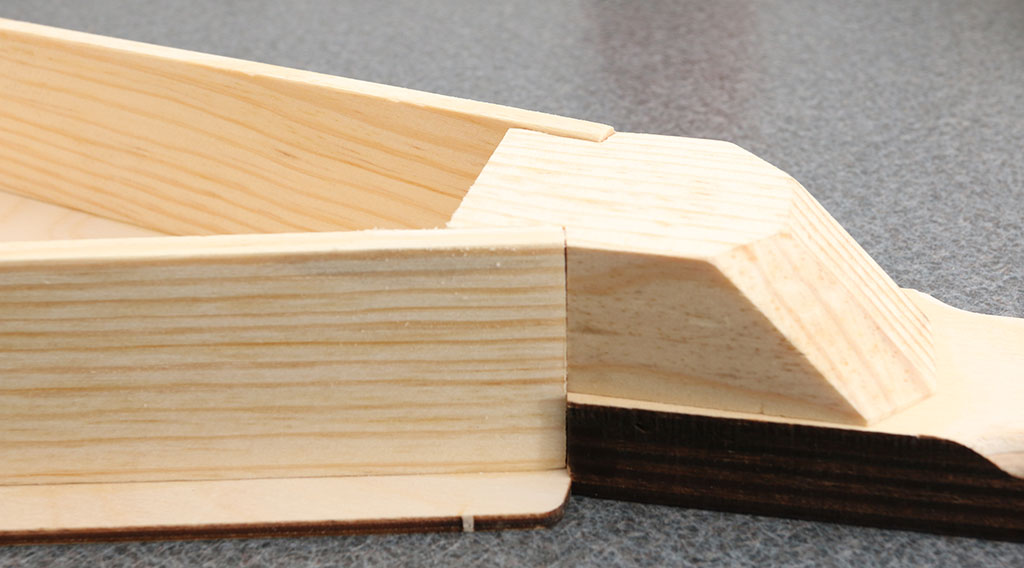
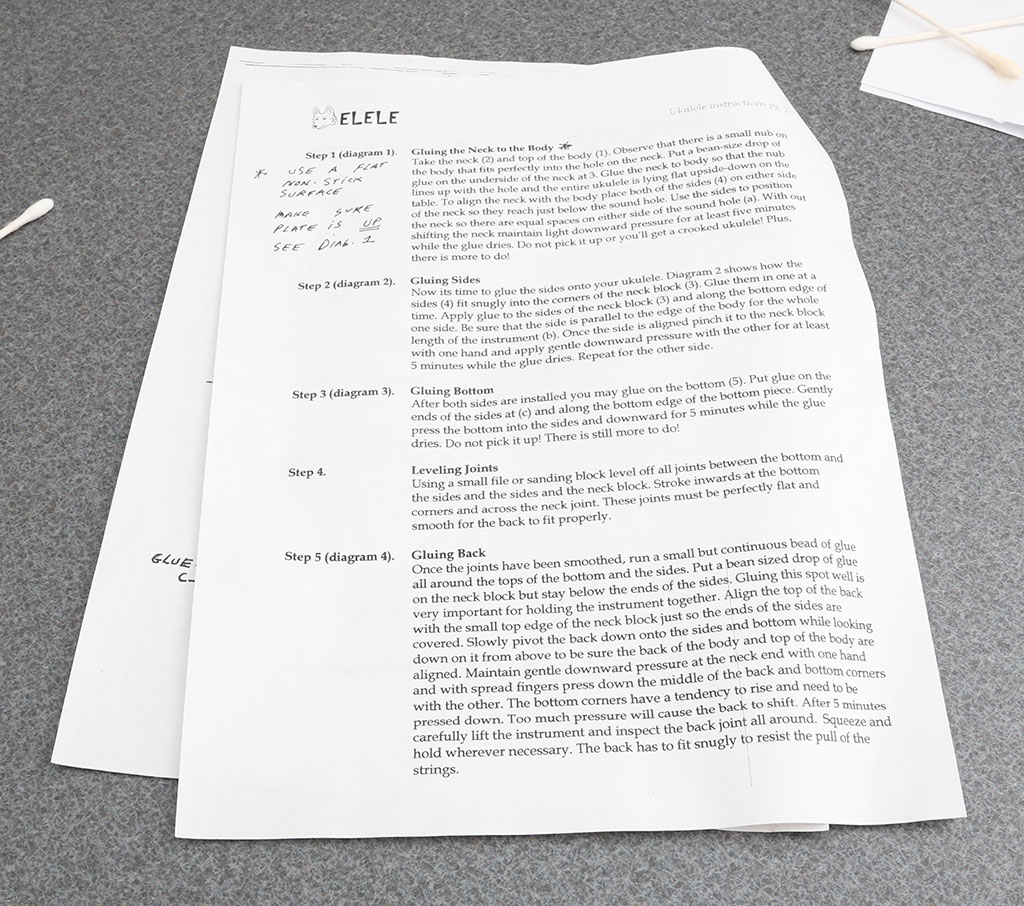
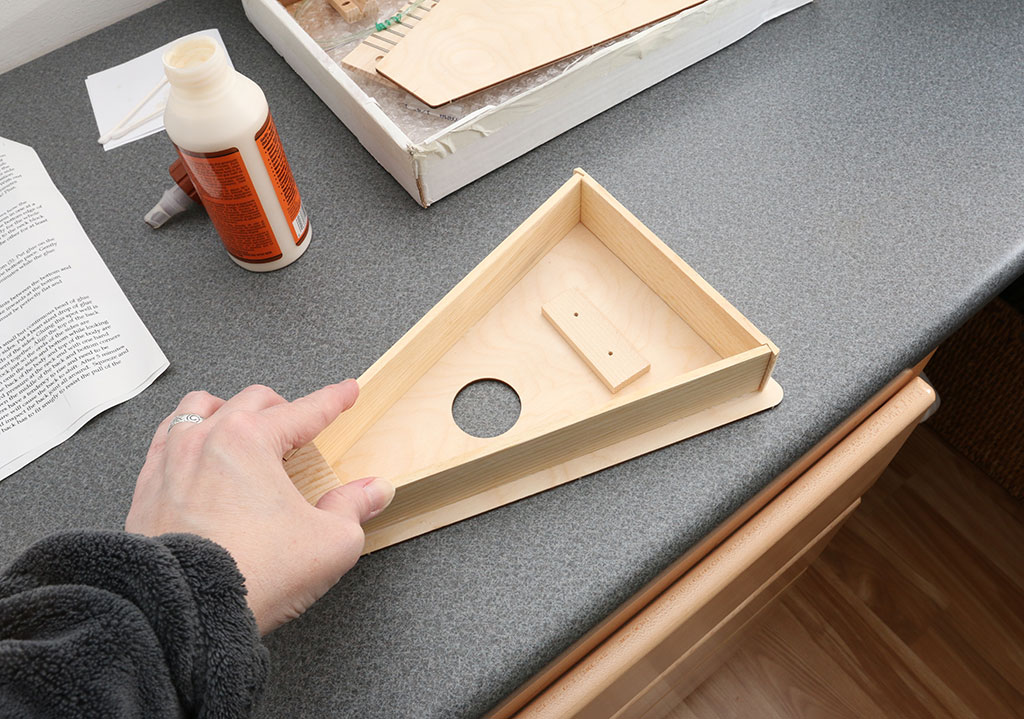
Step four. The next morning I check all the joints and noticed that where the sides met the neck, that the edges need to be leveled out in order for the back to glue down correctly. I used some sand paper first, but ended up finding a file in my garage to speed things along.
After all the joints were smooth, it was time for step five – gluing on the back.
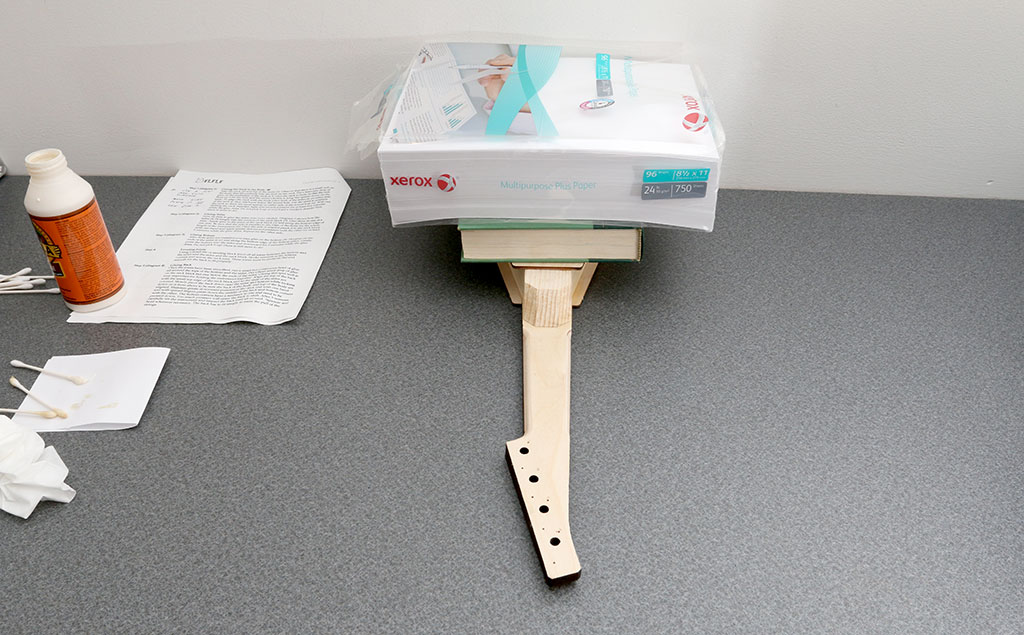
For obvious reasons, it was important to make sure the back was lined up correctly, so I used the flat surface of a wall and a book to line up the back and sides. I then applied some weight and let the assembly dry for an hour or so.
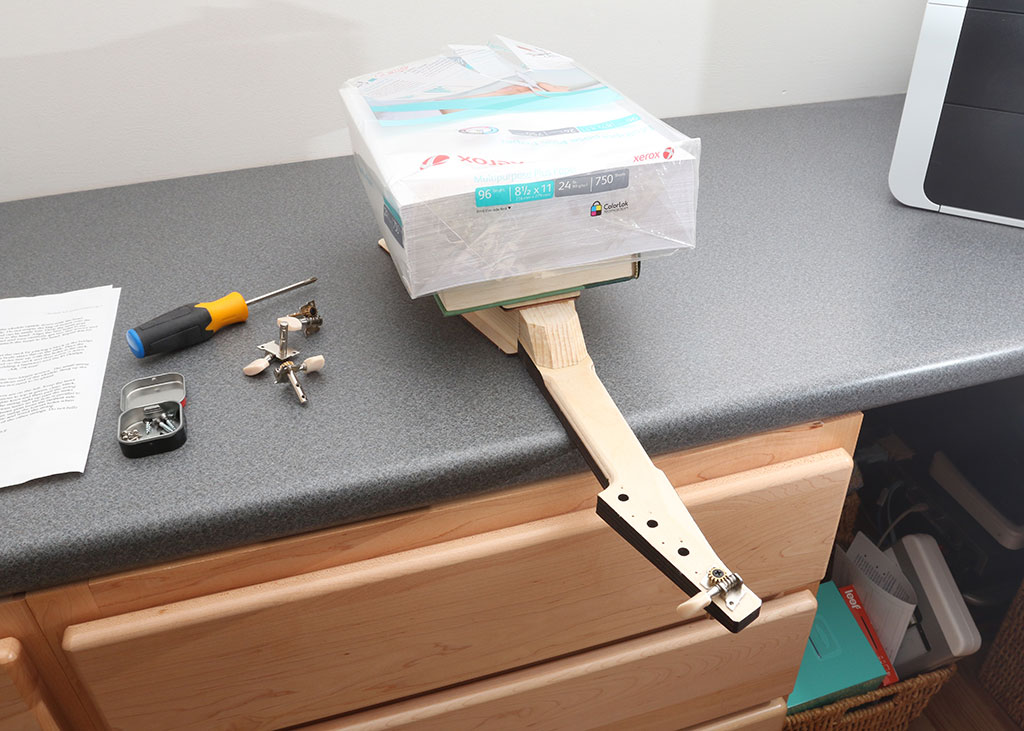
Step six told me to attach the tuning gears. This was easy because all the holes are pre-drilled, but it does require a Phillips screwdriver that wasn’t included in the kit.

After I attached the tuners, I left the glued back dry all night.

Steps seven and eight: All that was left the next morning was to attach the finger board and bridge. Again, the holes are pre-drilled (except for one on the fingerboard, so it was quick and easy.

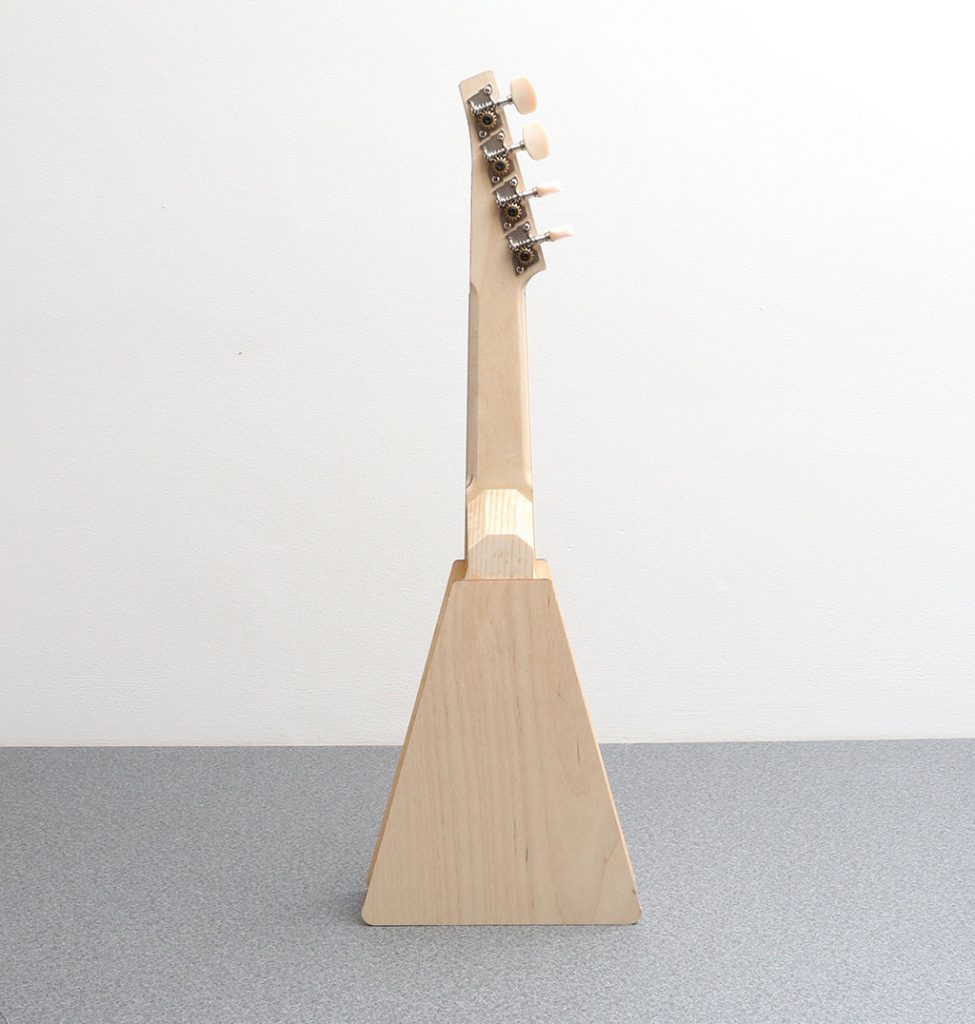

Almost done and it sits upright on a flat surface without any wobble!
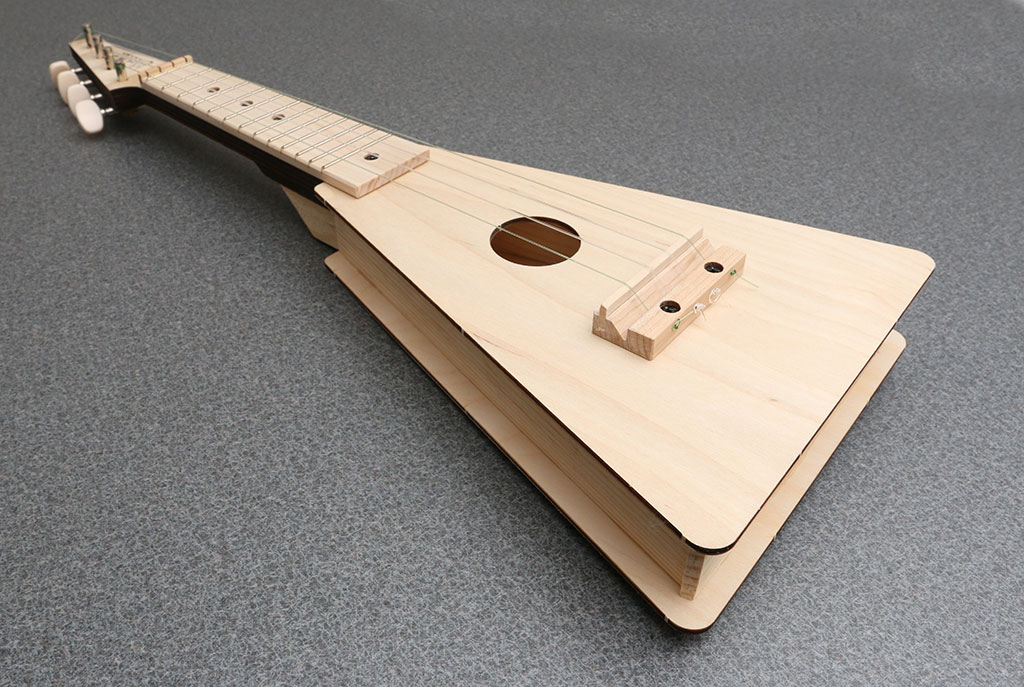
The last step is to string it up with the included strings.
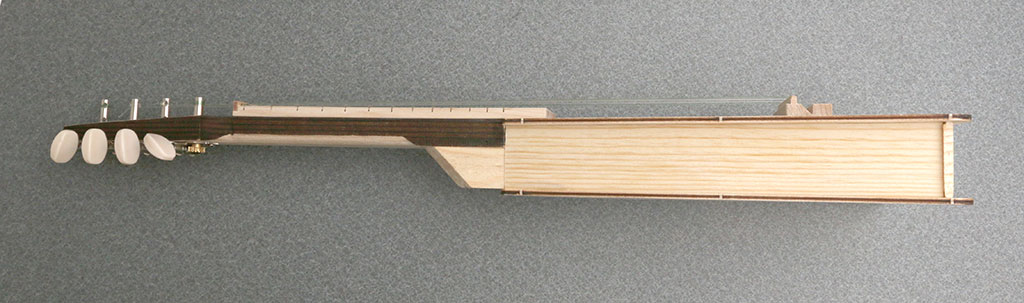
The string height is a little high, but that’s to be expected on an instrument as inexpensive as this one. It’s also interesting that they use wood for the saddle and the nut instead of bone or plastic. And from what I can tell, both are glued in, so you can’t update later.
Check out a quick demo to hear what it sounds like.
Keep in mind that the strings are still stretching and easily go out of tune.
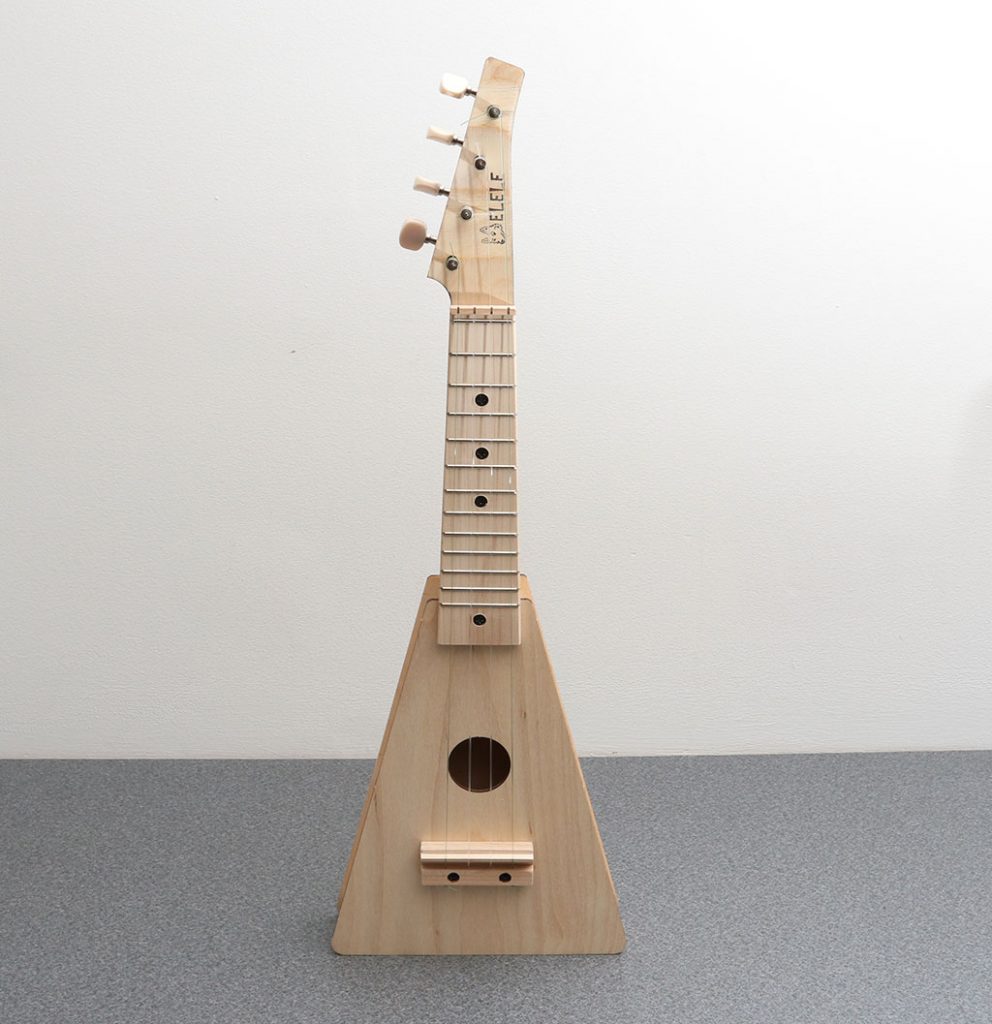
When it’s all said and done, it was a lot of fun to build the Wolfelele. I only had the one building hiccup at the beginning, but otherwise it was very easy to put together. The final product is a nice looking instrument that plays ok. It’s definitely not going to replace one of my other non-DIY ukes, but just the fact that I can say I made it myself makes it worth the effort to build it.
Source: The sample for this review was provided by Wolfelele. Please visit their site for more info.
Gerber Gear 22-47162N Fast Draw Folding Assisted Opening Pocket Knife, Fine Edge, Black
(as of March 17, 2026 18:36 GMT -05:00 - More infoProduct prices and availability are accurate as of the date/time indicated and are subject to change. Any price and availability information displayed on [relevant Amazon Site(s), as applicable] at the time of purchase will apply to the purchase of this product.)
Gerber Gear EVO Jr. Folding Knife - Serrated Edge [22-41493]
(as of March 17, 2026 18:36 GMT -05:00 - More infoProduct prices and availability are accurate as of the date/time indicated and are subject to change. Any price and availability information displayed on [relevant Amazon Site(s), as applicable] at the time of purchase will apply to the purchase of this product.)Product Information
| Price: | $55 CAD ($41 US) |
| Manufacturer: | Wolfelele |
| Requirements: |
|
| Pros: |
|
| Cons: |
|
Gadgeteer Comment Policy - Please read before commenting
Did you perform the patented Gadgeteer stress test to it? 🙂
Ha! It’s pretty solid and does not feel at all fragile. A quick shake reveals no rattles. 🙂
Nice job on the build- next time try smiling a bit in the video, looks like your being forced to preform-lol
I hate being in front of the camera. I need more practice 🙂