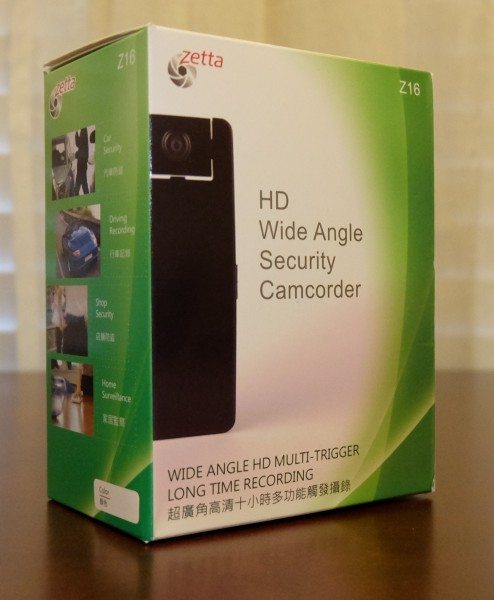
We live in a gated community and just a few years ago, things were stolen out of our car while it was parked in our driveway in broad daylight (we had forgotten to lock it that day). We never found out who had perpetrated the crime, but I remember wishing I had some kind of security camera to catch the person(s). There are many security camcorders out there and the Zetta Z16 HD Wide Angle Intelligent Security Camcorder is one of them. I wanted to know if it would work well enough to protect our car and home.
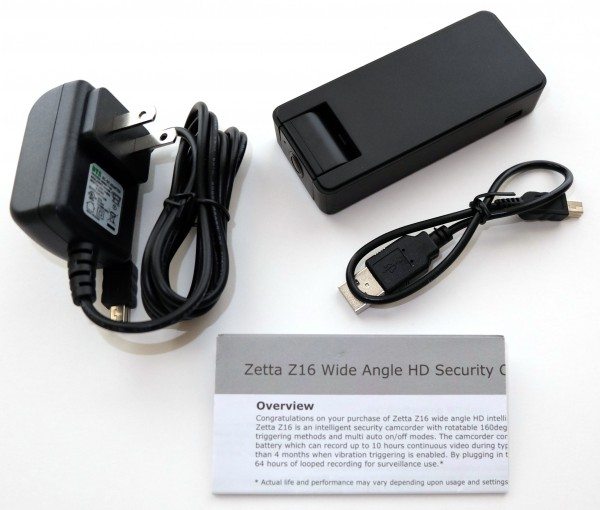
Package Contents
- Zetta Z16 Intelligent Security Camcorder
- 5V DC Adapter
- USB 2.0 Cable
- Quick Start Guide
Technical Specifications
- Storage temperature: 0 to 45degC (32 to 113degF)
- Operating temperature: 0 to 45degC (32 to 113degF)
- Dimensions: 10.2 x 4.3 x 1.9 cm
- Battery: 1200mAh 3.7V Li-ion
- Adapter: 5V, 600mA DC adapter with mini USB out
- Current consumption: 100mA
- Recording time: max 10 hours (with fully charged battery)
- Standby time: max 90 days (in vibration triggering power saving mode with fully charged battery)
- Sensor resolution: 1280 x 960
- Sensor sensitivity: 1.3V/lux-sec
- Sensor viewing angle: 160deg
- Microphone: speech grade
- Memory card supported: max 64GB micro SD card (TF)
- Memory usage: 15 minute/GB (high frame rate), 1 hour/GB (low frame rate)
- Video recording resolution: HD 720p (1280 x 720) or 360p (640 x 360)
- Video compression: JPEG
- Voice recording: 12kSps, 8bit
- Voice compression: PCM
- File format: AVI
- USB: Mass storage device
- OS supported: Windows 2000 / XP / Vista / 7 / 8, Mac OS X
Design & Build Quality
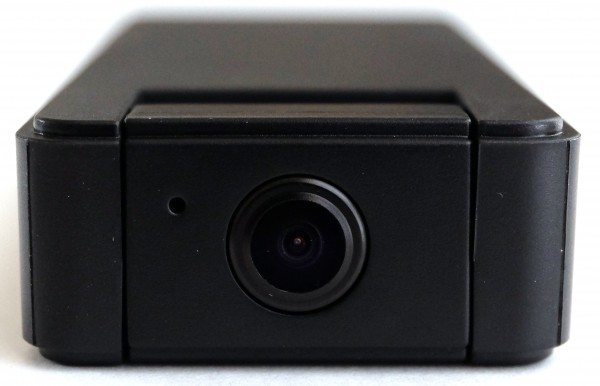
The Zetta Z16 is a small rectangular security camcorder measuring 10.2 x 4.3 x 1.9 cm. It is lightweight, made of rigid black plastic, and seems sturdy. The front of the Zetta Z16 has a 160 degree angle lens and a microphone (there are no IR LEDs to aid in night recording). The lens of the camcorder is mounted on a swiveling mechanism and thus can be adjusted up to 180 degrees top to bottom for greater flexibility of recording angles. Up close the lens is reminiscent of HAL 9000, minus the red glow. “Open the pod bay doors, HAL.” “I’m sorry, Dave. I’m afraid I can’t do that.” It’s just a little unnerving… Okay, on with the review.
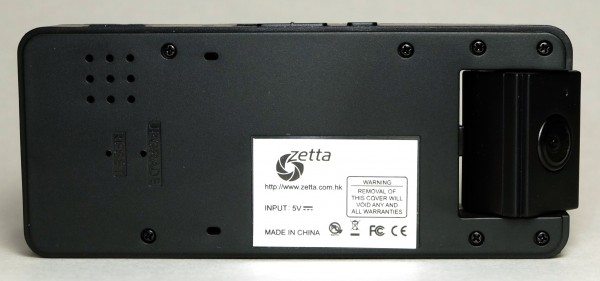
One side of the camcorder has (from left to right) the micro SD card slot which is compatible with up to a 64 GB micro SD card (cards should be class 4 or higher); the charging/recording indicator light; a selector switch to go from continuous low resolution recording in “Surveillance” mode, motion triggered high resolution recording in “On-the-GO” mode, or “Custom” mode recording (set up using the PC widget); and the power button.
Indicator light status:
Without DC adapter:
- Green LED on: camcorder is booted up
- Red LED on: no card, card failed, battery low, or card is full (not in circular recording)
- Green LED flashing: normal recording
- Green / Red LED intermittent flashing: battery low and recording
DC adapter plugged in:
- Orange LED on: charging but no recording
- Green LED on: charging complete but no recording
- Green LED flashing: charging complete and recording
- Green / Orange LED intermittent flashing: charging and recording
- Red LED on: no card, card fail or card full (not in circular recording)
Connected to computer:
- Orange LED on: charging
- Green LED on: charging complete
The other side of the camcorder has the data transfer/charging mini USB port to connect to your PC, MAC, or the power adapter.
The bottom has reset and upgrade (to upgrade firmware) switches which require a small straight tool to be inserted into them while pressing on the power button at the same time (the camcorder also needs to be plugged into either the computer or an outlet) to activate the feature.
Setup & Use
First I downloaded and installed the PC software widget from the Zetta website. The widget is available for Windows 2000, XP, Vista, 7, 8 and Mac OS X. I used the Windows PC widget.
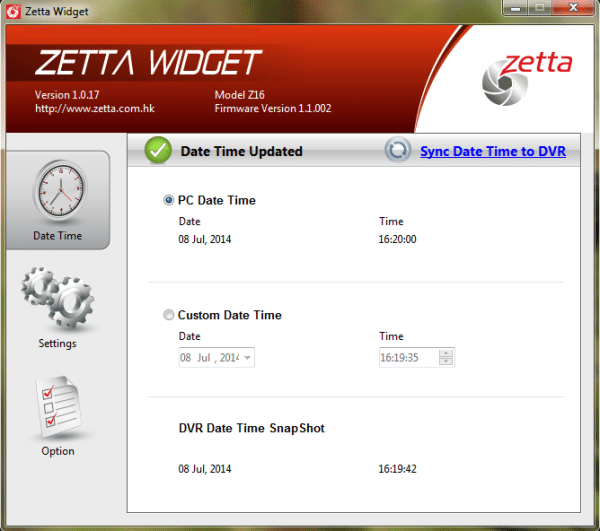
After installing and launching the widget, you see the opening window. To use the widget, you must connect the Zetta Z16 to your PC using the provided mini USB to USB cable. On the Date Time tab, you are able to sync the camcorder’s date and time with the computer’s, or set your own custom date and time.
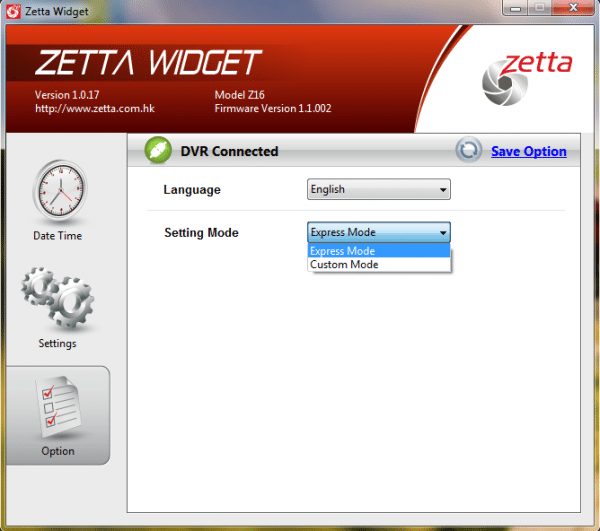
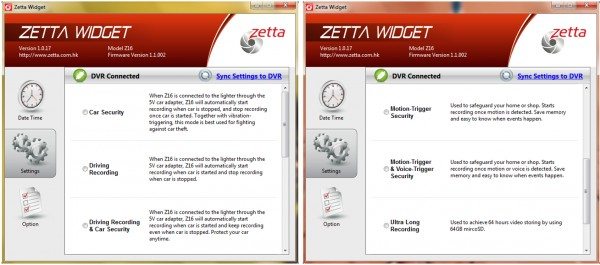
If you use the Express Mode under the Option tab, you will see the following in the Settings tab.
These are the quick setups under the Settings tab for the camcorder in Express Mode. Click on the picture to observe a larger view. You can set up the camcorder for Car Security, Driving Recording, Driving Recording and Car Security, Motion Trigger Security, Motion Trigger and Voice Trigger Security, Ultra Long Recording (using a 64 GB micro SD card), and Scheduled Recording.
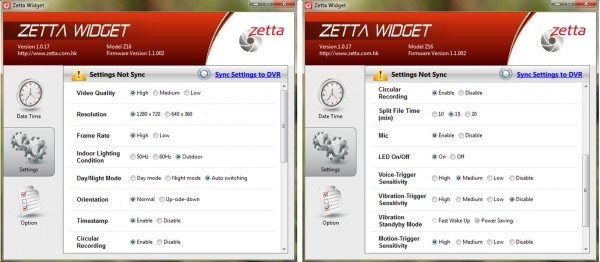
If, however, you choose Custom Mode under the Option tab (you must also set the slider switch on the camcorder to the Custom Mode), you will see the above settings. You’ll notice that there are many available on this camcorder. You can adjust the following:
- Video Quality (high, medium, or low)
- Resolution (1280 x 720 or 640 x 360)
- Frame Rate (high or low)
- Indoor Lighting Conditions (50 Hz, 60 Hz, or outdoor)
- Day/Night Mode (day, night or auto switching)
- Orientation (normal or upside down)
- Timestamp (enable or disable)
- Looped or Circular Recording (enable or disable)
- Split File Times (10,15, or 20 minutes – no gaps)
- Microphone (on or off)
- LED (on or off)
- Voice Trigger Sensitivity (high, medium, low, or disable)
- Vibration Trigger Sensitivity (high, medium, low, or disable)
- Vibration Stand-by Mode (fast wake-up or power saving)
- Motion Trigger Sensitivity (high, medium, low, or disable)
- Auto On/Off (car-activate recording, car-stop recording, car-activate and car-stop recording)
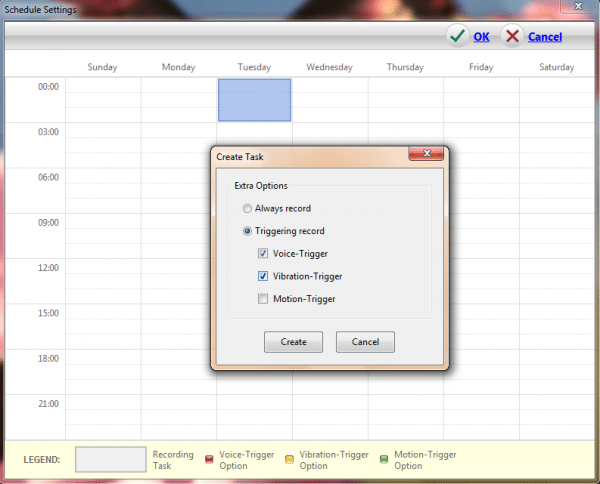
- Scheduled Recording
If you have a certain time that you want continuously recorded, you can set up a schedule. However, all of the following footage in this review was obtained by turning the camcorder on using the power button (you must press and hold the power button for two seconds to turn it on and then press and hold it again for two seconds to turn it off).
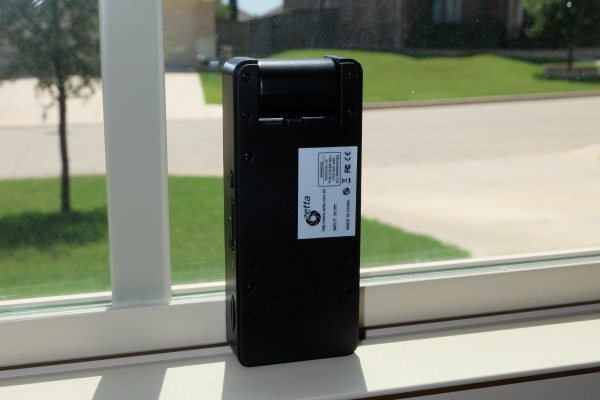
To test the high video quality, high resolution, high frame rate, and high sensitivity motion trigger settings (voice and vibration triggers were disabled), I placed the camcorder on a window casing in the guest room next to the entryway of the house facing the front yard. Having the lens angled in this direction required me to set the “Orientation” in the custom settings of the widget to “Up-side-down”.
This is the resulting video. The footage is beautiful and clear (some of what you see in this video is the reflection of sunlight on the window blinds). It was quite impressive to be able to capture as much of the street as this camcorder did. It was during the recording that I noticed a problem with the high sensitivity motion trigger – anything blowing in the wind outside will keep the camcorder recording. Using the low sensitivity motion trigger setting improves this, so that it records only when people or cars pass by.
This is another high resolution video with me picking up a piece of trash in the yard and collecting the mail late in the day (therefore there is less light and a not-so-clear recording of the details of my face). In the beginning of the video, you can hear me walking to the front door (about 10 feet away from the camcorder), unlocking it to go outside, and then closing it behind me, so the sound sensitivity and recording is excellent.
Here is a low resolution (640 x 360) video recording (all others settings remained the same). The objects in this video are only a little less distinct.
This is a sample of a night shot. I had to turn on both the front door and garage door lights to discern the objects in the yard. This video is noticeably grainy and choppy even though the camcorder settings were on the highest video quality, highest resolution and highest frame rate.
This is another sample of a high video quality, high resolution, high frame rate, and high sensitivity motion trigger night shot without my front door lights on. You can’t see anything but specks of light from our neighbors’ house lights and a car’s headlights as it drives by.
My indoor very low light recordings were similar. Illuminated immobile objects are discernible, but anything that moves is just a blur. The camcorder does not have IR night vision capability and therefore low light and no light recordings are often unusable.
This is a sample of a night shot at low resolution. Now a passing car’s headlights are just a blur.
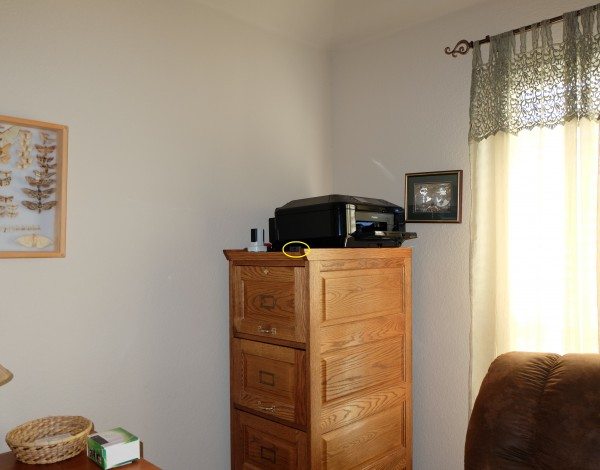
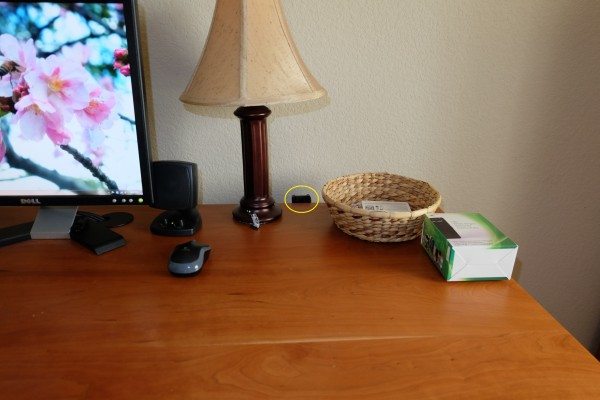
Because it is small, the camcorder is capable of blending in with the surroundings, depending on where it is placed. You can barely see the camcorder on top of the filing cabinet (circled in yellow) in our den which is just off the entryway of our house.
This is a sample of the footage from on top of the filing cabinet. This again shows that as long as there is plenty of light, the footage is clear.
Here is a sample of recorded voice to illustrate sound sensitivity and recording.
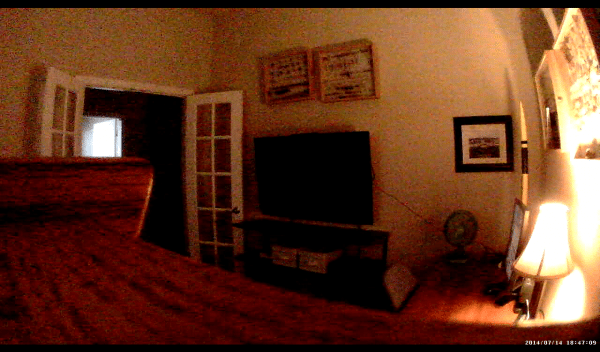
This is a screen shot of another video in the same location as the one previous with all the same settings, but for some reason, yielded a different quality of recording.
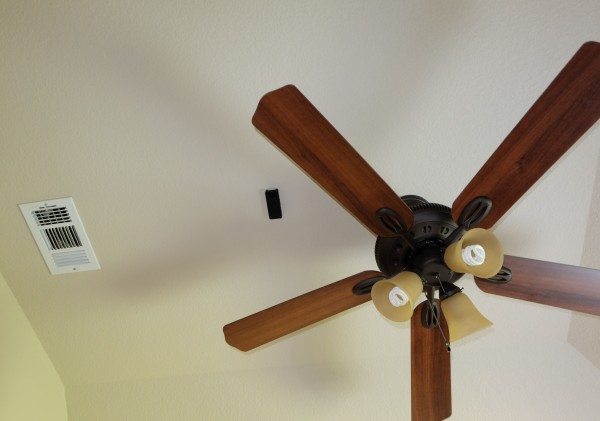
I also wanted to see what a ceiling shot would look like. Here I used masking tape to adhere the camcorder to the ceiling, but if I wanted this placement to be more permanent, I would have tried 3M Command Strips.
This sample of the ceiling video shows what the footage would look like if you wanted to set up the camcorder to watch over a cash register. My ceiling fan is on to show movement in the recording.
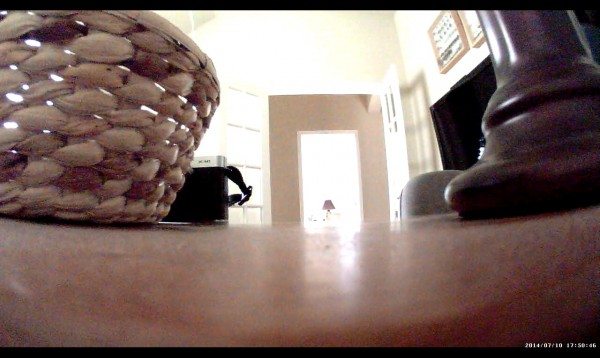
This is the Zetta Z16 peeking out from behind the desk (again, I used masking tape to adhere it to the desk). It is kind of obvious here, but I suppose you could pile up some papers around it to make it less so.
This is a screen shot showing what the video looks like from behind the desk.
When fully charged the camcorder was able to record at least 10 hours of video starting at 10 pm one night (the indicator was continuously flashing through the night until at least 4 am – yes, I was up that late) then recorded its last video at 11 am the next day before the battery was depleted. It appeared that the camcorder was able to record for 13 hours but I was unable to verify whether it was continuously recording or whether there were gaps during that time because I was using a 16 GB micro SD card with the camcorder set on looped recording.
Once the battery was depleted, I was able to charge the camcorder in about 4 hours using the power adapter (it is much slower if charging from a computer). The Quick Start Guide states that if the camcorder hasn’t been used in a long while, it should be charged for at least 6 hours and the time synced with your computer.
I tried to use the voice triggering feature of the camcorder (the other triggers were disabled) and set it on medium sensitivity. I placed the camcorder on top of the filing cabinet and tried to get it to record while speaking at a normal level. It had started recording only after I had come within one foot away from it. When I tried to use the high sensitivity voice trigger, it would not stop recording even though the only thing audible in the house was the air conditioner or refrigerator (30 feet away).
I also tried the vibration trigger set on high sensitivity (the other triggers were disabled) and was unable to get the camcorder to start recording while jumping up and down when it was placed on the filing cabinet. When I placed the camcorder on the window casing in the guest room, I was able to trigger the recording with a slam of the front door 10 feet away from the camcorder. A normal opening and closing of the front door was not enough. It would appear that in order to get the vibration trigger to work, I have to mount the camcorder to something that is a part of the house like the door jambs or windows. Our house is set on a slab of concrete which reduces any vibrations, so if your house has a basement and thus the main floor is made up of sub-flooring and joists, then the vibrations sensors may work better for you.
I did not have the car adapter to test any of the car camcorder features so I cannot say how well those work. But according to the documentation,
When the Z16 is connected to the lighter through the 5V car adapter and the auto on /off mode is selected: Car-activated Recording: Auto-starts recording once the car is started, auto-stops recording when car is stopped. Car-stop Recording: Auto-starts recording when car is stopped, auto-stops recording once car is started. Car-activate and Car-stop Recording: Auto-starts recording once car is started and continues to record even when the car is stopped. The camcorder needs to be turned off manually.
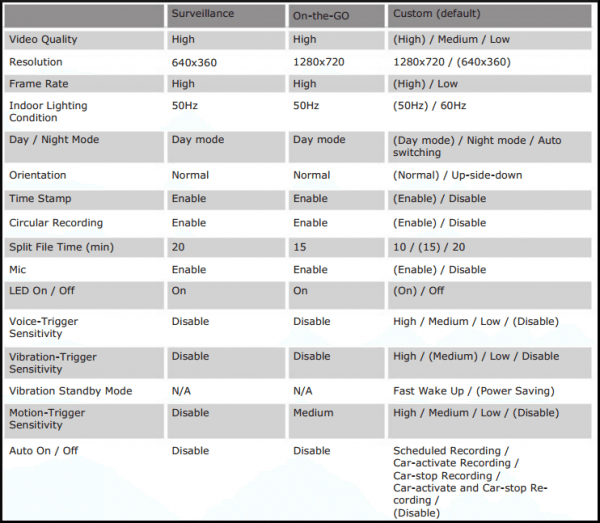
All of the footage shown in this review used the custom settings of the camcorder, but there are other modes. As mentioned earlier, there is a sliding switch that allows you to quickly set up the camcorder for Surveillance mode which is continuous low resolution recording and On-the-GO mode which is motion triggered high resolution recording. The figure above shows the settings for each of those modes.
The Zetta Z16 is capable of recording up to 64 hours of looped footage using the power adapter. The Quick Start Guide states “For the longest recording time, set Video Quality to Low, Resolution to 640 x 360 and Frame Rate to Low. This way the Z16 can act as a digital voice recorder.” Also according to the documentation, it can last up to 4 months when you set the camcorder on the the low sensitivity vibration trigger and vibration power saving mode.
Recommendation
Although the indoor and outdoor video quality of the Zetta Z16 HD Wide Angle Intelligent Security Camcorder was excellent as long as there was ample light, I was disappointed in the quality of the low light/nighttime video recordings. This camcorder does not have IR night vision capability which improves night or low light recording. All footage that had less than ideal lighting was very grainy and any moving objects were a complete blur making these recordings unusable. I like the swiveling 160 degree wide angle lens, but that was just not enough to compensate for the poor quality night recordings, especially when other security camcorders have the IR feature and some of them are available for around the same price as the Zetta Z16.
Source: The Zetta Z16 HD Wide Angle Intelligent Security Camcorder was provided by Spy Tec. The Zetta Z16 is available through Spy Tec or Amazon for $99.95.
Syncwire 3.5mm Nylon Braided Aux Cable (3.3ft/1m,Hi-Fi Sound), Audio Auxiliary Input Adapter Male to Male Cord for Headphones, Car, Home Stereos, Speaker, iPhone, iPad, iPod, Echo & More – Black
27% OffNanxudyj AUX Cord 6ft,3.5mm Stereo Audio Cable 90 Degree Nylon Braided 3.5mm Male to Male Stereo Aux Cables Right Angle TRS Cable Portable Compatible for Headphone, car,Tablets, Speakers
38% OffProduct Information
| Price: | $99.95 |
| Manufacturer: | Zetta |
| Retailer: | Spy Tec |
| Requirements: |
|
| Pros: |
|
| Cons: |
|





Gadgeteer Comment Policy - Please read before commenting
You mentioned that there are other products around the same price as the zetta z16, but have the IR feature, what are those product that you would recommend?
Dropcam has some highly rated security cameras with night vision, but they are a little more expensive (starting at about $149), require you to pay for cloud service recording, and must be near a power source.
Foscam has the following camera for about $90:
http://www.amazon.com/Foscam-FI9821W-Megapixel-Wireless-Camera/dp/B00F5CTTAU/ref=sr_1_5?s=electronics&ie=UTF8&qid=1411850499&sr=1-5&keywords=wireless+hd+security+camera
However, this camera is apparently difficult to set up. I do not have any personal experience with these cameras.
how do the Z16 compare to the SJ4000, which one do you recommend between these two units. thanks.
@Jimmy – unfortunately, I do not have any experience with the SJ4000 and am therefore unable to help you. Sorry about that!