Unlike those people that can tell when a storm is approaching by
the ache in their knees or by the call of a rain crow, my
meteorological abilities usually only manifest about thirty minutes
before the storm hits – when I can smell the rain in the air and
once I have heard the rumble of distant thunder. I know it’s going
to turn bad when the clouds turn green. Luckily I don’t have
to rely on some underdeveloped “Spidey Sense” to know when the
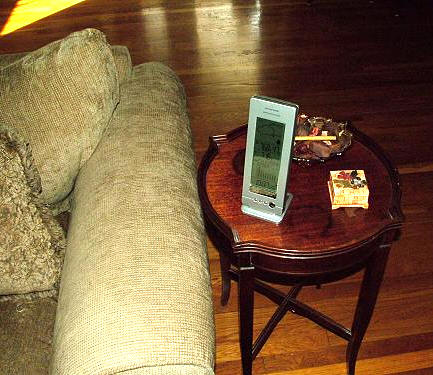
weather is going to turn ugly; I have WeatherBug installed on my
computer and I have a Smarthome 1900 Weather Station in my
living room. As much as I have come to rely on Weatherbug, its
reading is based on measurements taken over seven
miles away at Mathis Field Airport. The Smarthome Weather Station
bases its readings on what is currently happening at my
home.
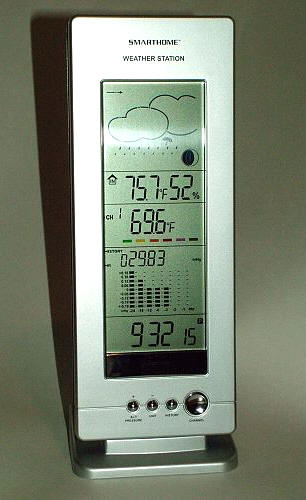
The 1900 Weather Station is a 9.25″ tall x 3.5″ wide x 0.75″
thick device which tells the time, the temperature inside and the
temperature outside. It gives a graphic display of the day’s
forecasted weather, lists the barometric pressure, air pressure and
the moon phase. Included in the box are the Weather Station, one
remote sensor, a sensor table stand, a Weather Station table stand
and the instructions. The Weather Station is composed of matte
silver plastic with black accented sides which will look good in
most decors.
The device feels solid, and it does not creak when torqued or
squeezed. Its front features a large 6″ tall x 2.25″ wide green and
black LCD display.
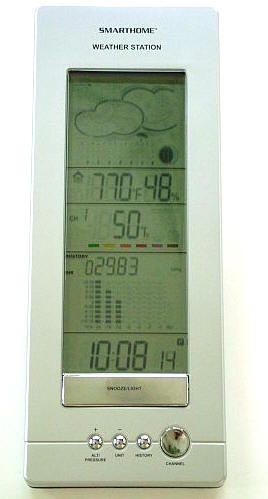
From top to bottom the Weather Station’s screen shows a section
dedicated to a graphic representation of the day’s weather forecast
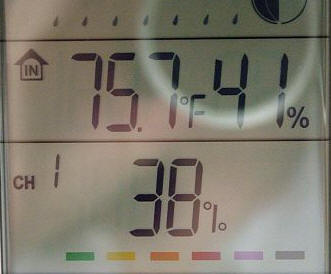
and a graphic representation of the moon phase, a section with the
indoor temperature and humidity, a section which shows the results
of up to five remotes sensor’s temperature and humidity readings, a
section dedicated to the current and 24 historical barometric
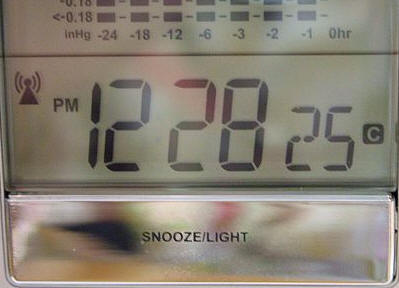
pressures, and a section with the current time.
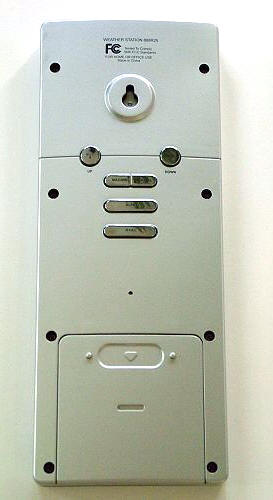
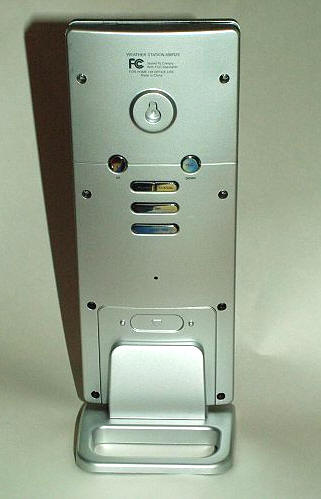
The back of the device has a hanging hole so that the unit may
be wall mounted, and there is a battery compartment in which three
AA batteries must be placed. There are no wires attached to the
1900; it is completely self contained.
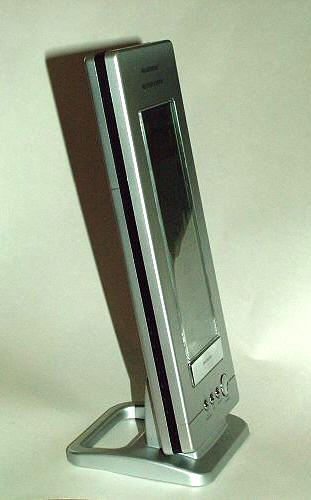
The included silver plastic stand allows the Weather Station to
be placed on a desk or table…
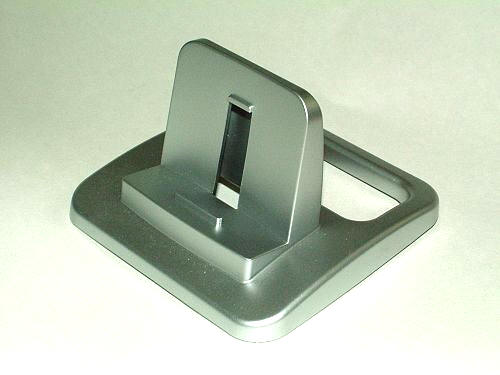
It simply snaps onto the bottom rear of the 1900.
|
Specifications: |
|
| LCD Dimensions: | 6 1/4″ diagonal |
| Power: | Main unit: 3 AA batteries; sensor: 2 AAA batteries |
| Operating Temperature Range: | Main unit: 32° F to 122° F (0° C to 50° C); sensor: -4° F to 122° F (-20° C to 50° C) |
| Temperature Resolution: | 0.2° F (0.1° C) |
| Sensor Measuring Range: | 58° F to 158° F (-50° C to 70° C) |
| Relative Humidity Range: | 20% RH to 99% RH |
| Relative Humidity Resolution: | 1% RH |
| Air Pressure Measurements: | mb hPa, inHg or mmHg |
| RF Transmission Frequency: | 433 MHz |
| RF Transmission Range: | Up to 100ft. |
| Maximum Sensors: | 5 |
| Temperature Display: | Celsius or Fahrenheit, selectable |
| Time Display: | 12- or 24-hour, selectable |
As was probably noticed in the pictures above, there are various
buttons on the back and front of the device, all of which are used
for accessing or setting the weather and time features. On the
front of the 1900, there are five buttons.
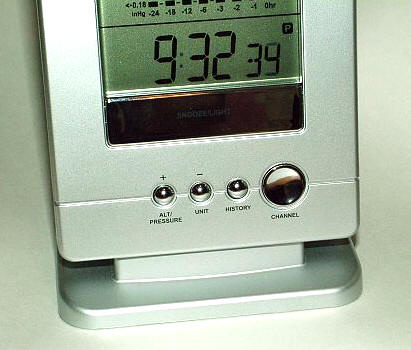
The ALT/Pressure button toggles between the user’s set
ALTitude and the Sea Level Barometric Pressure reading at
that altitude. In order for the device to accurately display the
measured location’s barometric pressure, the user must enter the
altitude, or elevation, for their location. This may be determined
by entering
their city and state name at this site. San Angelo’s elevation
is 1848 feet, but if it is preferred, that number can be multiplied
by 0.3048 and converted to 563 meters. Once the correct altitude
has been entered, the adjusted atmospheric pressure can be
displayed as mb/hPa, inHg or mmHg by toggling the Unit
button.
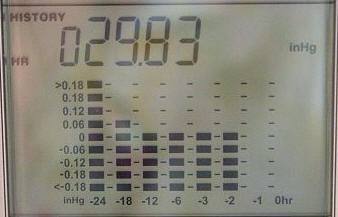
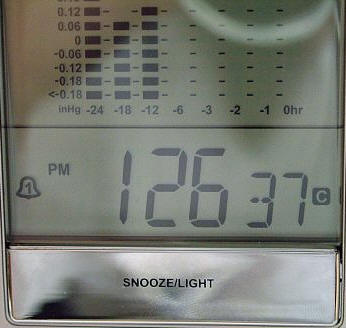
The Weather Station will display each of the past 24 hour’s
barometric readings by pressing the History button.
The Channel button toggles between the remote sensors that are
wirelessly coupled with the Weather Station. The device comes with
one sensor, and so its readings of temperature and humidity will
toggle back and forth and they are shown as CH 1 in these
pictures. The readings next to the house icon are the temperature
and humidity inside the room where the Weather Station is
located.
If I had any other remote sensors linked to the Weather Station,
I could set the Channel button to scroll through them,
stopping for a couple seconds on each reading before scrolling on
to the next. I’ll talk a bit more about the remote sensors further
in this review.
The largest, and easiest to hit button is labeled
SNOOZE/LIGHT. It is a 2.5″ long x 0.5″ tall chrome bar that
when pressed will either snooze a sounding alarm, or will turn on
the green “electro-luminescent” sidelight,
which basically consists of ten evenly spaced green LEDs on the
right side of the screen.
There are six buttons on the back of the Weather Station, and
they work as follows…
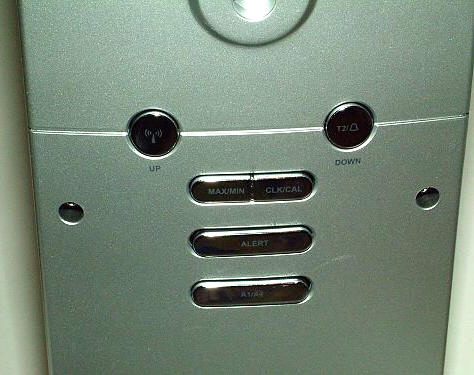
The Up/Radio Reception button is for the WWVB 60 radio
controlled time reception feature. Unlike other “atomic” clocks
which I have owned, the Weather Station does not receive a constant
signal. When the radio button is pressed and held, the signal will
be received for ten minutes. During this time, the previously
manually set time and calendar settings will be updated. While the
radio transmission is coming in all manual settings are suspended,
which means that pressing any of the buttons on the front of the
1900 will have no effect.
The time zones may be toggled between Pacific (P), Mountain (M),
Central (C) and Eastern (E) by quickly pressing the Up/Radio
button.
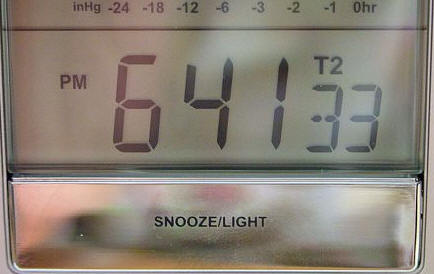
The Down/T2 button is used to turn off set alarms or to
toggle between the “home” time and a second location’s set time.
The second time is set when the Down/T2 button is pressed and held.
Whereas only the various time zones in the United States may be
seen by pressing the Up/Radio button, the time that is set
in the T2 feature may be from anywhere in the world. Instead
of entering an actual time, their amount of hours ahead or behind
is entered. For nostalgic reasons I have mine set to six hours
ahead, for the UK.
The MAX/MIN button toggles between the Maximum and
Minimum readings on the main and sensor locations. When it is
activated, a small temperature/humidity alert icon will show on the
home section of the screen. As the button is pressed the maximum or
minimum readings will be displayed on the home section, while the
words Max or Min will toggle on both the home and sensor
displays.
The CLK/CAL button is used to toggle between the Clock
and Calendar when pressed quickly. When pressed and held, it is
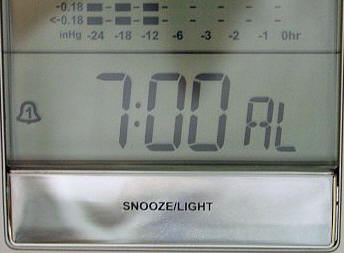
used to set both features. The ALERT button allows the user
to set high and low temperature and humidity alerts. In other
words, if I want the alarm to sound when the temperature reaches
100ºF or 32ºF, I can. This alert will sound if my limits are
reached at either the base unit or a remote sensor. The same type
alerts may be set for upper and lower humidity amounts.
Pressing and holding the A1/A2 button will cause it to go
into set mode.
Pressing the CLK/CAL button will switch the screen back to the
time.
The one screen that I haven’t really discussed is the graphic
forecast and moon phase section. The following pictures represent
the scenes that the Weather Station will display…
Picture from the Weather Station manual
Snowfall is indicated by the following screen, which will only
display when the “air pressure goes to predict rainy or stormy
weather and the temperature falls to less than 30.2ºF (-1ºC).

Picture from the Weather Station manual
It is important to note that the snowfall indicator feature only
applies to the remote sensor that it shown as CH 1, so that
particular sensor should always be kept outdoors “in an appropriate
place but away from direct sunlight and rain to avoid inaccurate
data measurements.”
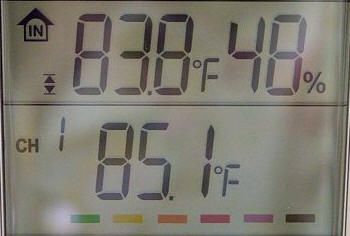
Today, my screen looks like this:
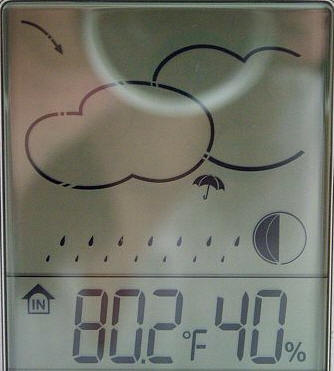
The little arrow in the upper left corner of the screen
indicates the air pressure trends, staying about the same, rising,
or falling as shown here. Interestingly enough, the Weather Station
has been showing rain all day. The humidity this morning was as
high as 50% but has fallen a bit to about 40%, which is similar to
what WeatherBug is saying for the airport seven miles away.

Picture courtesy of Weatherbug
I was checking the Weather Station’s graphic results against
WeatherBug’s, and WeatherBug was saying nothing about rain and the
radar has been clear. But the forecast is calling for isolated
thunderstorms this evening…

Picture courtesy of Weatherbug
I suppose that if I had arthritis, my knees might be telling me
something right about now. Since we need the rain so badly, I would
gladly bear the pain.
In the lower right hand of the graphic screen is the four
sectioned ball which represents the eight phases of the moon.
Picture from the Weather Station manual
According to the Weather Station, we are in the first quarter,
which jives with what this
current moon phase site says.
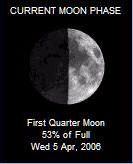
Picture courtesy of CaluculatorCat site
Other than perhaps the direct correlation of the moon’s phase to
the ocean’s tide, I wasn’t sure why the moon’s phases were
relevant. A quick Google search revealed that the phases of the
moon in combination with certain weather patterns are very
important to fishermen. According to the article “The Real Scoop on Moon
Phases” on the Solunar
site, “In other words, you want to plan your fishing trips to hit
the peak of the full or new moon. Then you want to be on your
favorite big fish spots during the daily rise and set of both the
sun and the moon.” To further explain the correlation of the moon
phases with weather, the same article said “Whenever a local
weather change coincides with the daily rise or set of either the
sun or the moon, during a peak monthly moon period,
big things happen in bunches. Big
things meaning big fish.” Well, that information’s
still not entirely relevant to me, but I am sure that it
will be for some of you. :0)
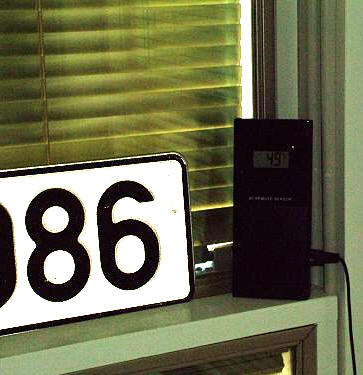
Since the Weather Station is completely wireless, the only way
that accurate outdoor information can be gathered and displayed on
the Weather Station is through the use of remote sensors. One comes
with the 1900, but up to four more may be purchased separately and
linked to the device. The remote sensor is a 5″ long x 2″ wide x 1″
thick black plastic box that can actually operate as a stand-alone
outside temperature and humidity display. A 6′ sensor cable is
included which can be used to measure the temperature in water,
soil a freezer, or the temperature of whatever substance the user
wishes to measure. The remote sensor is made to be
weather-resistant, but it should not be placed in direct sunlight,
rain or snow, and when the temperature hits 0ºC/32ºF it should be
moved indoors and the probe should be placed outside to prevent the
unit’s batteries from freezing. It would probably be easiest to
install it indoors with the six foot probe snaked out through a
window.
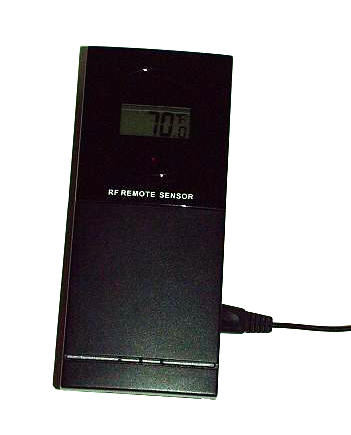
The remote sensor has a 1′ wide x 0.5″ tall LED screen on it’s
front side which displays the alternating temperature and humidity.
These numbers are transmitted to the main Weather Station via
433mHz wireless transmission frequency, as long as the remote
sensor is placed within 100 feet (30 meters) of the main unit.
According to Smarthome, “any 433MHz transmitting
sensor can connect to the Weather Station within 100 ft.” The 100′
distance may be substantially reduced by physical or wireless
obstructions.
The back of the remote sensor has a weather-resistant battery
compartment that when opened…
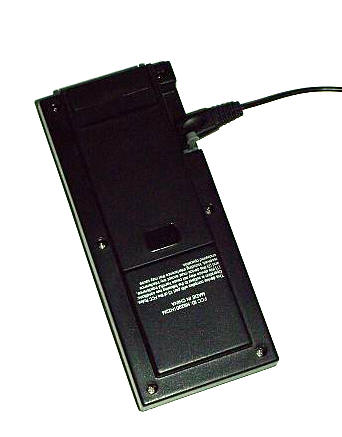
…reveals the a slider allowing the user to choose between
Centigrade or Fahrenheit measurement. There is also a button
labeled TX which is used to manually start the radio
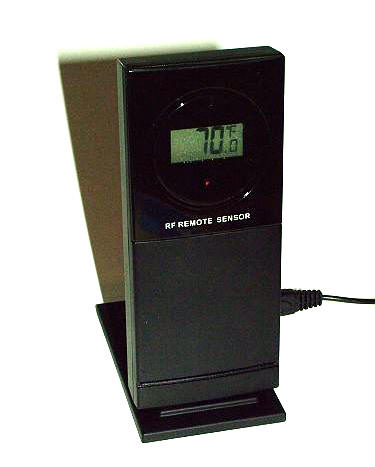
transmission if the devices fail to immediately couple. A wall
bracket that also functions as a stand is included so that there
are multiple ways to mount the remote sensor.
Although I don’t typically glance at all of the Weather
Station’s display features, it has been very handy to have for its
indoor and outdoor temperature, as well as the time and graphic
weather display. I think that as we enter tornado season I may have
an opportunity or two to see the heavy thunderstorm graphic and
track the barometer as it drops. :0/
The Smarthome1900 Weather Station is available from the Smarthome web store.
A complete online user’s manual with all of the instructions for
setup may be
found here.

KAMRUI Essenx E1 Mini PC Computer, AMD 3150U (Beats i3-10110U/N95), 8GB RAM 256GB SSD, Mini Desktop Computer Support Dual 4K, WiFi, Bluetooth, Ethernet for Business, Education, Home
(as of June 19, 2026 20:24 GMT -05:00 - More infoProduct prices and availability are accurate as of the date/time indicated and are subject to change. Any price and availability information displayed on [relevant Amazon Site(s), as applicable] at the time of purchase will apply to the purchase of this product.)
GMKtec G3 Pro Mini PC, Intel Core i3-10110U (Beats 4300U/N150) 16GB DDR4 (Dual Channel) 512GB PCIe M.2 SSD, Desktop Computer 4K Dual HDMI/USB3.2/WiFi 6/BT5.2/2.5GbE for Office, Business
(as of June 20, 2026 03:29 GMT -05:00 - More infoProduct prices and availability are accurate as of the date/time indicated and are subject to change. Any price and availability information displayed on [relevant Amazon Site(s), as applicable] at the time of purchase will apply to the purchase of this product.)Product Information
| Price: | 59.99 |
| Manufacturer: | Smarthome |
| Requirements: |
|
| Pros: |
|
| Cons: |
|